Using Connections in CDM+ gives you a deeper perspective on how individuals and entities in your database relate to one another and to the organization as a whole.
-
To navigate to the Connections tab, go to Program → Membership → Individual Record.
-
Set up a Find to search for the individual you need. Then, click to highlight their record.
-
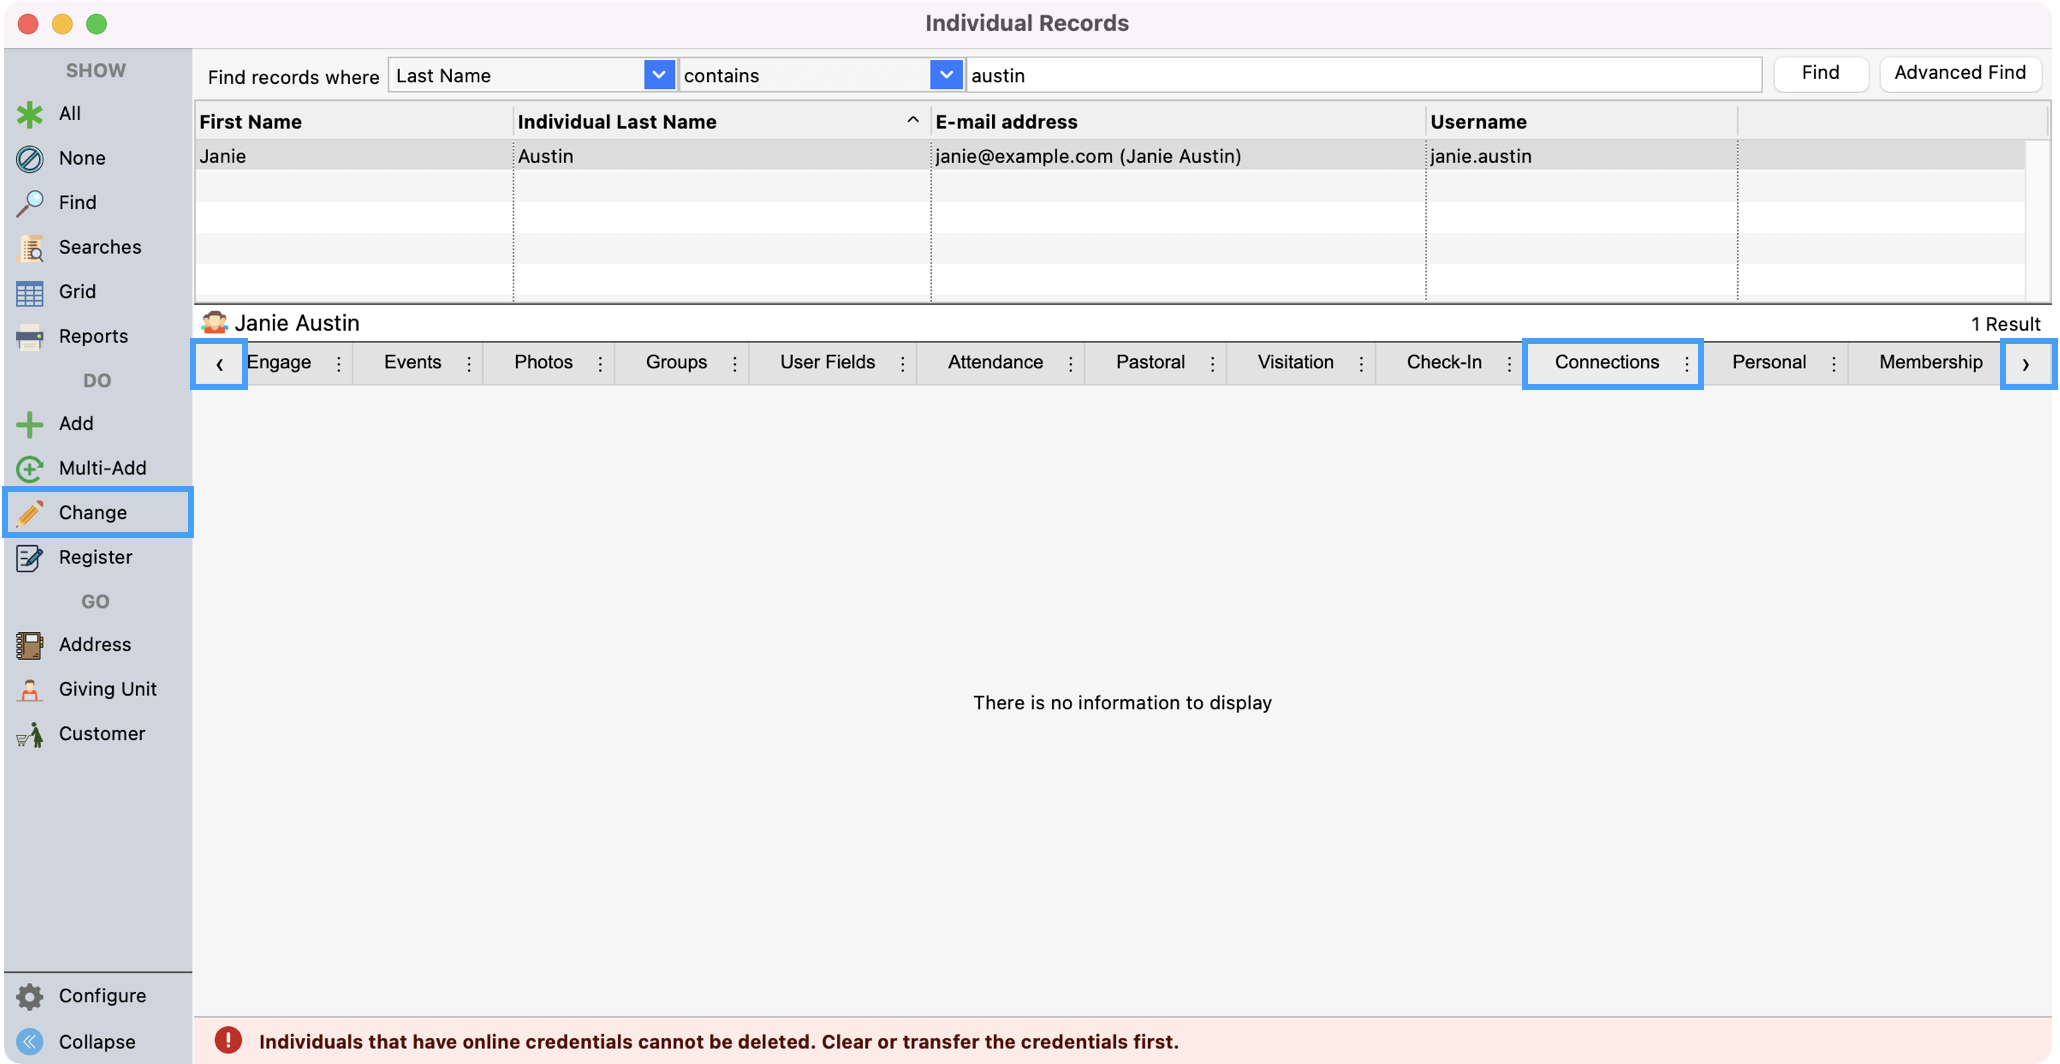
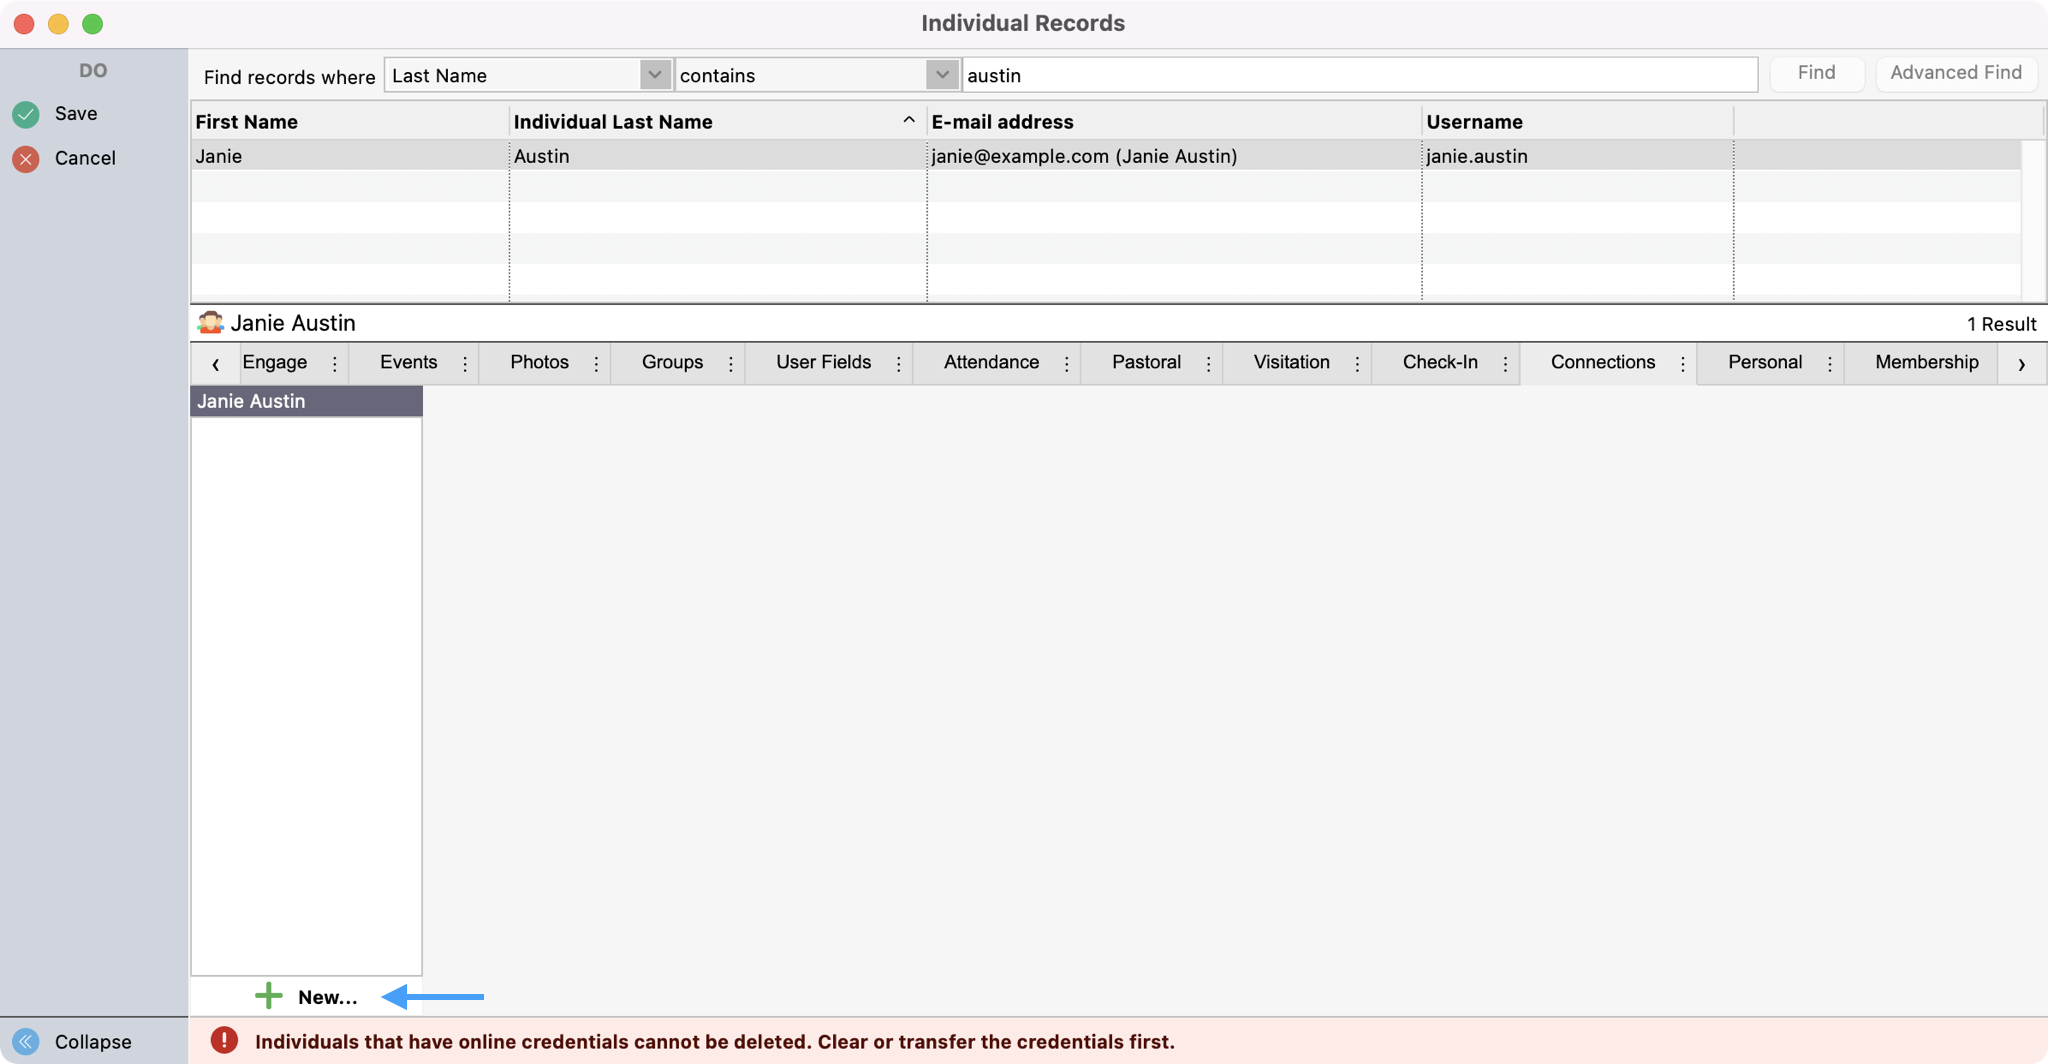
Use the scroll arrows to navigate between the tabs of an Individual record until you find the Connections tab. Click the Connections tab and then click Change from the left sidebar.
-
Click New in the bottom left-hand side of the window.
-
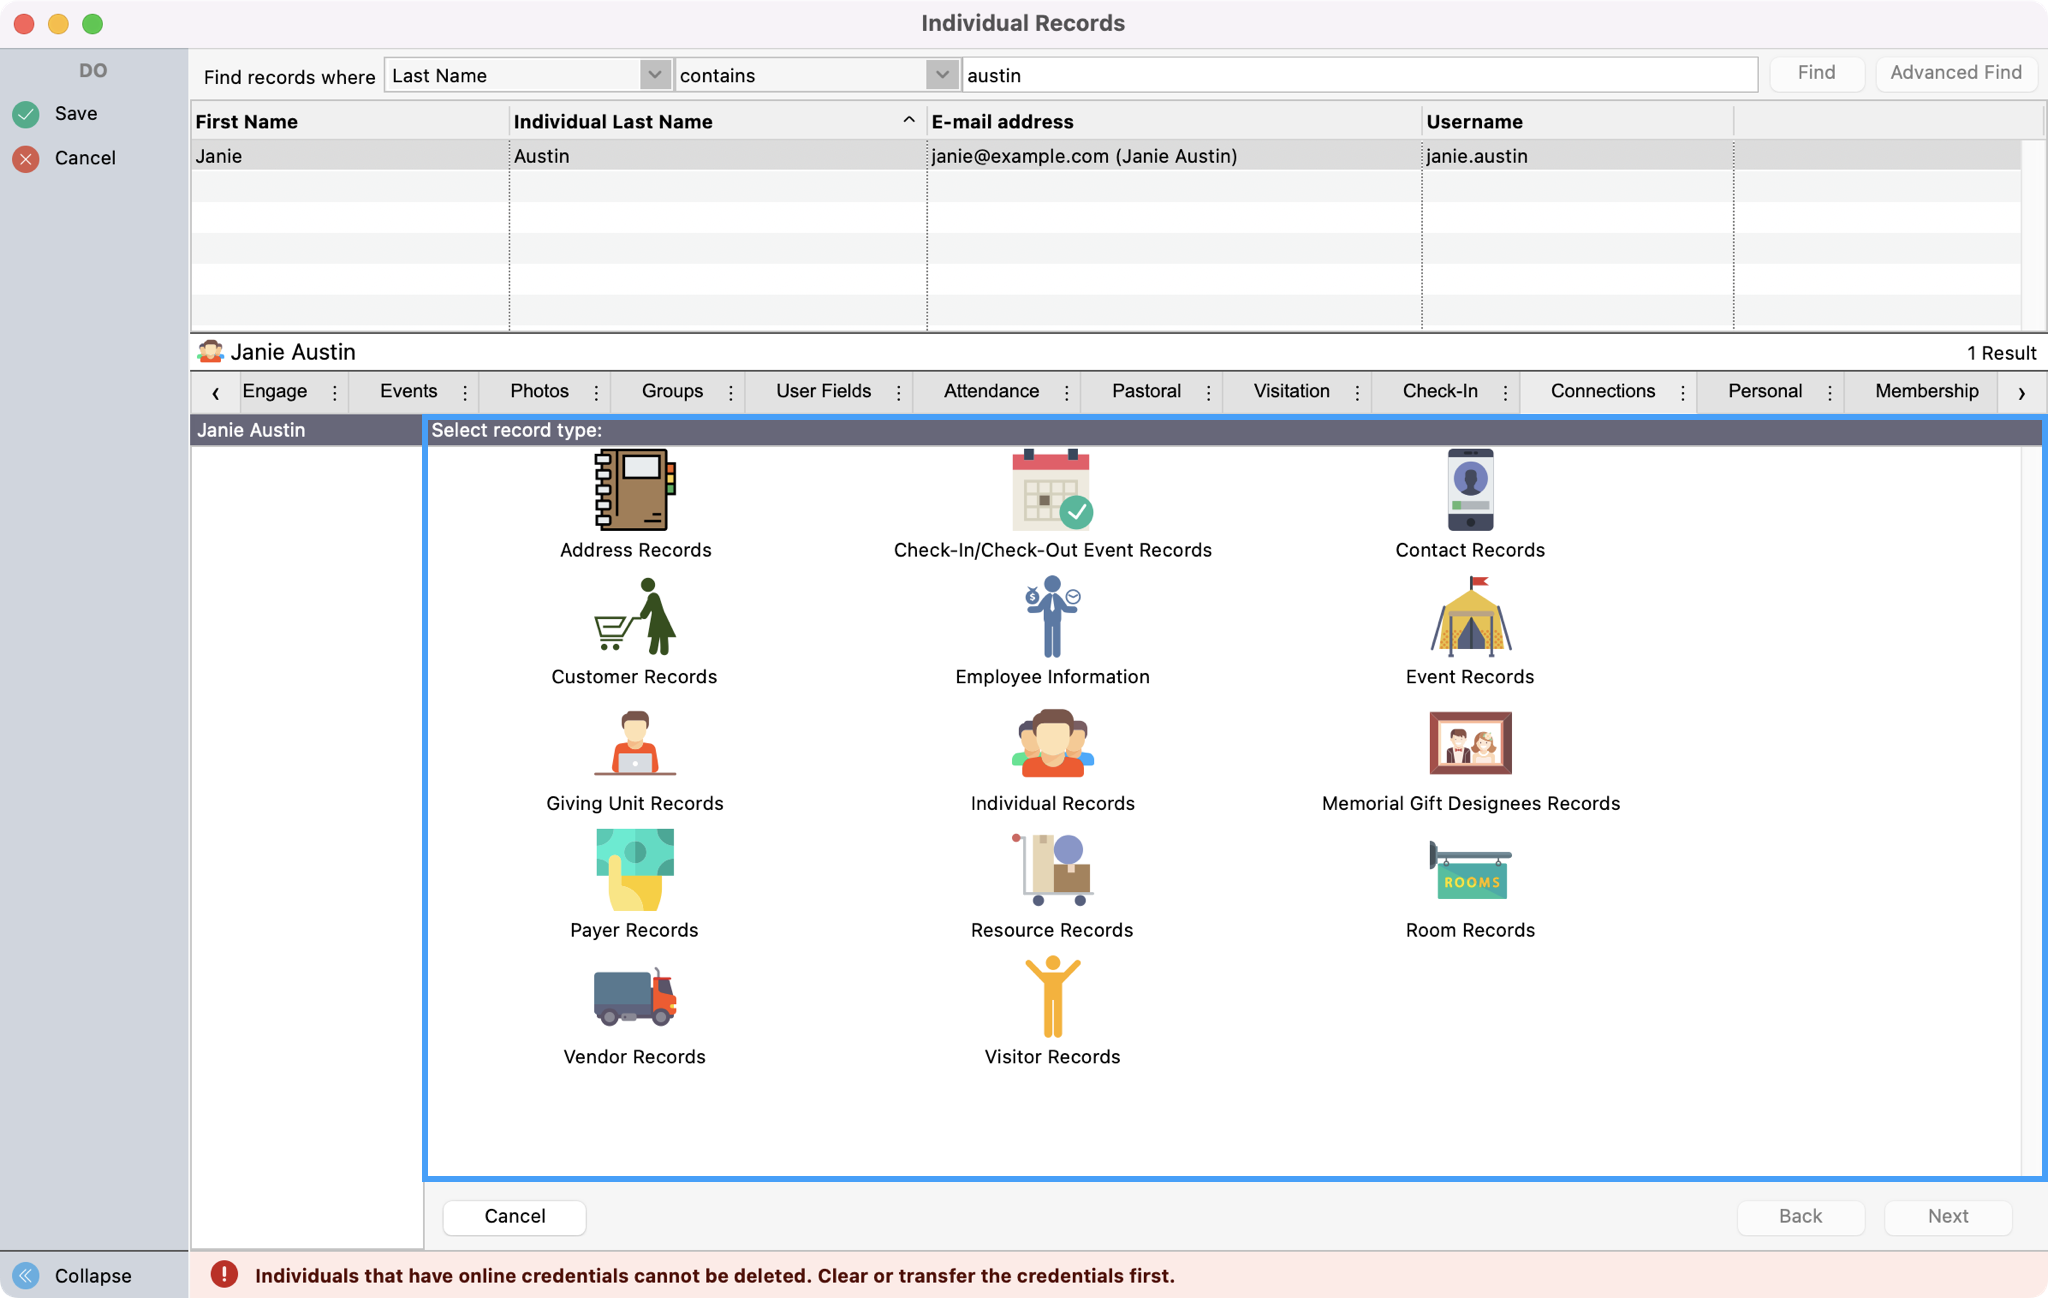
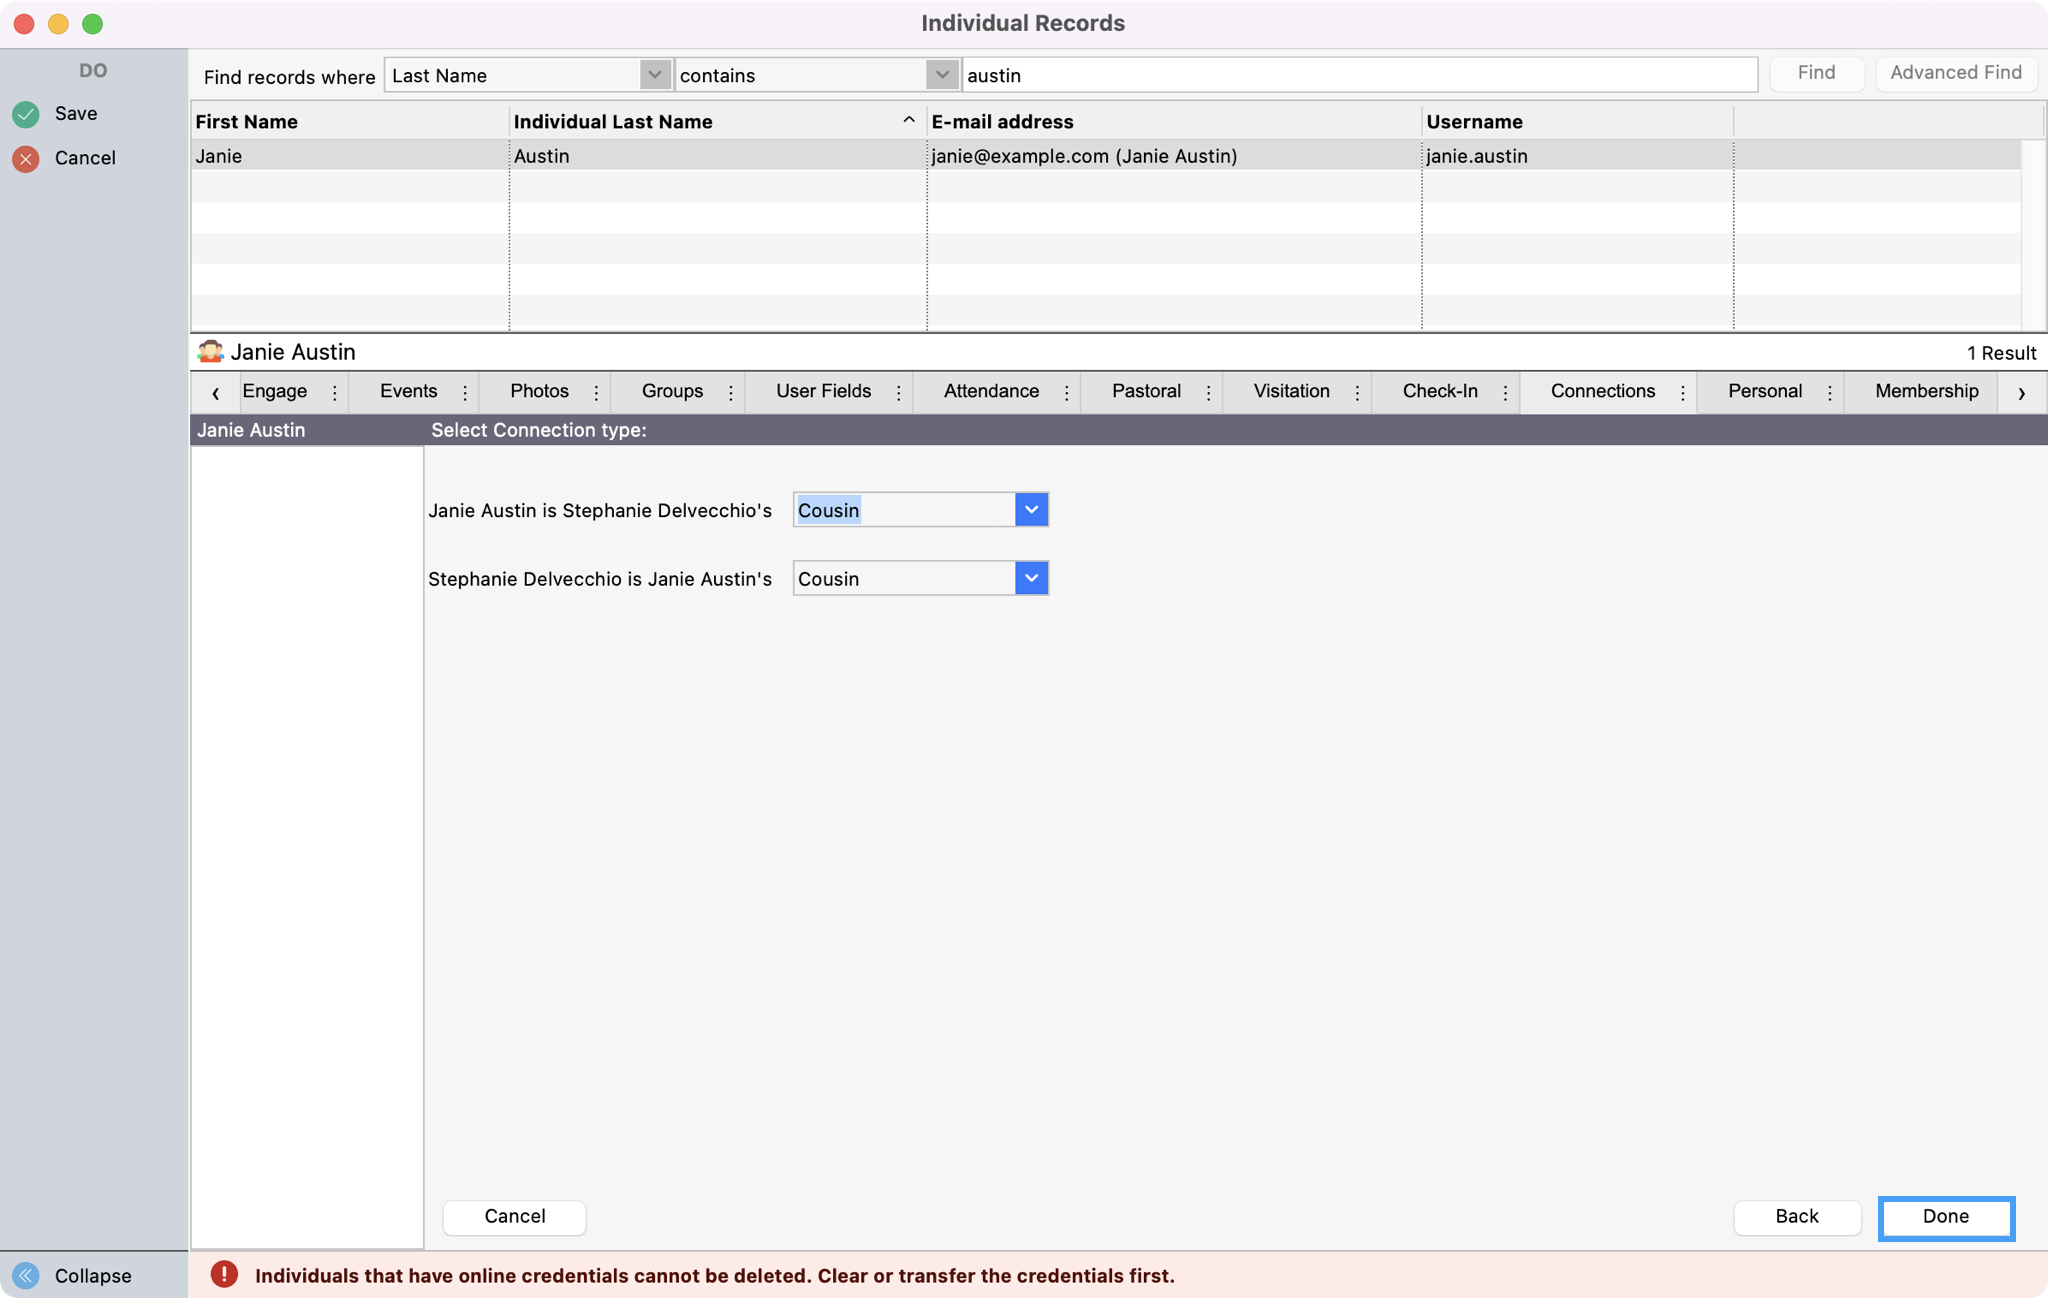
Next, select the Type of connection you want to create.
-
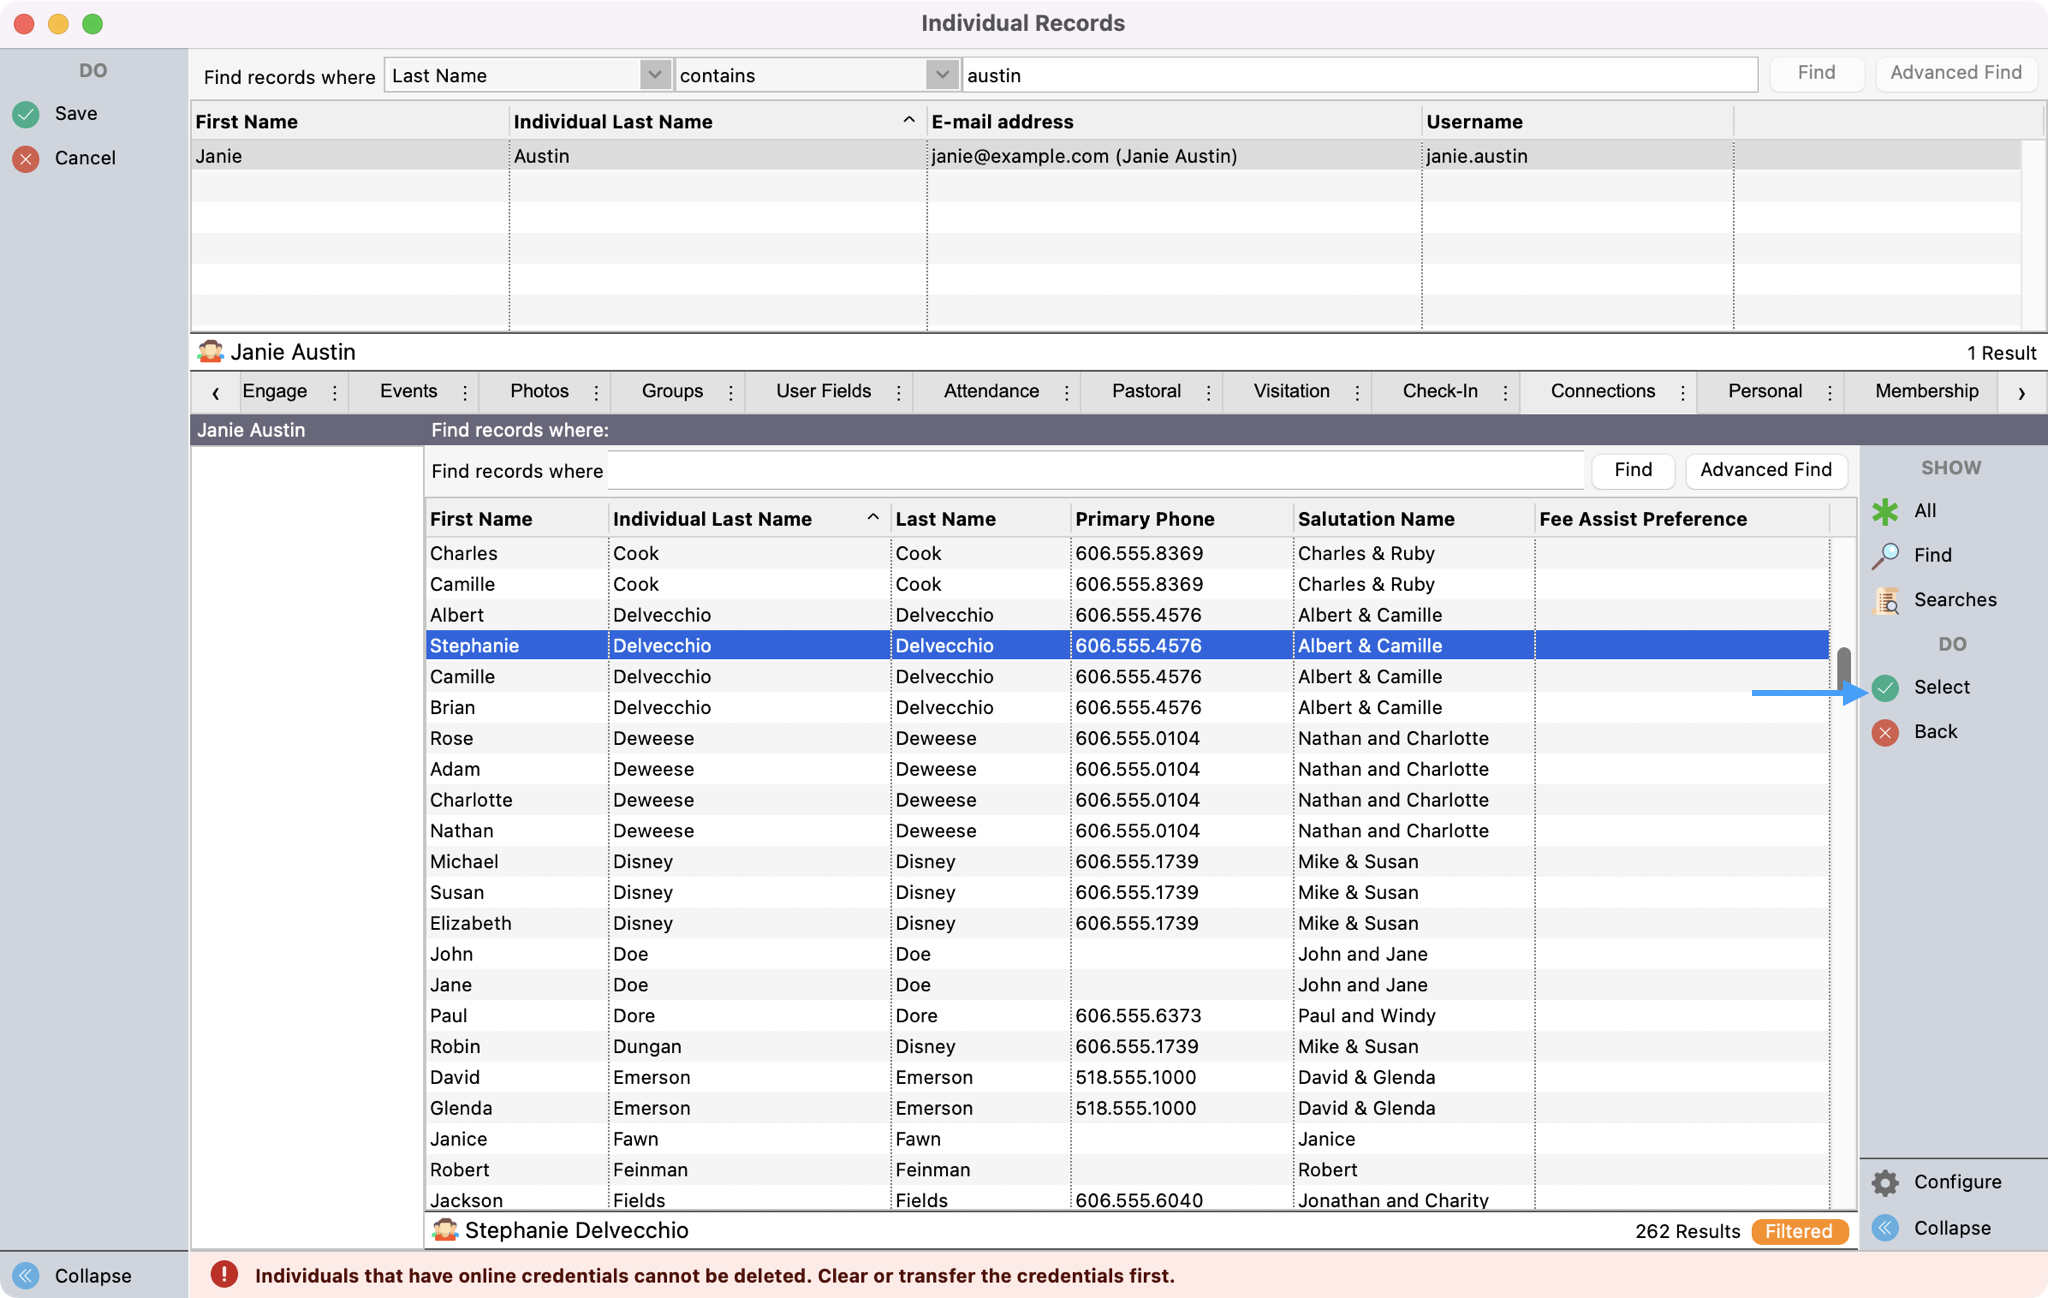
Then, locate the record that you want to connect to. Click to highlight the record and then click Select from the right sidebar.
-
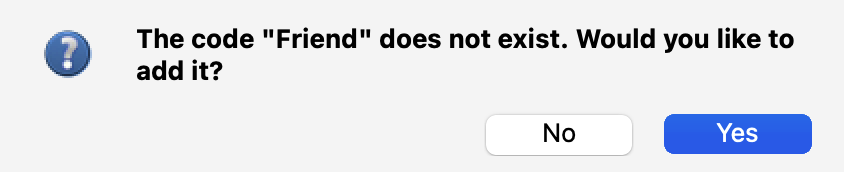
Enter or use the drop-down field to choose a connection code.
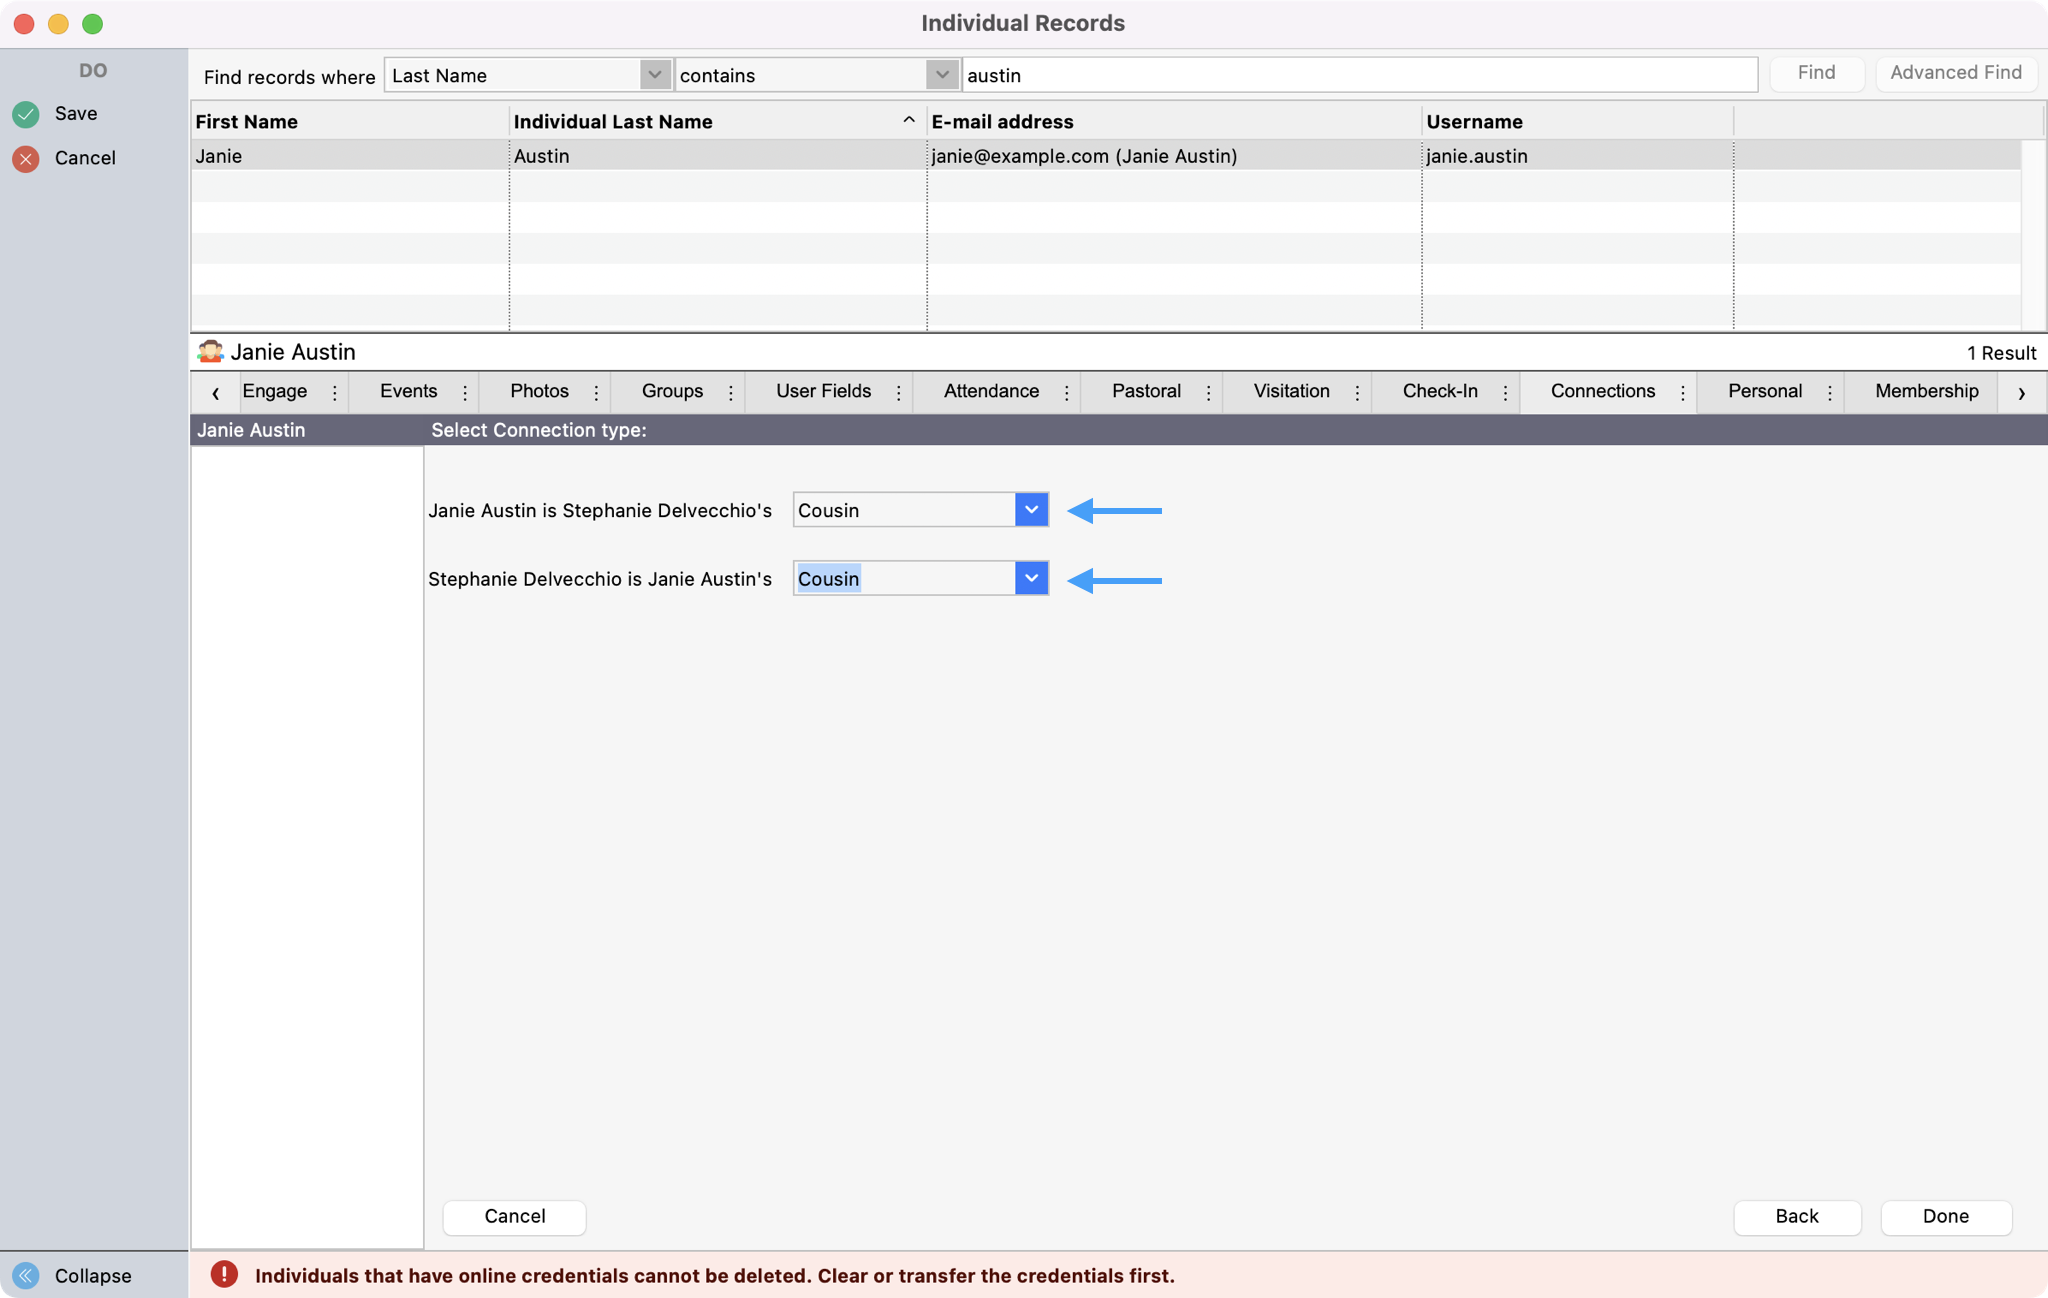
If you don’t see a code that you need, you can always create a new one on-the-fly by typing in the new code. You’ll see a pop-up asking if you want to add it. Clicking Yes will add this new code to the Master Coding System.
-
Click, Done in the bottom right-hand corner.
-
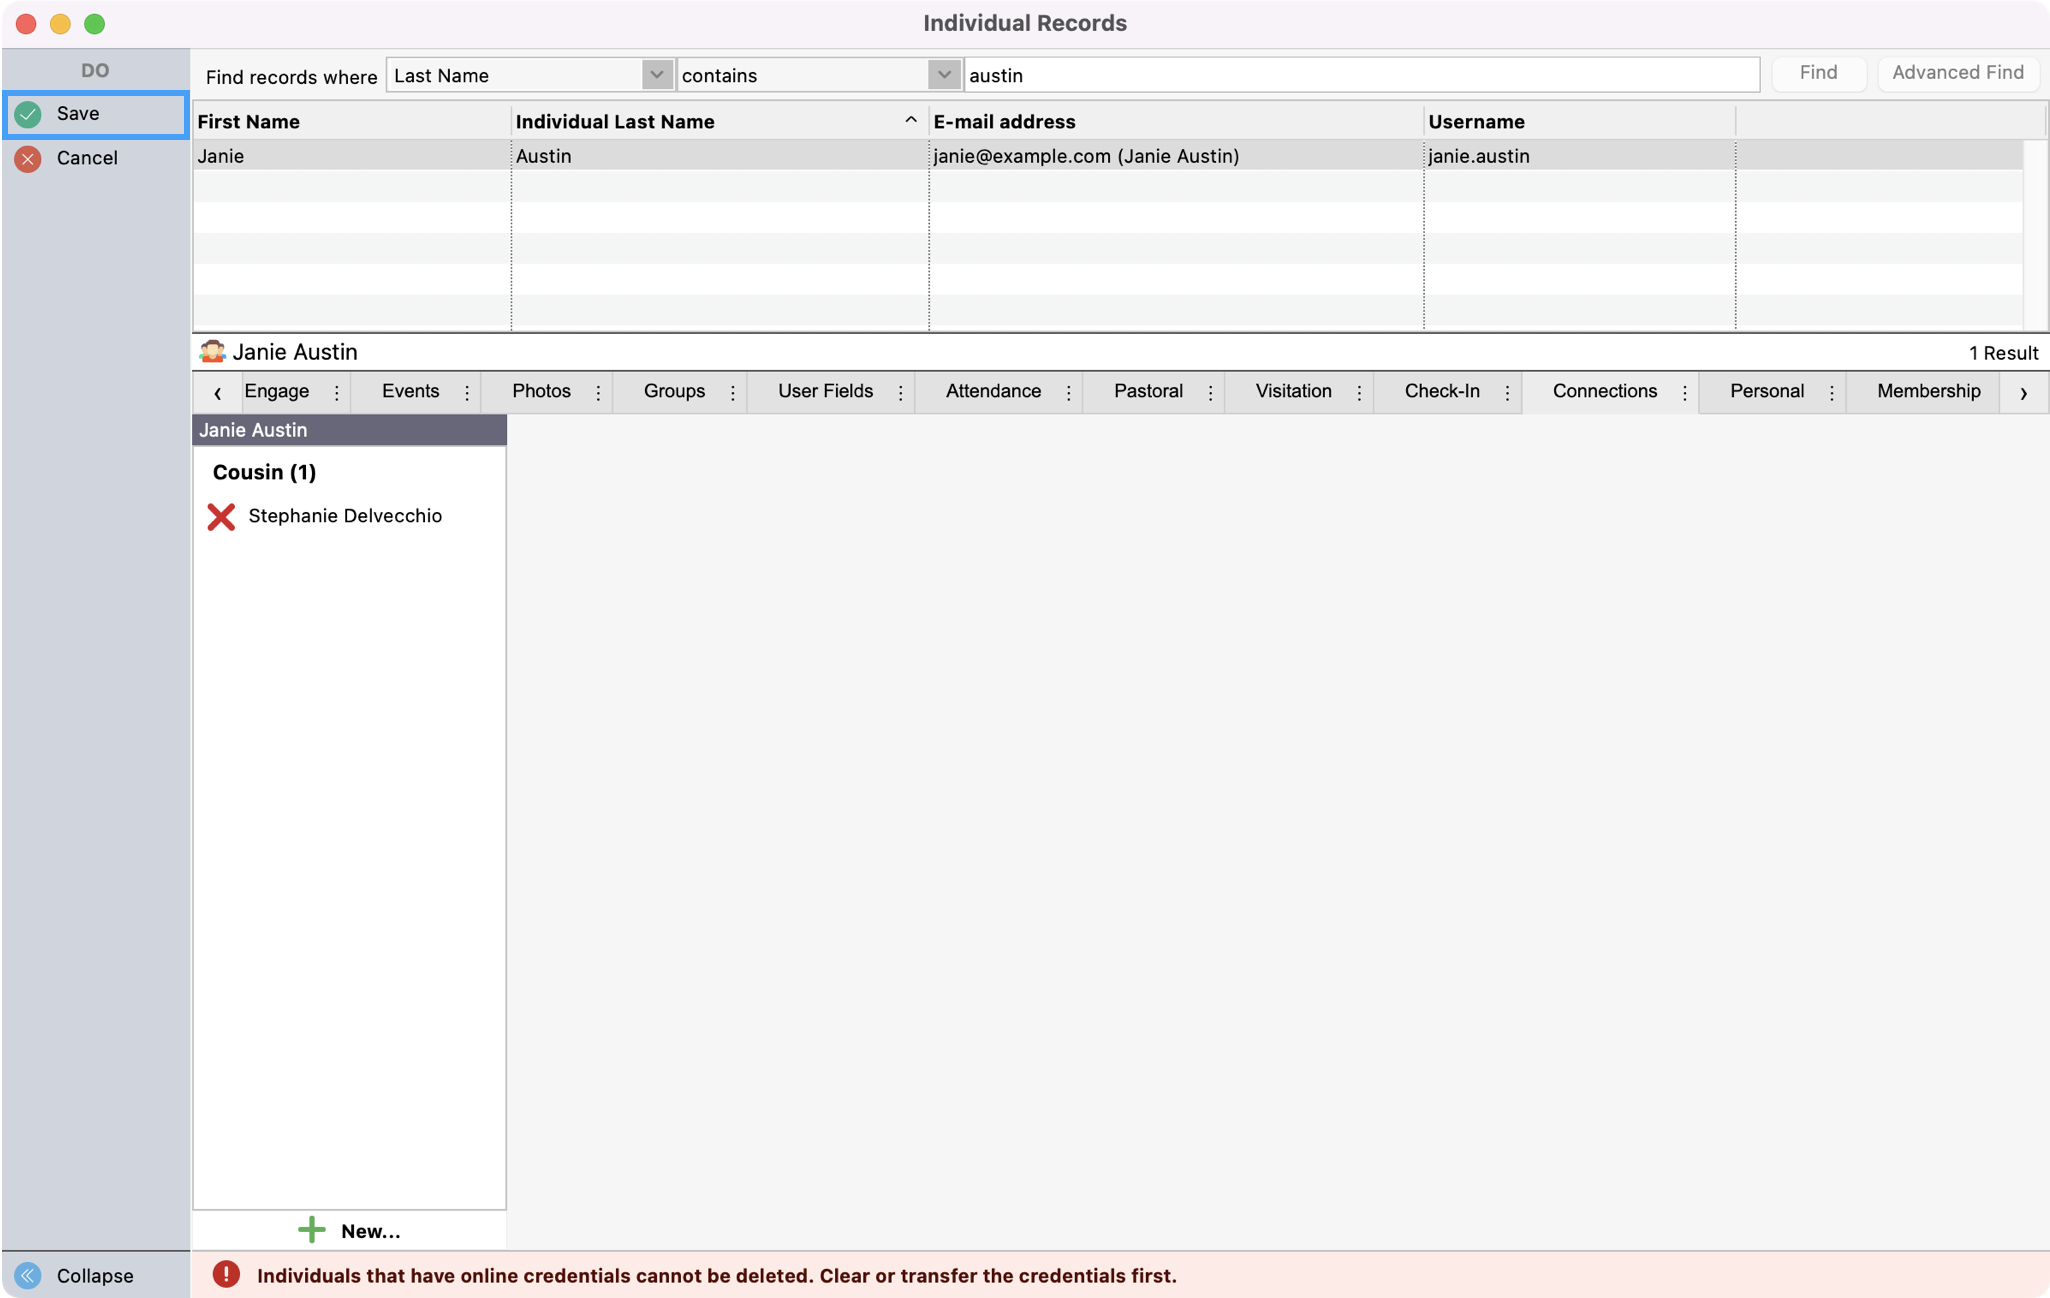
Lastly, click Save in the upper left-hand corner.
-
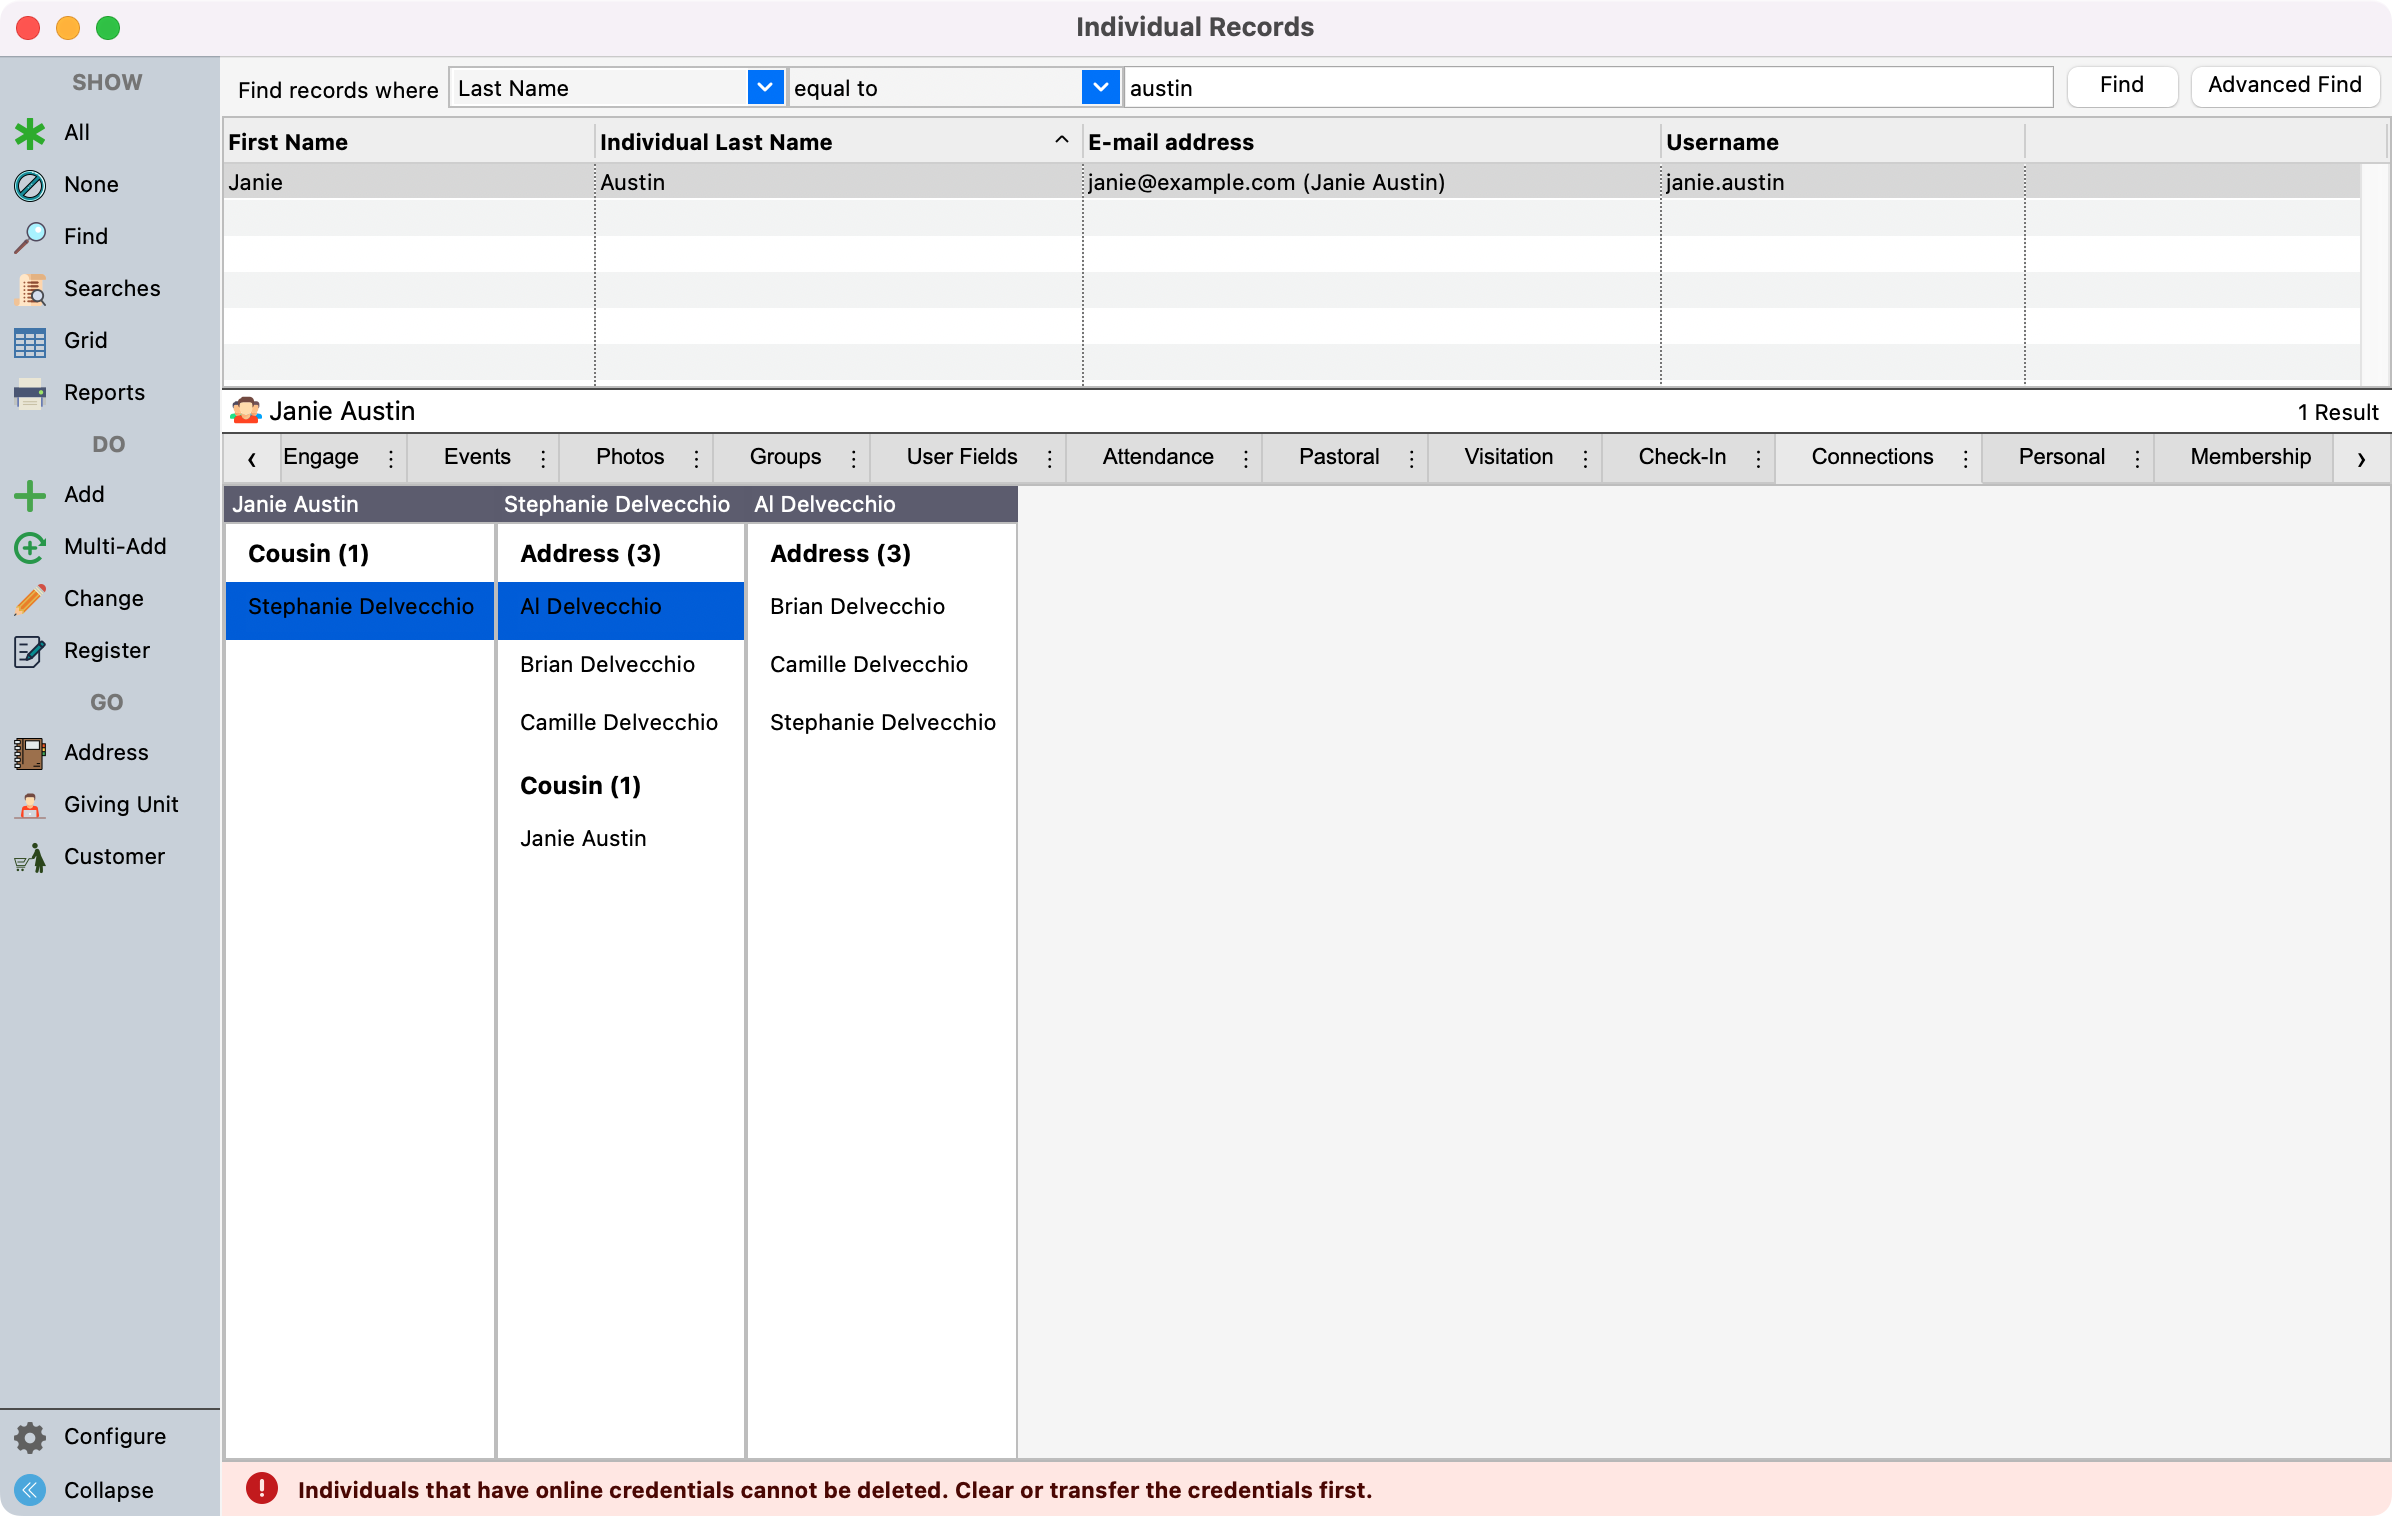
To view the connection, under the Connections tab, click the connection and a second window will open to the right showing other connections. As the viewer continues to click, windows open to follow the web of connections.