-
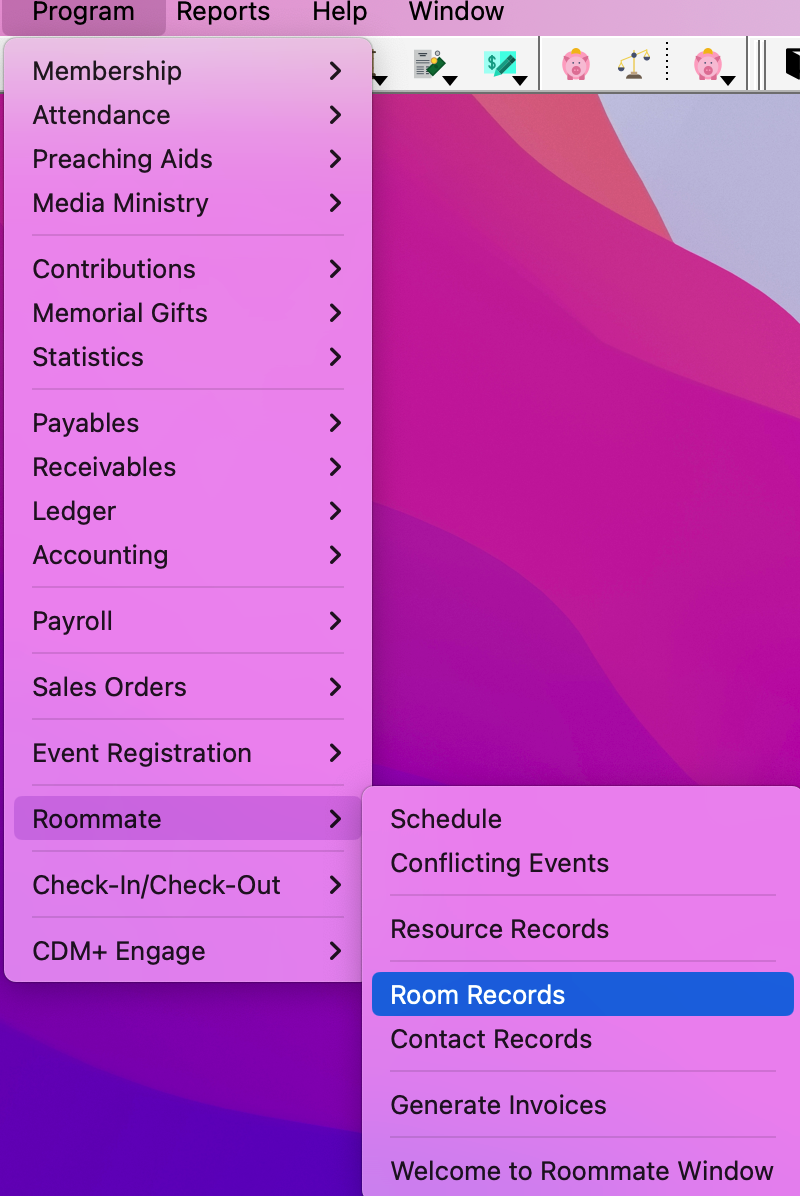
To add a Room, go to Program → Roommate → Room Record.
-
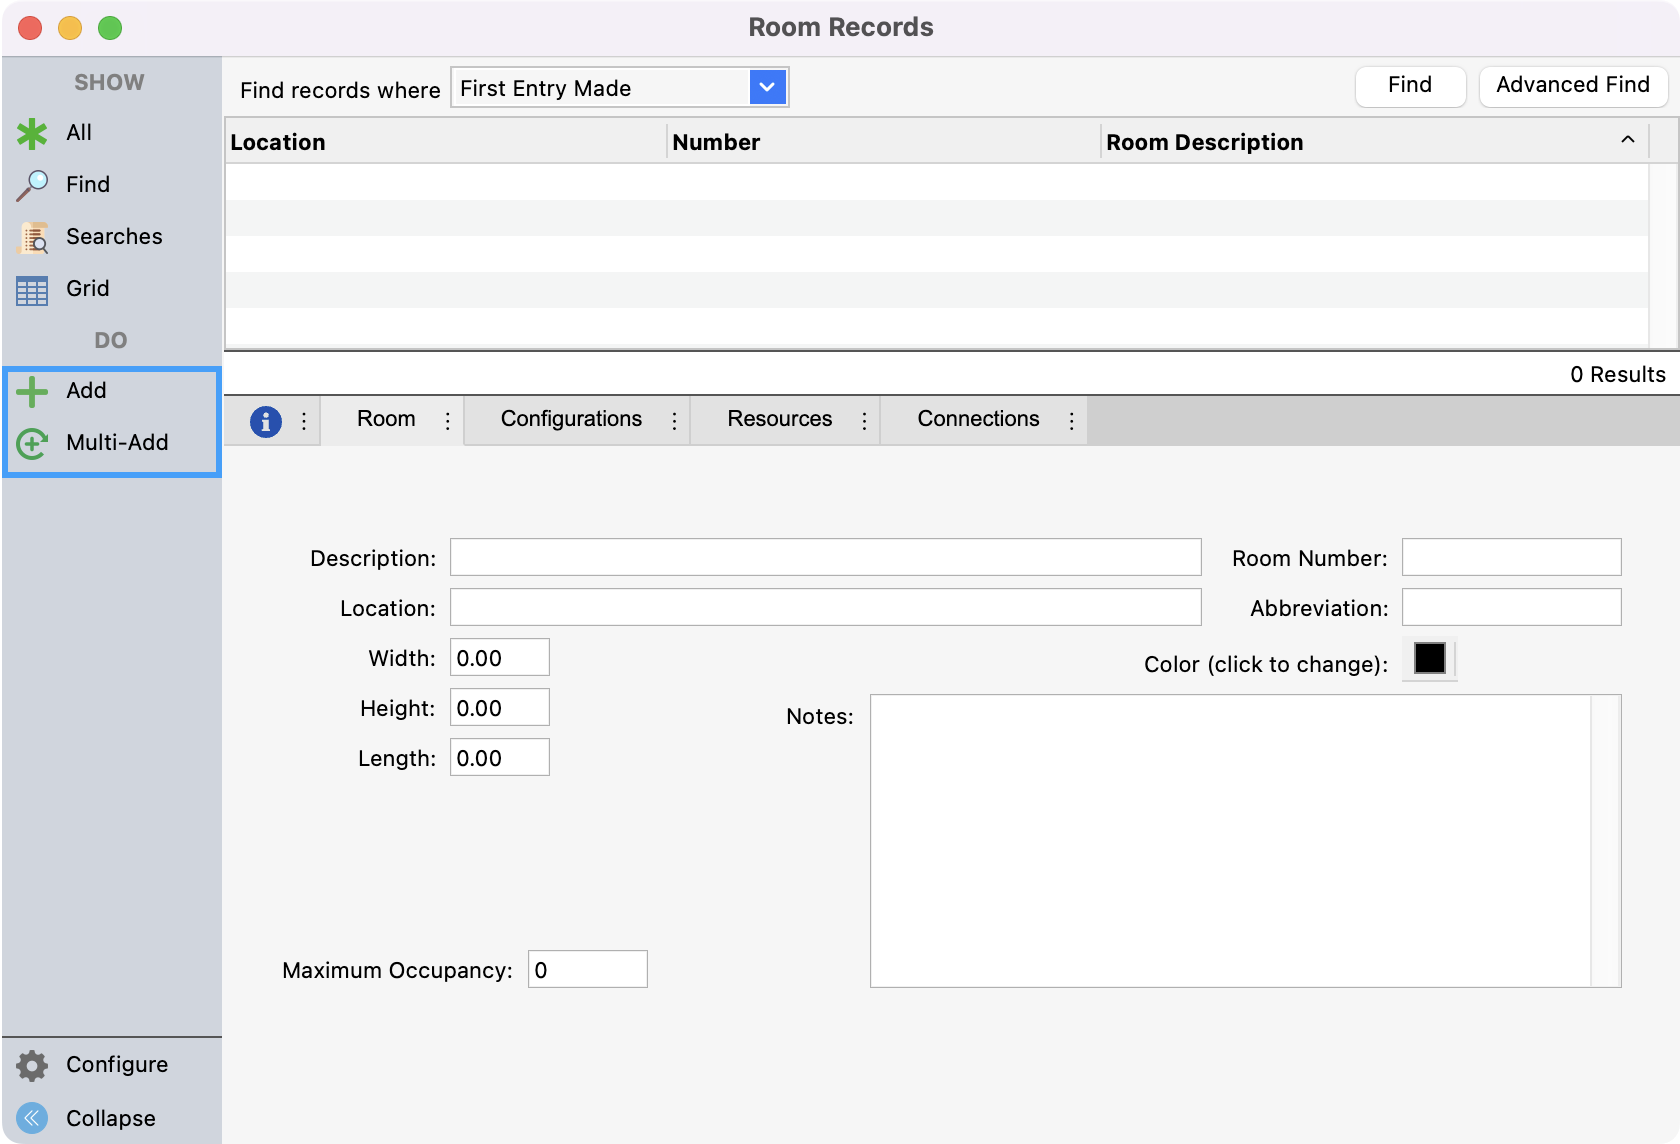
Click Add or Multi-Add from the left sidebar.
-
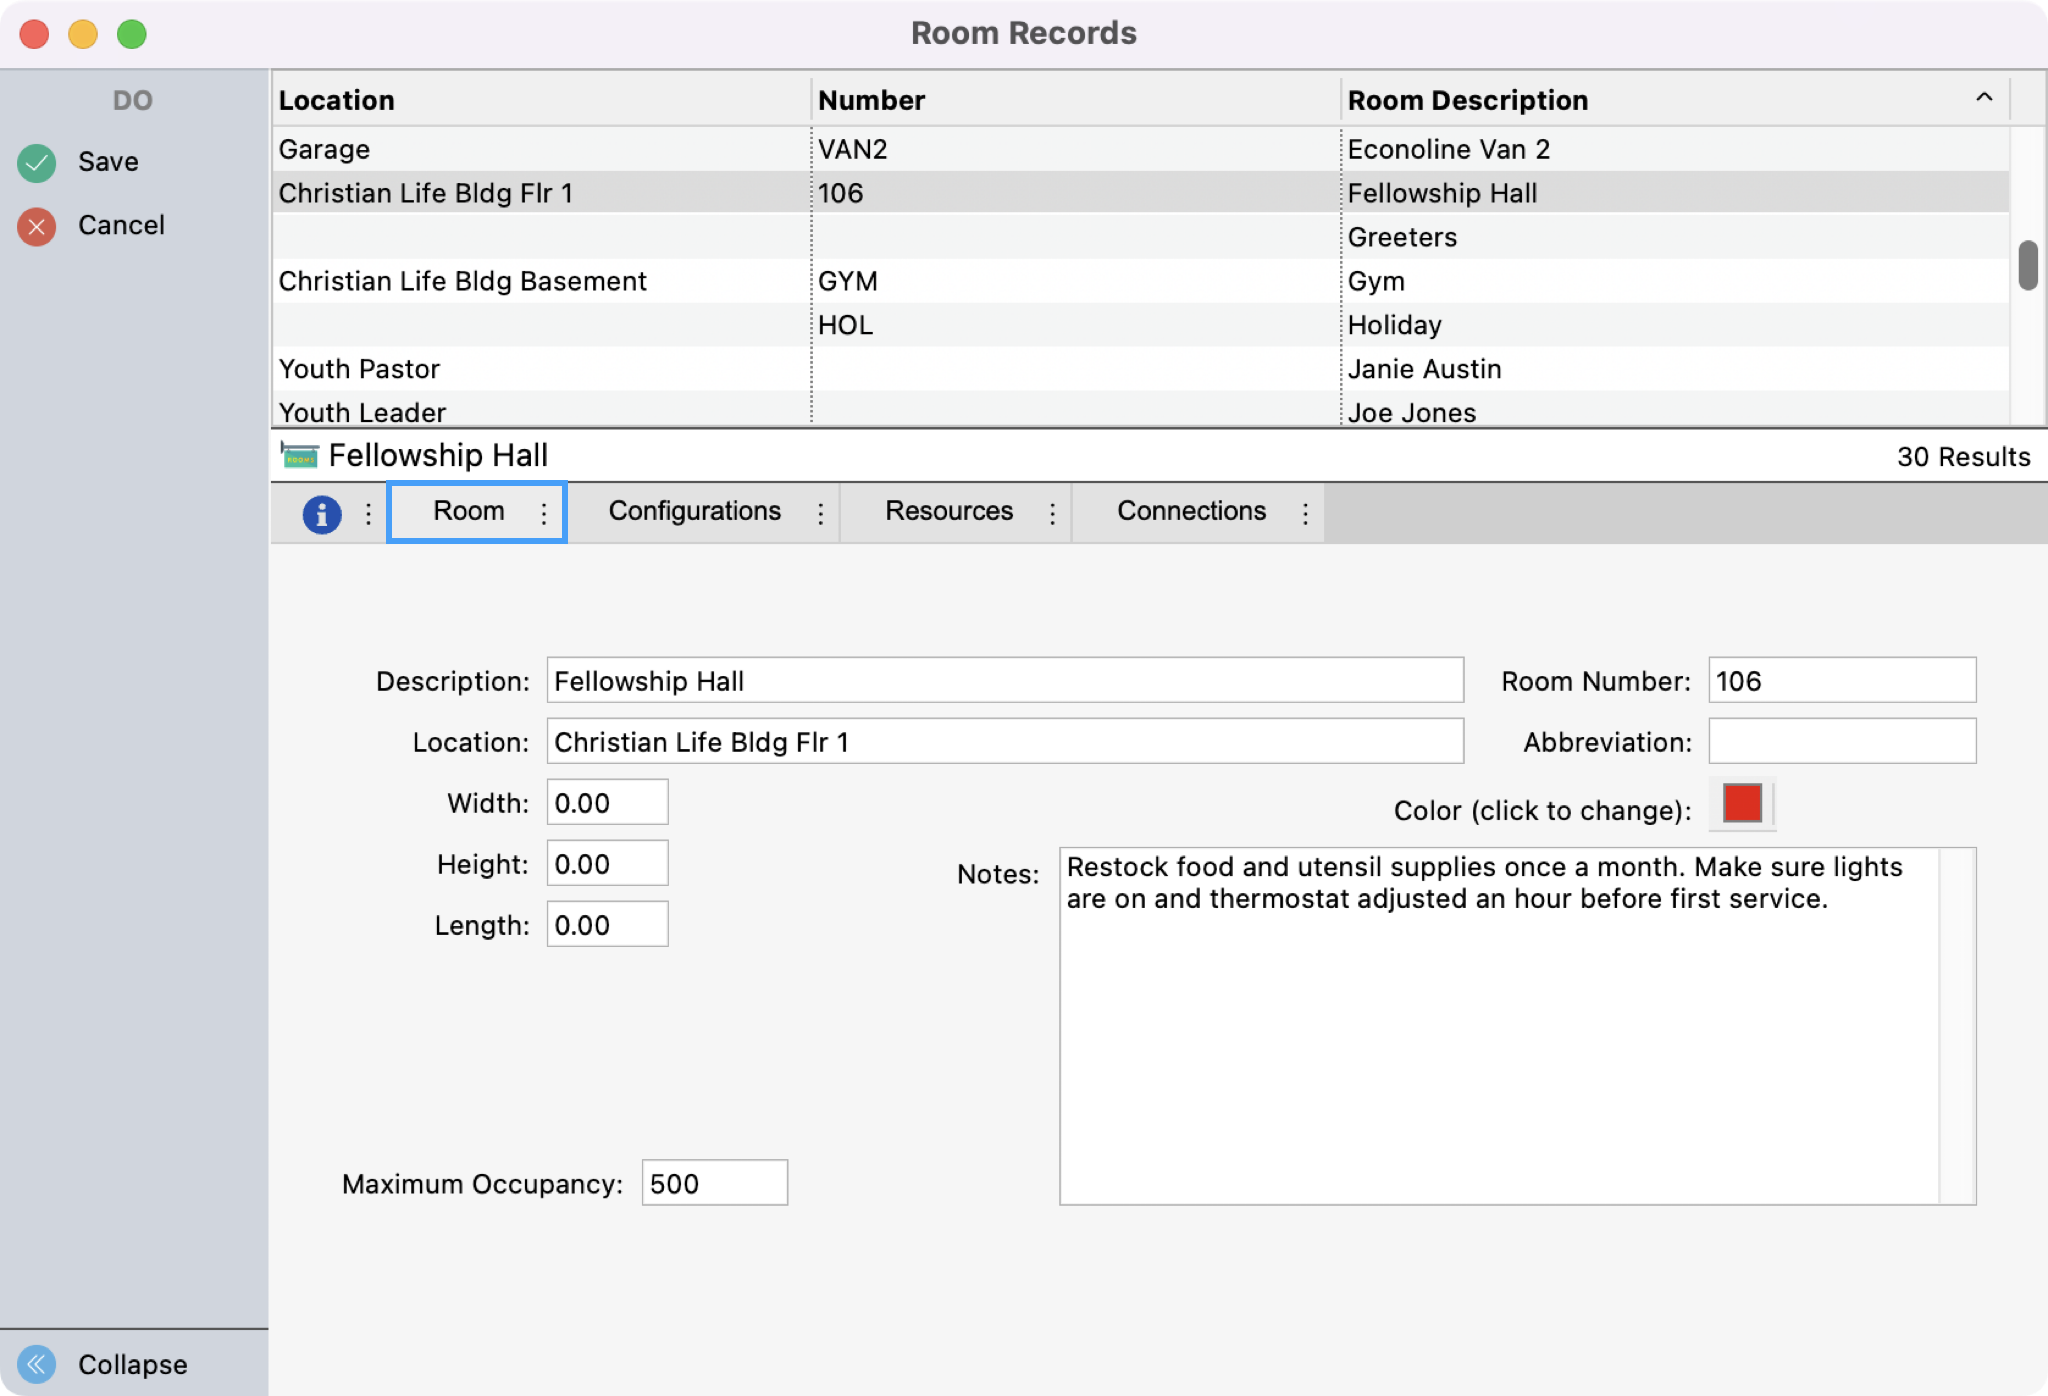
Under the Room tab, begin entering information, pressing tab to move to the next field.
-
Enter a Description for the room, e.g. Gym.
-
Enter a Room Number, if applicable.
-
Enter the Location.
-
Enter an Abbreviation of the room description for optional use on the Event Schedule and Monthly Calendar.
Try to be consistent in entering Descriptions and Locations. It will make for better results when sorting and searching.
-
Enter the Width, Length and Height of the room and Maximum Occupancy, if this information is known.
-
Enter any Notes that are applicable to the room. These notes will be visible while scheduling events and on reports.
-
Choose a color for the room. You can assign colors to the rooms, which will be used on the Event Schedule. Unless you are scheduling a very small number of rooms, we suggest that you use a different color for each category of room, e.g., make all classrooms blue, all offices orange, all vehicles black, etc.
-
-
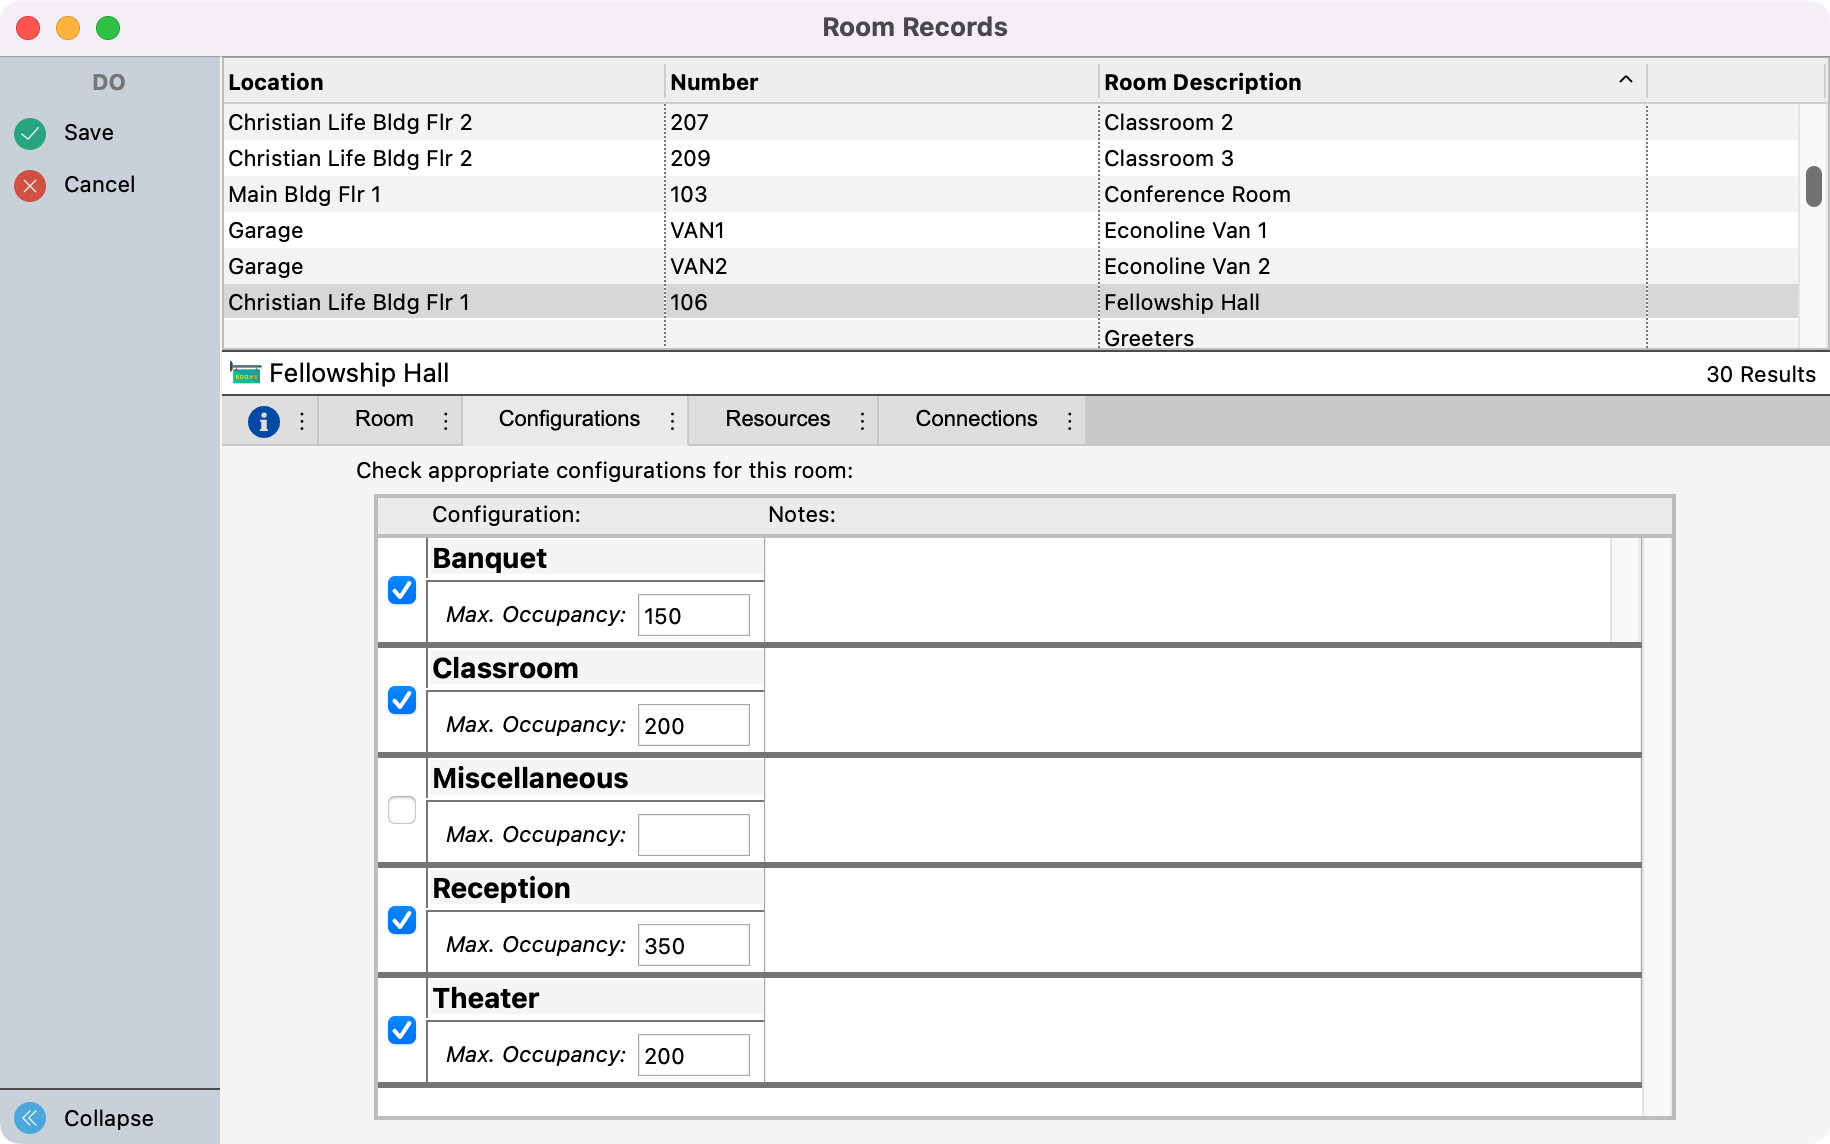
Next, click the Configurations tab. This is where you can assign what configurations are available for this room and the configuration’s maximun occupancy for that space.
-
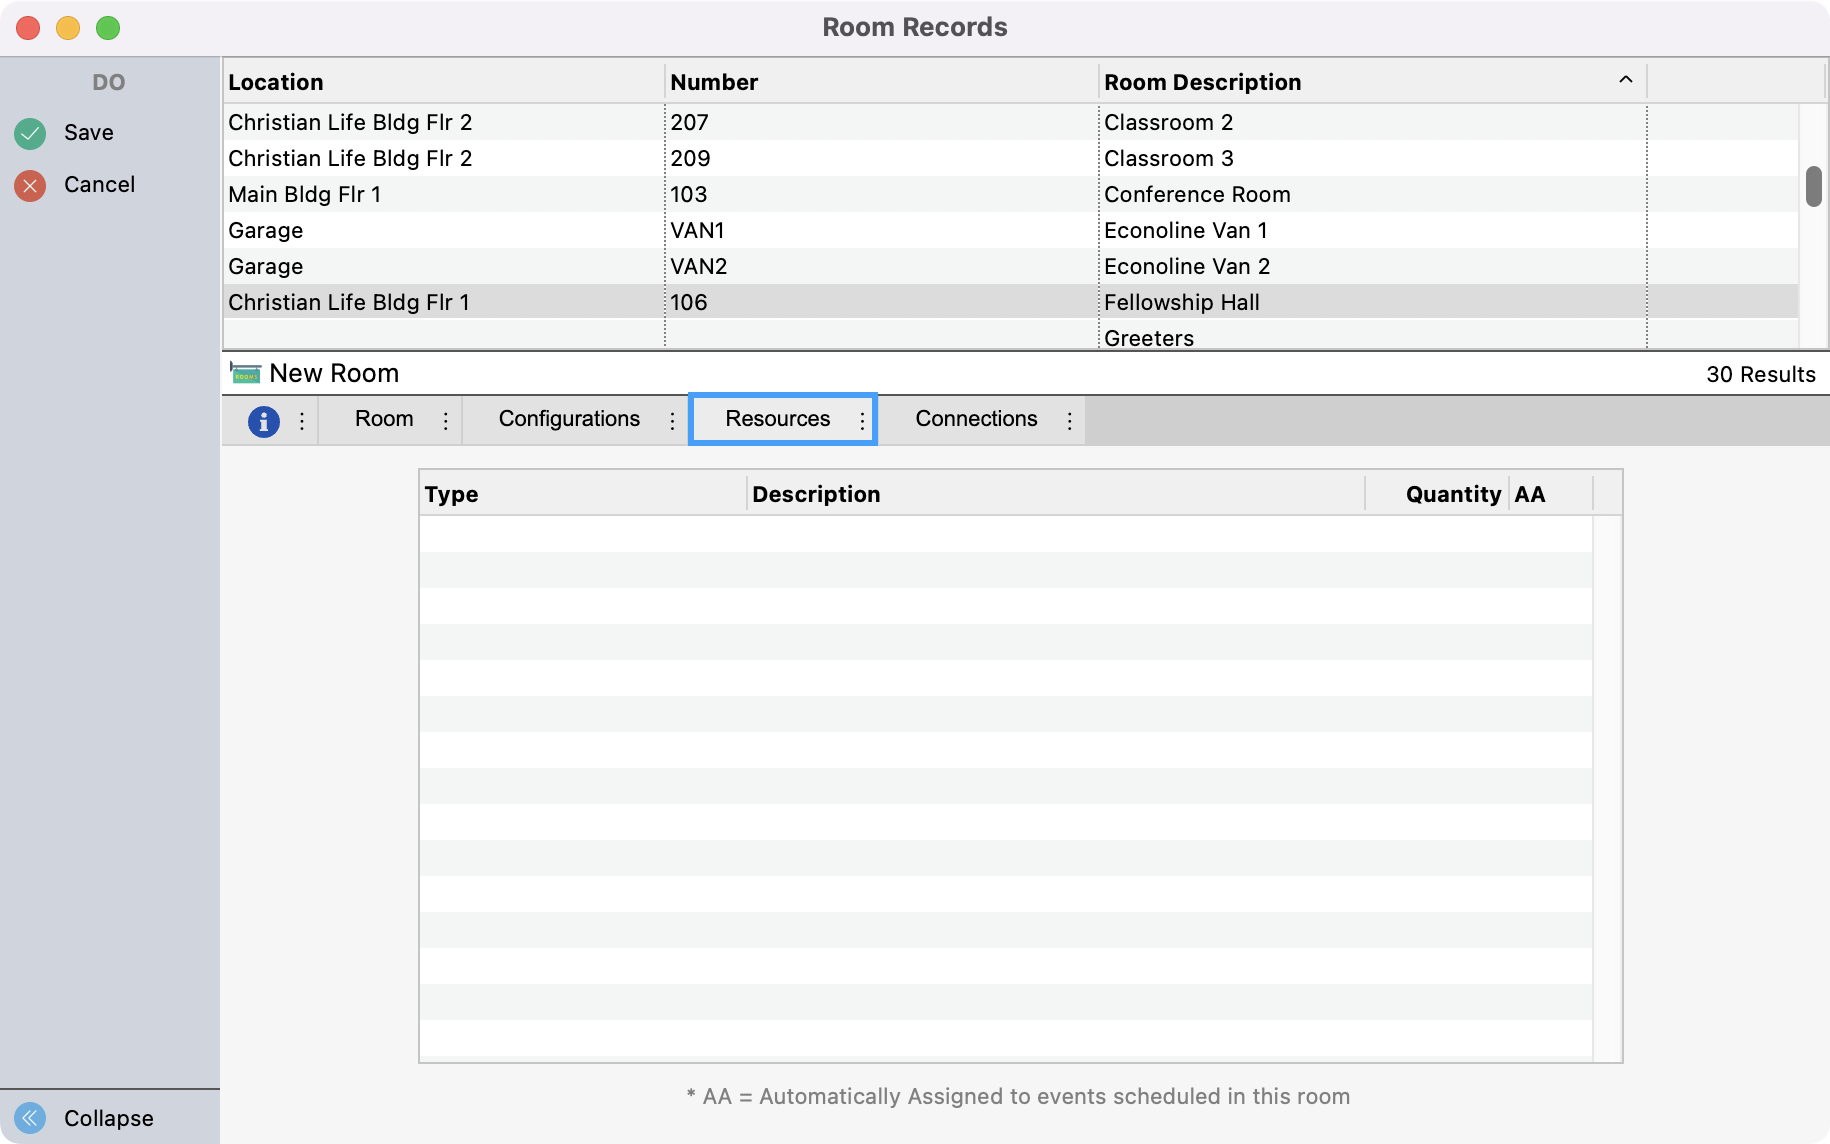
After a room is created, you can assign resource to the room under Resource Records. You can skip this tab for now.
-
Lastly, you can click the Connections tab and add neccessary connections.

-
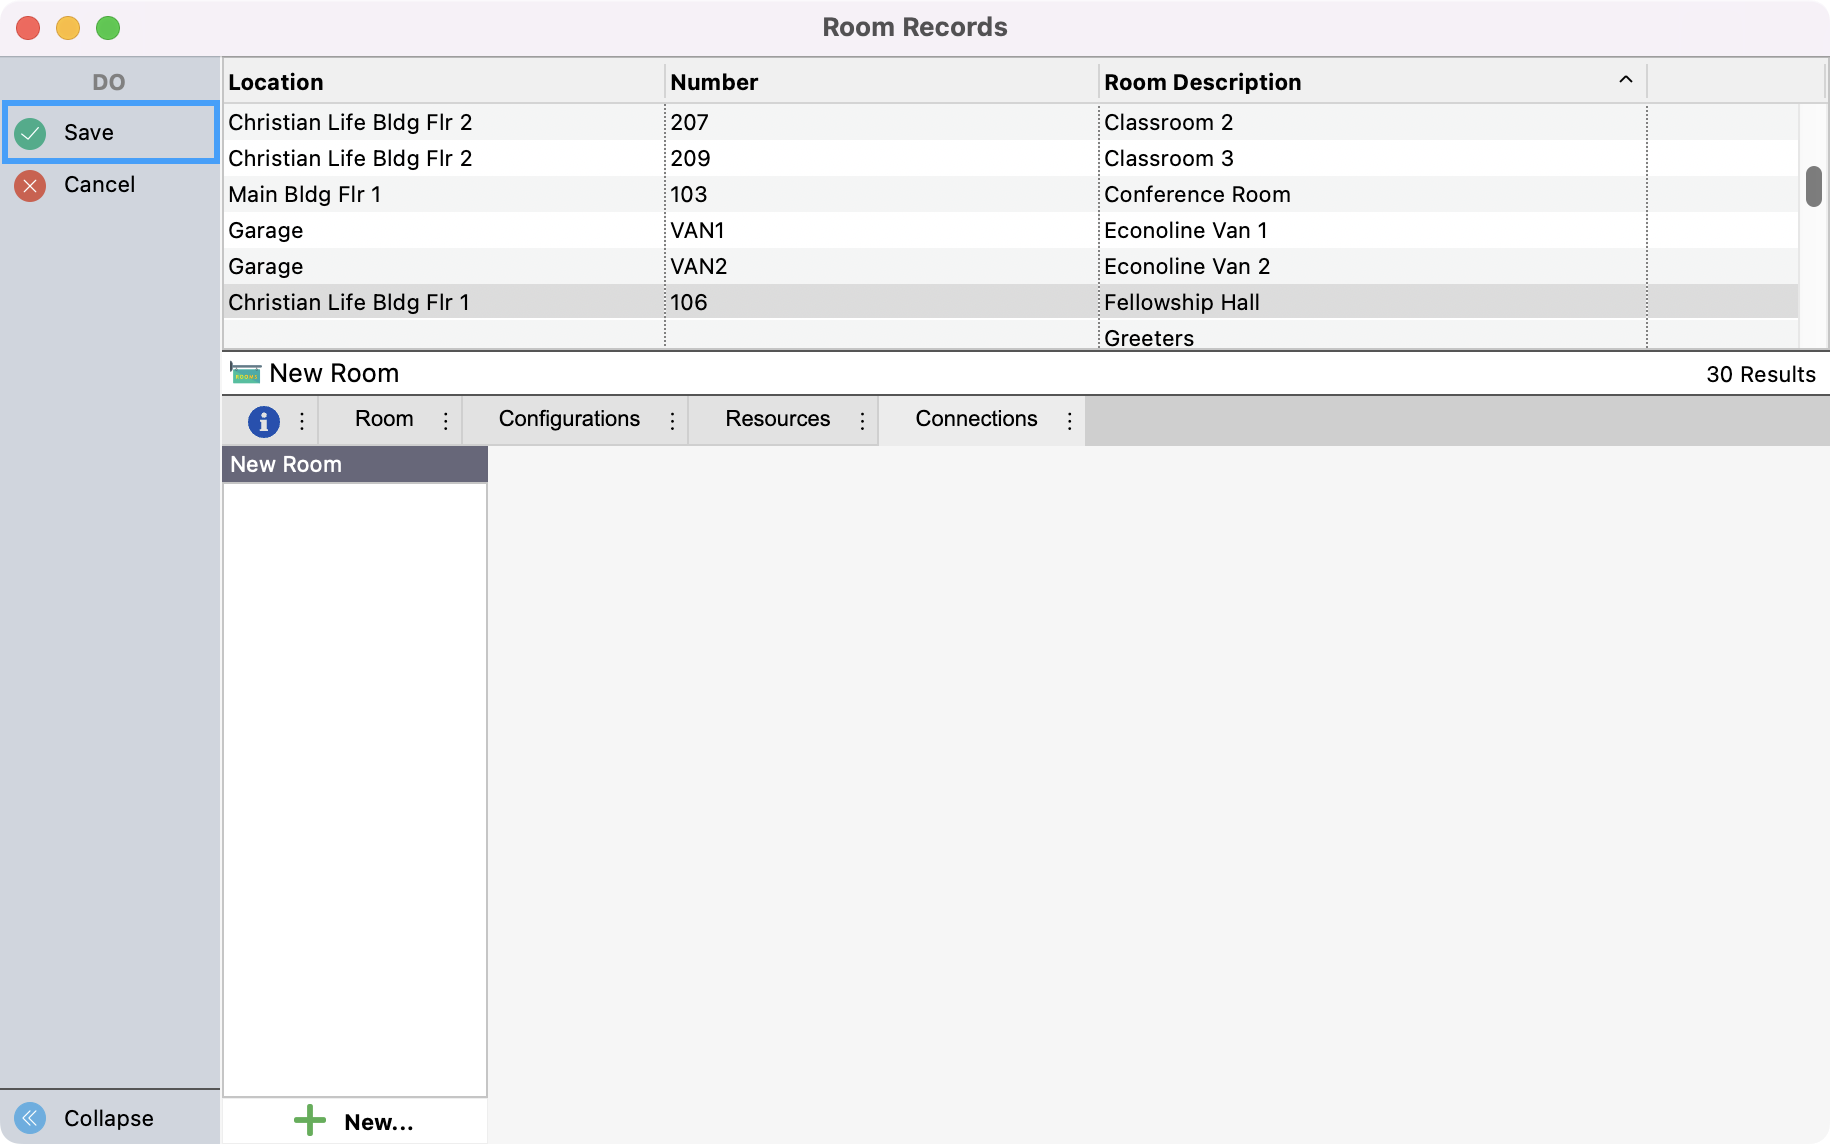
If you clicked Multi-Add you can click Save to go to the next entry and repeat steps 3-6 . Once finished, click Finish. If you clicked Add, simply click Save.