The same vendor records are used in both Accounts Payable and Ledger Entries options.
-
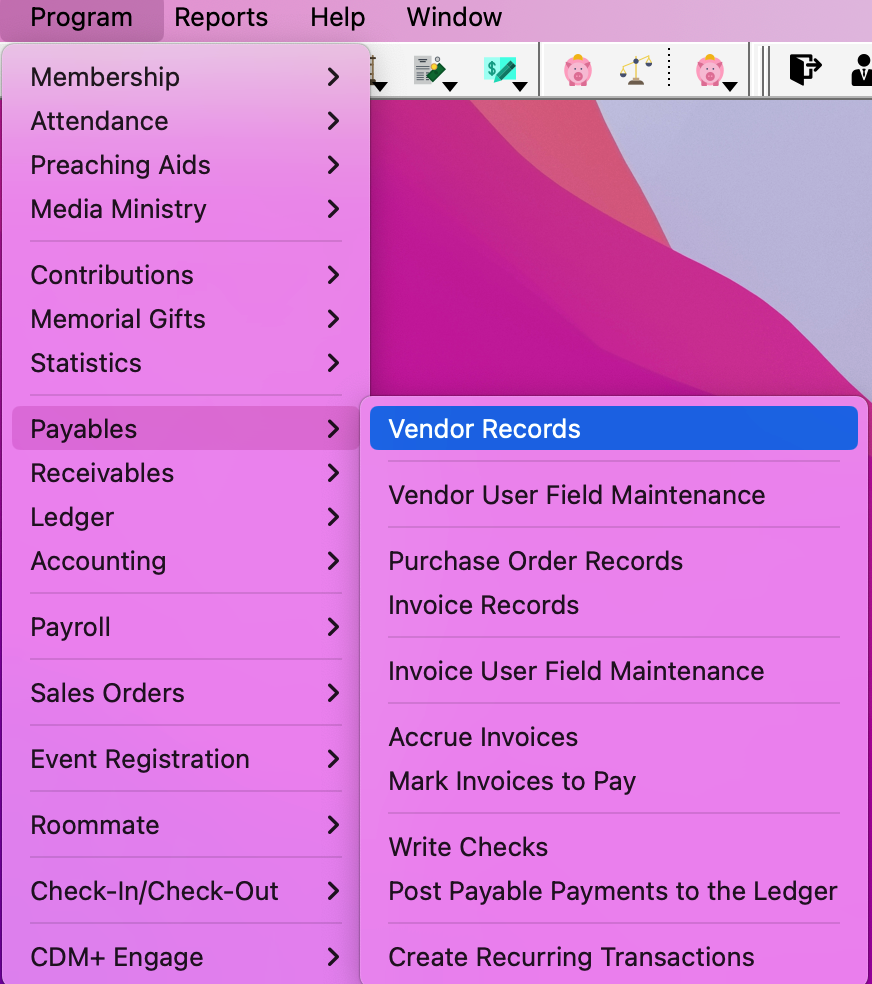
To create a vendor, go to Program → Payables → Vendor Records.
-
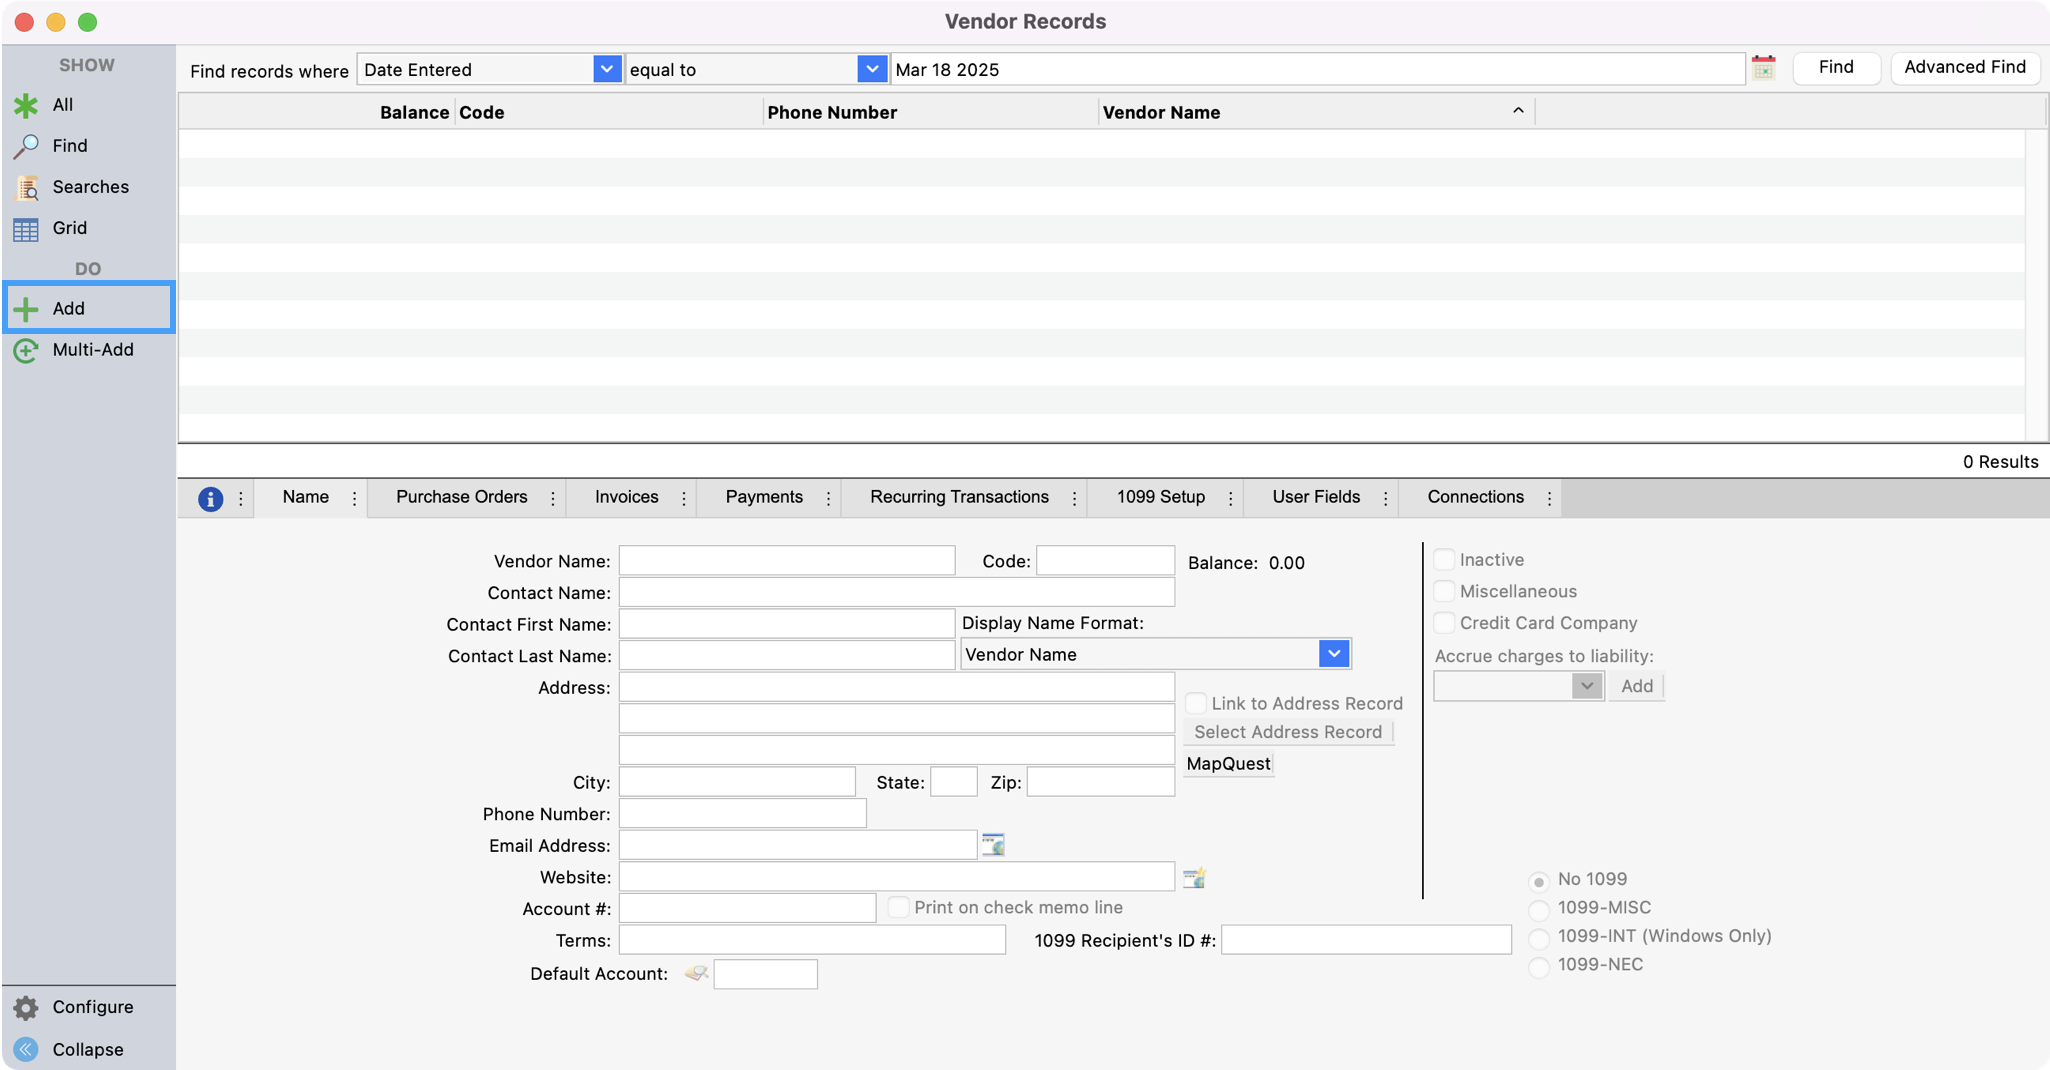
Click Add from the left sidebar.
-
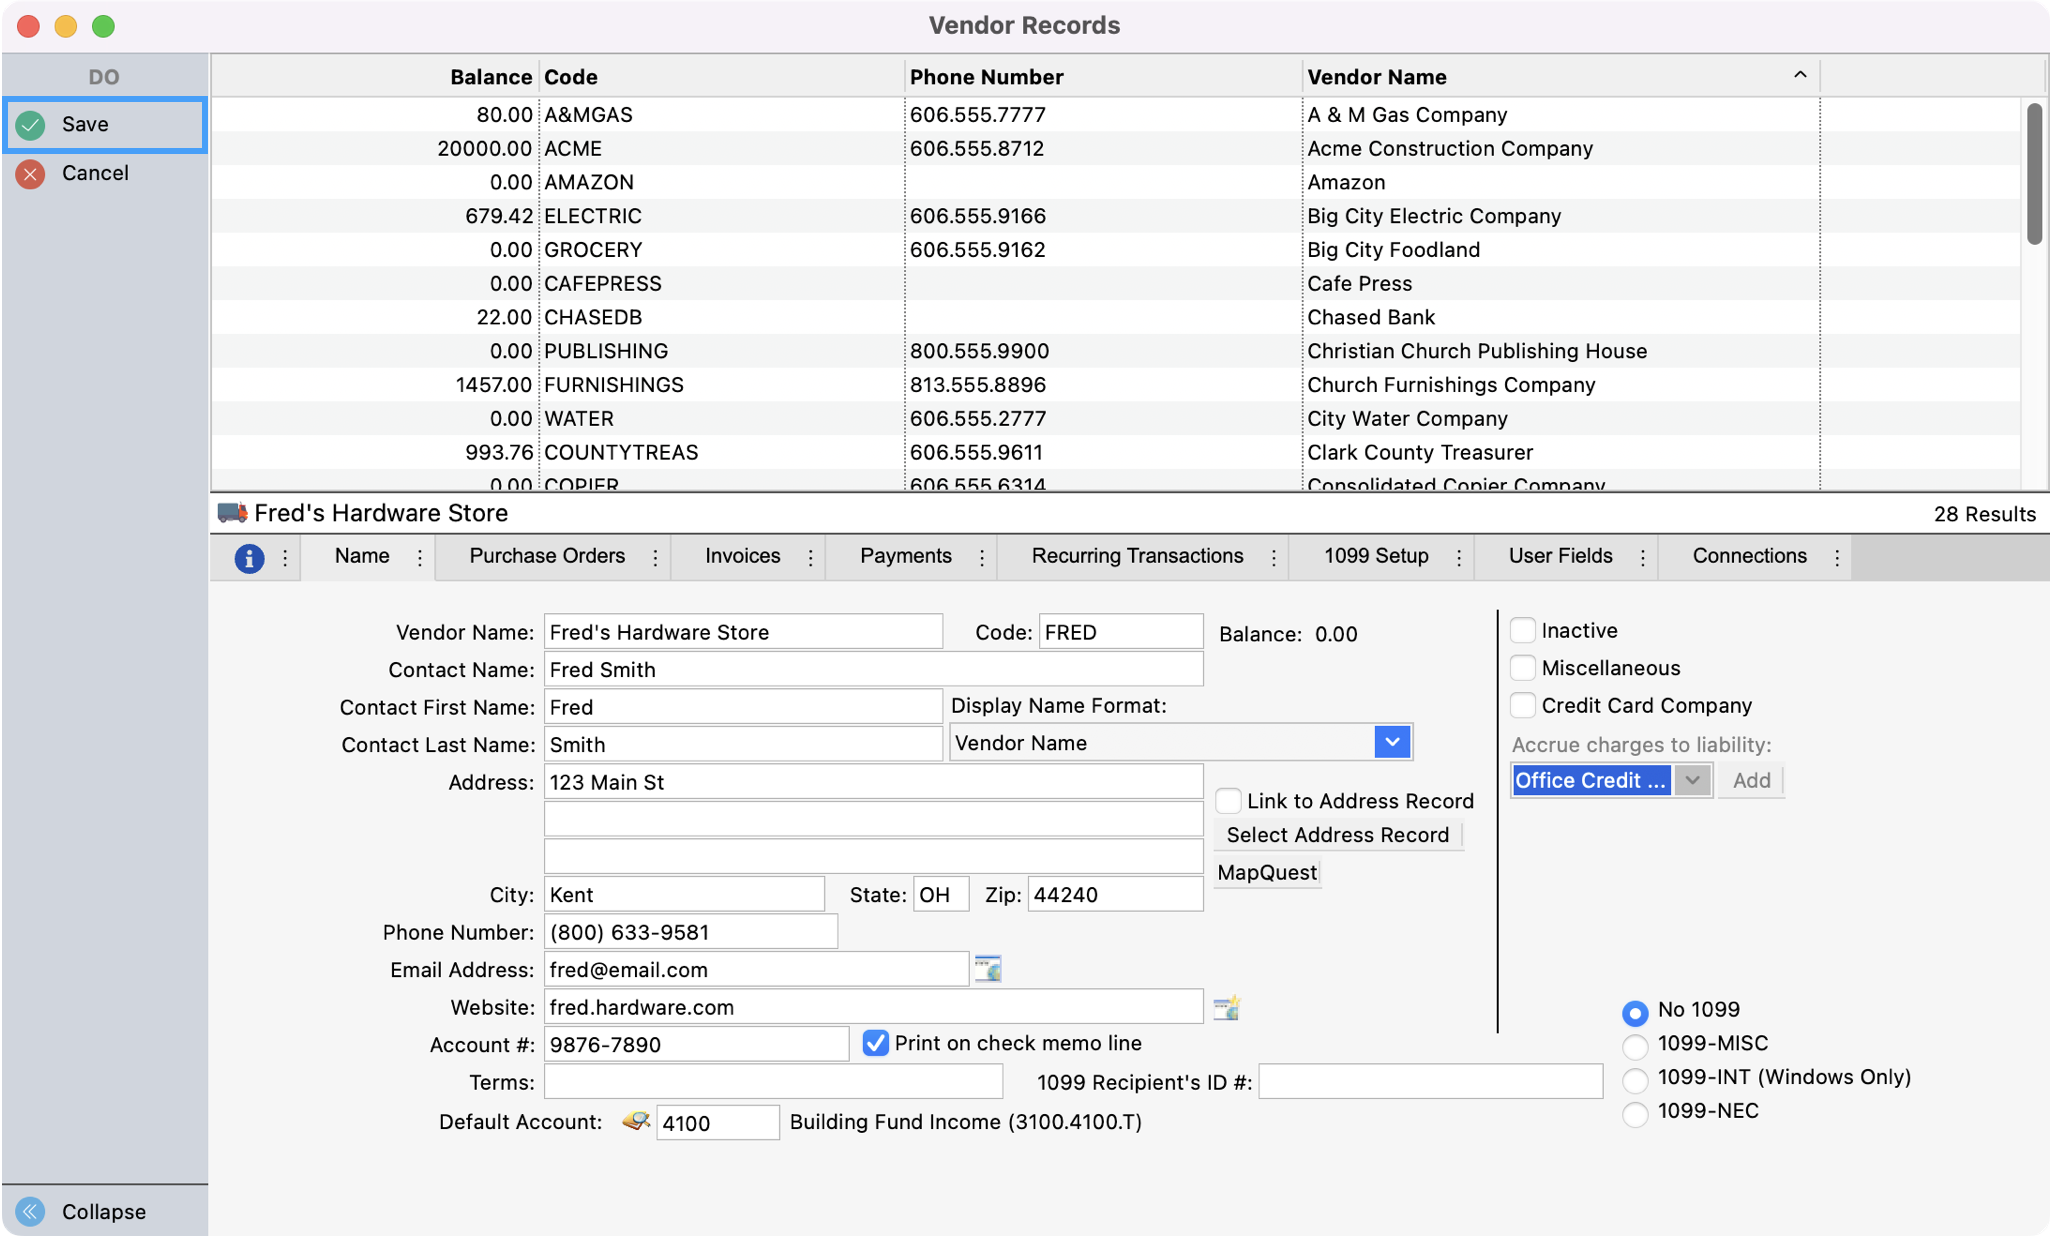
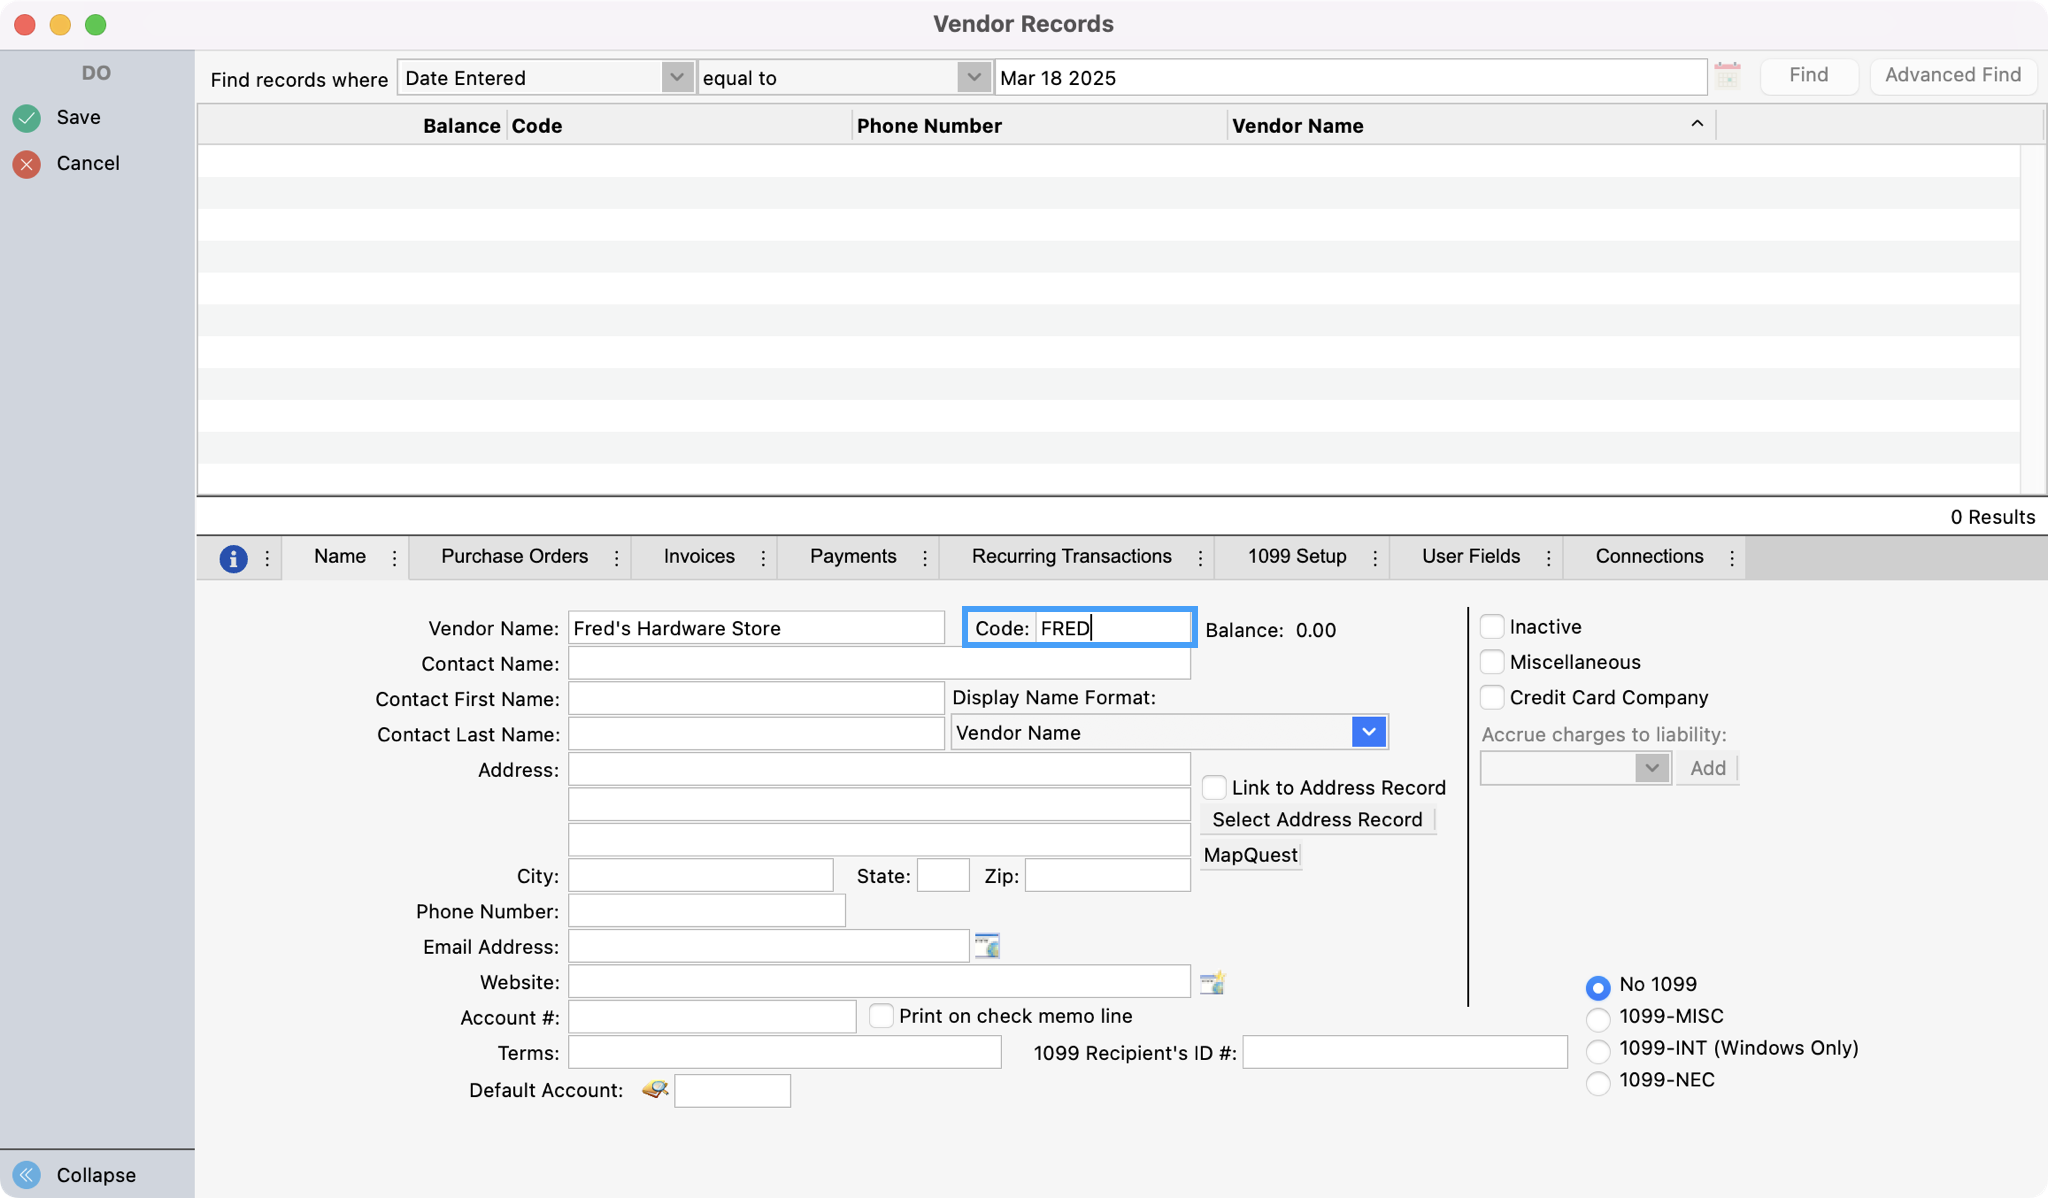
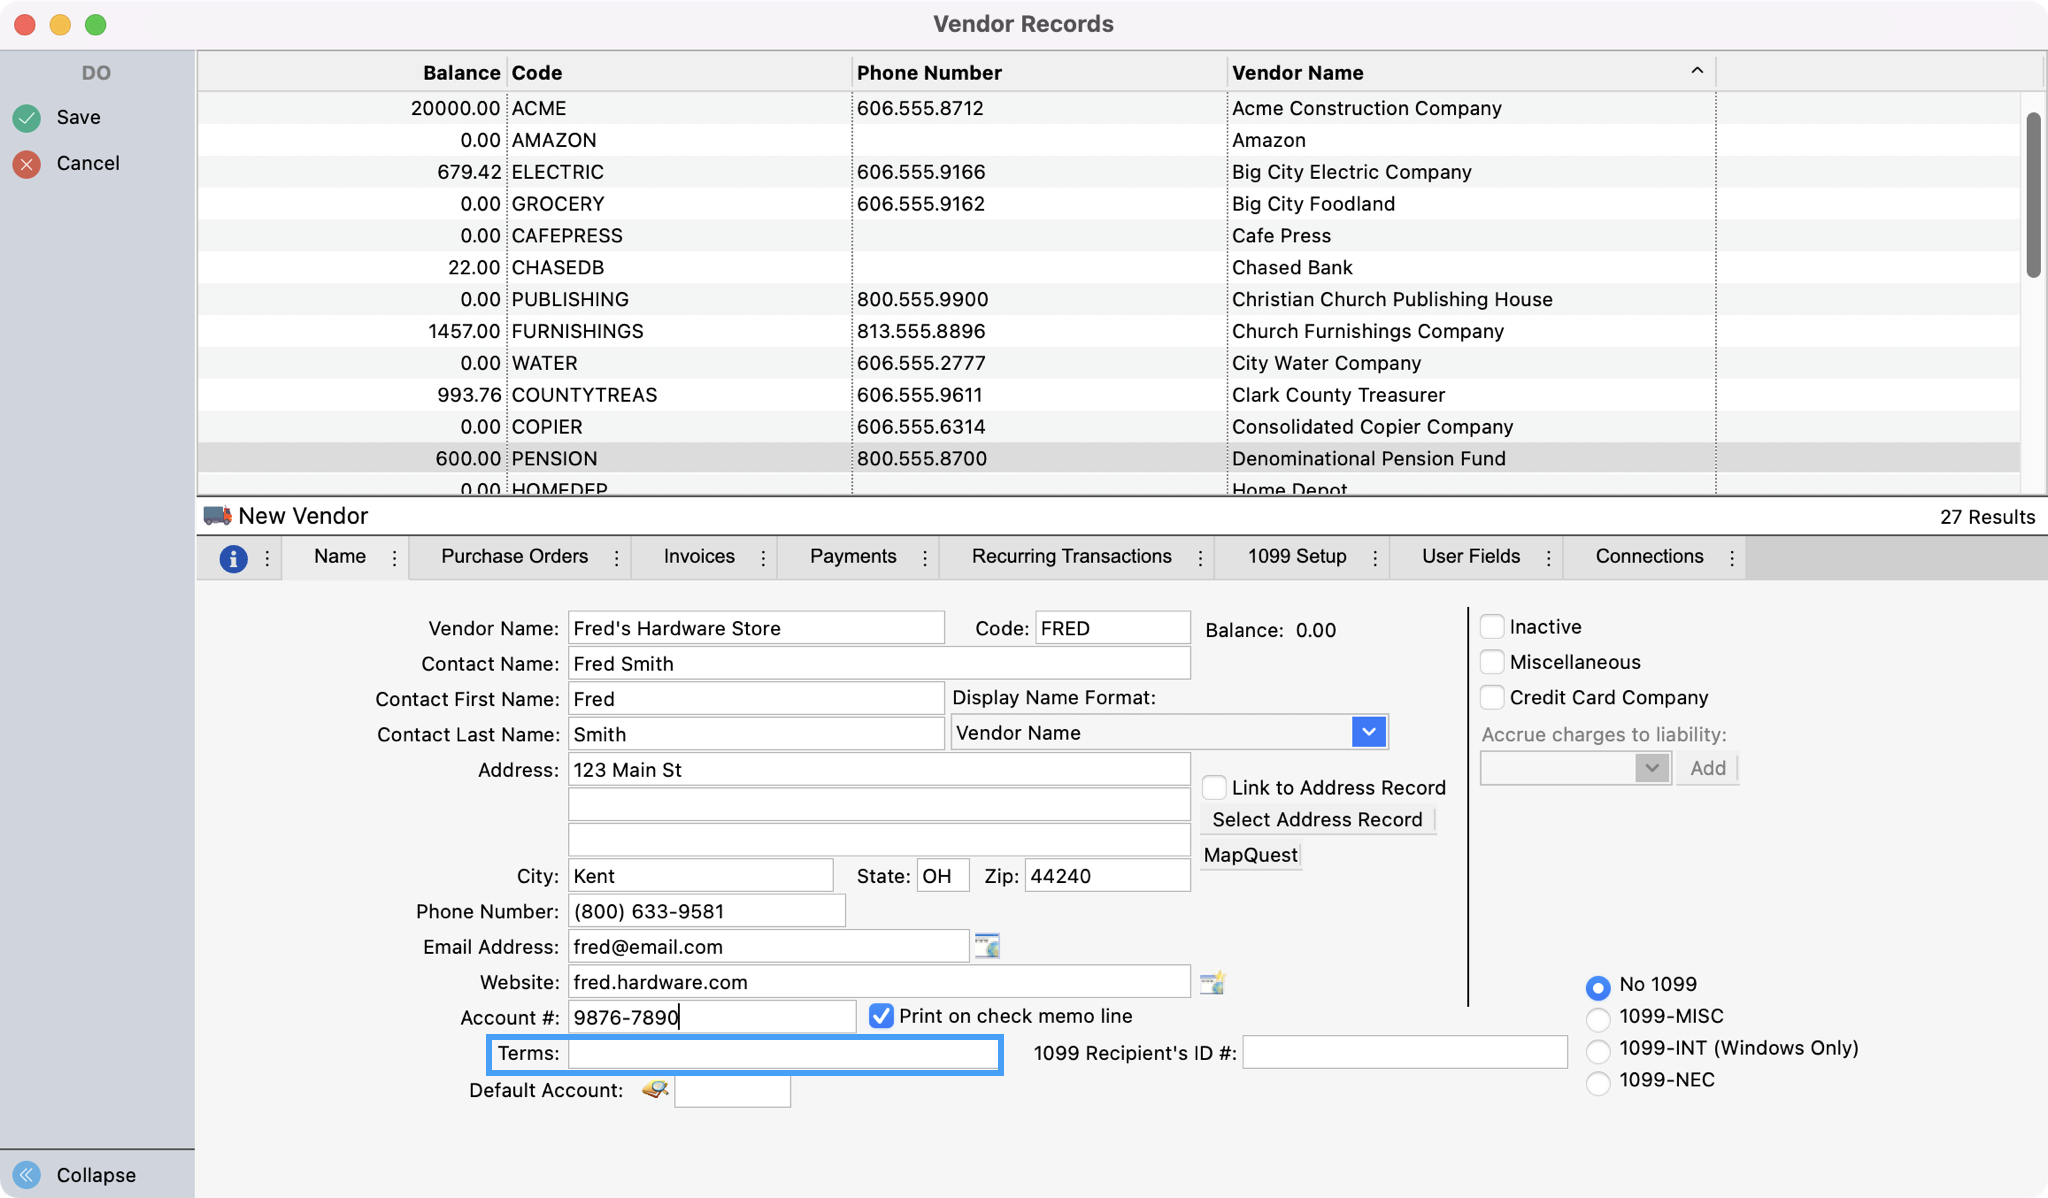
Under the Name tab, type the Vendor Name (e.g.—Fred's Hardware Store).
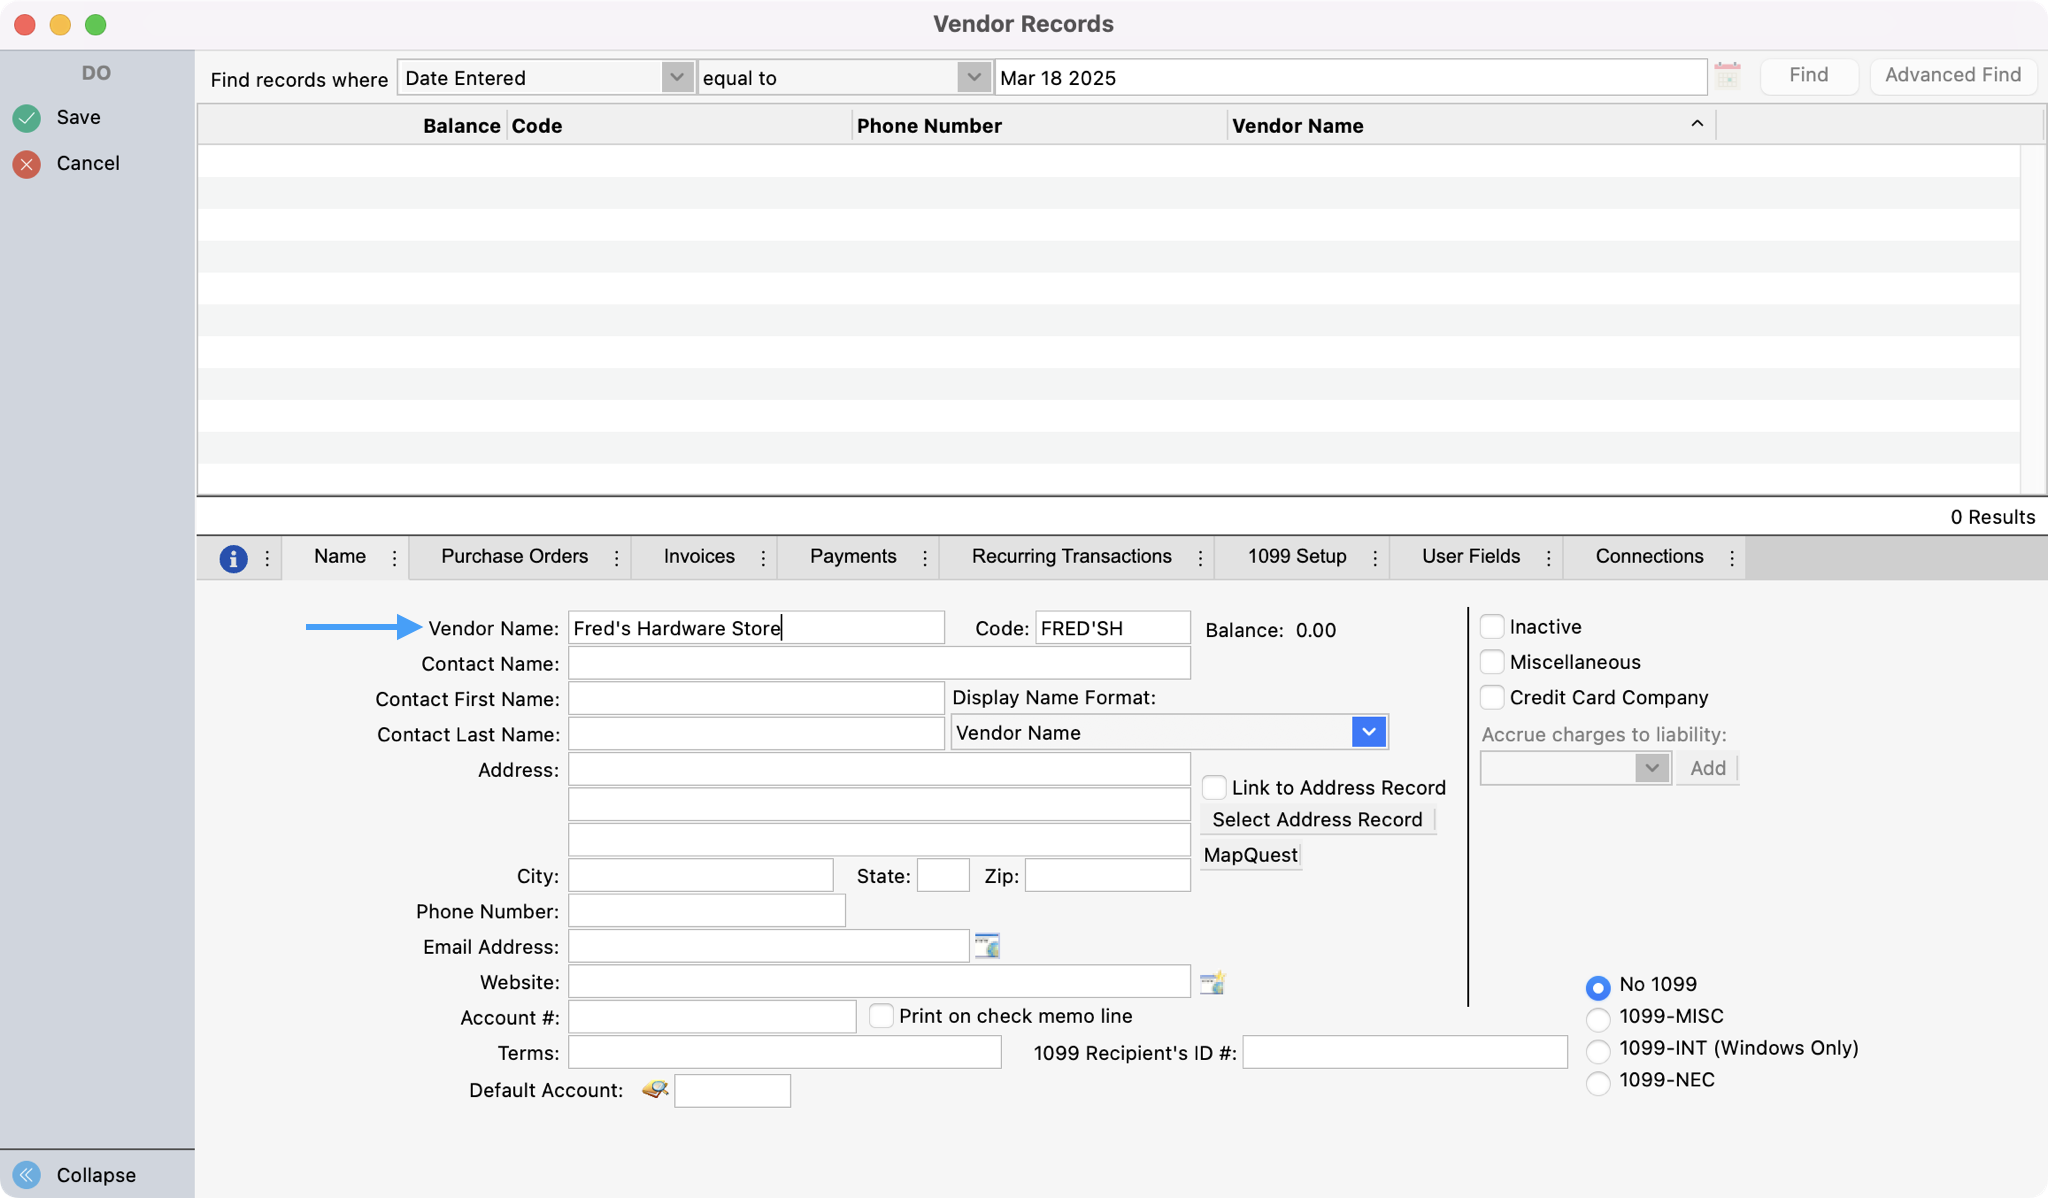
Note that the name will appear on the check exactly as you enter it in this field.
-
Press the Tab key and enter a 1-to-12 character code for the Vendor (e.g.—FRED for Fred's Hardware Store).
-
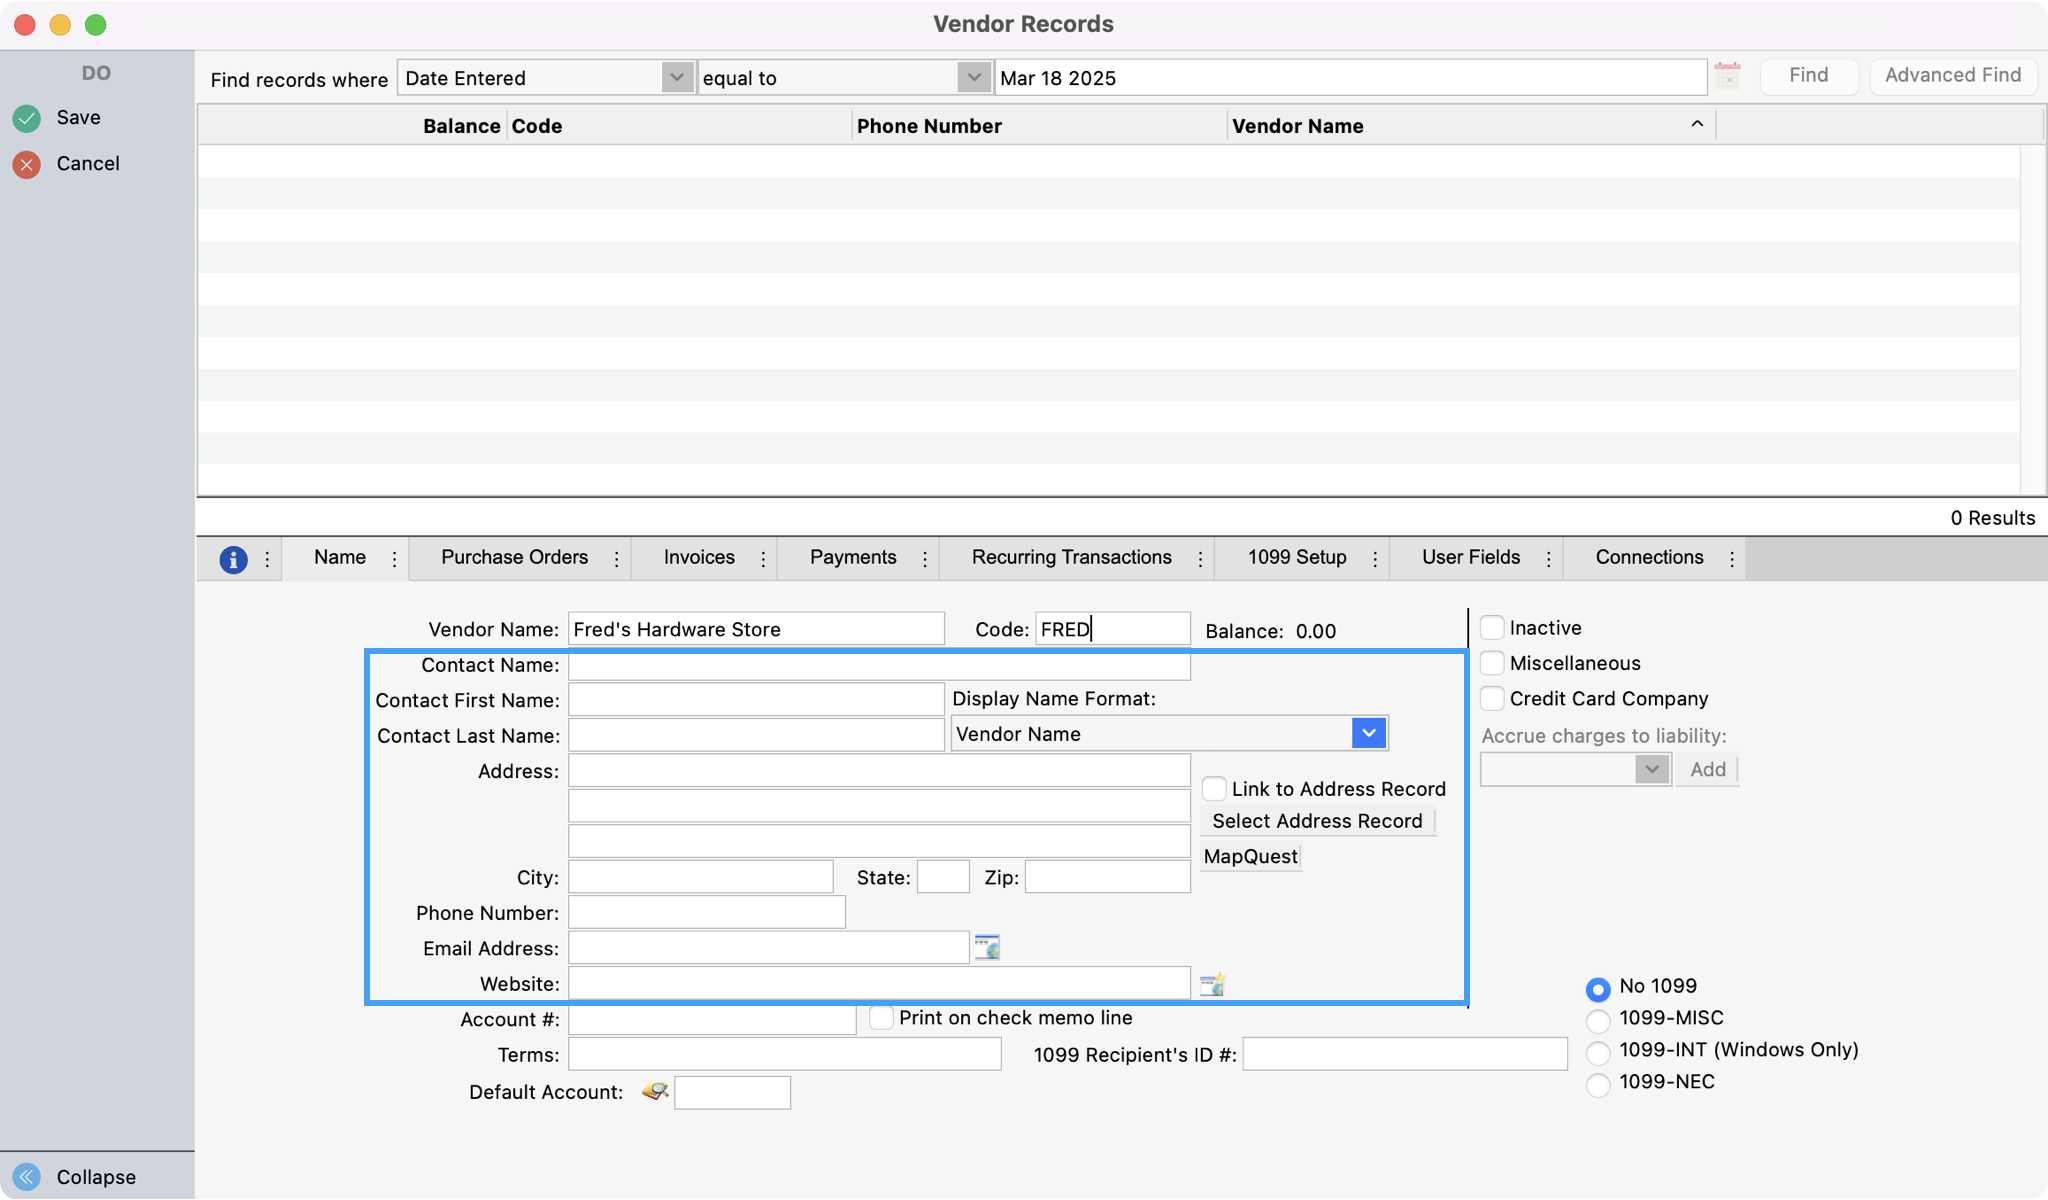
Tab through the Contact Name, Address, City, State, Zip, Phone, E-Mail and Website fields, filling in the appropriate information. All of these fields are optional, although you would want to enter at least an address if you will be using window envelopes to mail checks.
-
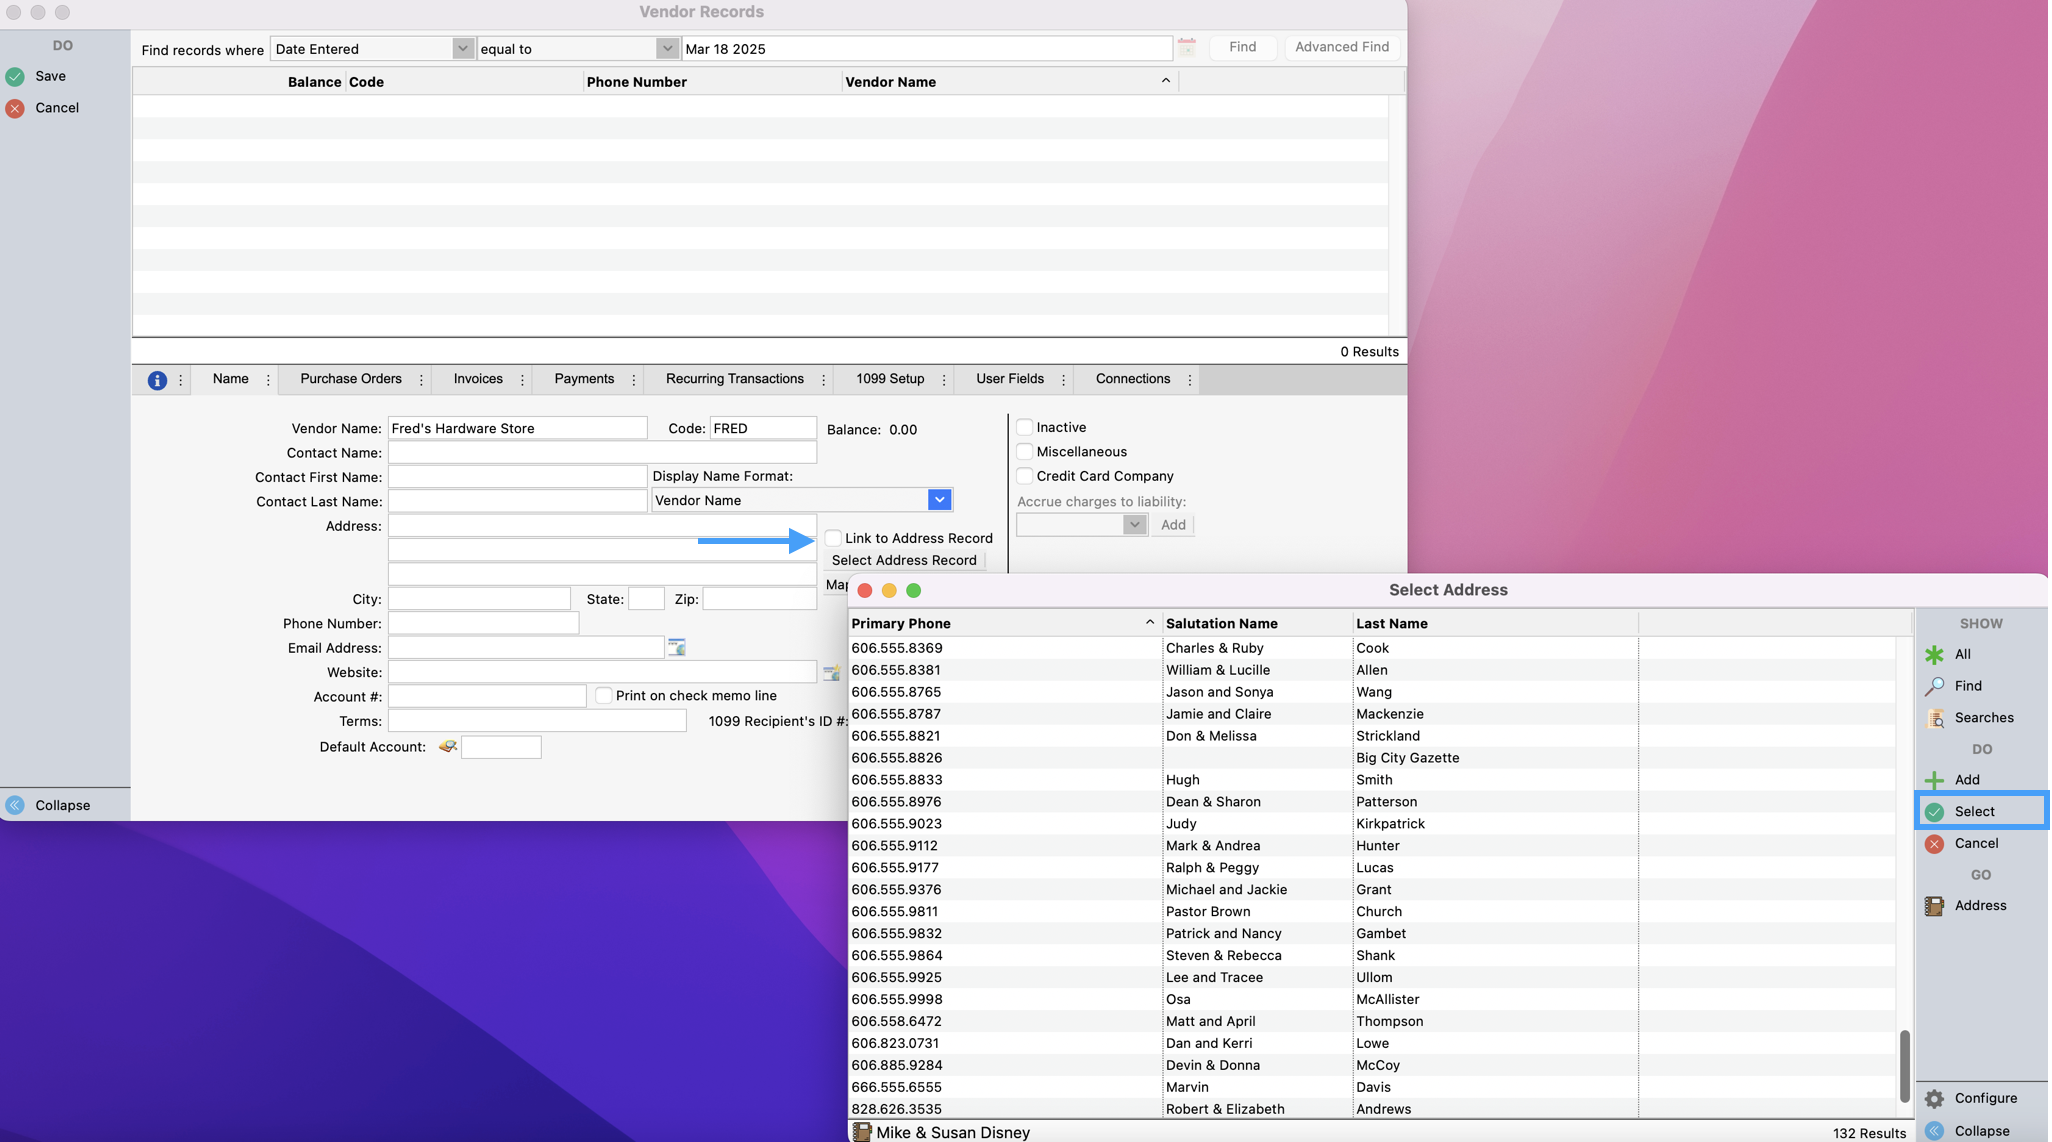
If the vendor is someone in your Membership database, you can click the Link to Address Record checkbox. Then, you can find the address and select it. This way if an address is changed in Membership, then it will automatically be updated on the Vendor address window. You can change the Vendor name, if necessary. The items in the address information are the only ones which will be updated.
-
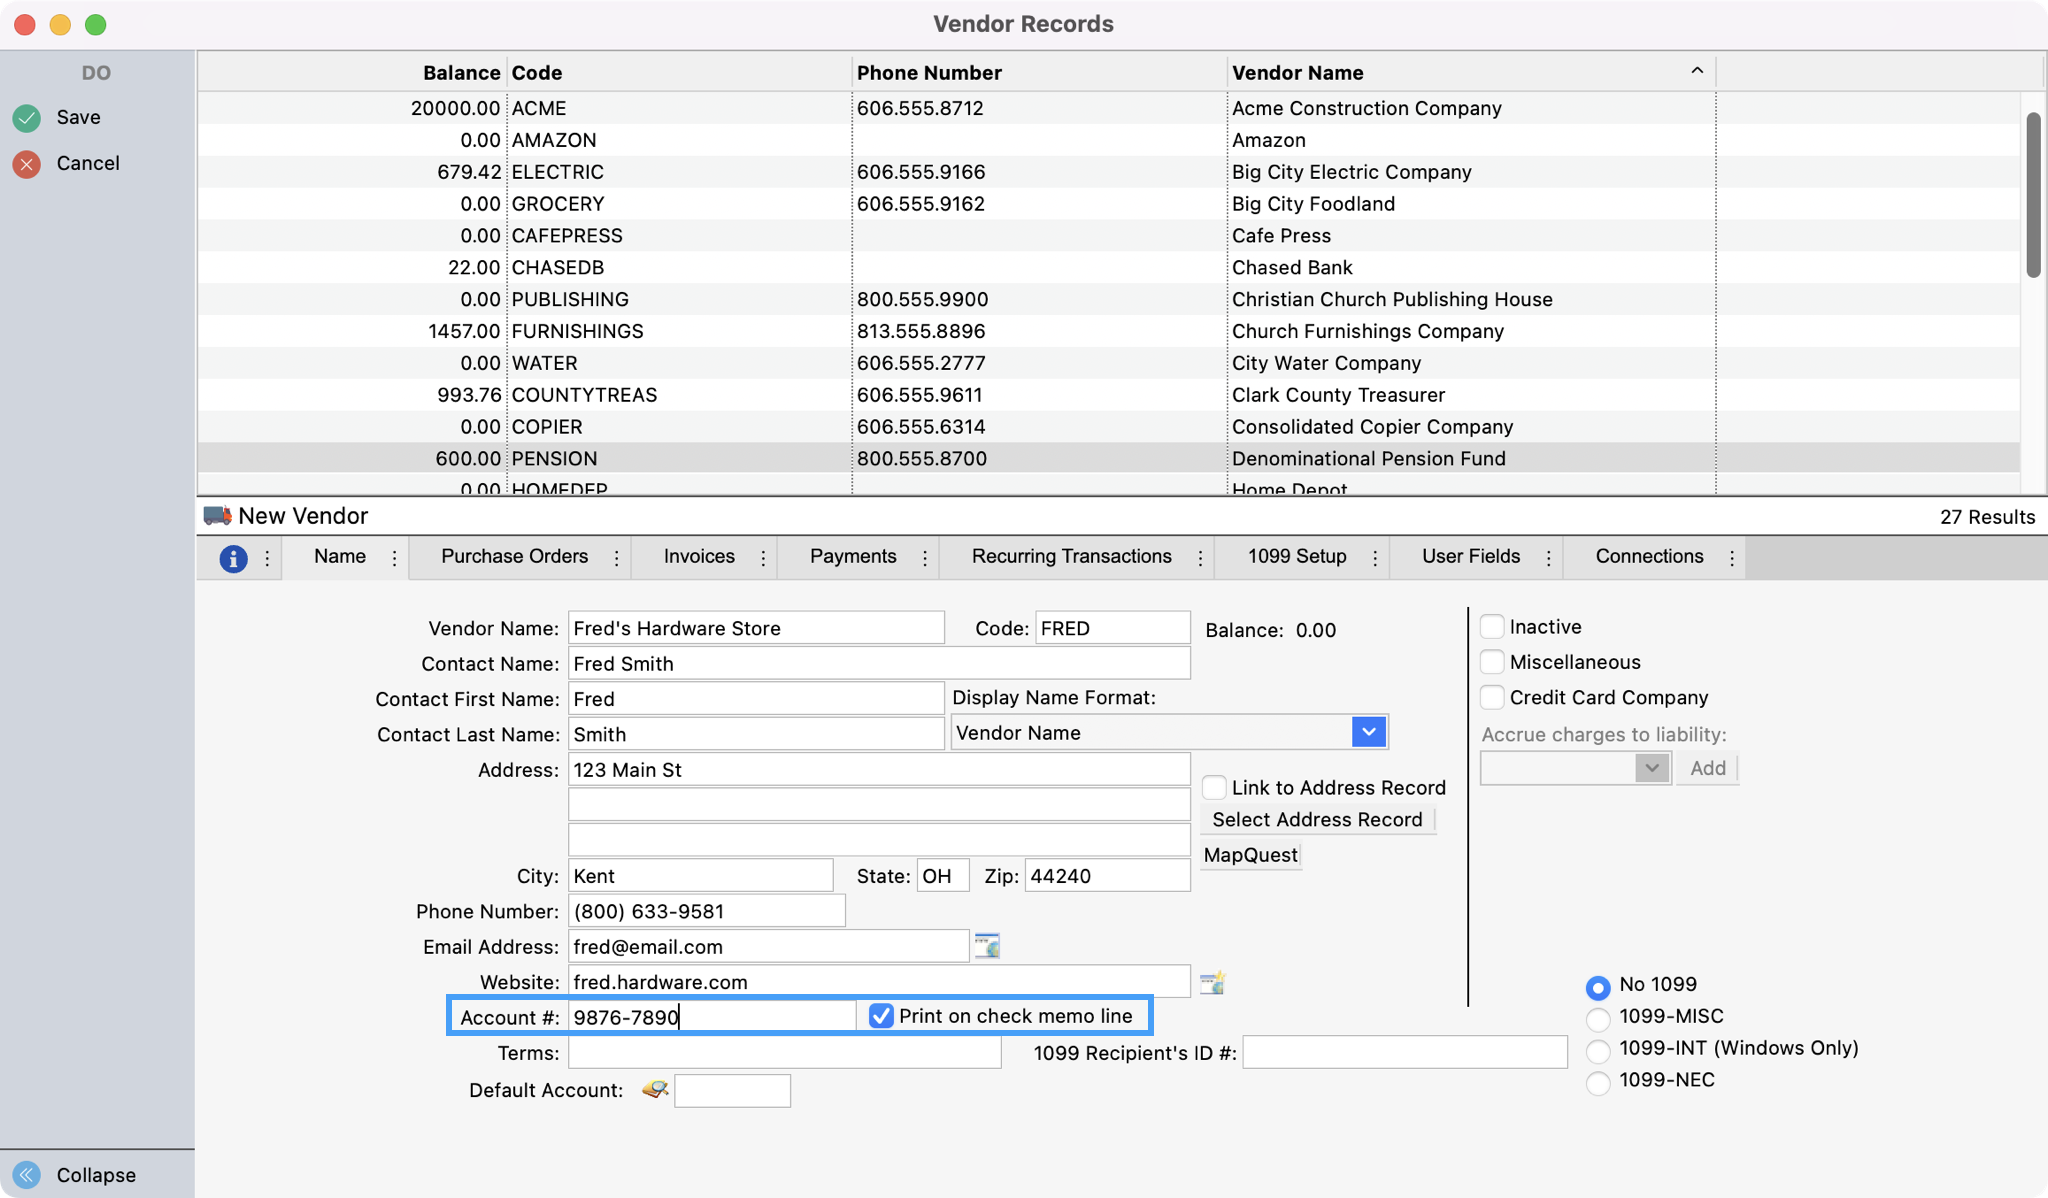
Tab to Account # and enter your account number, if available. Click the Print on check memo line checkbox if you want the account number to appear on checks.
-
Press the Tab key and enter terms, if applicable (e.g.—Net 15 days).
-
Press the Tab key and enter 1099 Recipient's ID# if this vendor is to receive a 1099 at the end of the year. Also click on the appropriate 1099 checkbox if this is the case. Turning on the 1099 checkbox will cause CDM+ to indicate every transaction to be included on the 1099.
The amount to be printed on a 1099 is determined on the transaction line for this vendor. When entering invoices or transactions in the ledger, you can turn on or off the 1099 checkbox on those windows. The Vendor Record checkbox is simply a default so all items are initially checked to be included.

You can create a Vendor record for a staff member that does not receive a W-2 and who are not setup in CDM+ Payroll.
-
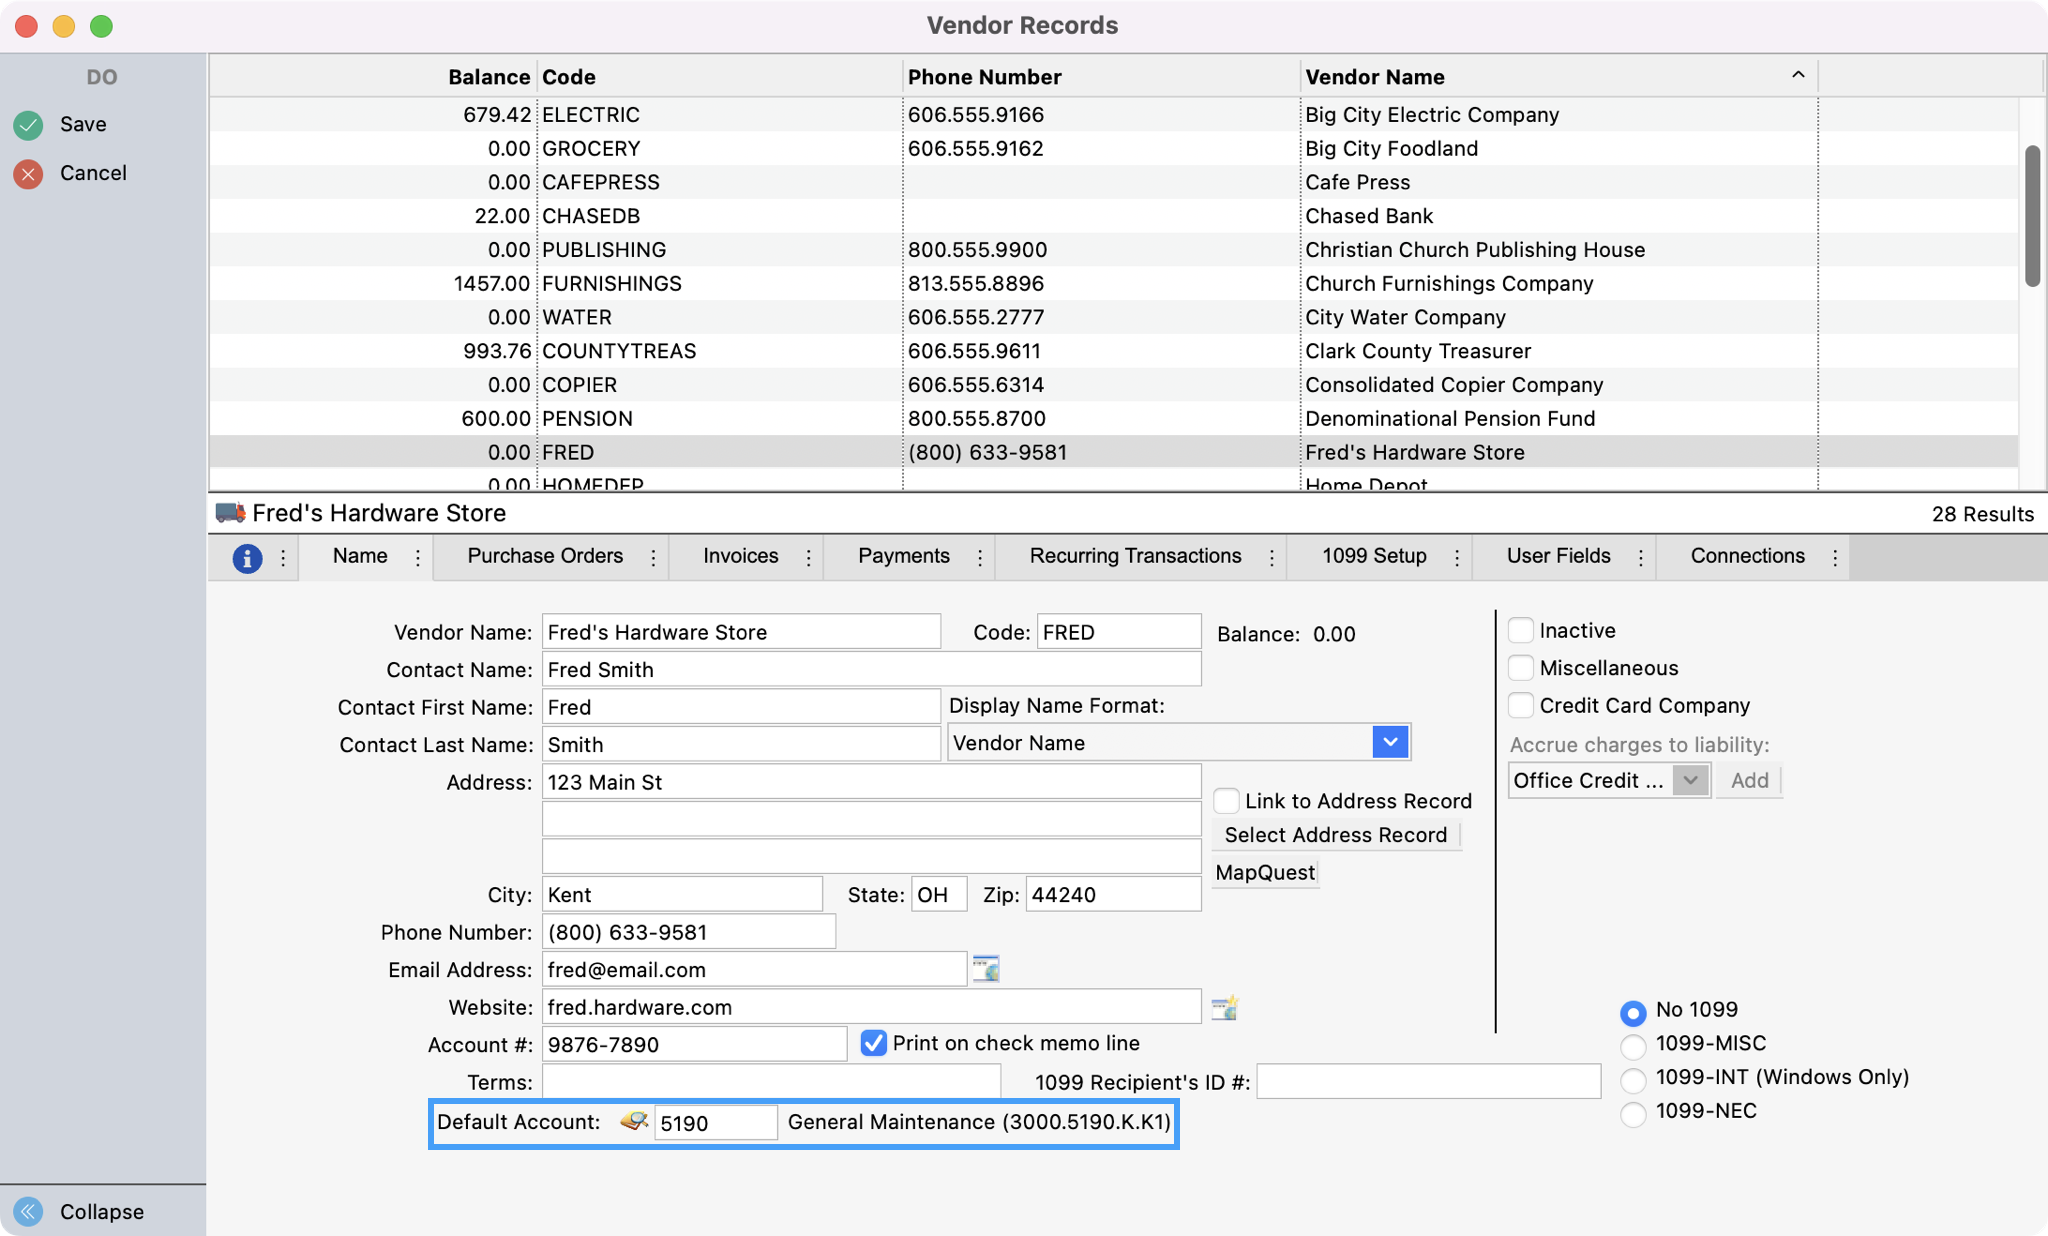
Enter a Default Chart of Account # if this Vendor is most often paid out of one particular account number from the Chart of Accounts (you may click the pencil icon and double-click the expense account from the chart of accounts). If the Vendor is often paid out of various account numbers, this field may be left blank and filled in when invoices are entered for this Vendor.
-
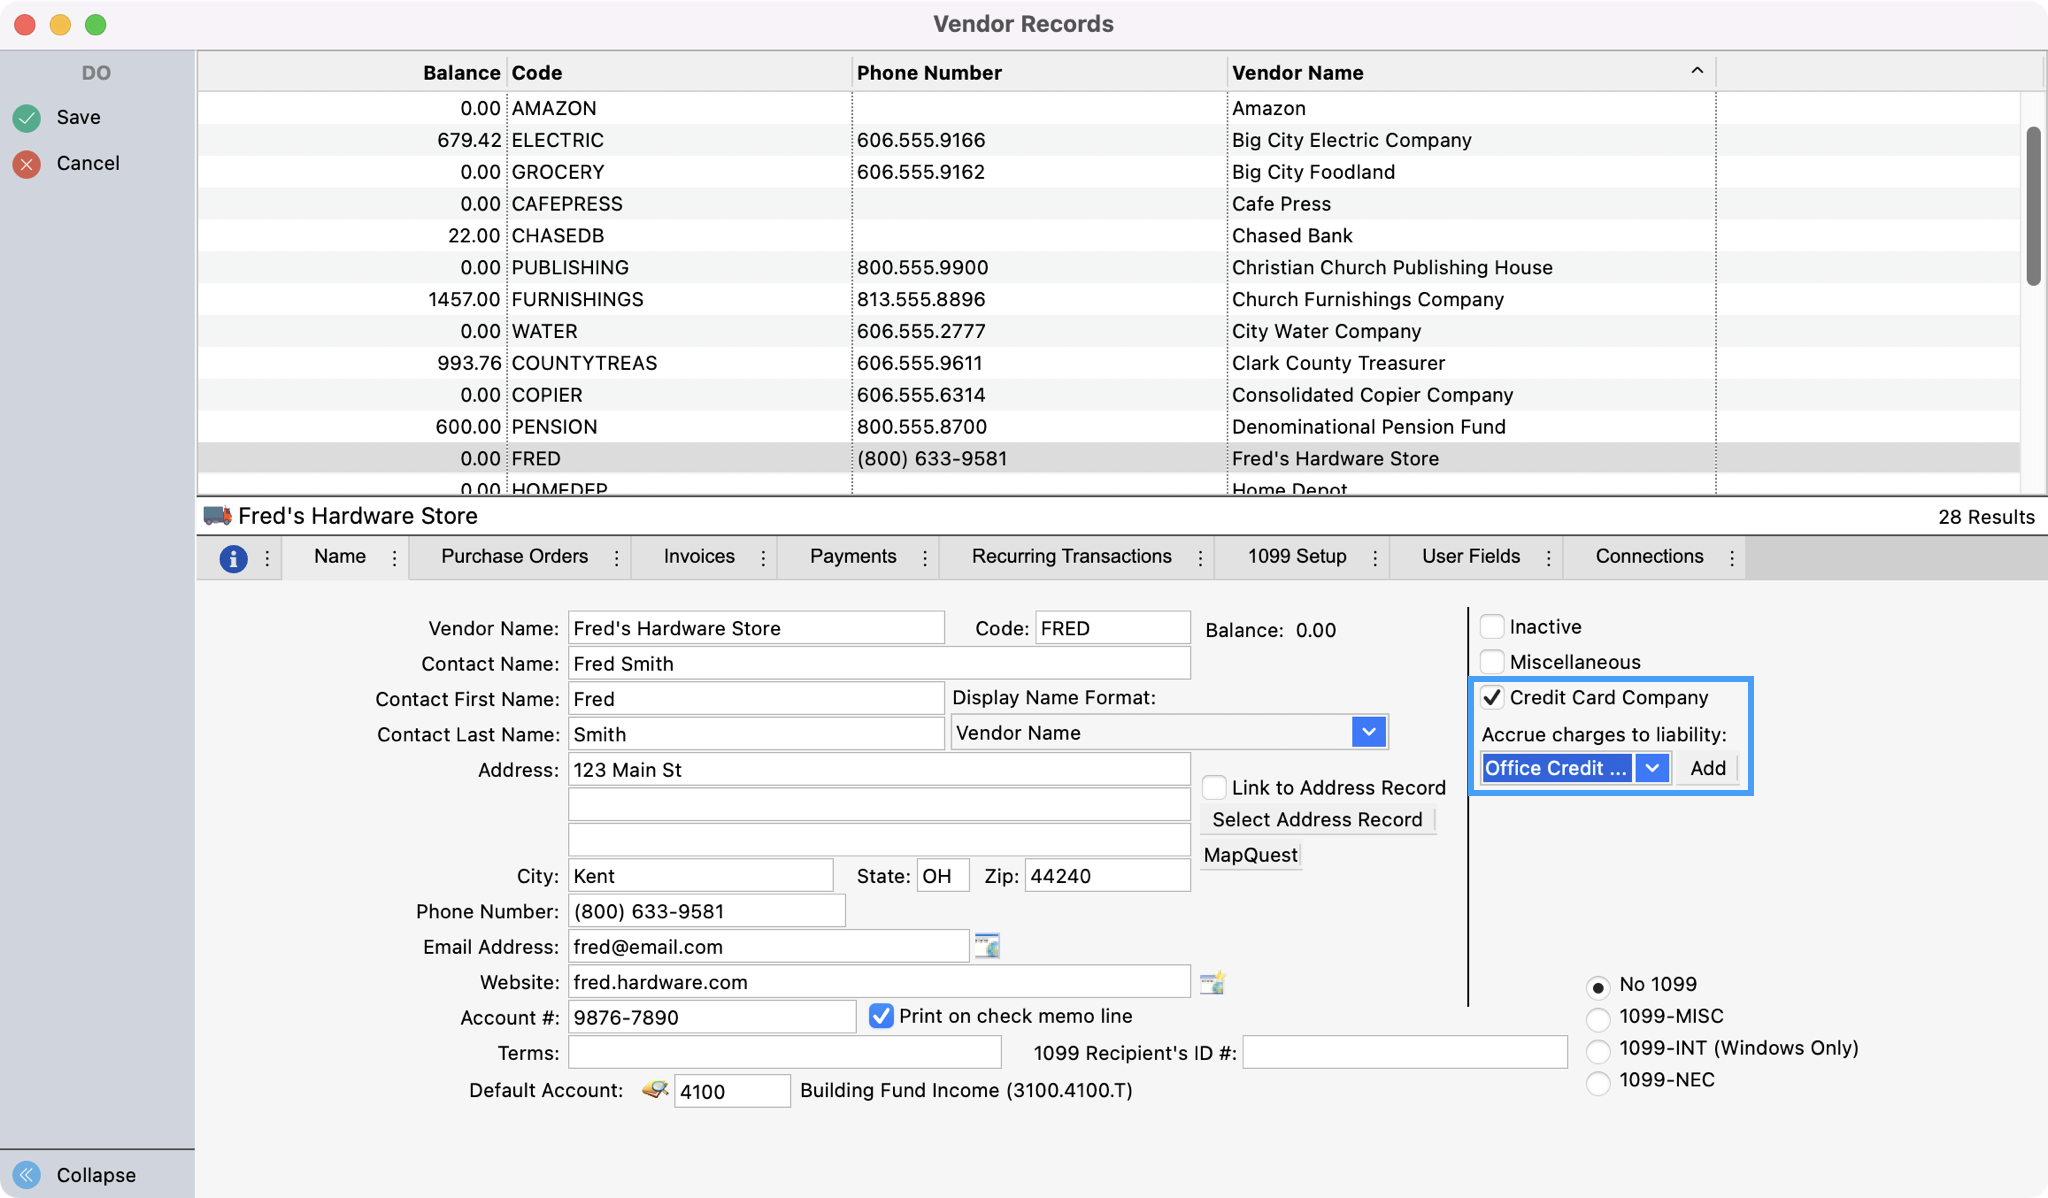
If this vendor is a credit card against which you will pay invoices, check the Credit Card Company checkbox and select a liability to which to accrue charges (e.g.—Credit Cards).
-
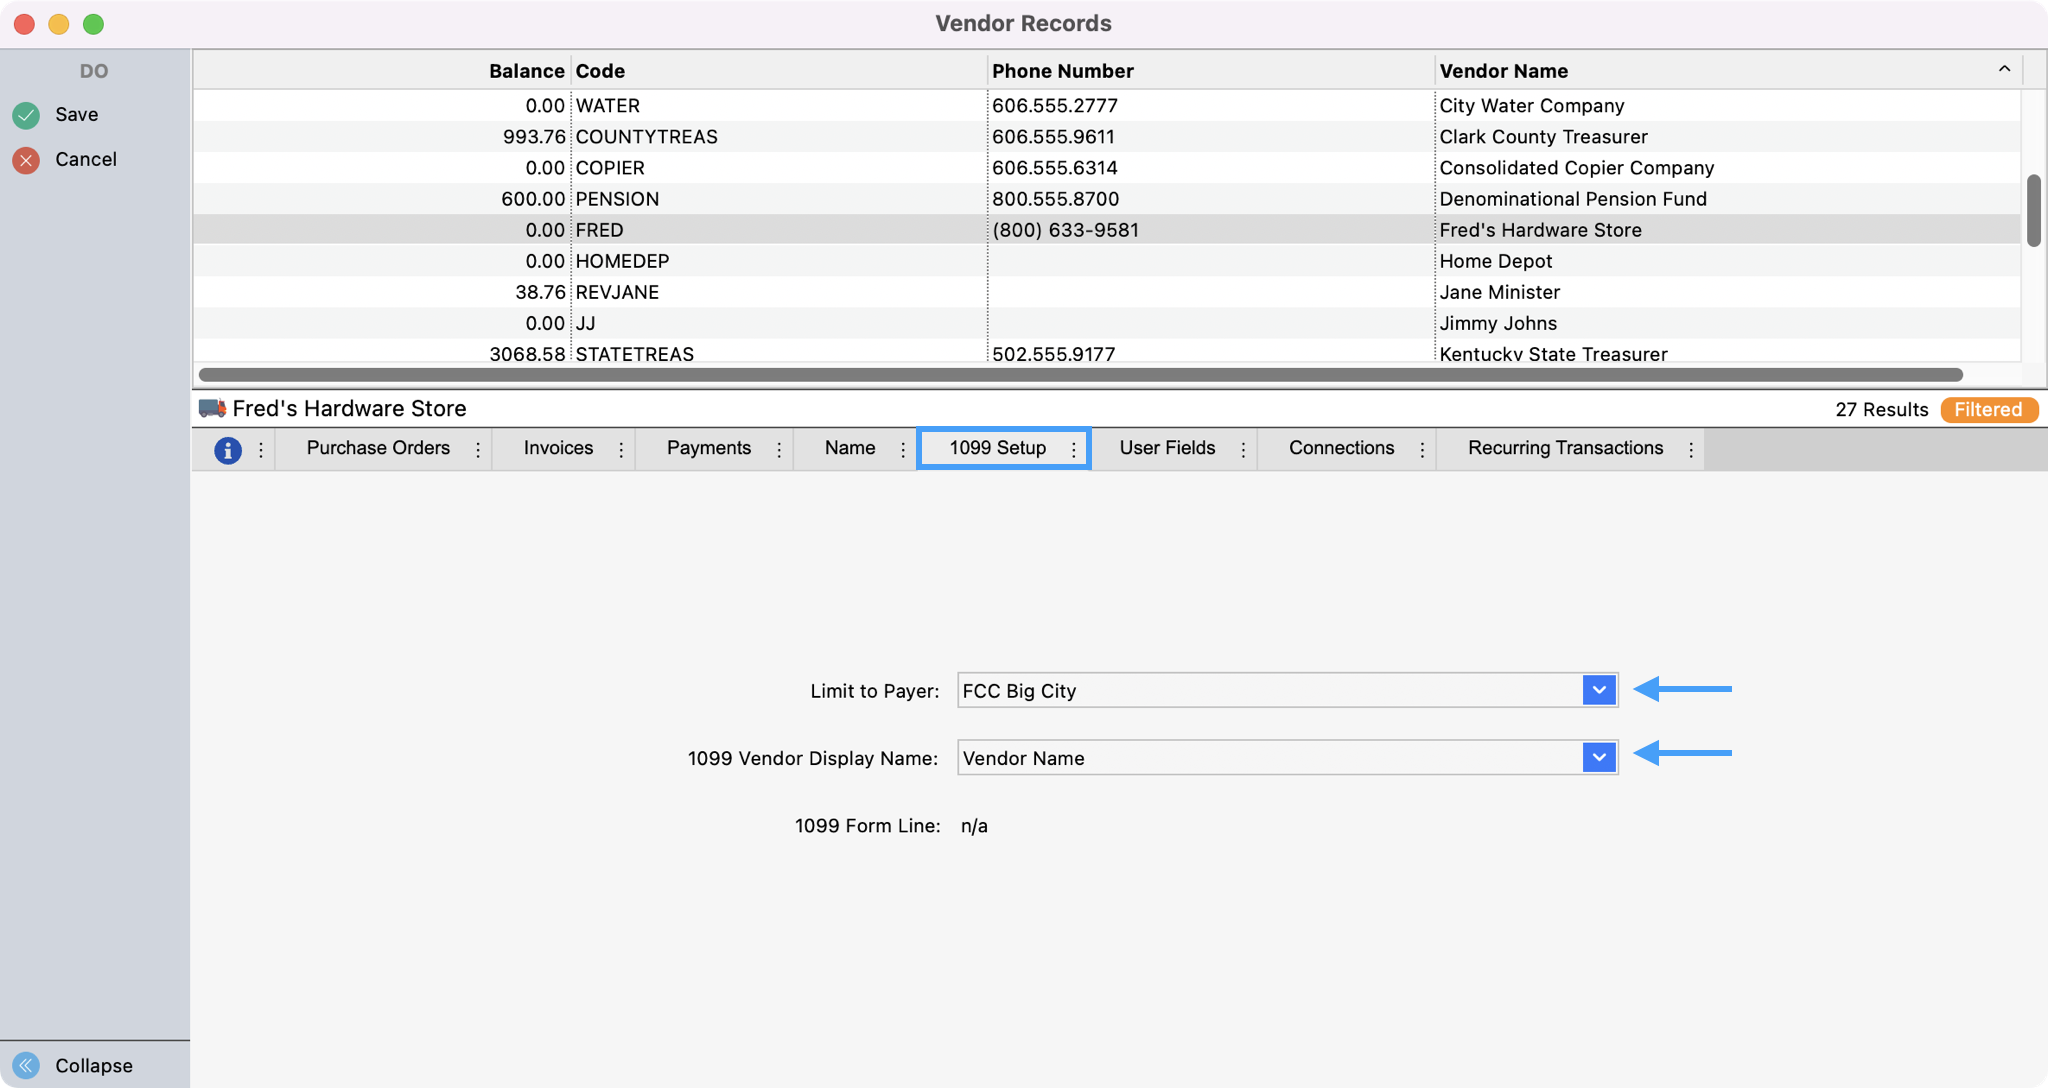
If you selected a 1099 option on Step # 9 click the 1099 Setup tab. Here if you have more than one Payer, you can select it from the drop-down list and also set the 1099 Vendor Display Name. Depending on the type of 1099 you selected under the Name tab, you may have additional options to select on the 1099 Form Line.
-
Under User Fields you can add any documentation you want to keep that associated with the vendor such as a contract.

-
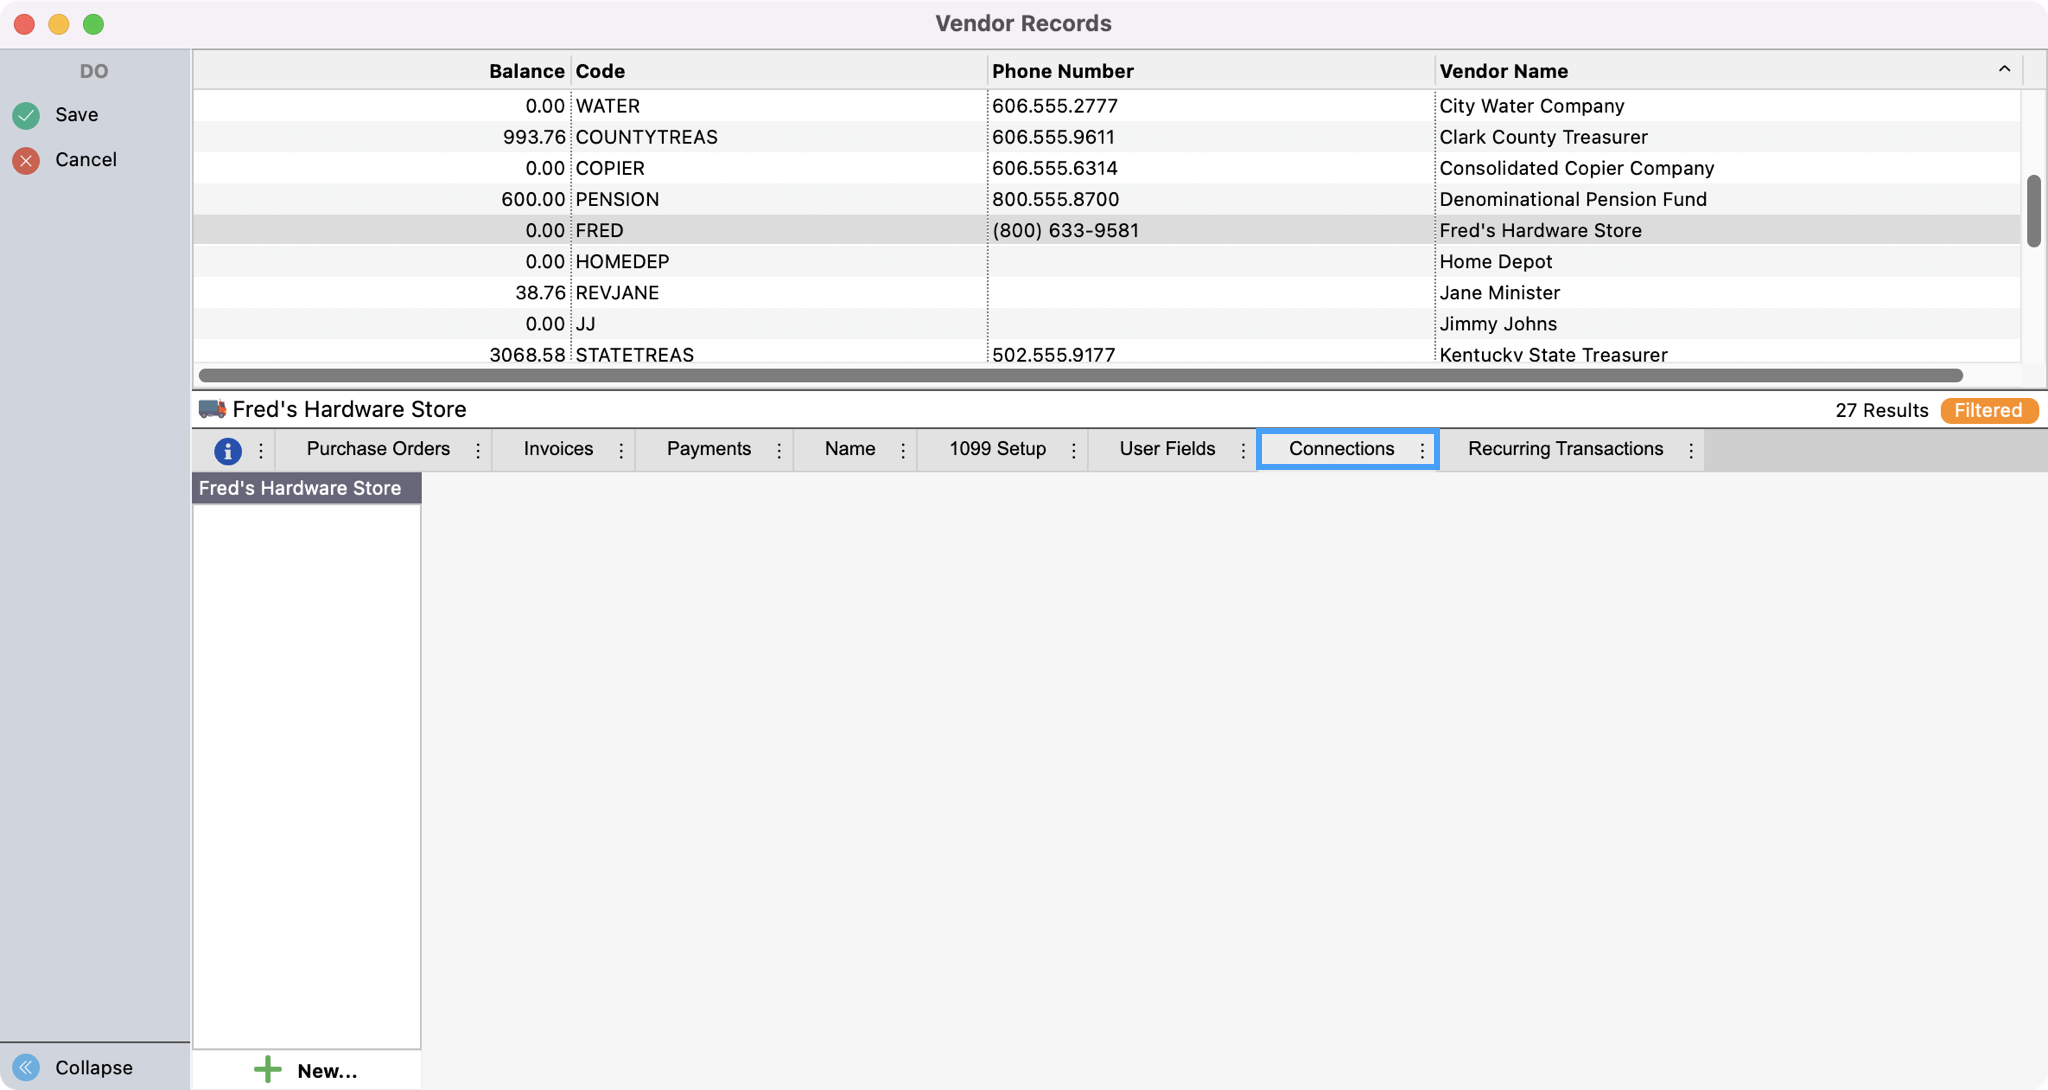
Under the Connections tab you can connect the vendor to other CDM+ records to showcase relationships. For example, if the vendor attends your organization, you could link the vendor record to their Individual record.
-
If this Vendor is paid the same amount on the same day of every month, click the Recurring Transactions tab and fill in the recurring transaction.
-
Click Add Transaction to be able to enter the transaction details.
-
Choose the Day of the month the reocurrannce occurs.
-
Provide a Description.
-
Click Add Transaction Line to add aditional lines to track different accounts and amounts needed.
Multiple recurring transactions may be entered for each vendor.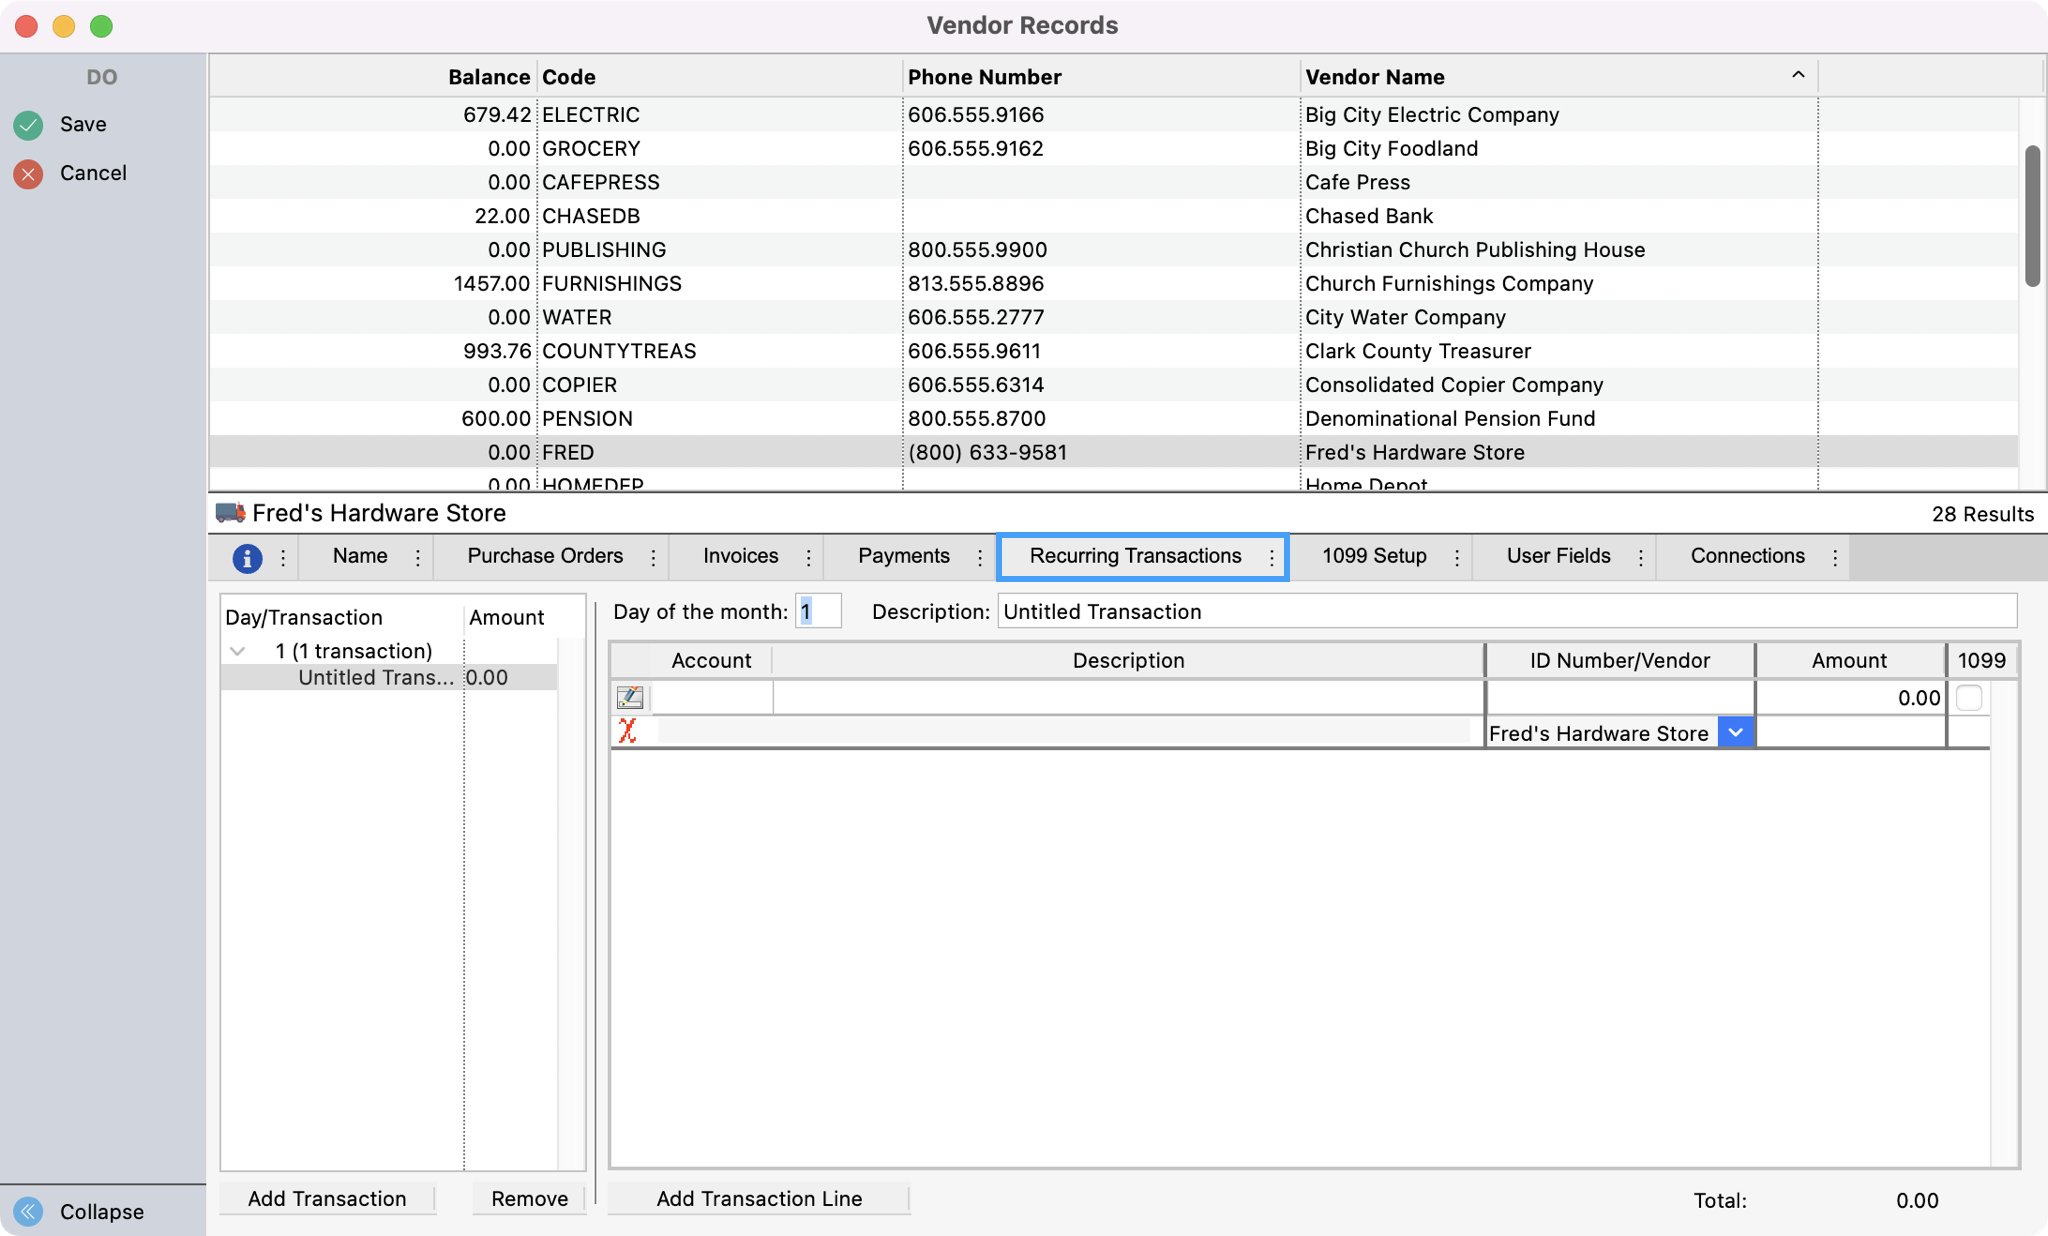
-
-
Press Return/Enter or click Save.