Contributions labels and envelopes reports are very similar to all other label output in CDM+. You can choose from a wide variety of preset Avery® label formats or you may edit an existing format or add a new one to create a custom format. Giving Labels allow the user to configure ranges to select givers, non-givers or by range of giving. Pledge Labels allow user to select which pledge fund to include as well as whether to include non-pledgers and projected pledges as well.
-
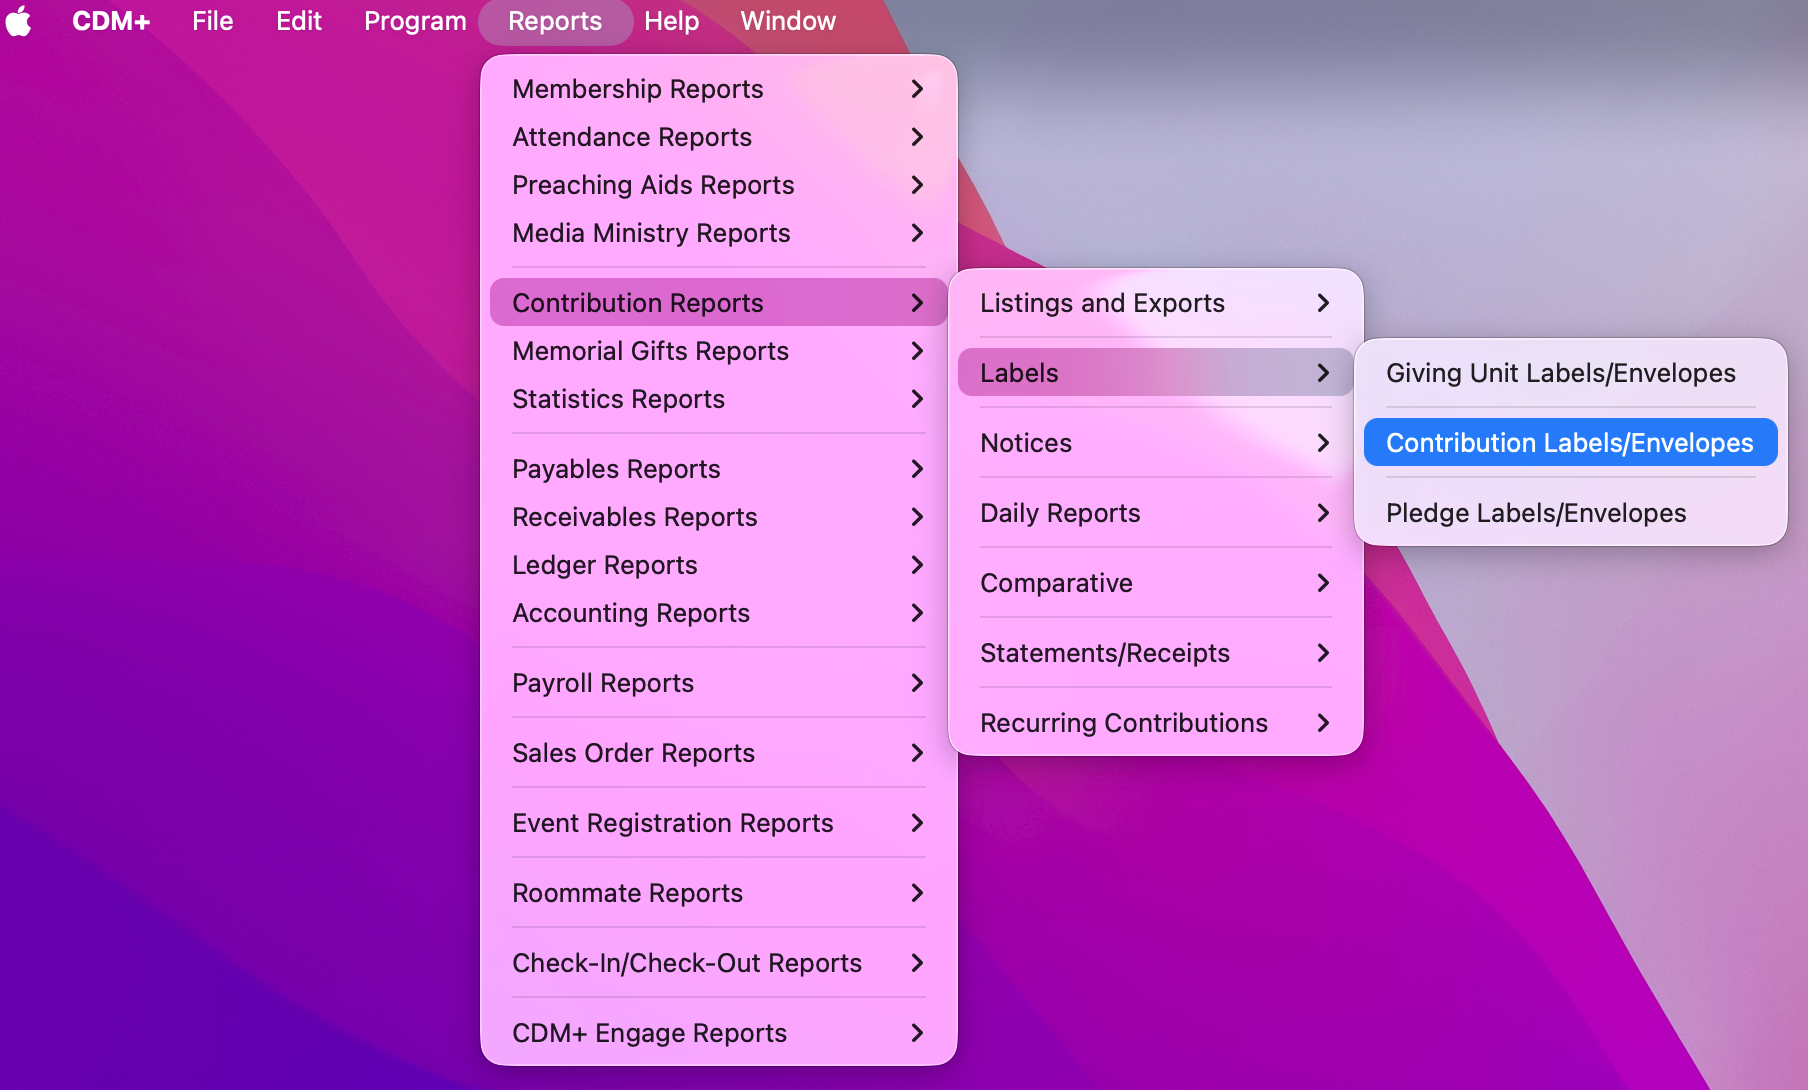
To create a label or envelope, go to Reports → Contribution Reports → Labels →Giving Unit Labels/Envelopes, Contribution Labels/Envelopes, or Pledge Labels/Envelopes.
-
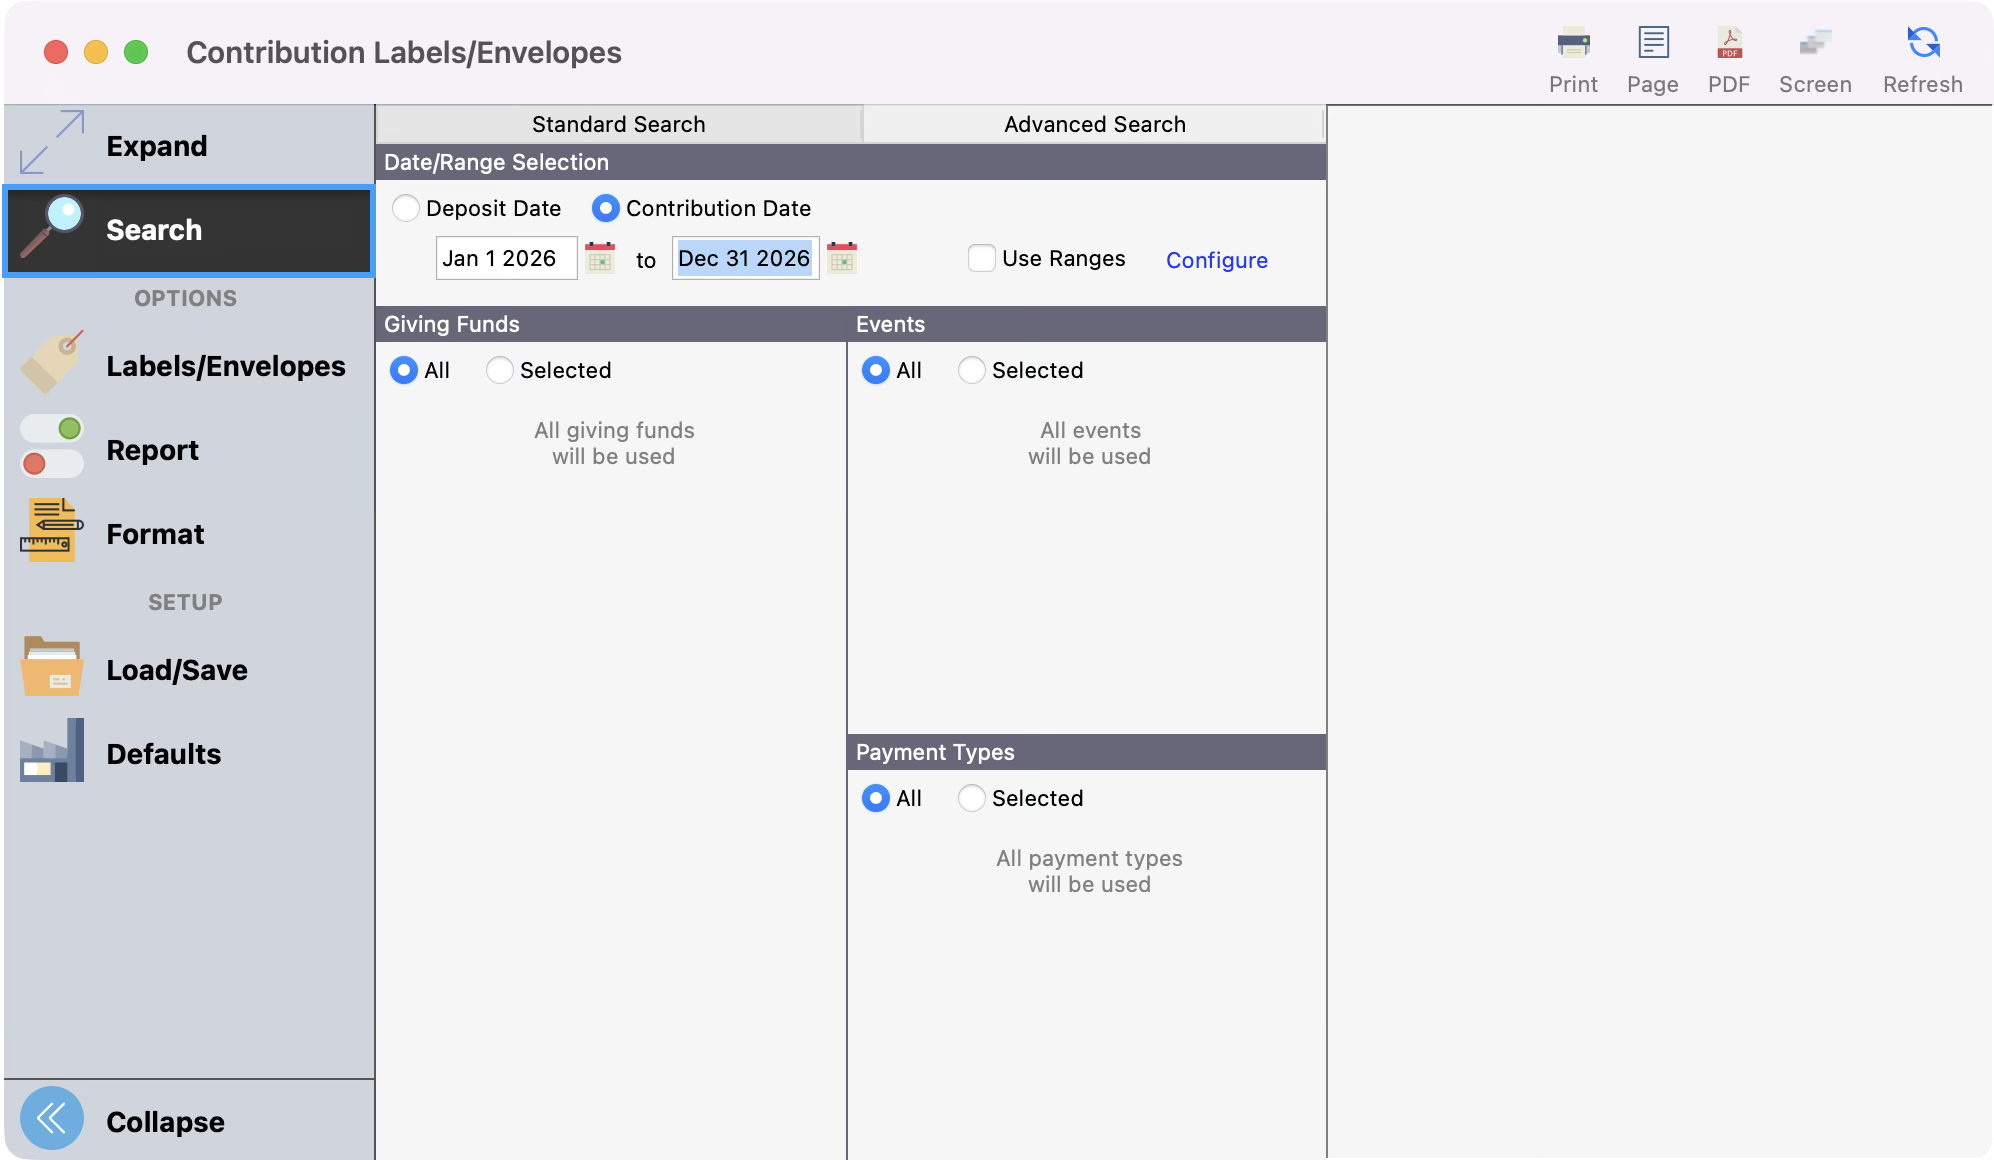
In the Labels/Envelopes window under Search, enter your search criteria by Deposit or Contribution Date, Giving Funds, Events, and Payment Type. You can also Use Ranges or set up an Advanced Search.
-
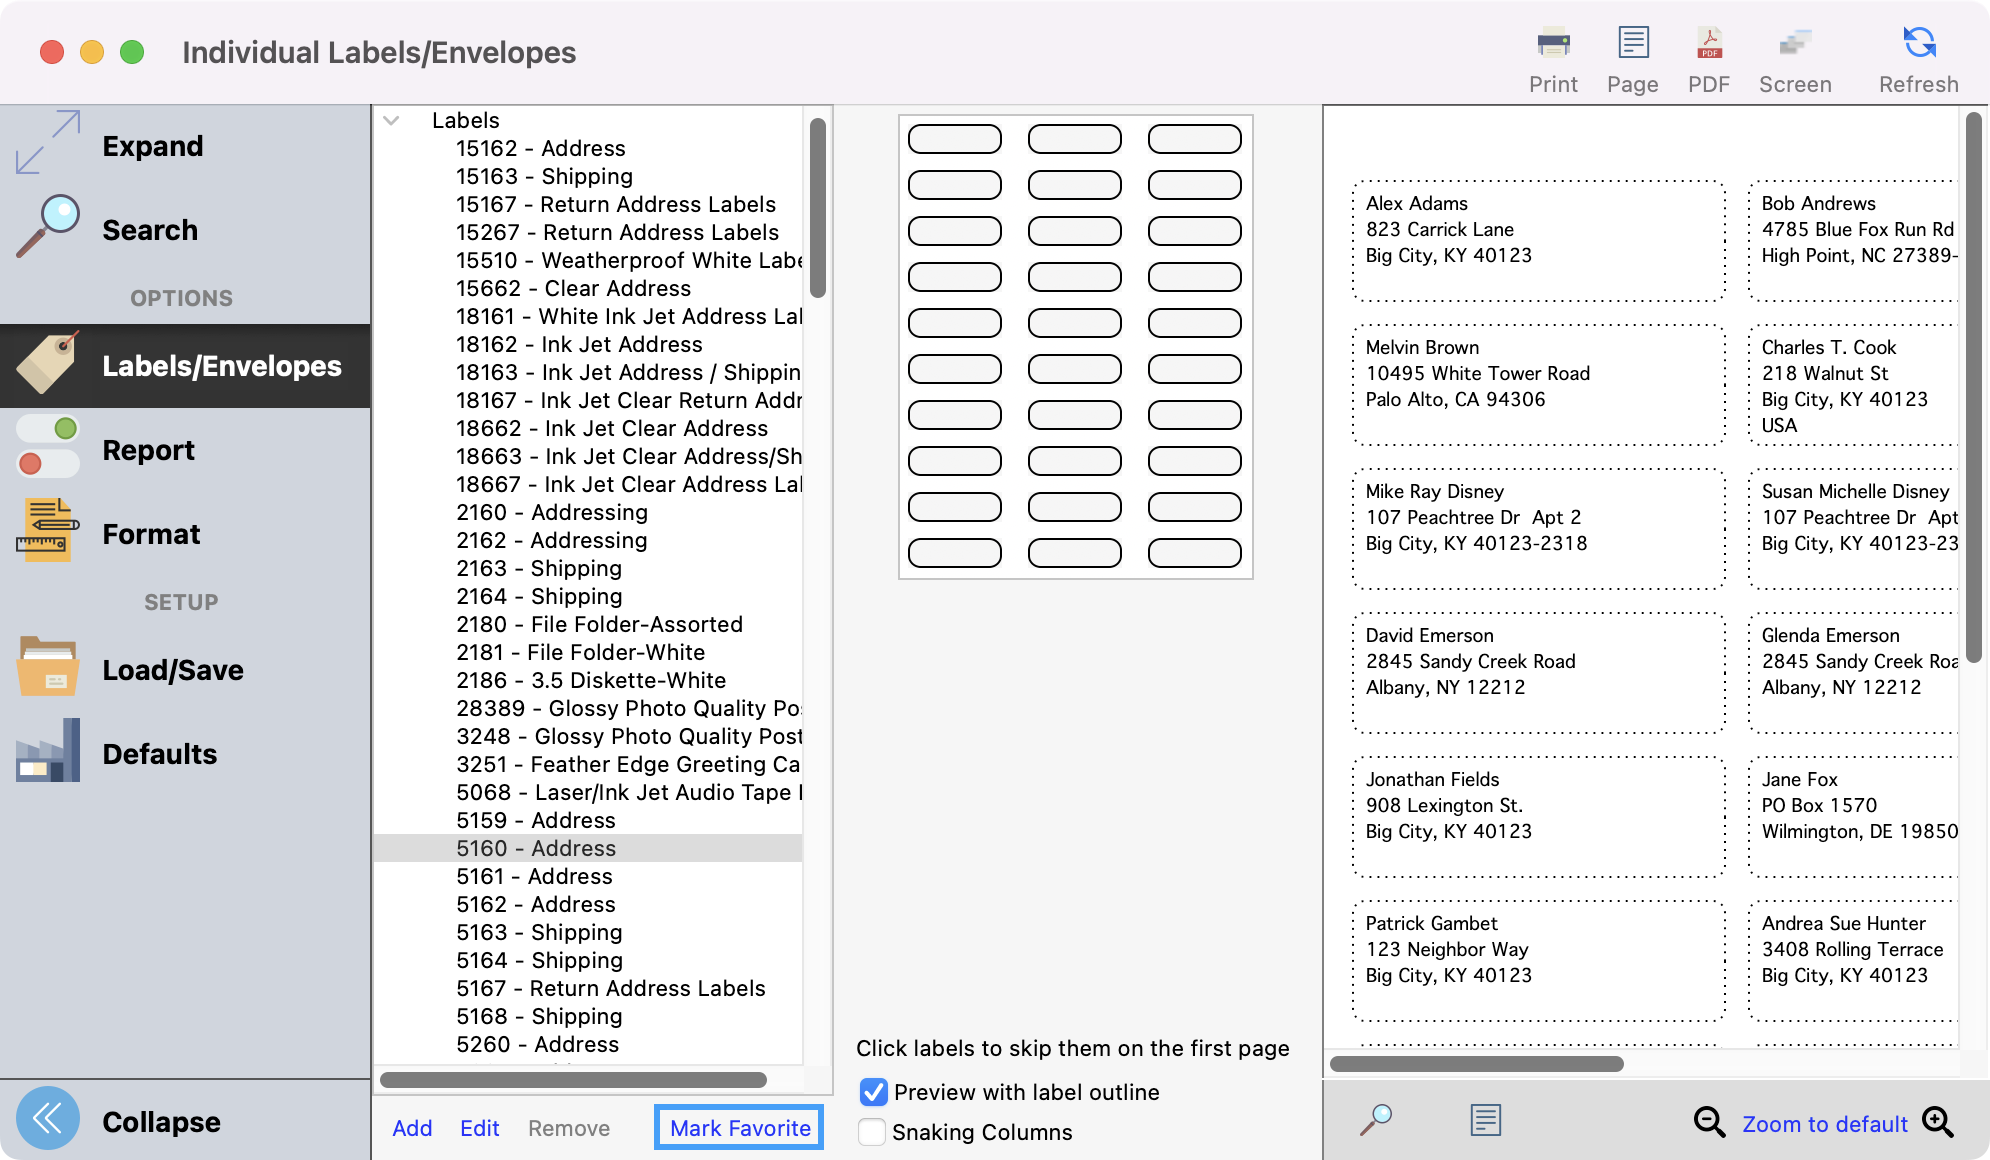
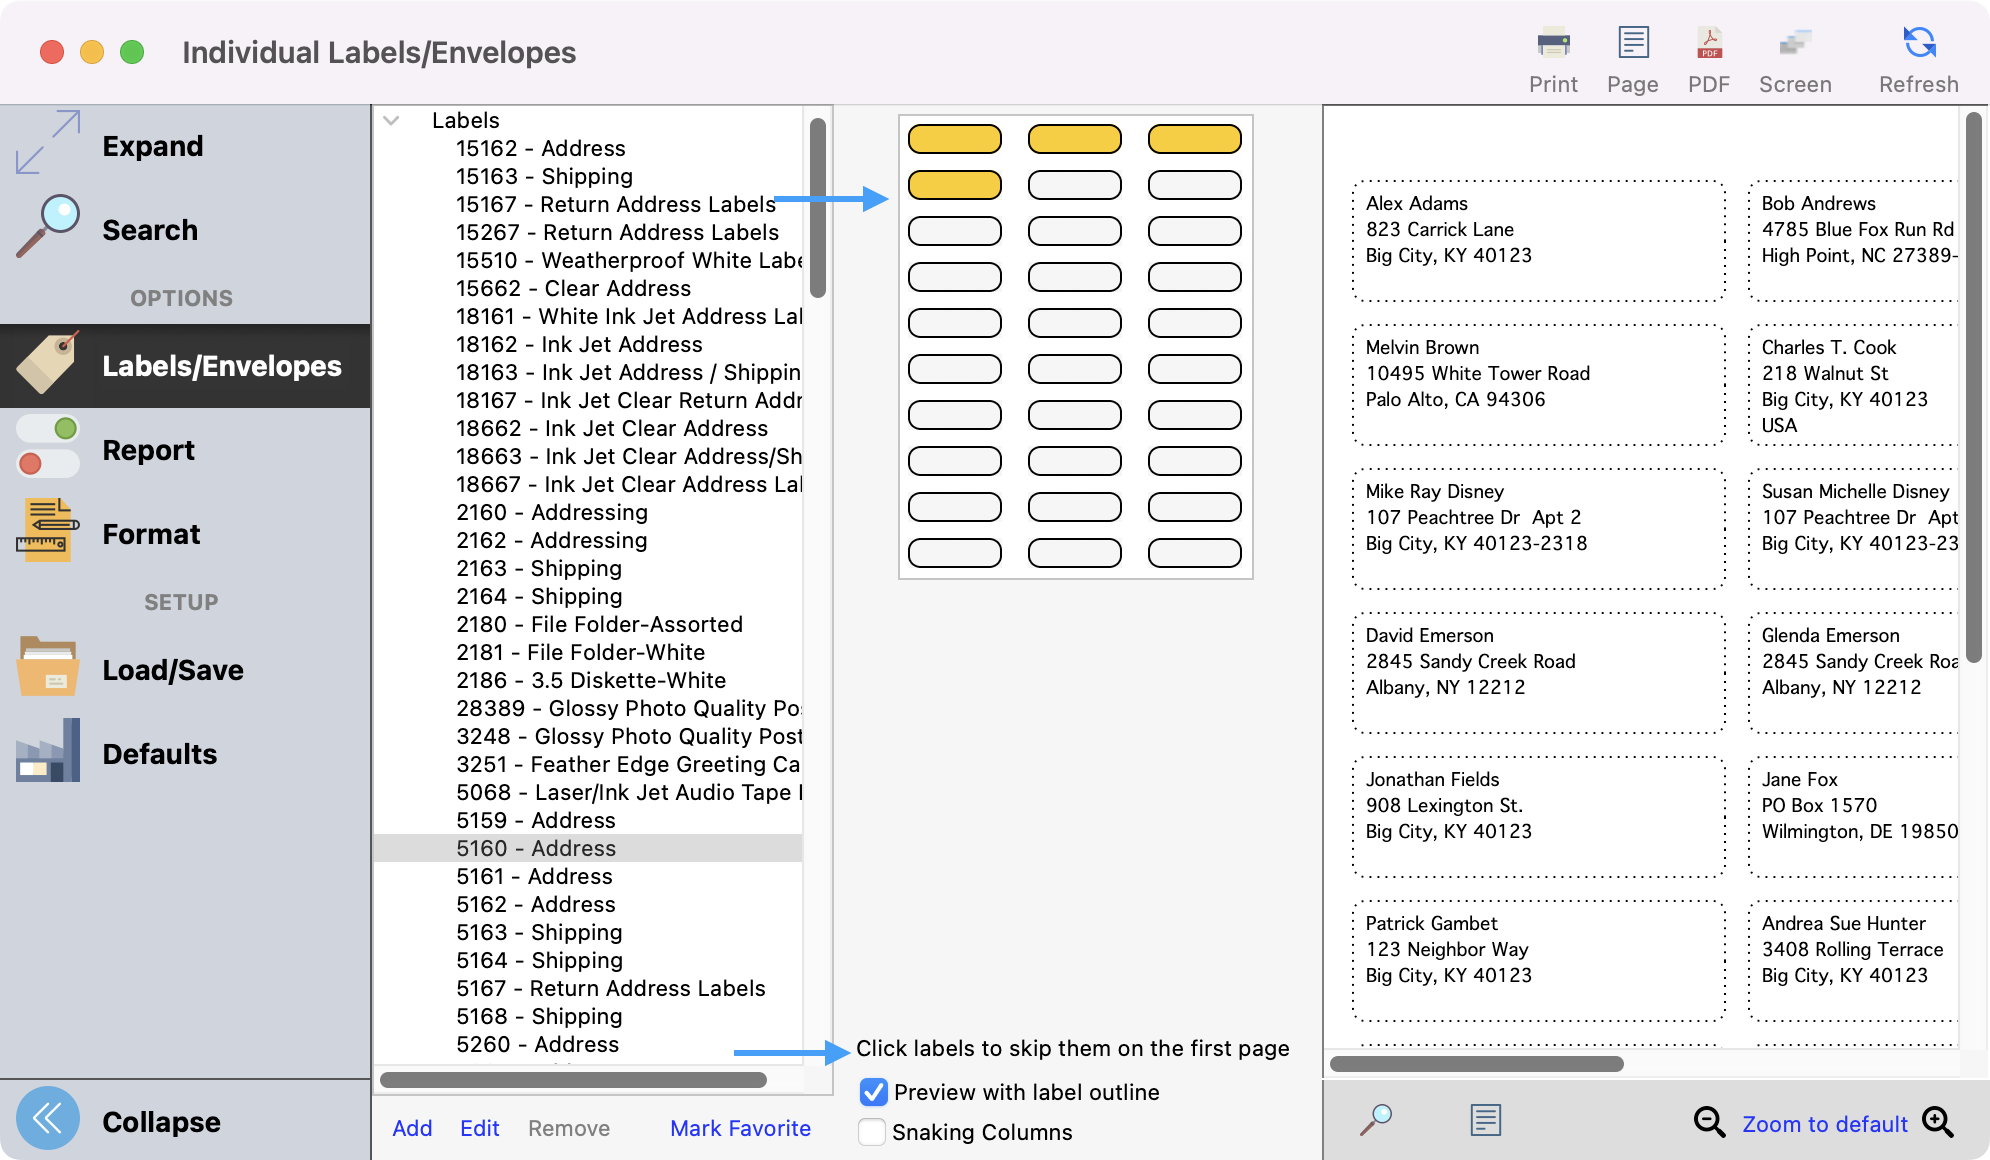
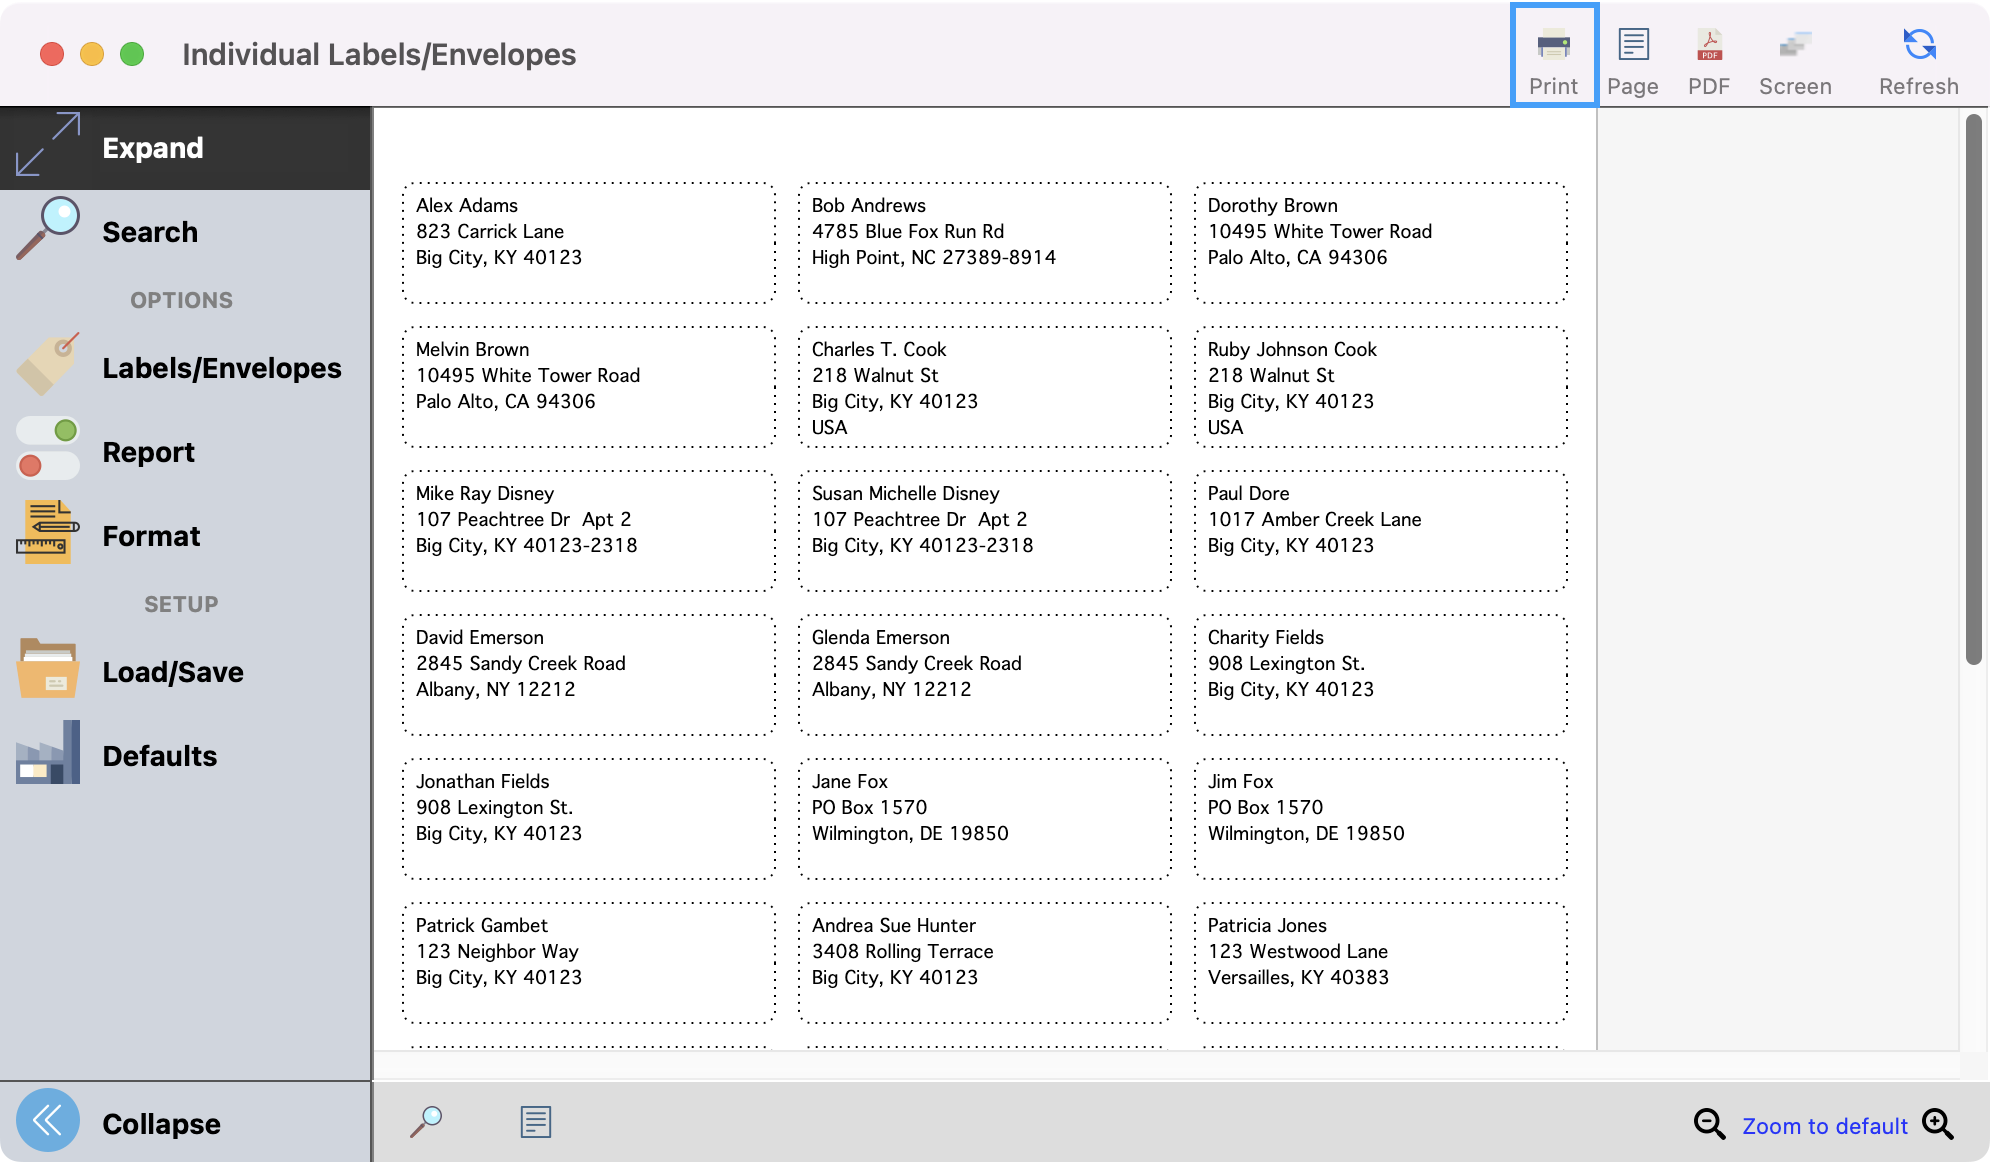
Next, click the Labels/Envelopes tab. When you want to print out labels, click the arrow beside the word Labels to see dozens of label options, most of which correspond to Avery or Avery-equivalent labels commonly available through office supply retailers. Select the one you want by clicking it once.
-20260429-143849.png?cb=b9ad0a9e0a4ad551f396f4dbafbabb41)
-
Please note these additional items on the Label report window:
-
Mark/Un-Mark Fav. - If you use the same label setup often, you can mark it as a Favorite to promote it to the top of your list of available options. If you no longer use that label setup, unmark it as a Favorite, and you'll no longer see it at the top.
-
Click labels to skip them on the first page - If you are starting with a partial sheet of labels, click to highlight where the missing labels appear on your sheet, and CDM+ will skip those spaces. This applies only to the first sheet of labels.
-
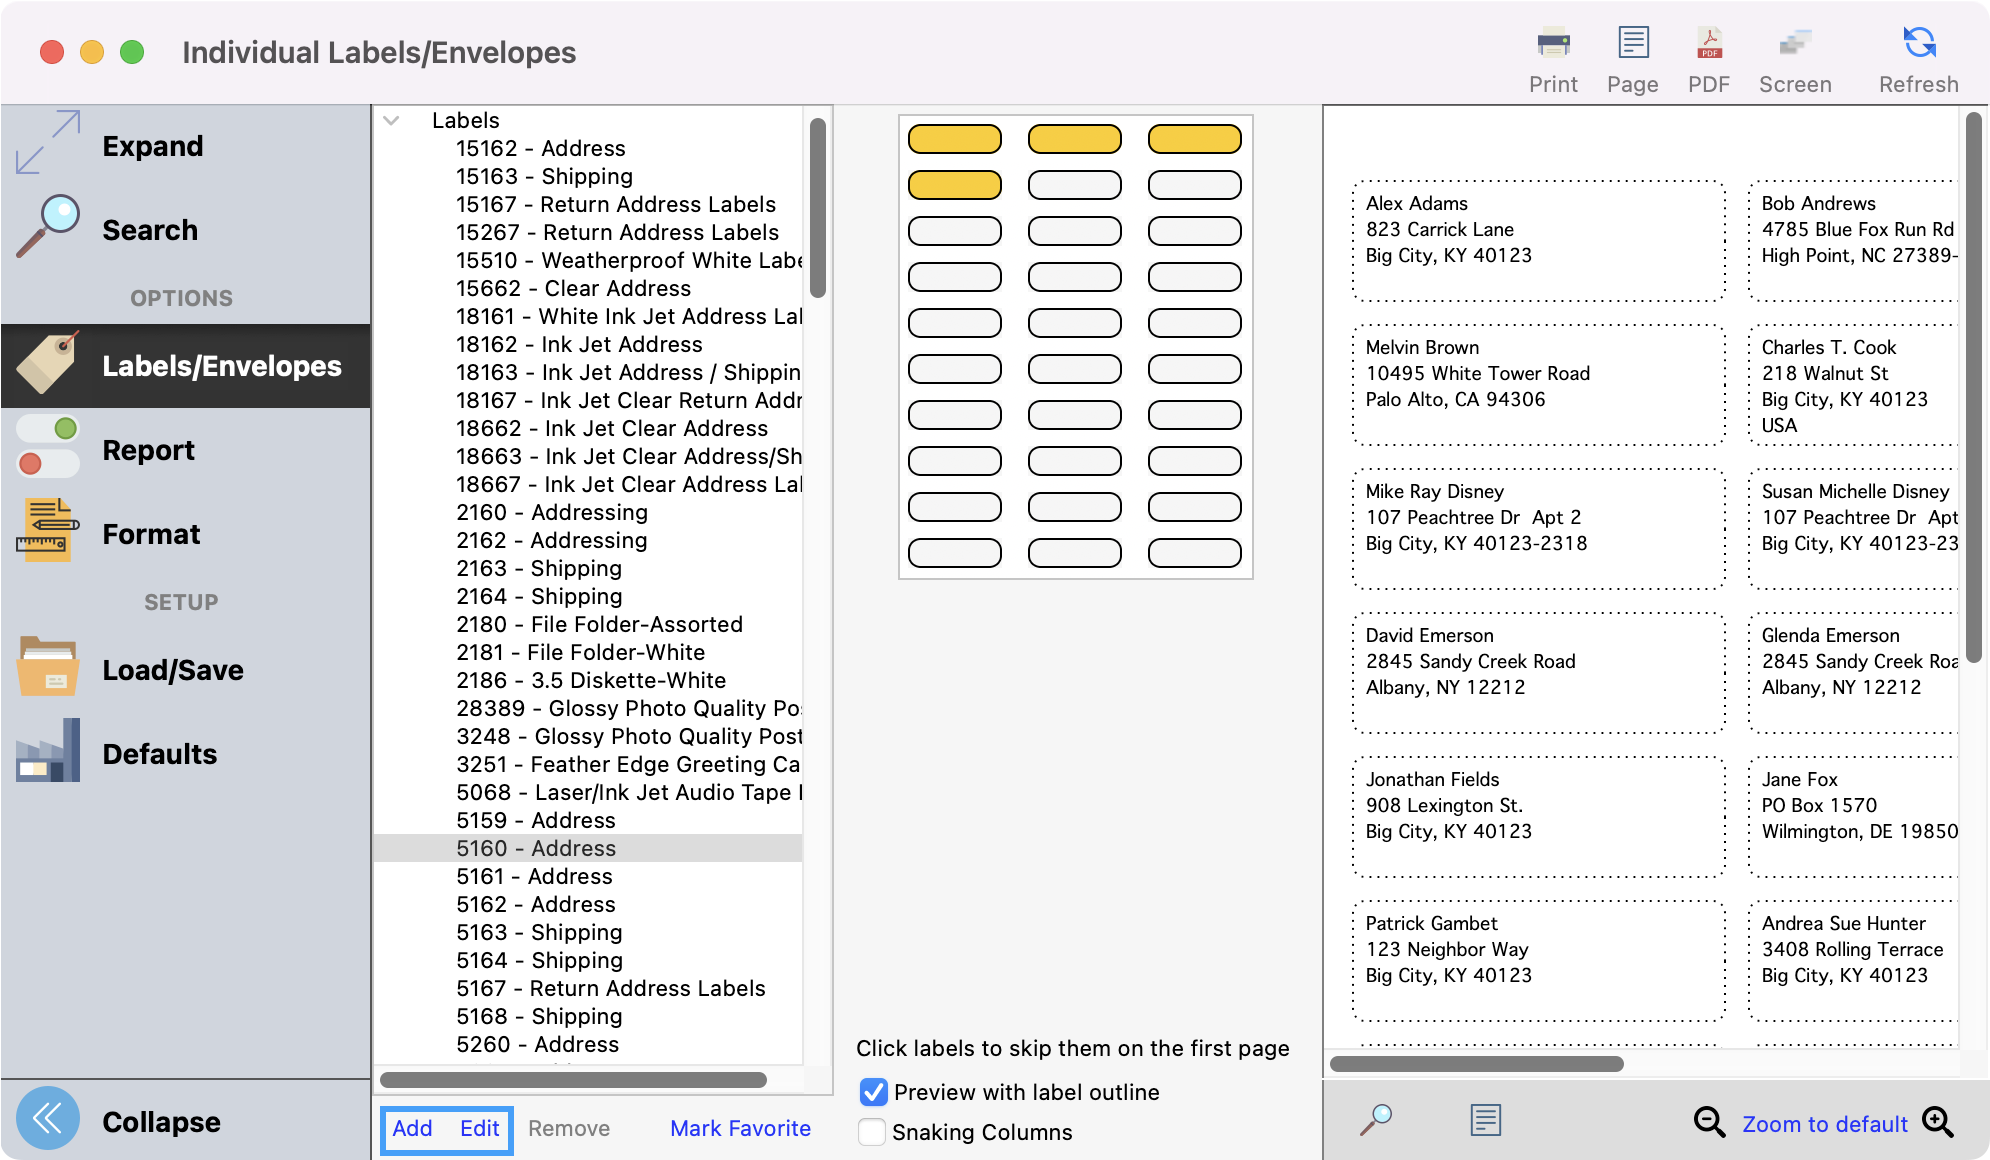
To add your own label, click Add at the bottom of the list of labels. To edit an existing label, click Edit at the bottom of the list of labels. Fill in the correct information and click OK when you are finished.
-
-
Next, you can click Report from the left sidebar. Here, you see a few options of how to organize the labels once they are printed.
-20260429-144319.png?cb=a4c0d6e61aa26f92bd2c1988aed4c91a)
-
Next, you can click Format from the left sidebar. Here you will see several format options. Select the options that best fit your needs and brand.
-20260429-144632.png?cb=d50cee42c4ee29ed6586cdb2d9e48fc6)
-
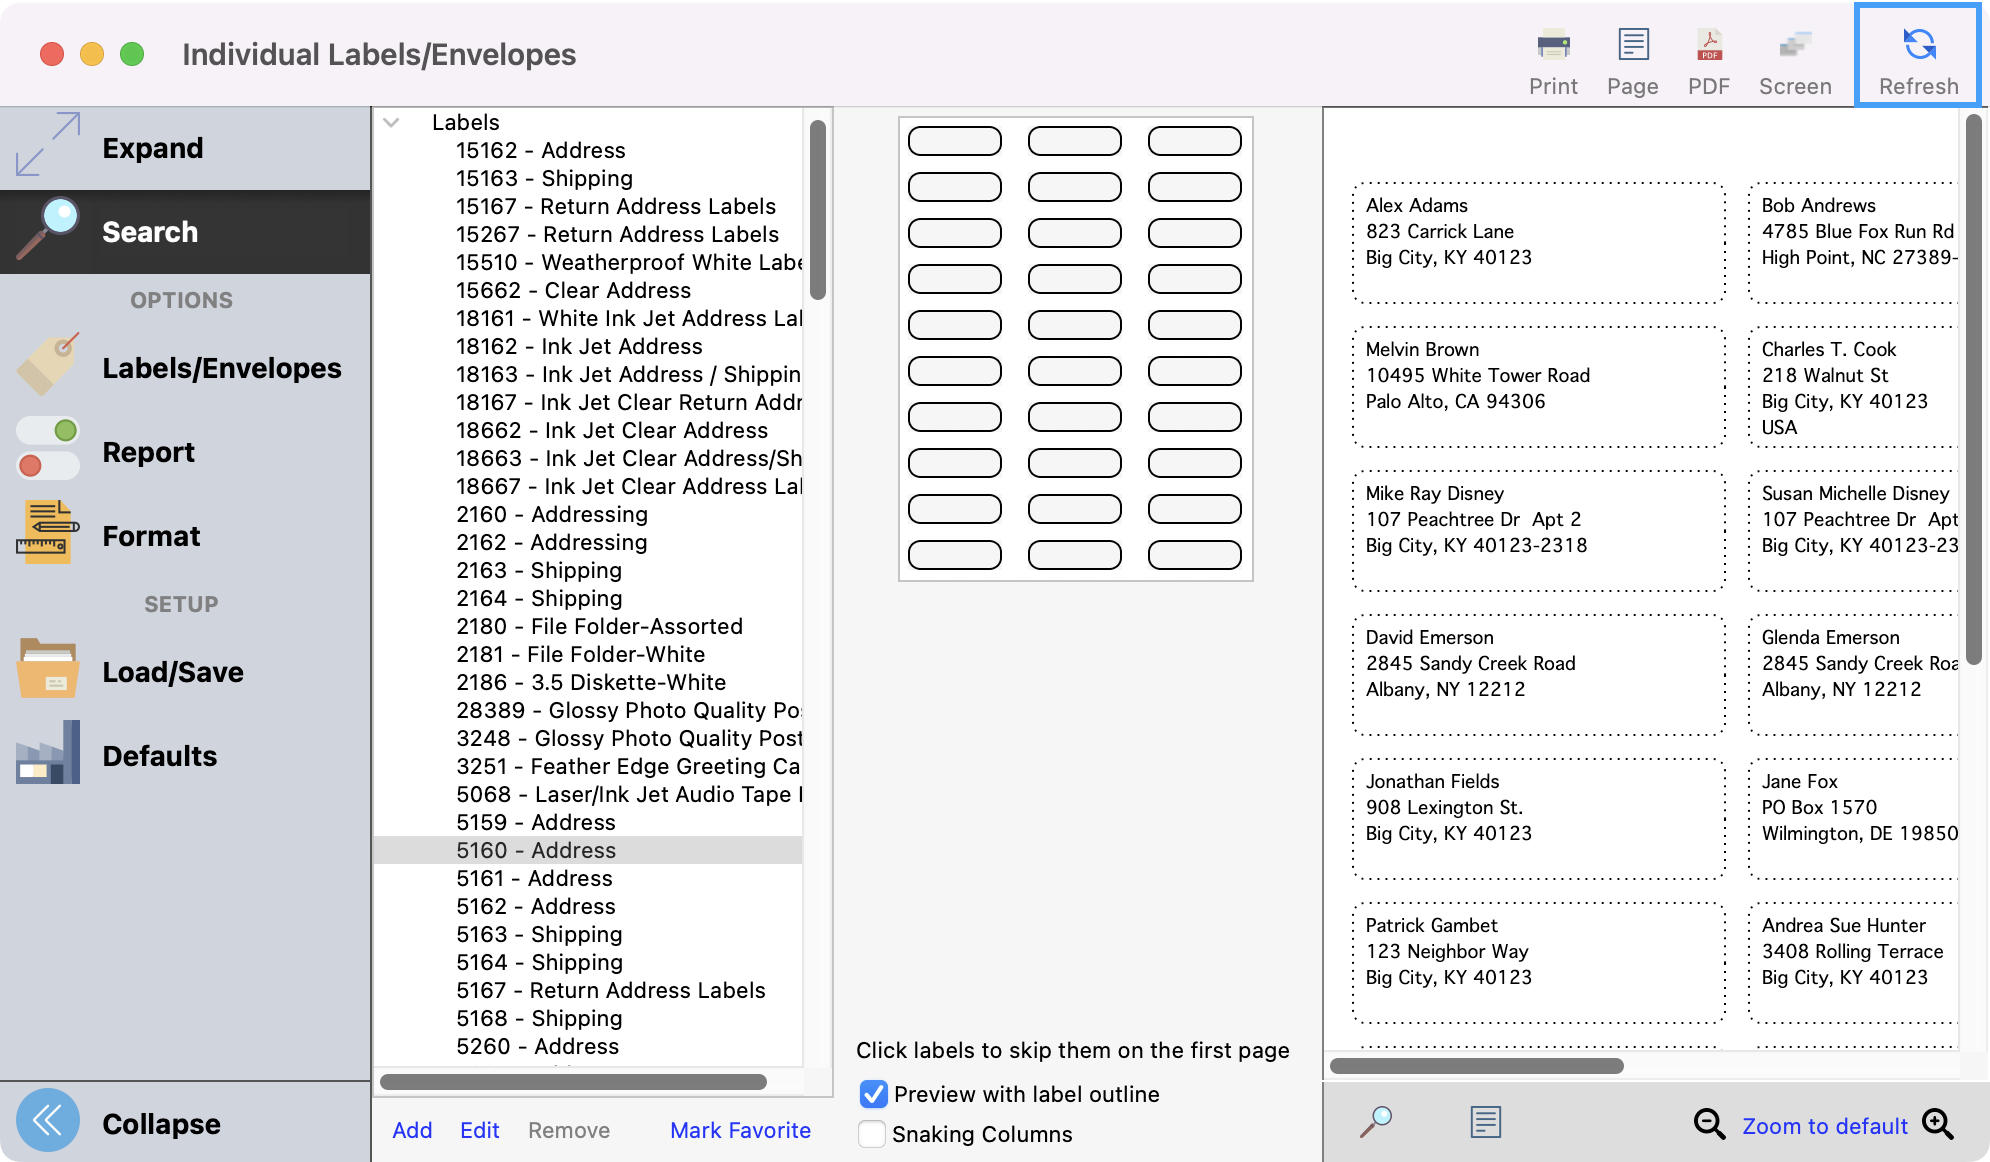
After selecting the labels, selecting your report, and formatting options, preview the results by clicking the Refresh icon.
-
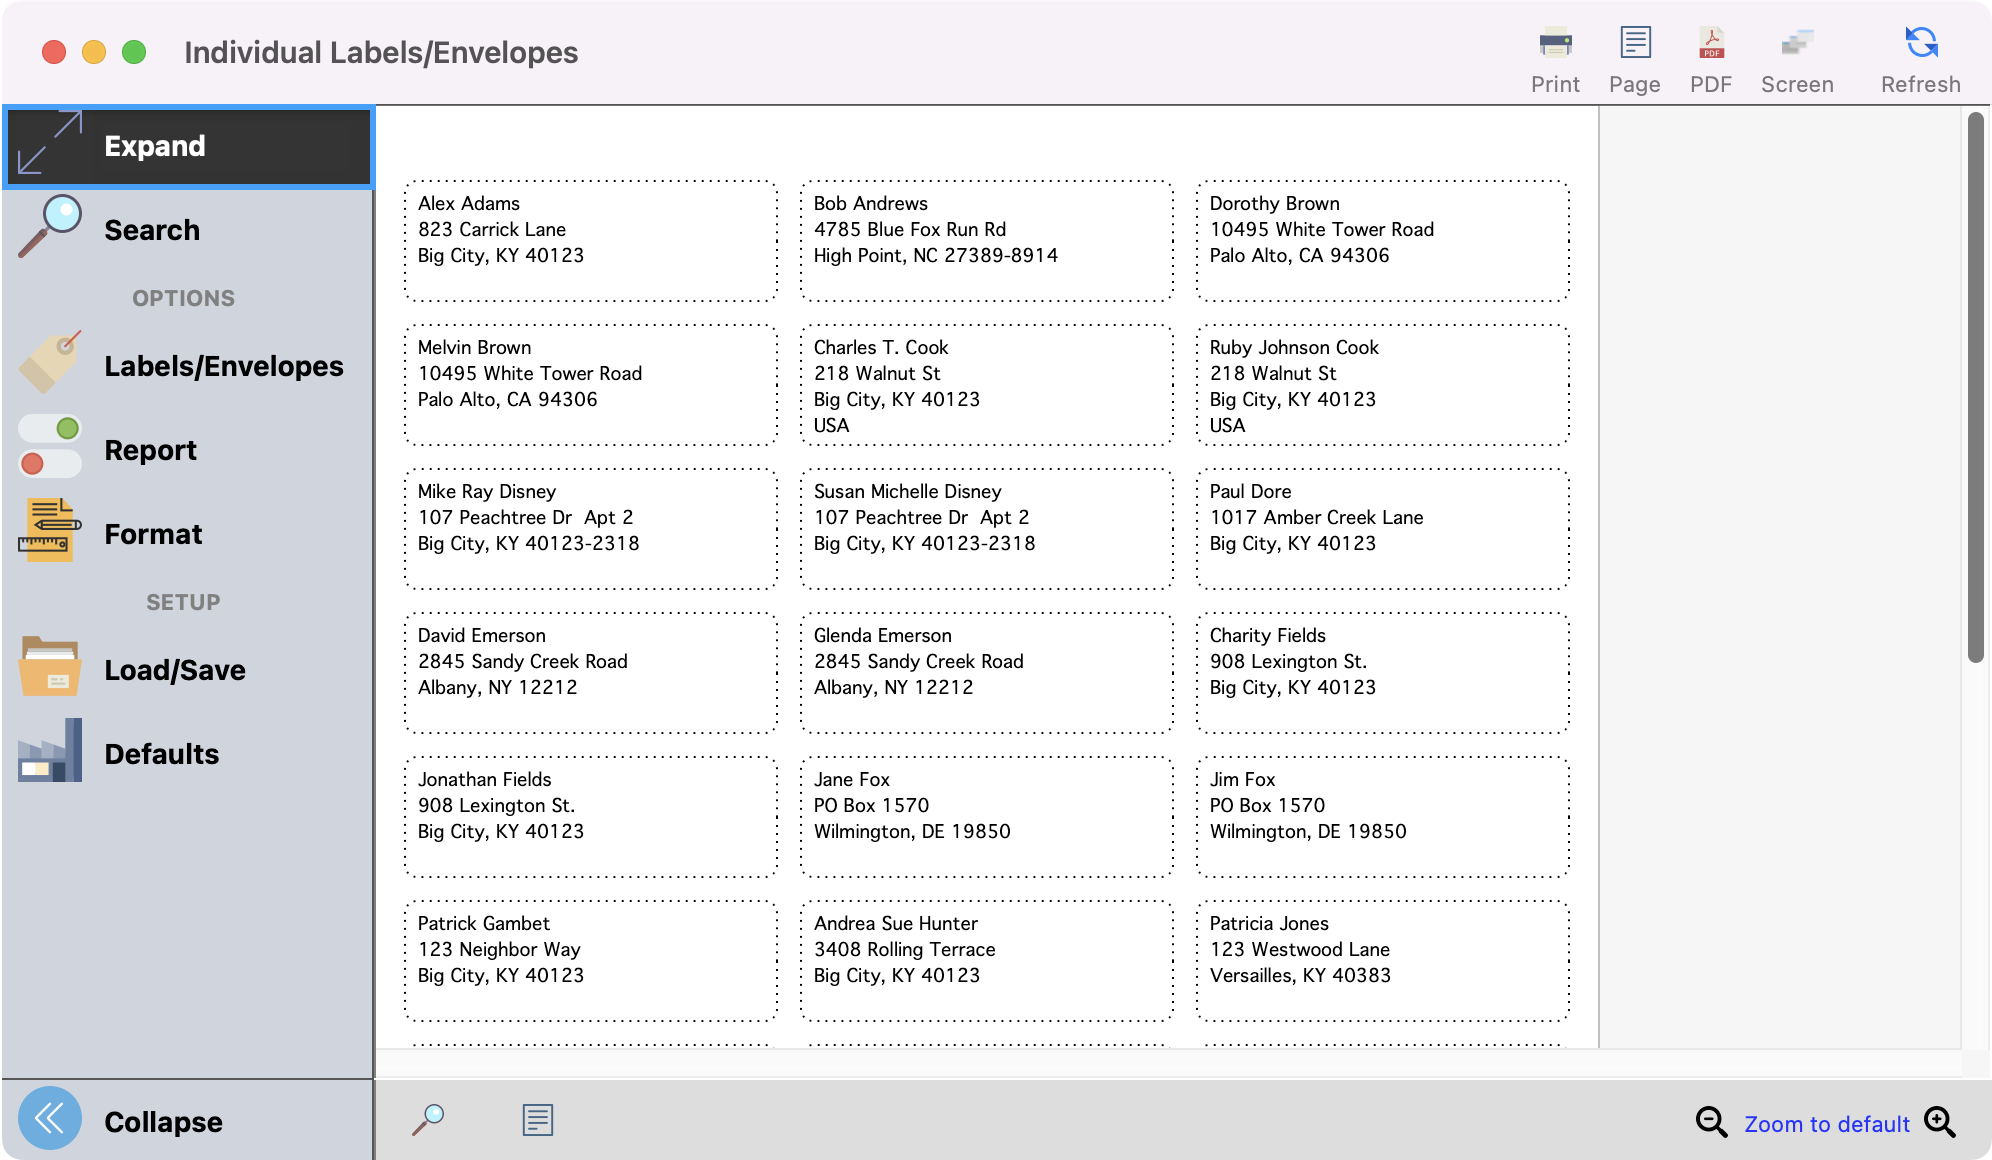
To see a larger view of your results, click Expand in the left sidebar.
-
Once satisfied with your results, you can print your labels.
-
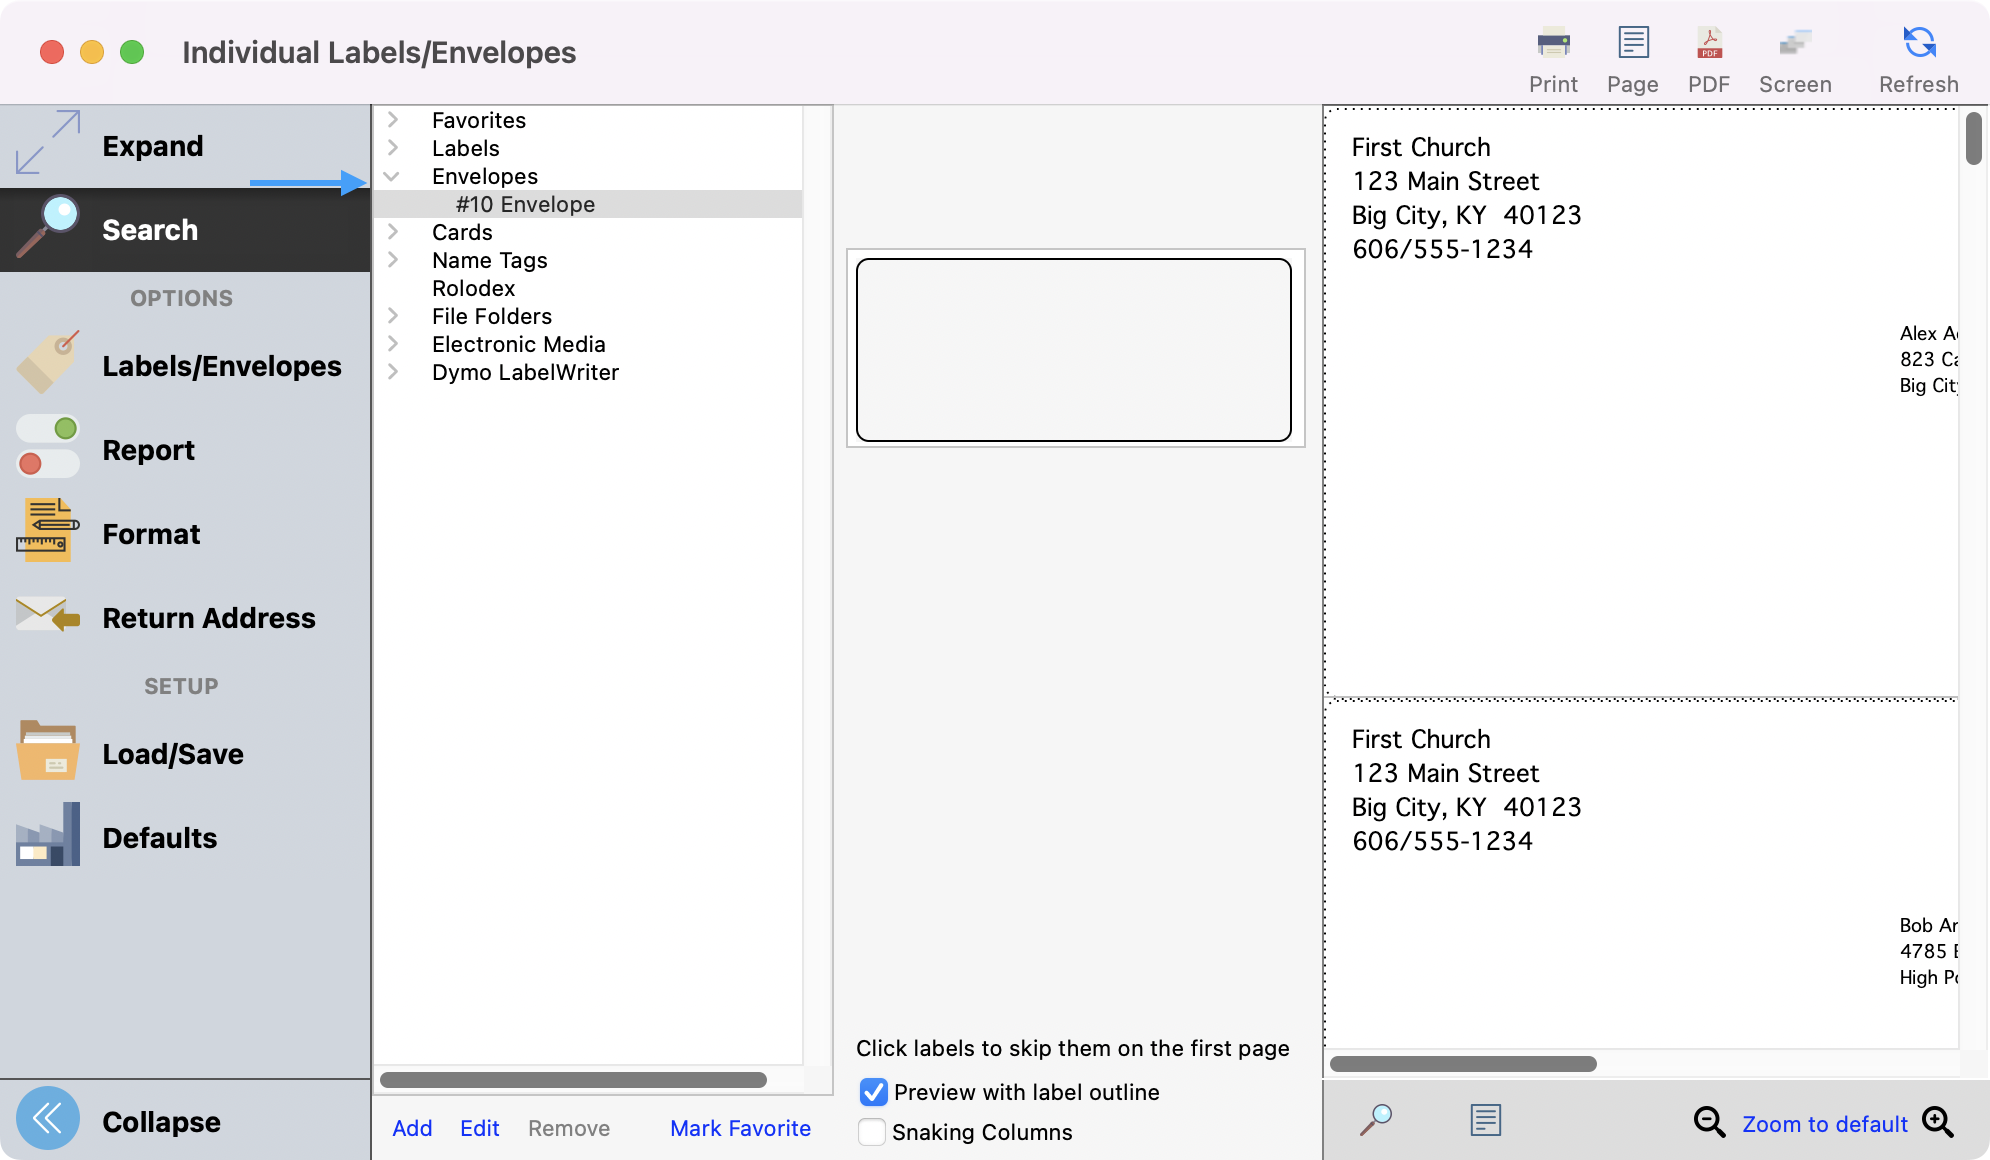
To print on envelopes, follow the steps above but select the options under the Envelope drop-down arrow.