How to Create a Postcard
You can send postcards from programs throughout CDM+. For example, send postcards to:
- Visitors to a worship service
- Giving Units to acknowledge a gift
- Last year's pledgers to encourage a new pledge
- Camp registrants to build excitement for summer camp
- Parents and grandparents to celebrate a new baby
The program you use determines who receives the postcard and which fields you can embed. Past that, the process is identical for all programs.
Open Card Notices
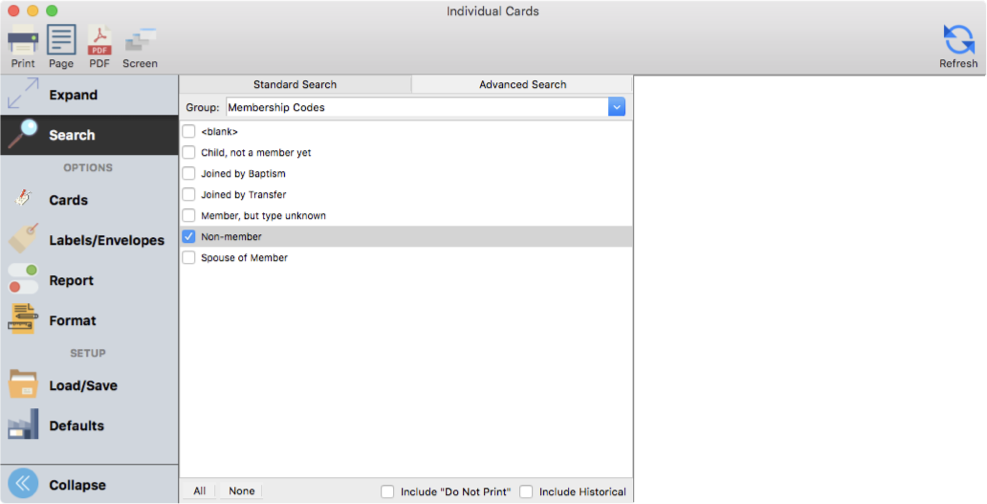
To create a postcard, go to the Reports menu, choose the program you want, then go to Notices → Cards. For this example, we're using Individual Cards from Membership Reports.
Choose the Card Type
It's important to set the proper size of the postcard you are sending before you start designing the card itself.
- Click the Labels/Envelopes tab
- Scroll down the list and select the desired size and shape
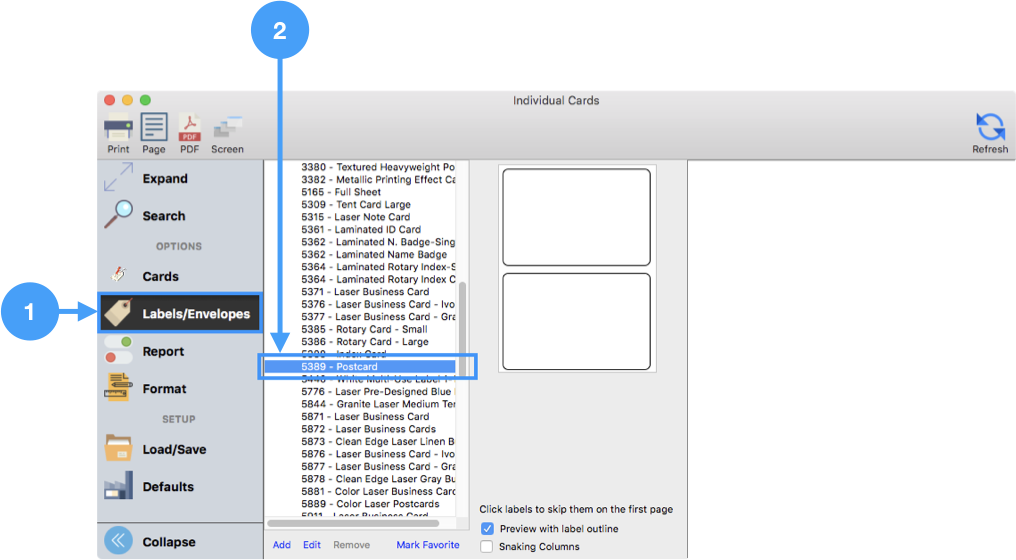
If you don't see the size and shape you want, you can Add to or Edit the labels and cards in the list. For more information, click here.
Add a Card
Once you have selected your card size, you can create a postcard desin. CDM+ lets you create and store as many card designs and layouts as you'd like in each program.
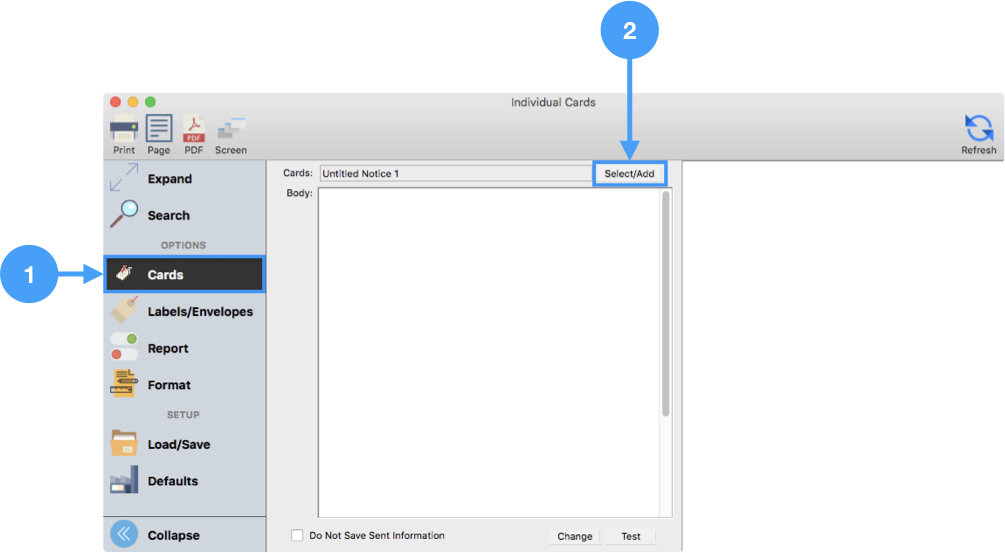
- Click the Cards tab
- Click Select/Add
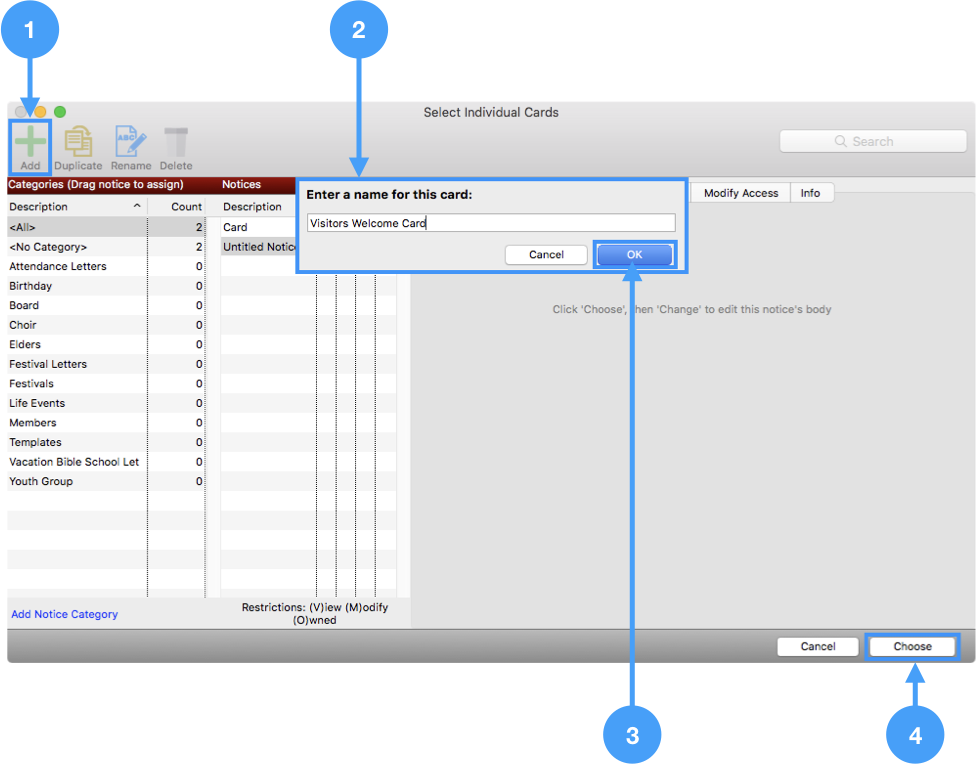
In the new window:
- Click Add
- Enter a name for the card
- Click OK
- Click Choose
Create the Card Layout
With a card selected, you can start designing it.
Click Change to open the Notice Editor window
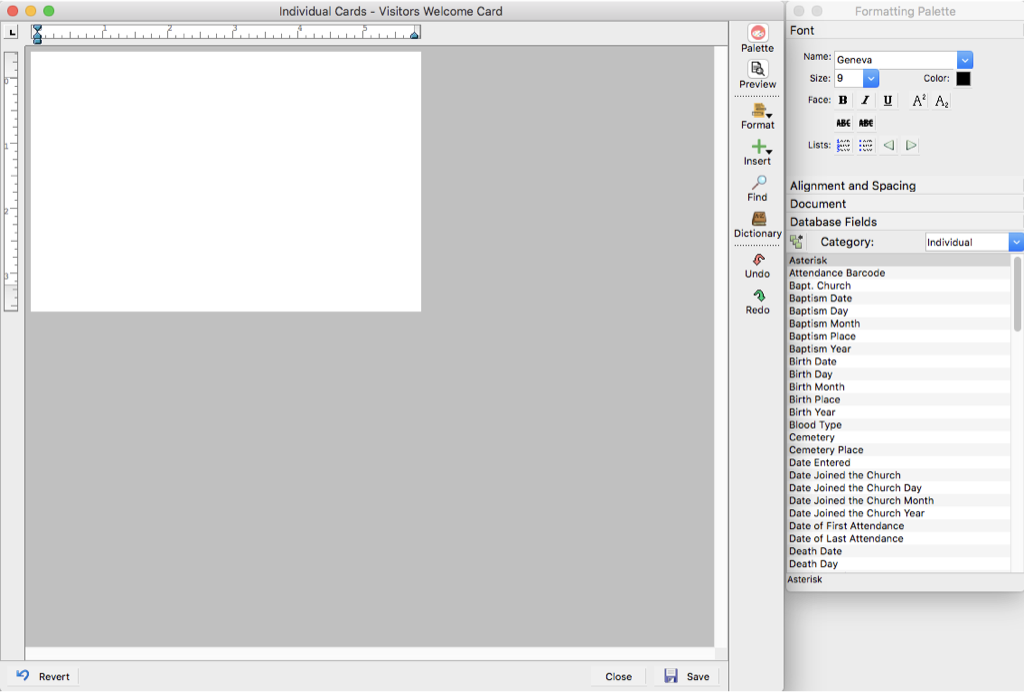
From here, you can now add images, text, etc. For more information on formatting, click here.
When you are finished with your notice, click Save and close out the window.
Send the Card
Set a search to find the card recipients, then click Refresh. You will now be able to see what your notice looks like. To make any desired changes, click Change to open the Notice Editor window again.
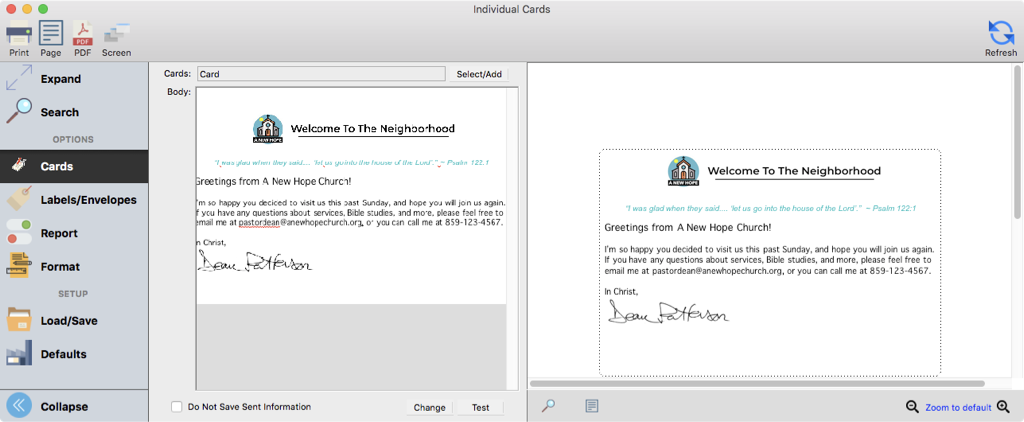
Use the corresponding Labels/Envelopes report to create mailing labels for the opposite side of your card.
