-
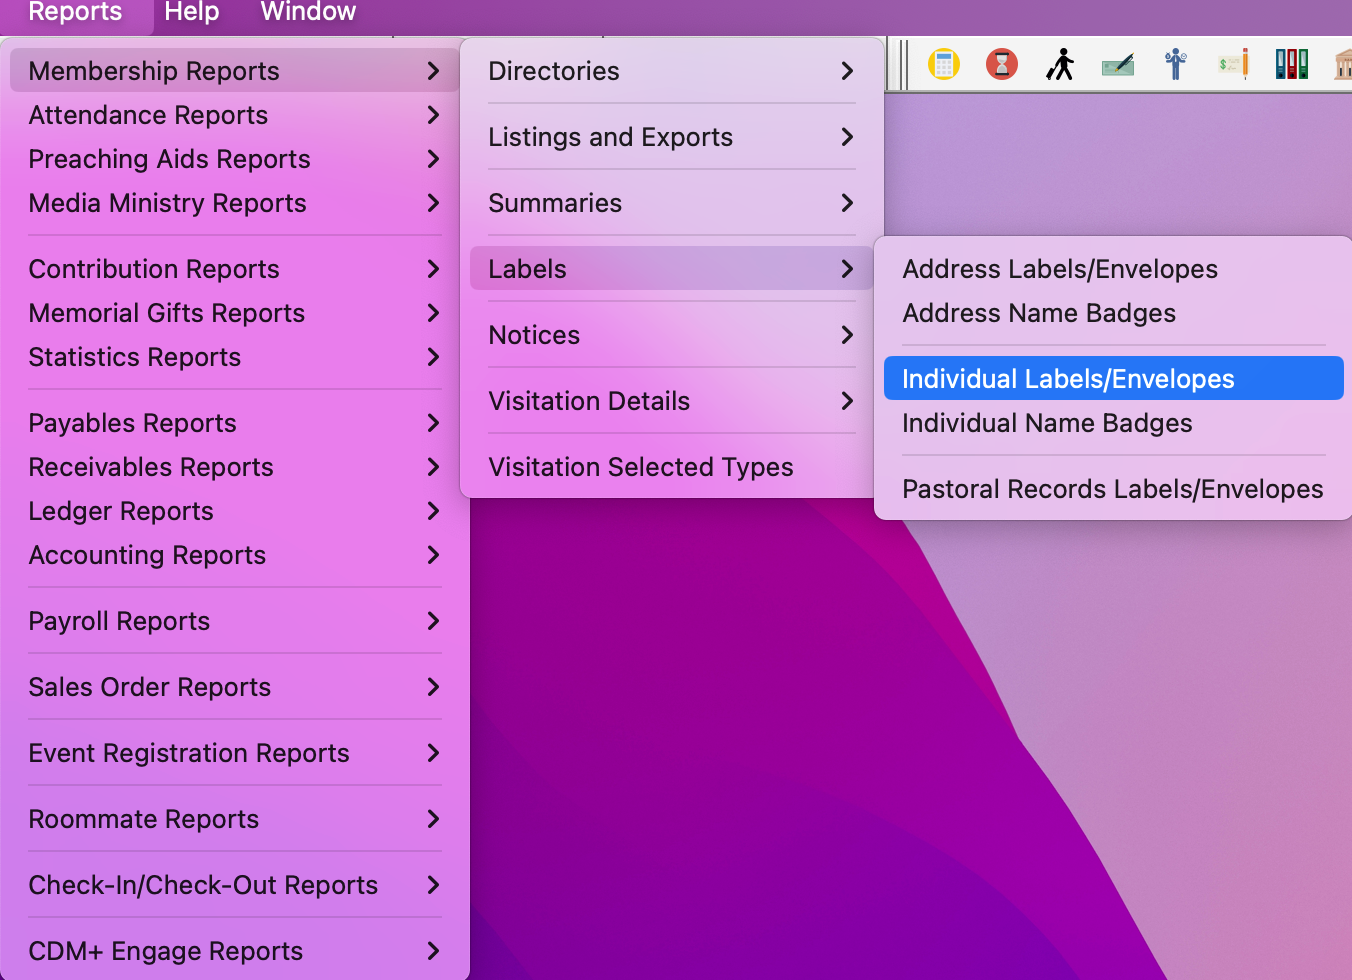
To create a label or envelope, go to Reports → Membership Reports → Labels →Address Labels/Envelopes or Individual Labels/Envelopes.
-
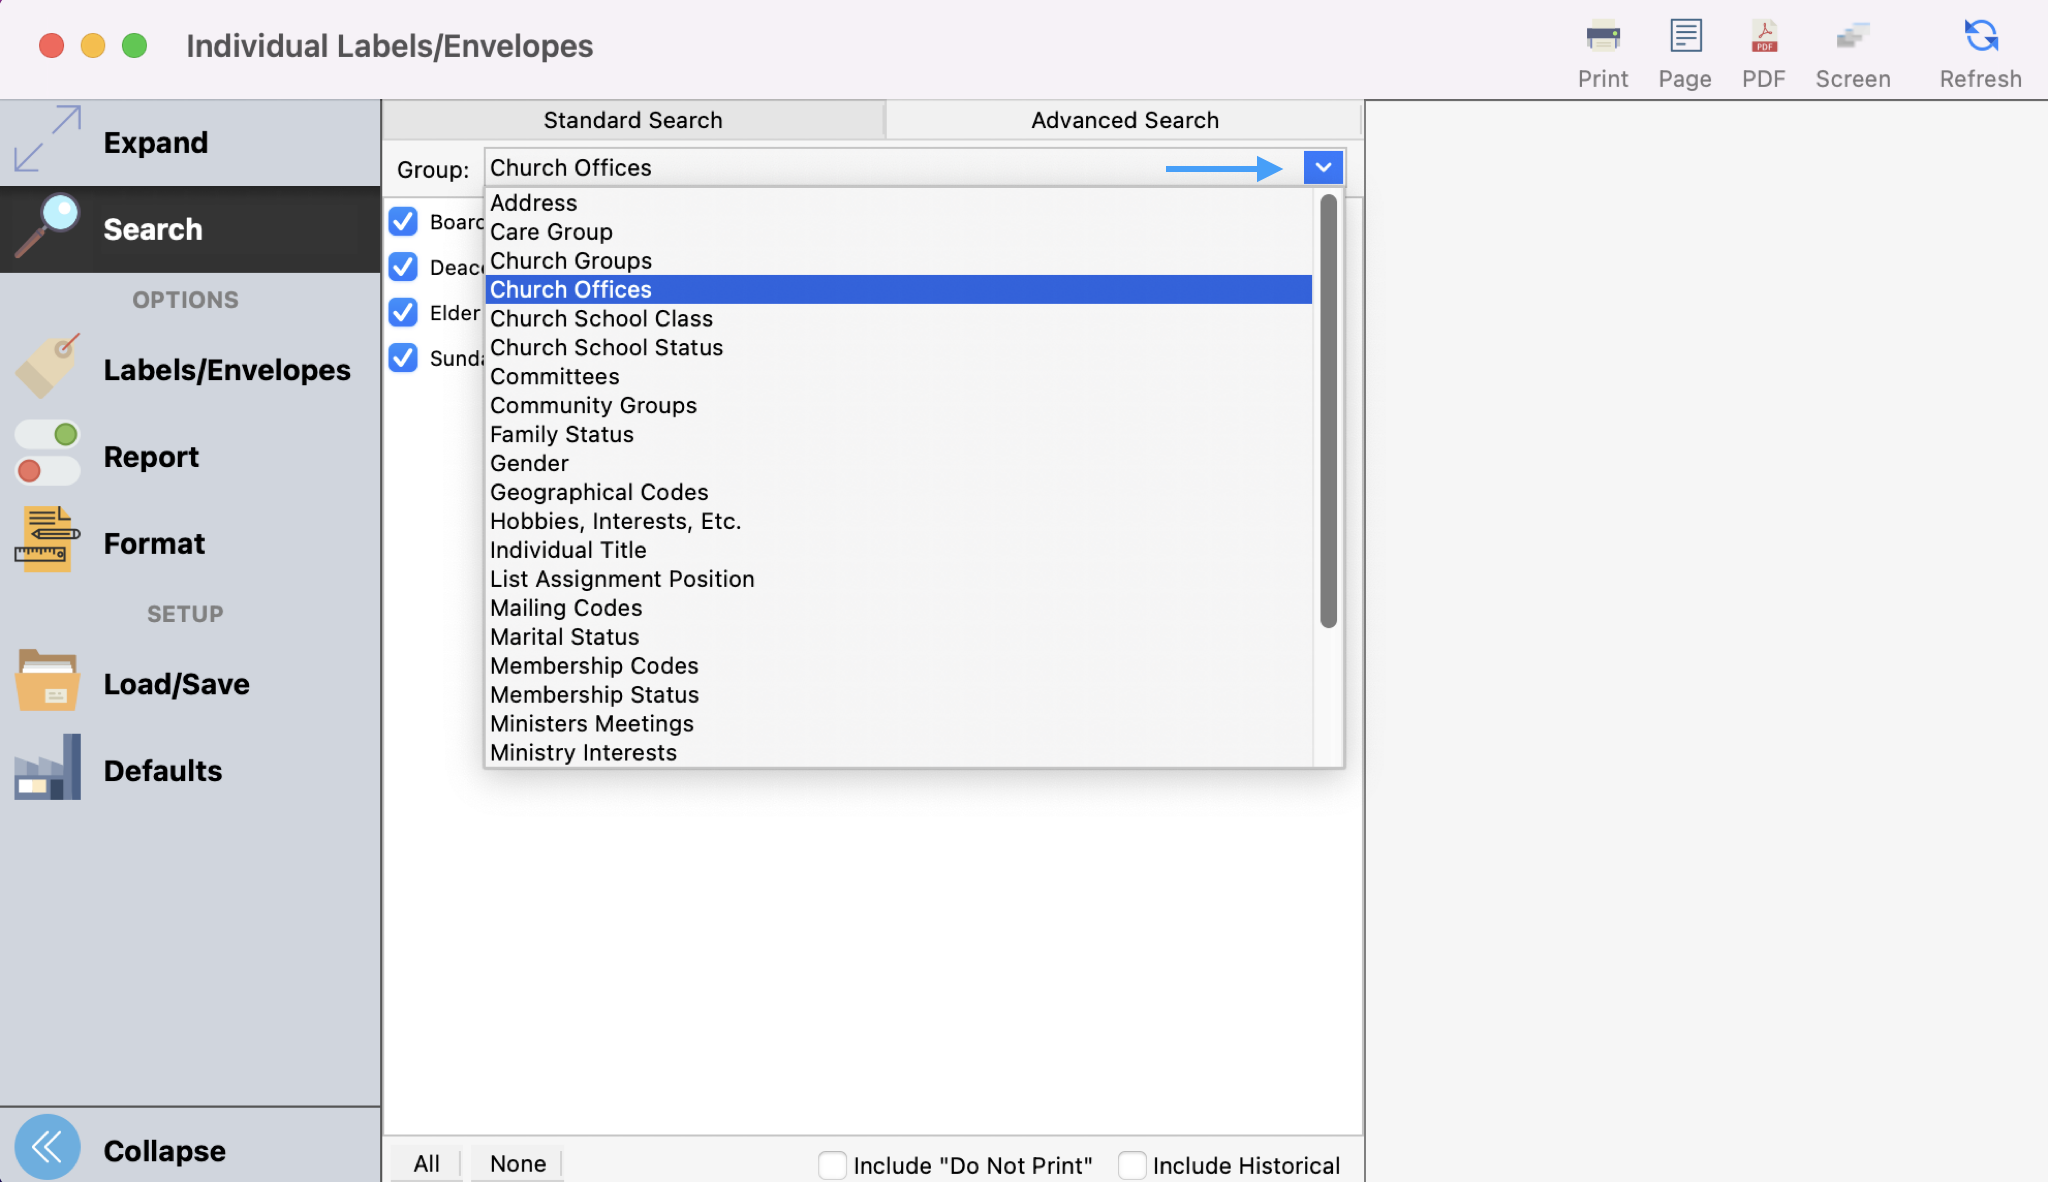
In the Labels/Envelopes window under Search, select a Group from the drop-down list and check all the Codes that apply.

-
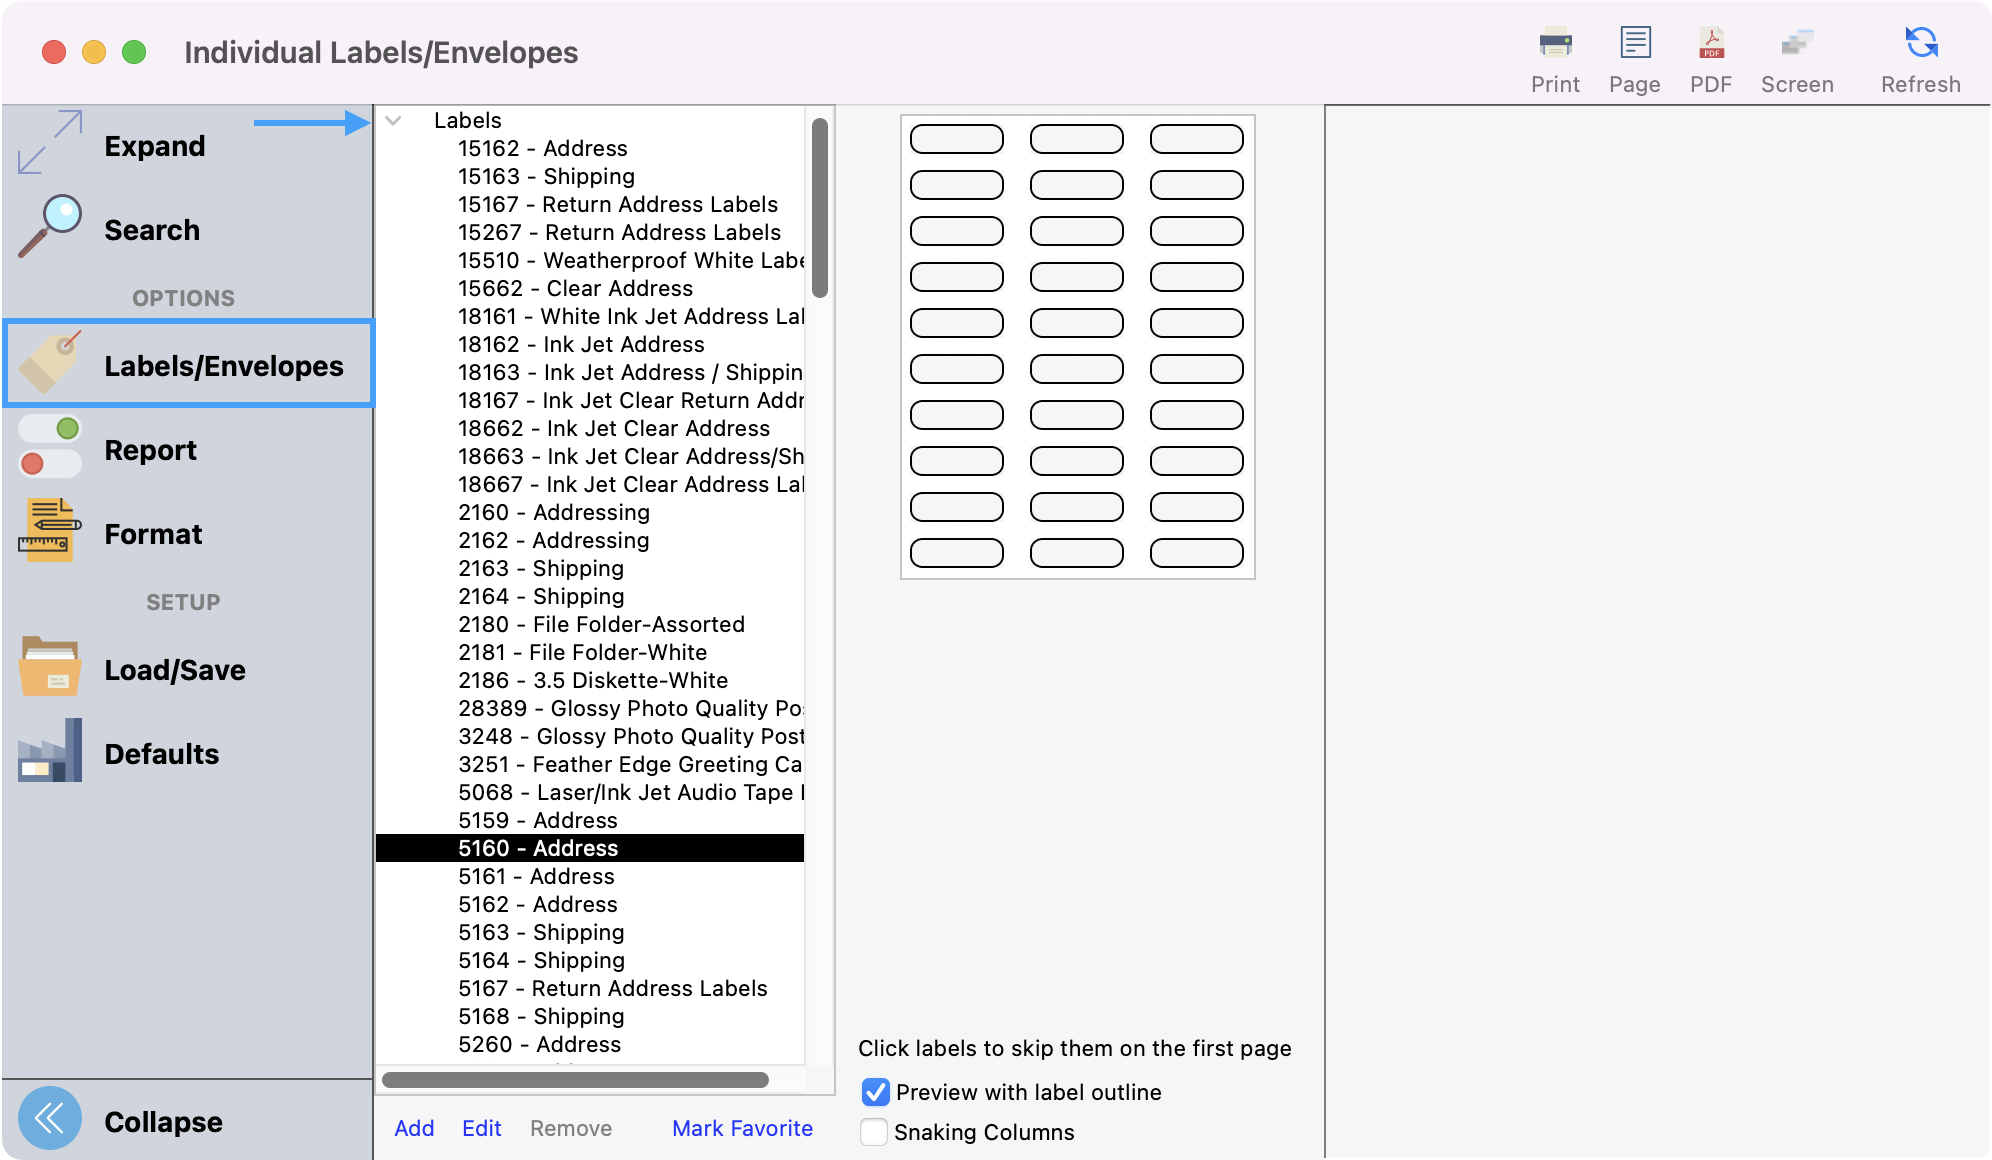
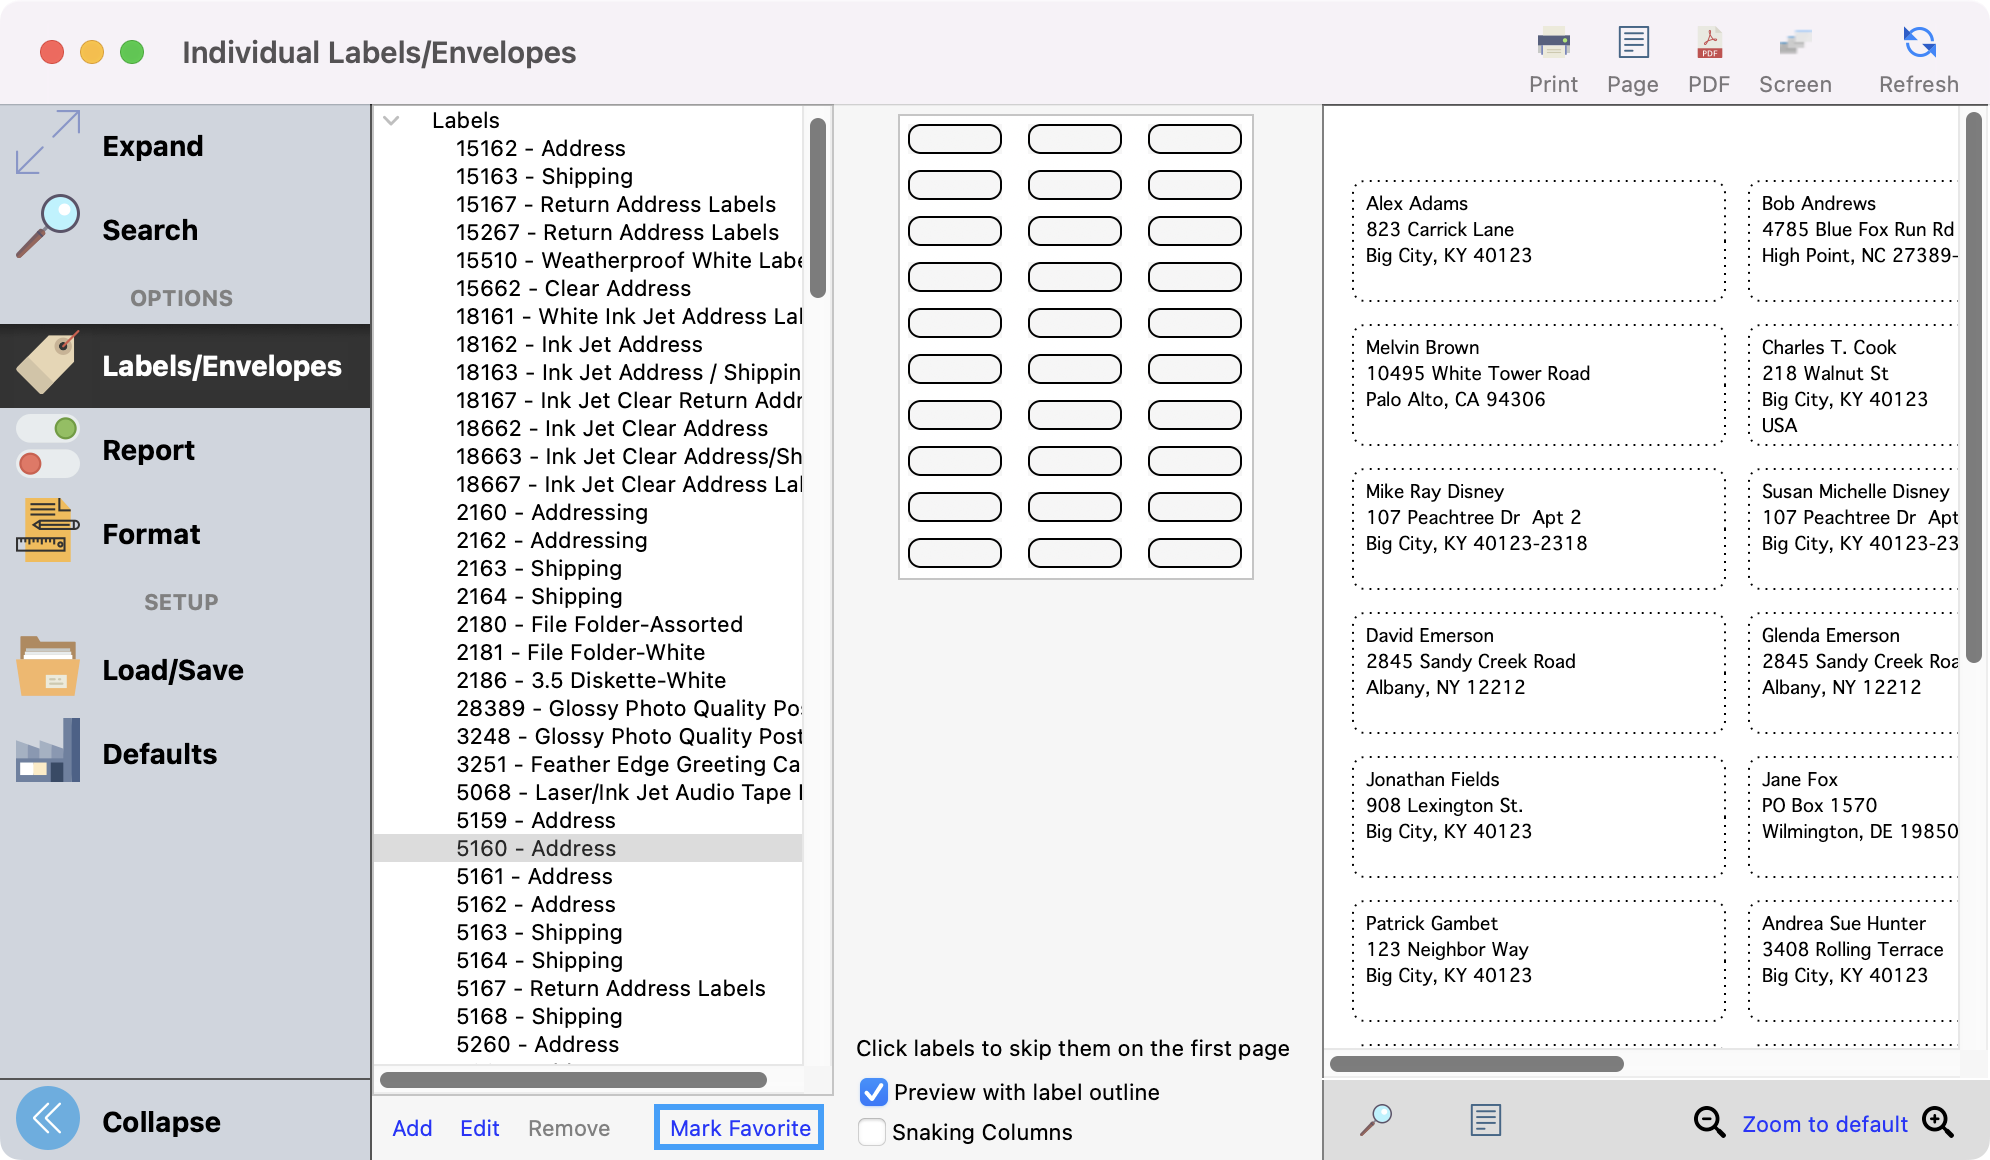
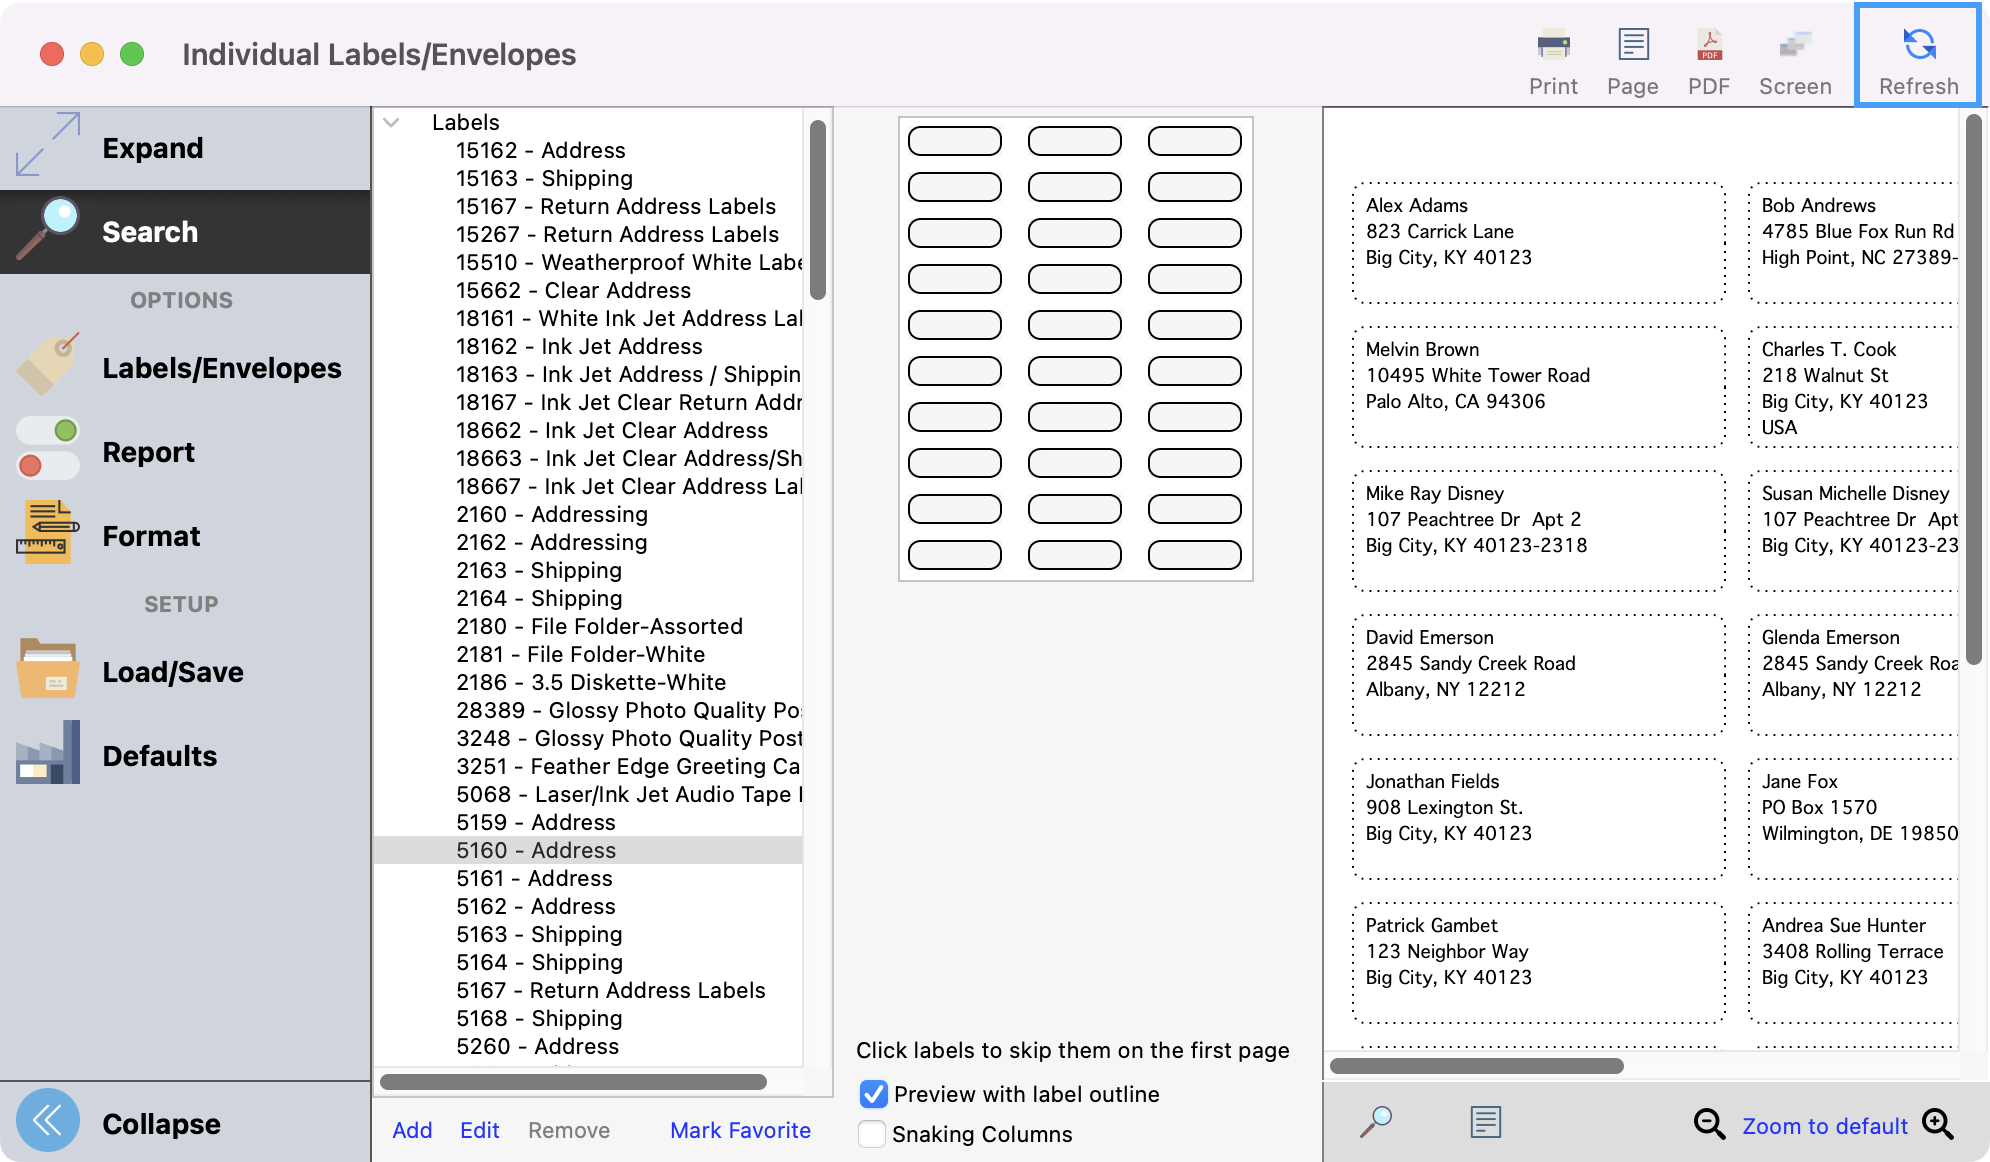
Next, click the Labels/Envelopes tab. When you want to print out labels, click the arrow beside the word Labels to see dozens of label options, most of which correspond to Avery or Avery-equivalent labels commonly available through office supply retailers. Select the one you want by clicking it once.
-
Please note these additional items on the Label report window:
-
Mark/Un-Mark Fav. - If you use the same label setup often, you can mark it as a Favorite to promote it to the top of your list of available options. If you no longer use that label setup, unmark it as a Favorite, and you'll no longer see it at the top.
-
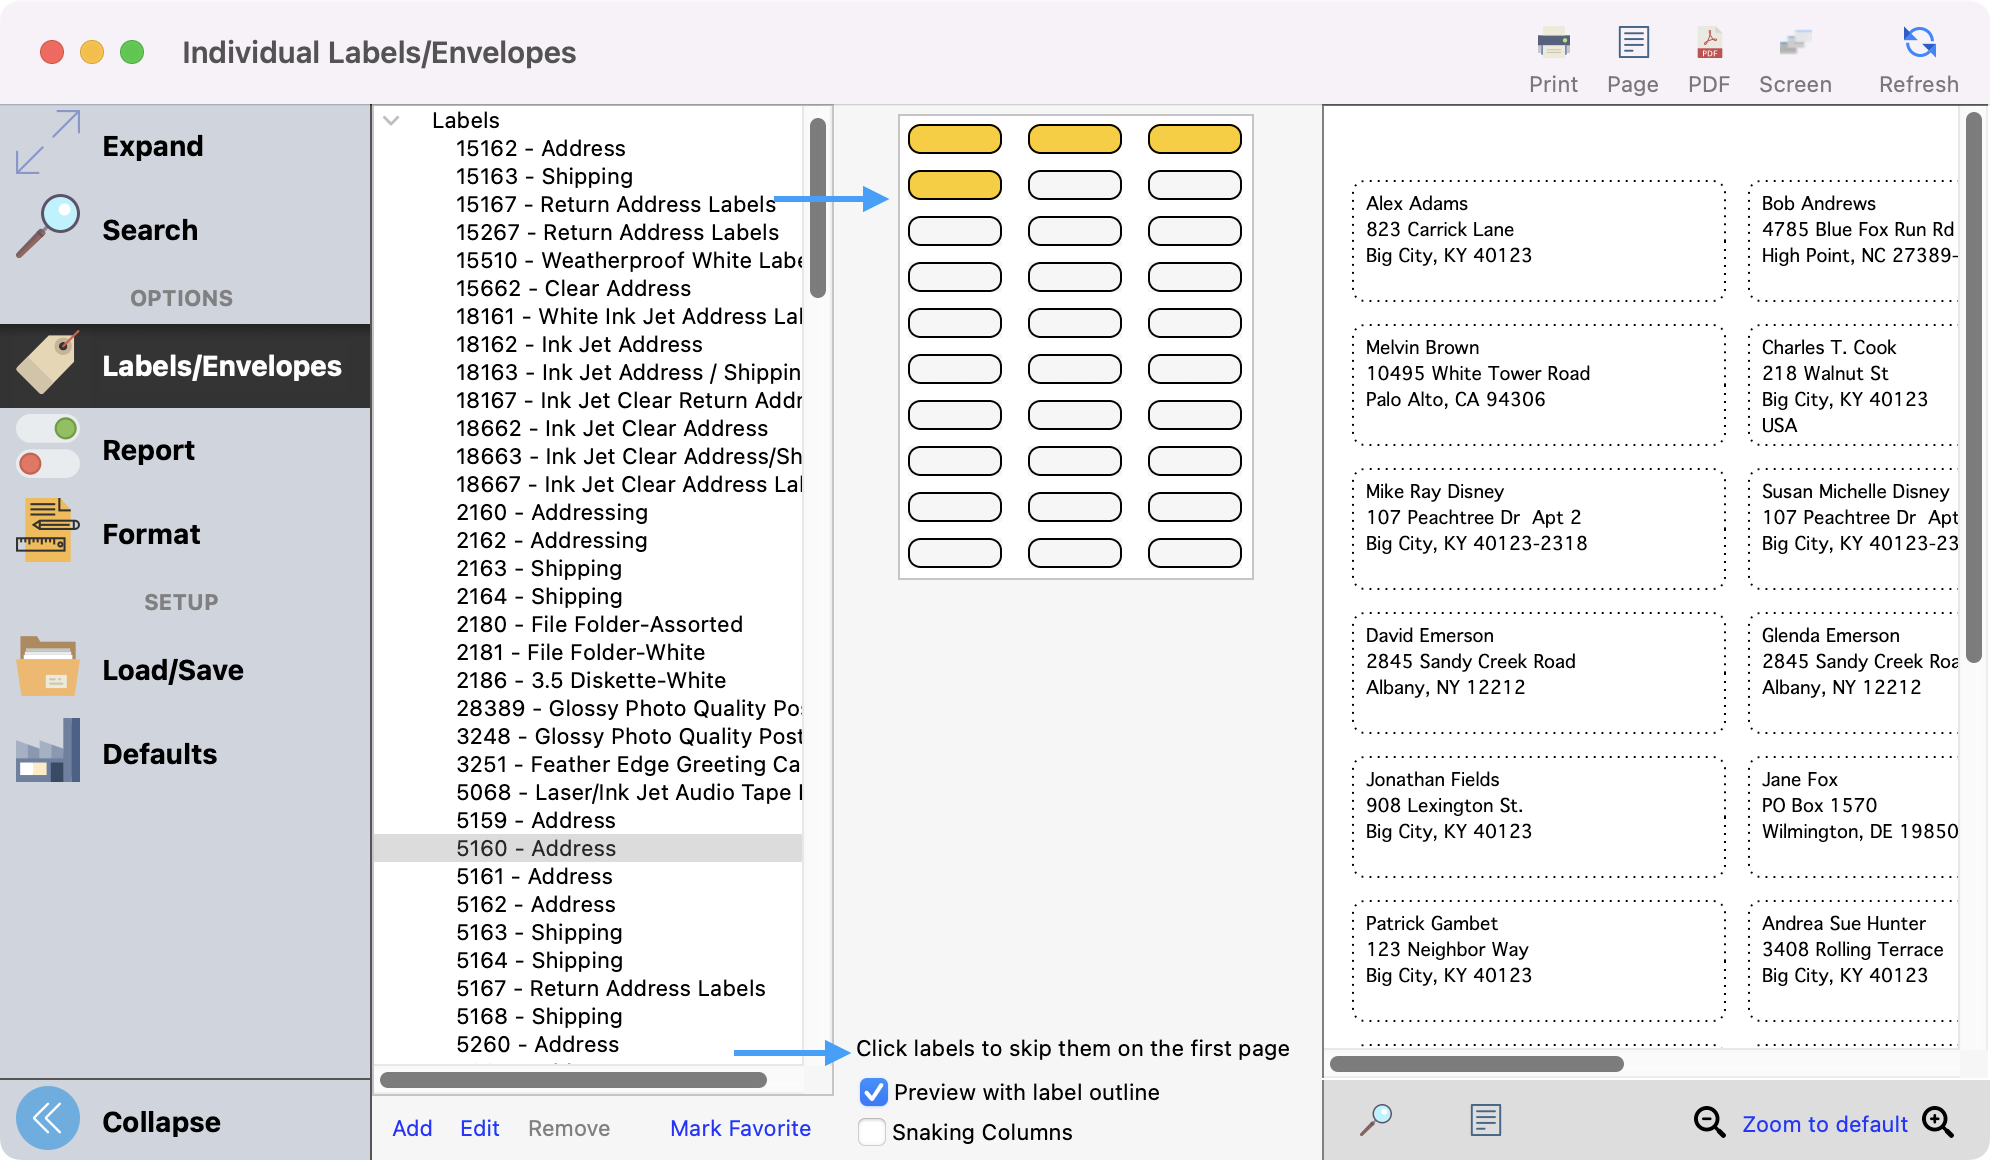
Click labels to skip them on the first page - If you are starting with a partial sheet of labels, click to highlight where the missing labels appear on your sheet, and CDM+ will skip those spaces. This applies only to the first sheet of labels.
-
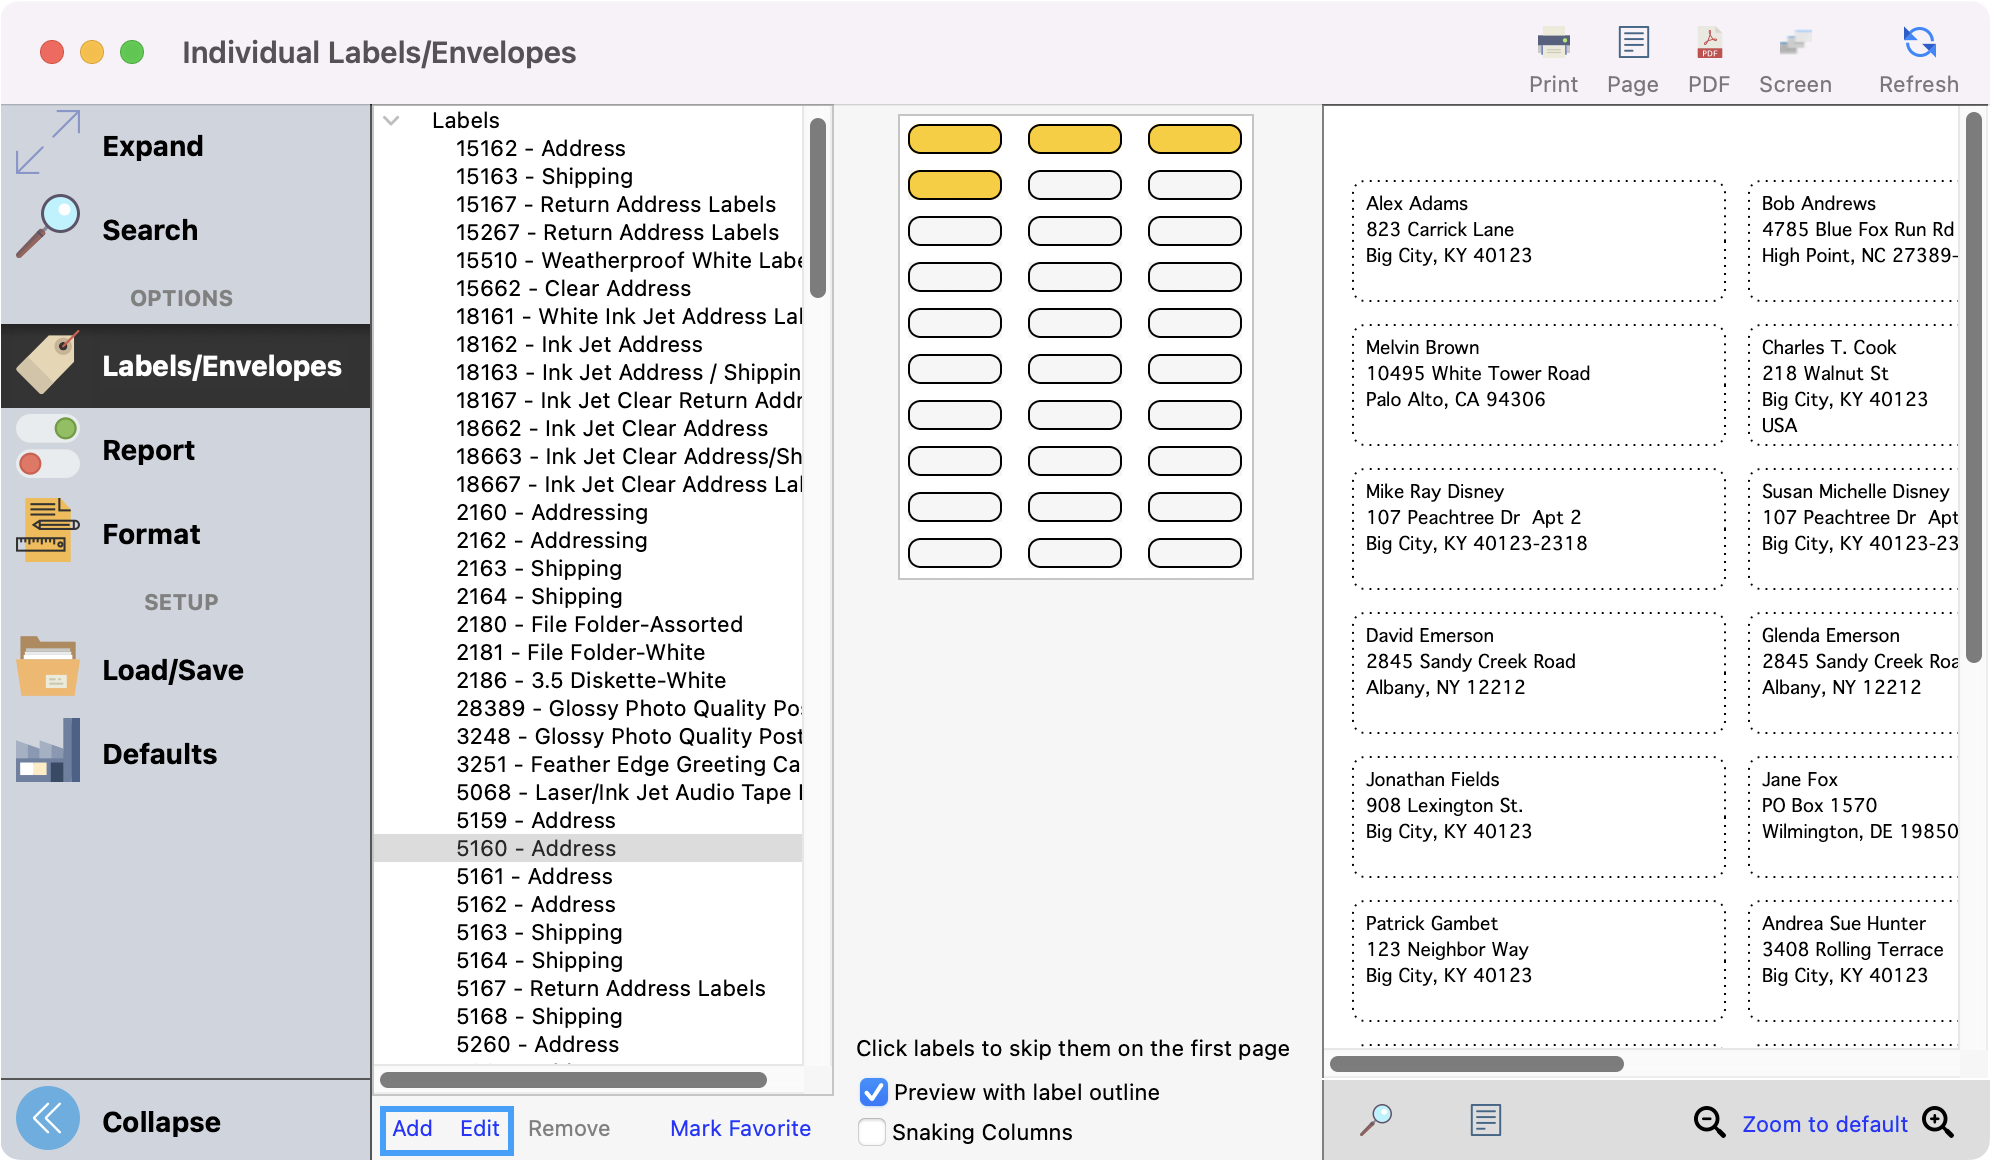
To add your own label, click Add at the bottom of the list of labels. To edit an existing label, click Edit at the bottom of the list of labels. Fill in the correct information and click OK when you are finished.
-
-
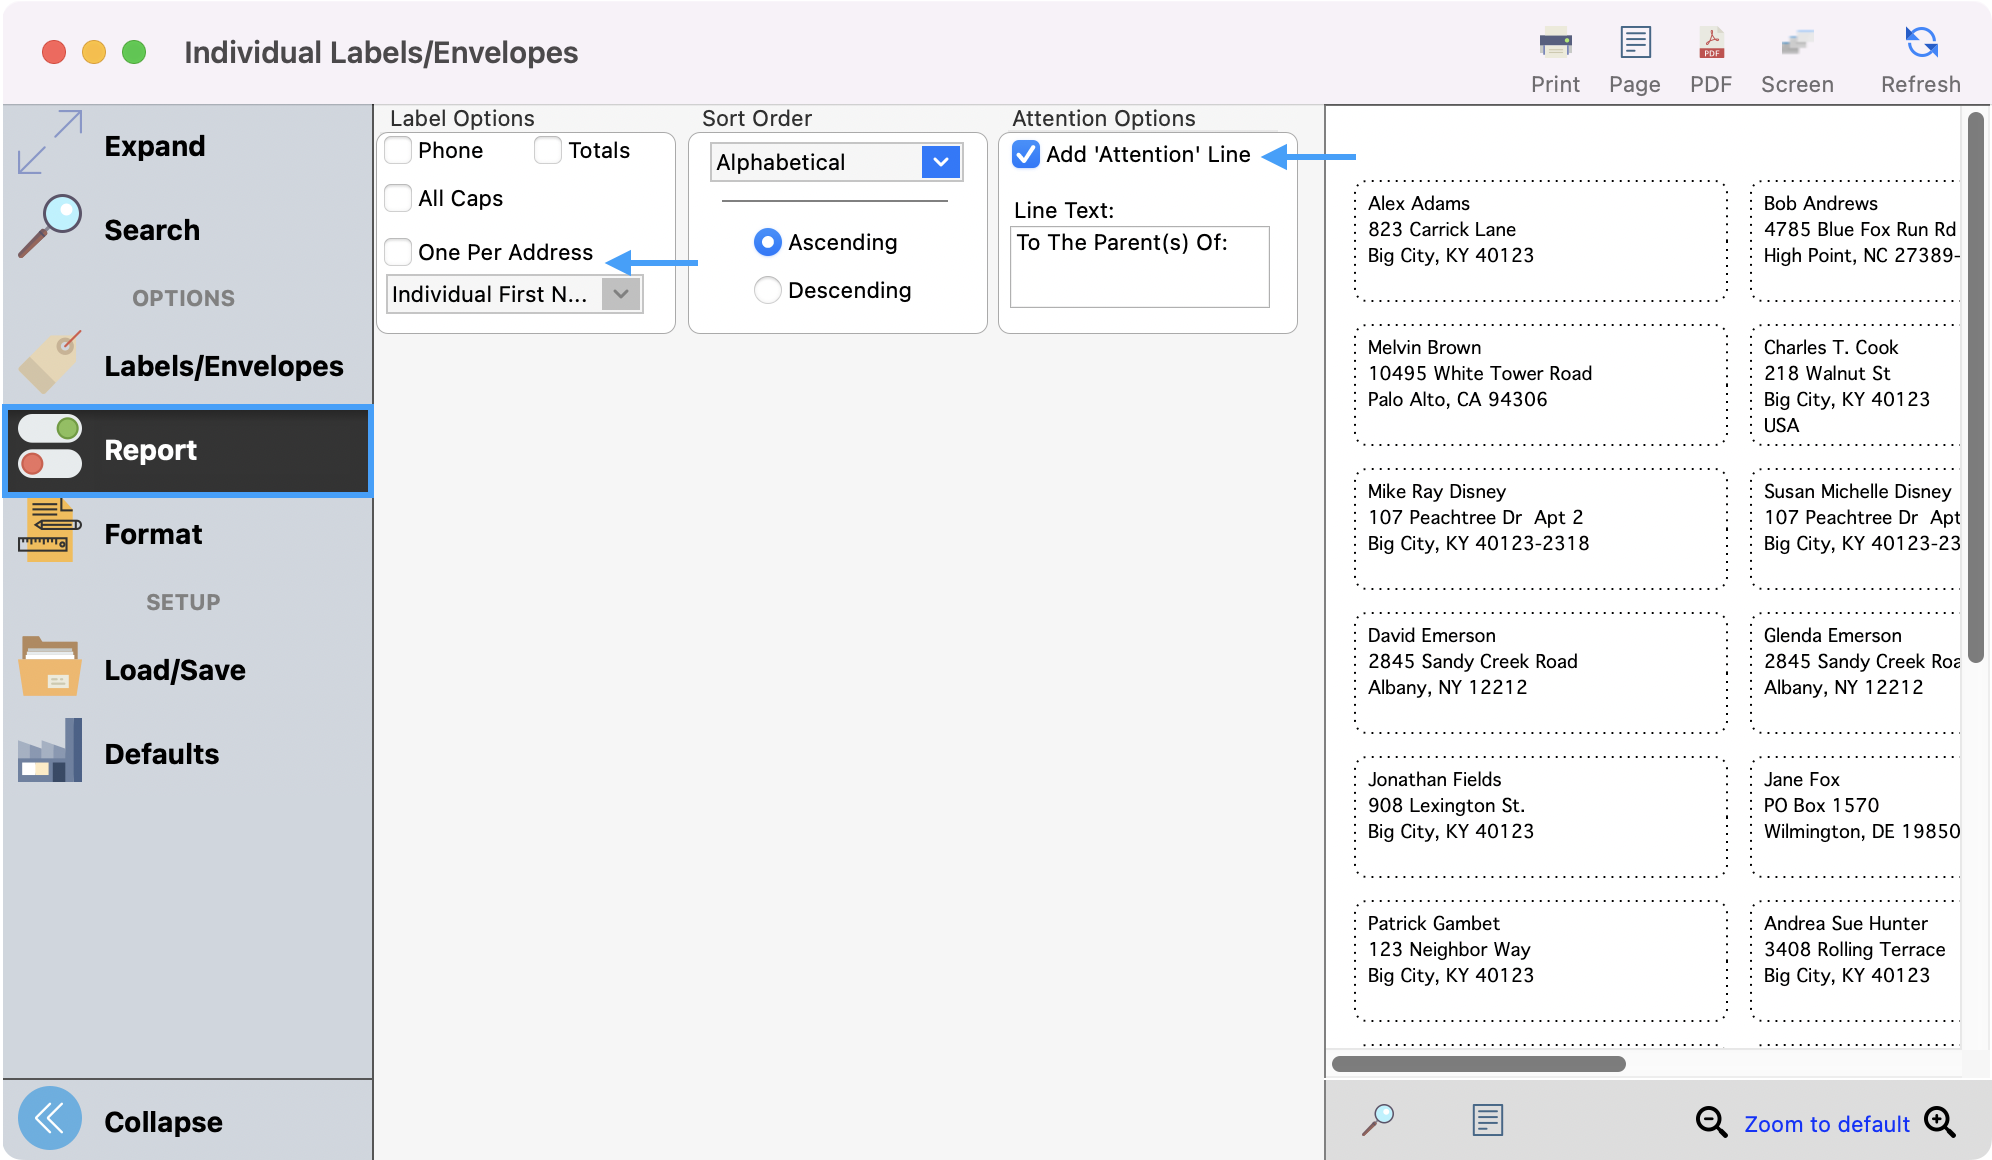
Next, you can click Report from the left sidebar. Here, you see a few options of how to organize the labels once they are printed. Some additional options to point out:
-
Check the One Per Address box if you do not need to send a mailing to every individual at the same address.
-
The Add ‘Attention’ Line can be used for a lot of reasons but is commonly used if sending a letter to a minor but should be directed to their parents/guadian.
-
-
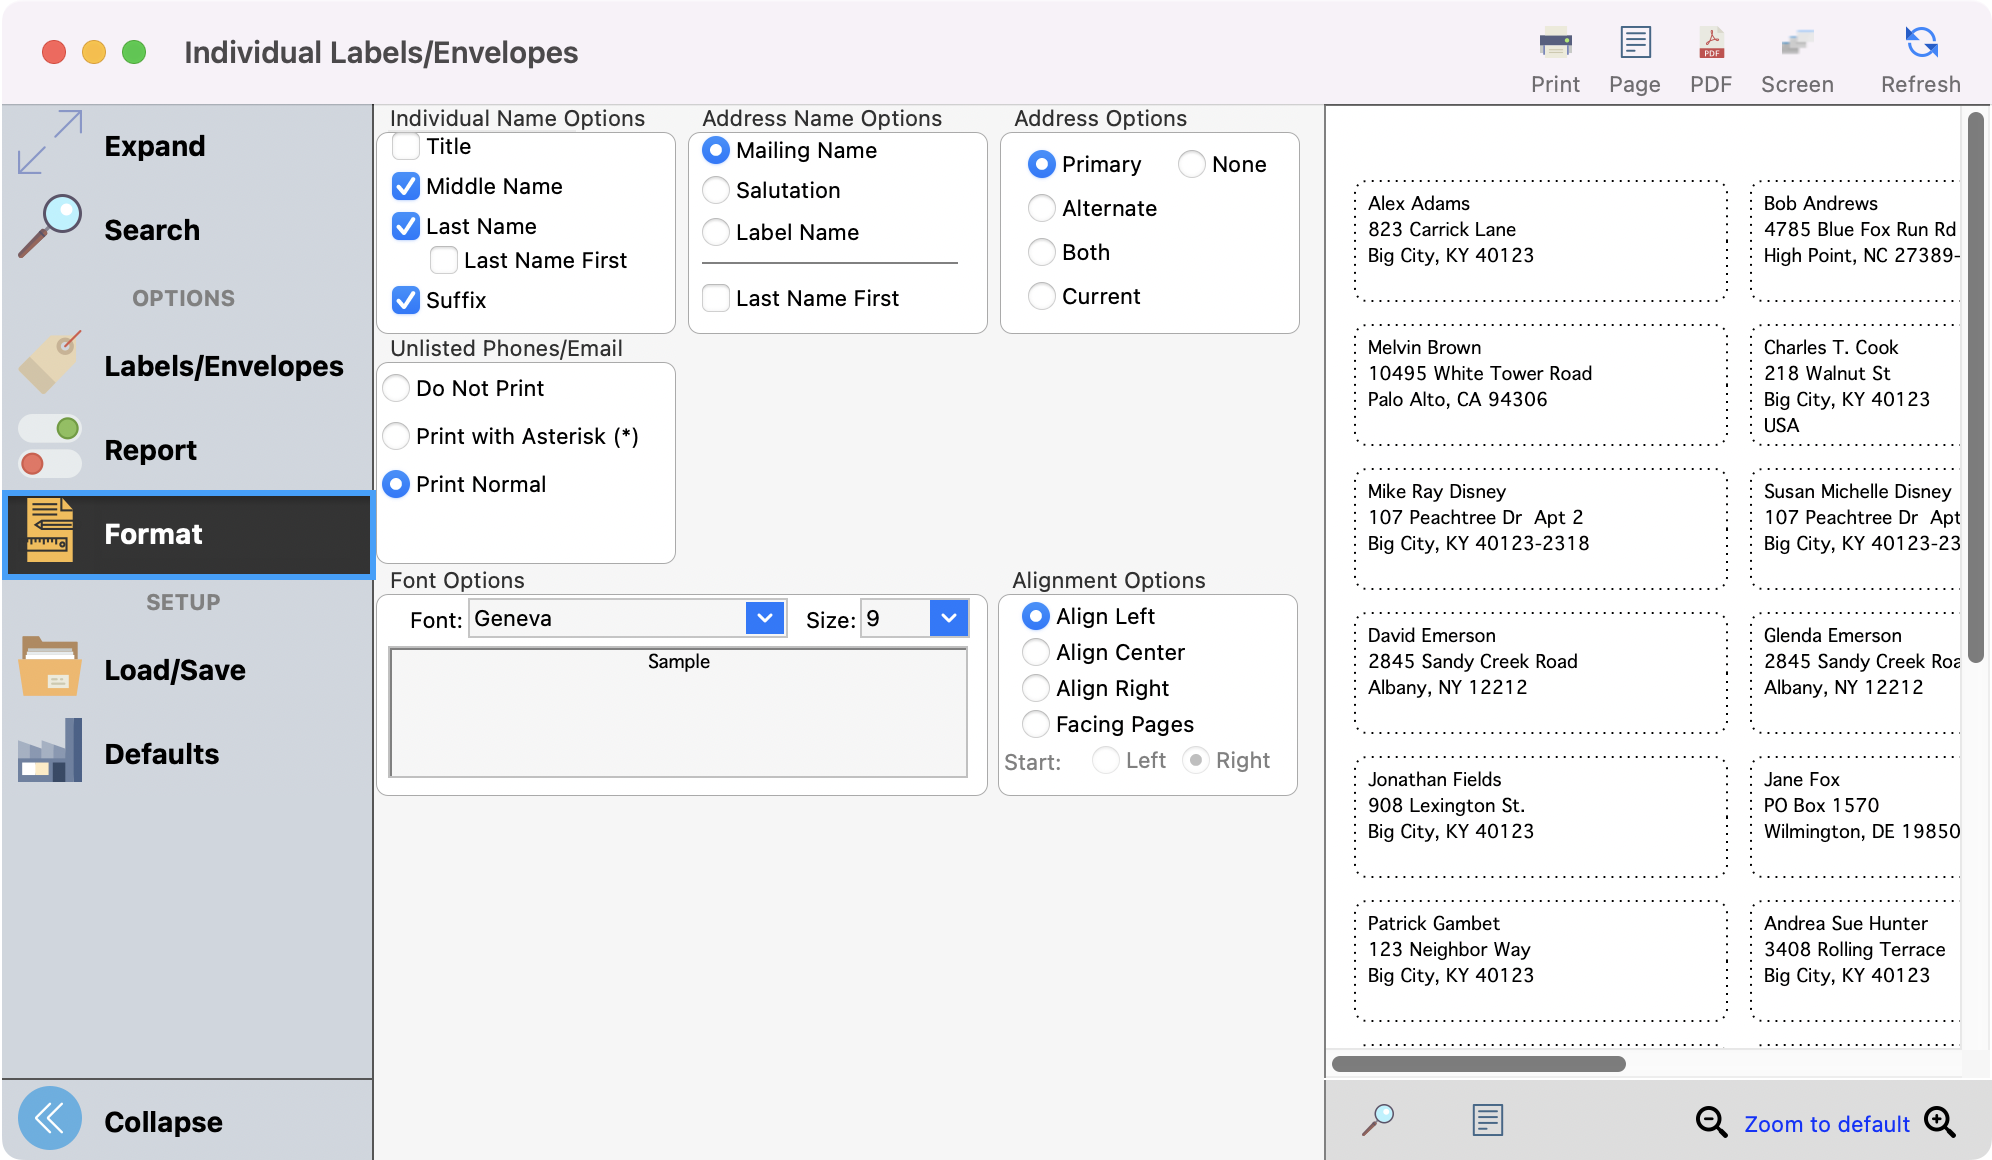
Next, you can click Format from the left sidebar. Here you will see several format options. Select the options that best fit your needs and brand.
-
After selecting the labels, selecting your report, and formatting options, preview the results by clicking the Refresh icon.
-
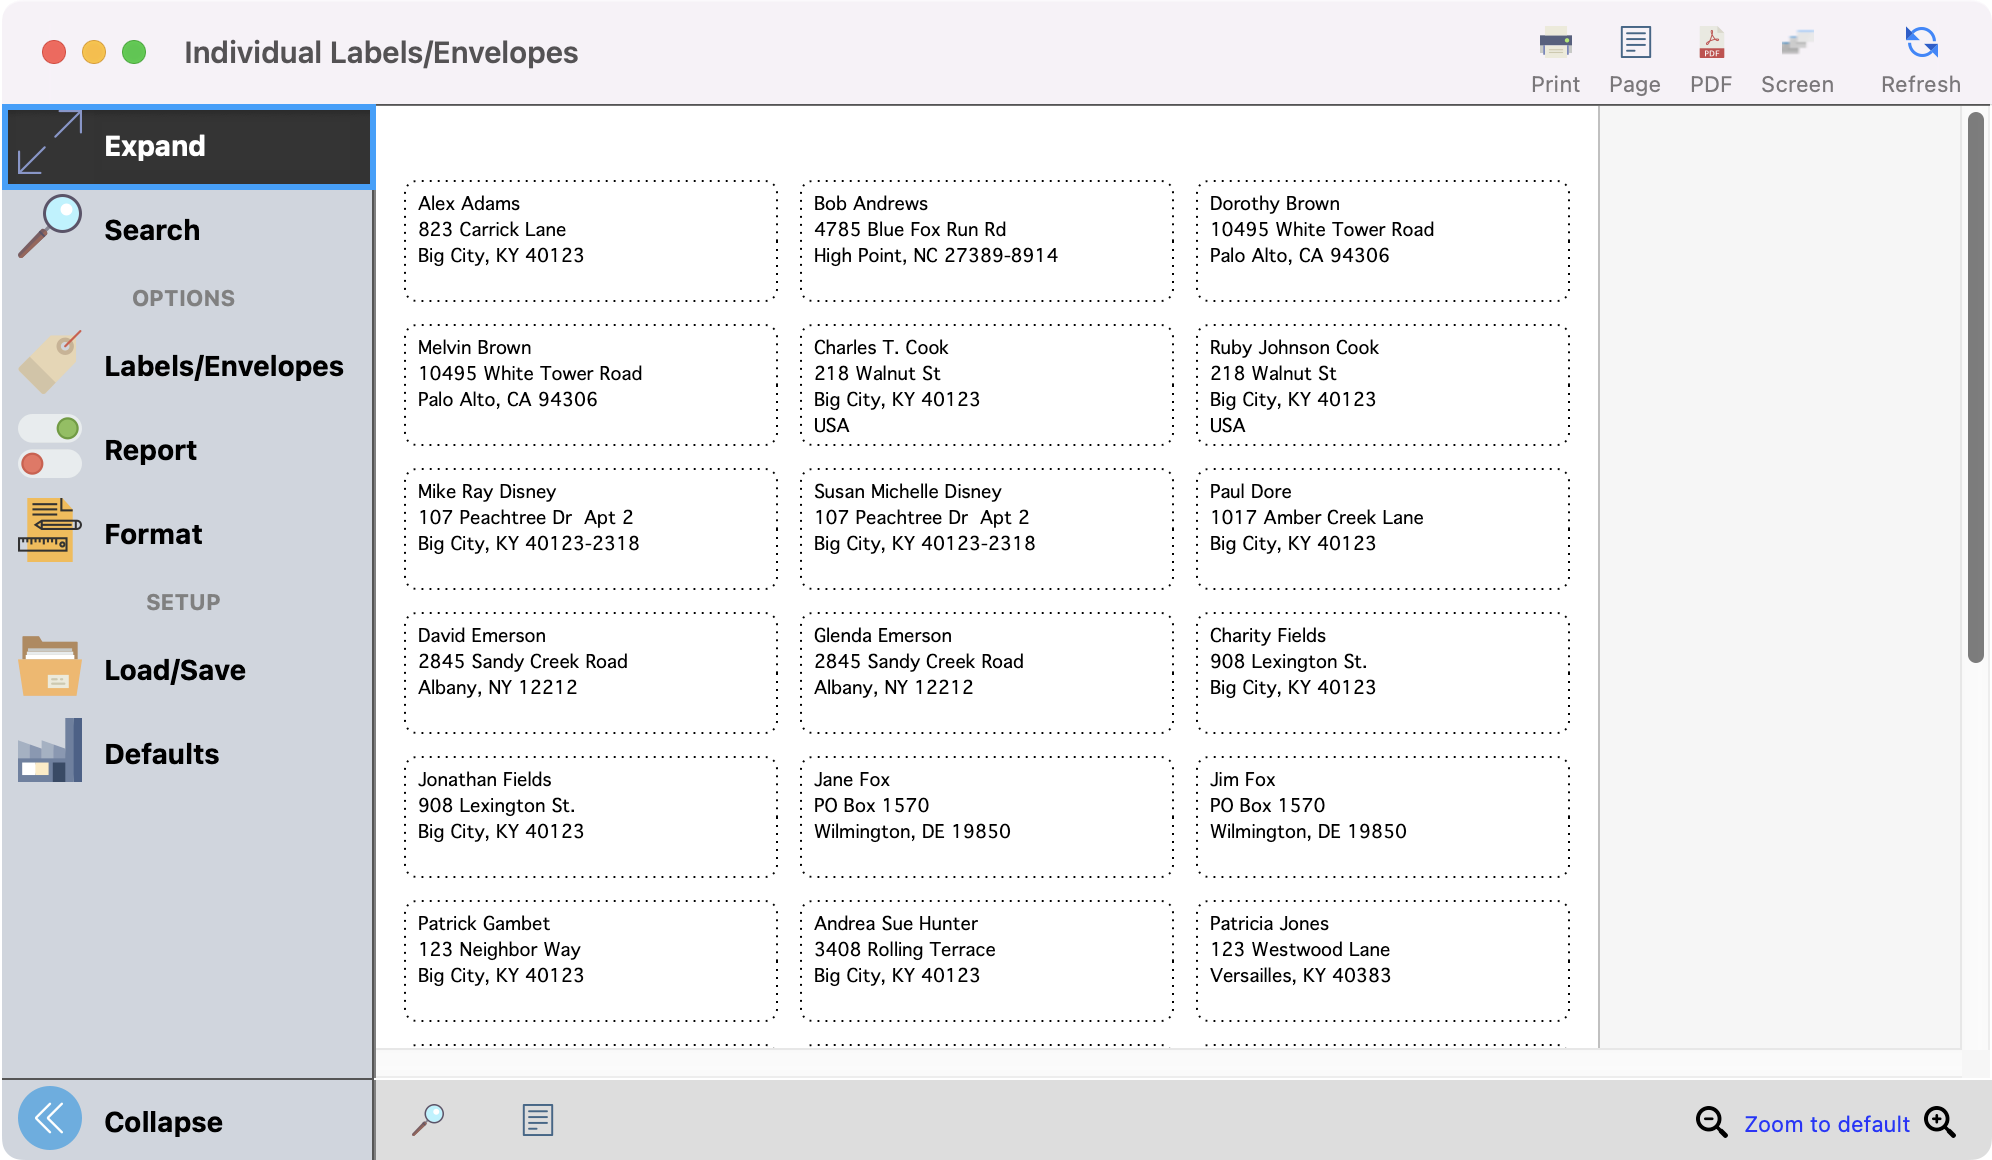
To see a larger view of your results, click Expand in the left sidebar.
-
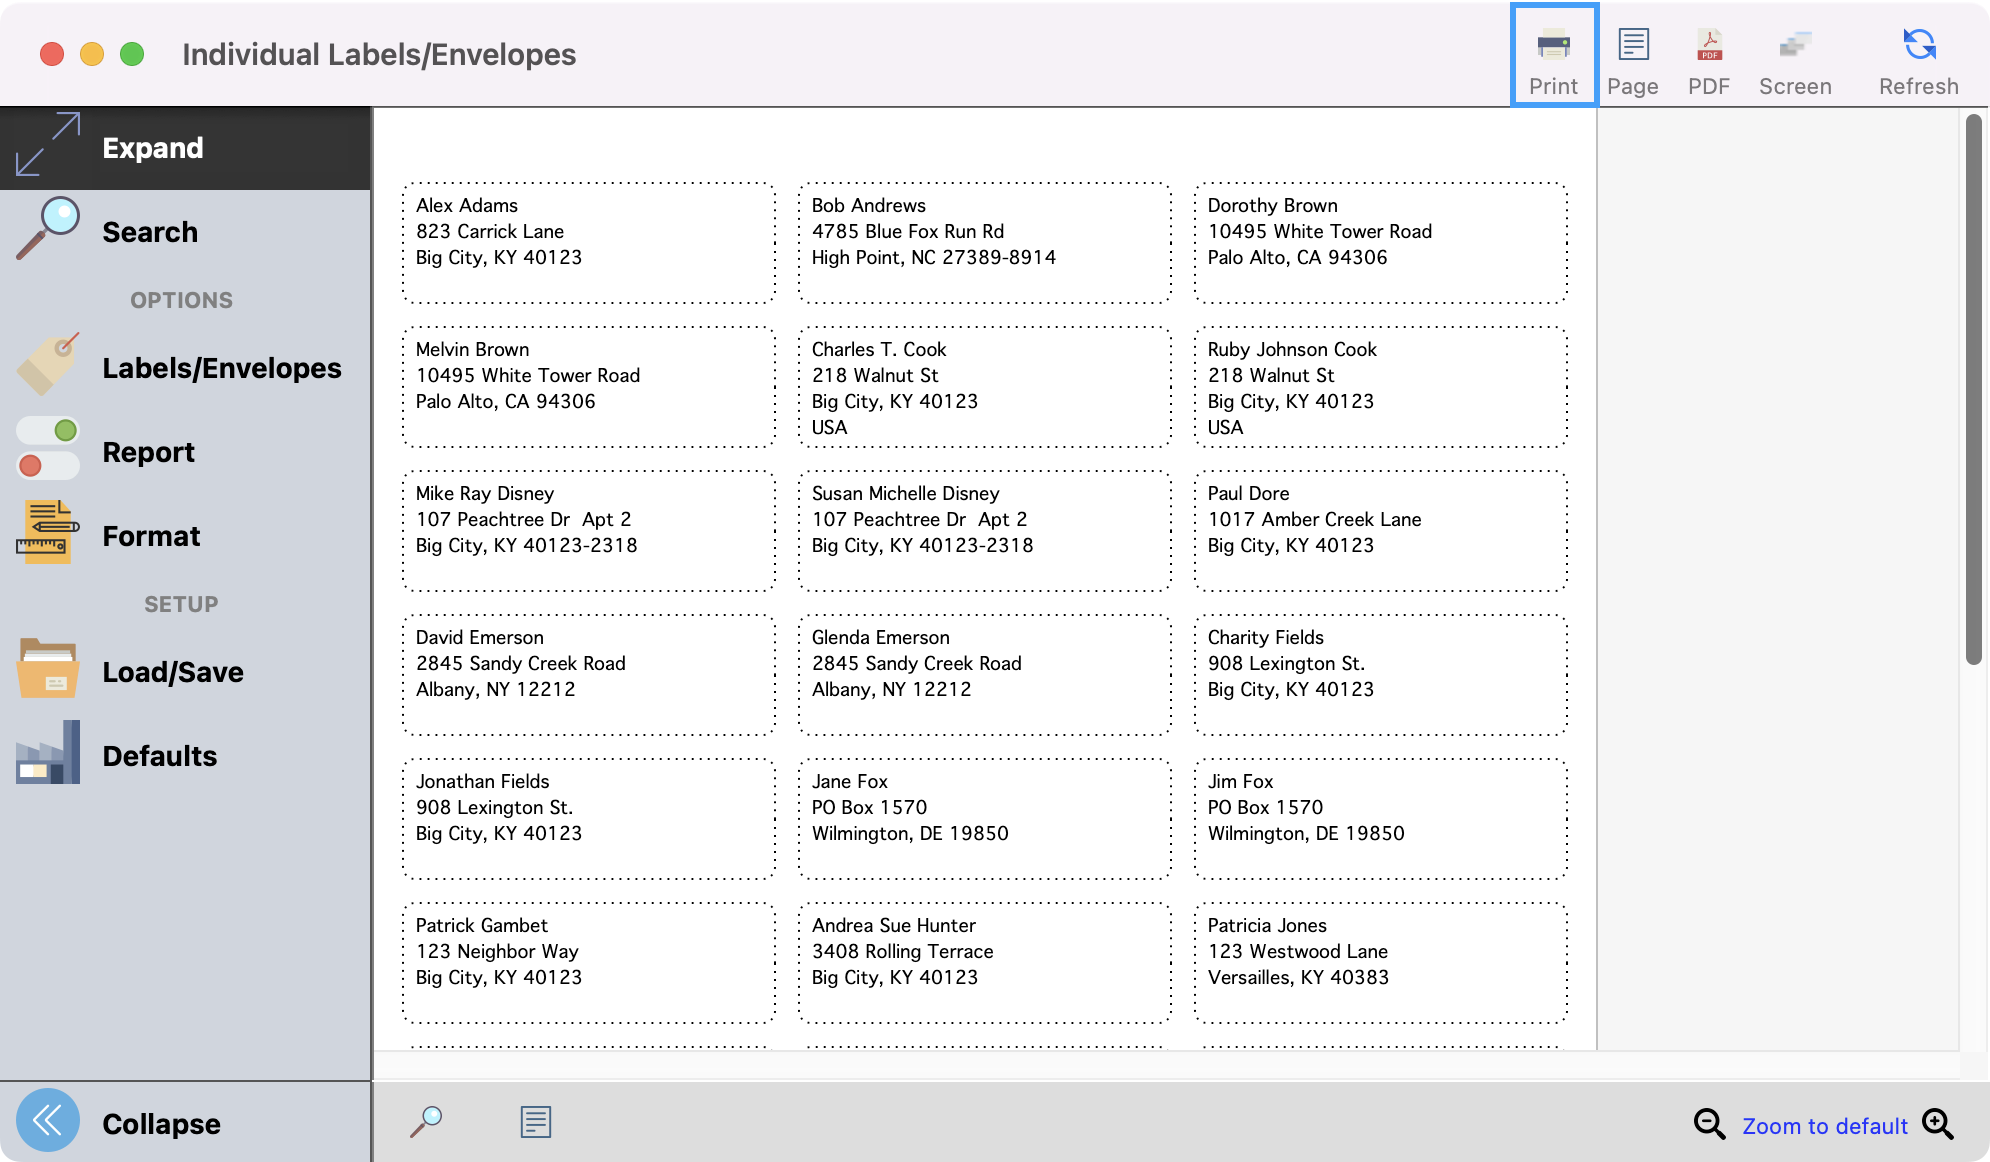
Once satisfied with your results, you can print your labels.
-
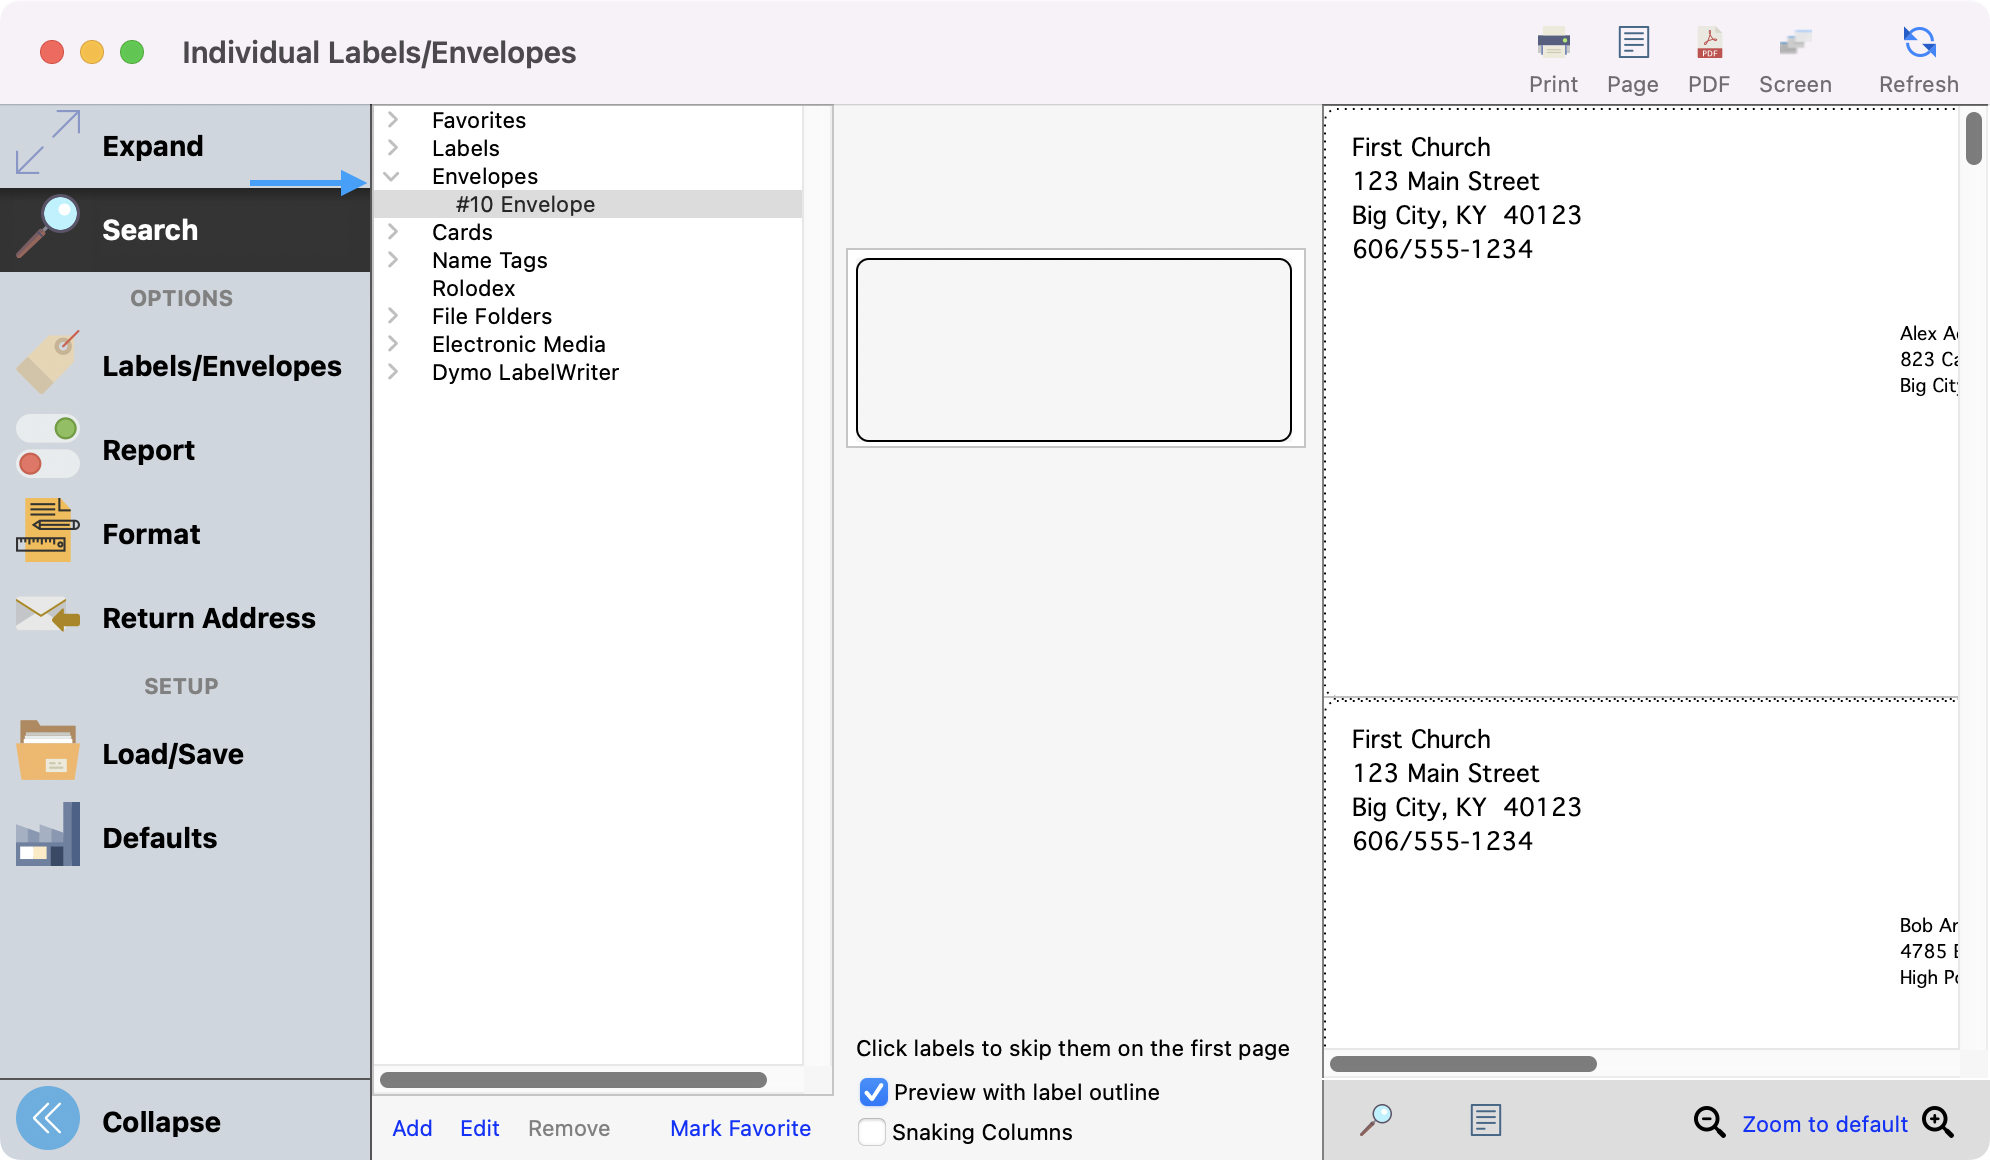
To print on envelopes, follow the steps above but select the options under the Envelope drop-down arrow.