Exporting
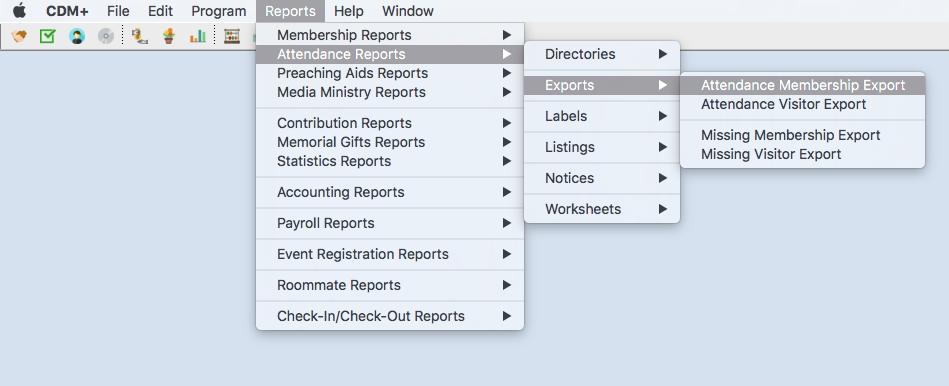
CDM+ allows you to export nearly every piece of information it tracks to files for use with other programs. To export data from the program, open an Export report. Export reports are found on the Reports menu for the various CDM+ programs.
Select Data to Export
Begin by setting up the export search to find the data you want to export.
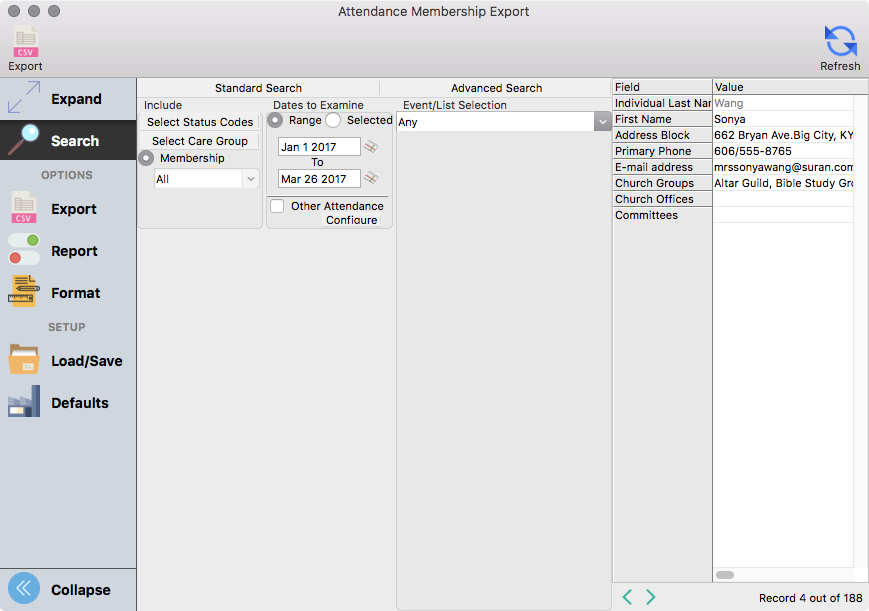
Next, you will need to create or select a set of export fields on the Export tab. These sets are shared with the Custom Listing reports for the same record types, so you may have existing sets from the Custom Listing reports.
If you have not defined any export or custom listing set for this particular type of export, click Create Set and enter a set name. If you have existing sets and want to add a new one, click Add and enter a set name. To modify existing sets, click the Modify icon 
The Modify Export Sets window displays a list of sets that you own at the top of the window.
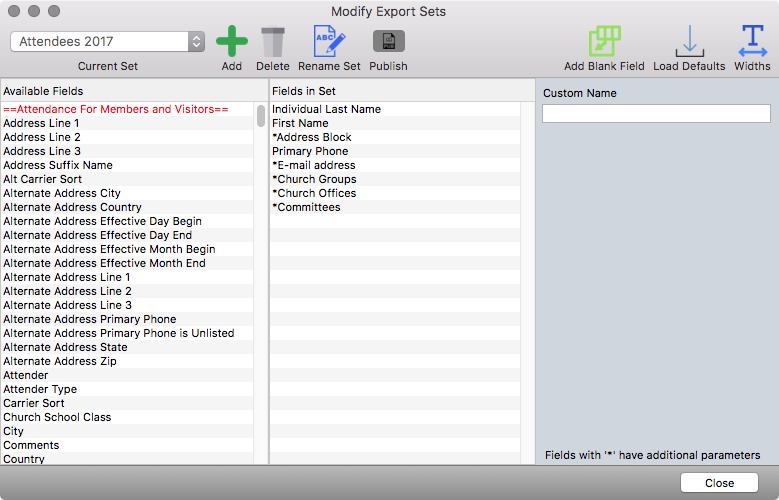
Once you’ve selected a set to configure, Fields that you can include on the set appear on the left side of the window, broken down by record type. On the right side of the window is the list of fields in your set, sorted in the order in which they will export.
To add a field to a set, drag it from the left list to the right list or double-click the field on the left list. Once you’ve added a field to a set, it disappears from the left list.
You can change the order in which fields will export by dragging them up and down the right-hand list. To remove a field from a set, select it and press the Delete/Backspace key or drag it to the left list.
If you’d like a field to have a different description in the header and on the preview, select the field and click Rename. Enter your replacement name and click OK. The field’s original name will appear in parentheses. To use the original name, rename it to use the original name.

Other Functions Available under Modify Export Sets
Add - To create another set, click Add and enter a set description.
Rename - To rename a set, select it from the Export Set list, click Rename and enter a new name.
Delete - To delete a set, select the set(s) to delete, click Delete and click Yes.
Note that deleting a set will remove it from both Exports and Custom Listings.
Publish - If you want other CDM+ users to be able to use your set, click Publish. This will allow others read-only access to your set, only you can modify a set you have created.
Add Blank Field - To include a blank column in the resulting file, click Add Blank Field and enter a name for the column.
Click Close when finished working with sets.
Configure the Export File
To the right of the field list are your options for Export Format. CDM+ supports delimited text files and text files with one field per line, useful for single field exports.
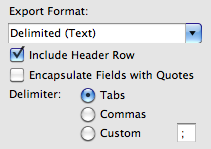
You will need to select a delimiter when using a delimited text file. In a delimited text file, data is represented with a delimiter separating data values and a return separating records. The two most common delimiters are tabs and commas, although CDM+ also allows you to use a custom delimiter.
- Tab-delimited text files, also called tab-separated values files, appear with a .tsv extension.
- Comma-delimited text files, or comma-separated values files, appear with a .csv extension.
- CDM+ uses a .txt extension by default, but you may change this to .tsv, .csv, or any other extension you like.
You also have the option of exporting your file with a header row, which is a row at the start of the export with field names for values. A header row helps you identify what data each column holds. Check Include Header Row to export your data with a header row.
You may wish to export your data with double quotes surrounding each field value, as some programs prefer this format. Check Encapsulate Fields with Quotes to do so.