Resources Tab
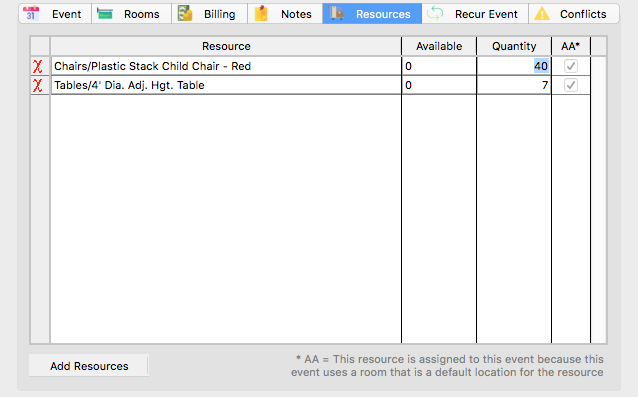
Click on the Resources tab to move to the next screen. Here you have the opportunity to assign available resources to this event. If you’ve already selected rooms for this event, any resources with those rooms as a default location and marked auto-assign will already be listed here. You may change the quantity of a particular resource assigned to this event by changing the number in the Quantity column.

To schedule additional resources for this event, click Add Resources. A list of available resources, grouped by type, will appear (resources already assigned to the event will not appear on this list). Check the resources you wish to add. All and None buttons allow you to quickly check and uncheck every resource. The number of resources available will be sensitive to the date and time of the event. Click OK to add the checked resources to the event, or Cancel to return to the Event Information window without adding resources.

Once resources are assigned to the event, you can edit the quantity of that resource used. The available quantity is influenced by assigned resources for concurrent events. For example, if 12 of the 30 china cup and saucer sets owned by the church have been scheduled for use from 10:00 AM–12:00 PM on February 25th, only the 18 remaining cup/saucer sets will show as available for any events scheduled during that time.
It is possible to over-schedule Resources by entering a number in the Assigned column that exceeds the number in the Available column. To avoid the over-scheduling, change the quantity of assigned resources. Over-scheduled resources will appear on the Conflicts tab (see elsewhere in this manual for help with the Conflicts tab).
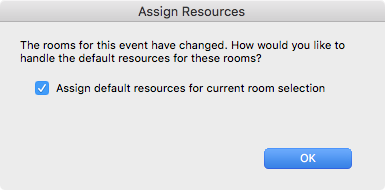
When changing the rooms for this event and saving or accessing the Resources tab, you will be prompted as to how to handle default resources for the rooms.

Please note that this deals only with Auto-Assigned Resources. For more information on auto-assigned resources, refer to the section of the document covering Resources.
