
I have multiple databases with Payroll associated with both. Each of the payrolls are on the same Employee Identification Number so I need to print/eFile W-2/W-3's together. How do I do that?
I have multiple databases that have 1099 Vendors and I need to print/eFile 1099-NEC forms together. How do I do that?
I have a minister that receives housing, but there is no money in Box 14 Other. All his money is in Box 1. How do I separate the Housing money from Box 1 so that it is in Box 14?
Click to expand...
PROBLEM
Housing is an allowance that is to only be reflected in Box 14 of the W-2s. There are times when a user goes to print the W-2 they find the housing amount is showing on Box 1 and/or 14 and need it removed from Box 1.
This happens when the user does not mark the 'Exclude from W2' check box when setting up the Housing allowance.
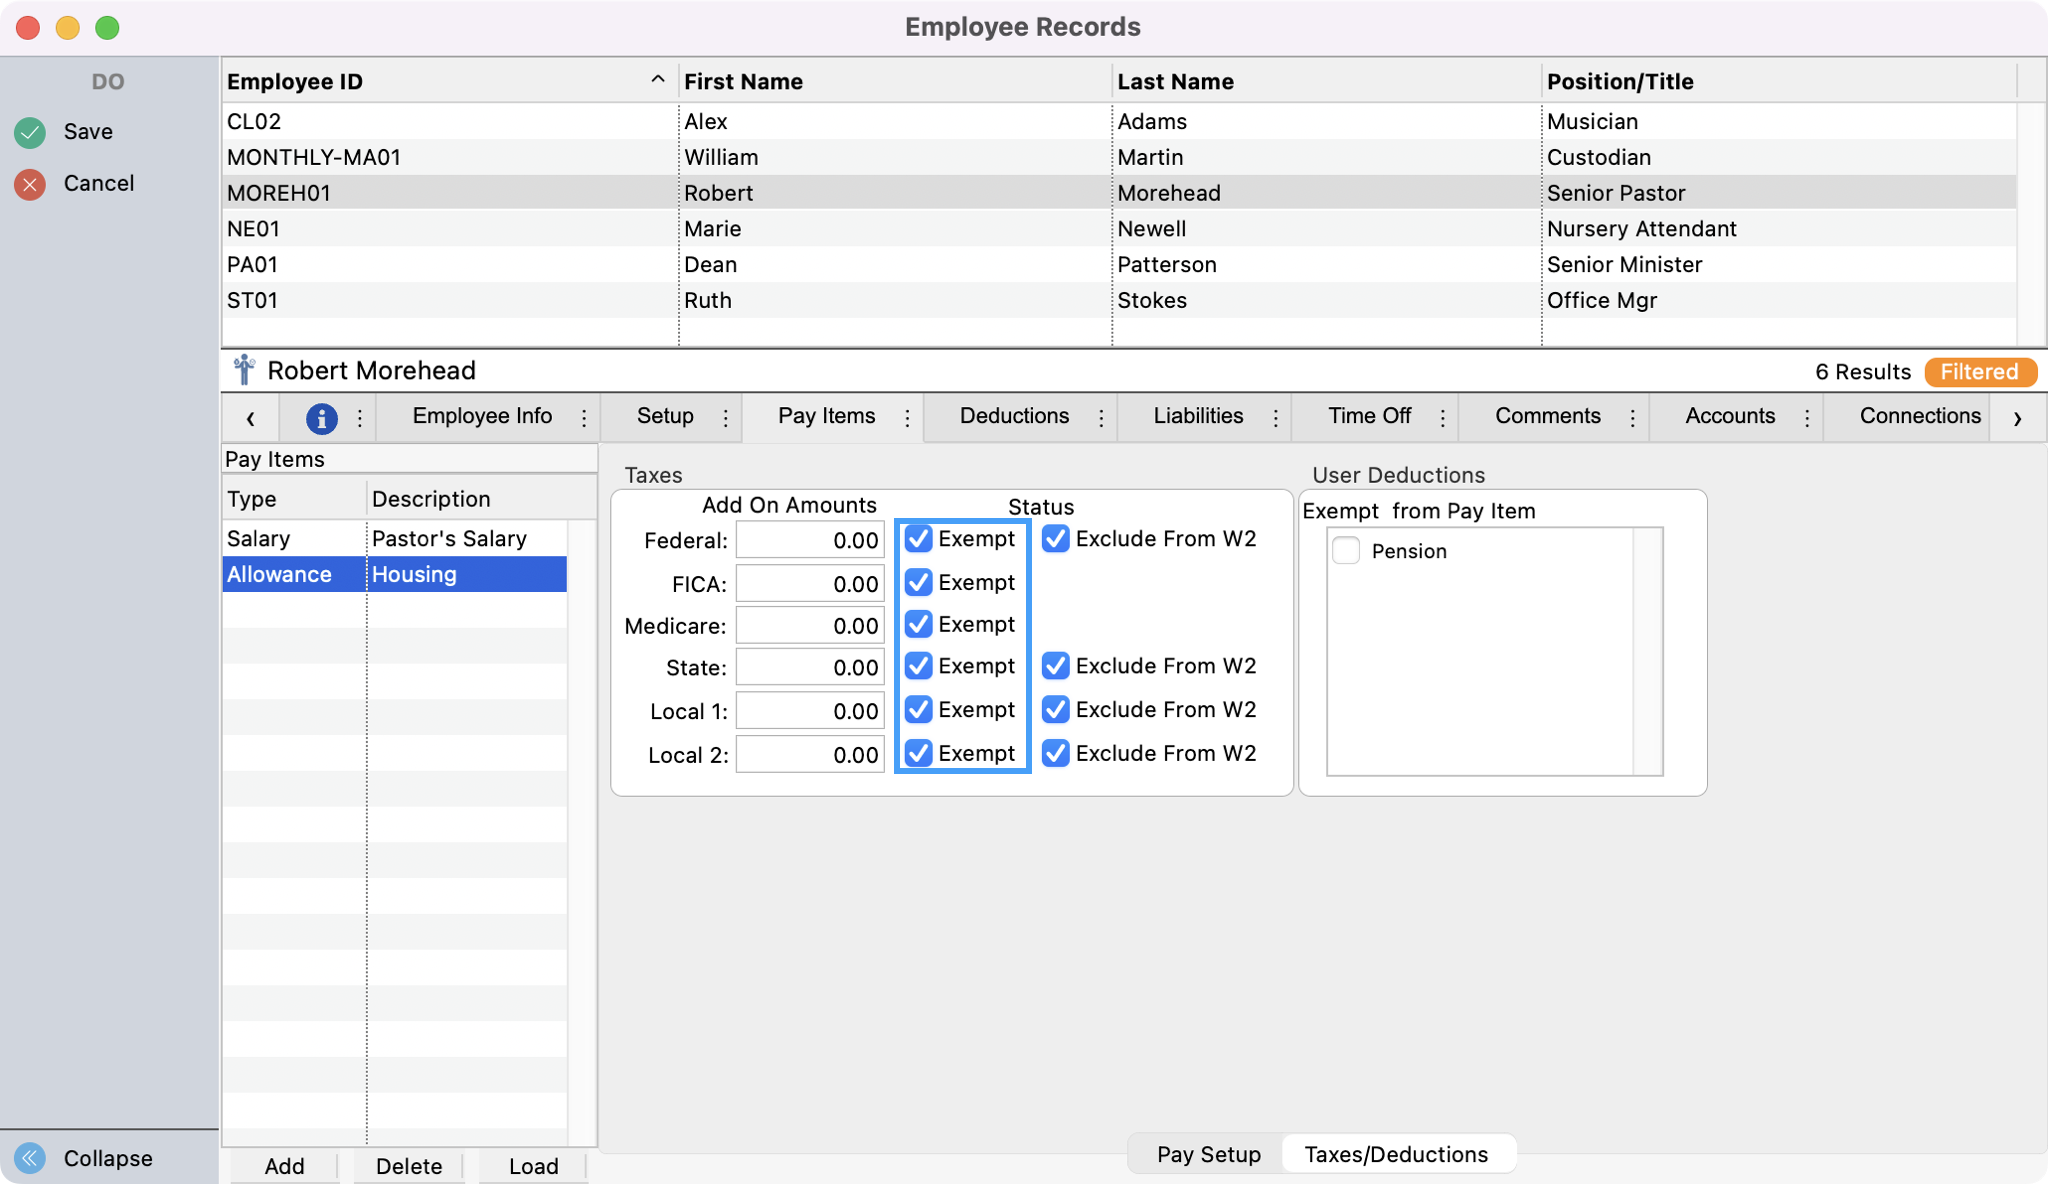
Go to the Employee's Record and mark the 'Exclude from W2' check boxes so it is set correctly for the new year.
You will also need to make sure the allowance is set to go in Box 14 under the Pay Item tab.
SOLUTION
There are two ways you can remove the housing amount out of Box 1.
Option A
Figure up the amount you need to reduce Box 1 by:
-
Calculate payroll for the housing allowance dated for some time in the tax year you are working with.
-
Go to that payroll record and change the gross amount on the housing pay item reducing the amount you need to lower box 1 by. (you will need to do a negative amount to lower it.)
-
If other Pay Items were calculated, click on them and zero them out.
-
Mark the Do No Print or Post box on the Summary tab so this does not ever try to post to the ledger.
-
Save
Option B
-
Open Payroll Tax Forms (Reports → Payroll Reports → Payroll Tax Forms
-
Select W-2/W-3 Forms
-
Set to the appropriate tax year
-
Click Show Forms
-
Go through the W-2/W-3 setup process
-
When you are in the Aatrix spreadsheet like grid (for Windows) or the W-2 form (for Mac), find the Box 1 amount
-
Lower the Box 1 amount by the amount of the Housing Allowance
-
Add an additional column to the Aatrix Grid (Windows) or add the work 'Housing' and the amount for Housing in Box 14 (macOS)
-
Then, continue on through the process of generating W-2/W-3 Forms
Note: If you do it this way, there is no record of it being lowered in CDM+. It is not taxable income so it will not affect the 941s but you will not see it on the payroll reports you print. This option will only affect the printing of W-2s in Aatrix.
How can I print a list 1099 vendors with their yearly totals to compare with 1099-NEC forms from Aatrix?
Click to expand...
-
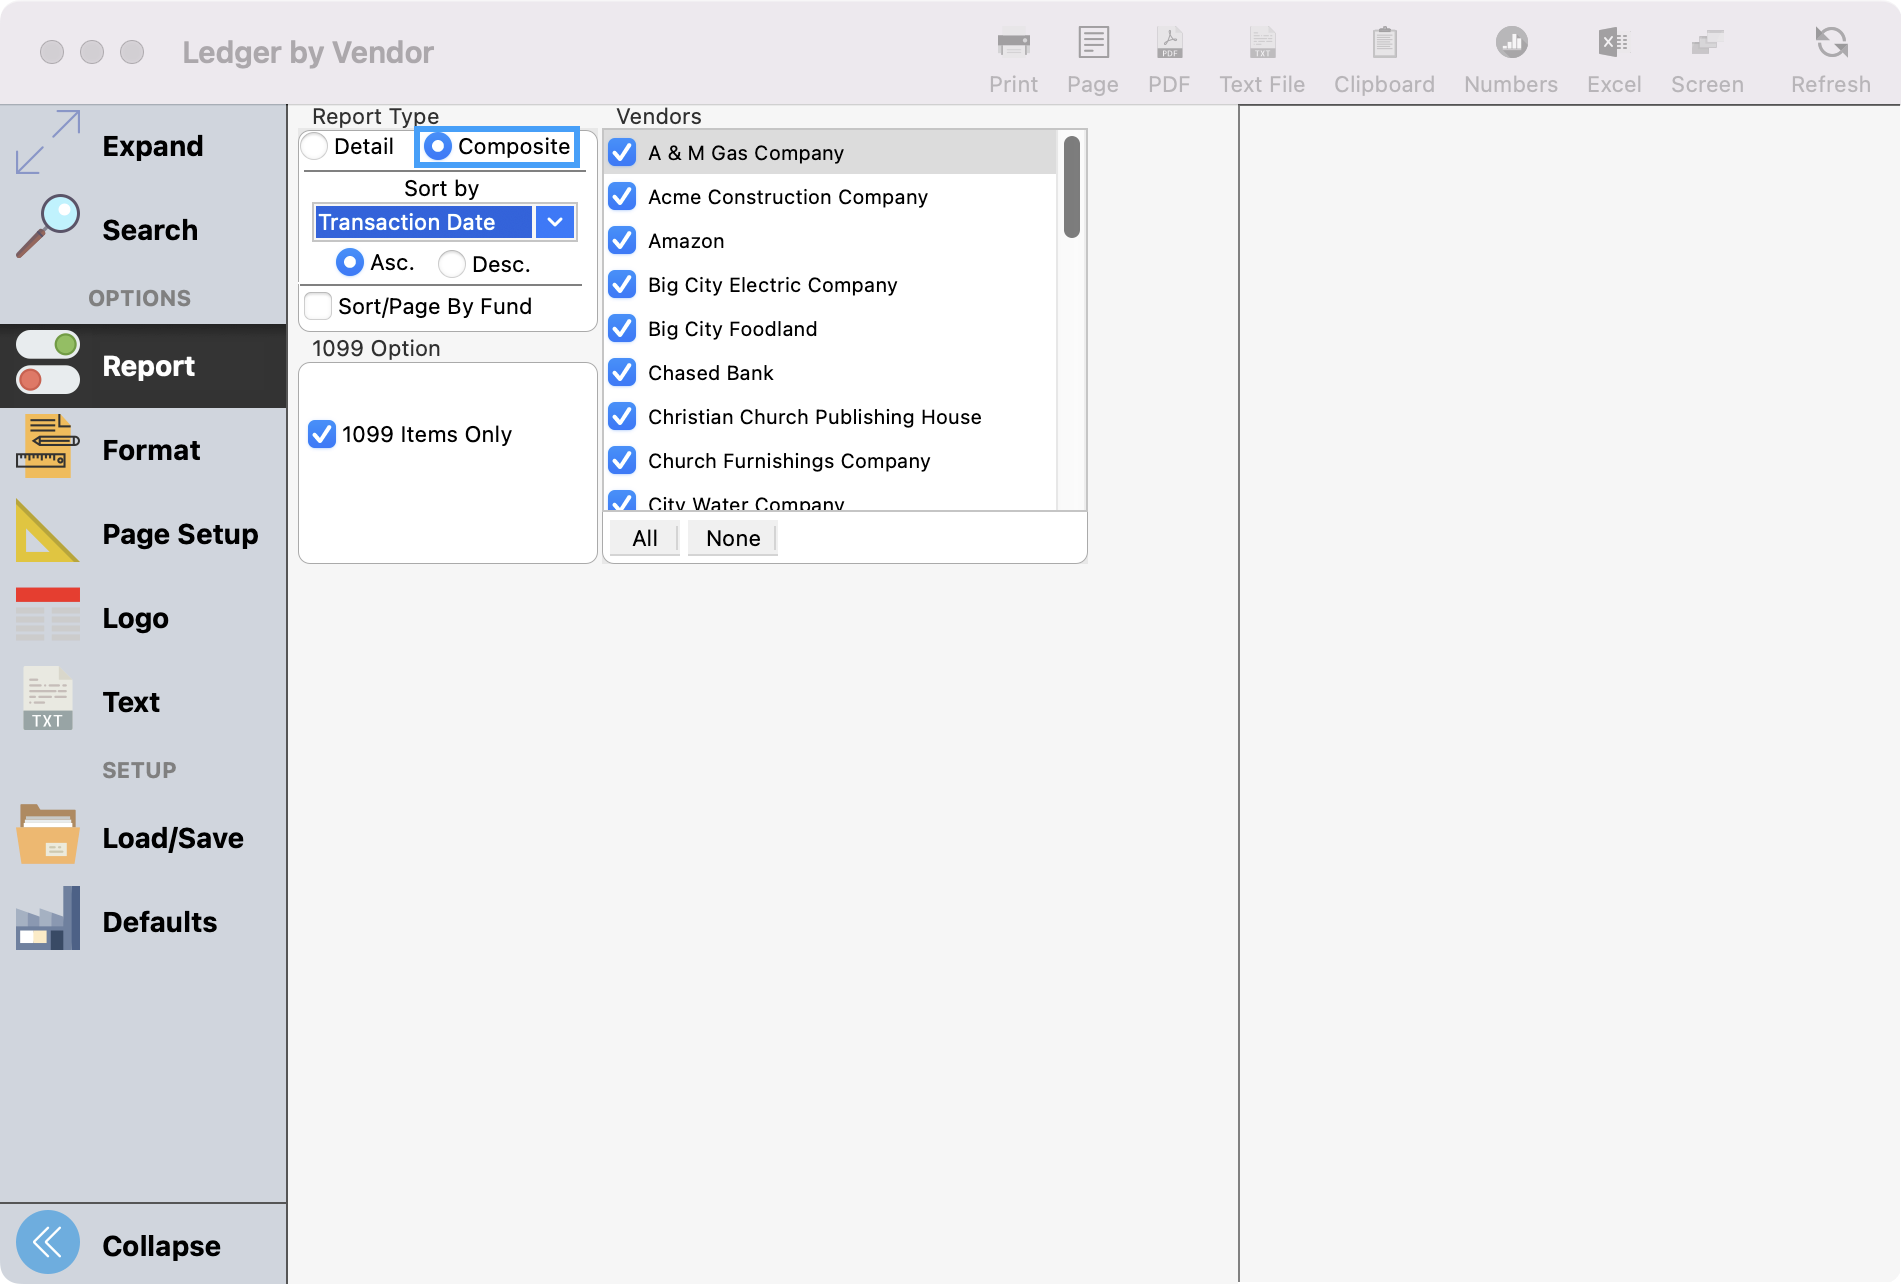
Go to Reports → Ledger Reports → Activity → Ledger by Vendor.
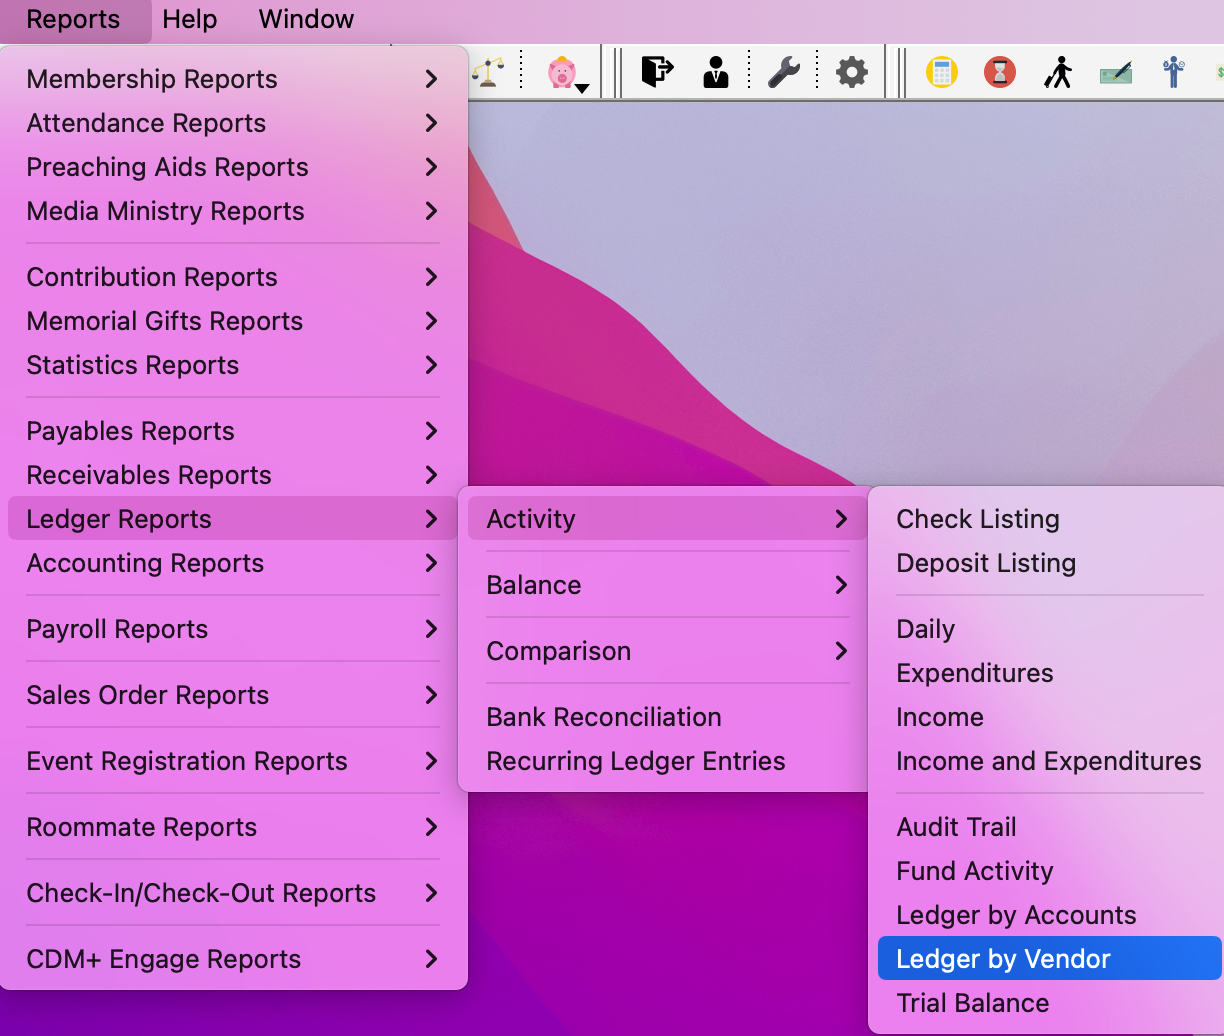
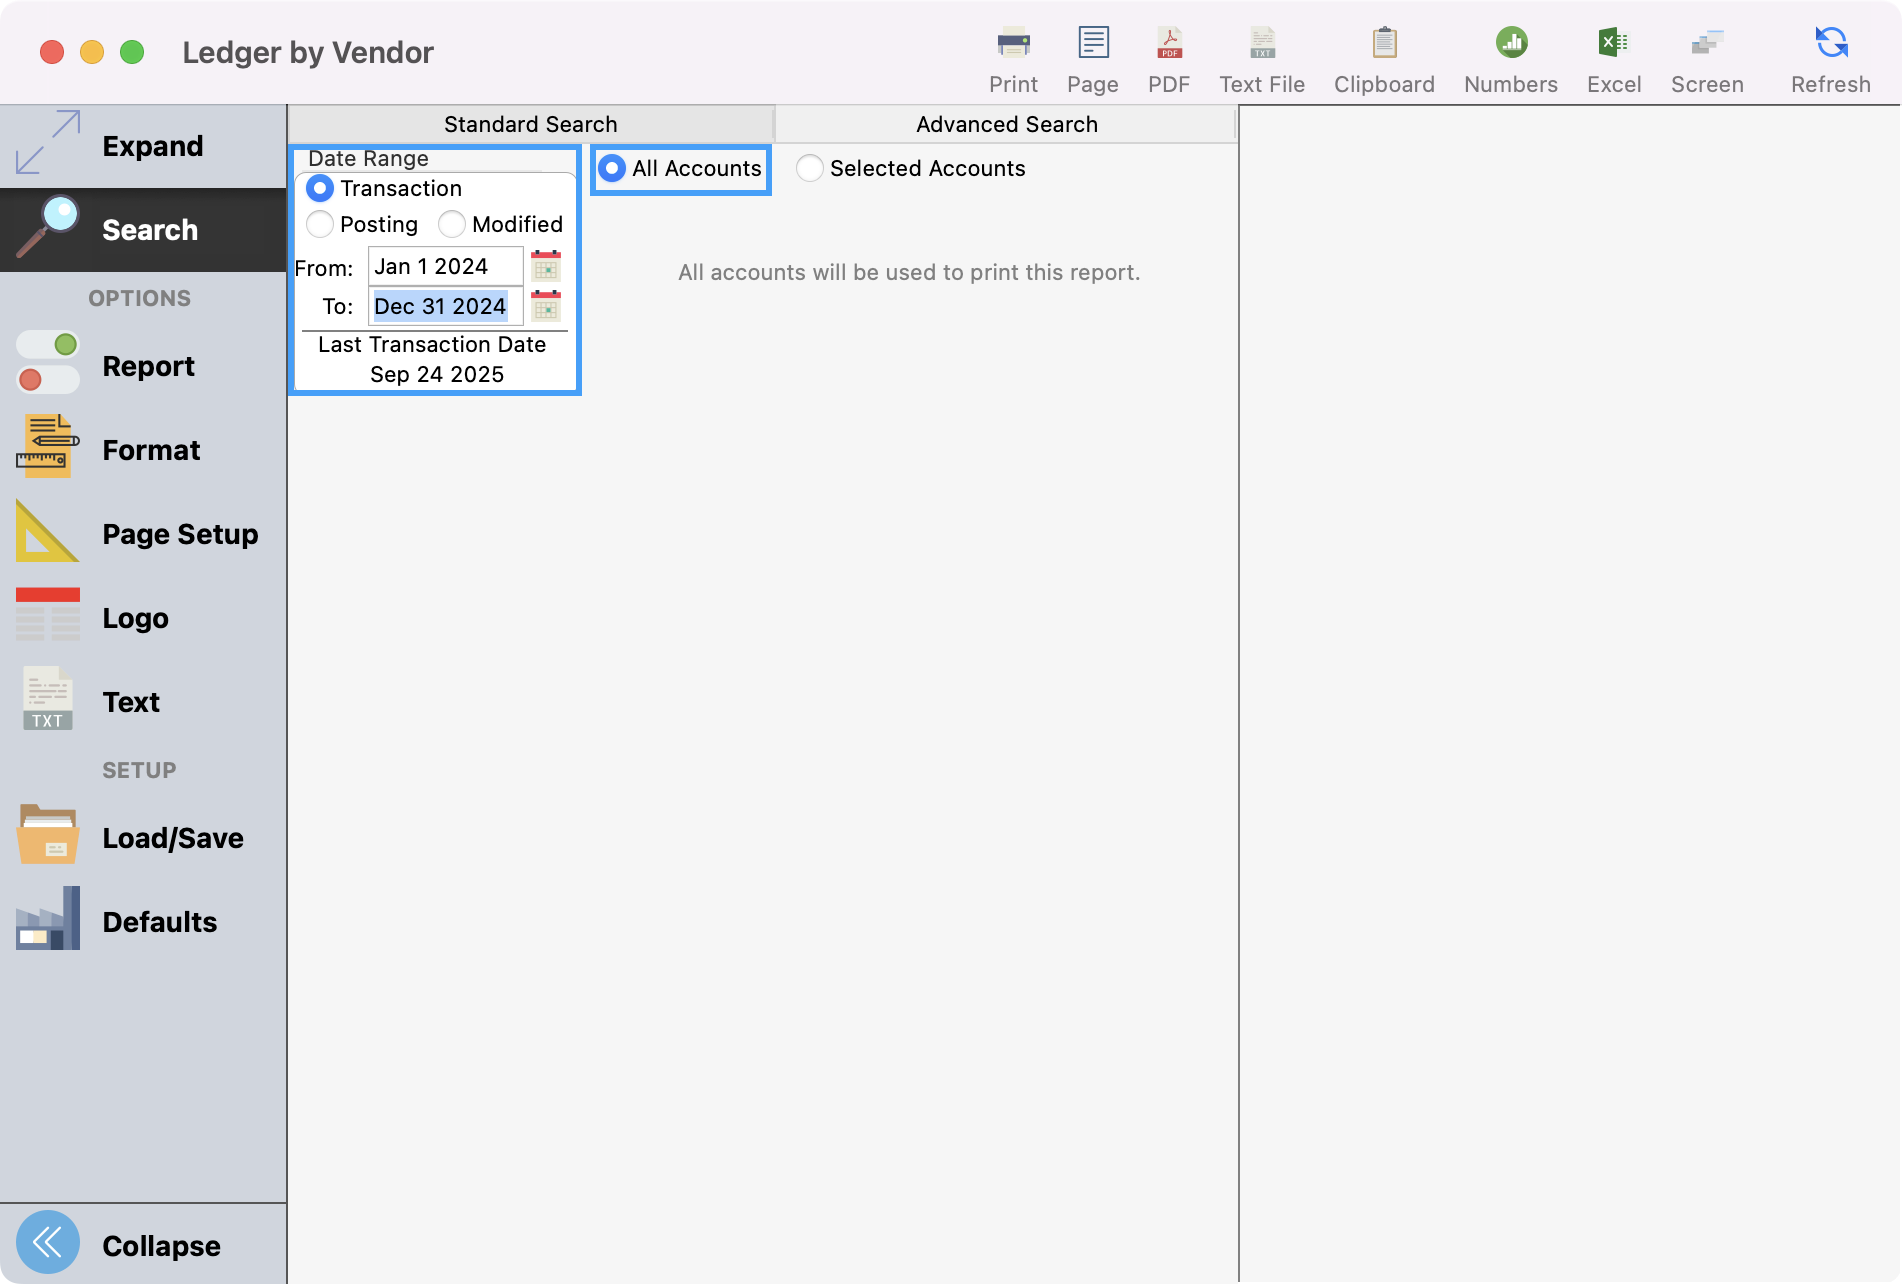
-
Set up your search to use the Transaction date for the calendar year (January 1 to December 31) and select the radio button for All Accounts.
-
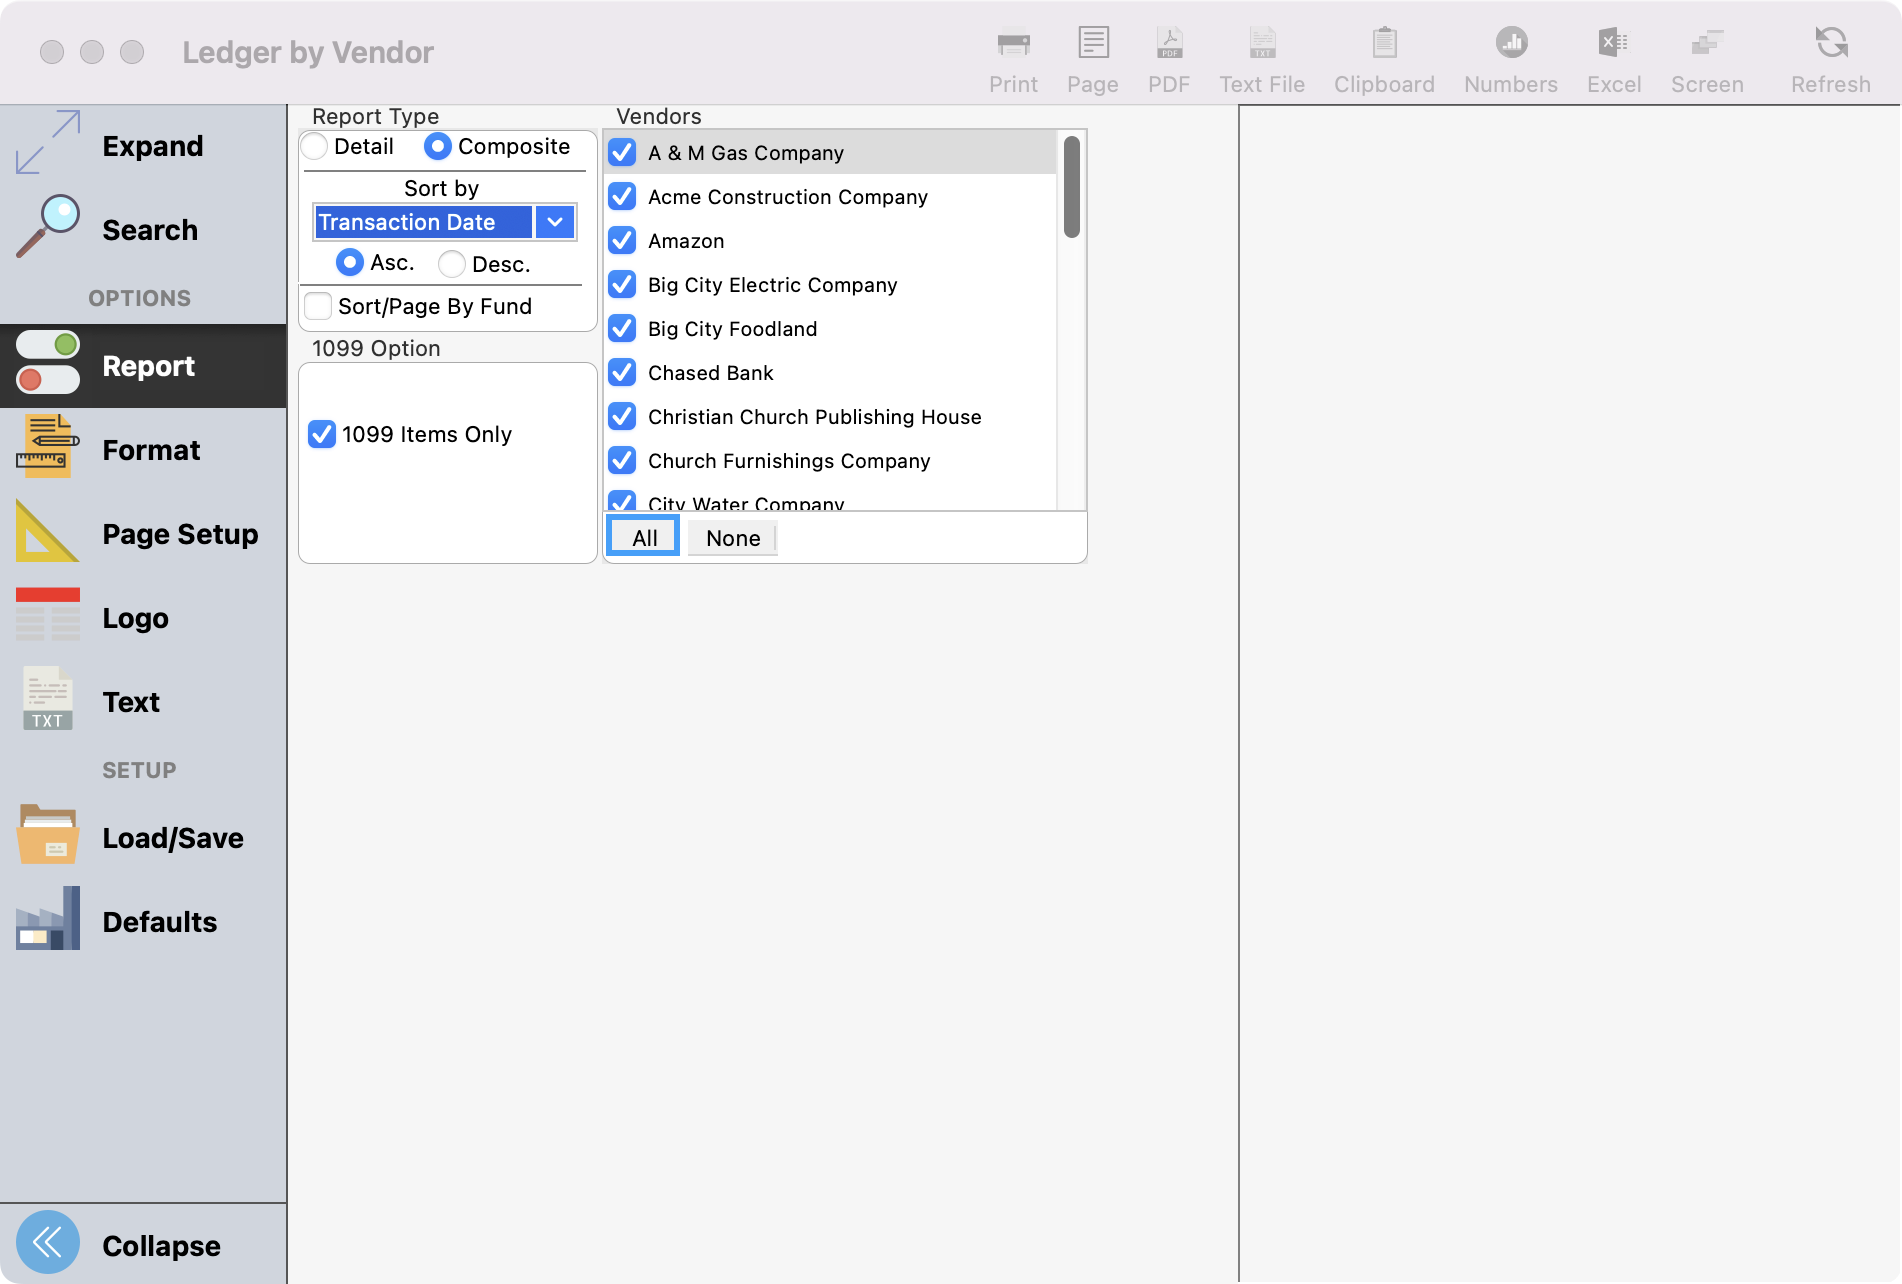
Click Reports under Options in the left-hand sidebar and click All under Vendors.
Our set up will only print those that have 1099 payments for the transaction date range you entered so you do not need to select individual vendors unless that is your preference.
-
Choose the Composite Report Type.
-
Put a check in the 1099 Items Only checkbox.

-
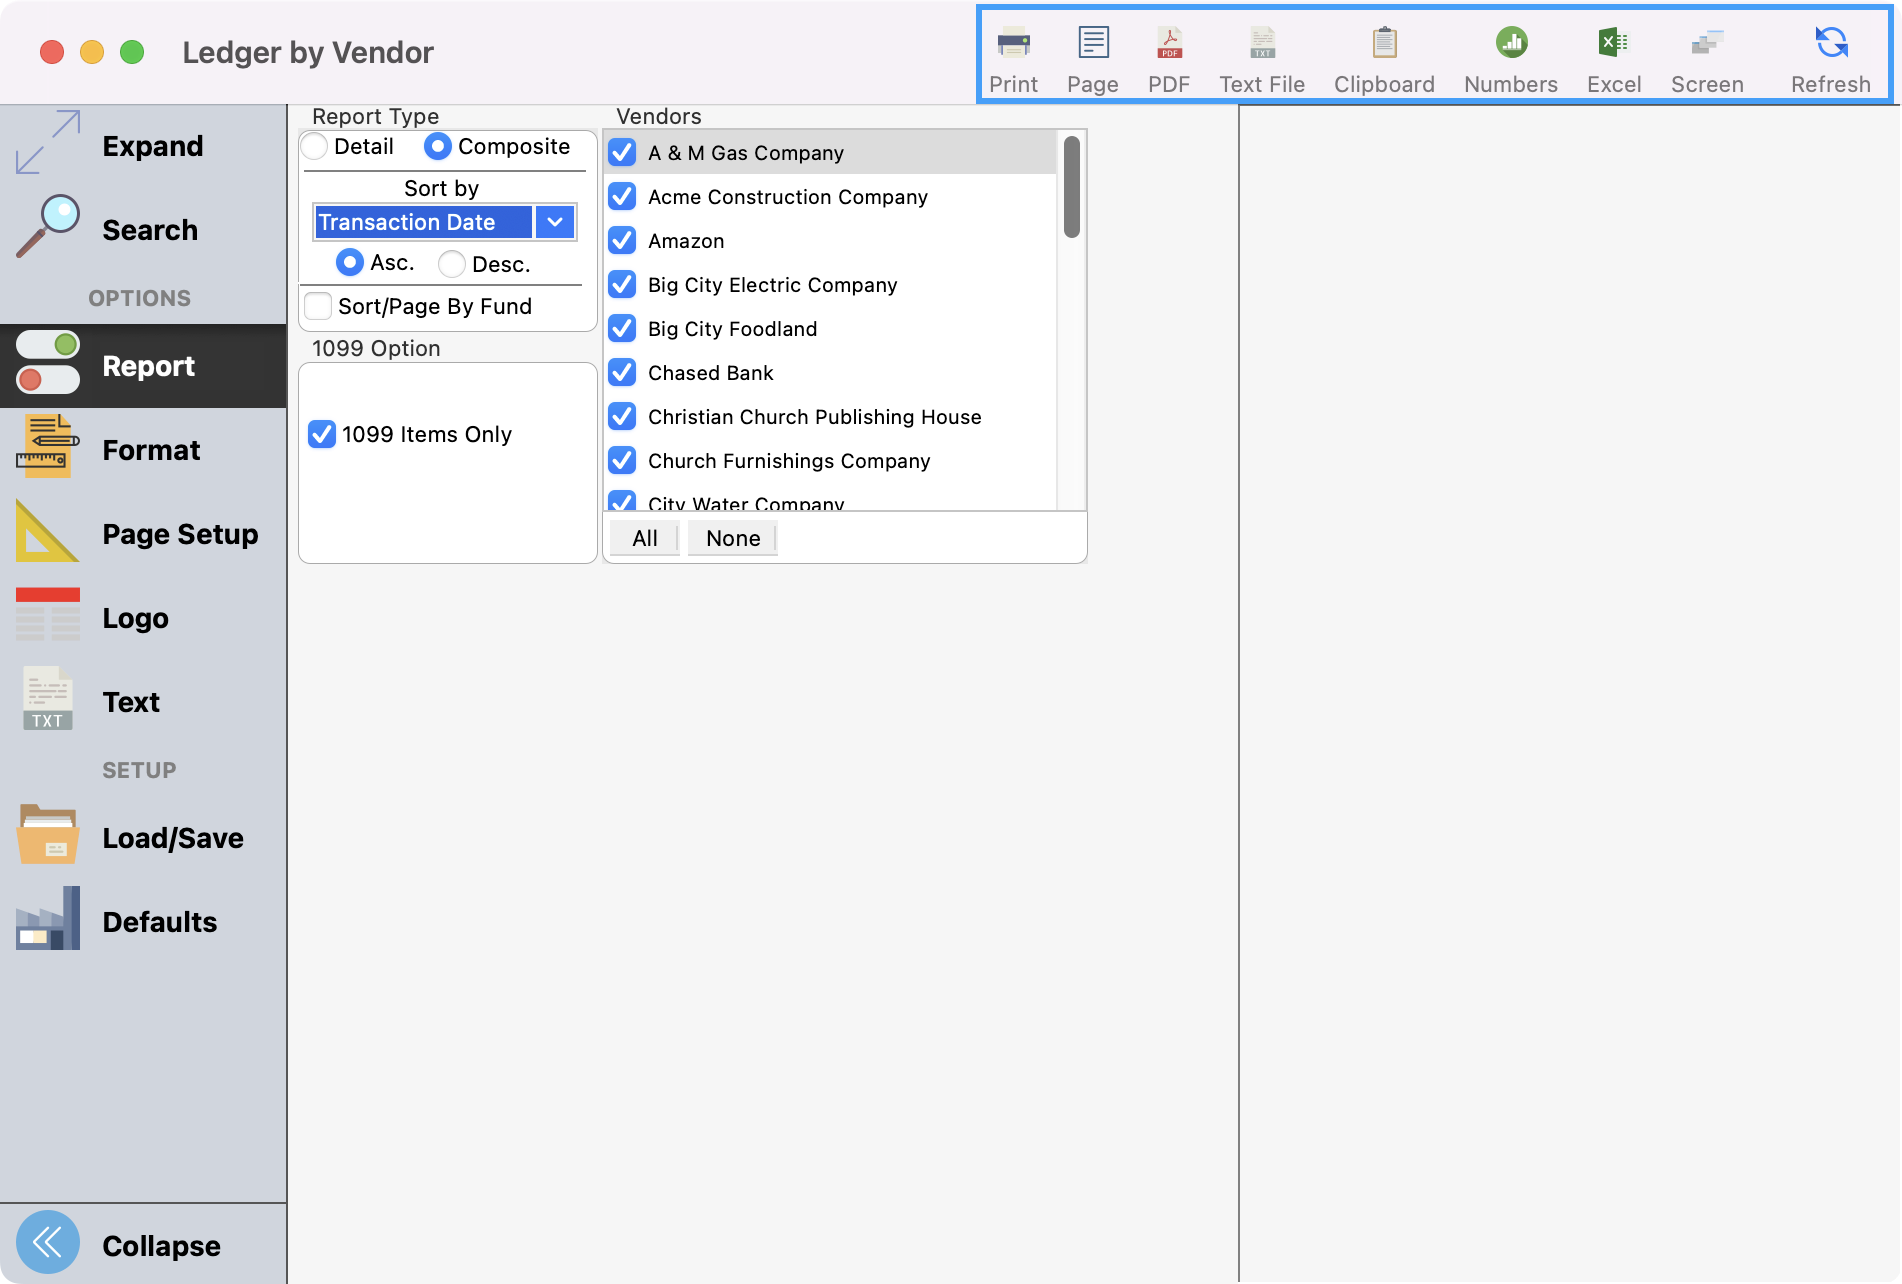
Select how you wish to print the report.
-
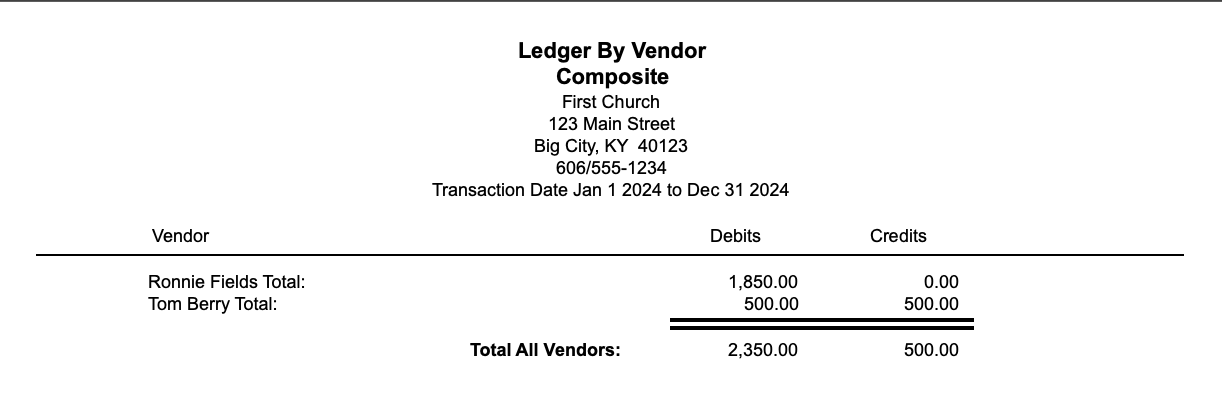
The selected report will look something like this:
I need to enter health insurance monies on an employee's W-2, how do I do it?
Click to expand...
There are times users need to add imputed income onto their payroll record, so it shows up on the W2 properly. This would be things such as insurance or fair rental value of parsonage lived in. They do not get a check for it, and it does not post to the user's ledger. It is just for reporting purposes.
Please seek the assistance of a CPA if you have any questions about adding imputed income to your W-2/W-3 forms.
Steps to Add Imputed Income
-
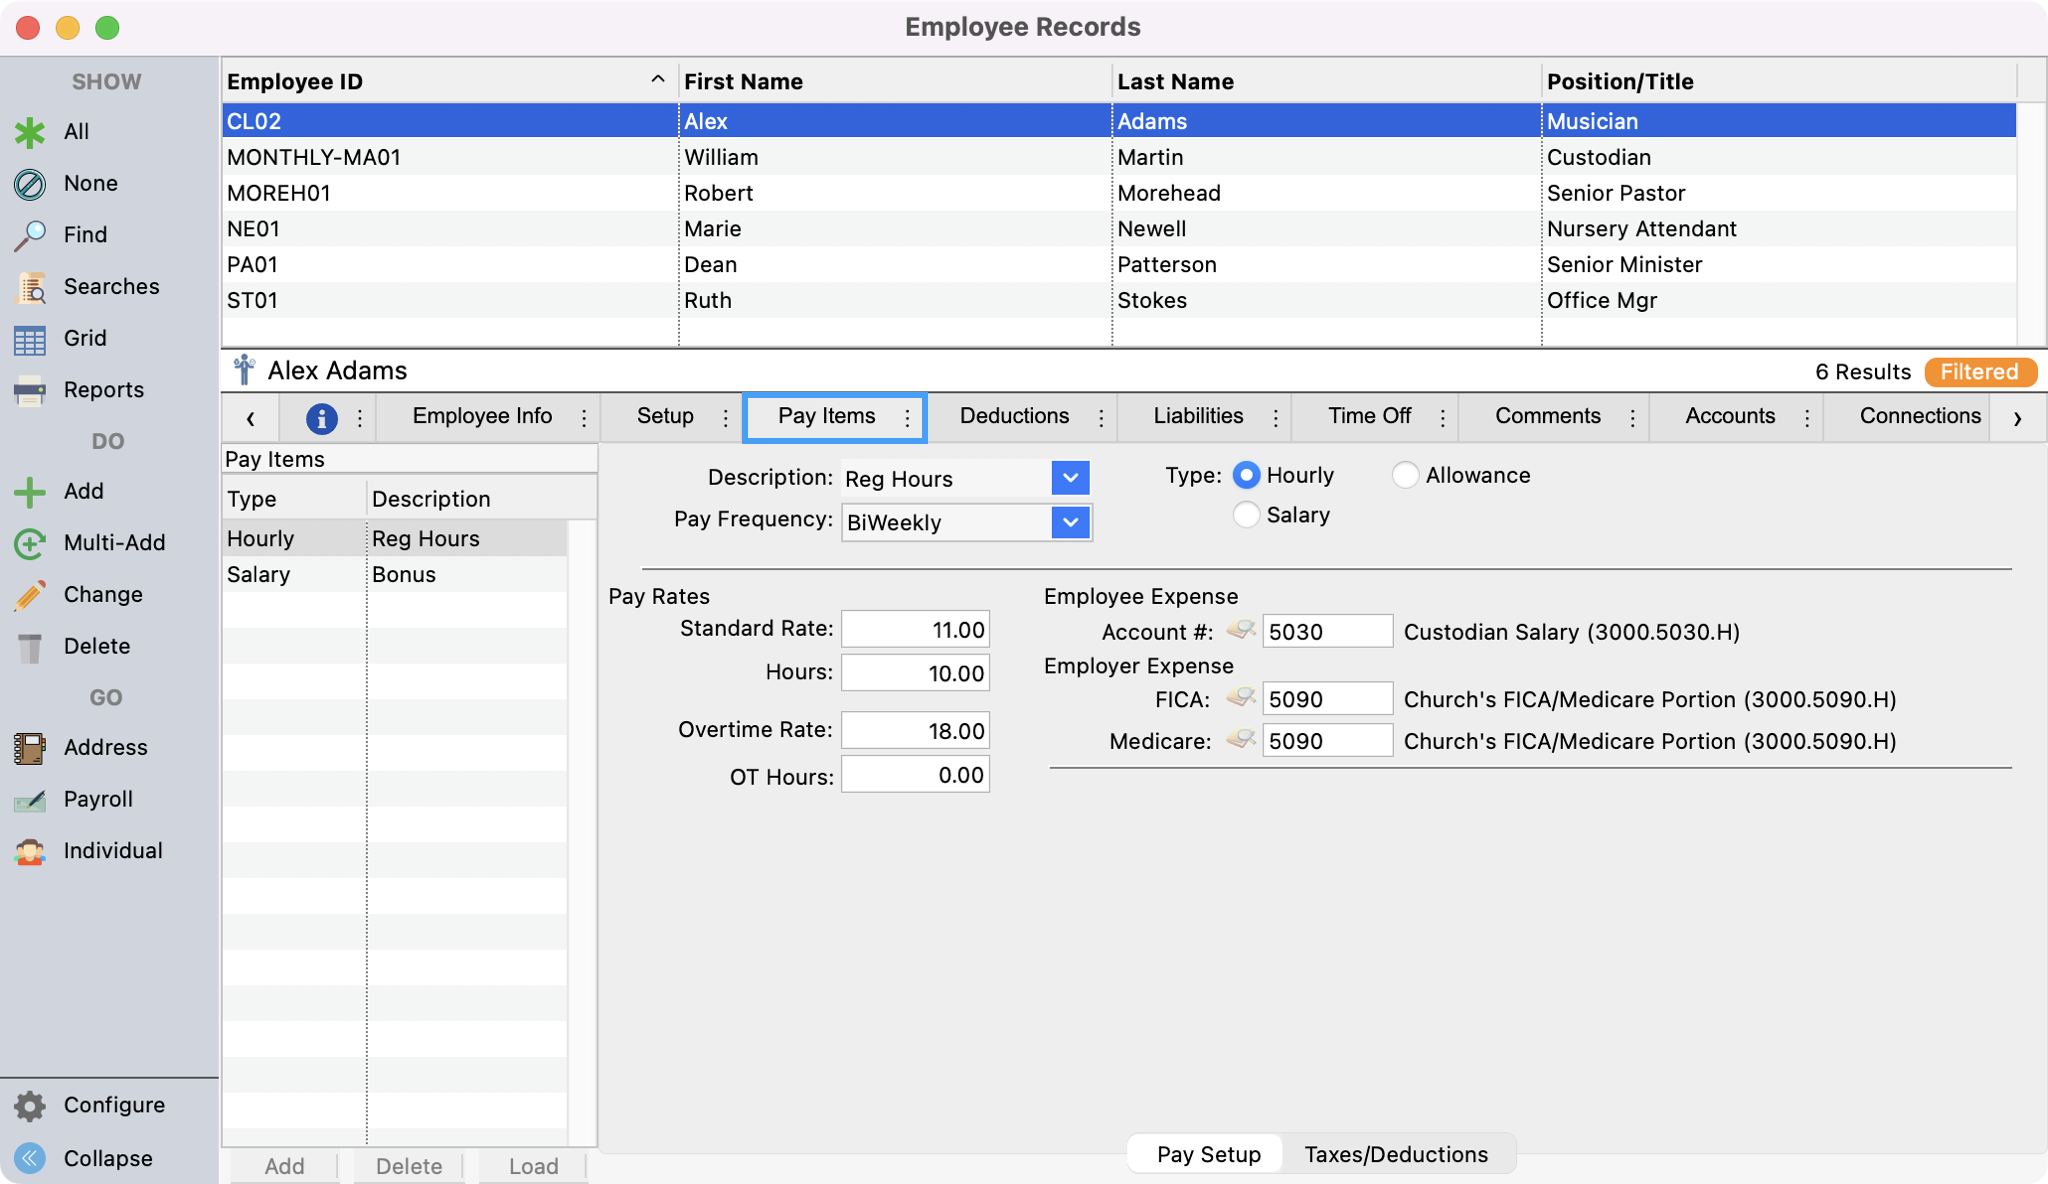
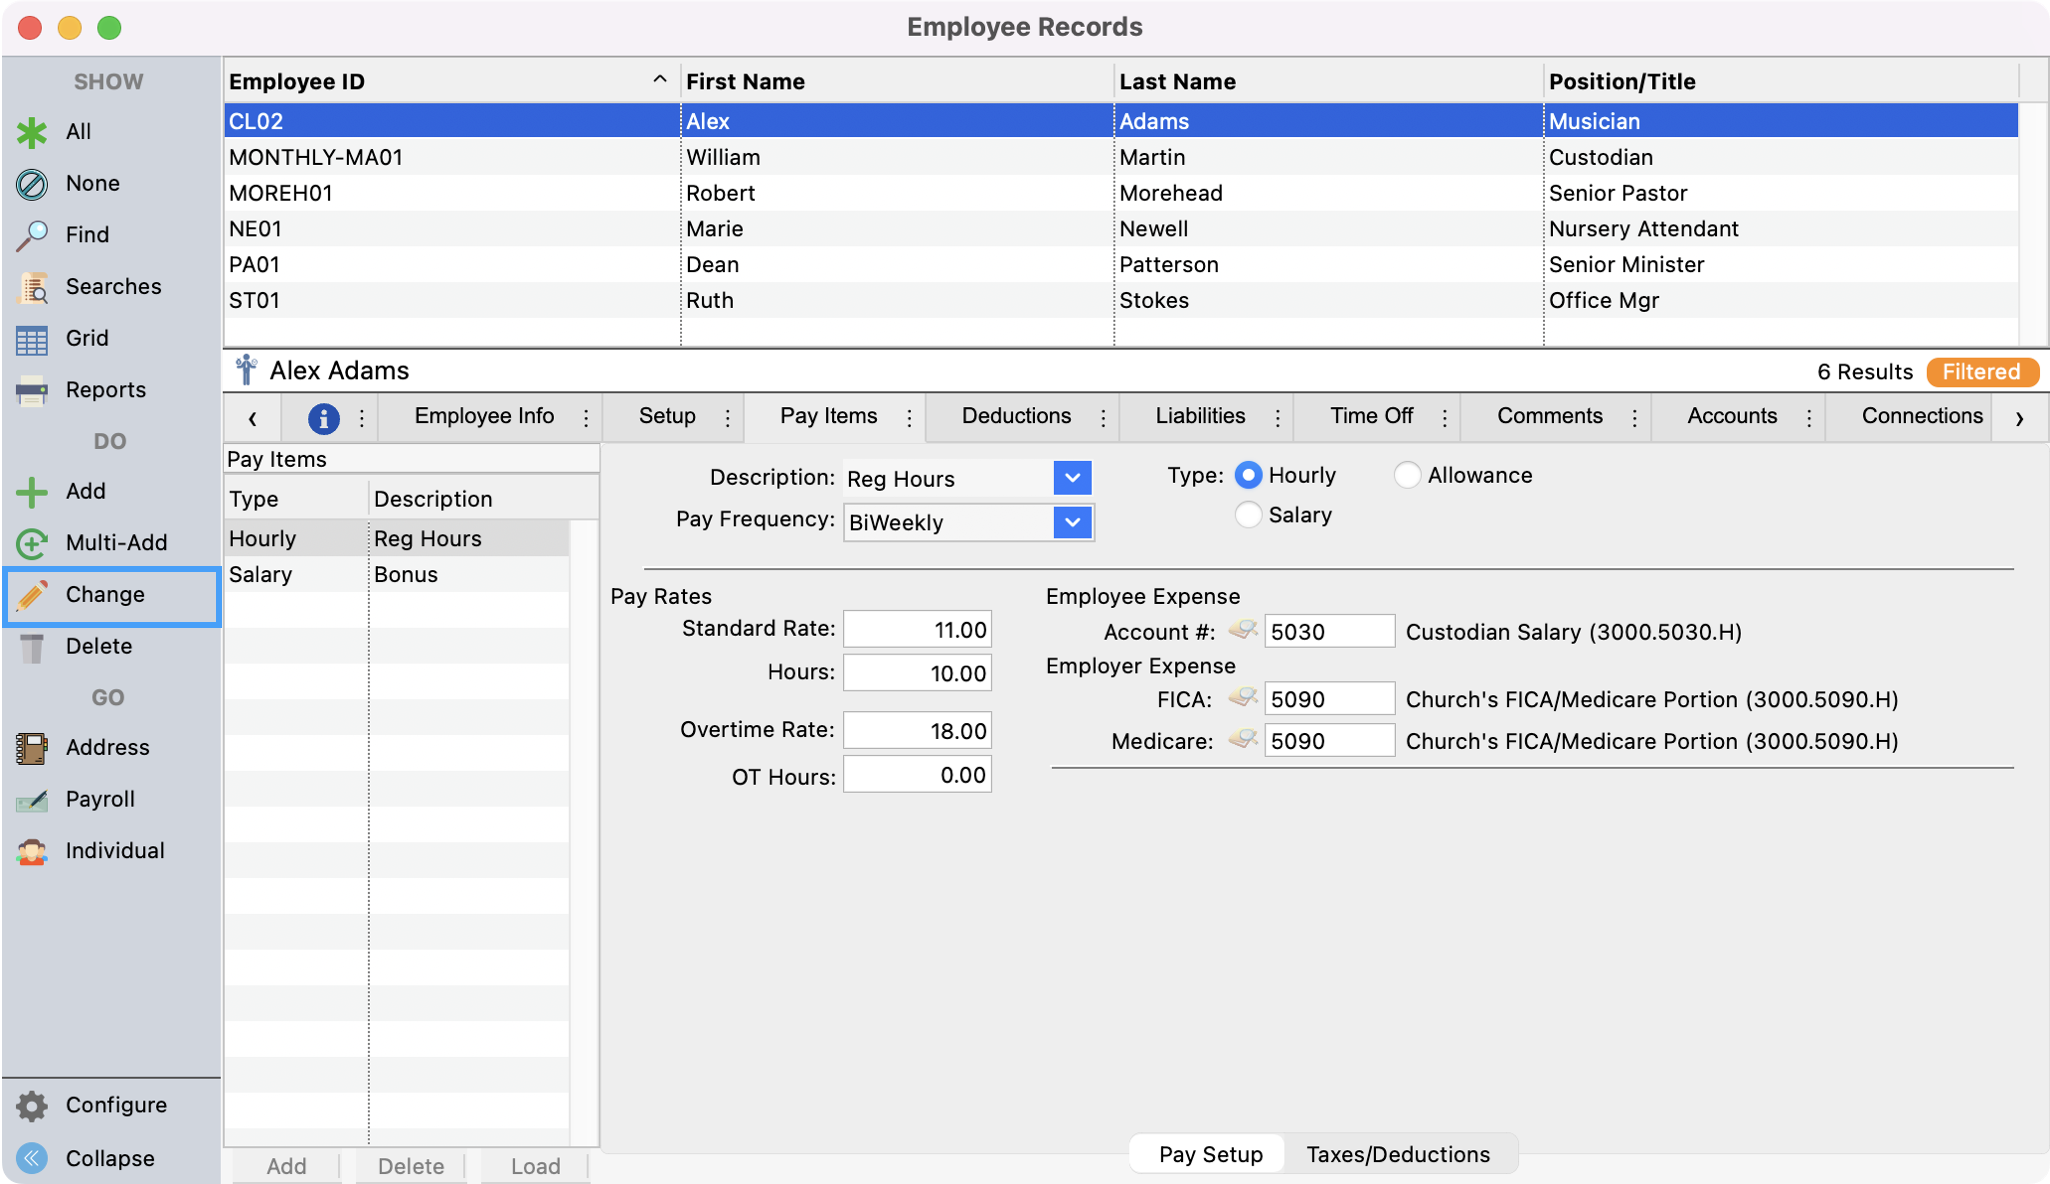
Open Employee Records (Program → Payroll → Employee Records)
-
Find the employee's record, click to highlight their record, and click Pay Items.
-
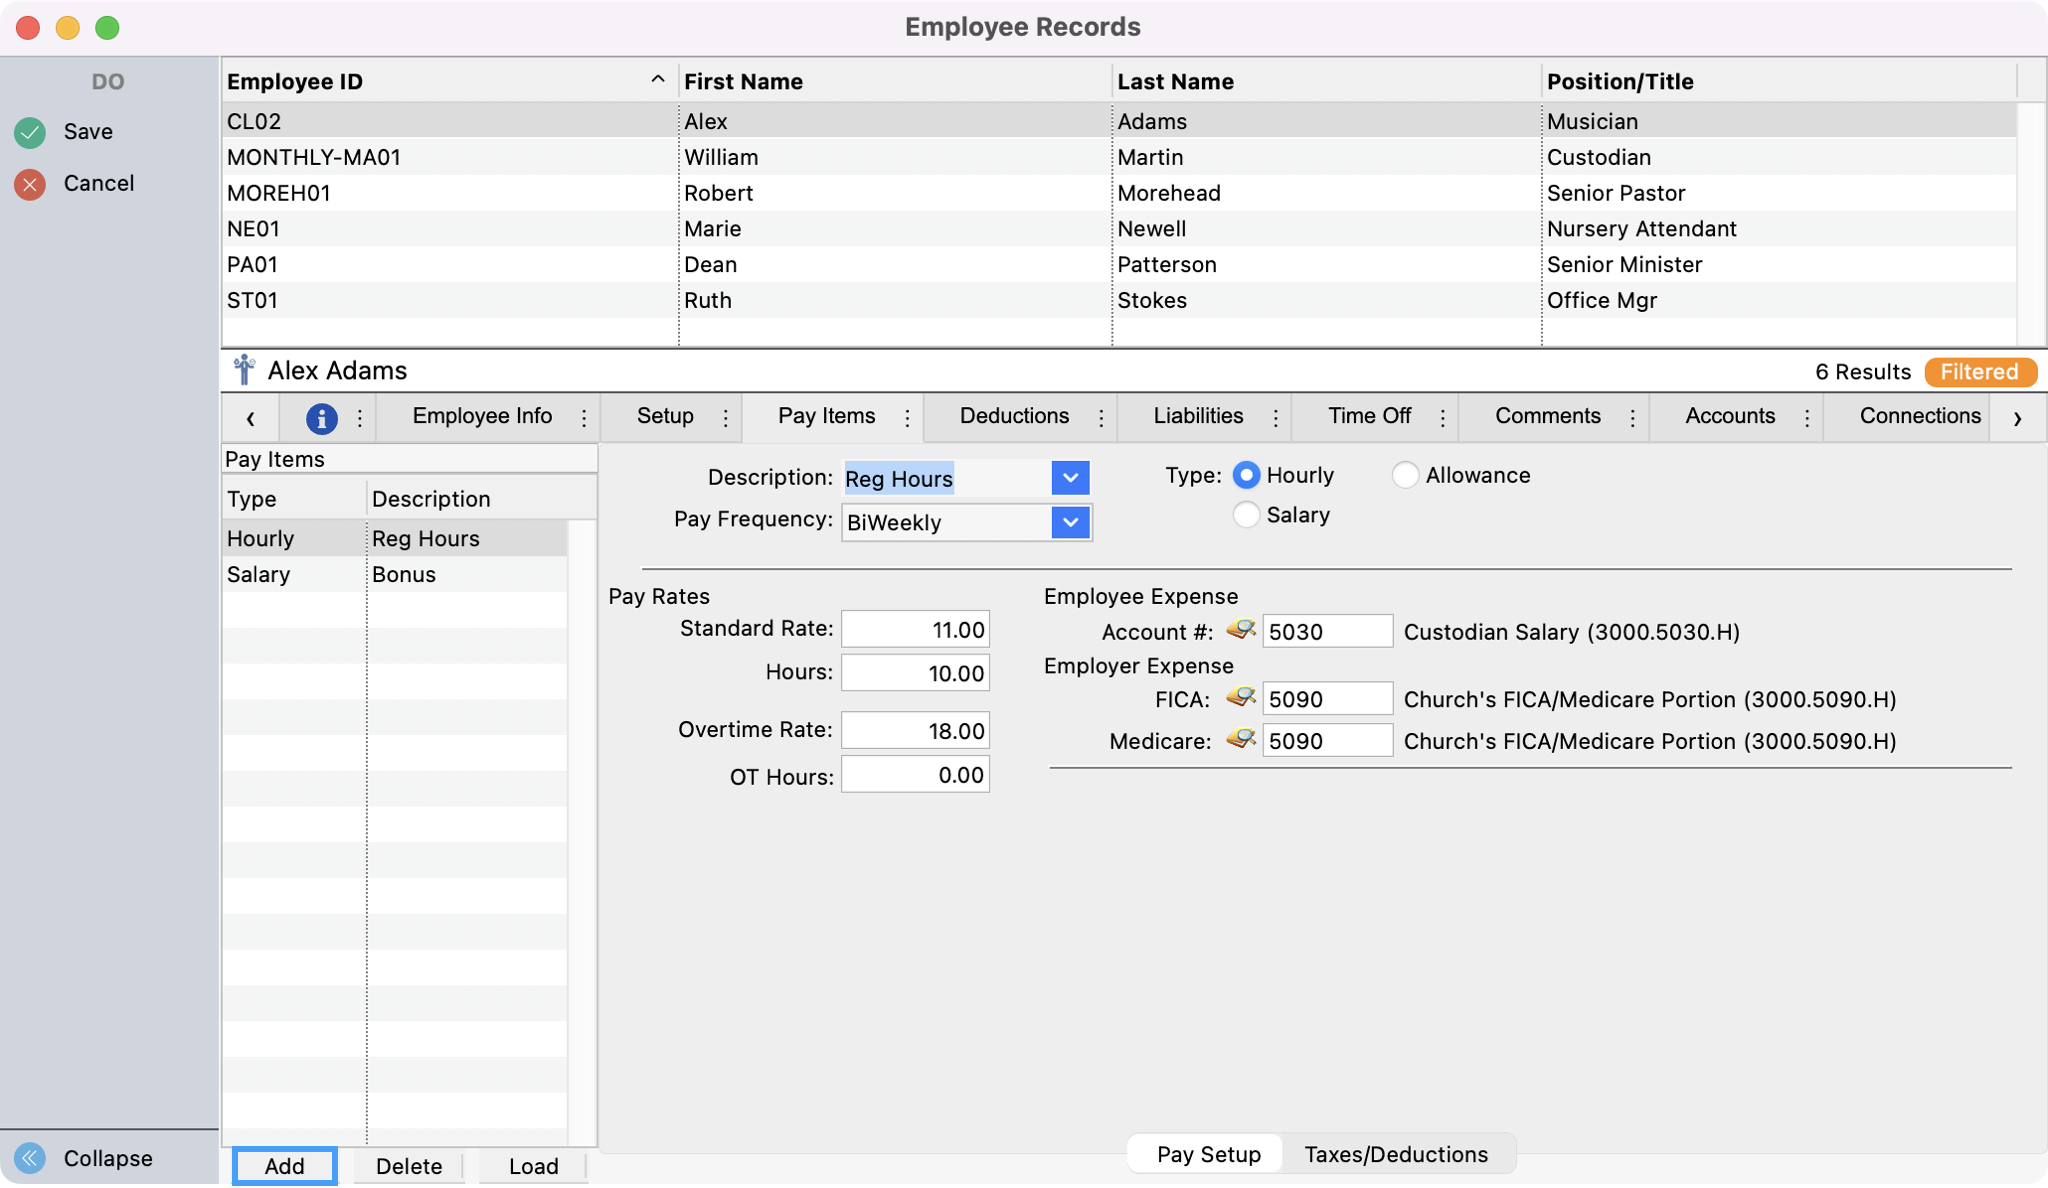
Click Change from the left sidebar and then Add in the bottom left of the Pay Items tab window.
-
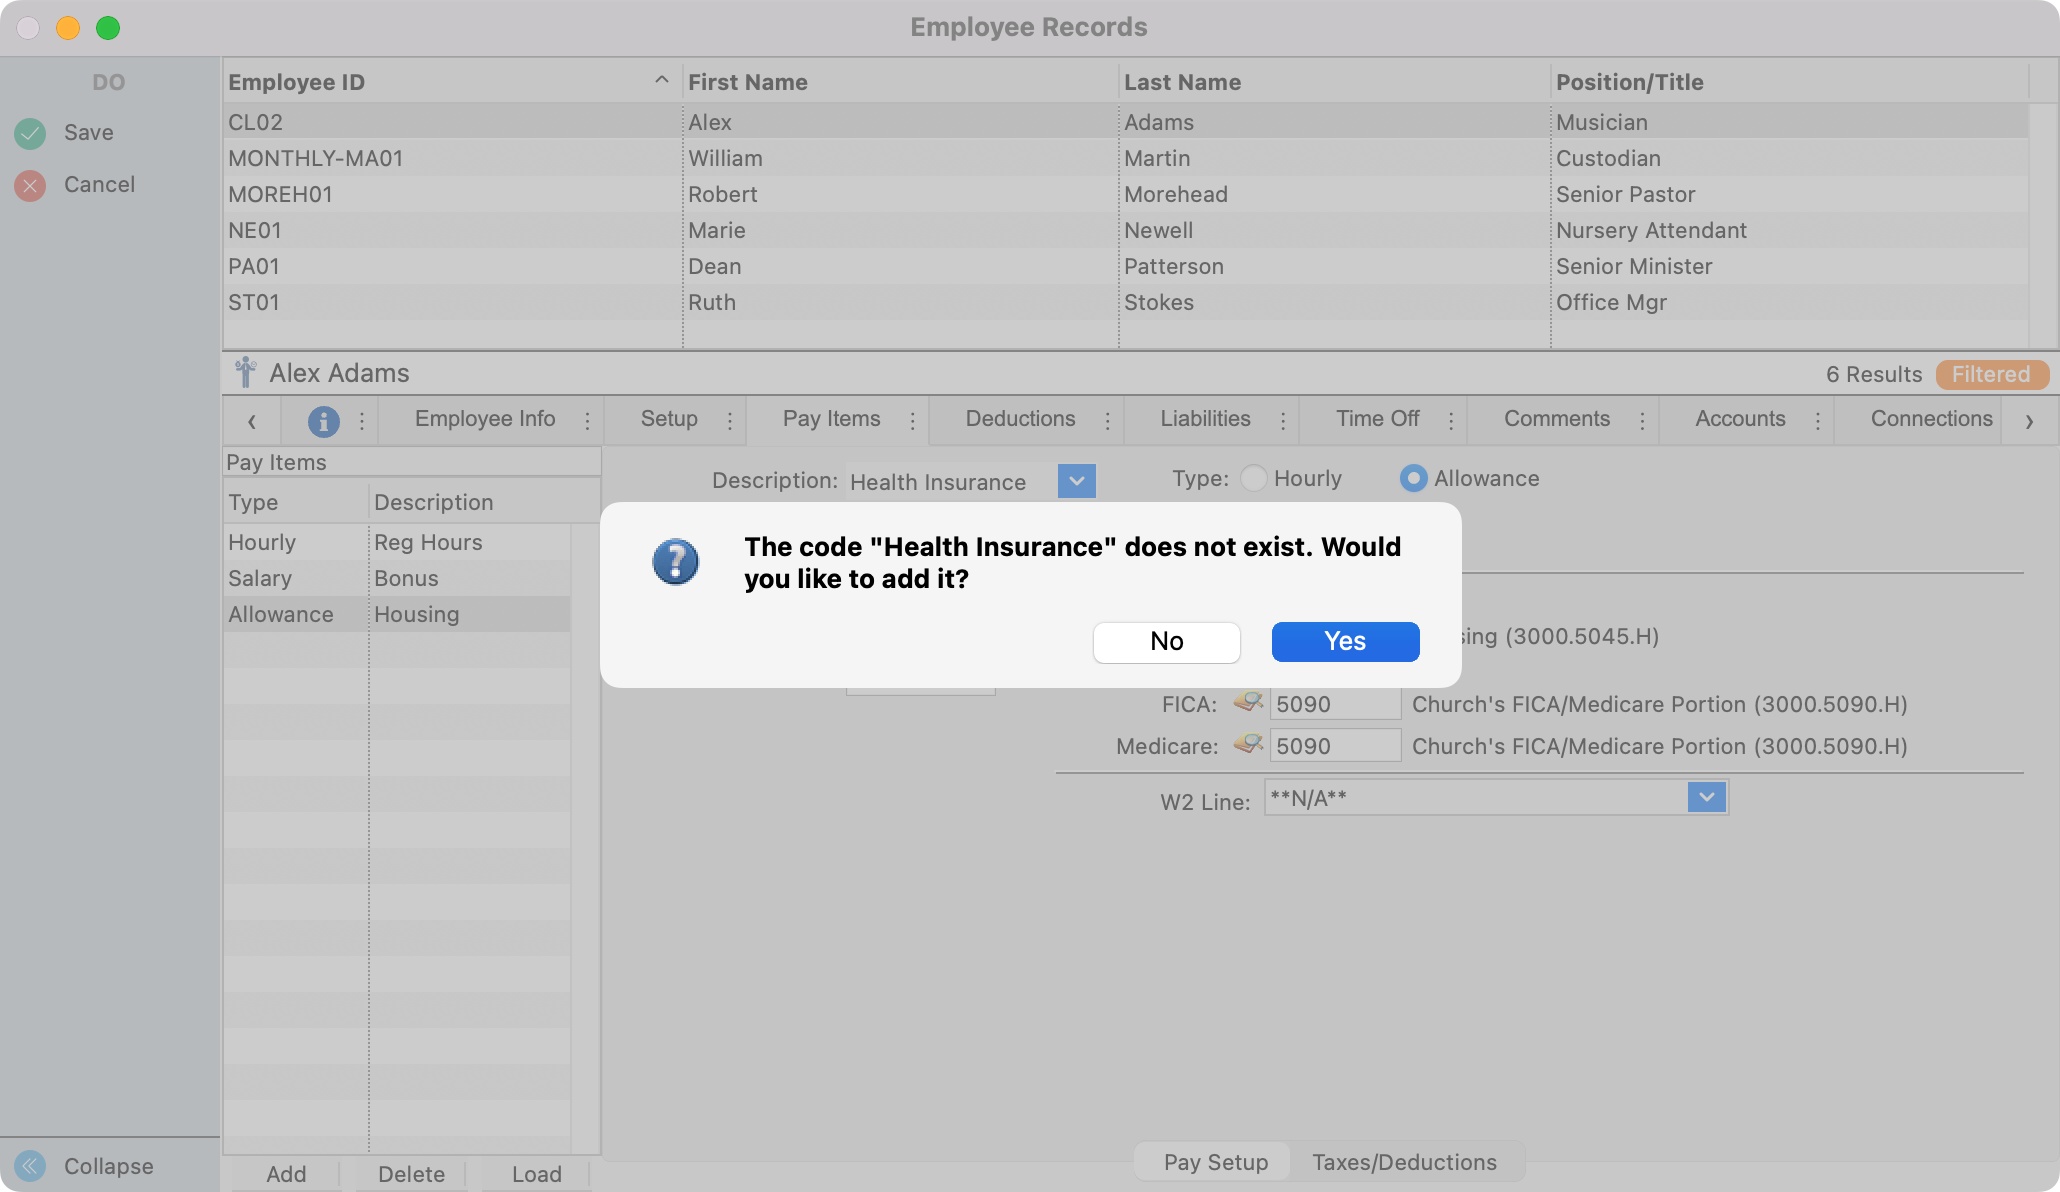
In the Description field select 'Health Insurance' or add it by entering the text Health Insurance, clicking tab, and selecting Yes.

-
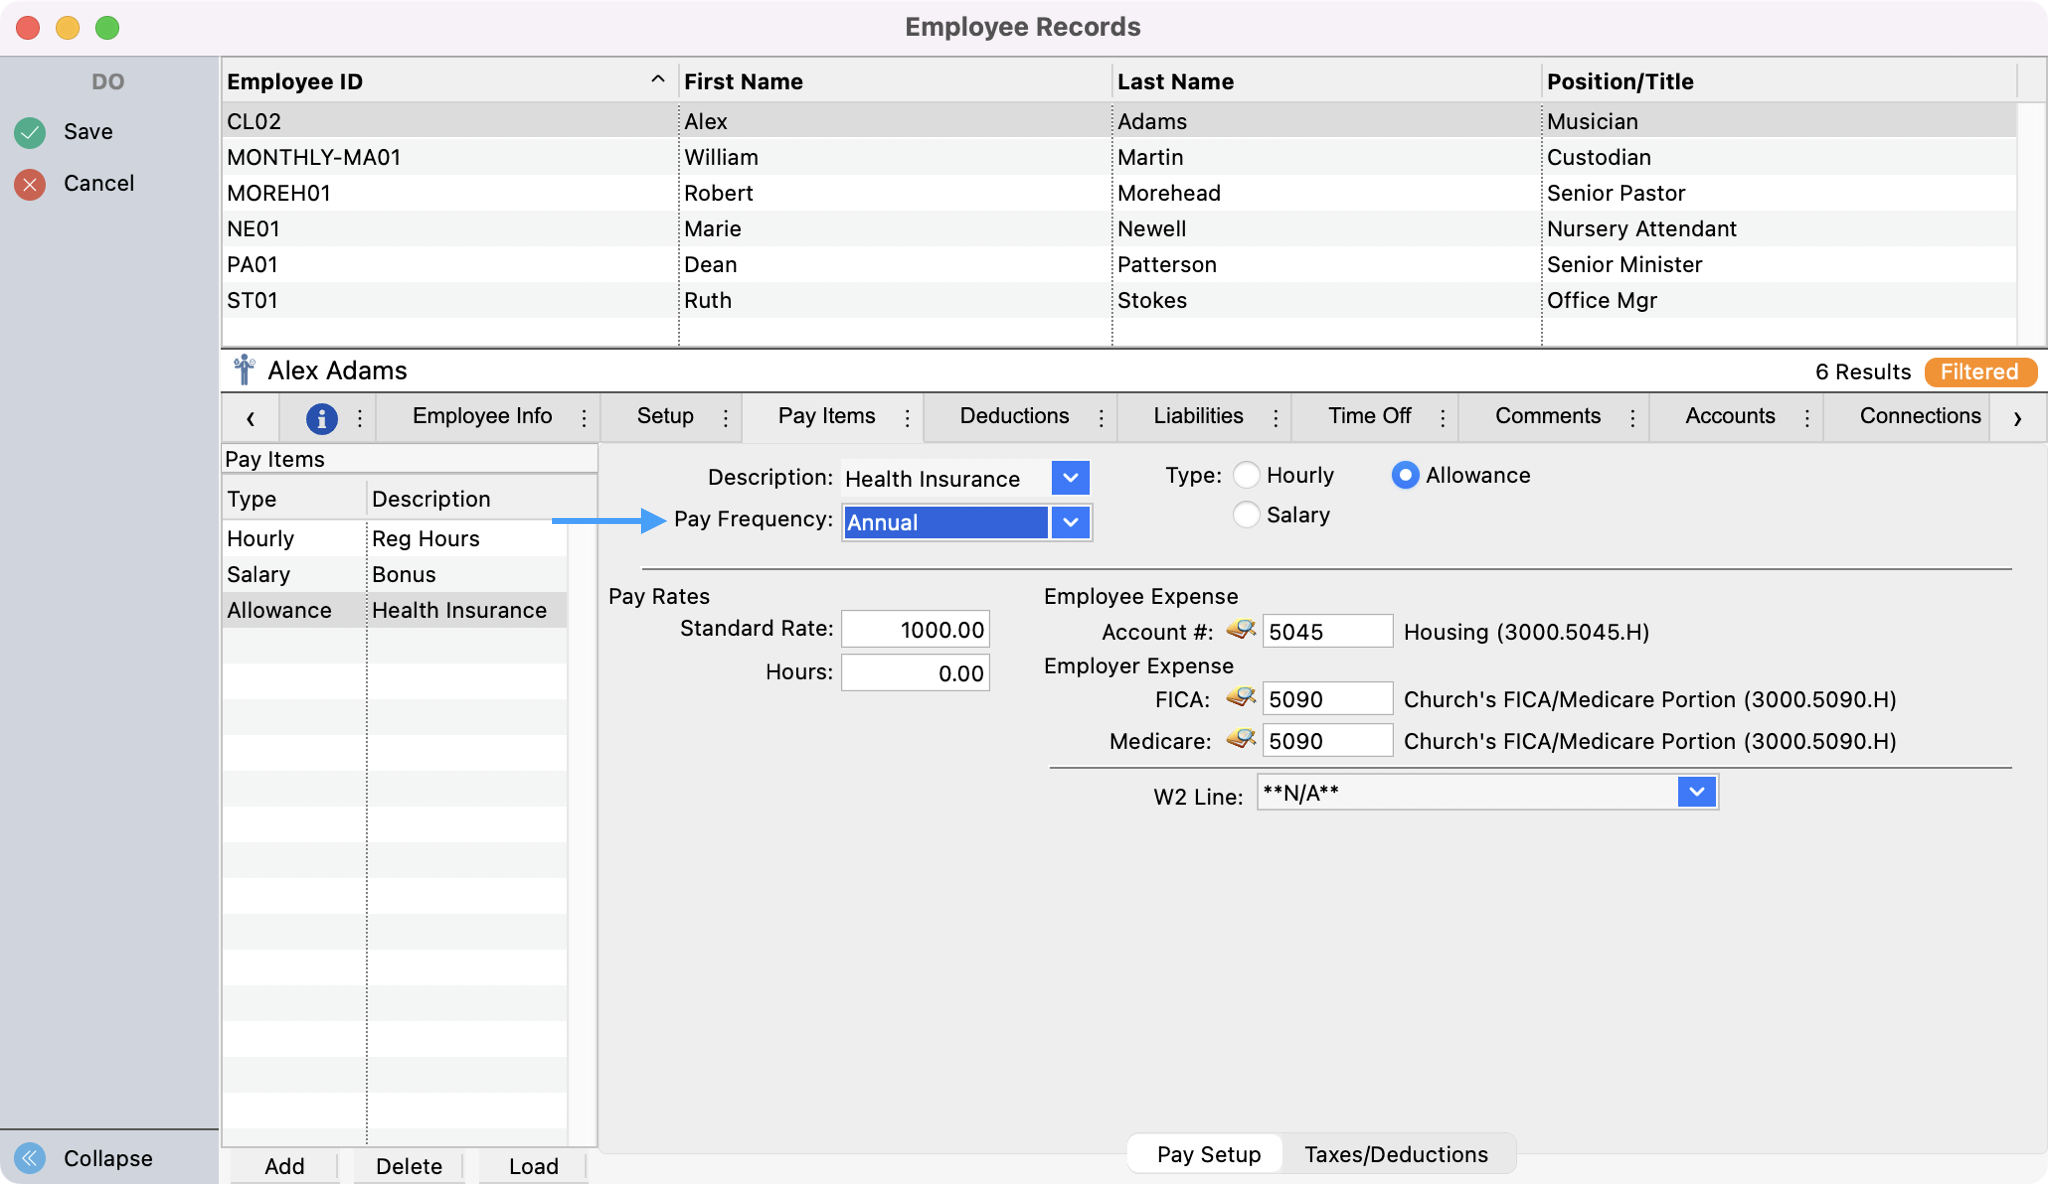
Select a Pay Frequency of Annual.
-
Select the Type, Allowance.
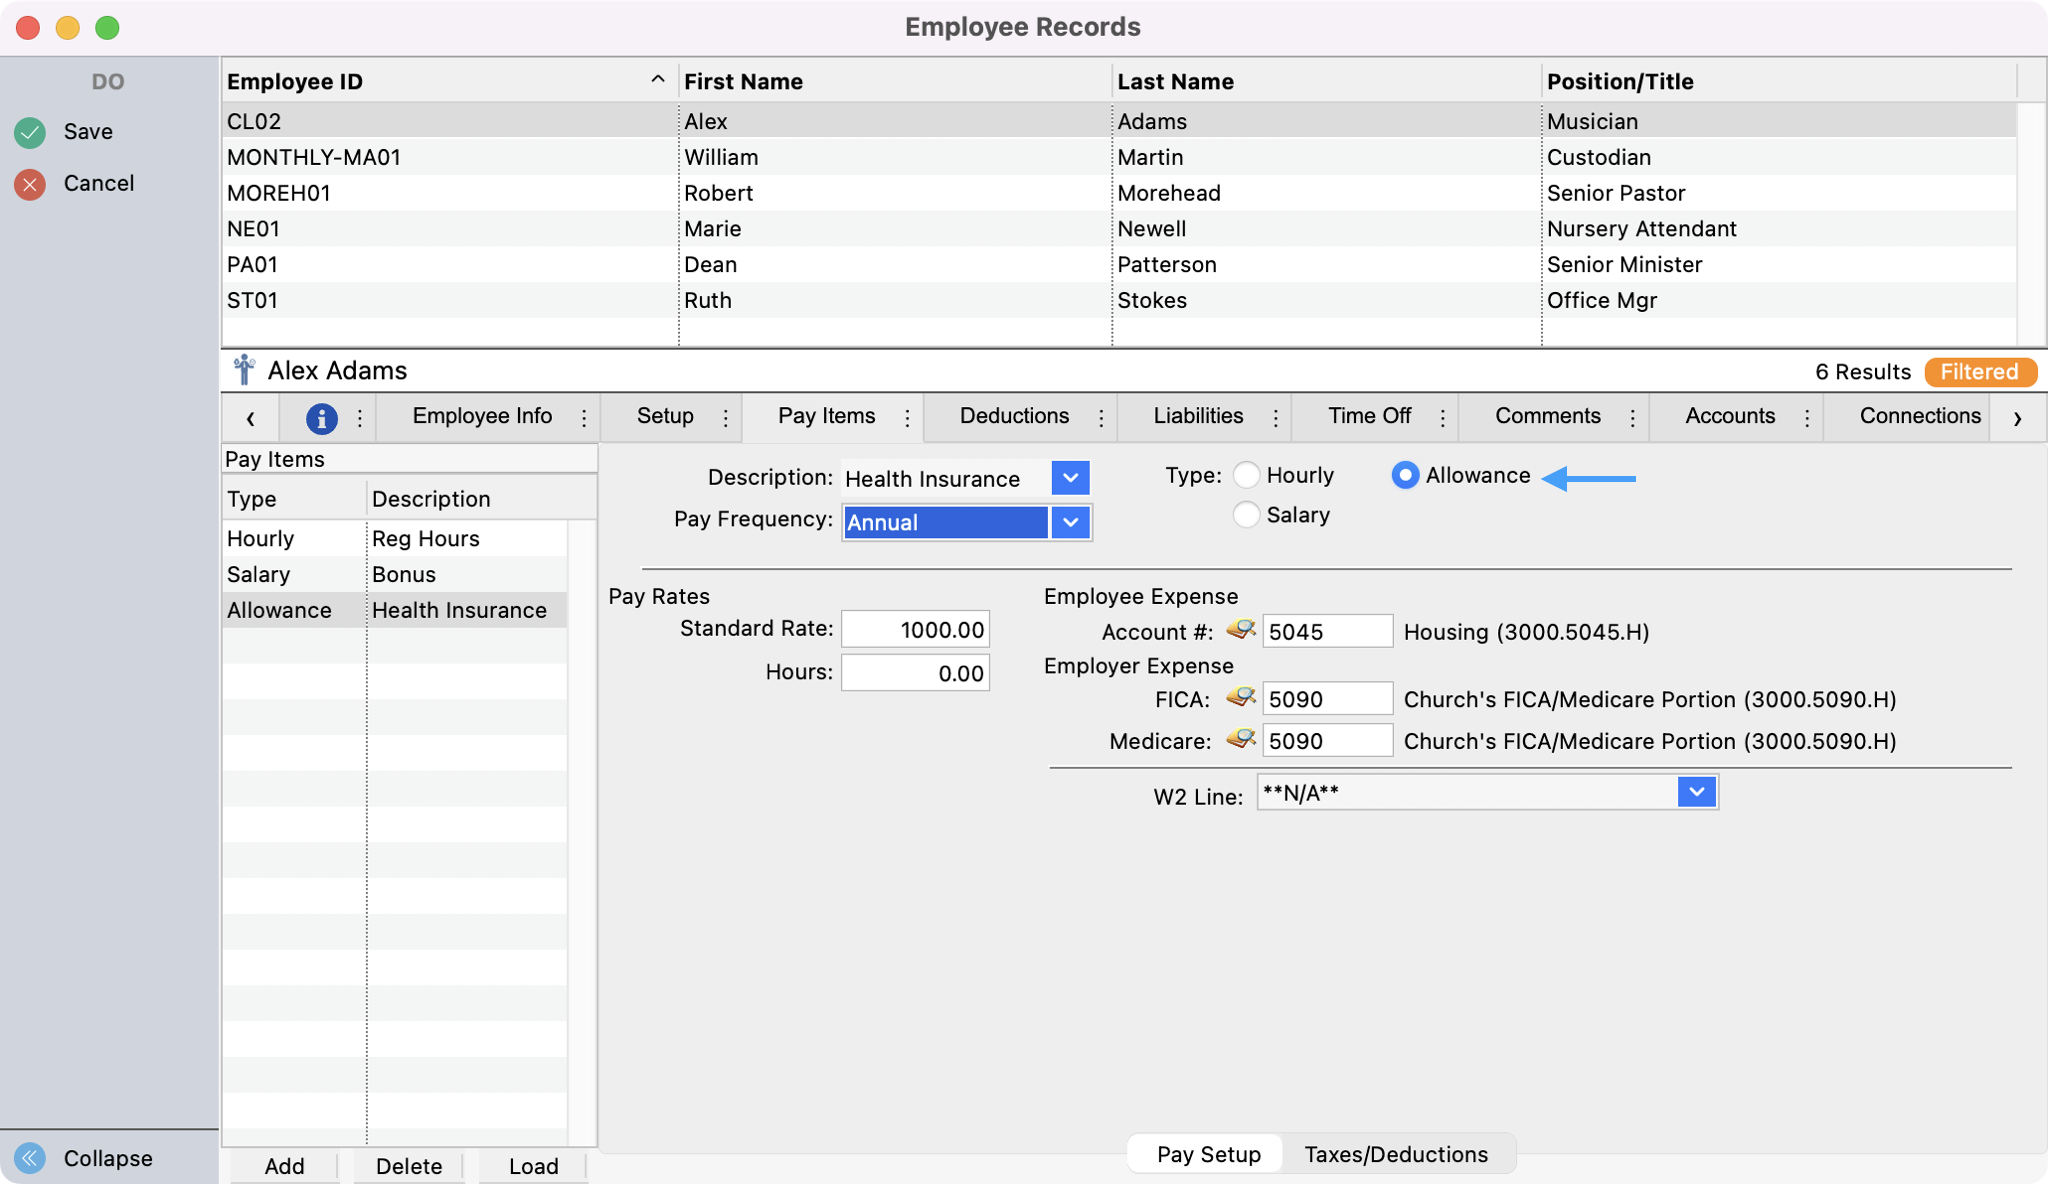
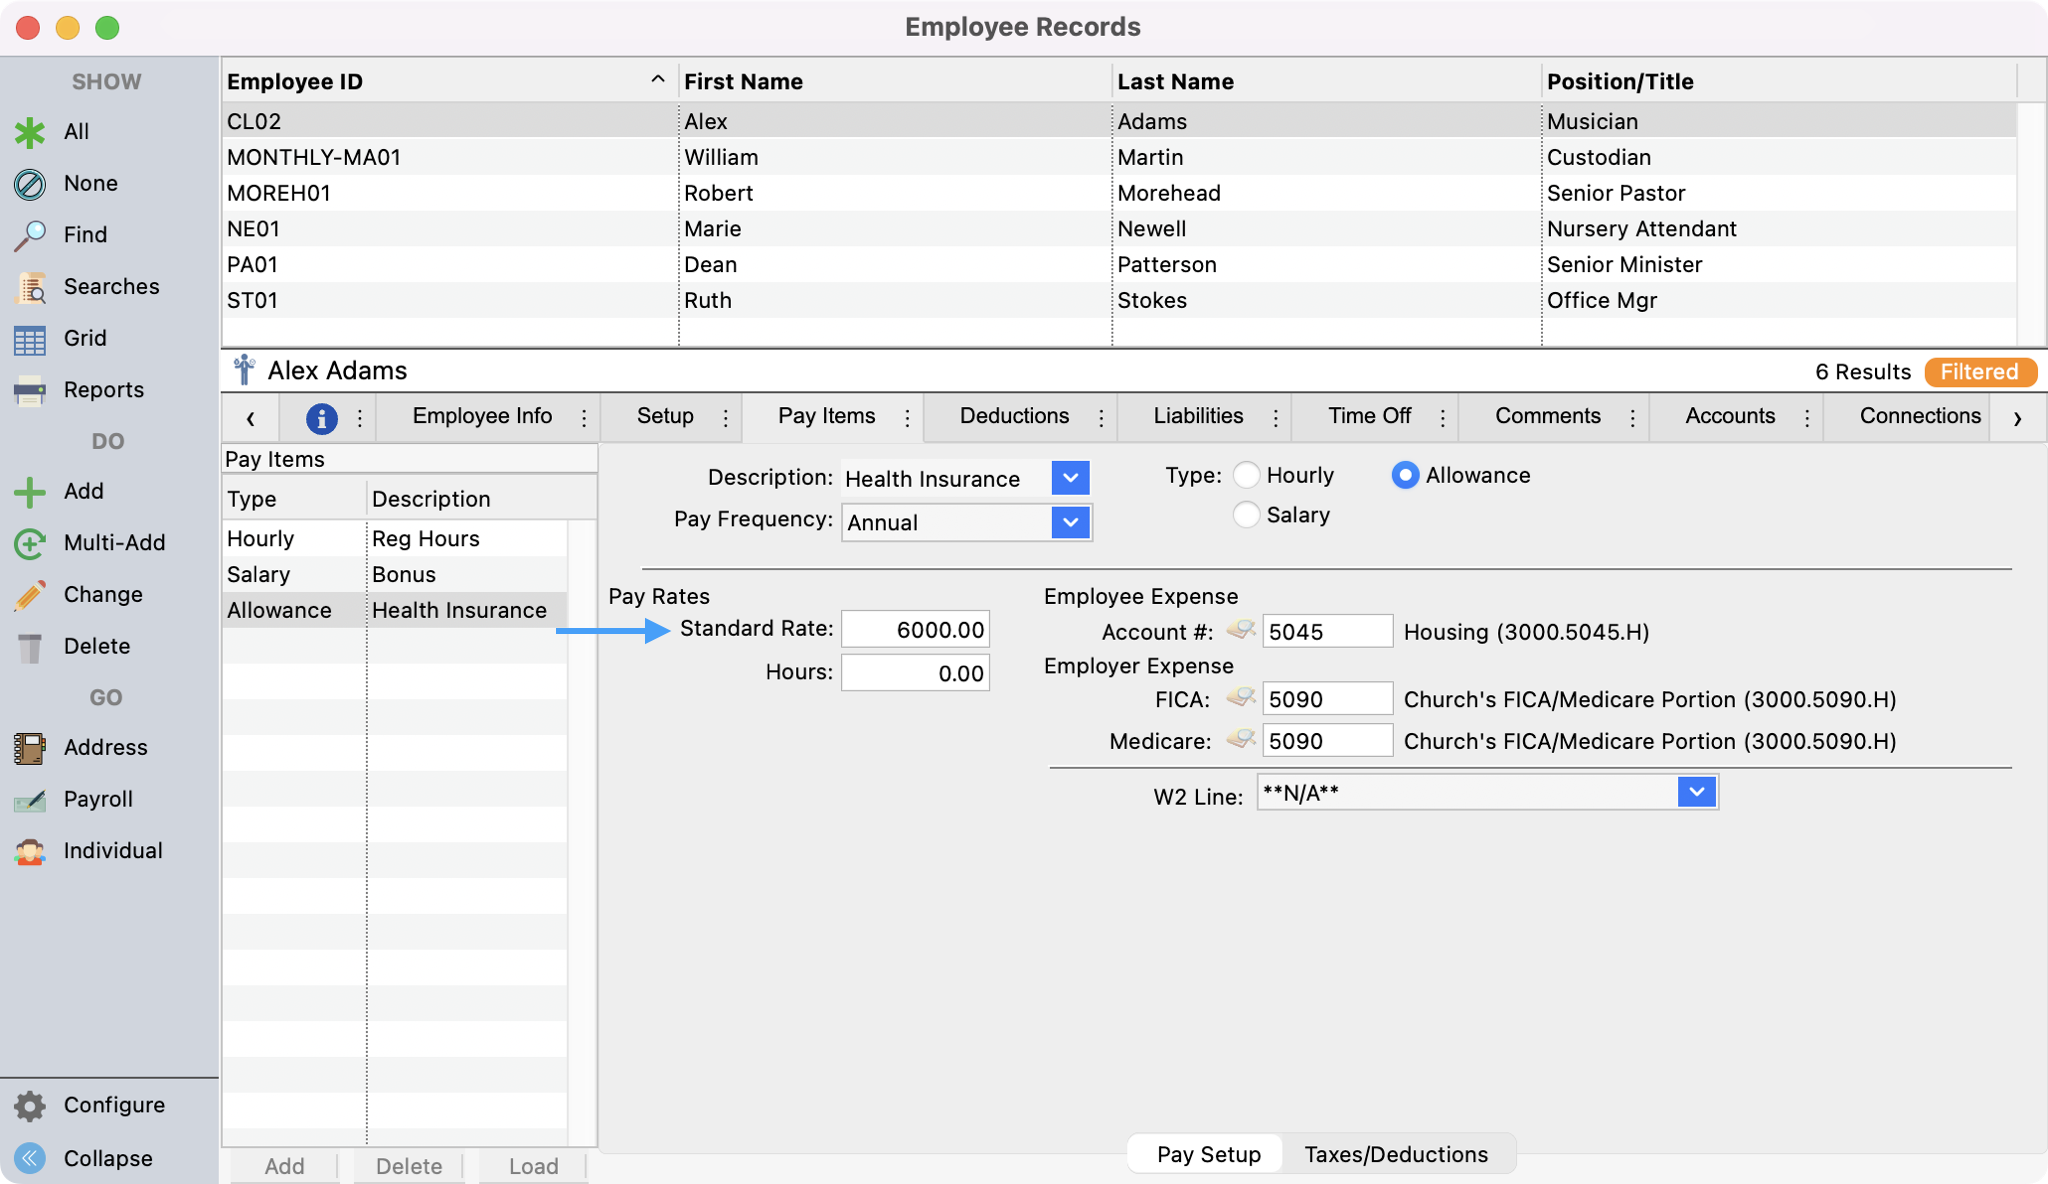
-
Under Pay Rates, enter in the total amount for the health insurance for the year.
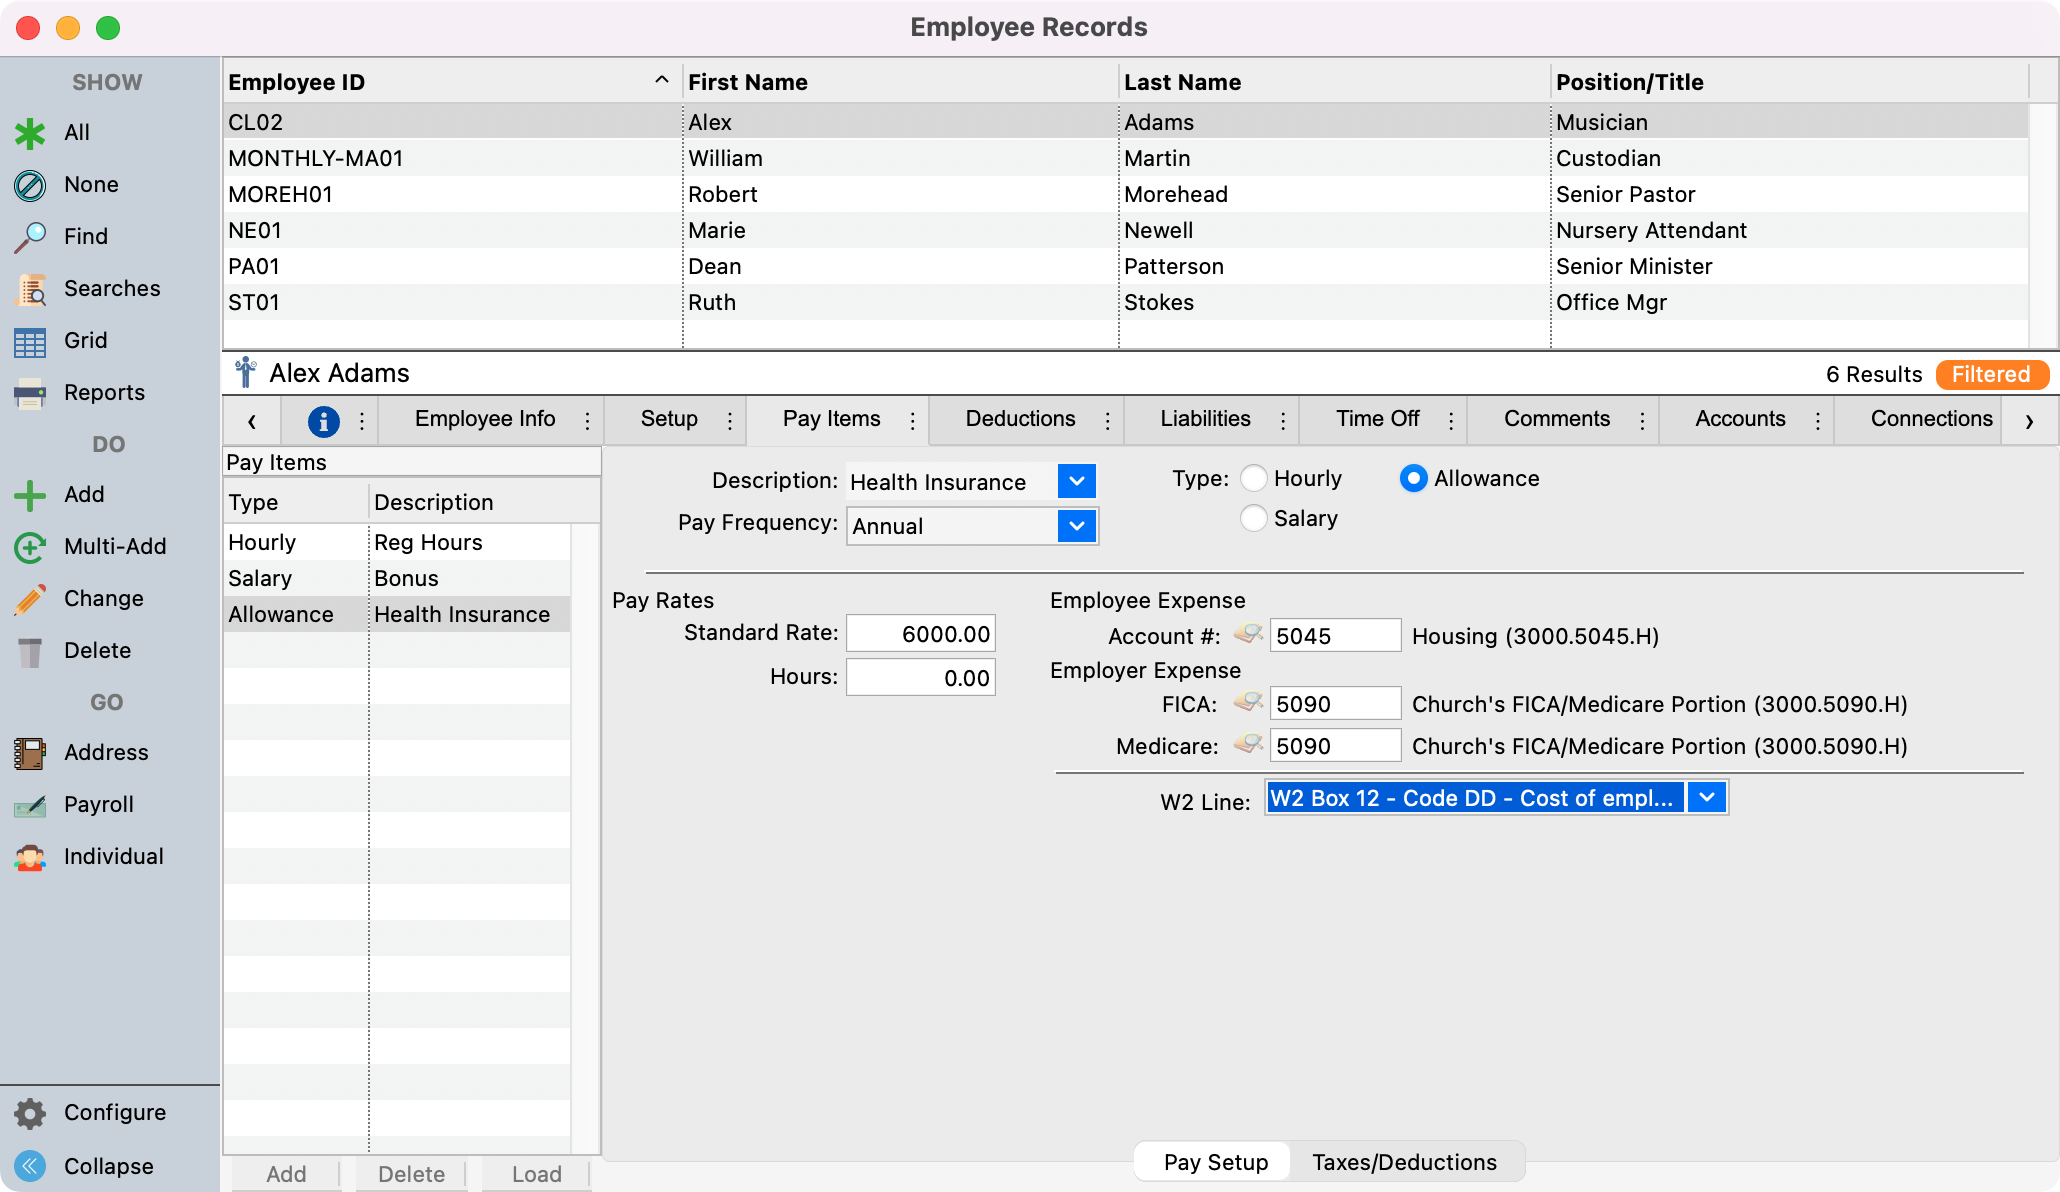
-
Select the appropriate code for the imputed income (in our case we are showing employer sponsored health coverage with is Box 12 - Code DD1 )
-
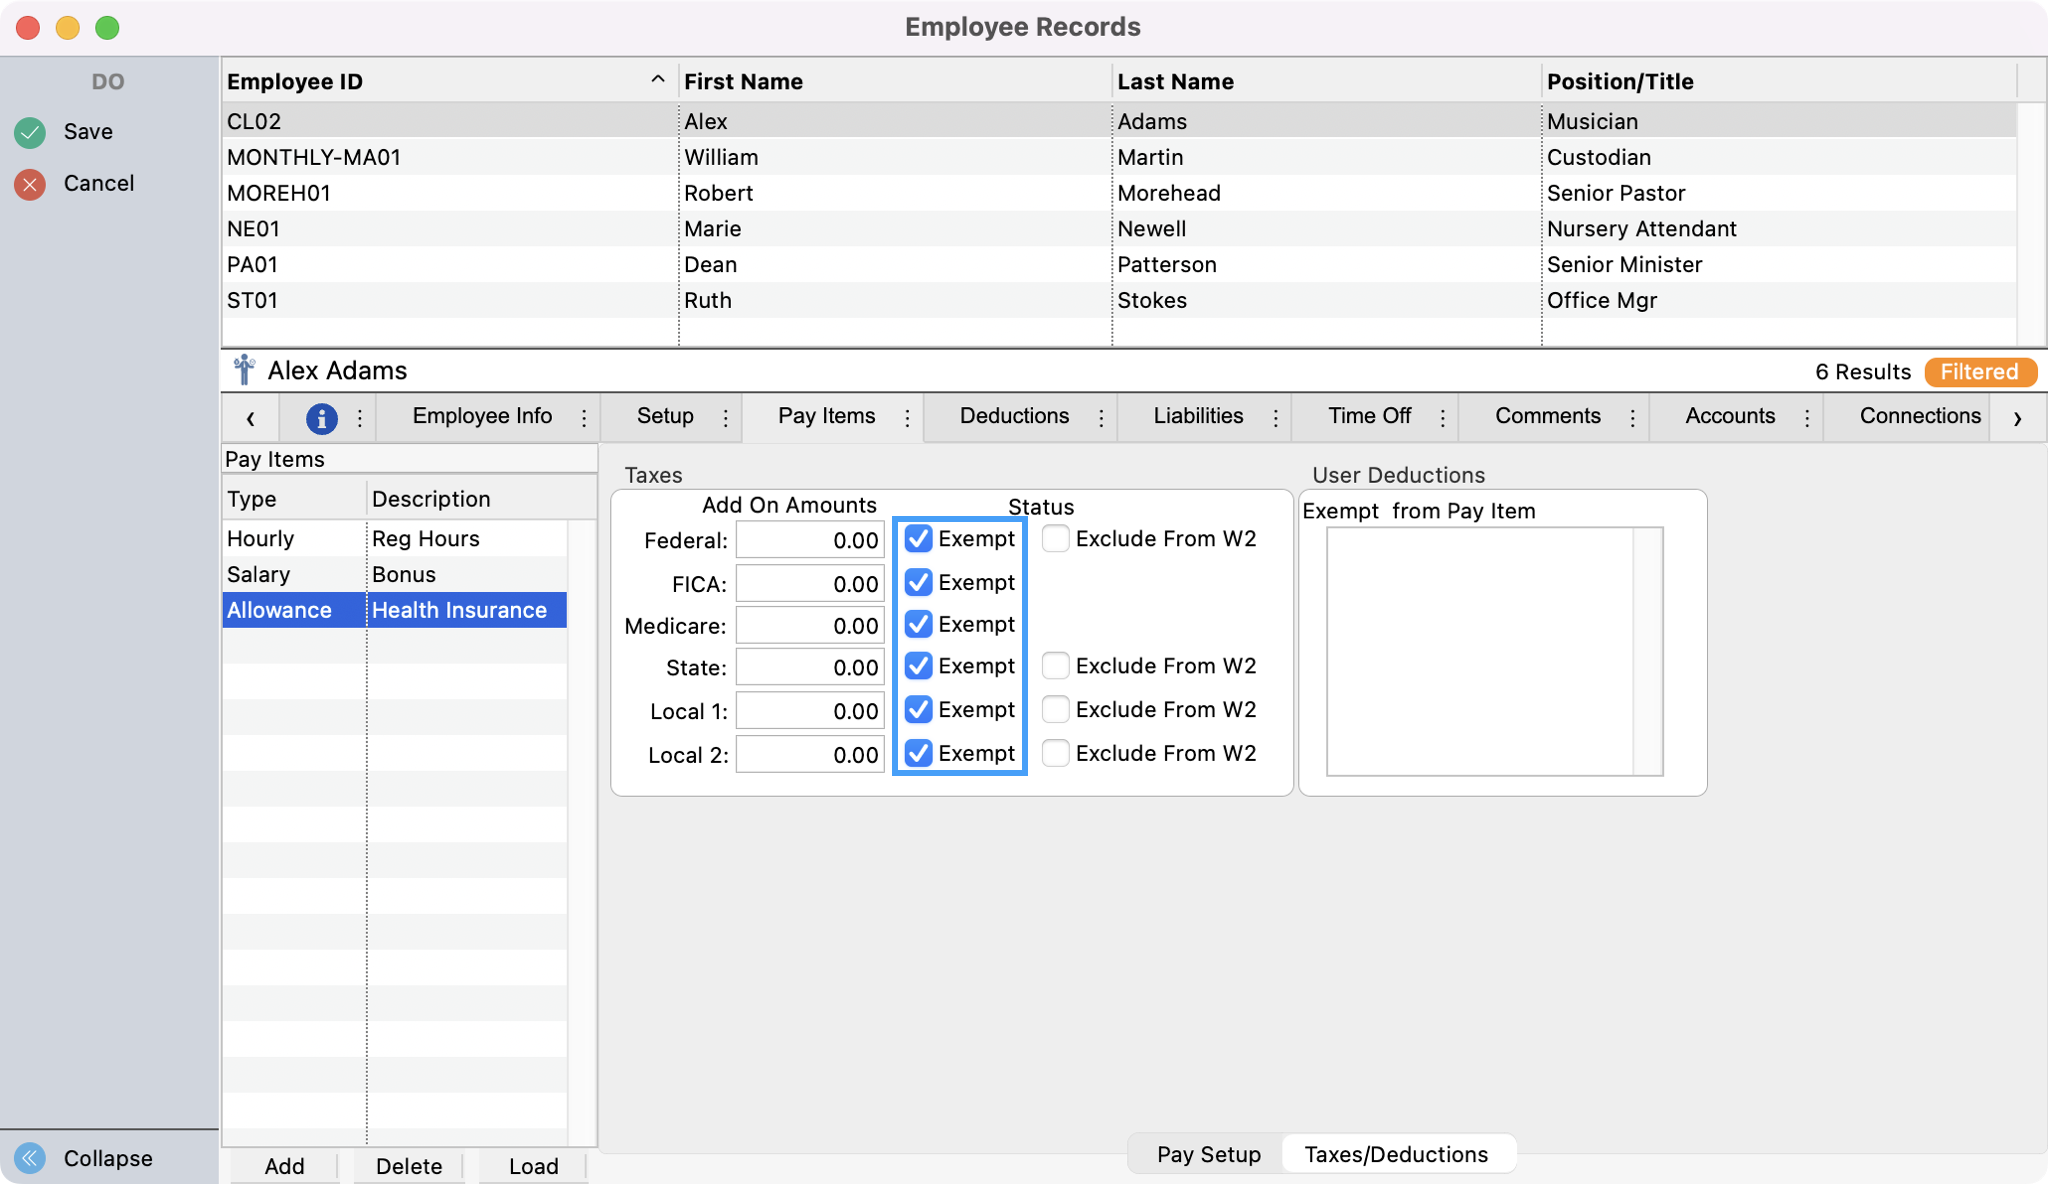
Select the Taxes/Deductions tab at the bottom of the Pay Items window.
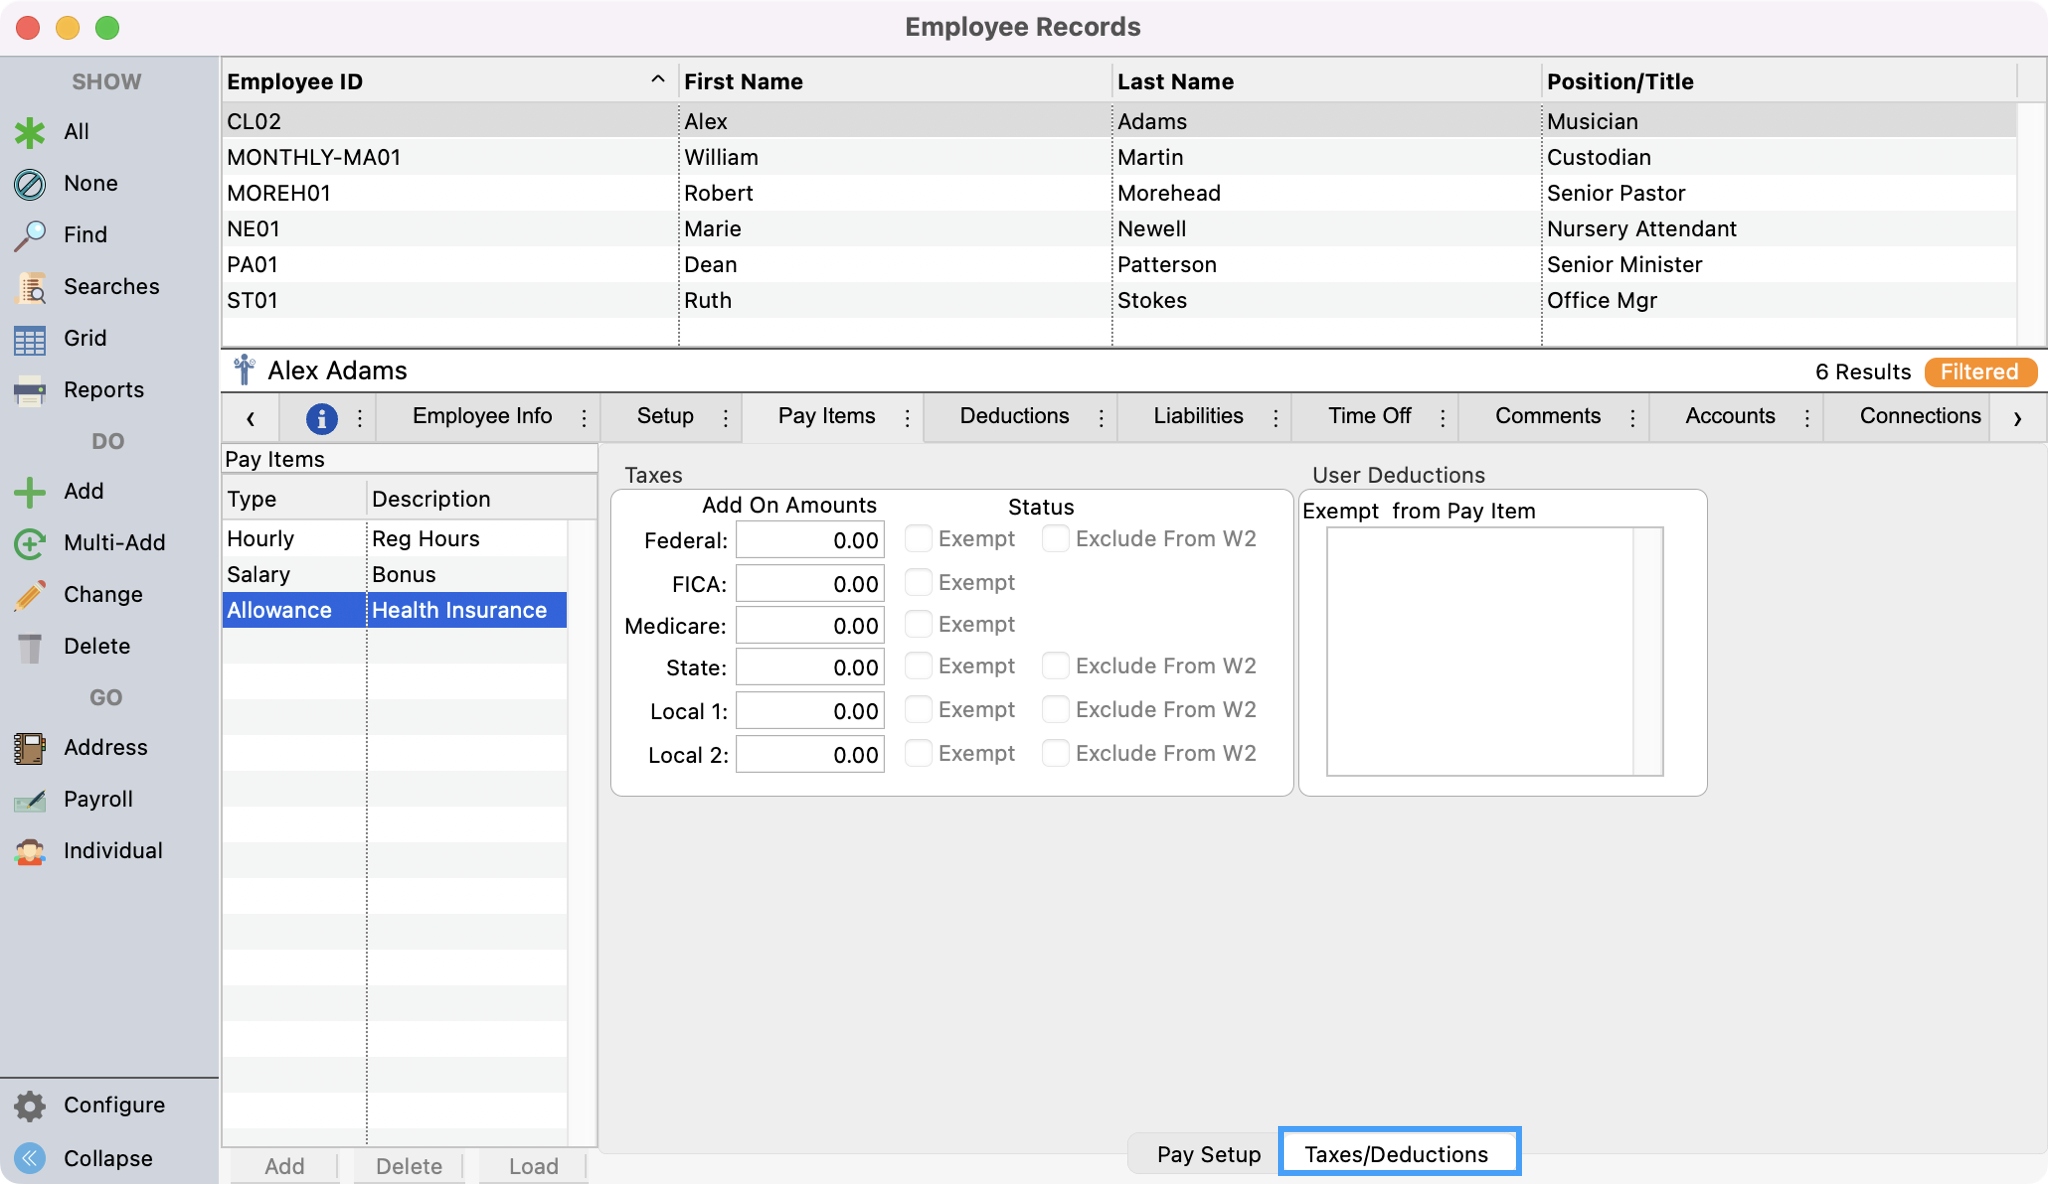
-
Place checks in all Exempt checkboxes.
-
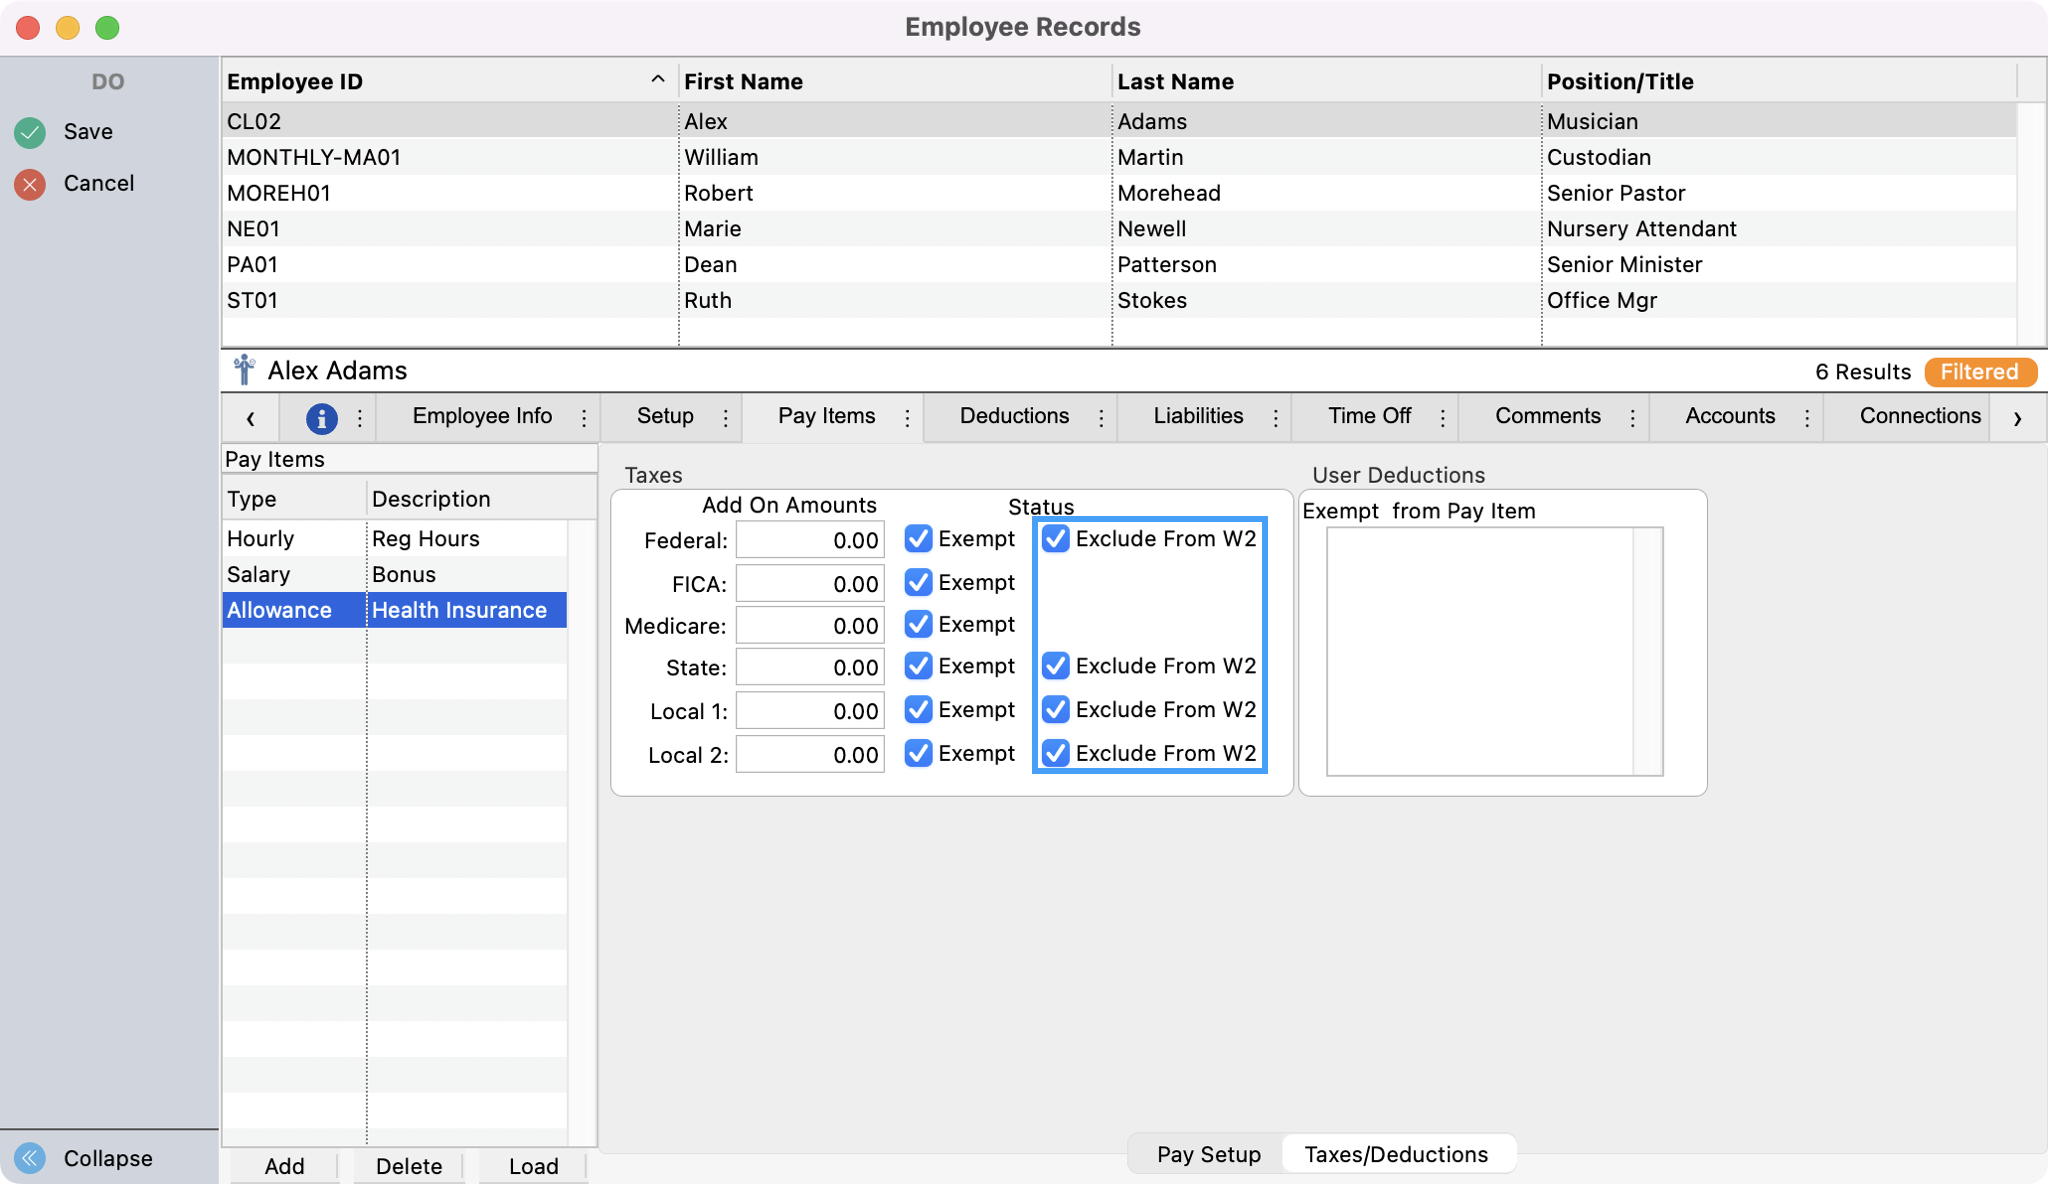
Place checks in all Exclude from W2 checkboxes (this will exclude this pay item from displaying in Box 1 of the W-2).
-
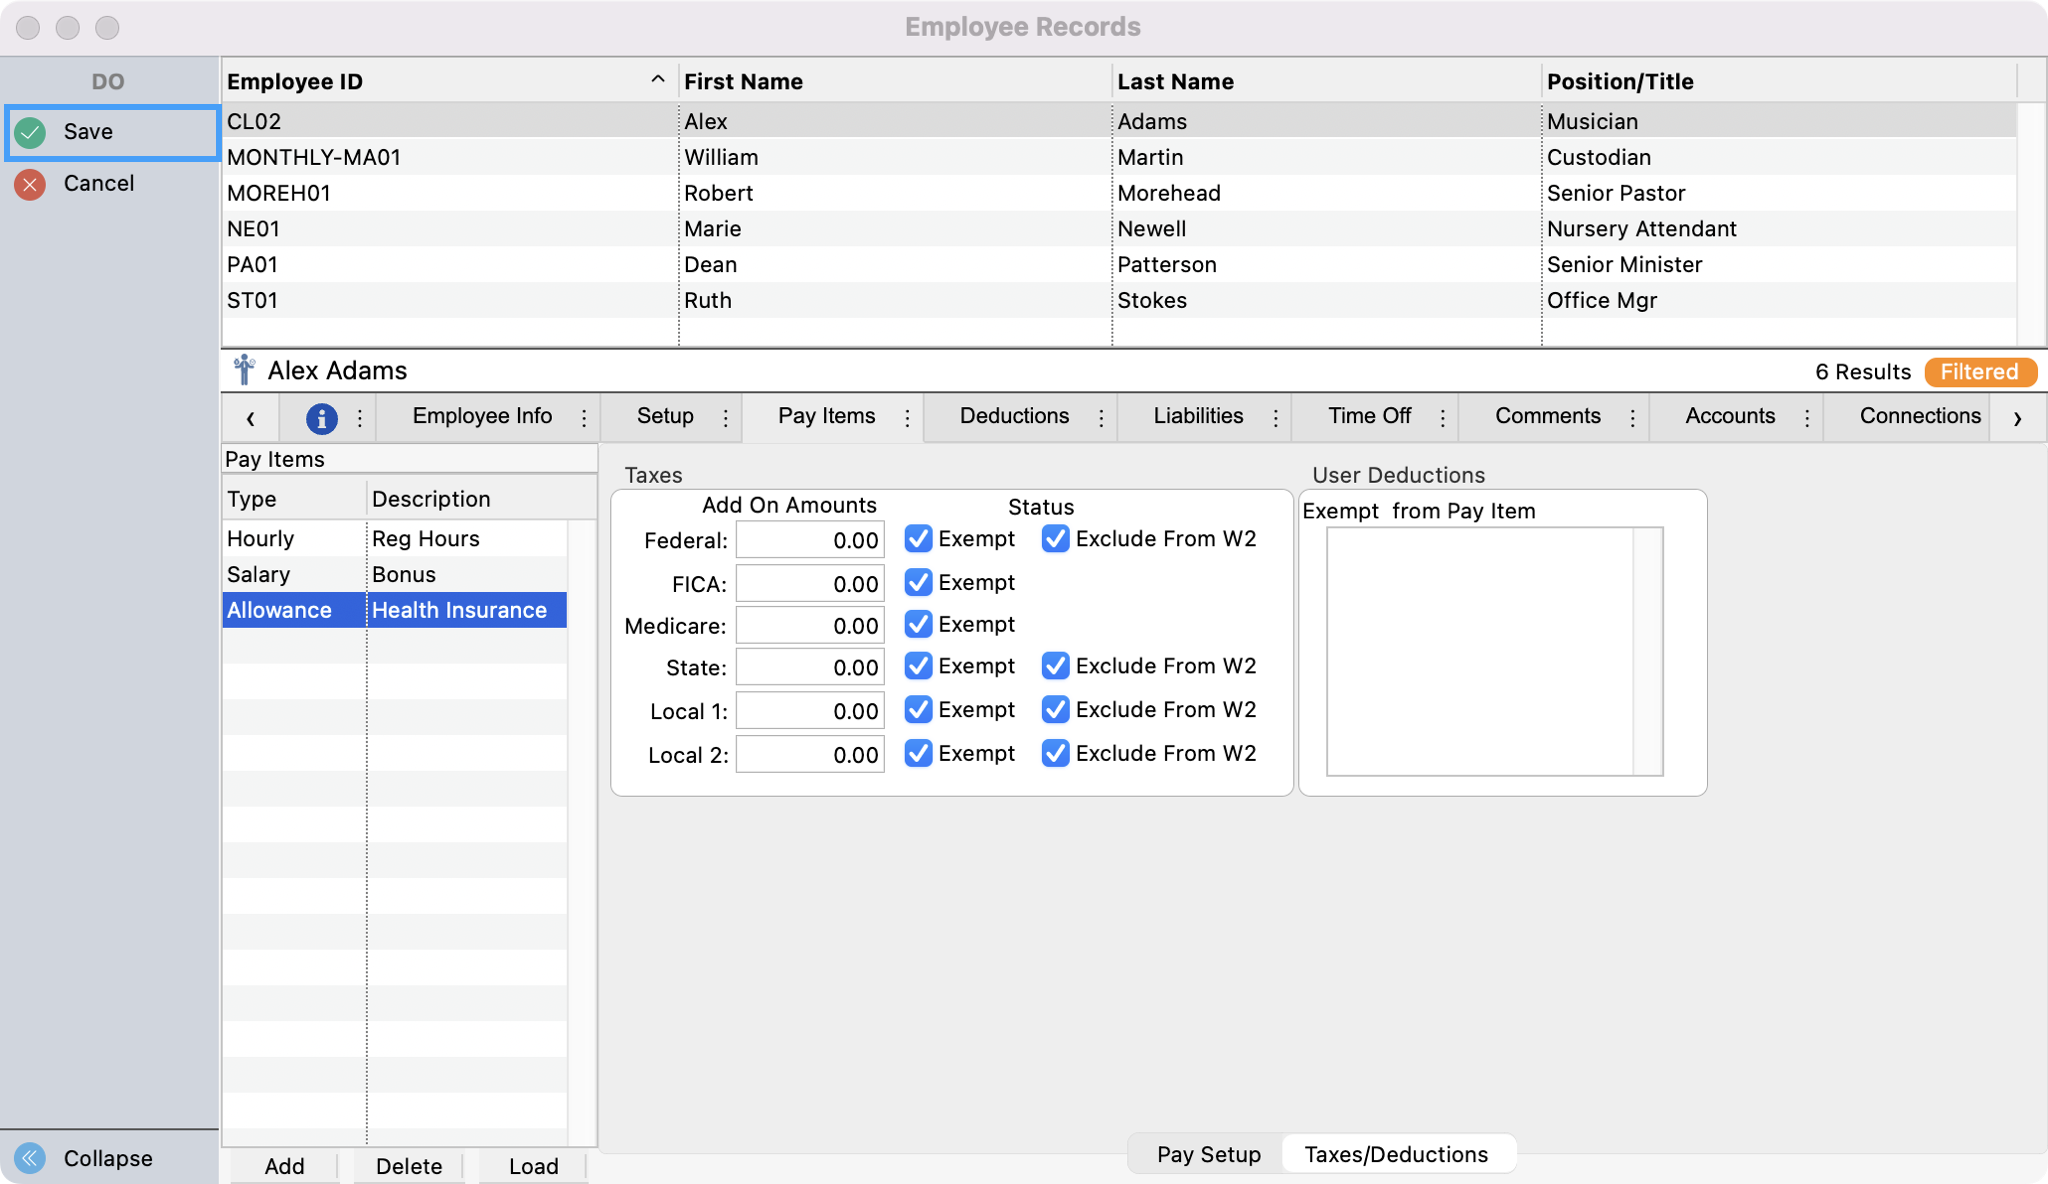
Click Save in the upper left sidebar.
-
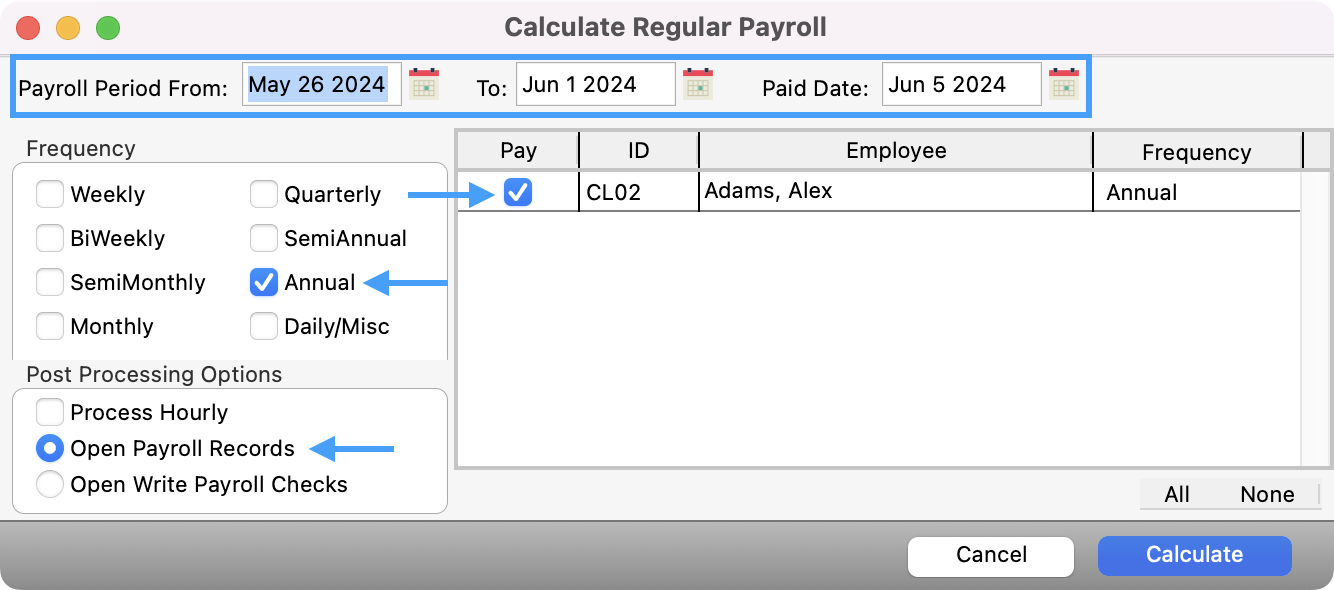
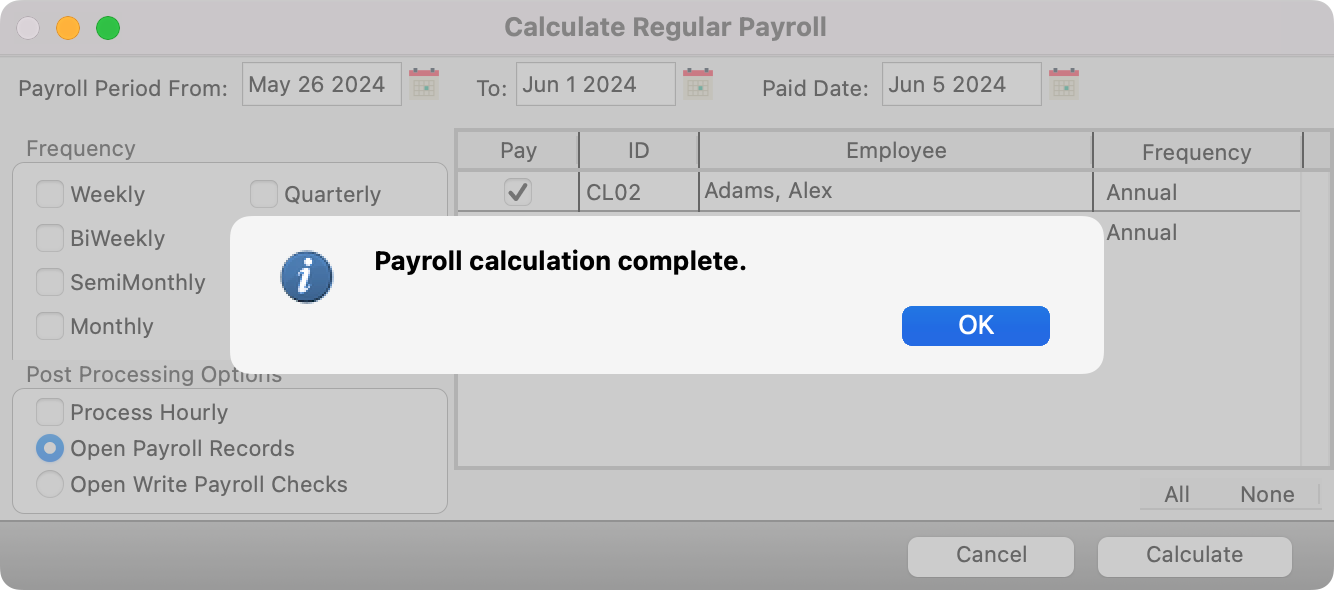
Open Calculate Payroll window (Program → Payroll → Calculate Regular Payroll).
-
Set the Payroll Period date range and Paid Date to dates not previously used. Then, set Frequency to Annual, put a check in the Pay checkbox next to the employee’s name (this will calculate the employee’s imputed income , and choose the Post Processing Option of Open Payroll Records. Click Calculate.
-
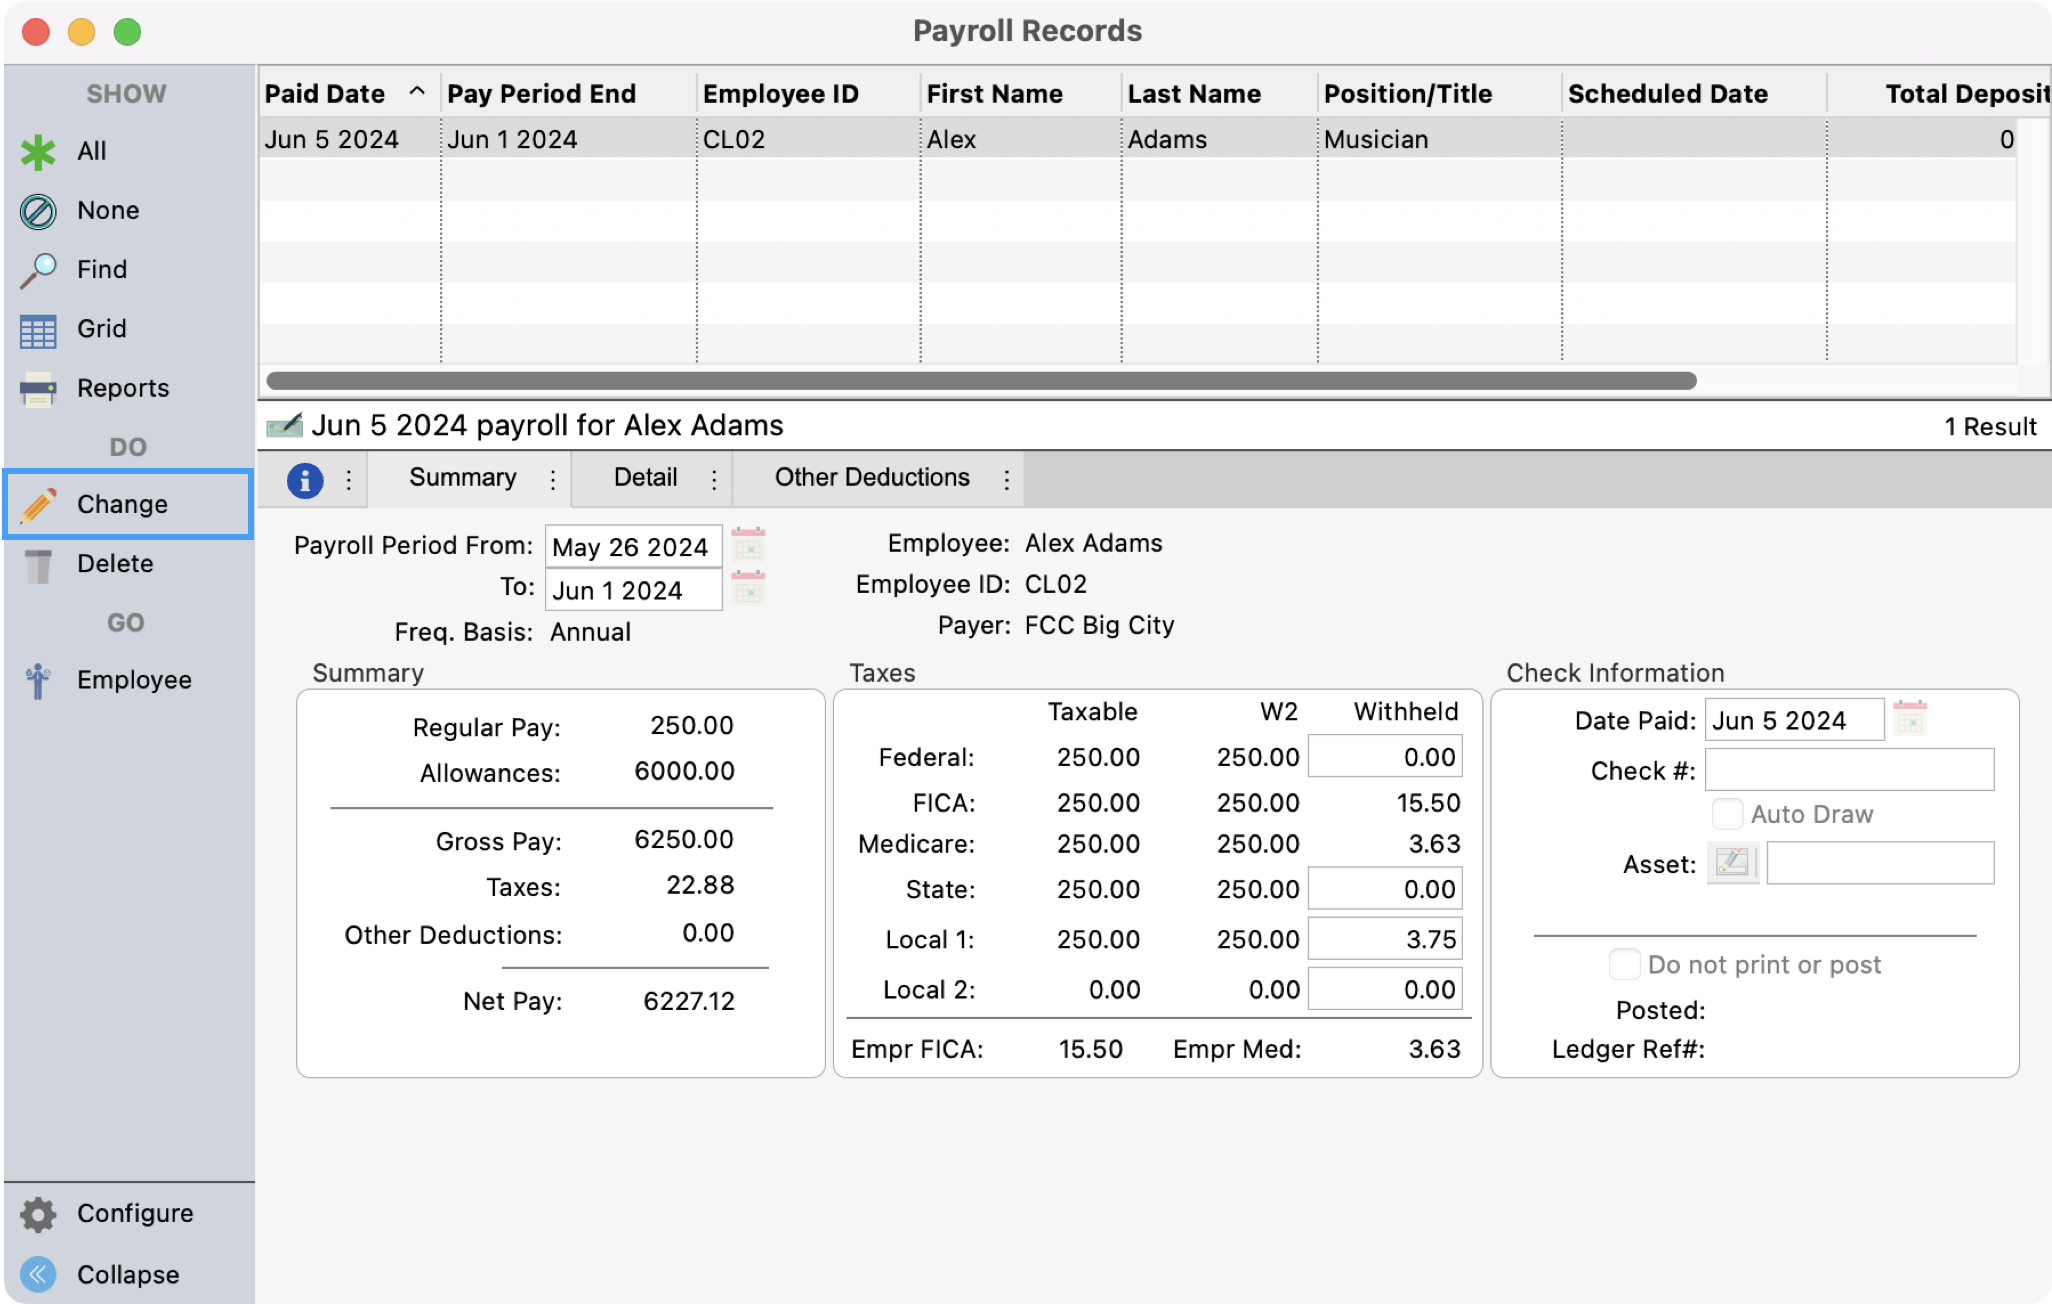
When calculation is complete and click OK. This opens the Payroll Records window. Click Change in this window.
-
Place a check in the Do not print or post checkbox and click Save.

Now, the imputed income will show in your printed/e-Filed W-2/W-3 forms.
1 https://www.irs.gov/affordable-care-act/form-w-2-reporting-of-employer-sponsored-health-coverage
How do I update Giving Unit Codes for the new year?
Click to expand...
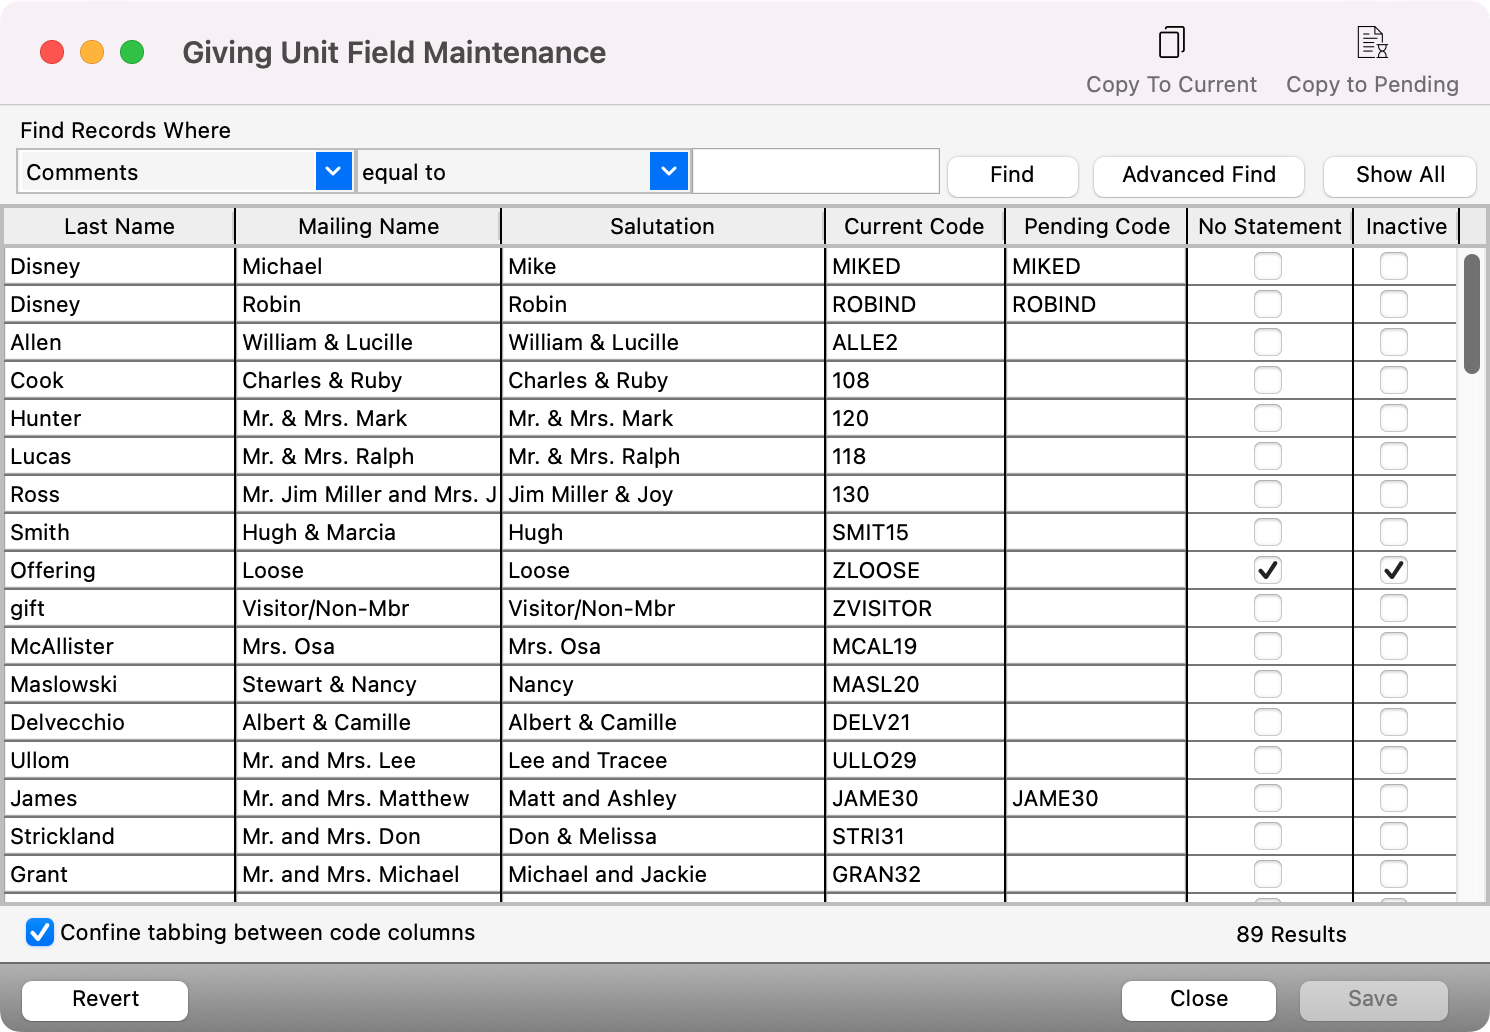
Two different Giving Unit Codes can be maintained for each giver – the Current Giving Code and the Pending Code. If you need to assign new envelope numbers for all giving units or for a segment of them, you can use the Giving Unit Field Maintenance window. This feature allows you to quickly accomplish this task. The Pending Code column allows you to make the changes you want to see in the coming year without changing the current codes you are using.
-
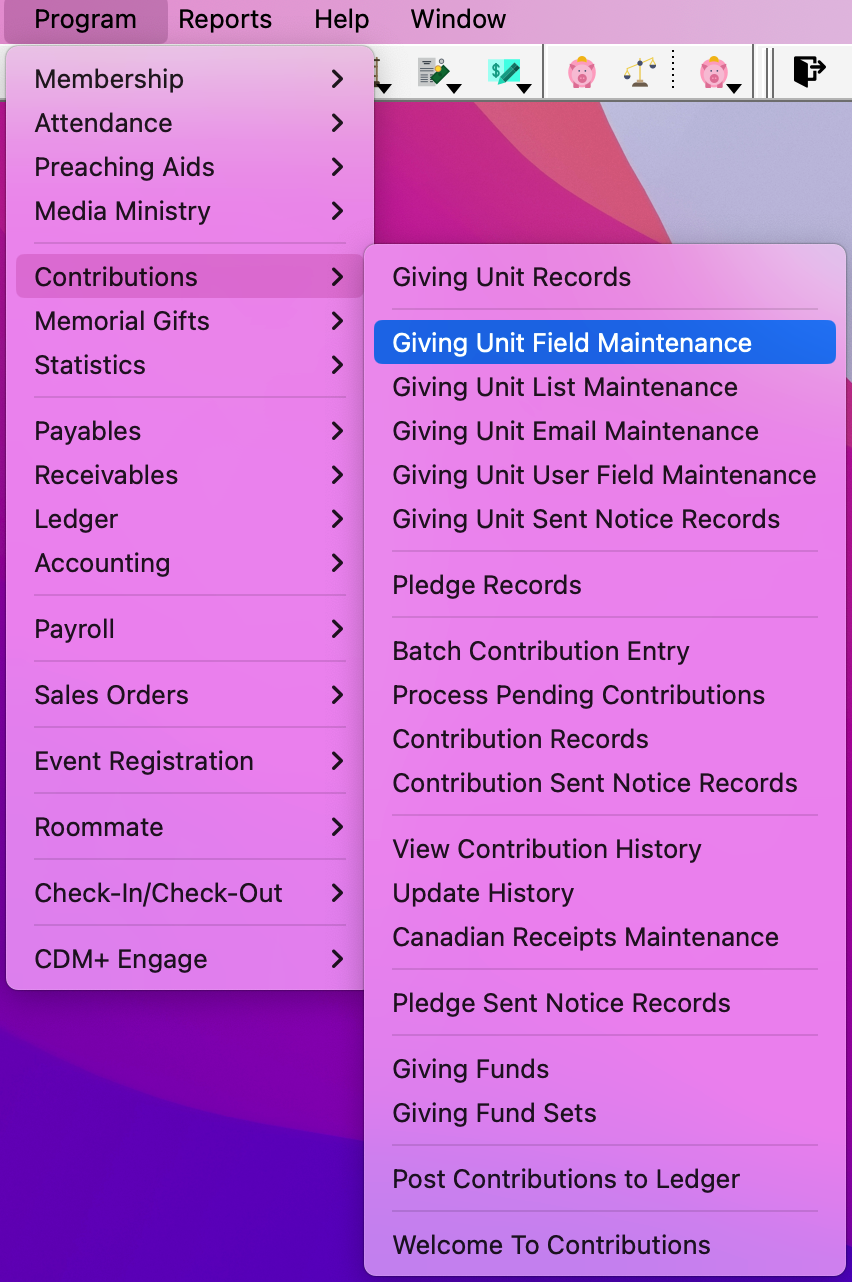
To navigate to the Giving Unit Field Maintenance window, go to Program → Contributions → Giving Unit Field Maintenance.
-
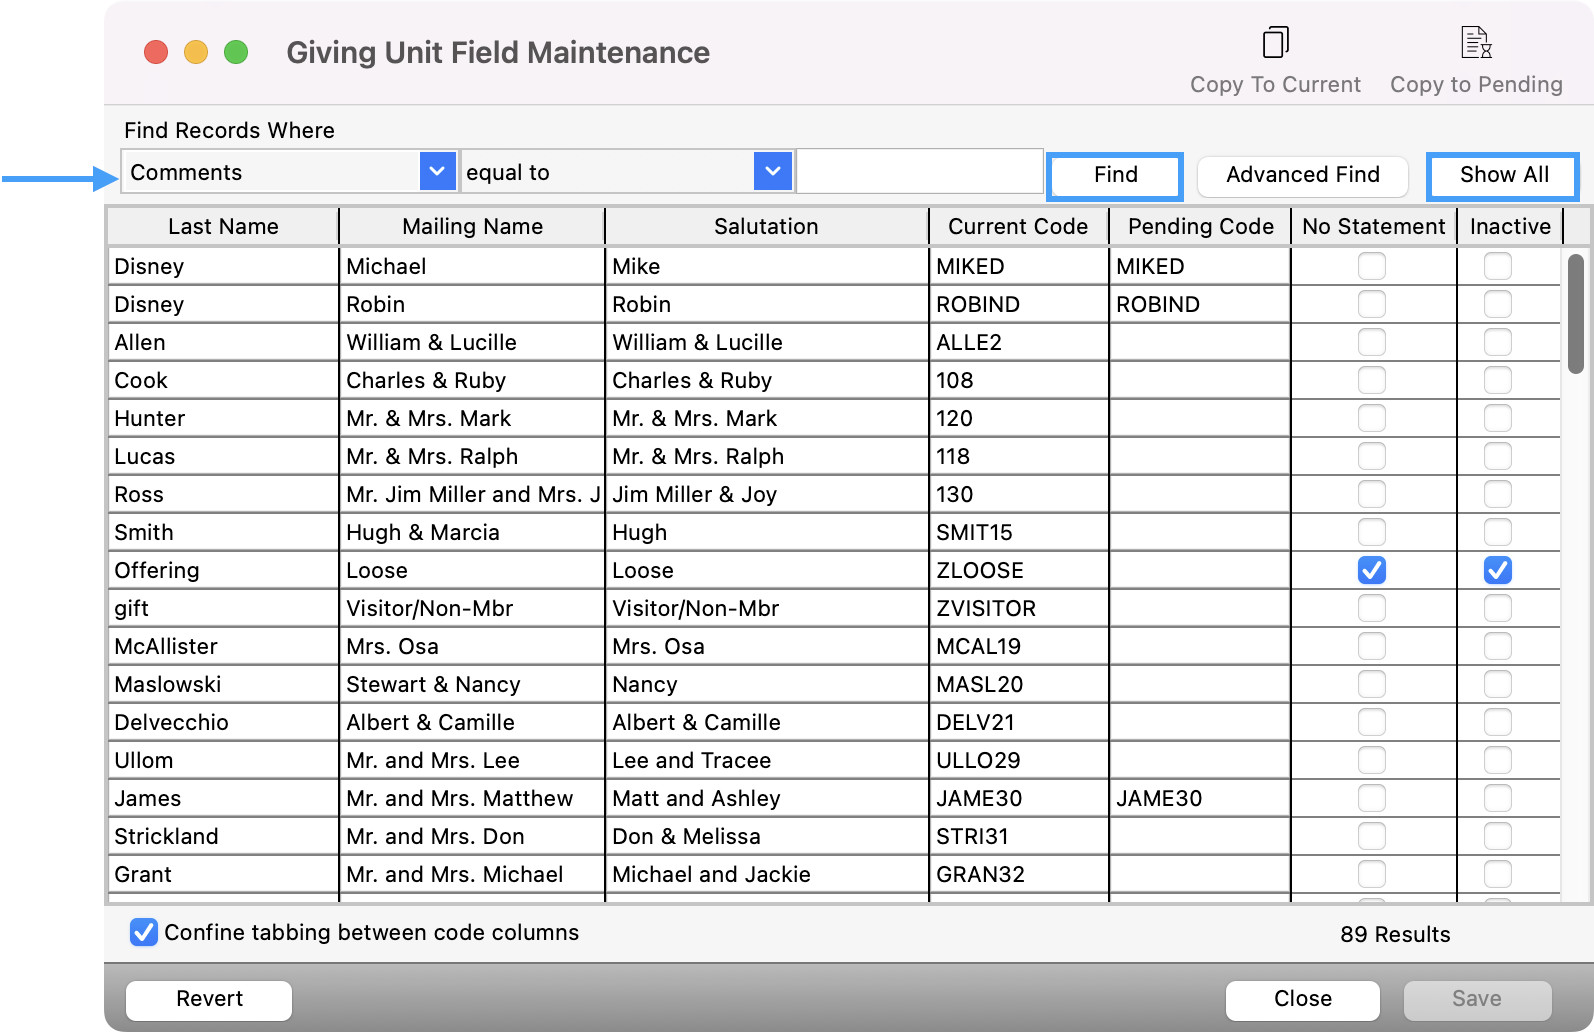
Setup a find for a specific group of Giving Units or click the Show All button to see all active Giving Units.
-
Once you have the names in the window you can click within the Pending Code field and add their new code. You can also make changes to their name, choose if they don’t need a statement, and/or make them inactive.
-
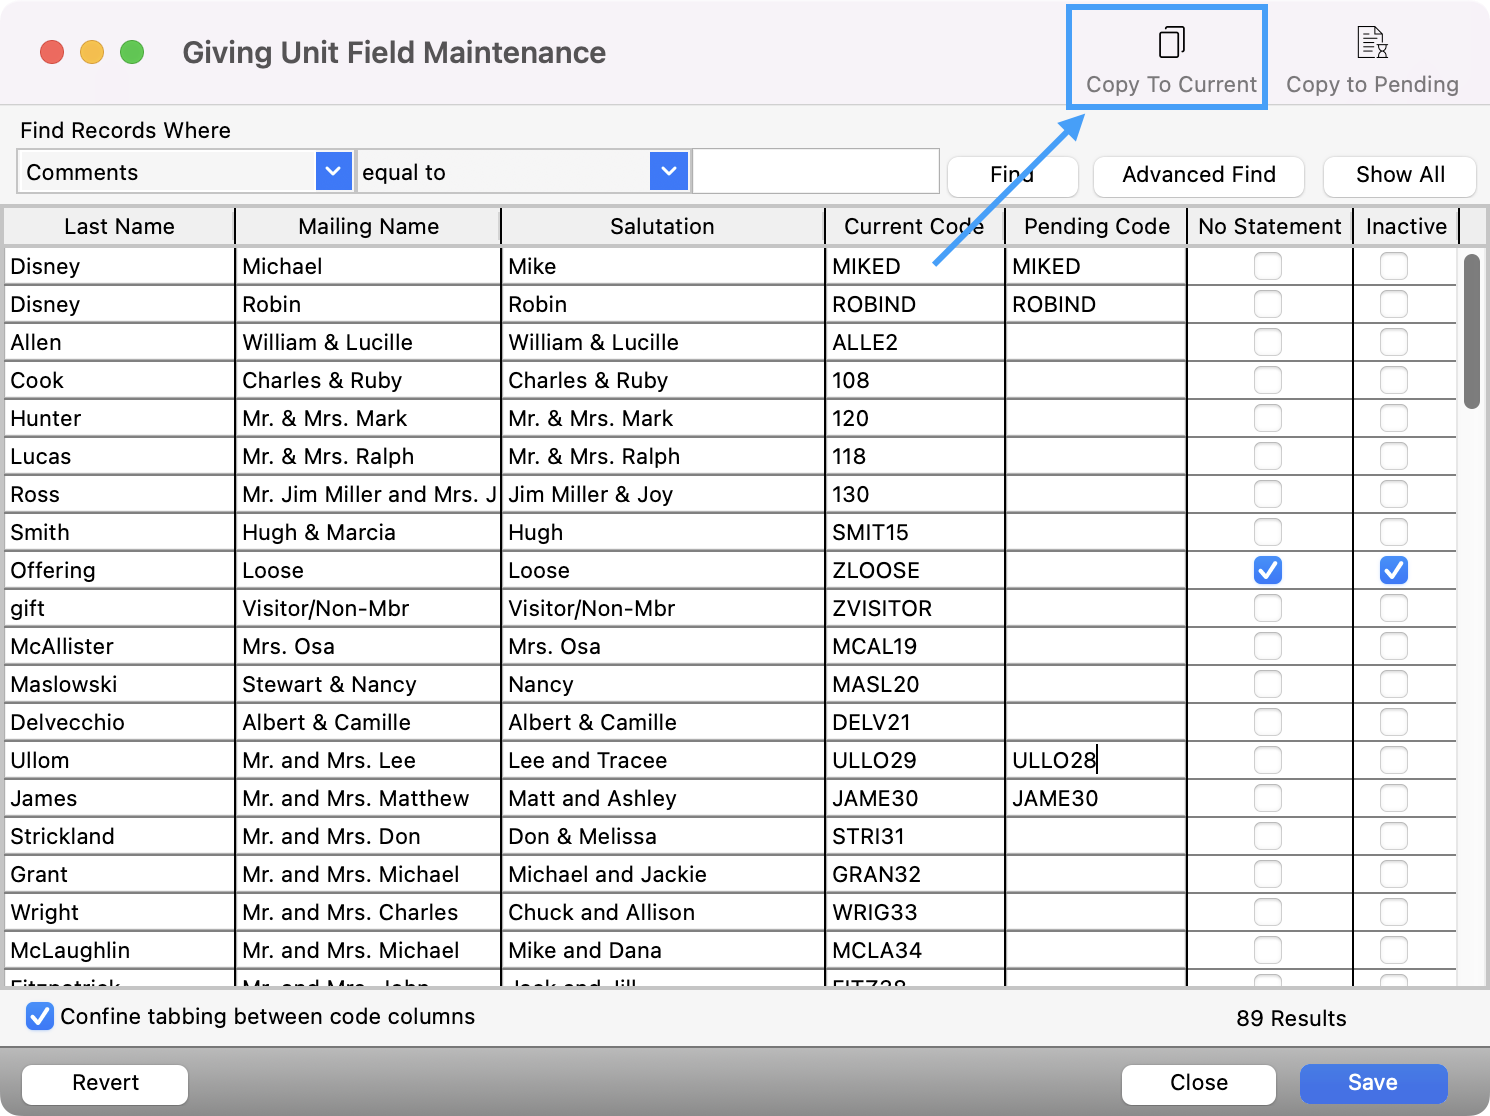
When you are ready to move all the pending codes to the current ones, click the Copy to Current button on the top right. This will replace the current codes with those you put in the pending code column.
-
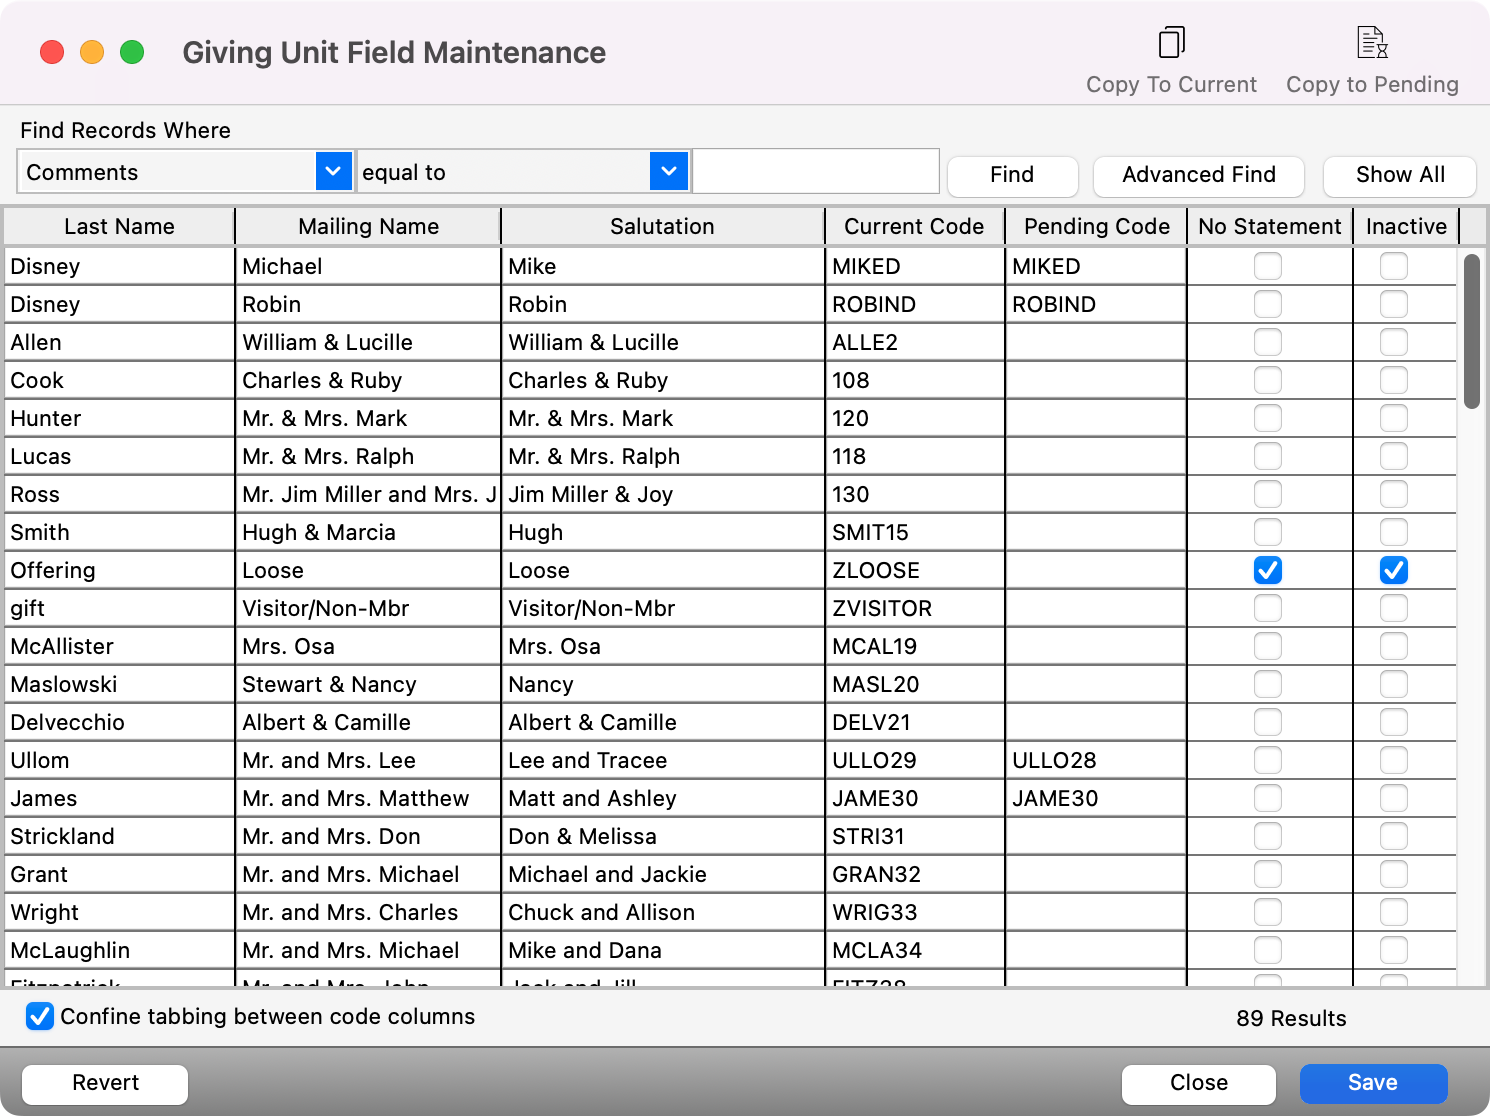
When the process is complete, click the save button on the bottom right.
-
You do not need to update ALL Giving Unit Codes at the same time. If a giver’s number hasn’t changed, leave the Pending Code field blank.
-
CDM+ requires unique Giving Unit Codes, so if you mistakenly attempt to assign the same code to multiple records, CDM+ will open an error resolution box, identifying the problems and allowing you to correct them.
-
If you only need to change a few givers' codes, make those changes directly in the Giving Unit Code field on the Giving Unit Information window.
Why are my W2/W3 forms printing with a Watermark?
Click to expand...
Problem
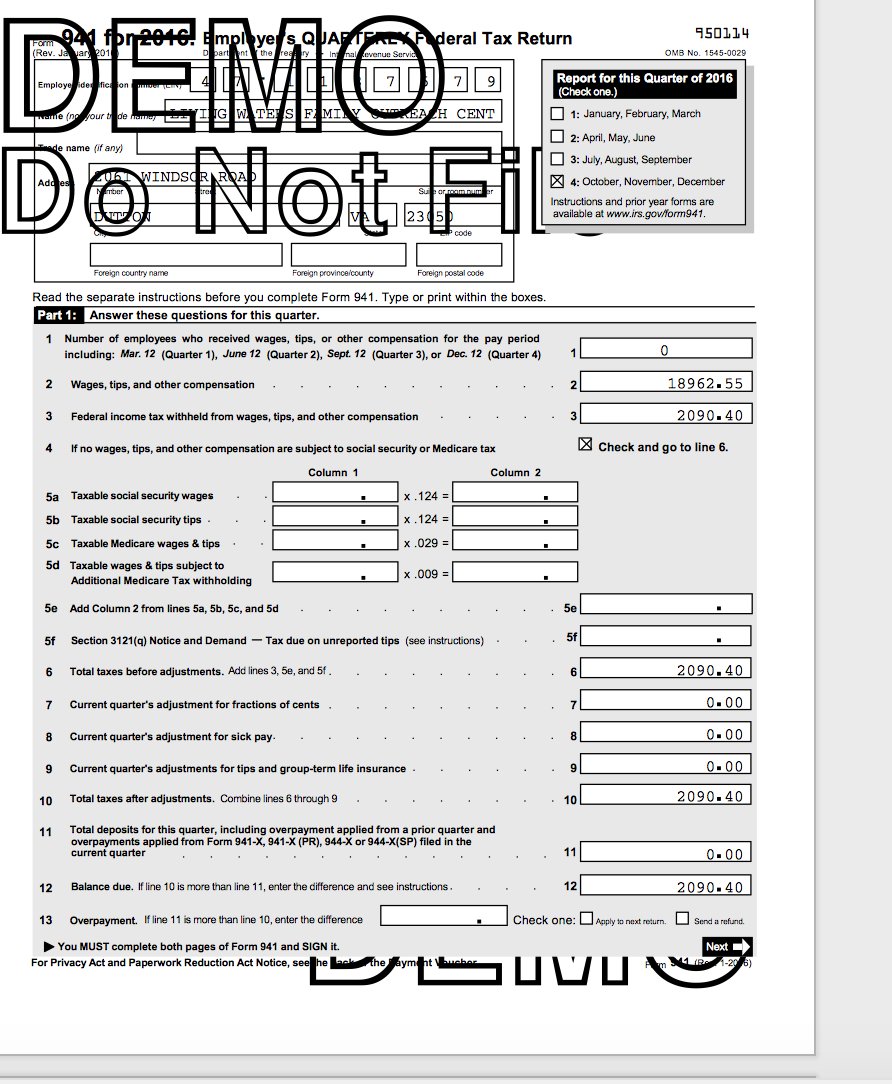
The user goes through the process of printing their tax form, but the resulting form has a large Demo watermark.
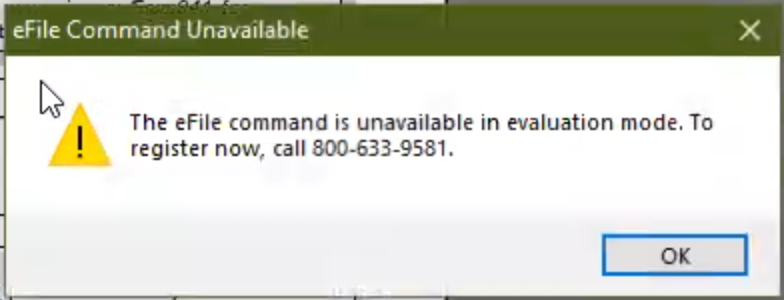
The user may also be attempting to eFile and gets a message "The efile command is unavailable in evaluation mode."
This issue is due to the Registration Code within the Aatrix Forms Viewer. It can manifest itself in two ways.
-
The first being that there will not be any codes listed in the Registration Code window. (Solution A)
-
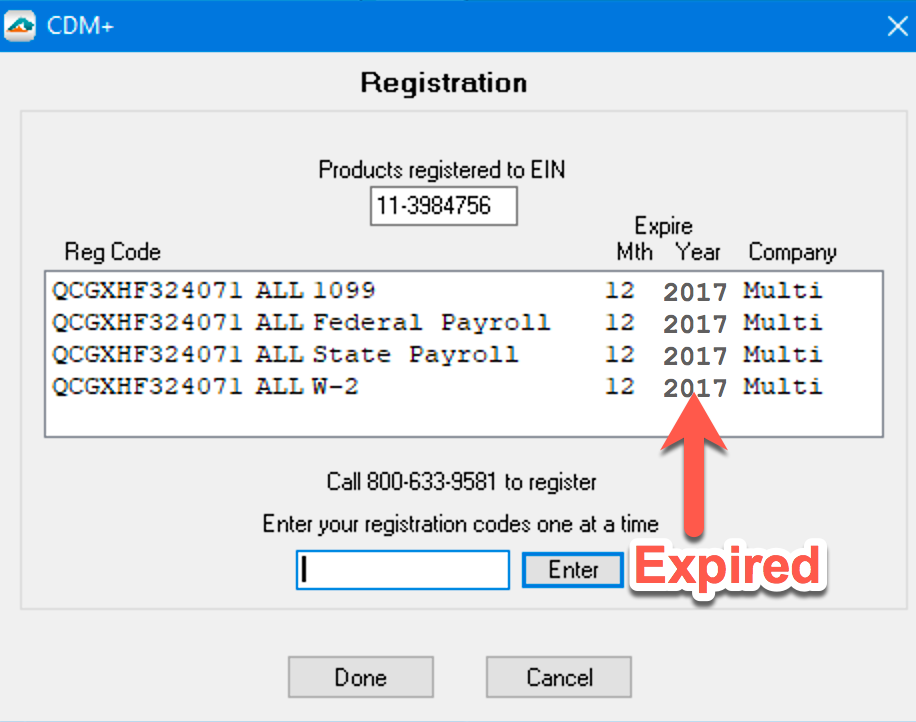
The second way that this error may occur is that the codes listed in the window will have an expired date. (Solution B)
Solution
A. How to address the first issue: The Registration Code window does not show any codes.
This is likely caused by a bad registration code.
-
Open Aatrix Forms Viewer and go to Company > Enter/Edit Registration Codes
Macintosh Screenshot:

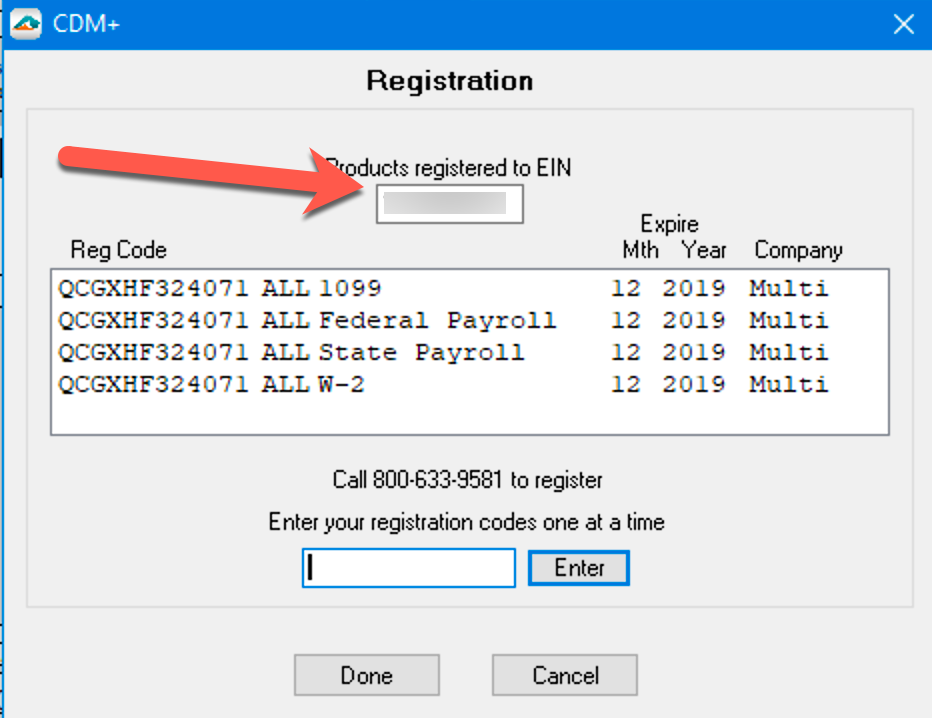
Windows Screenshot:

-
In the opened Registration window, verify that there are no codes.

-
If there are no codes listed in the window, do the following:
-
Close the Aatrix Forms Viewer
-
In CDM+, go to File → Utilities
-
Click Clear Records
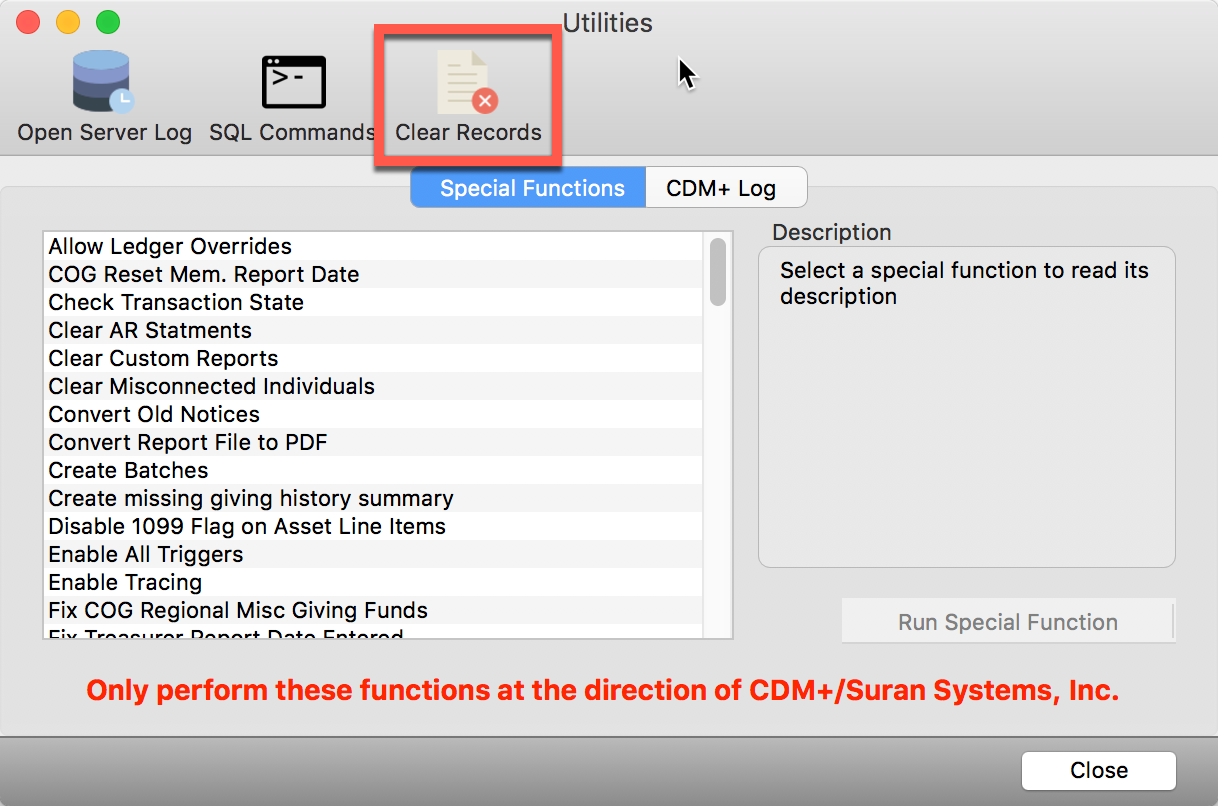
-
Check fypayerregistrationcode

-
Click OK and confirm the delete by ensuring that 0 records show in the window.
-
Re-open the Aatrix Forms Viewer and verify the problem is resolved
-
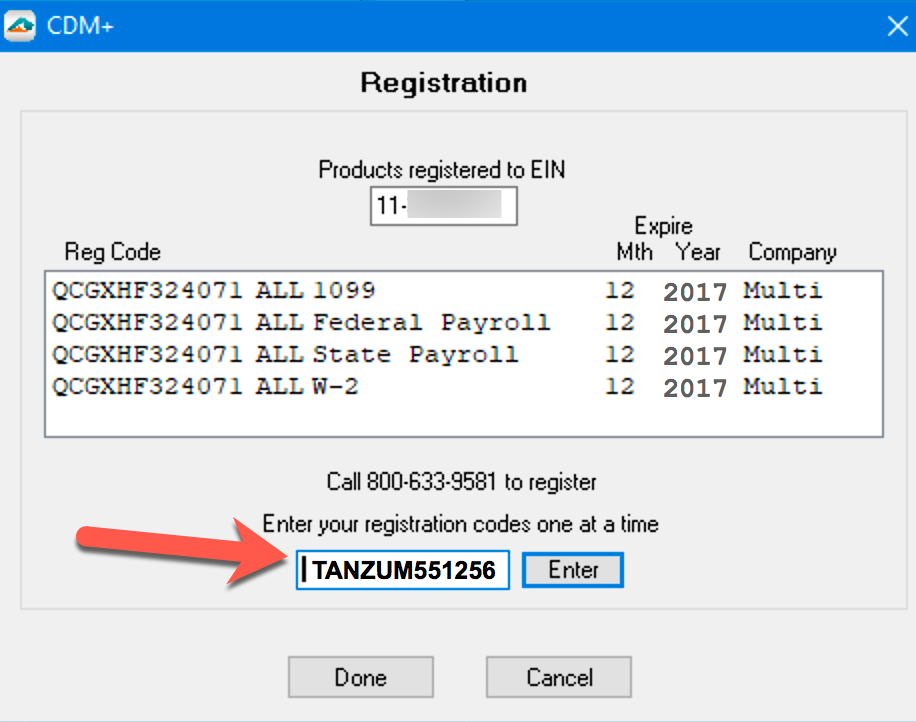
B. How to address the second issue: The registration codes are expired.
-
If the opened Registration Code window contains codes, but they are expired. This is manifesting when a user has more than one database with different EIN's in each database.
-
The EIN number showing in the Registration Code window must be the same as the one showing on the displayed tax form.
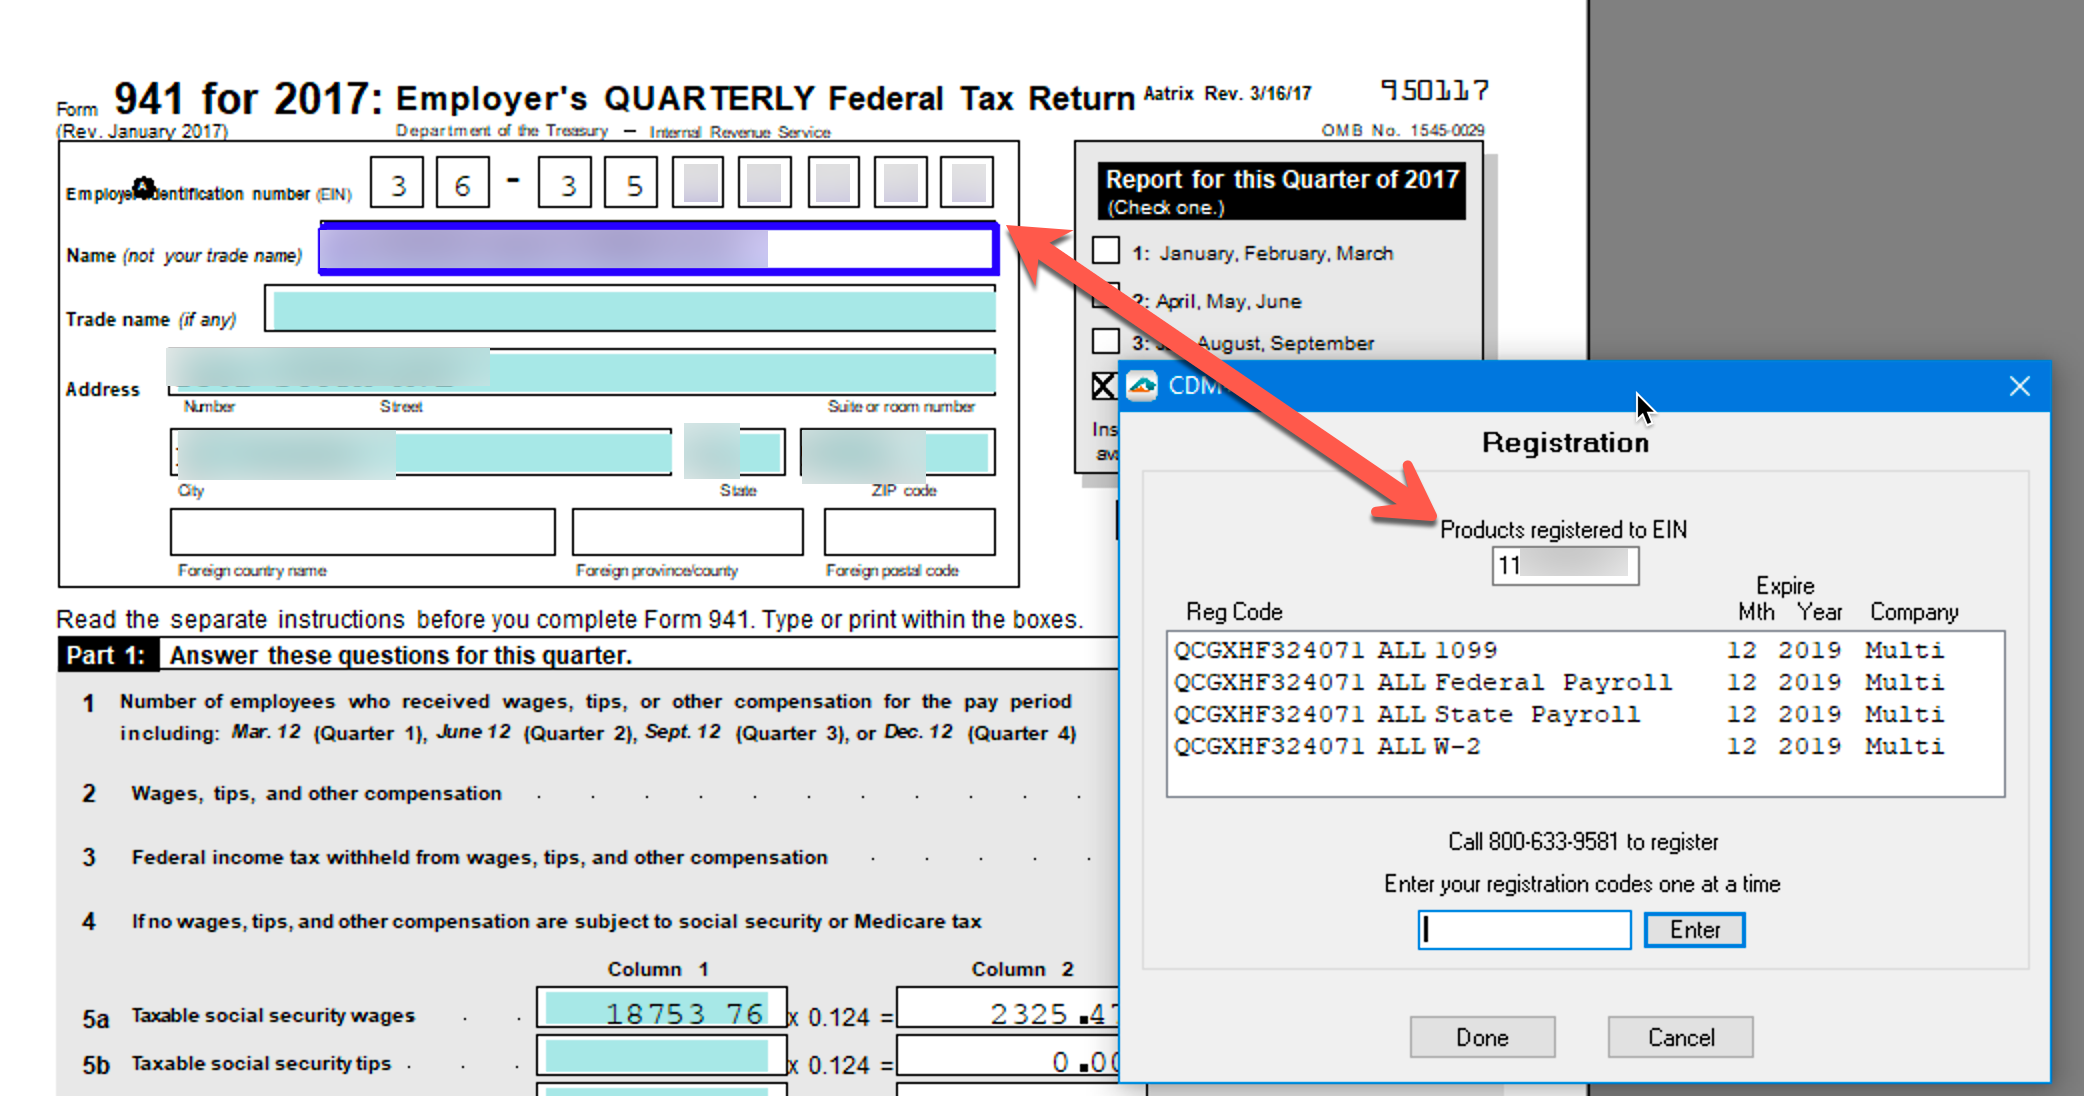
-
If it isn't, then click into the field in the Registration Code window and enter the correct EIN. In our case, it probably will NOT be the same.
-
Locate and open the config file by following the steps below:
-
Open the Tax Forms window
-
Hold the Shift key on the keyboard while clicking ‘Show Form’.
-
You will be asked ‘Use AEF format?’ Answer ‘No’.
.png?cb=cb1f716042b66fd9b667c456bdd445d3)
-
The finder window now opens with the AatrixConfig.ini file.
-
Double-click the AatrixConfig.ini file.
.png?cb=cd9861c8f995570068f59ffb7af586c7)
-
-
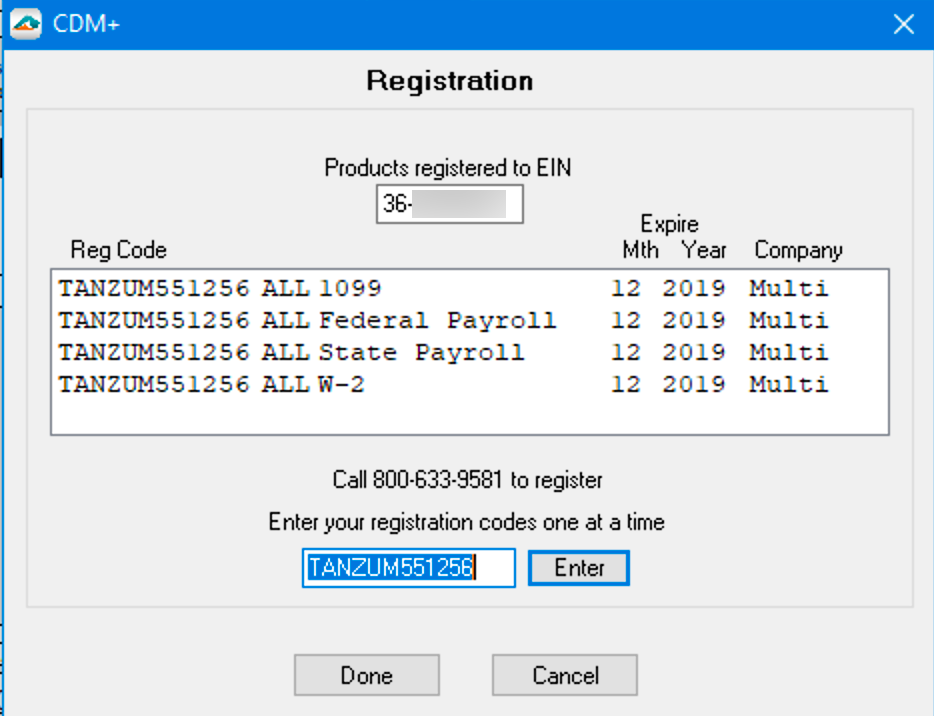
Copy the code in the config file and then go back to the Registration Code window in Aatrix Forms Viewer and paste it into field and then click 'Enter'.

-
This will update the registration codes.
Why can't I install Aatrix Form viewer?
Click to expand...
Problem
Attempting to install the Tax Forms Viewer (Aatrix) through CDM+ on Windows produces the following error even though the current user is an administrator.
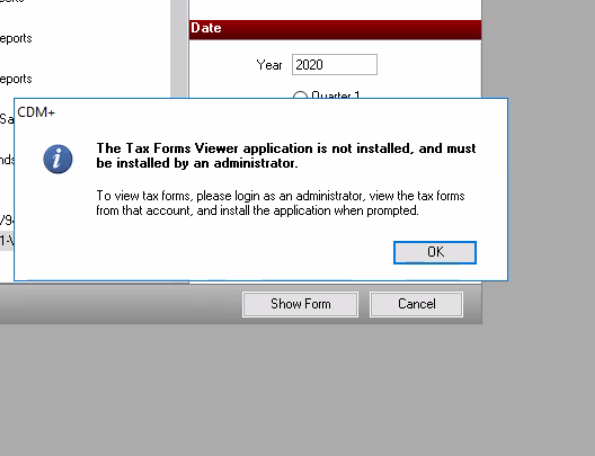
The Tax Forms Viewer application is not installed, and must be installed by an administrator.
To view tax forms, please log in as an administrator, view the tax forms from that account, and install the application when prompted.
This is a valid error message if the current user is not a Windows administrator. In that instance, follow the prompts to log in as an administrator and install Aatrix from an administrator account.
Verification
Open a command prompt and run:
echo %USERNAME%
Open another command prompt as an administrator and run:
net localgroup administrators
You should NOT see the result from the first command in the list from the second command.
If the result of the first command appears in the result of the second, please contact technical support for further assistance.
Solution
Run the following command, replacing {result from username } with the result of the first command run.
net localgroup administrators {result from username} /add
Close and reopen CDM+, then try installing Aatrix again.
Explanation
Installing Aatrix requires administrative rights in Windows. With CDM+ this membership is verified through the following command.
net localgroup administrators | findstr "%USERNAME%"
%USERNAME% is a Windows environment variable which stores the current user name. If this variable is not found in the administrators local group then CDM+ prevents installing Aatrix because it determines the current user is not an administrator.
All of a Vendor's payments are not showing on their 1099-NEC
Click to expand...
Reviewing Vendor Records
Program → Payables → Vendor Record
-
Ensure Name and Address are correct.
-
Ensure the state is exactly two characters.
-
Ensure 1099-NEC is selected.
-
Ensure 1099 Recipient's ID number is correct.

Prepping Your 1099
It is an IRS requirement that Vendors using a SSN must have the first and last name fields completed on the form.
If you notice the the Contact First Name and Contact Last Name fields are black, click Change from the left sidebar.
-
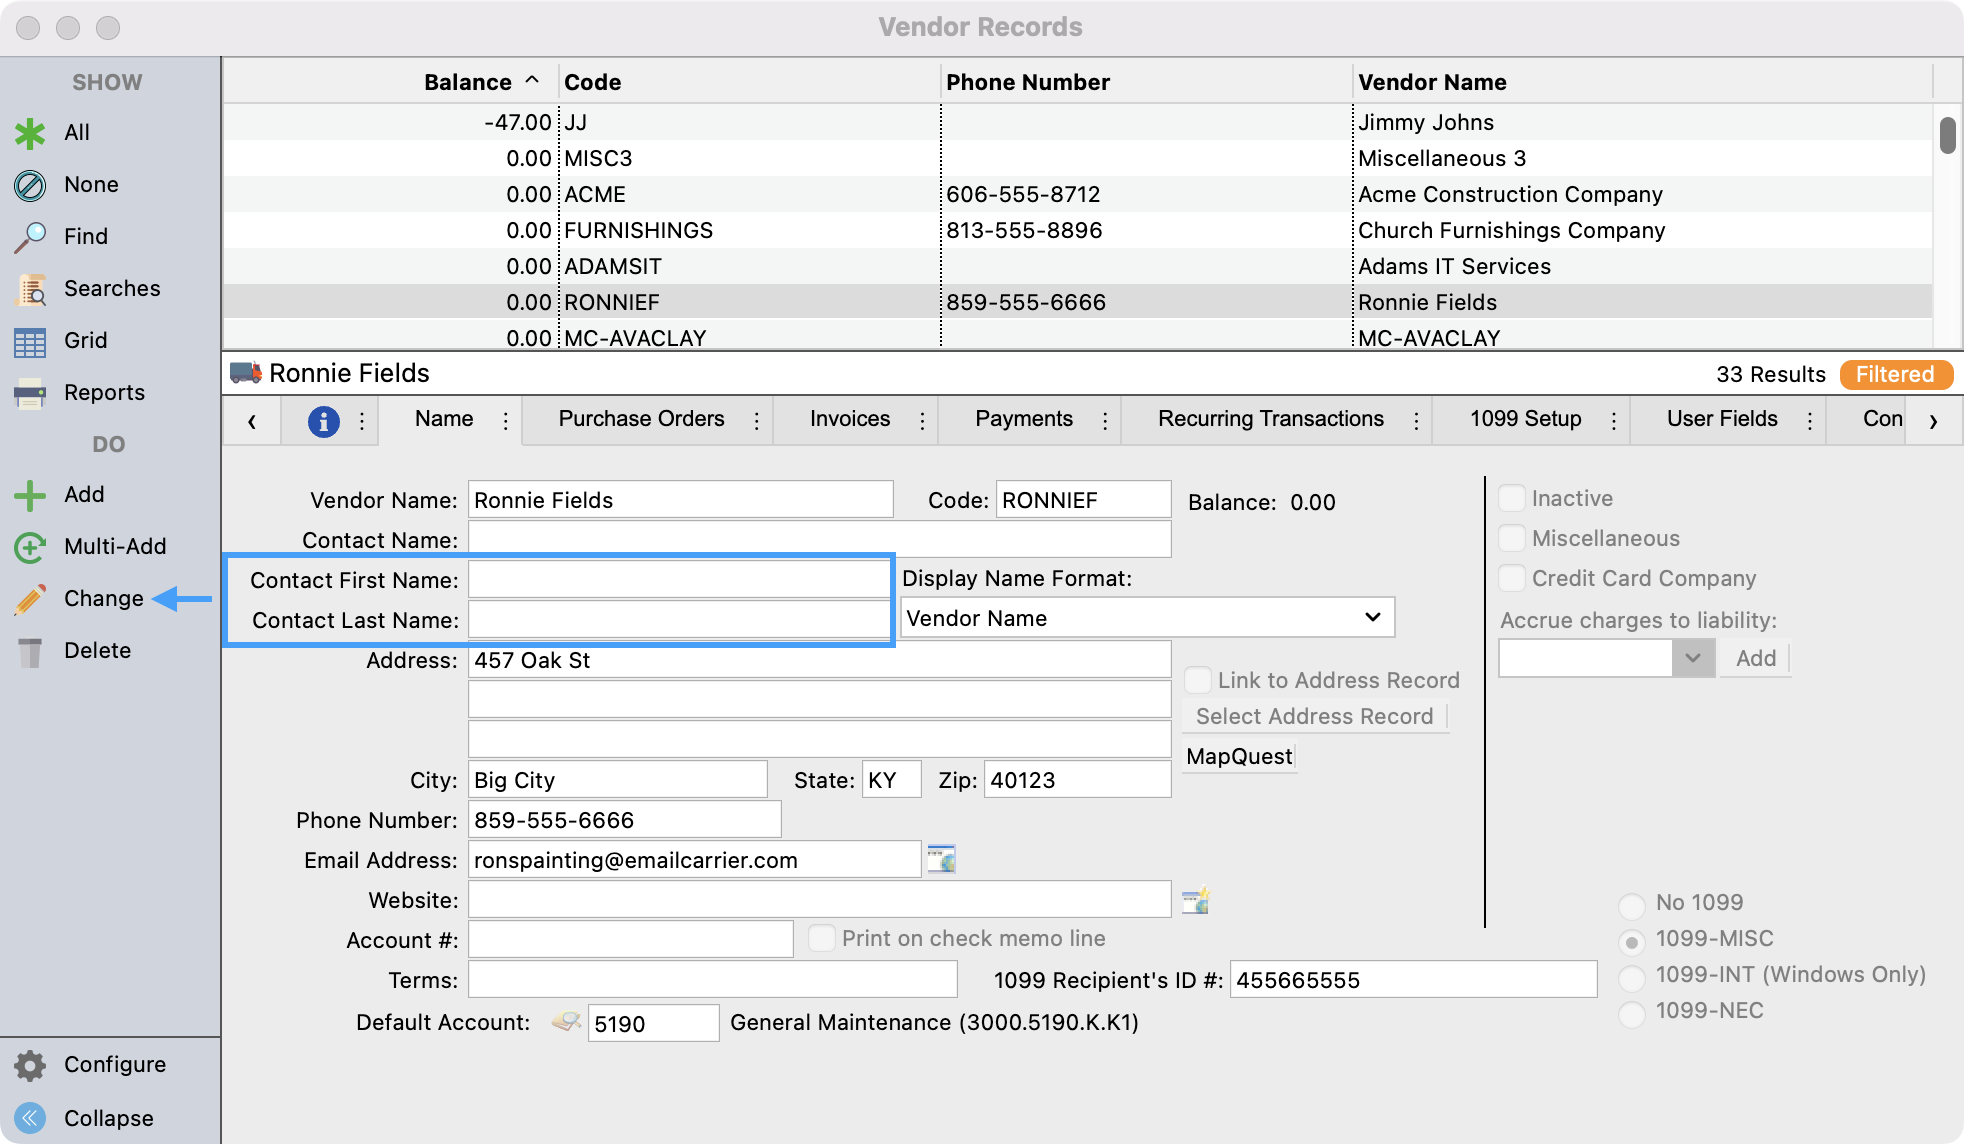
Fill in these required fields and then Save your changes.
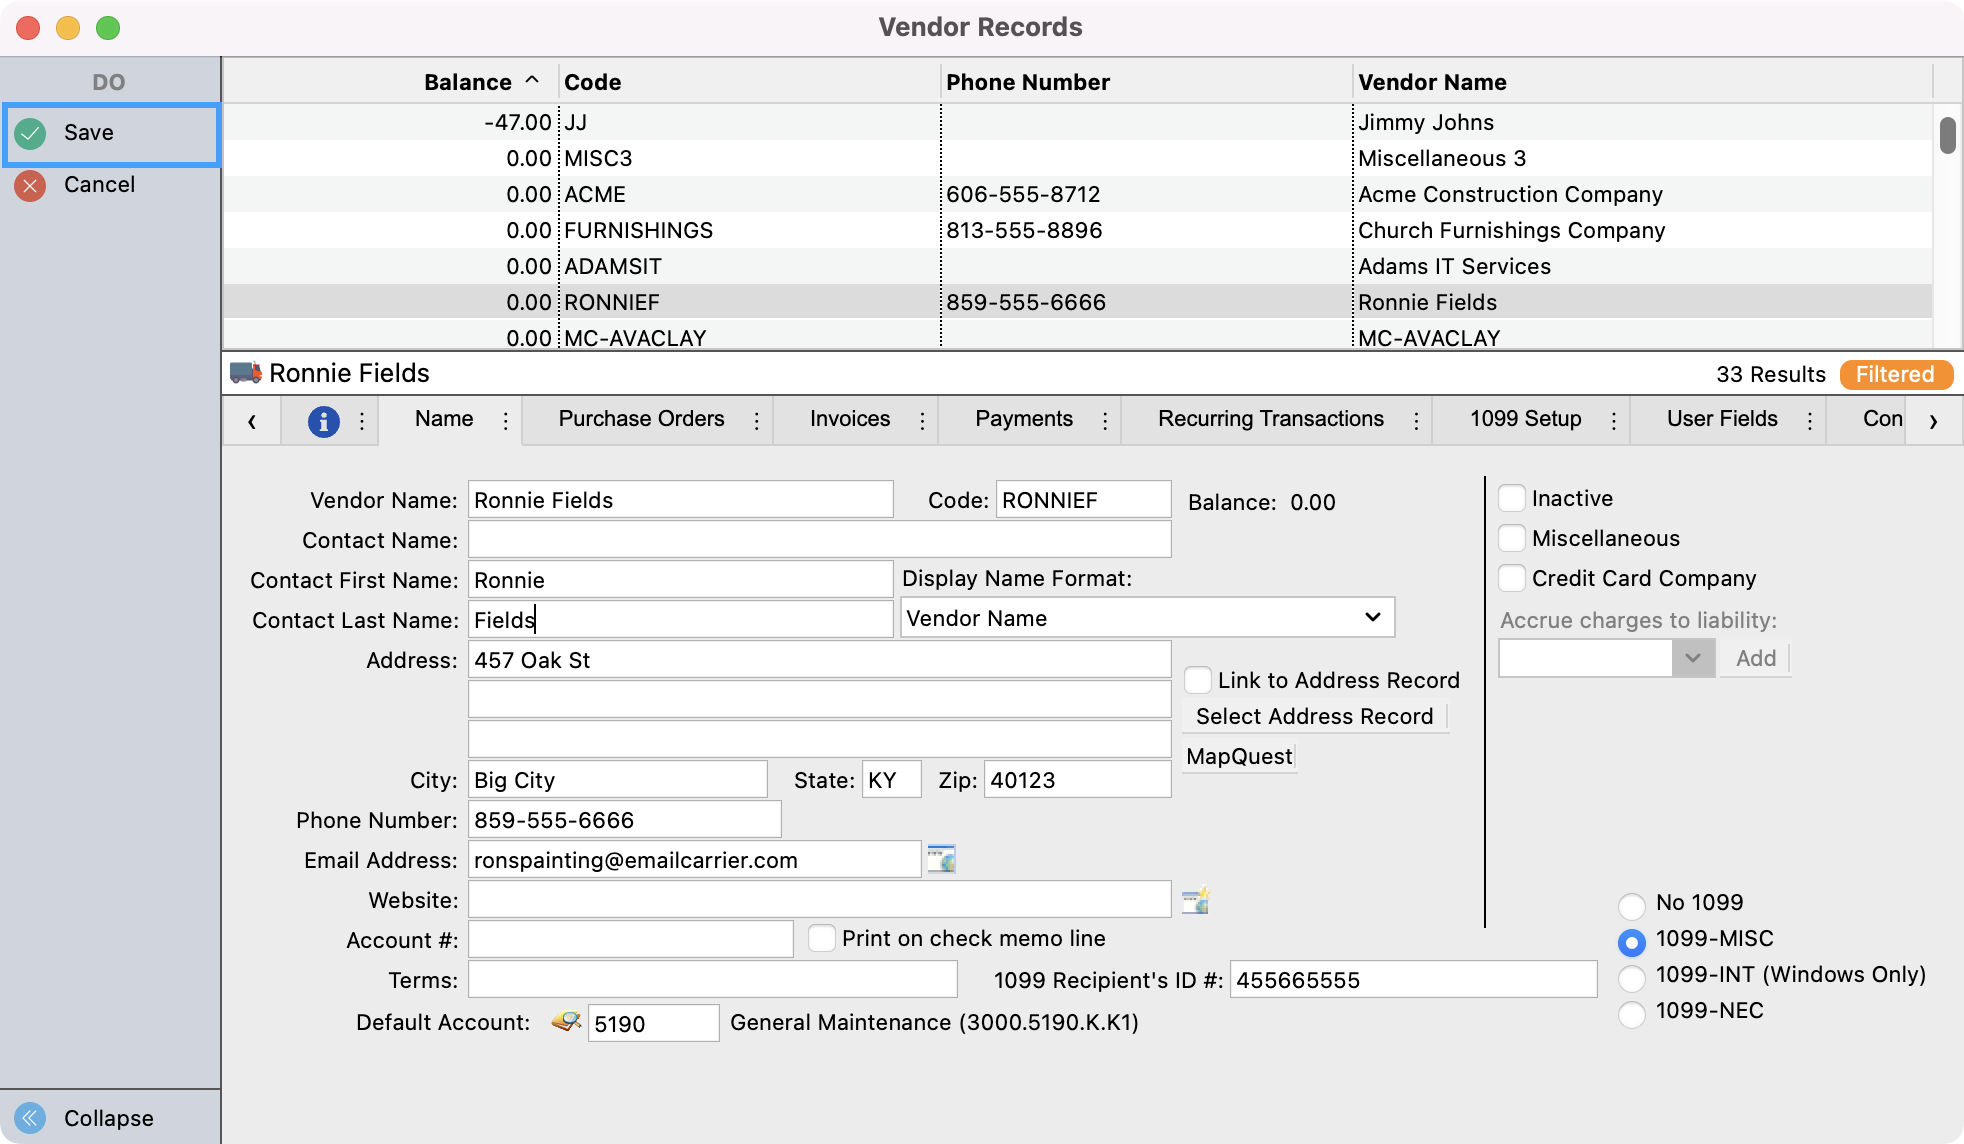
Once this information is filled it you can run your 1099’s like normal.
Vendor Records - Payments Tab
Ensure Expense accounts are tagged as 1099 showing an asterisk beside the account number. This is visible in the table on the right side of the Payments tab.
-
Select Payments tab
-
Click Change in Sidebar
-
Select the expense line you want to toggle.
-
Click Toggle 1099 ( * ) Setting
-
Click Save
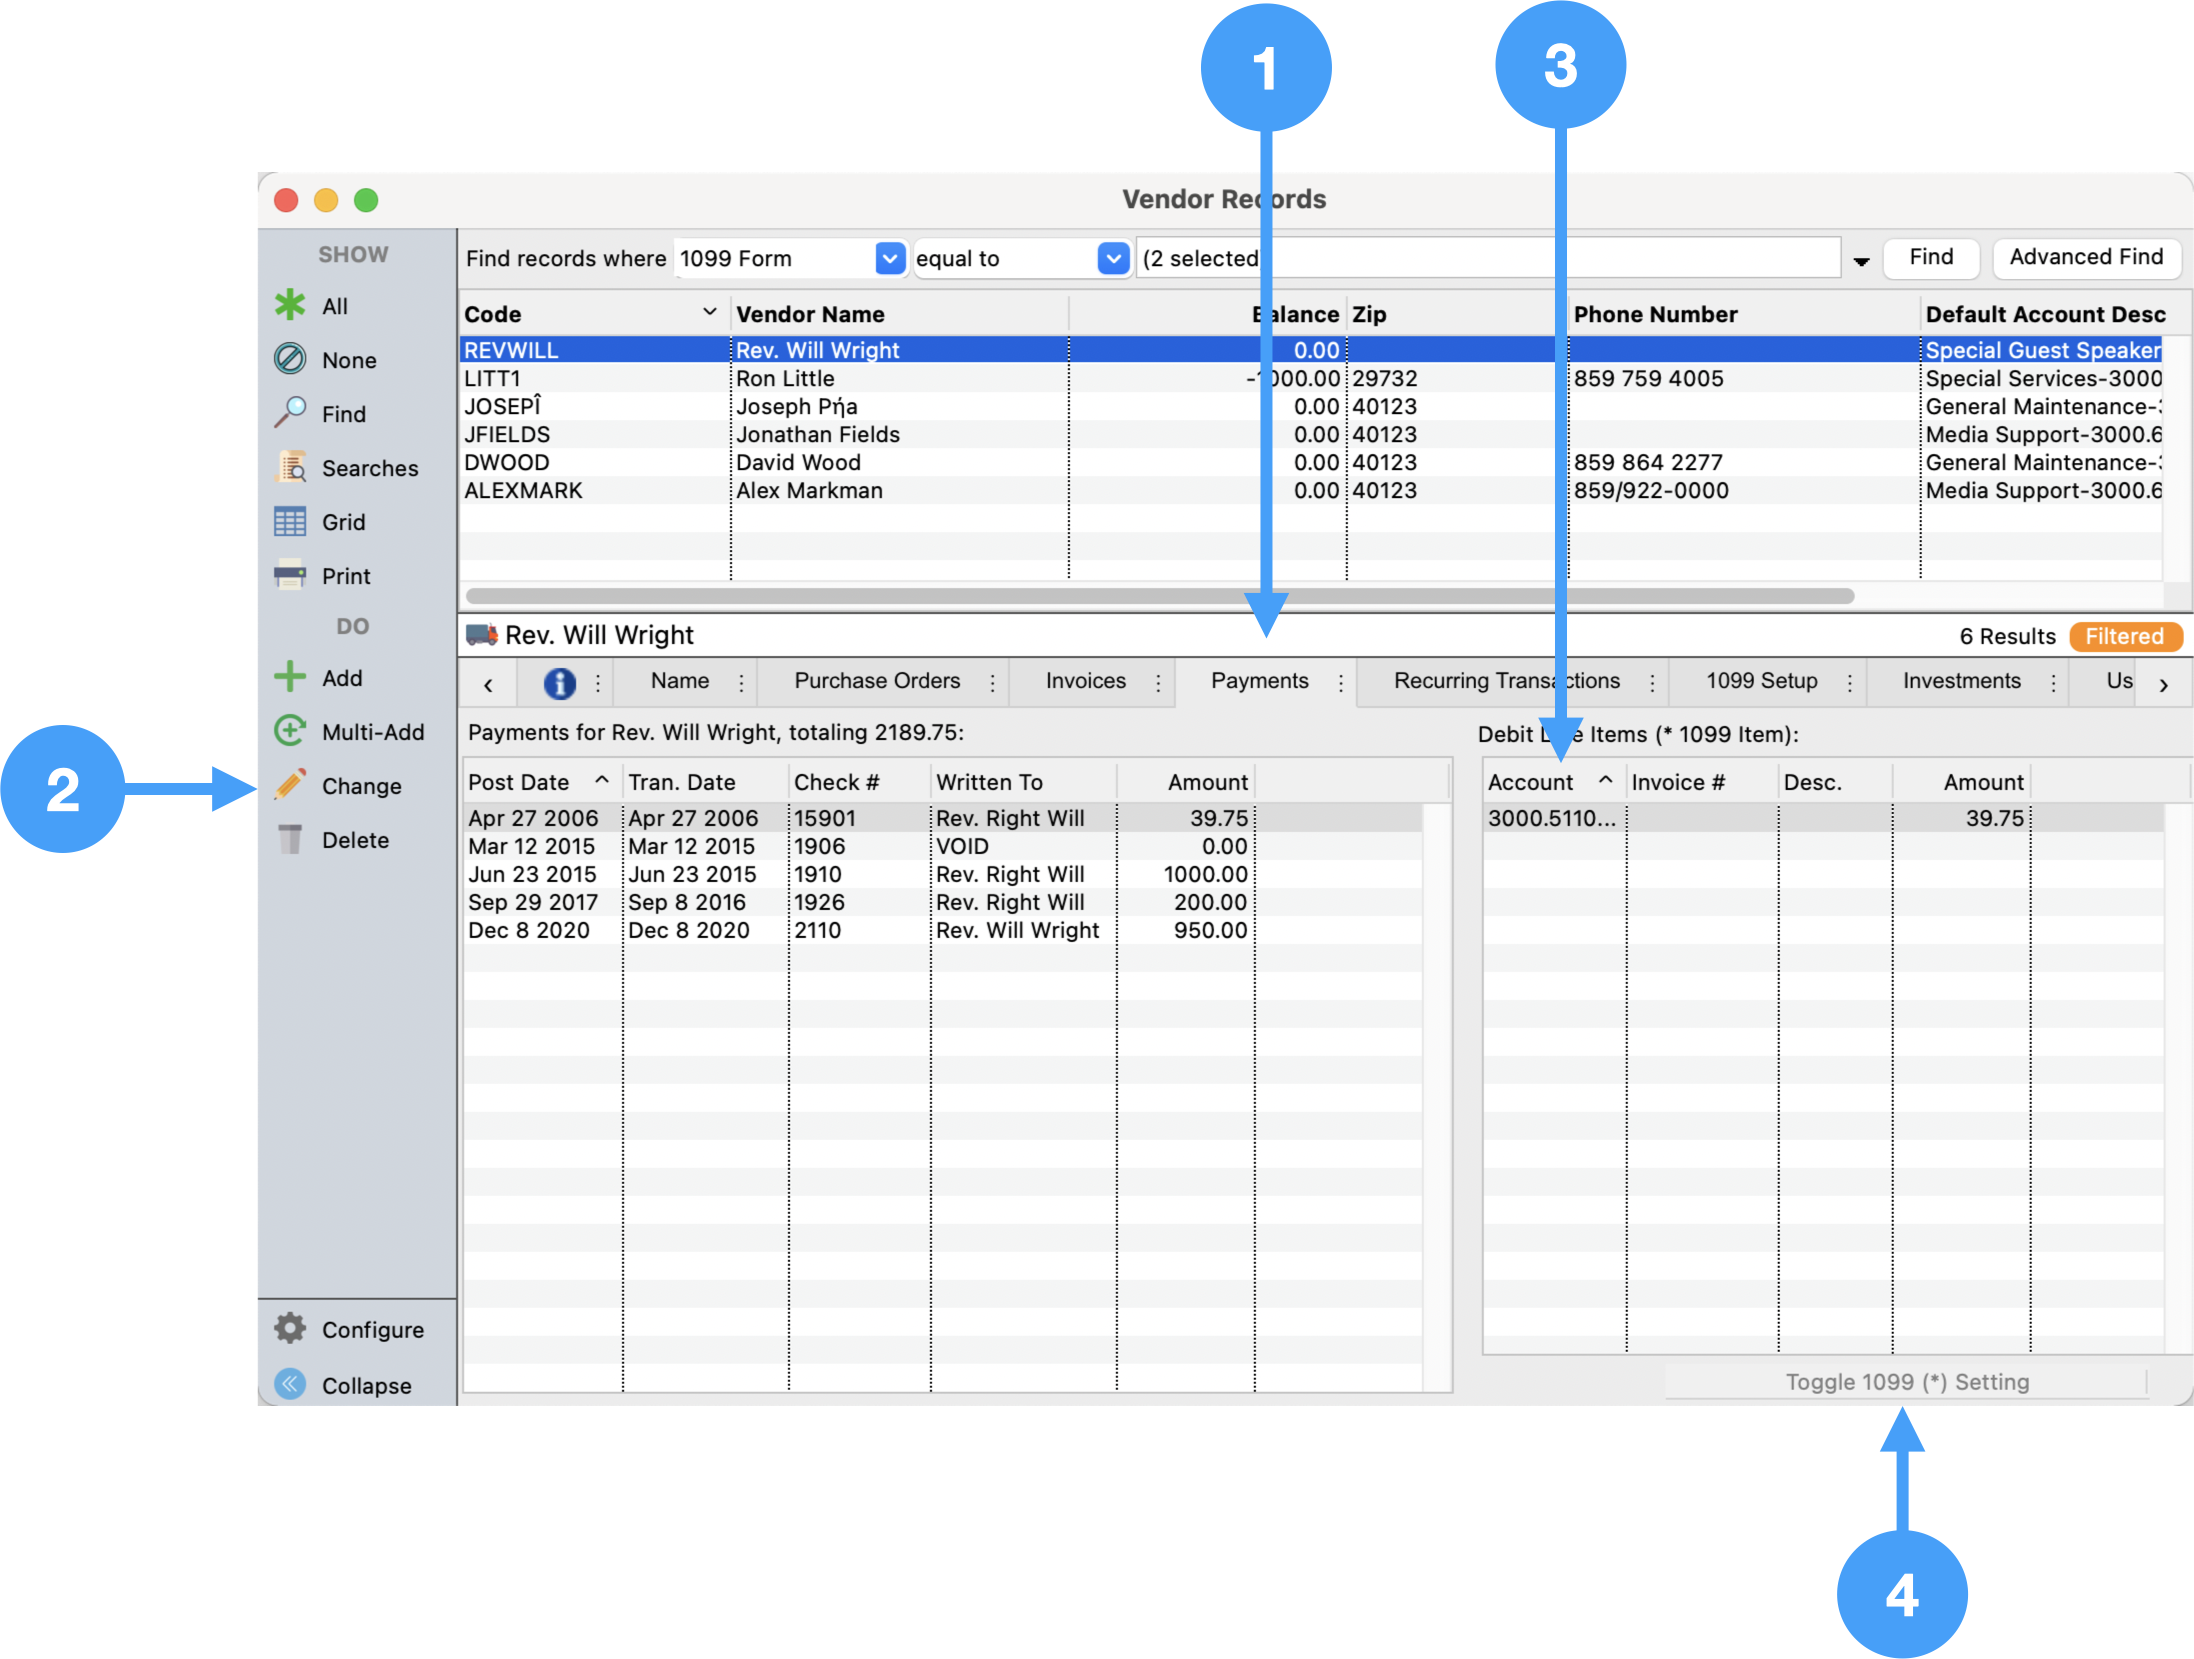
Below is an animation of the process in action:
If a payment to the vendor does not appear on the Payments tab, find the payment under Program → Ledger → Ledger Entry Records and ensure the vendor is selected in the Vendor field.
Vendor Records - 1099 Setup Tab
There is no setup required under the 1099 Setup tab for 1099-NEC forms.
Payer Records
Program → Accounting → Payer Records
-
Ensure the Company information is correct.
-
Ensure the Contact information is correct.
-
Ensure State is selected.

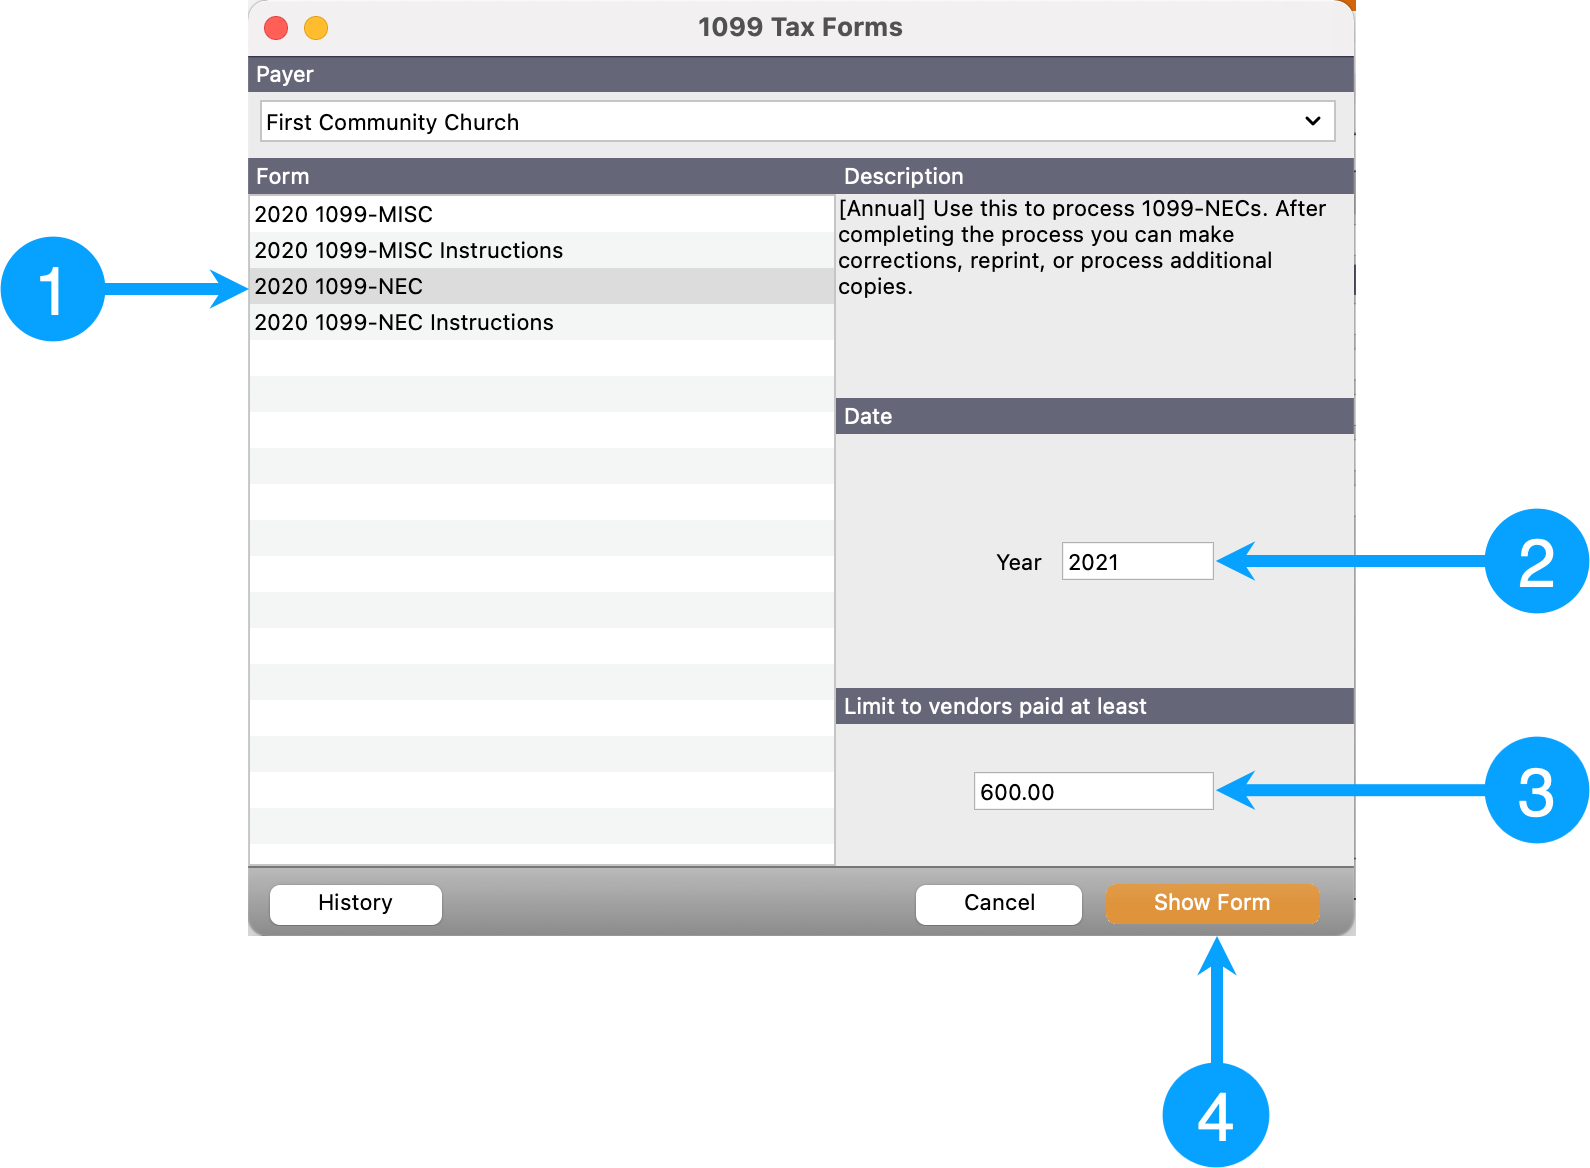
Processing 1099-NEC Forms
Reports → Payables → 1099 Forms
-
Select 1099-NEC
-
Enter 2020 for the Year field.
-
Ensure Vendor Limit is set to '600.00'
-
Click Show Form
What should I do when there are 53 Sundays in a year? How do I handle pledges that were given thinking that there were 52 Sundays?