
Once you have added an Event Record you can begin registration. Participants can register online through Engage if published, the Single Event Registration tool, or you can manually register participants through the Registration Entry window.
-
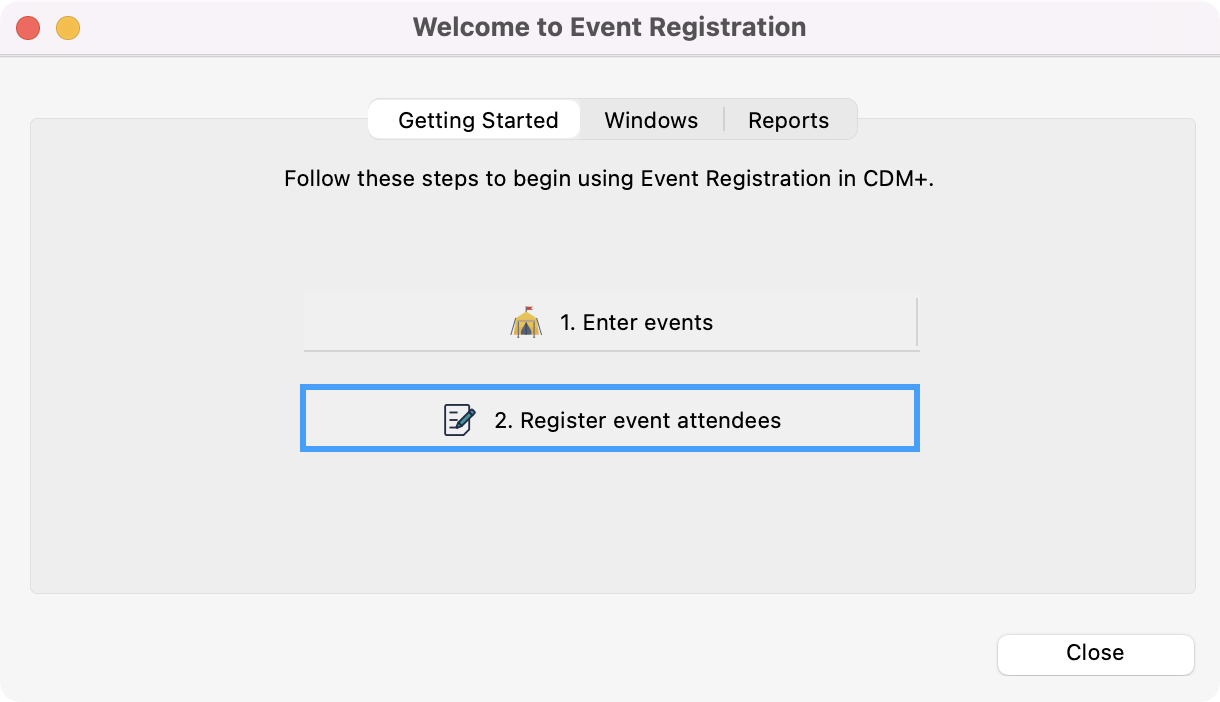
To Navigate to Registration Entry, from the Welcome to CDM+ window, click Event Registration.

Then, click Register event attendees.
or
Go to Program → Event Registration → Registration Entry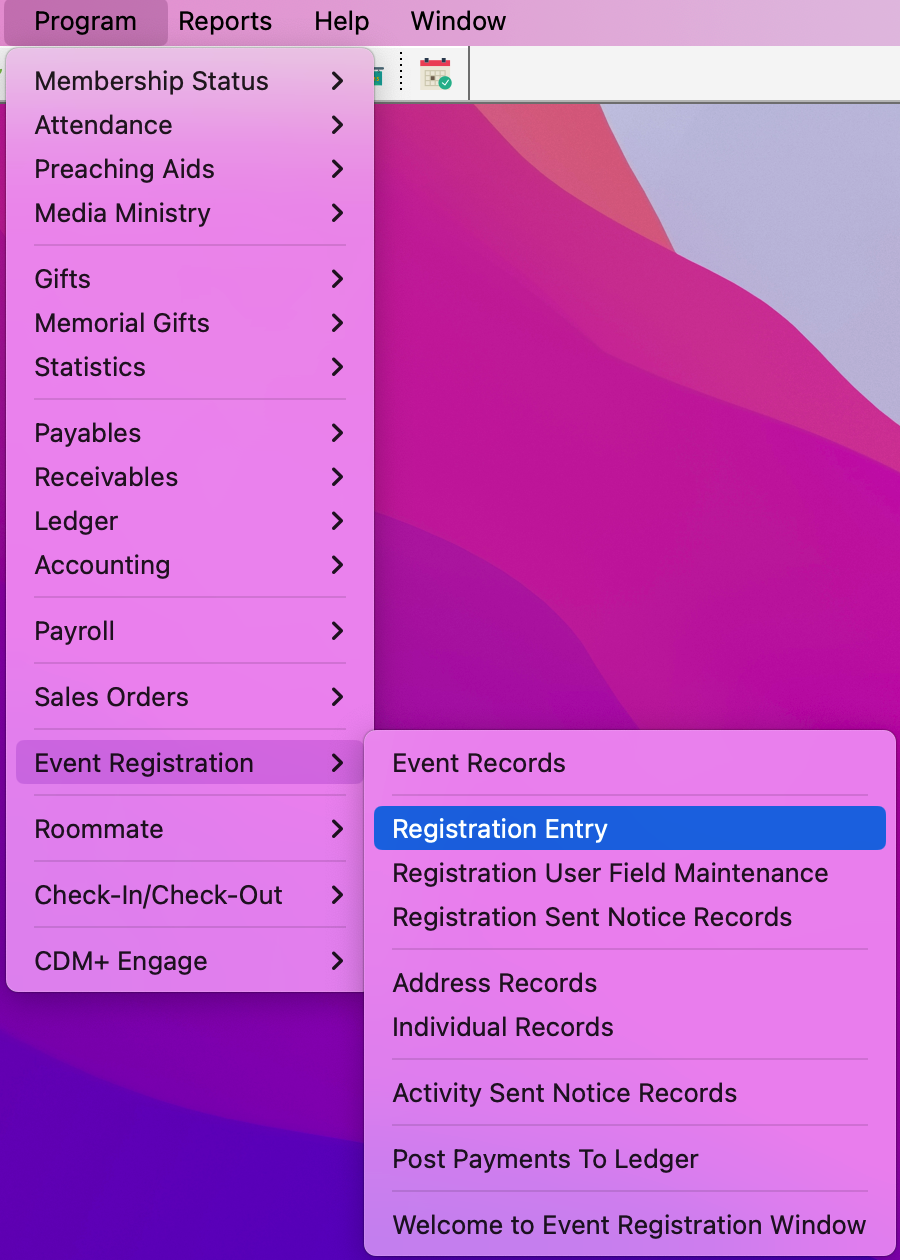
If you have chosen under Preferences-Toolbars to show the Event Registration toolbar, you may click the Event Registration icon.
Adding Registrants
-
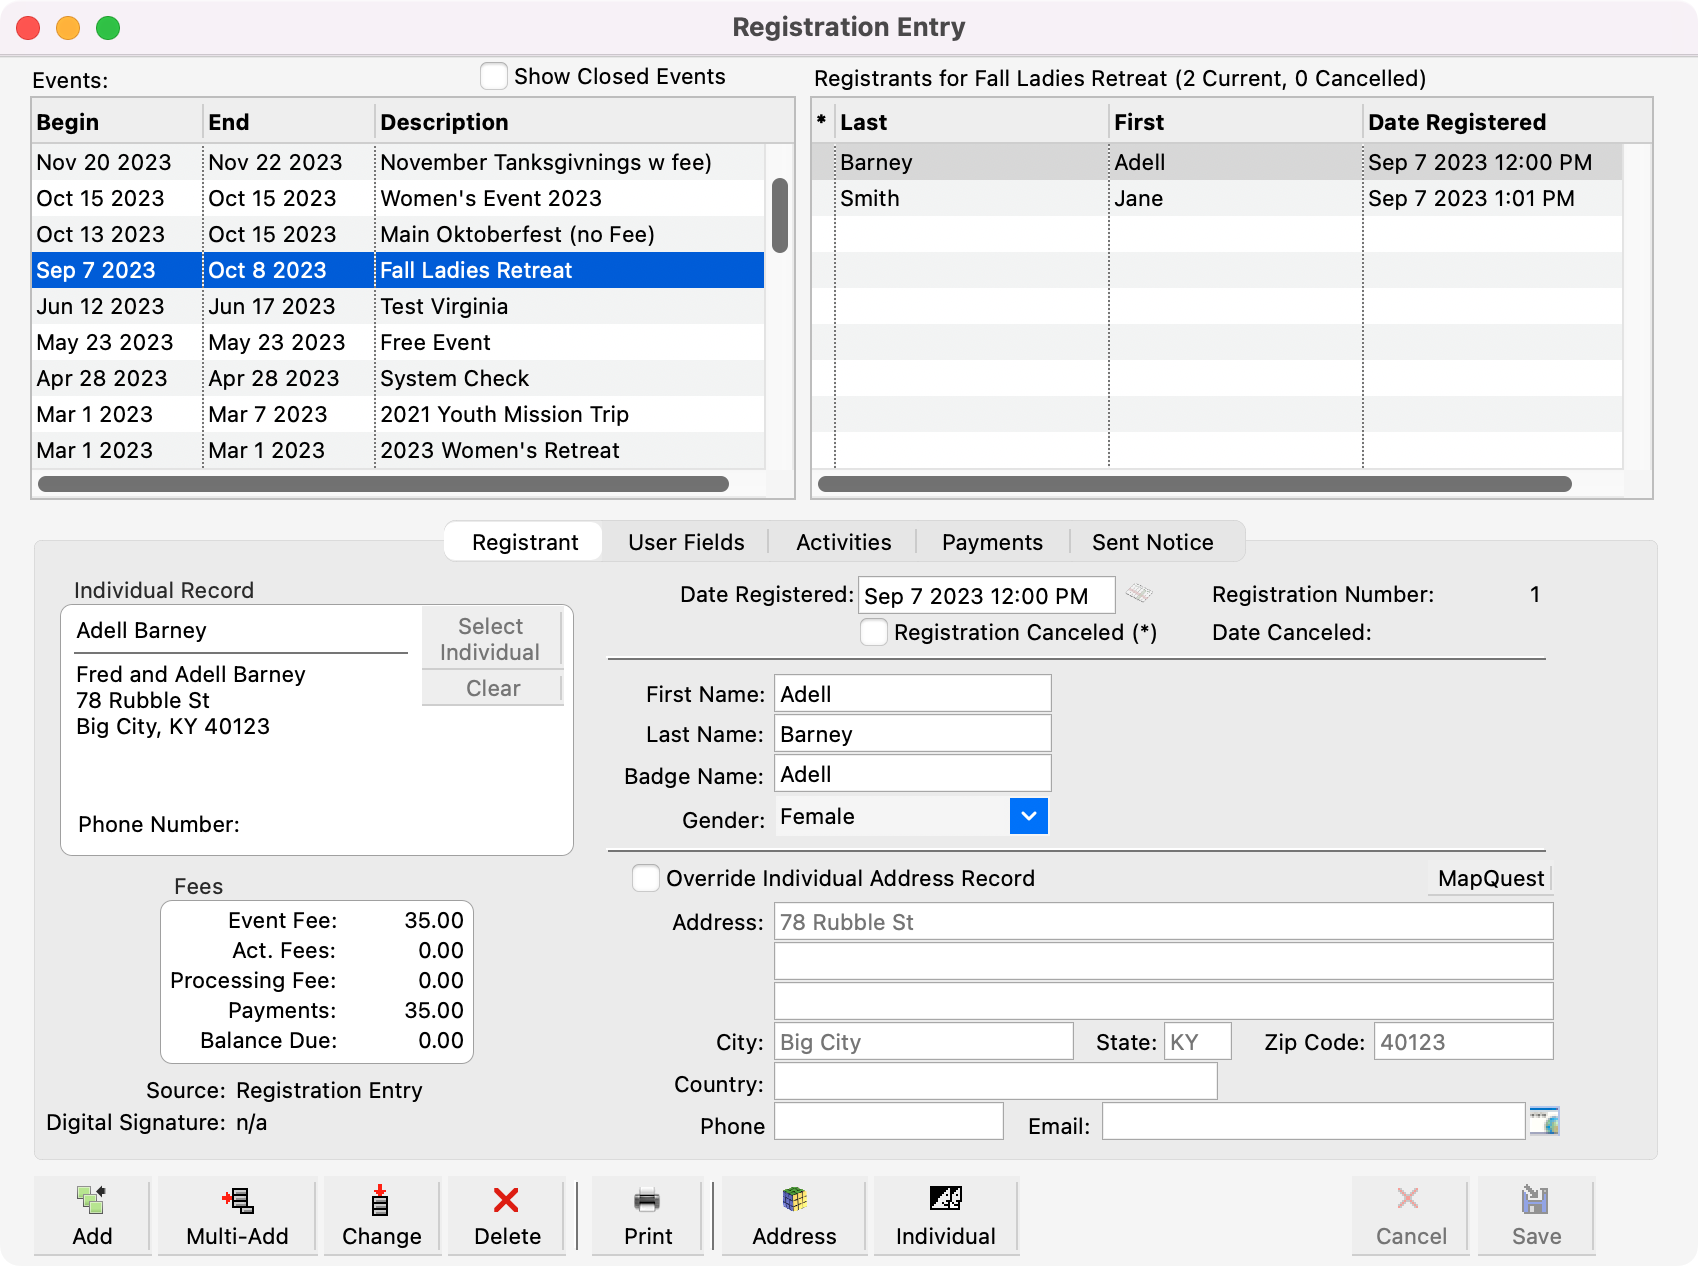
Click to highlight the desired event in the Events list on the top left of the window. Any existing registrants for this event will show in the list on the top right, along with the total number registered.
-
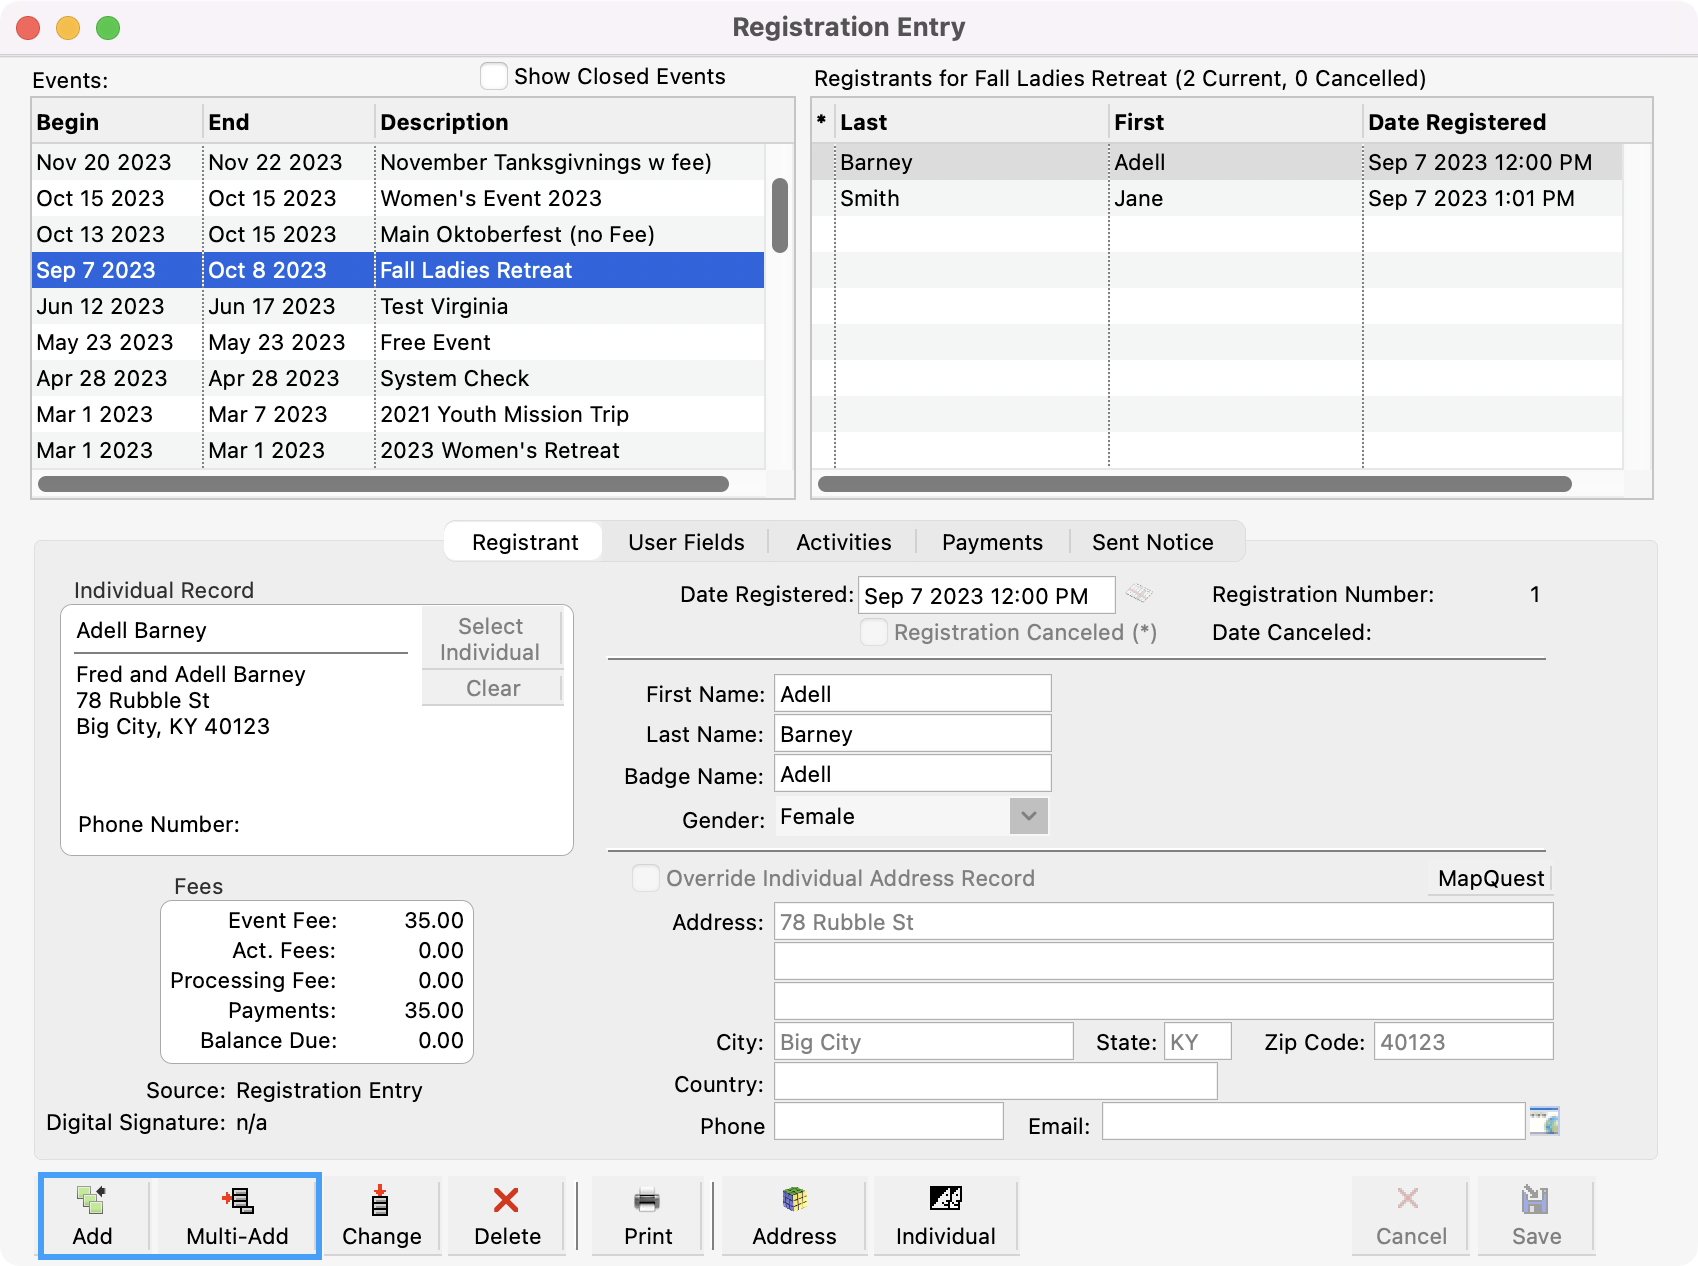
Click Add or Multi-Add.
-
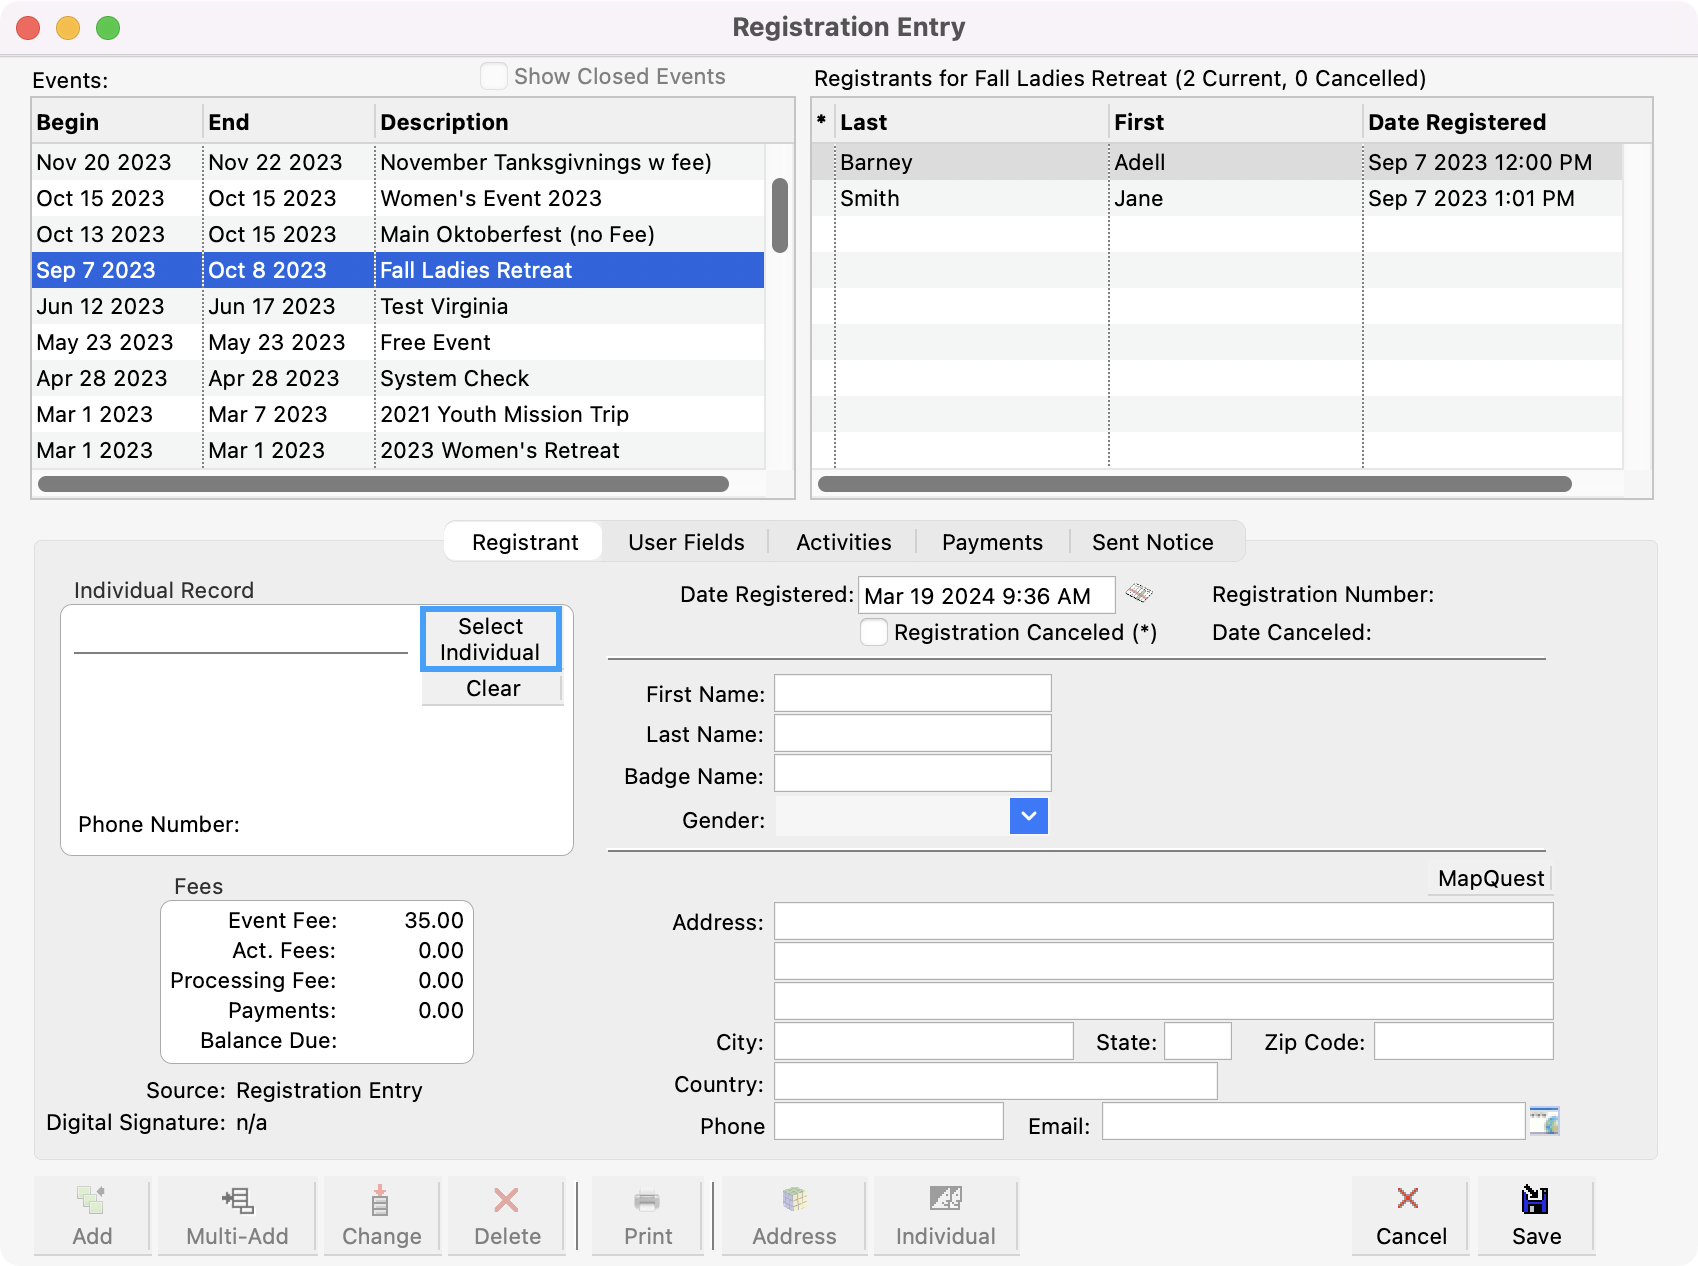
Unless you checked the Skip Individual Record lookup when adding a new registration box on the Event Record window, you will see the Select Individual window open.
Use the Find or Advanced Find feature to find the person you want to register for this event or click the Show All button to list all individuals in your CDM+ Membership database.
Double-click the name of the person you are registering or click to highlight their name and click Select. This will load this person’s information from their Individual Record in the Registrant pane of the Registration Entry window. If you want to use another address for this registrant, check the Override Individual Record address box and type the correct address, phone or e-mail address.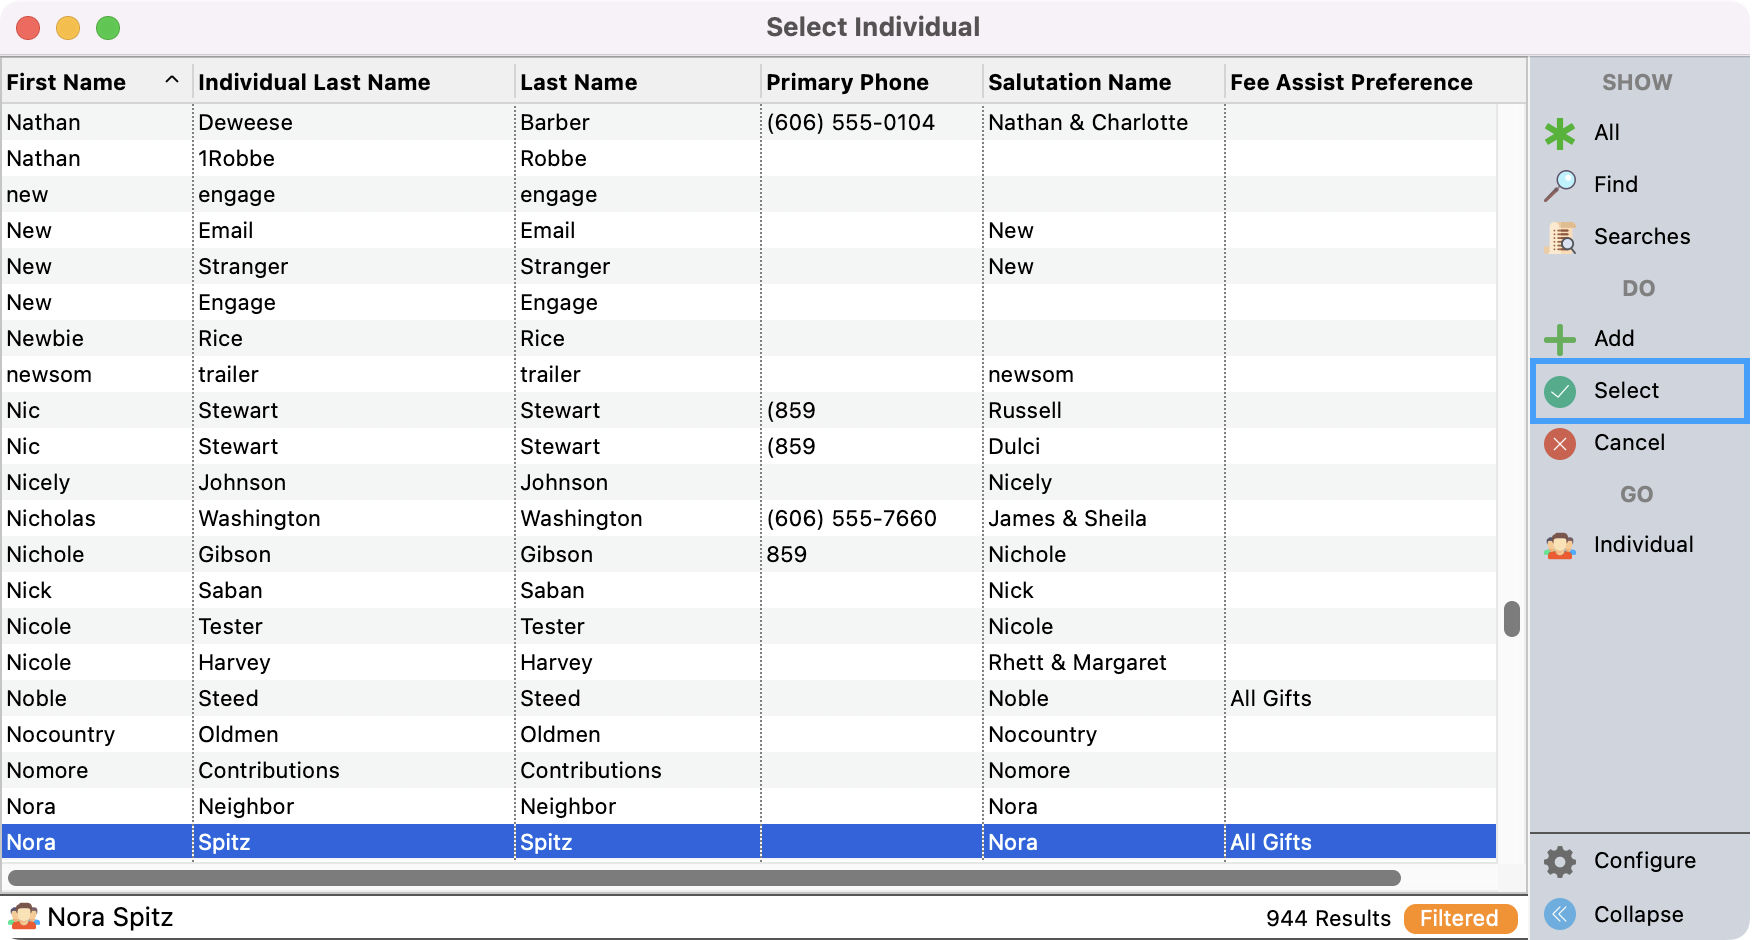
If you want to register an individual who is not in the CDM+ Membership database, and you have not checked the Skip Individual Record lookup when adding a new registration box on the Event Record window, click Close when the Select Individual window opens. Type the registrant’s information on the Registrant pane of the Registration Entry window.
-
If you did check the Skip Individual Record lookup when adding a new registration box on the Event Record window and want to register a person who has an Individual Record in CDM+ Membership, you may open the Select Individual window by clicking on the small Select Individual button in the Individual Record section of the Registrant pane of the Registration Entry window. Otherwise, simply type in the registrant's information.
-
In Multi-add mode, the Select Individual window will remain open in the background. Upon saving a registration, this window will come to the front with the search you last executed.
Camp/Youth Event Information
-
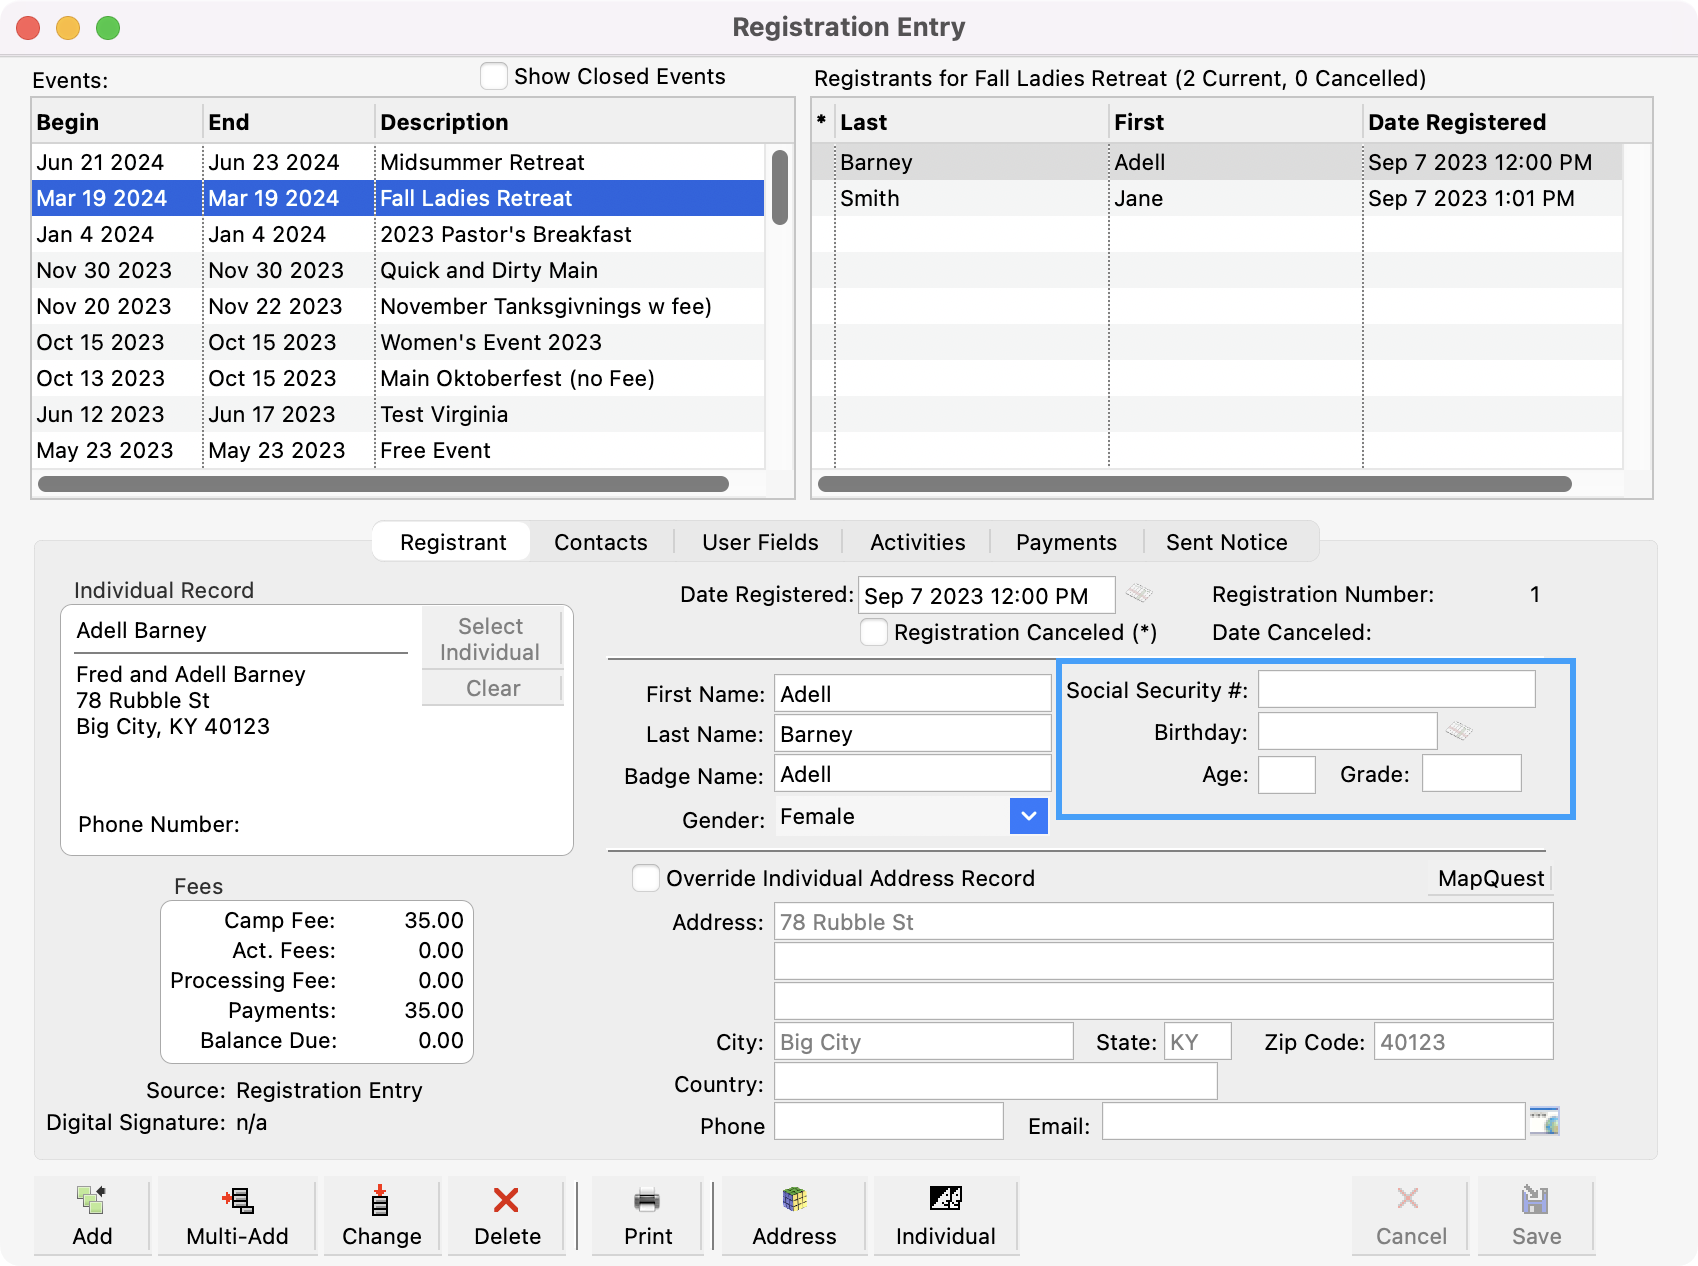
The Social Security #, Gender, Birthday, Age, and Grade fields only appear in the Registration Entry window if you have marked this event as a Camp/Youth Event on the Event Information pane of the Event Record window. Marking that box also causes an additional pane of information to be included in the Registration Entry window—Contacts. Therefore, anytime it would be useful to be able to record contact information for an event, even if it is not a youth or camp event, check the Camp/Youth Event box on the Event Record window.
-
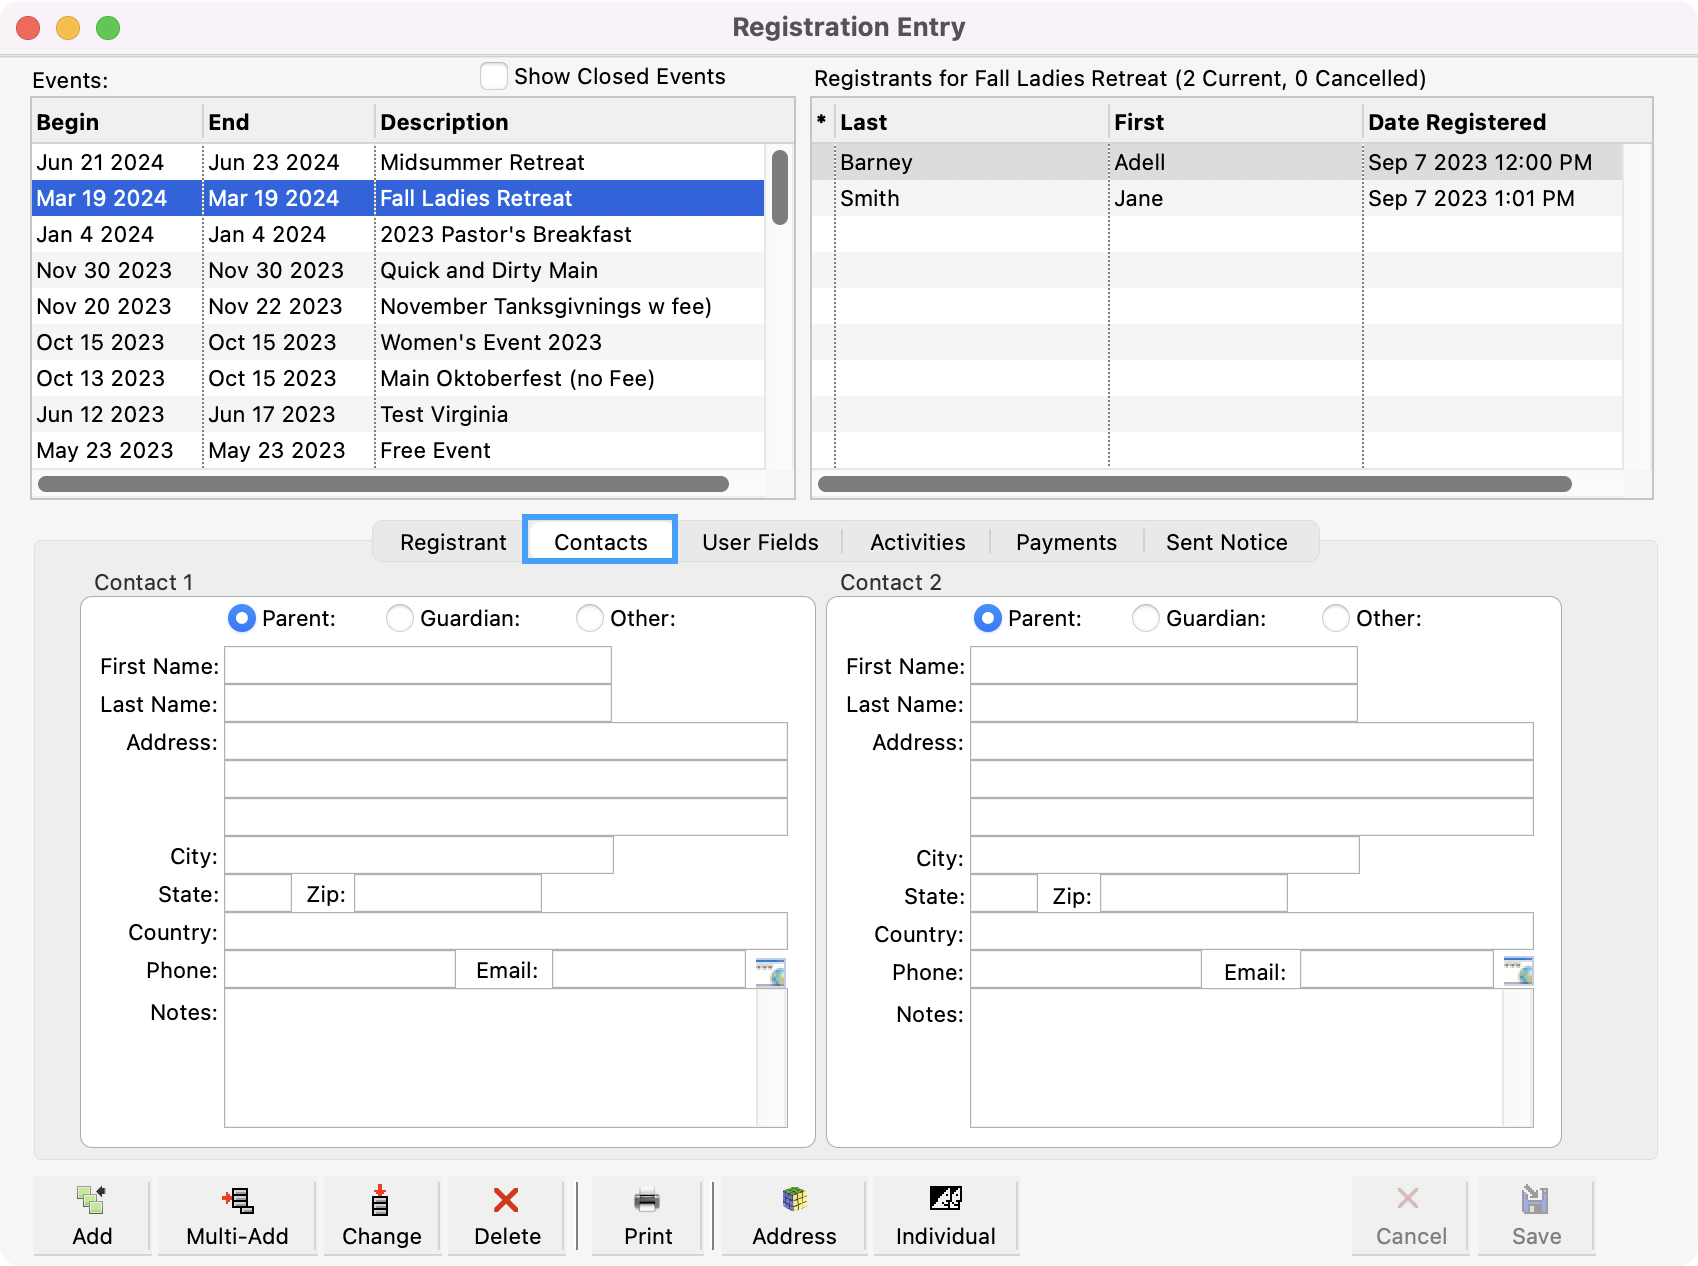
Once you are sure the information on the Registrant pane is correct, click the Contacts tab (if showing, otherwise skip to Other Information). Here you can enter all the contact details for the registrant.
User Fields
-
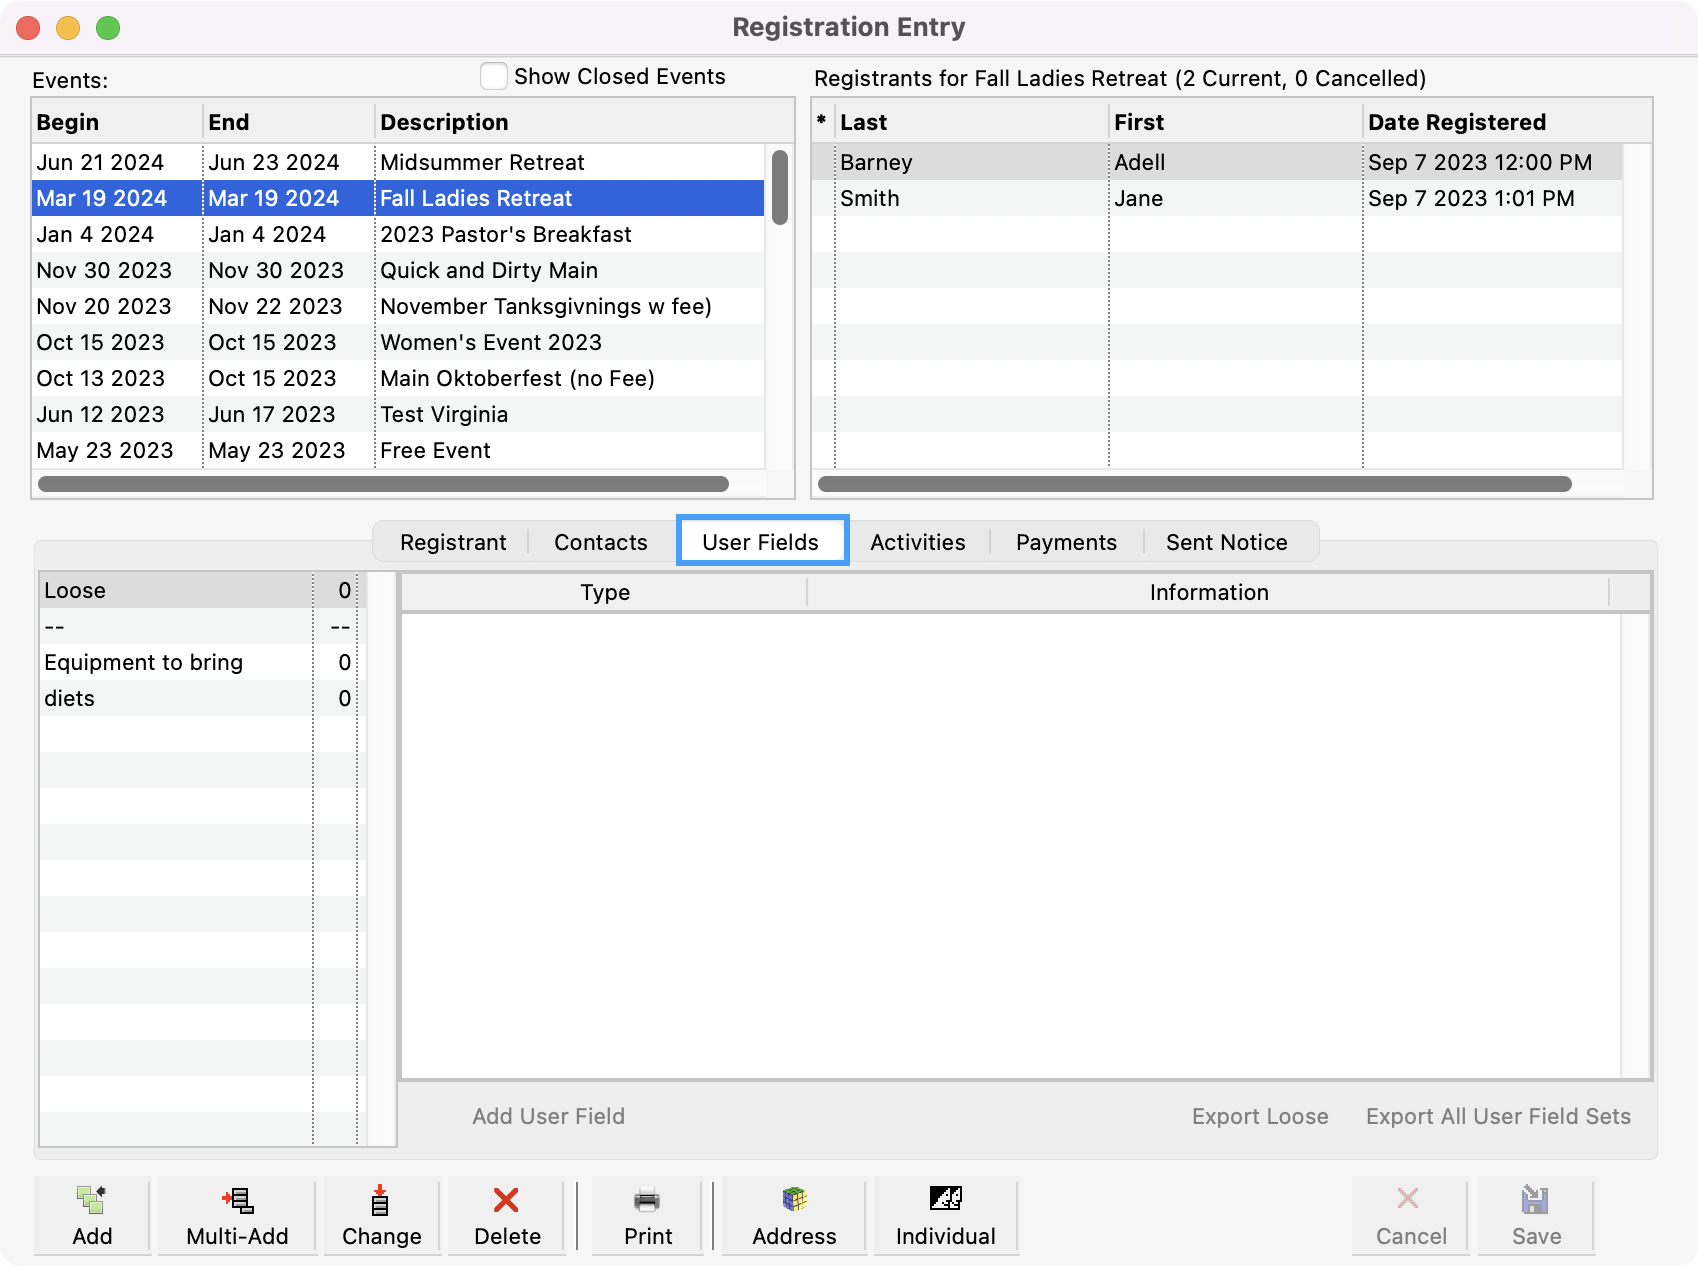
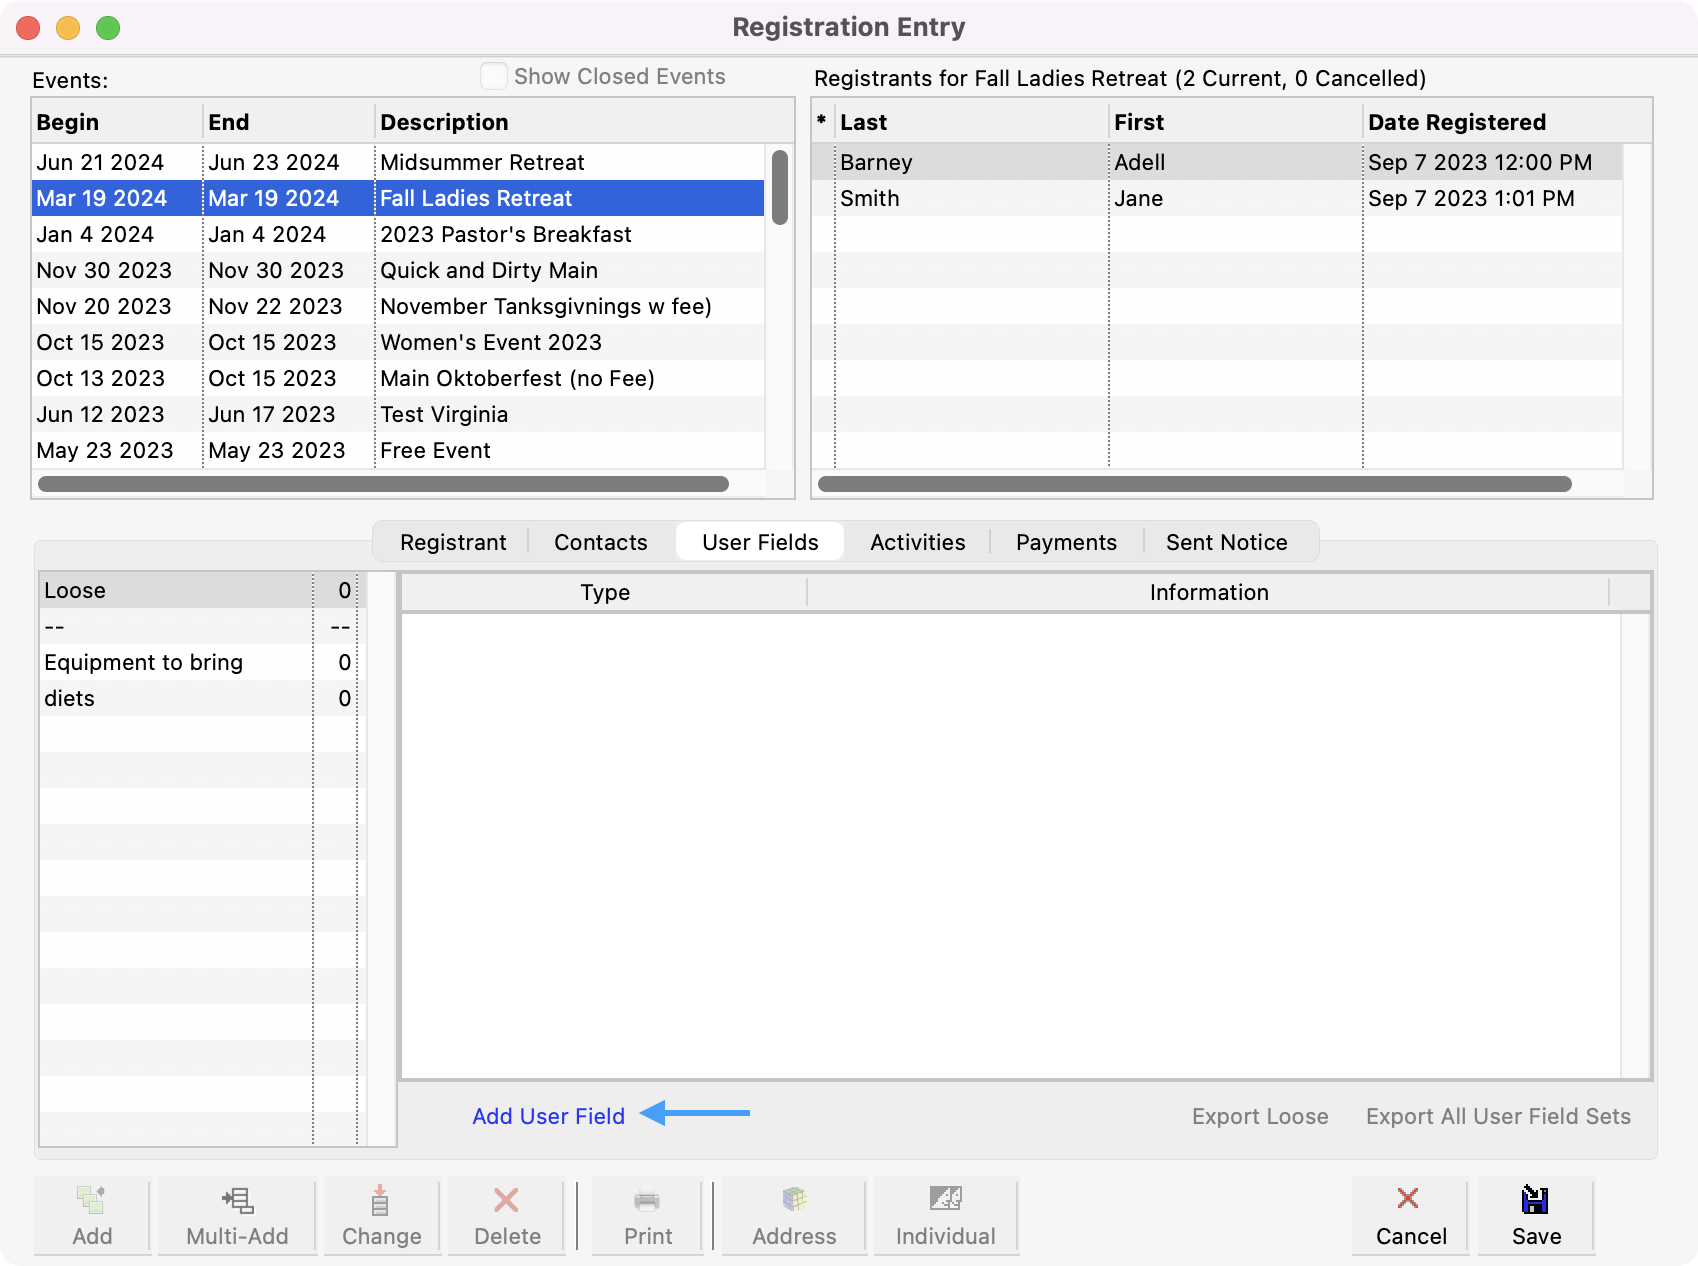
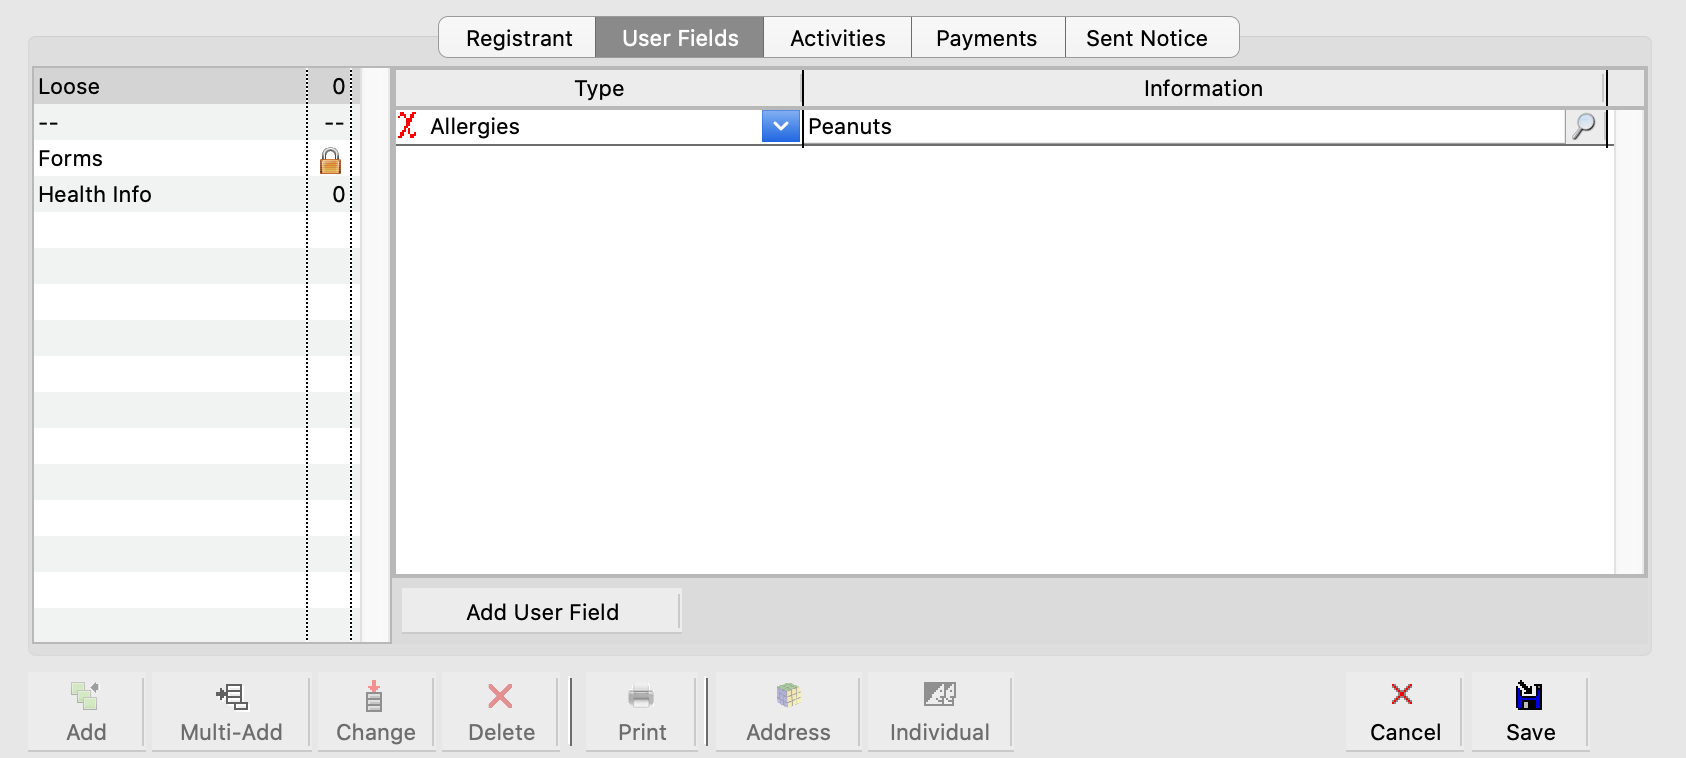
Next, click the User Fields tab.
-
To add a user field, click the small Add User Field link at the bottom middle of the widow.
-
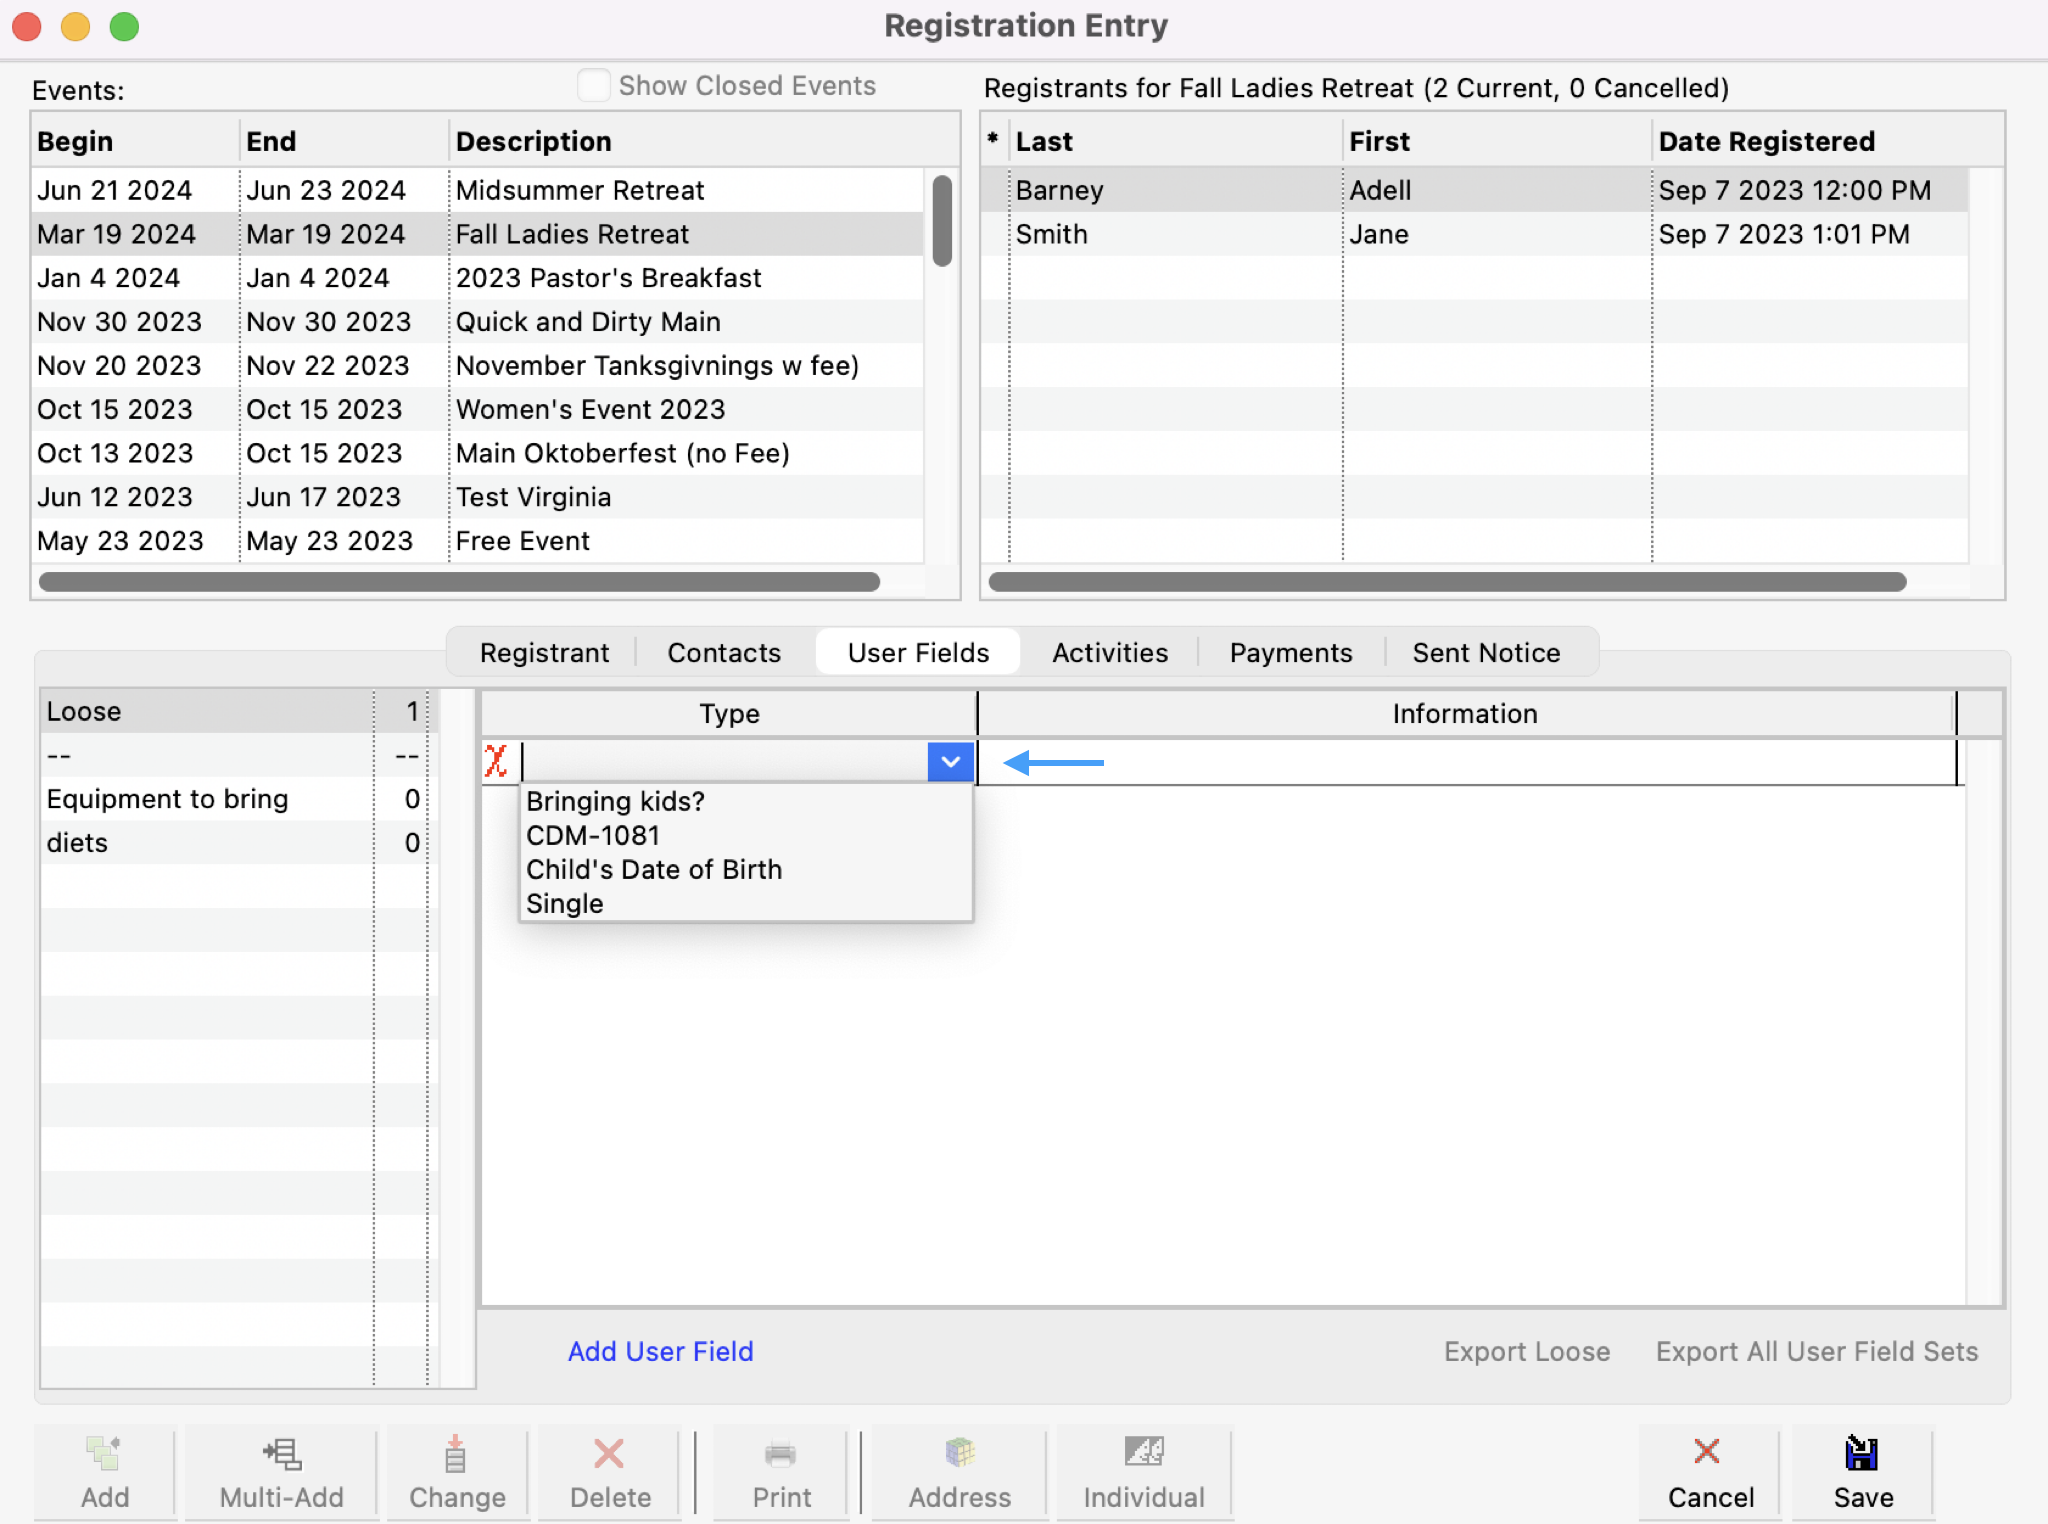
Click on the down arrow under Type to select an item code from the drop-down menu. Press tab and type the information. Or, you can type any portion of the item you want and press Tab to “auto-complete” the entry. This search is case-insensitive and works on any portion of the entry, not just the beginning letters. For example, typing “shirt” will bring up “T-shirt size.”
-
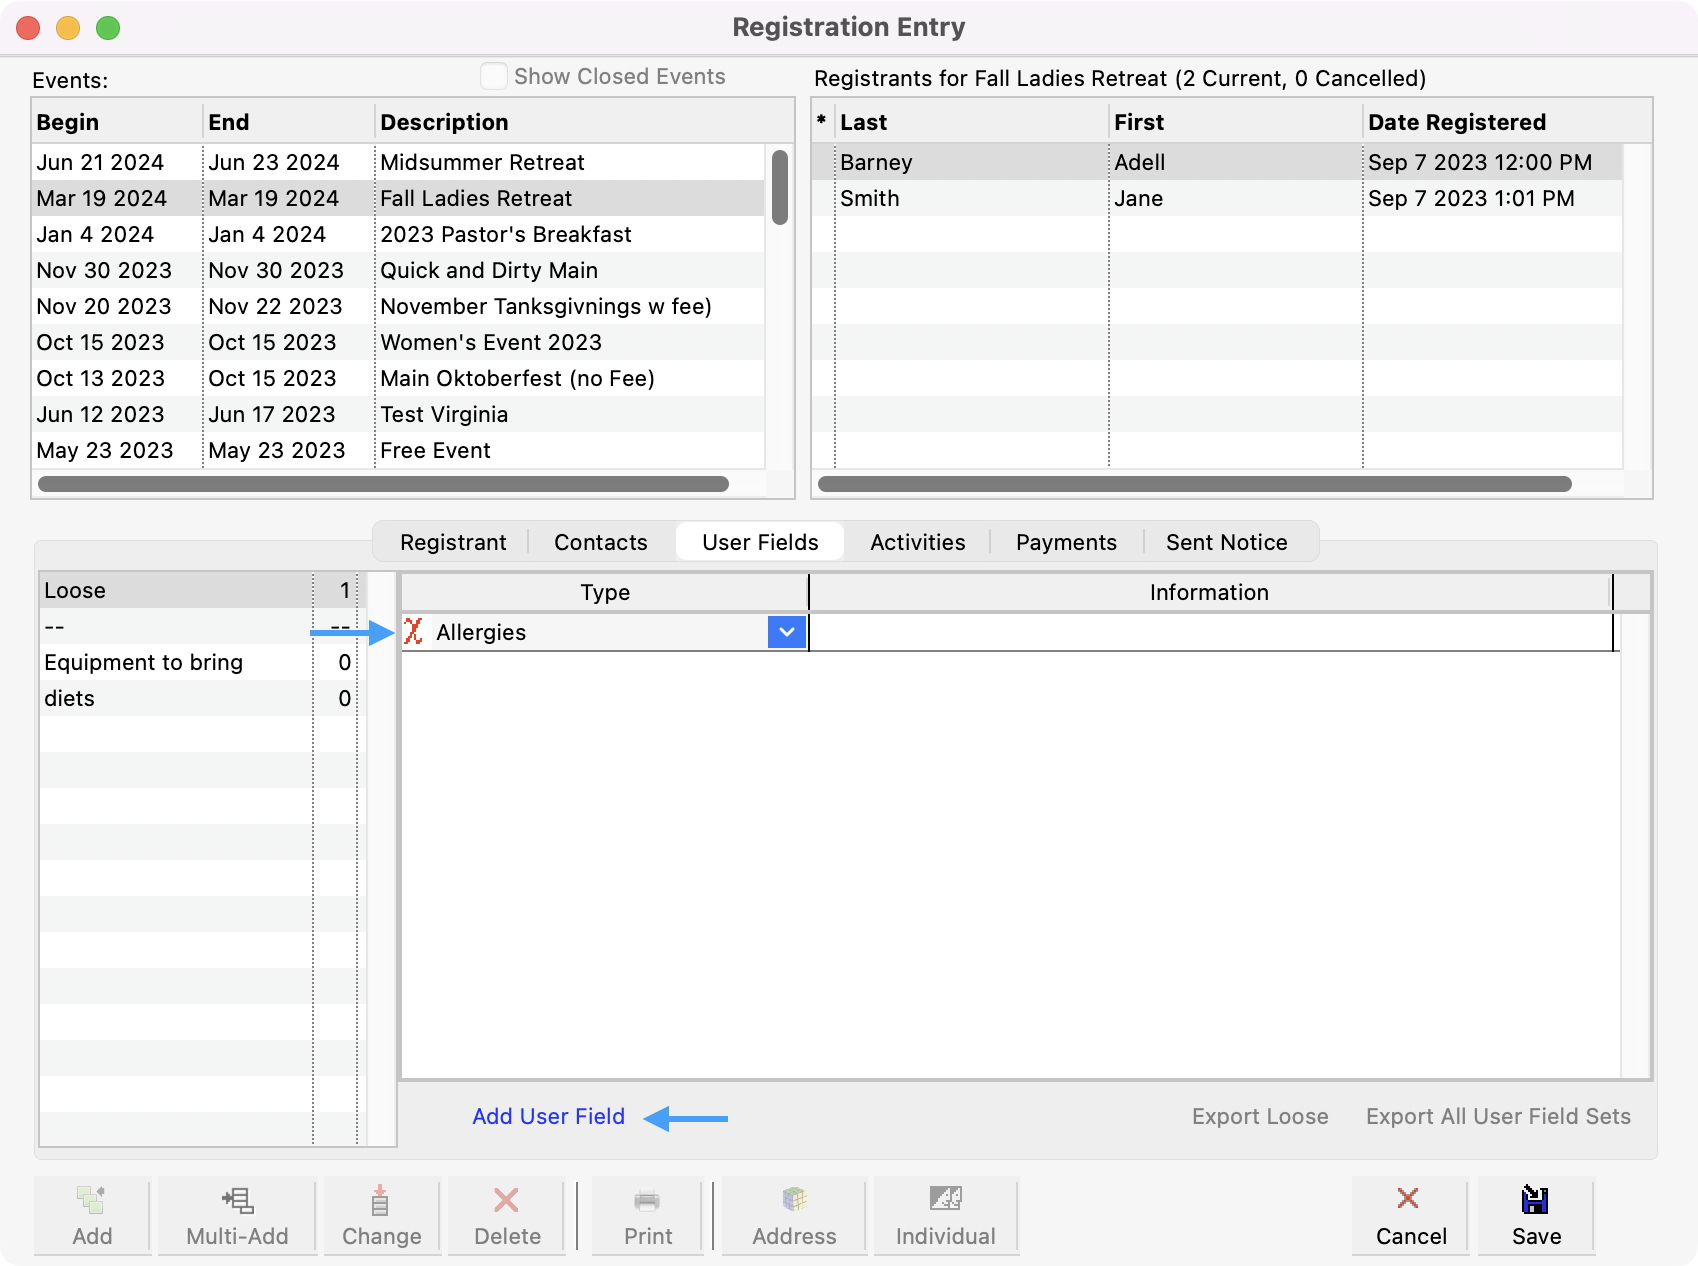
To add an item to the list, click the small Add User Field button at the bottom of the window. Place your cursor in the white box next to the down arrow and type the description of the code.
-
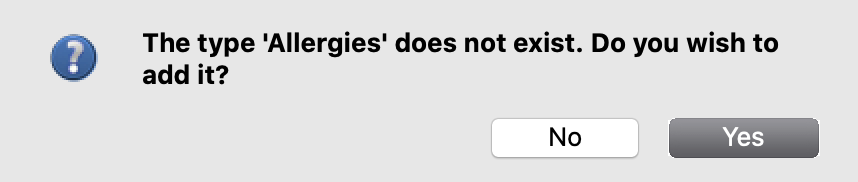
Press Enter. A message similar to this will appear:
-
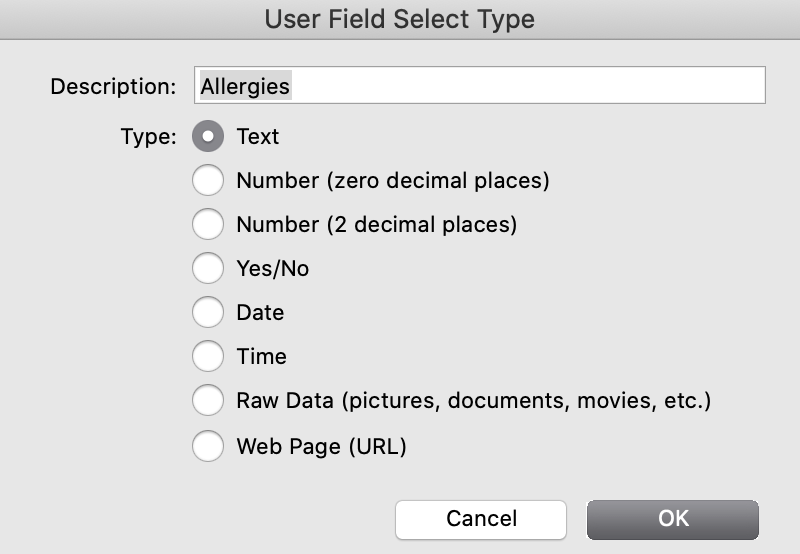
Click Yes and the following will appear:
-
Type the Description of the other information type and select the appropriate radio button for the type of information this code will track. For example, if you need to record special Allergies of registrants, you would click Text. Click OK.
Other possible uses include photos of registrants or signed permission forms for youth.
Activities
-
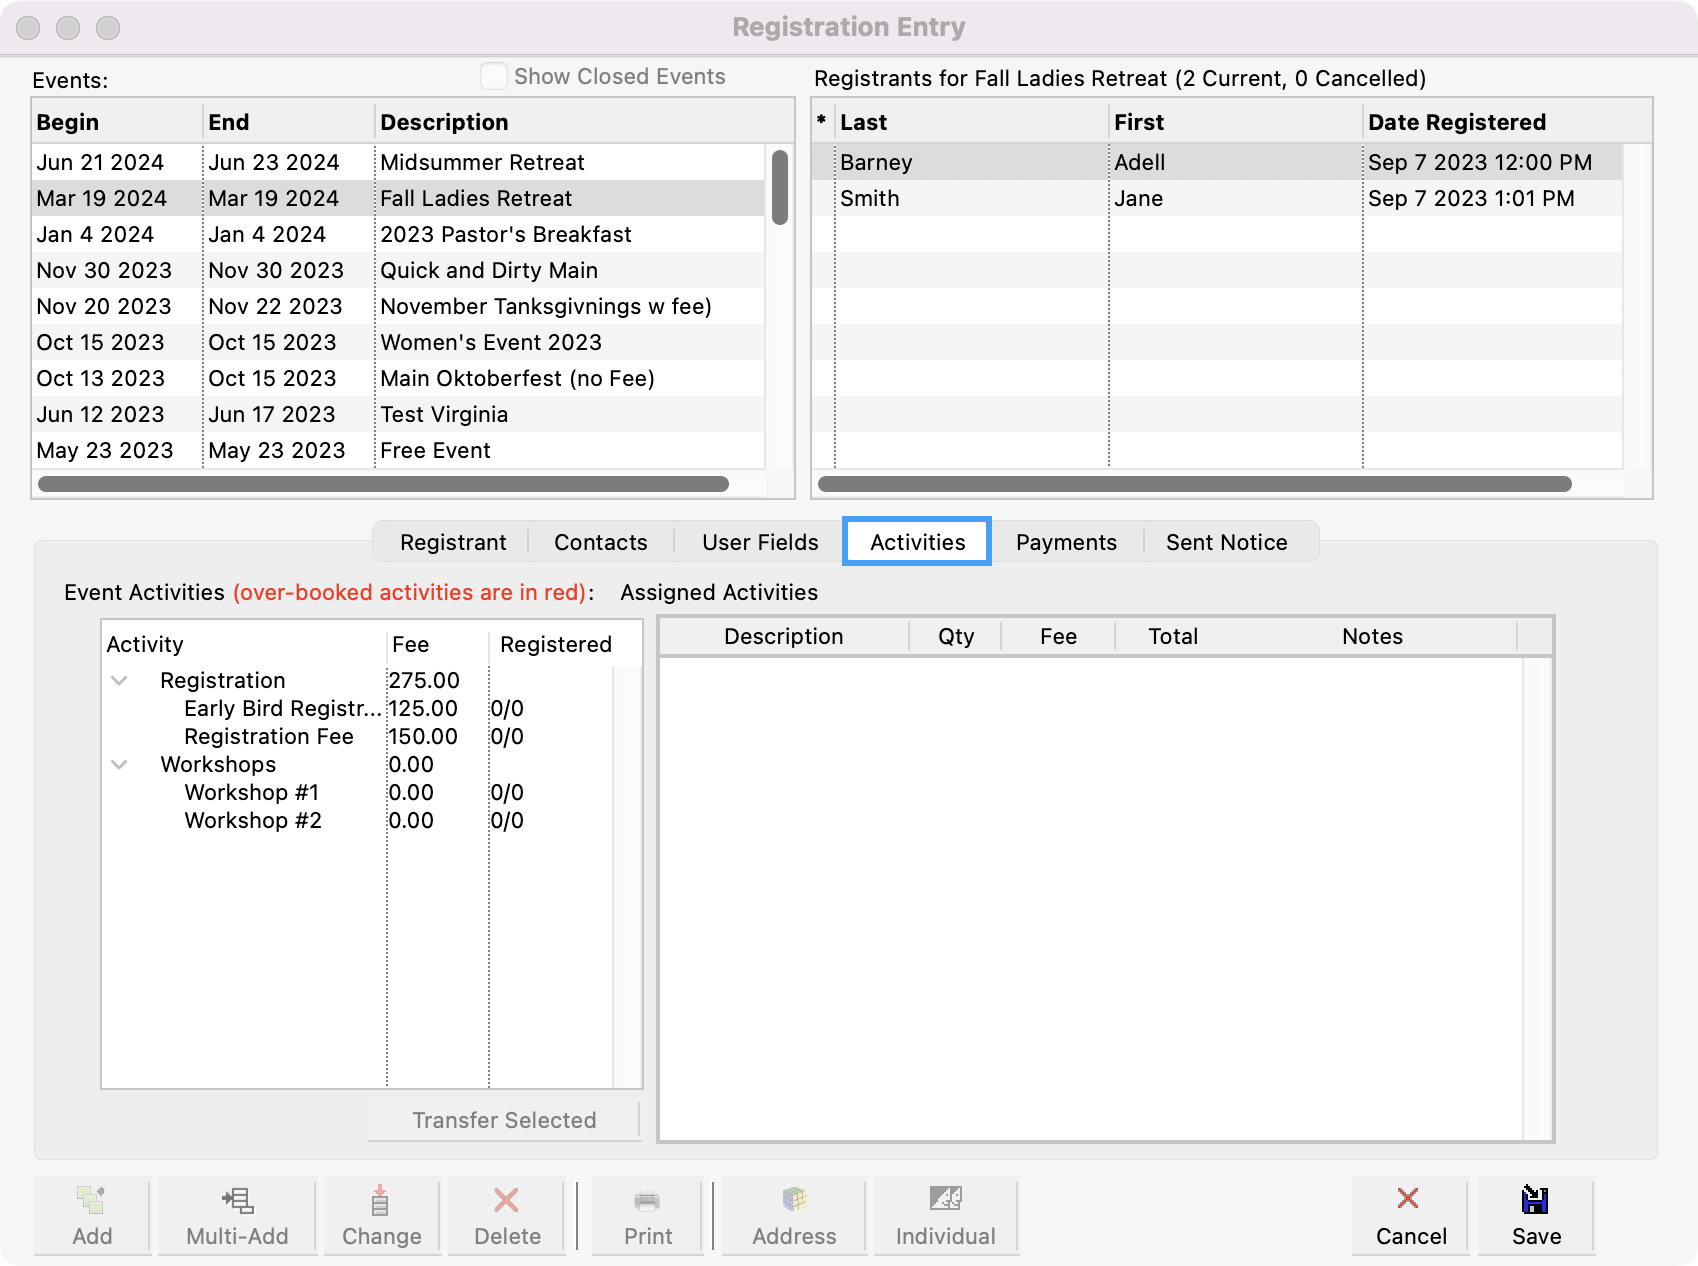
Next, click the Activities tab.
-
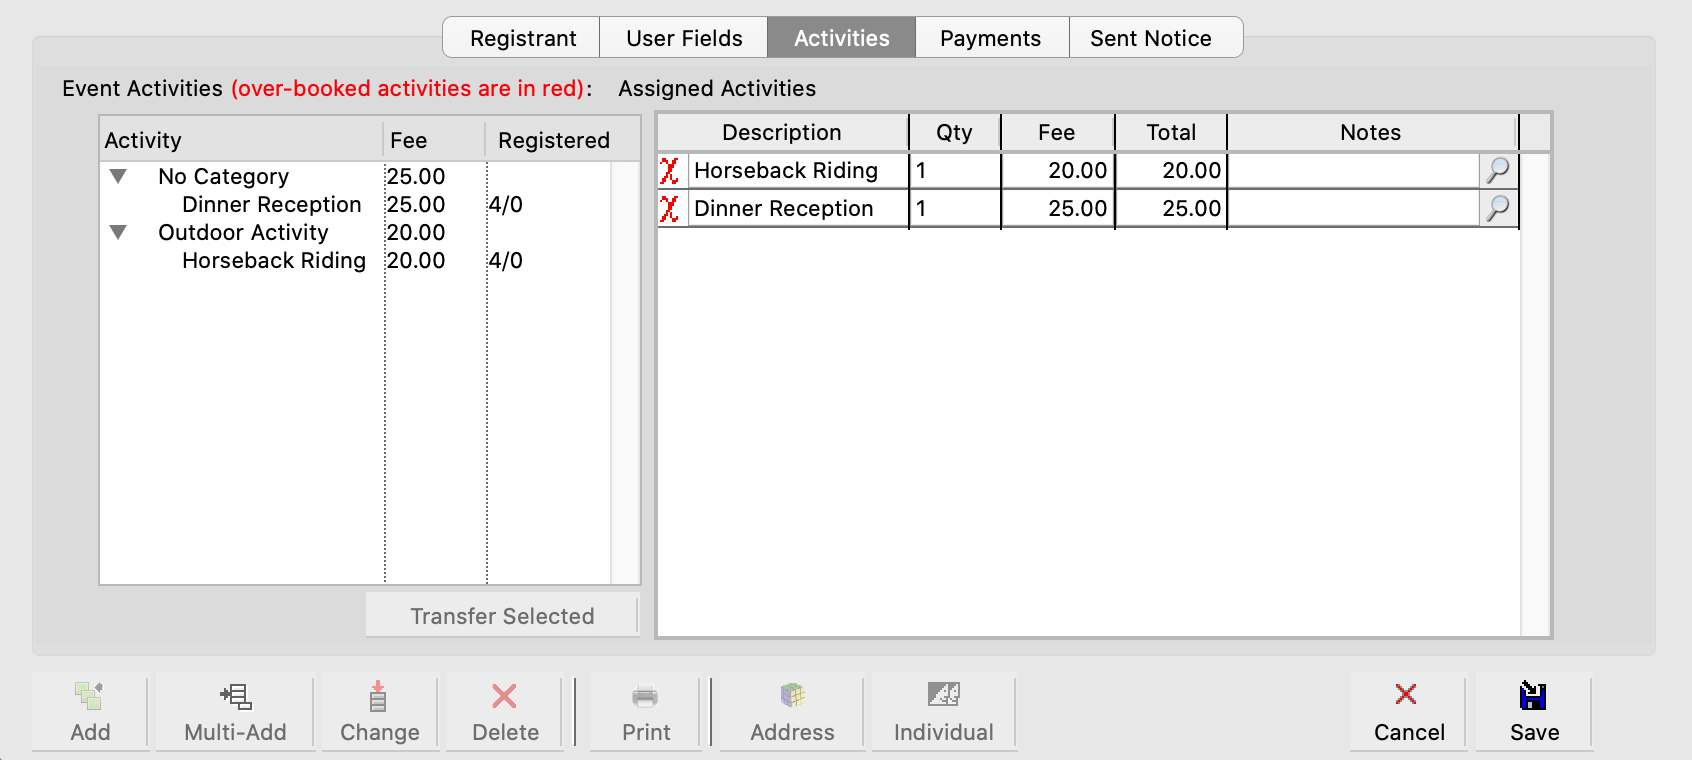
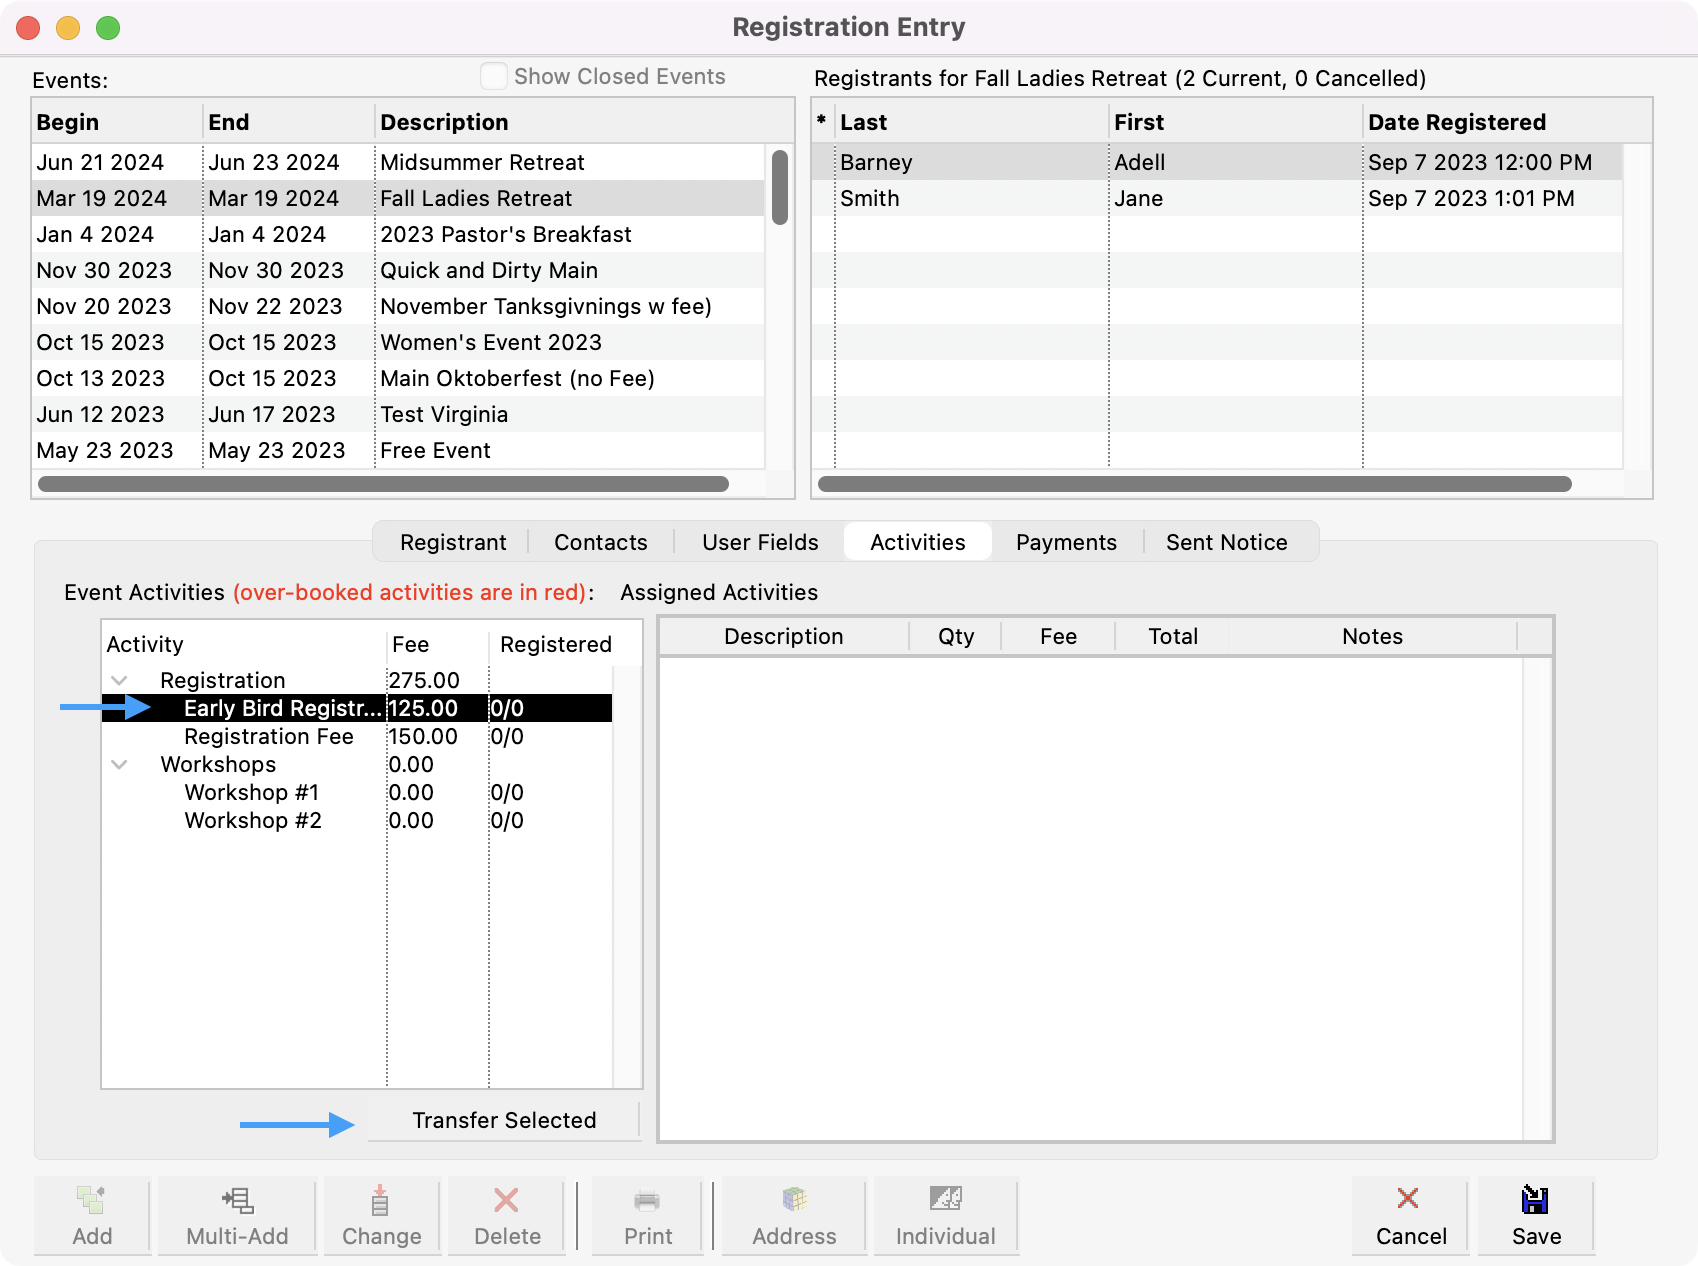
Listed on the left you’ll see all the activities you set up for this event on the Activities tab of the Event Record window, along with the Fee for the activity (if any). The third column of the Event Activities list shows the number of persons Registered for each and the limit on possible registrants, if any, for the activity.
-
Either double-click an activity or highlight one or more activities in the Event Activities list on the left and click the small Transfer Selected button to register an event attendee for an activity. The activity will now appear in the Assigned Activities list on the right.
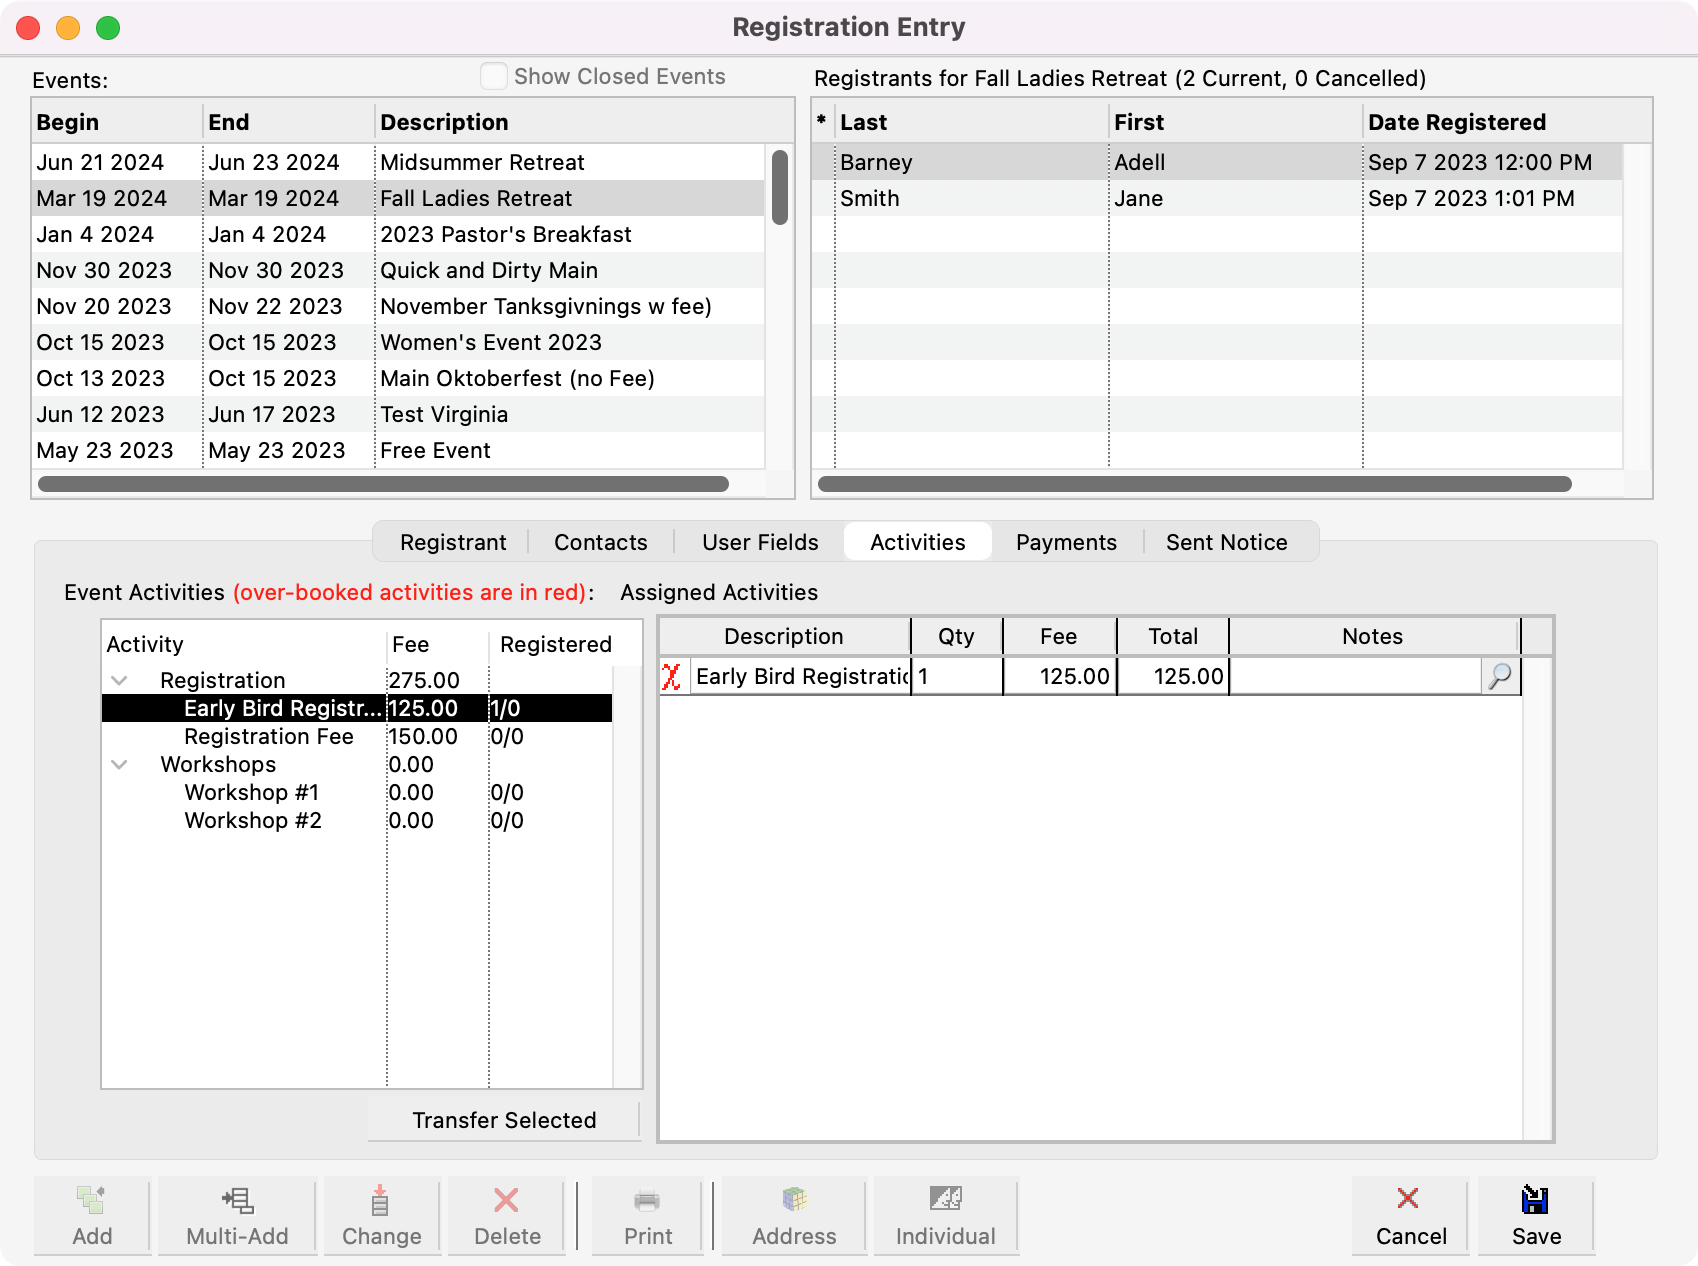
The quantity (Qty.) will default to 1 and the Fee to the amount specified in the Activities pane of the Event Record window. These fields may be changed. For example, if a registrant for the Youth Ski Trip wants to purchase 2 hours of additional snowboarding lessons, you would highlight the 1 in the Qty. field and change it to 2. Press Tab and CDM+ will calculate the Total cost (if any) for this activity.
In the same manner, you may change the Fee on a per-person basis.
The Notes field may be used for any number of purposes. In our example of snowboard & boots as an activity, the boot size is noted in this field. The Notes field is useful for recording why a Fee has been modified for a participant. You may type directly in the Notes field or click the magnifying glass icon in the Notes column to open a larger Notes window.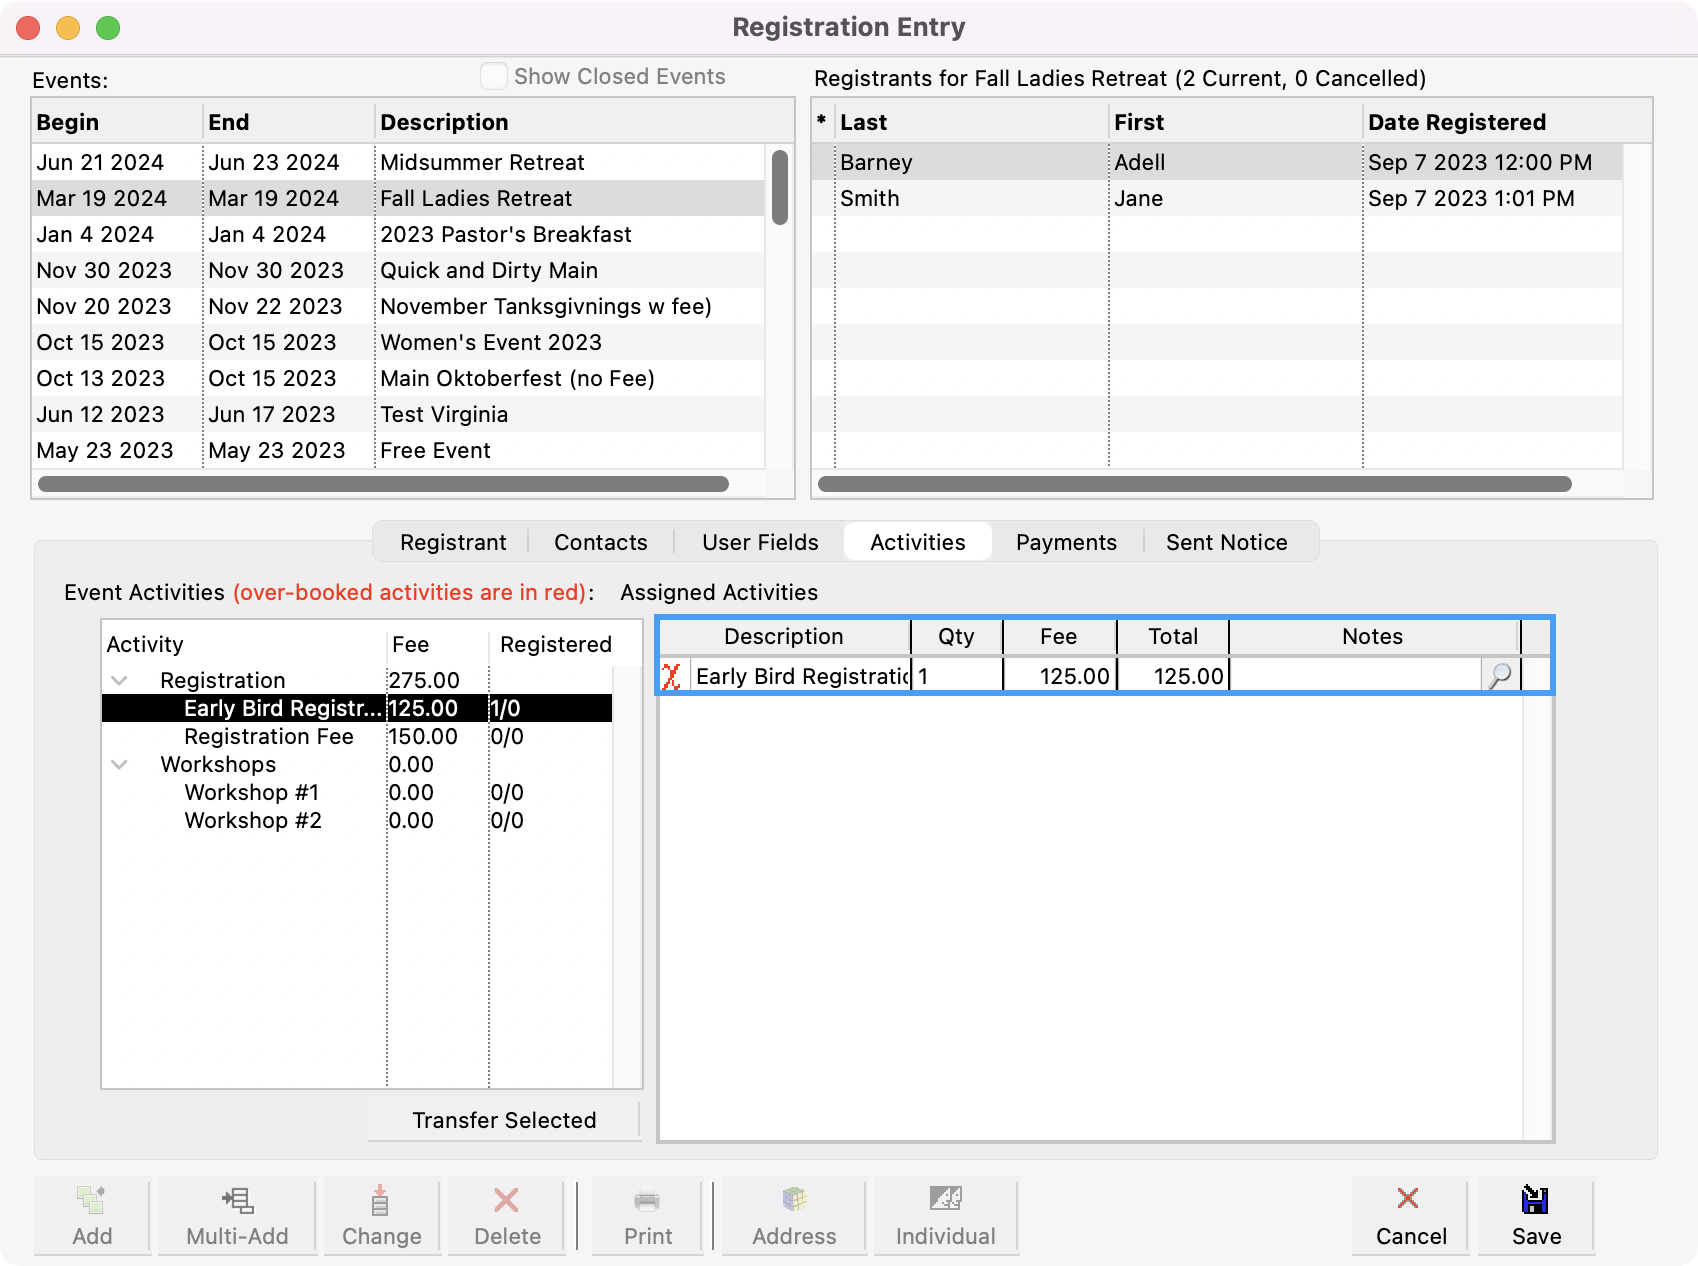
Payments
-
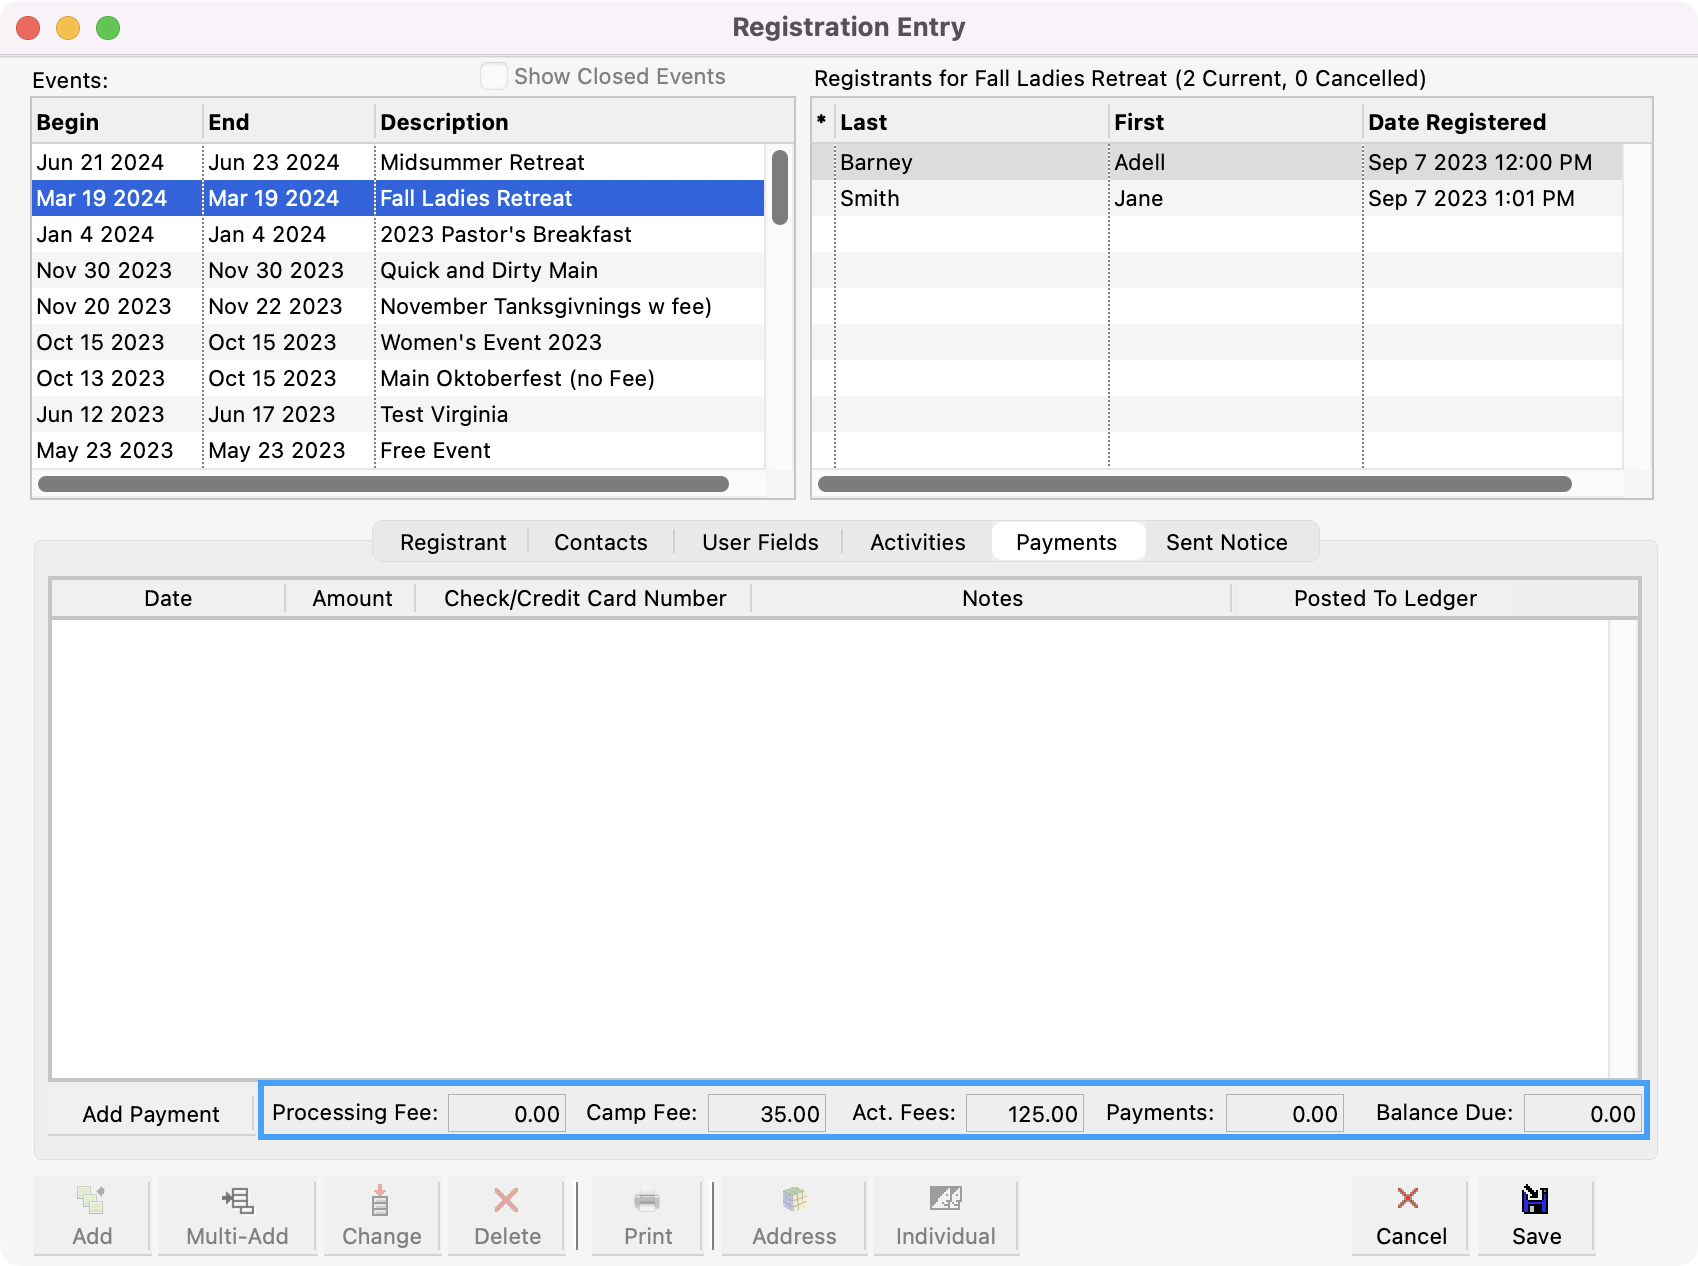
Next, click the Payments tab.
-
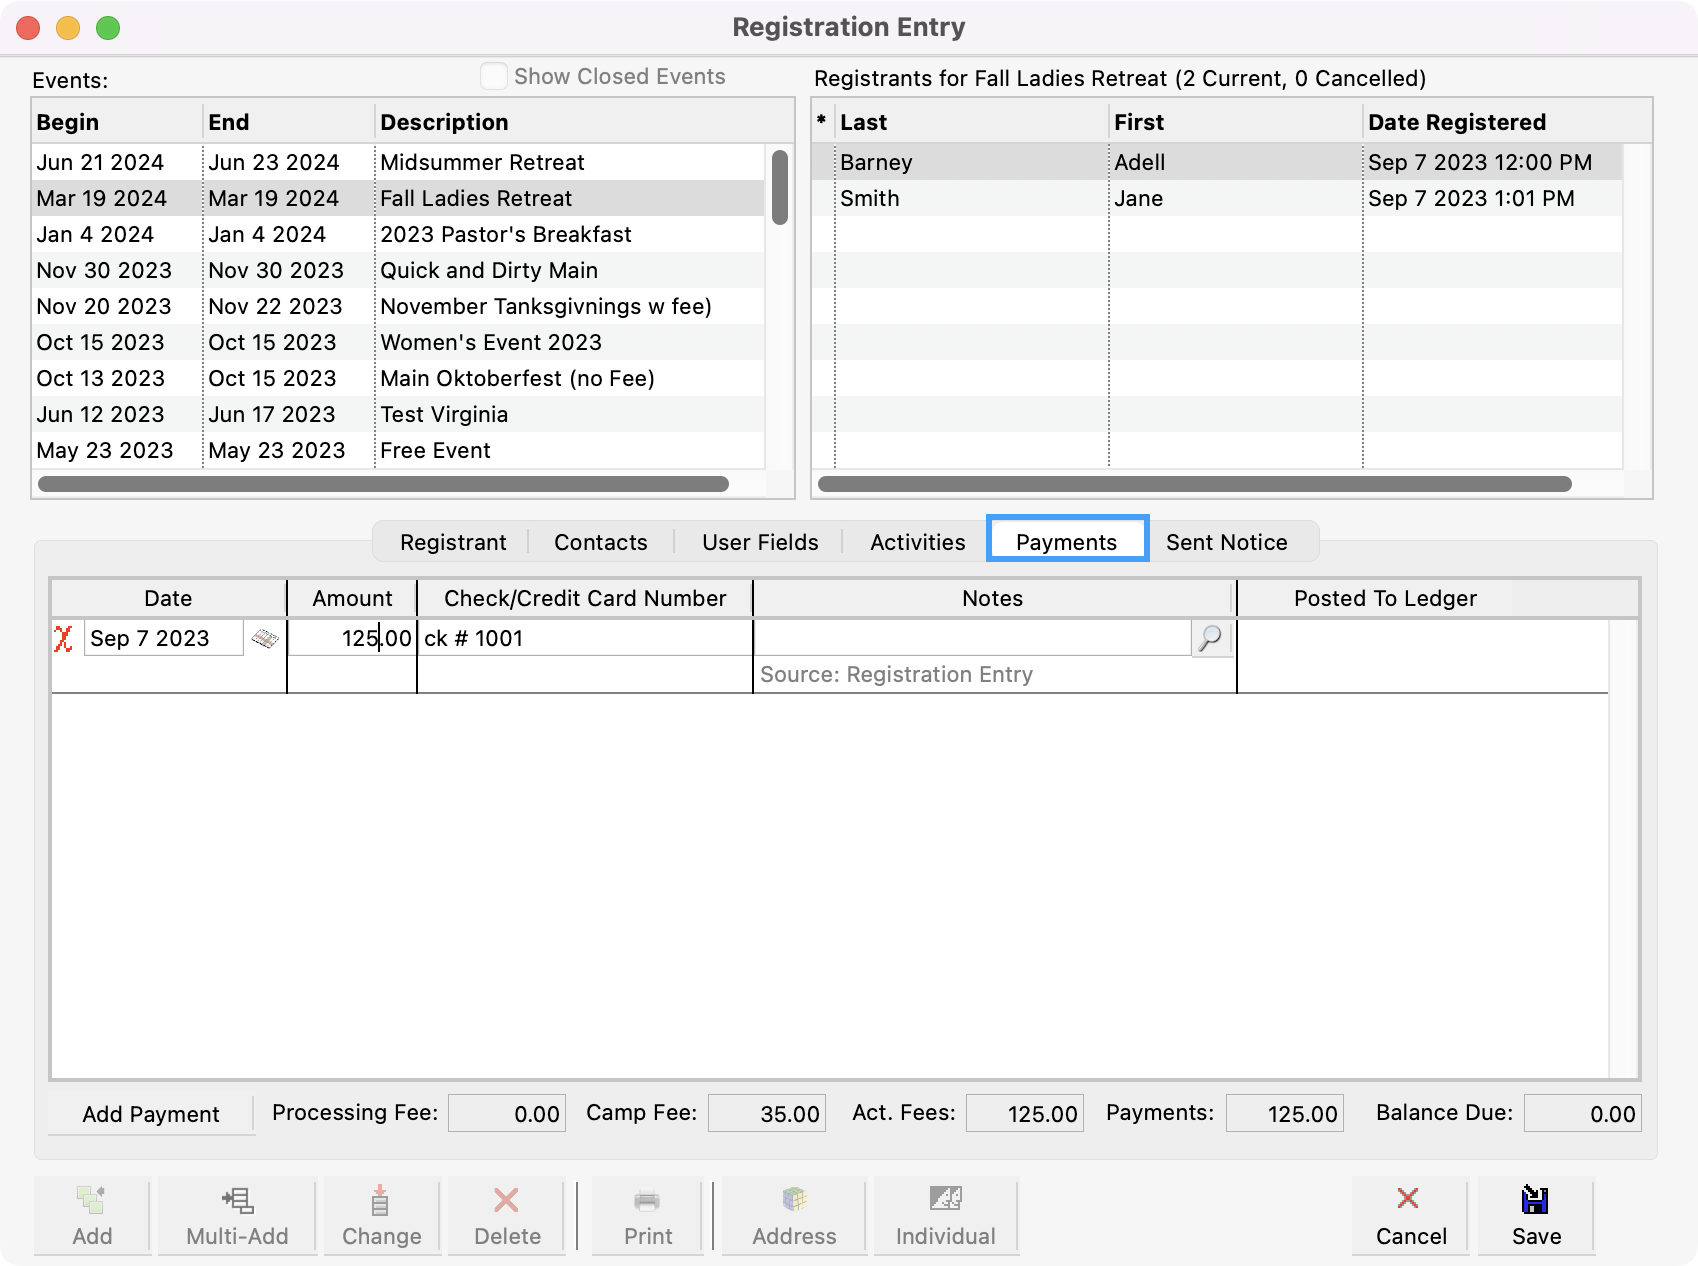
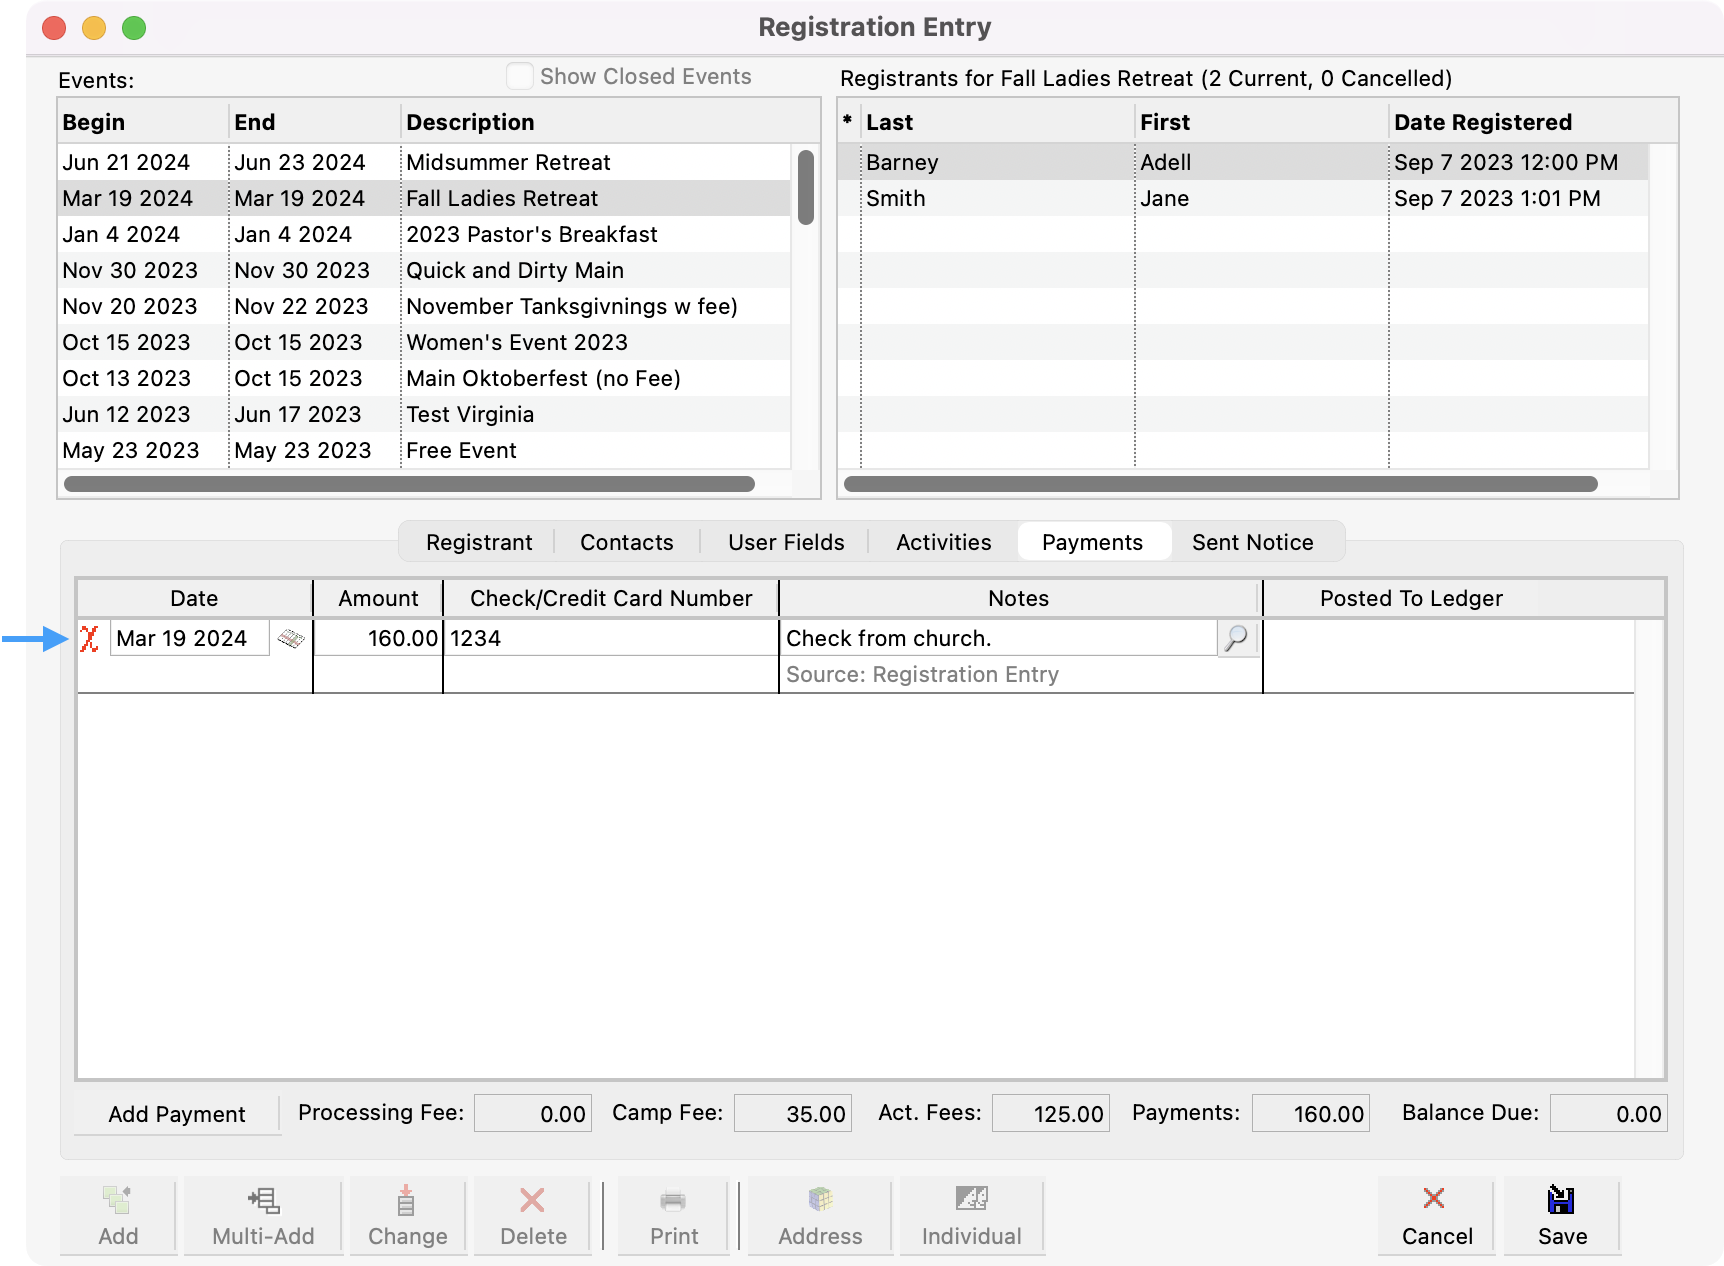
In the Fees section on the bottom of the Payments pane, you see an accounting of the charges and payments for the event. Fees are broken down between the Camp or Event Fee and Activity (Act.) Fees. Any payments already made will be reflected in the Payments amount. The Balance Due shows the total amount this registrant has yet to pay.
-
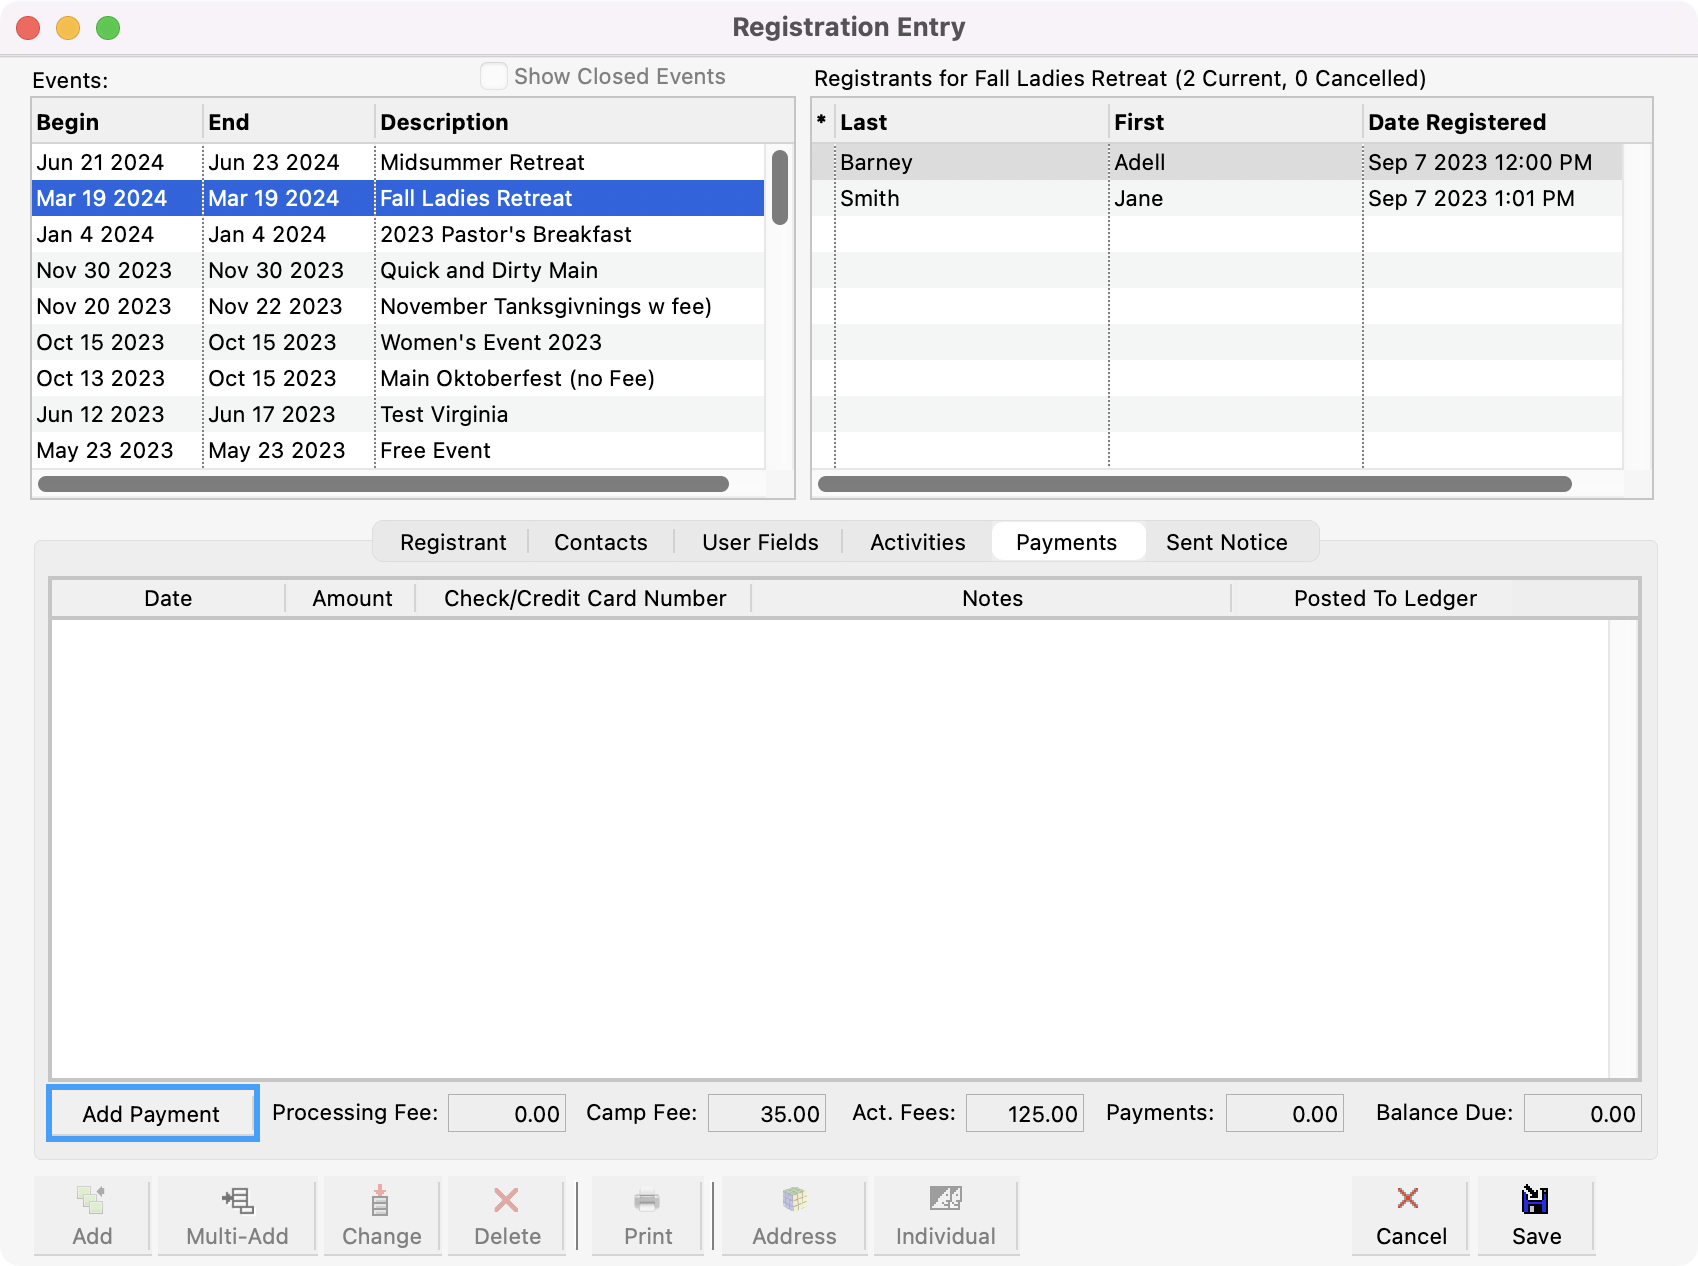
Click the small Add Payment button.
-
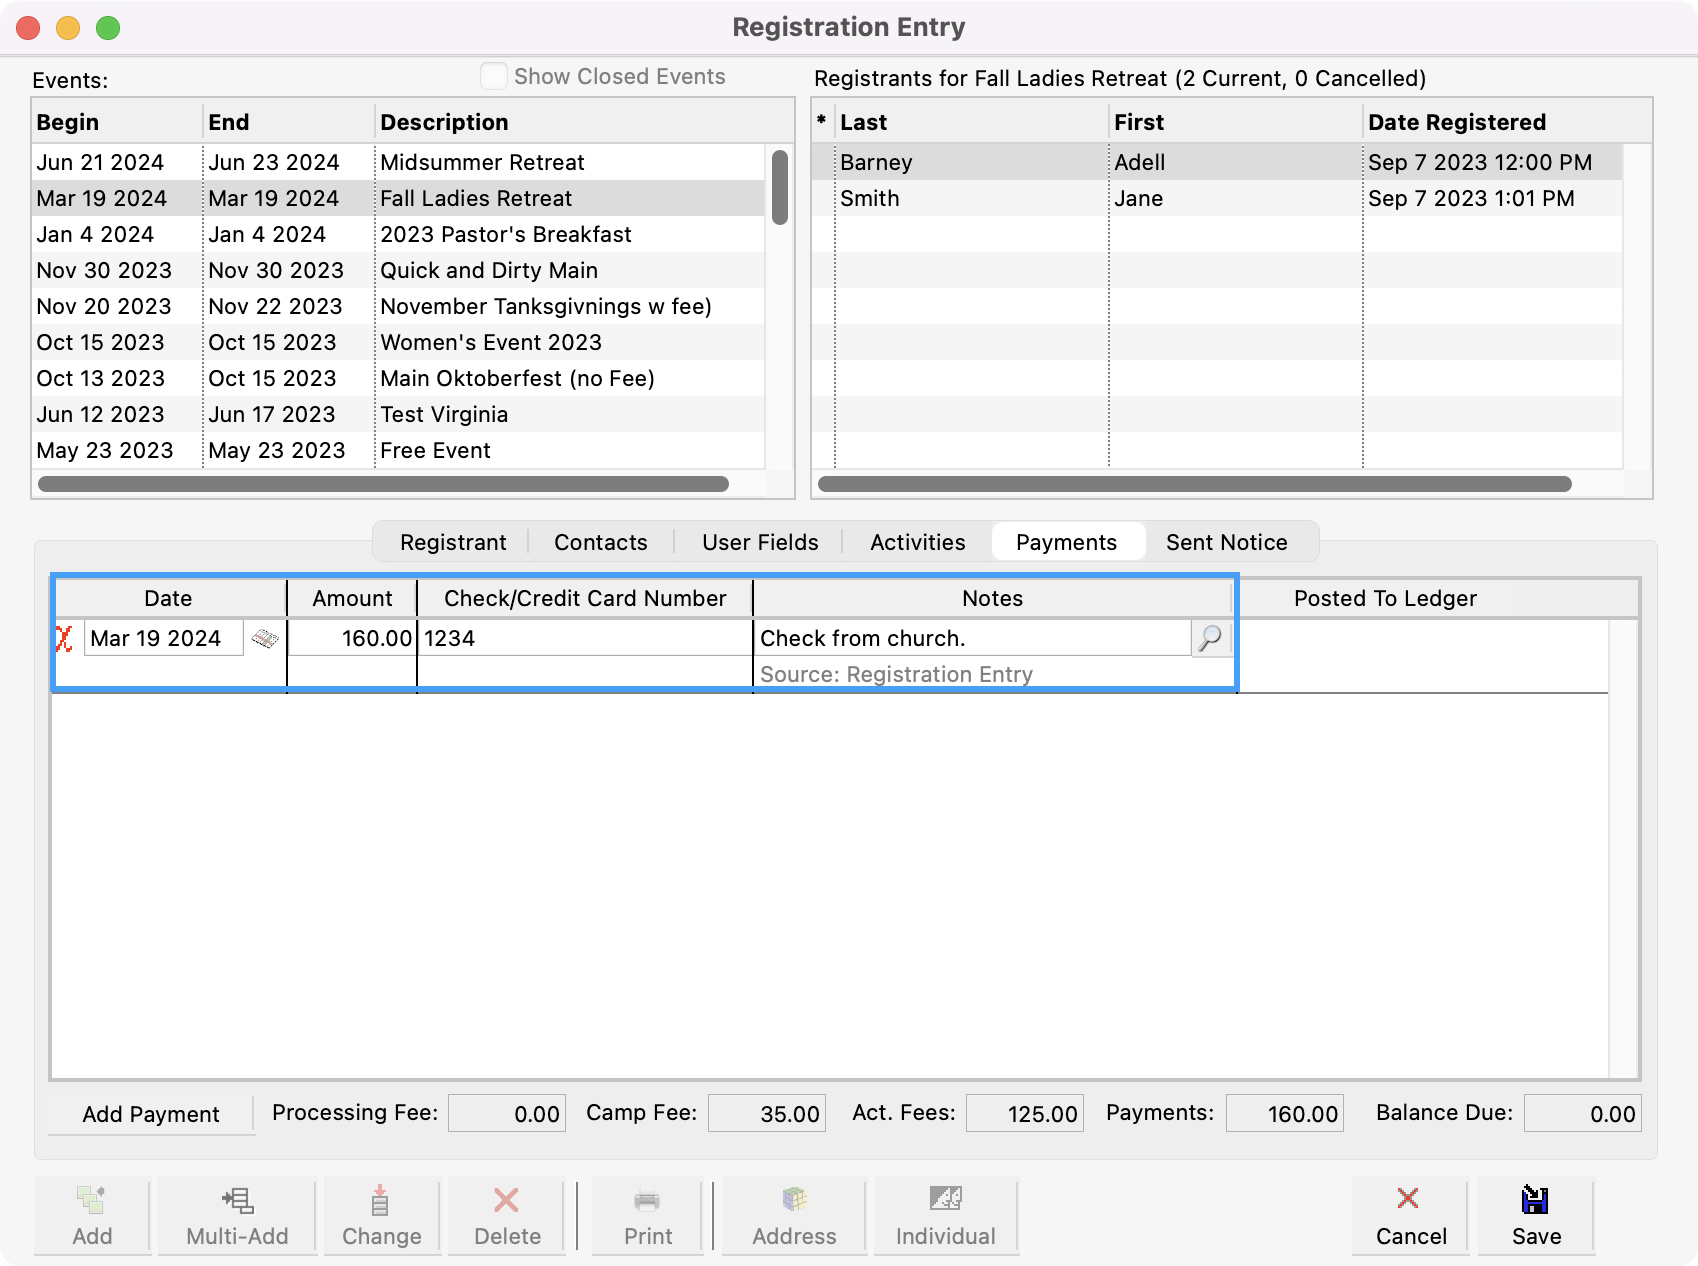
Then, type the Date or click the calendar icon and double-click the date of the payment. Next, type the Amount of the check or credit card payment. Press the Tab key and type the Check/Credit Card number. Lastly, press the Tab key and type Notes as necessary. Clicking the magnifying glass icon will open a larger Notes window. If you have additional payments from this person to enter, press tab and repeat this process.
-
To delete a payment, click the red X.
-
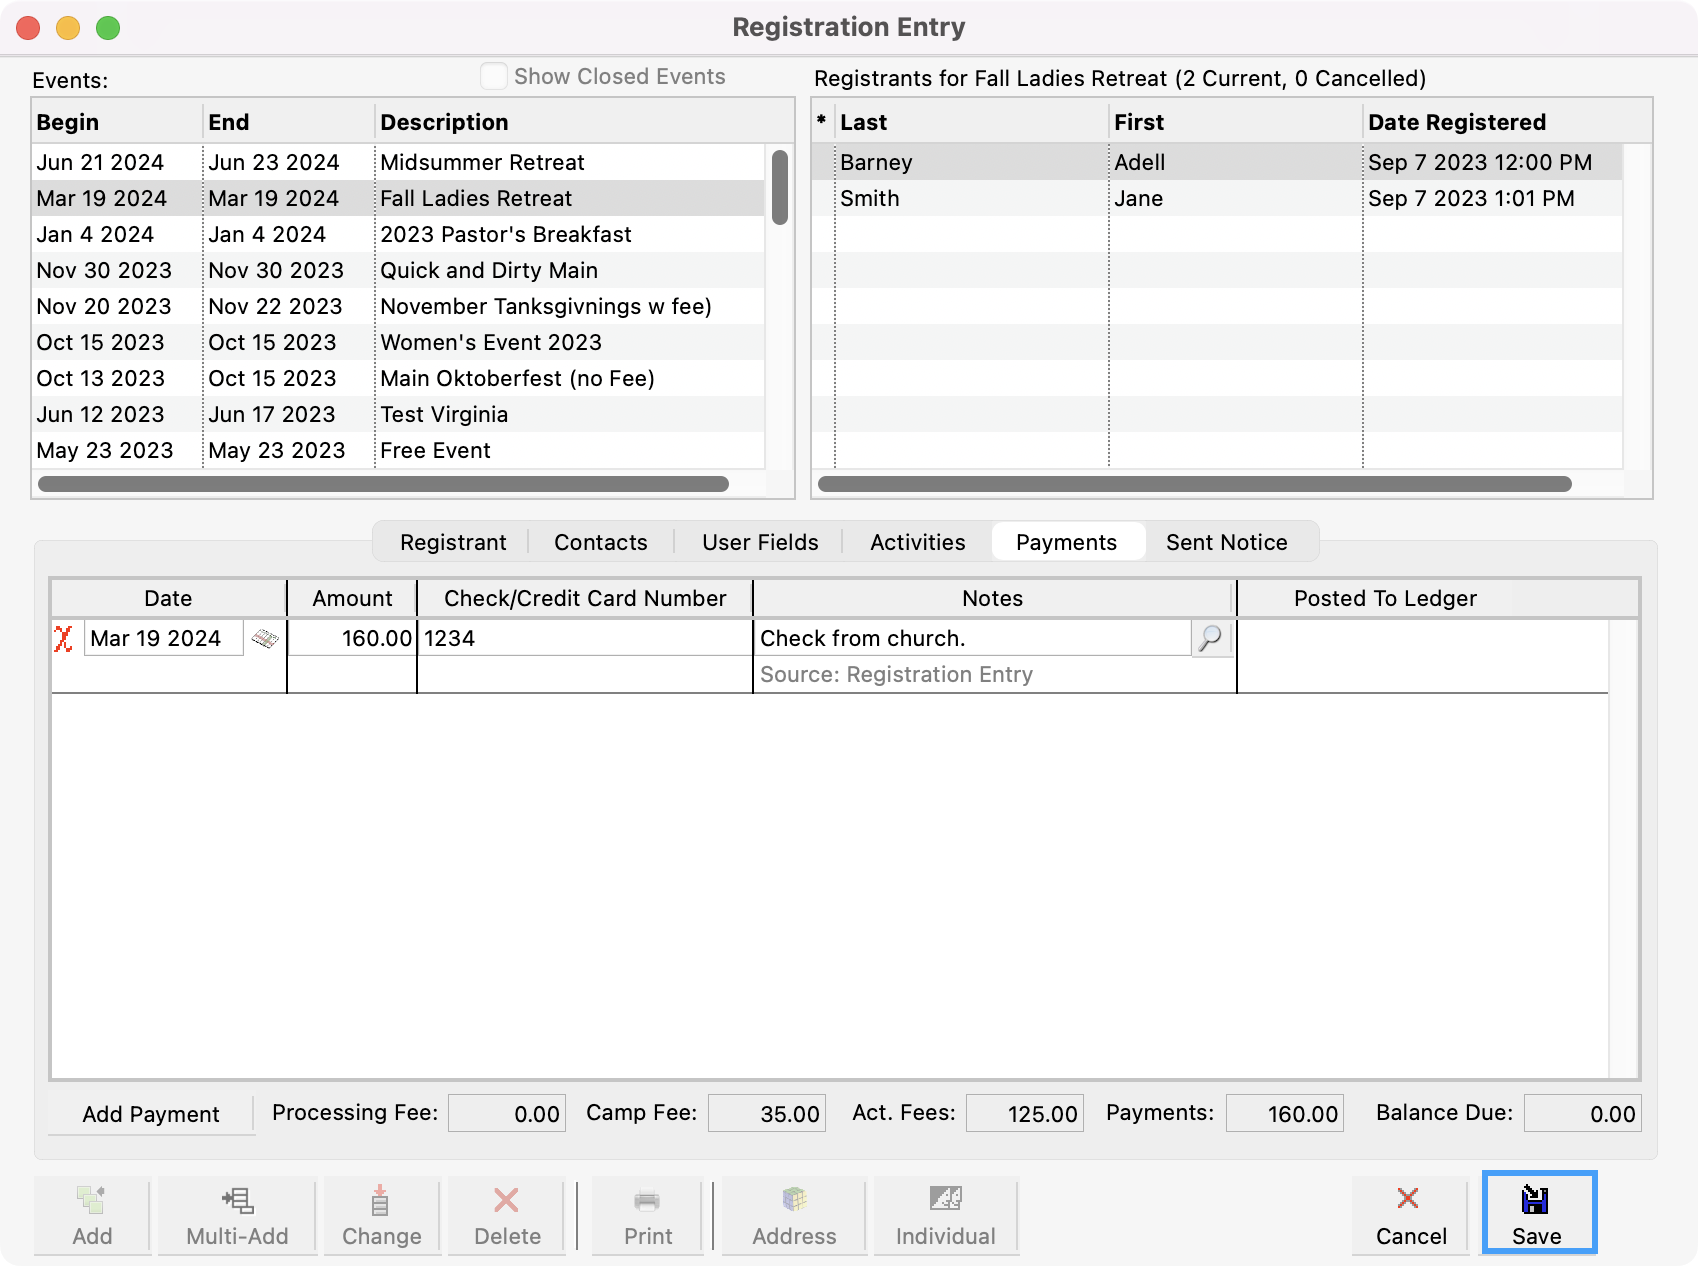
Click Save when finished to save all the information entered for this registrant.
Payments for events made online automatically show up on the Payments tab. The source will reflect that this is an online registration via Web Ministry Tools. To maintain security, credit card numbers will only show the last four digits of the card used.