
After marking invoices to be paid you can write checks and post these payments to the ledger.
-
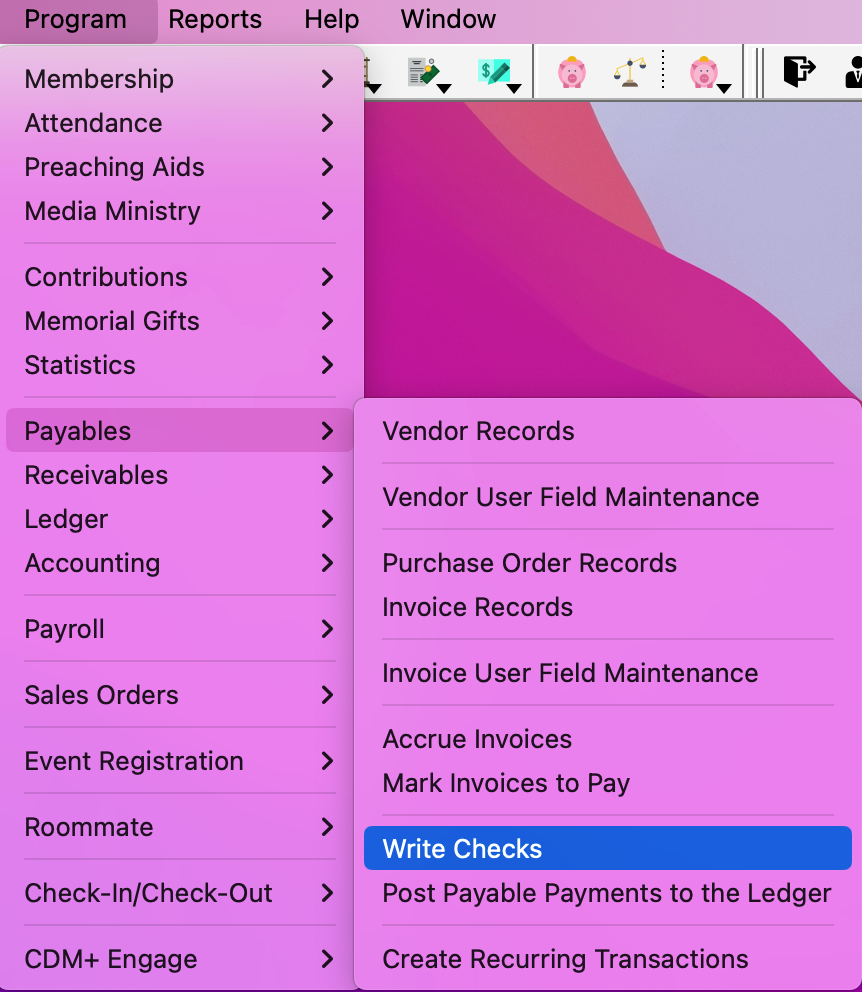
To write checks go to Program → Payables → Write Checks.
-
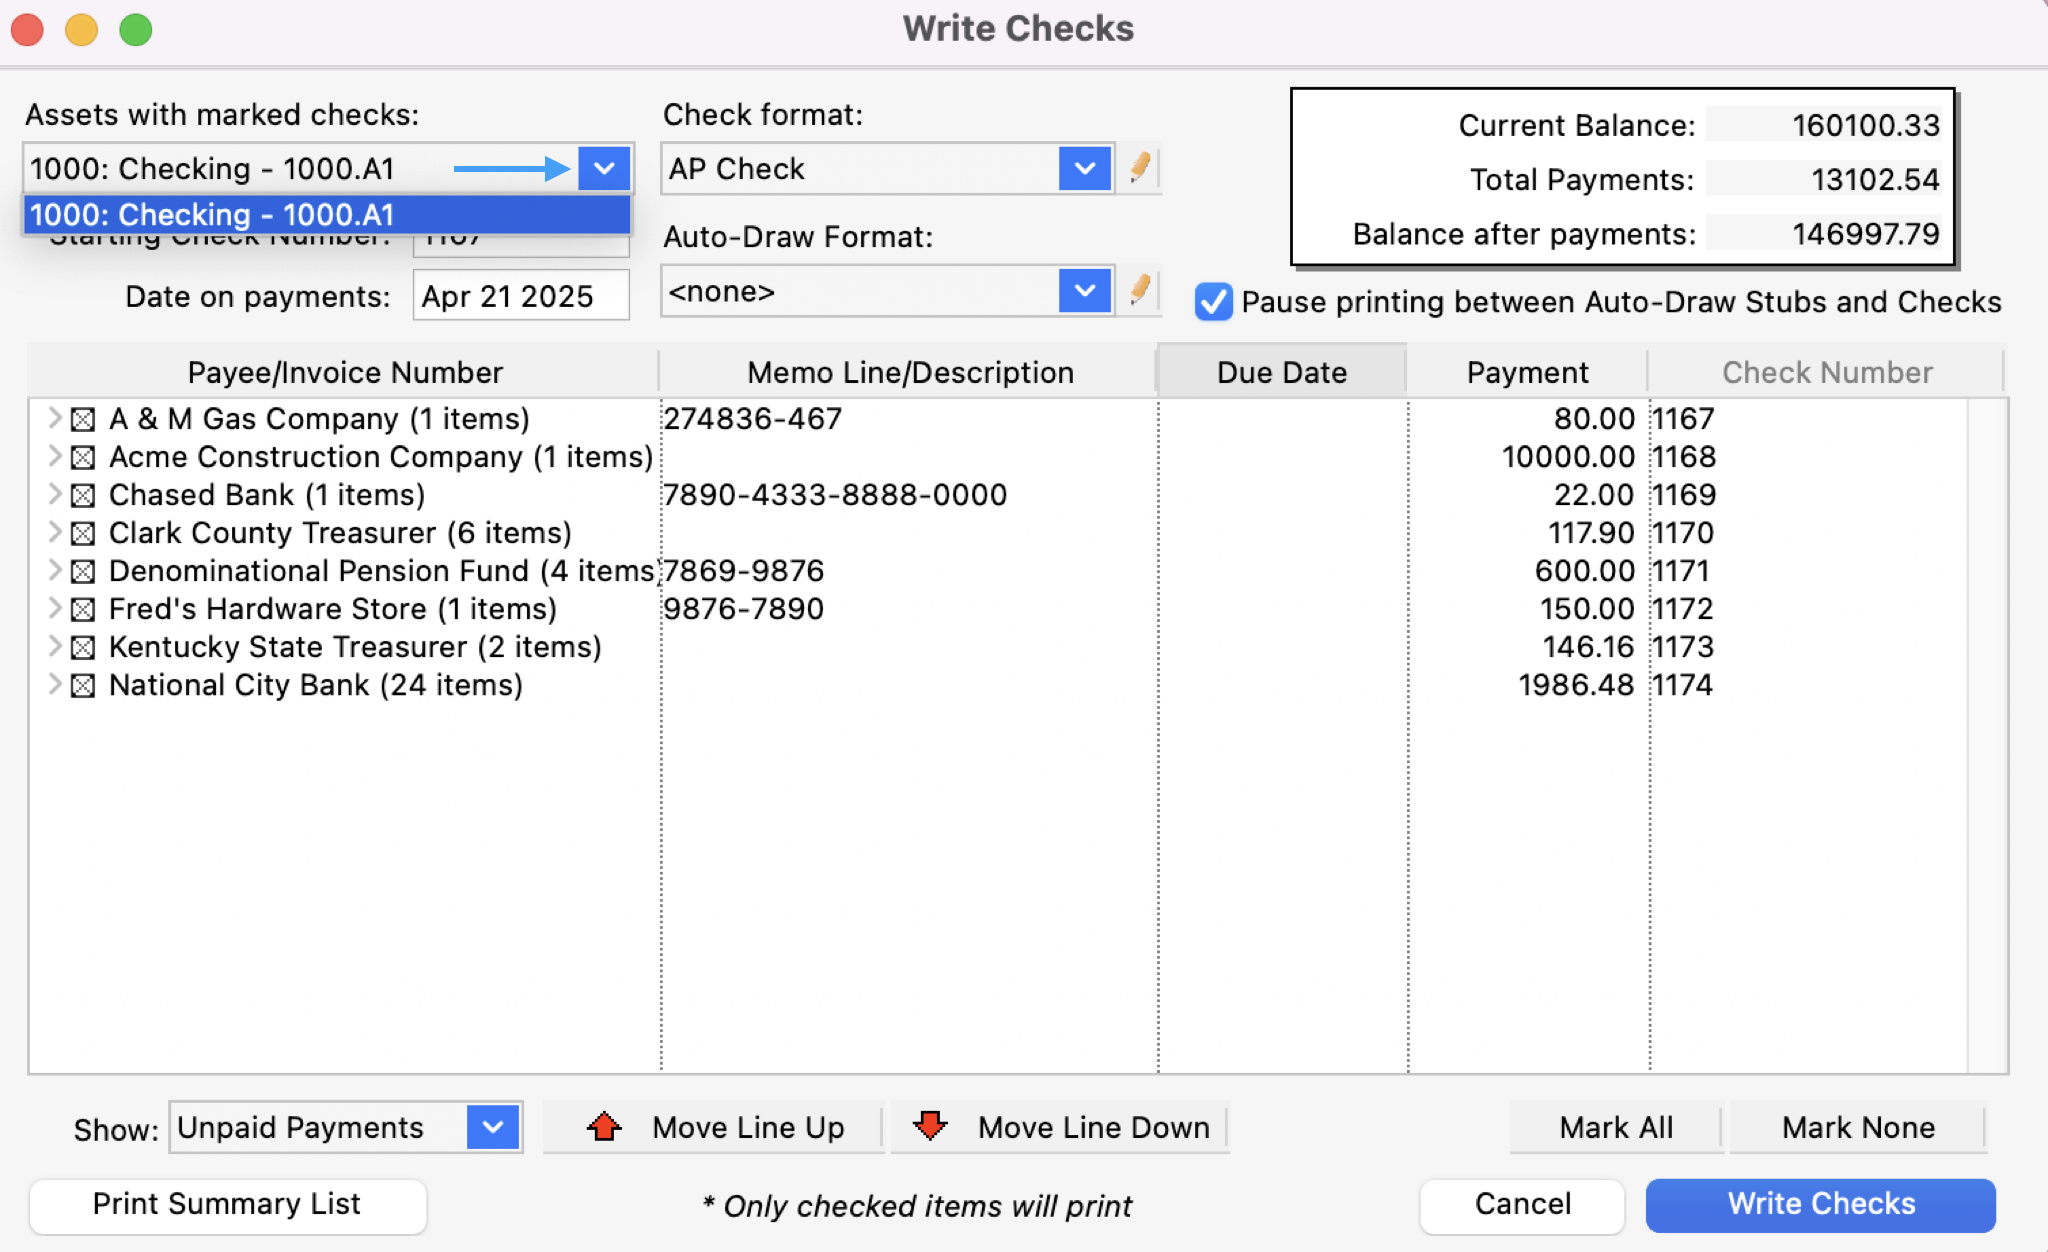
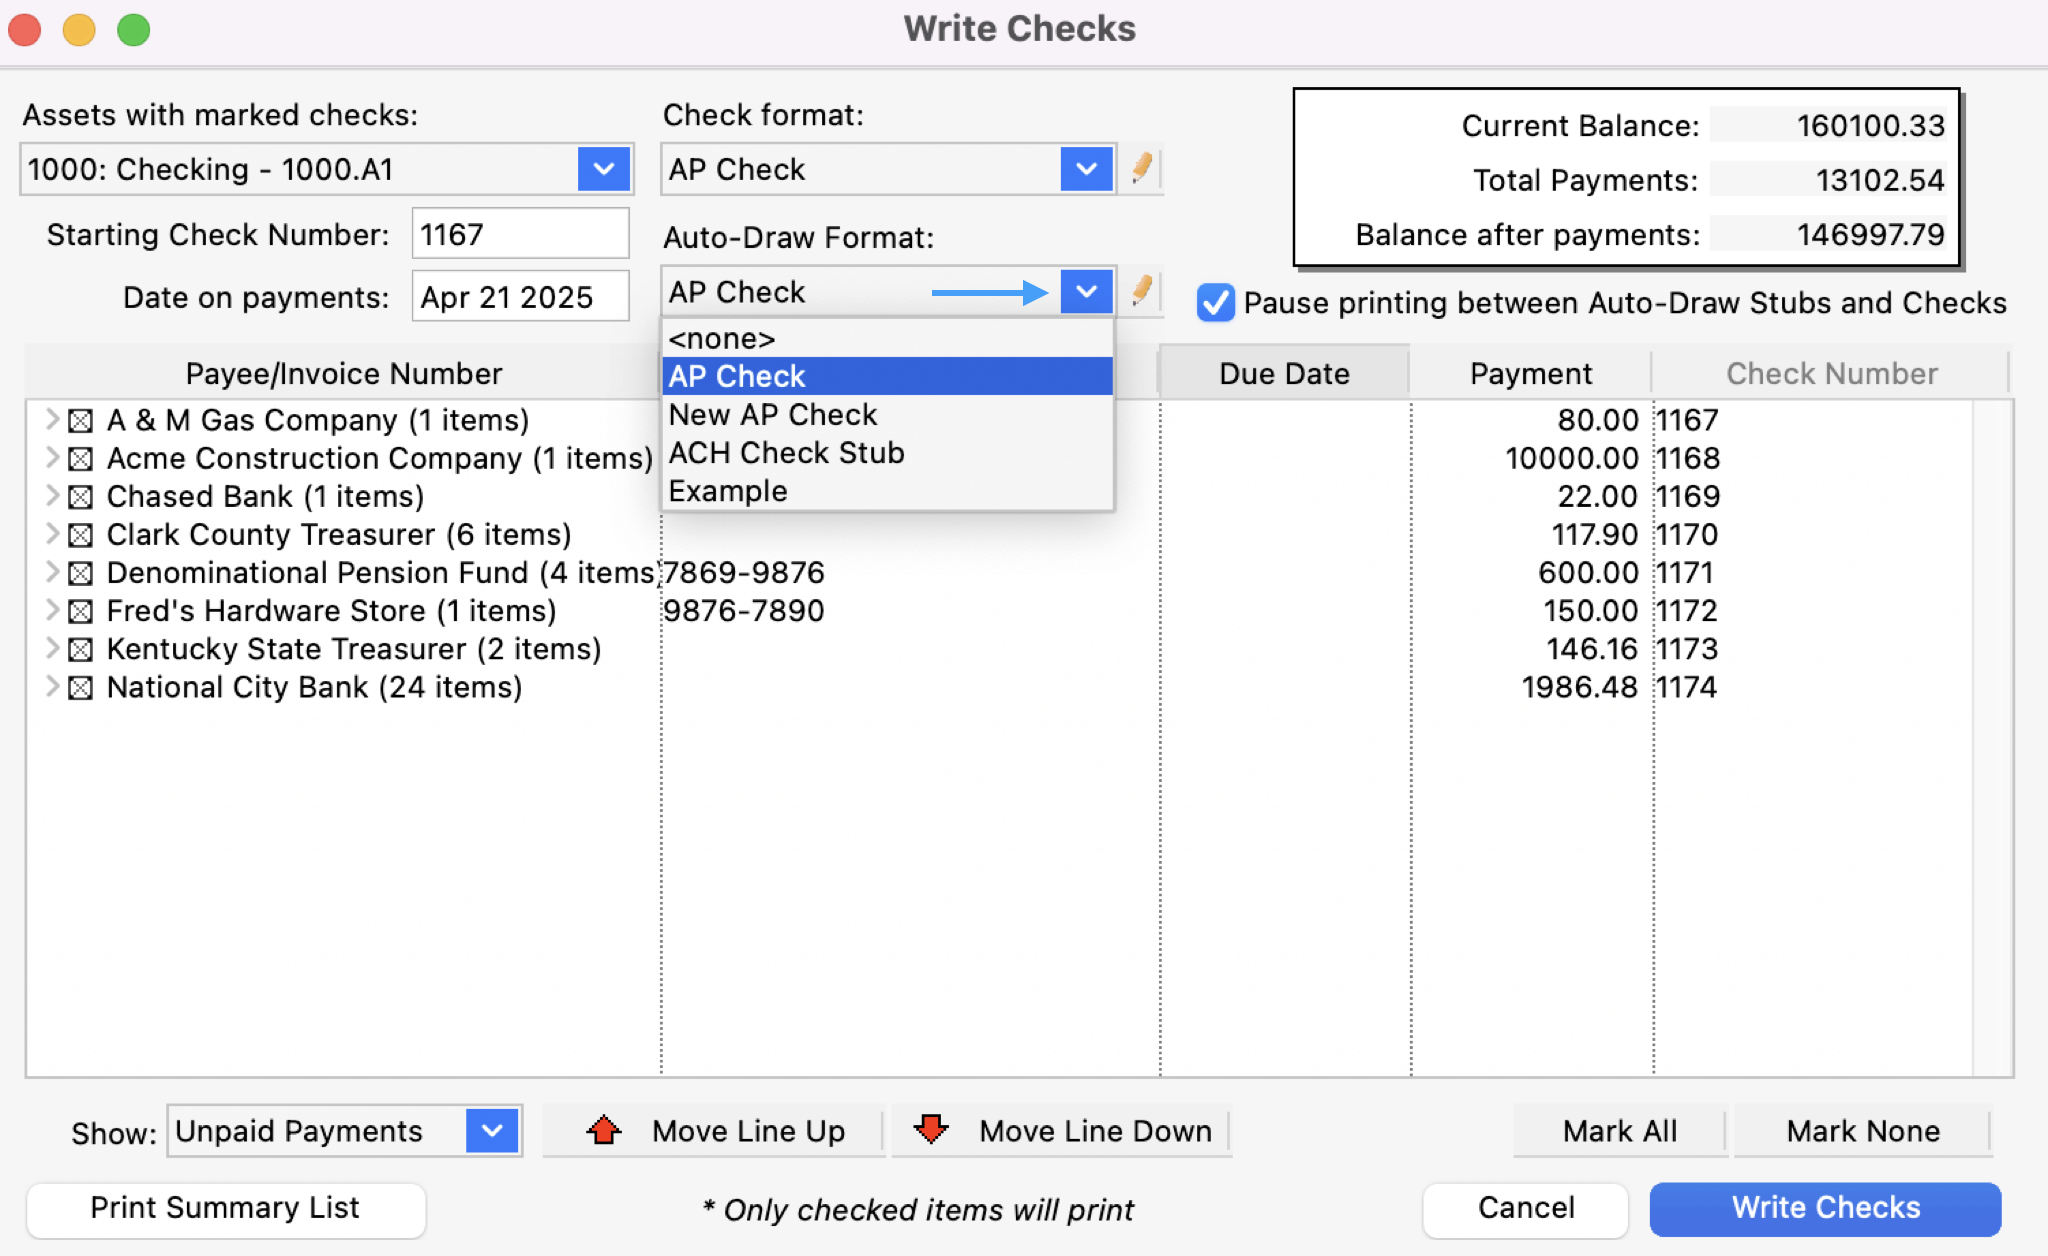
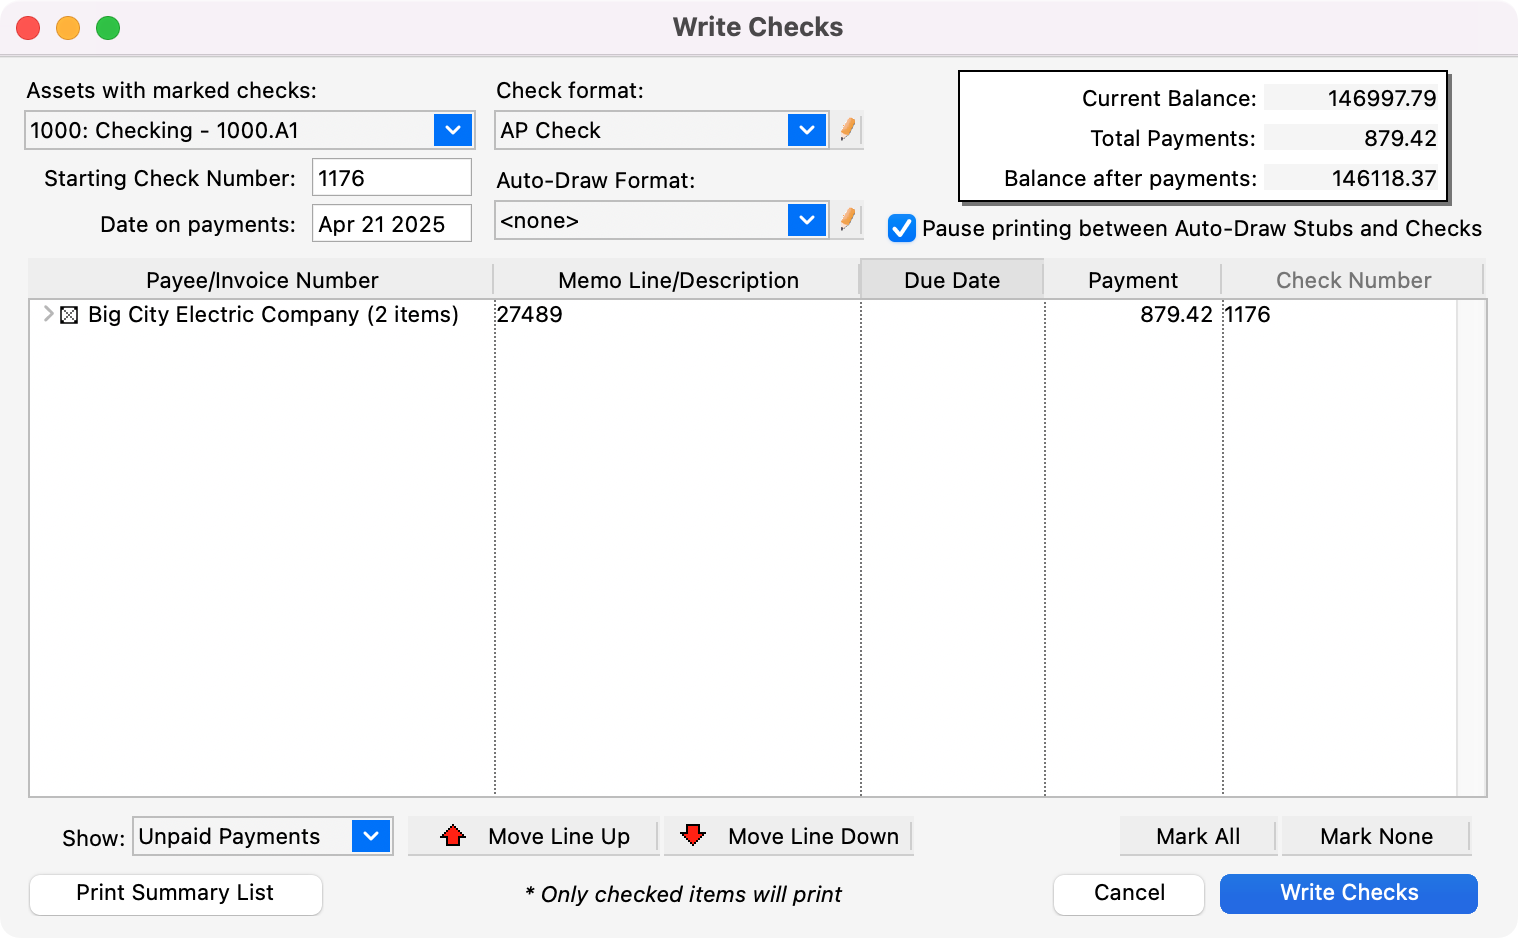
Select the Asset with marked checks from which you are going to print checks from the drop list window.
-
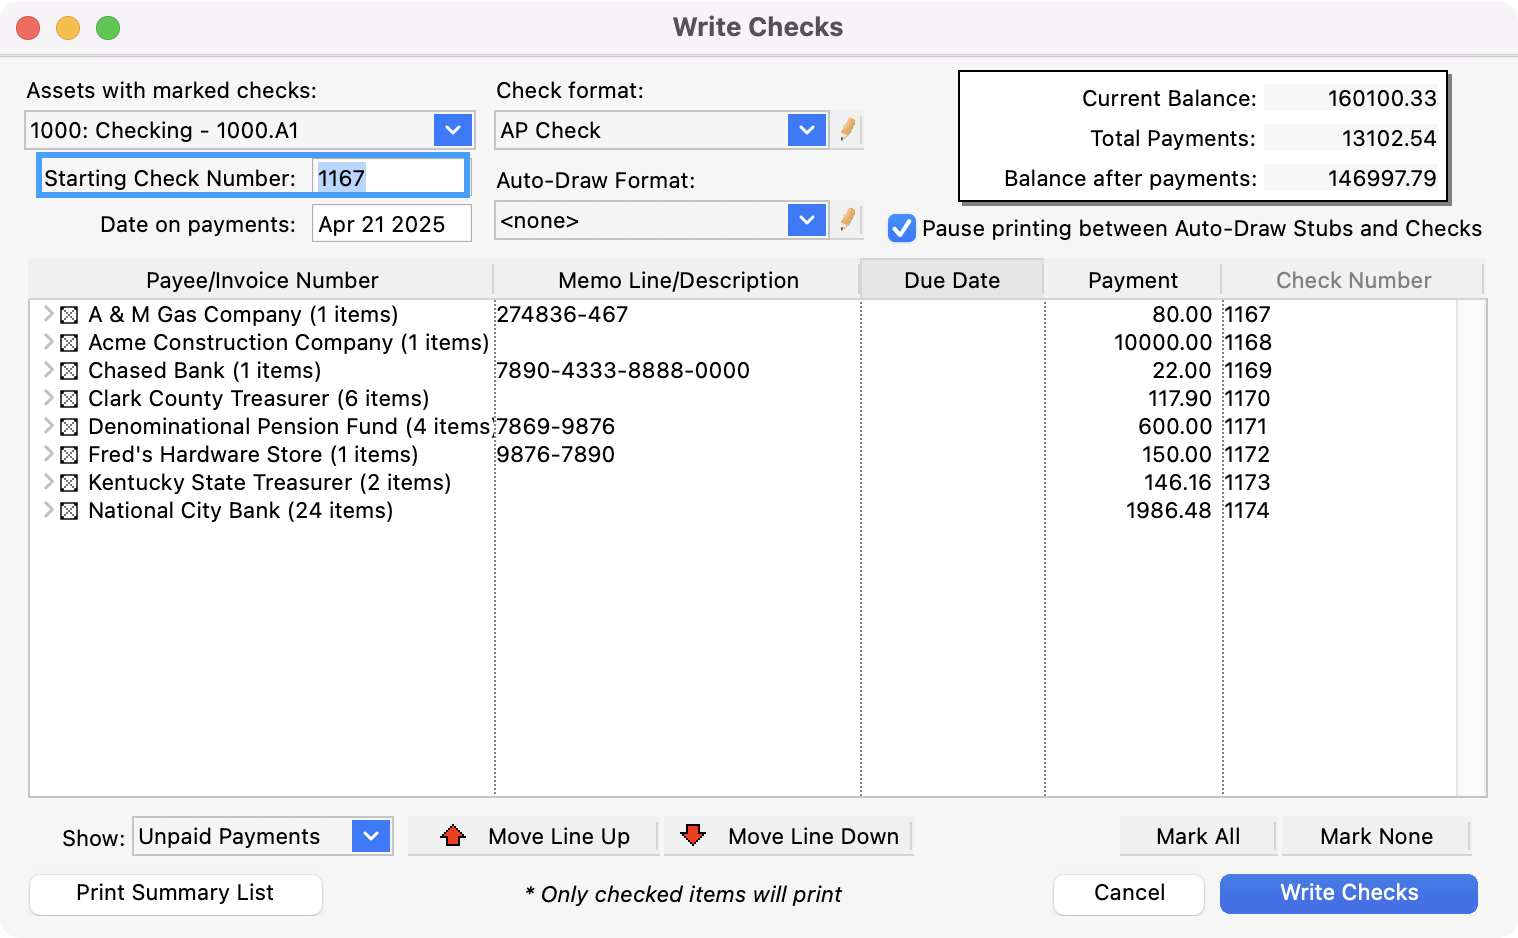
Press Tab. CDM+ will look to see the last check written and start with the next sequential check number. Enter the correct Starting Check Number if it is incorrect.
-
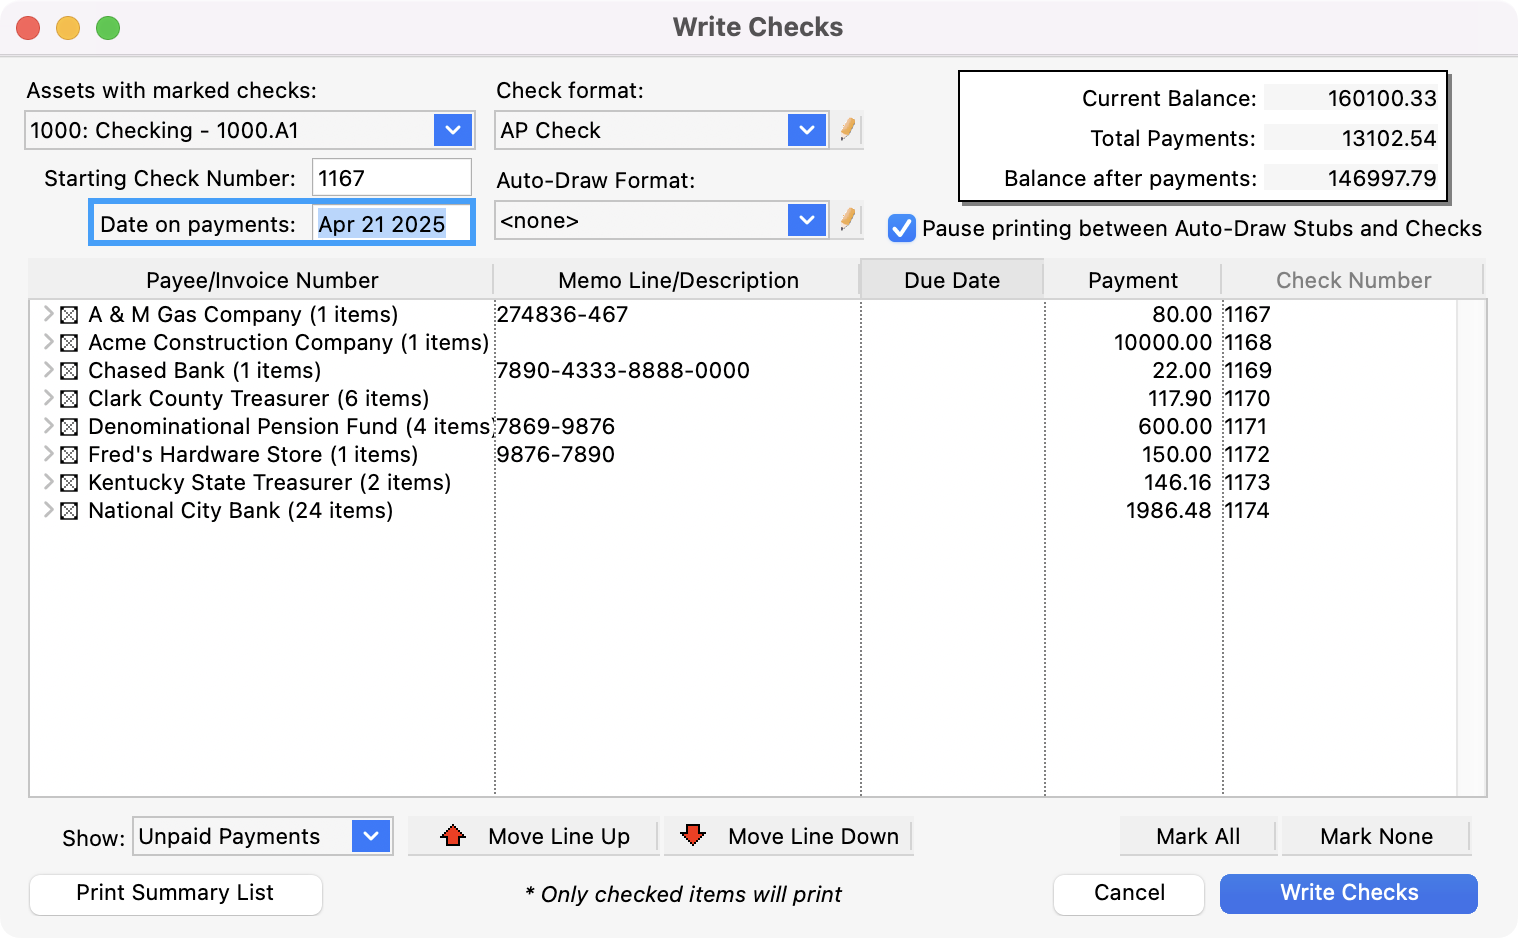
Press the Tab key and type the Date to print on the checks.
-
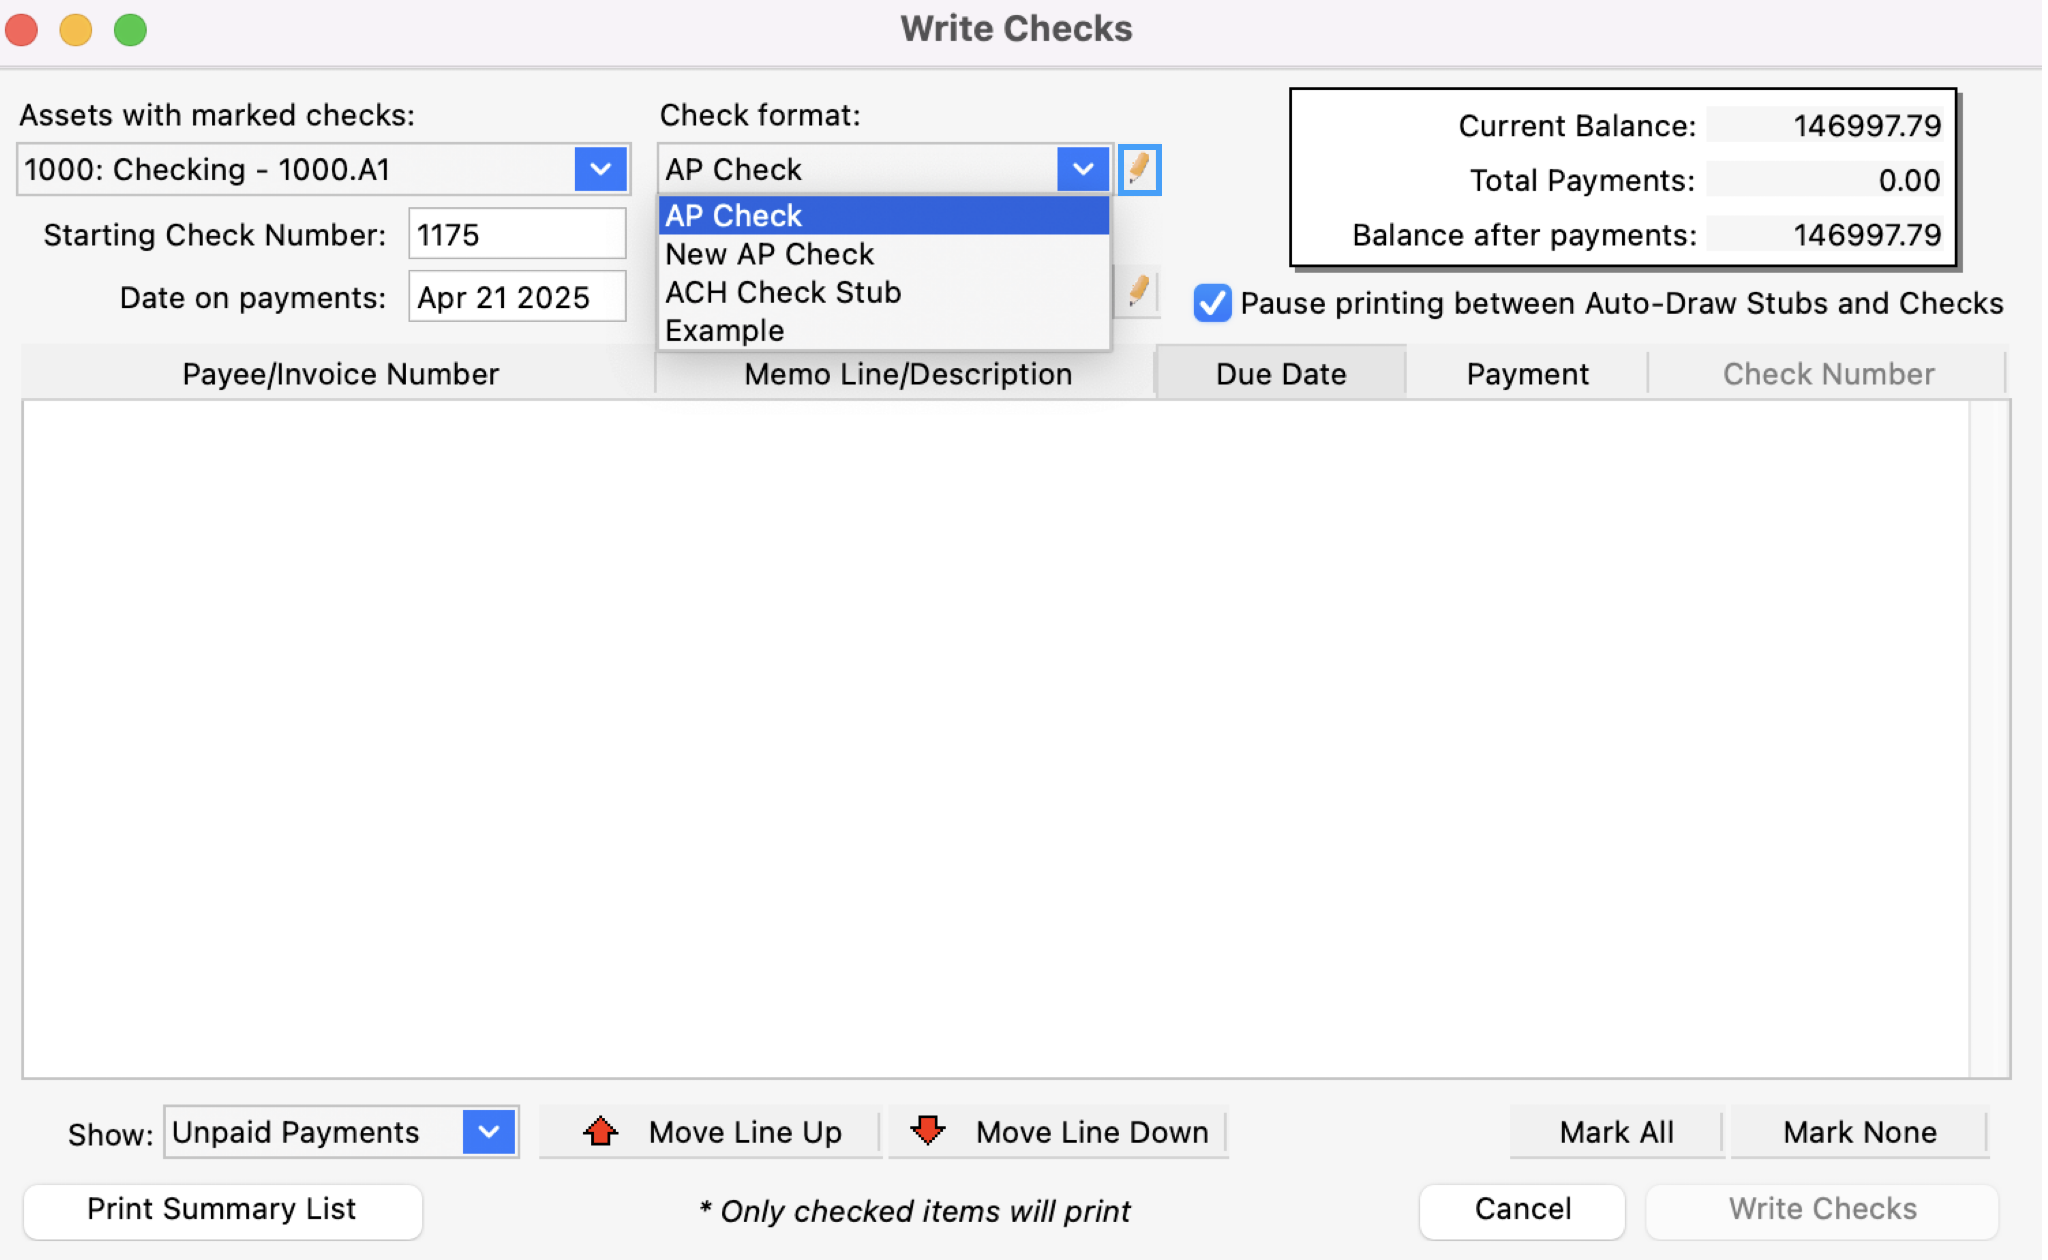
Press Tab and select a Check format from the drop list.
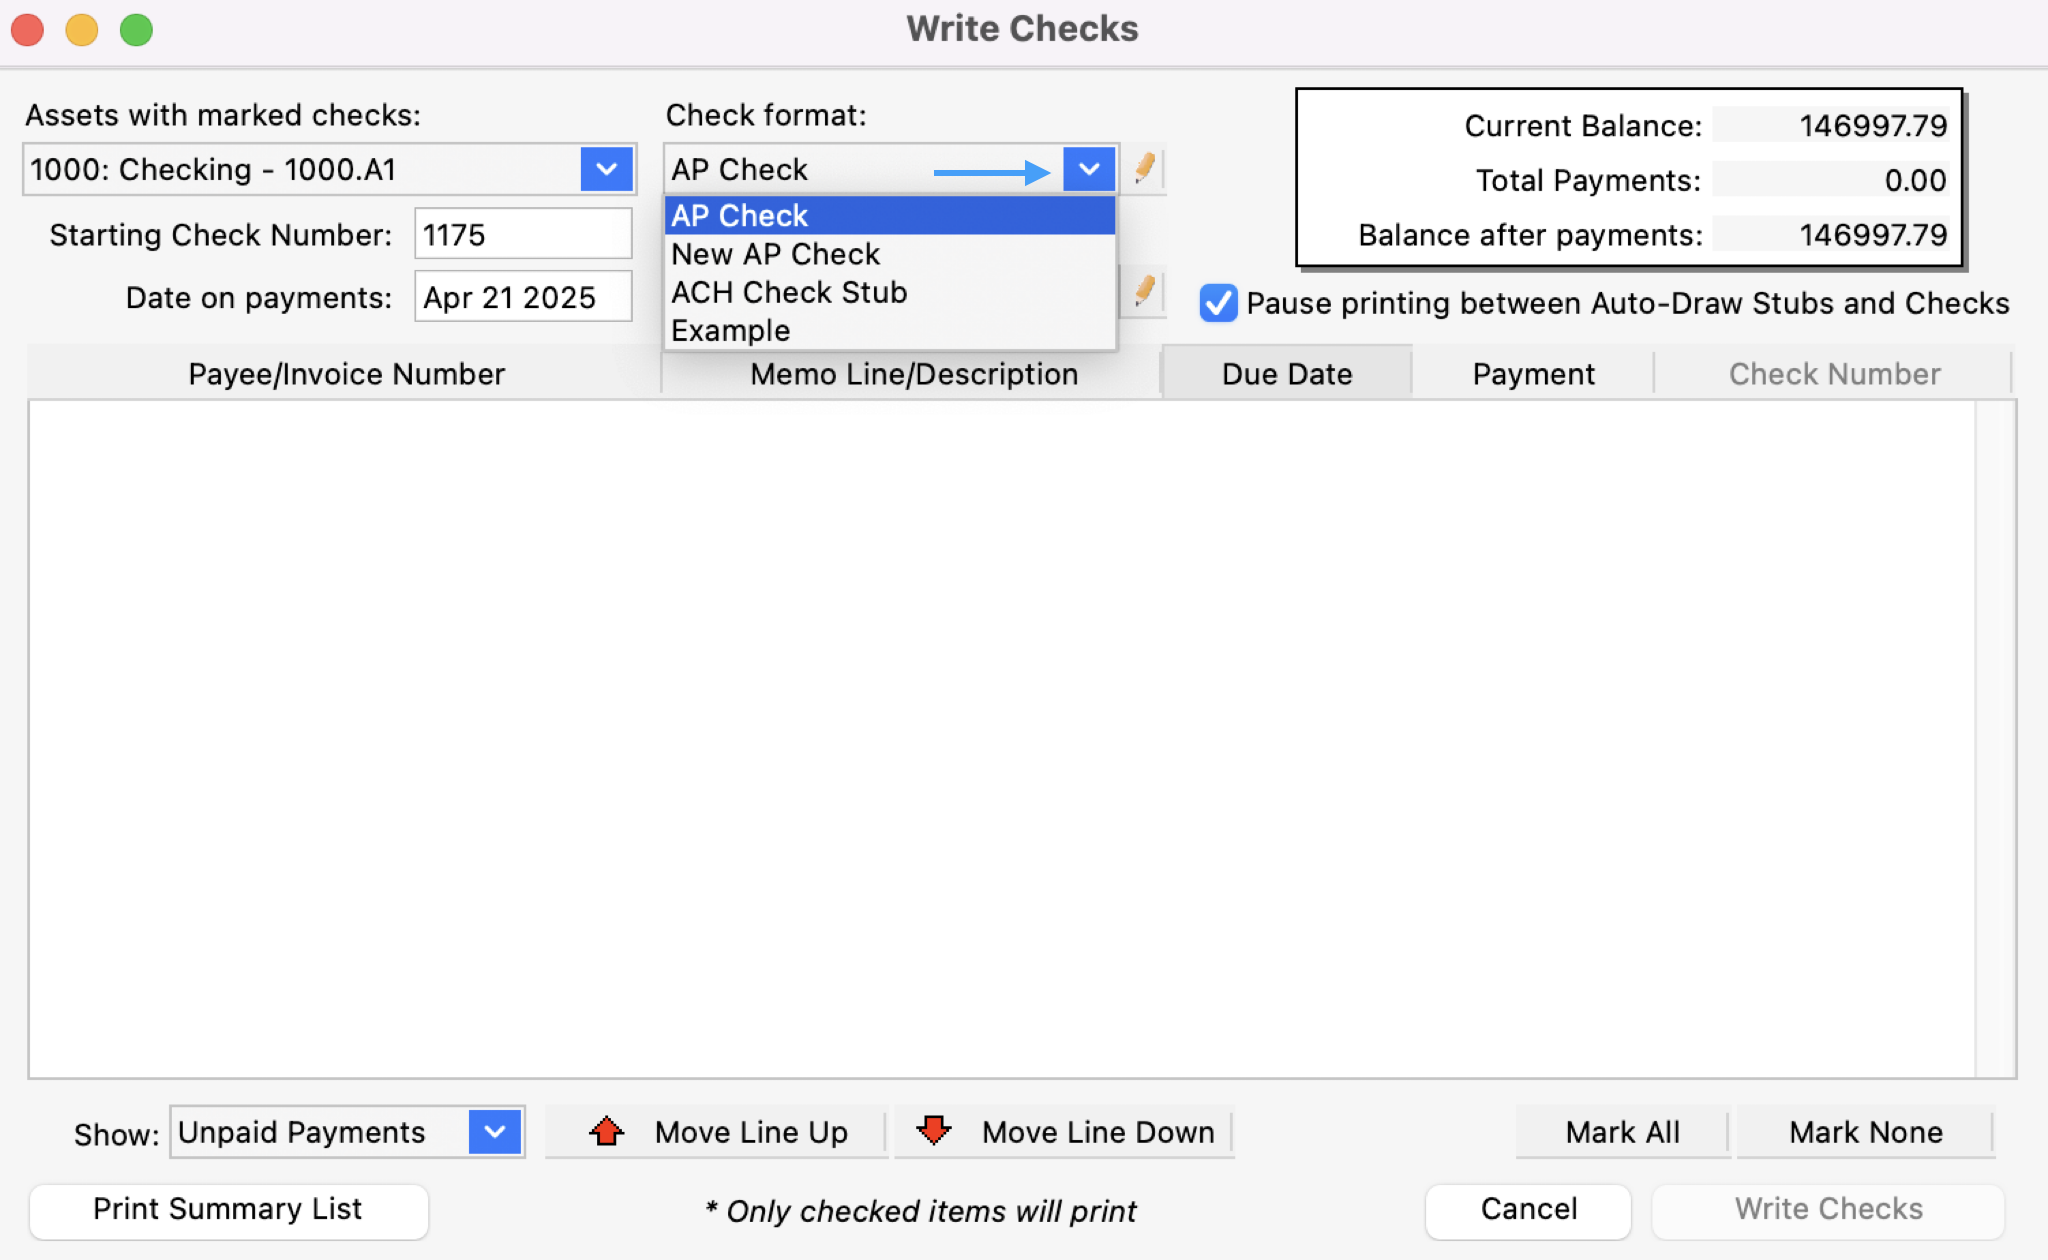
If you want to modify the check format, click the pencil icon next to the dropdown menu. For more information on modifying and adding check formats, click here.
-
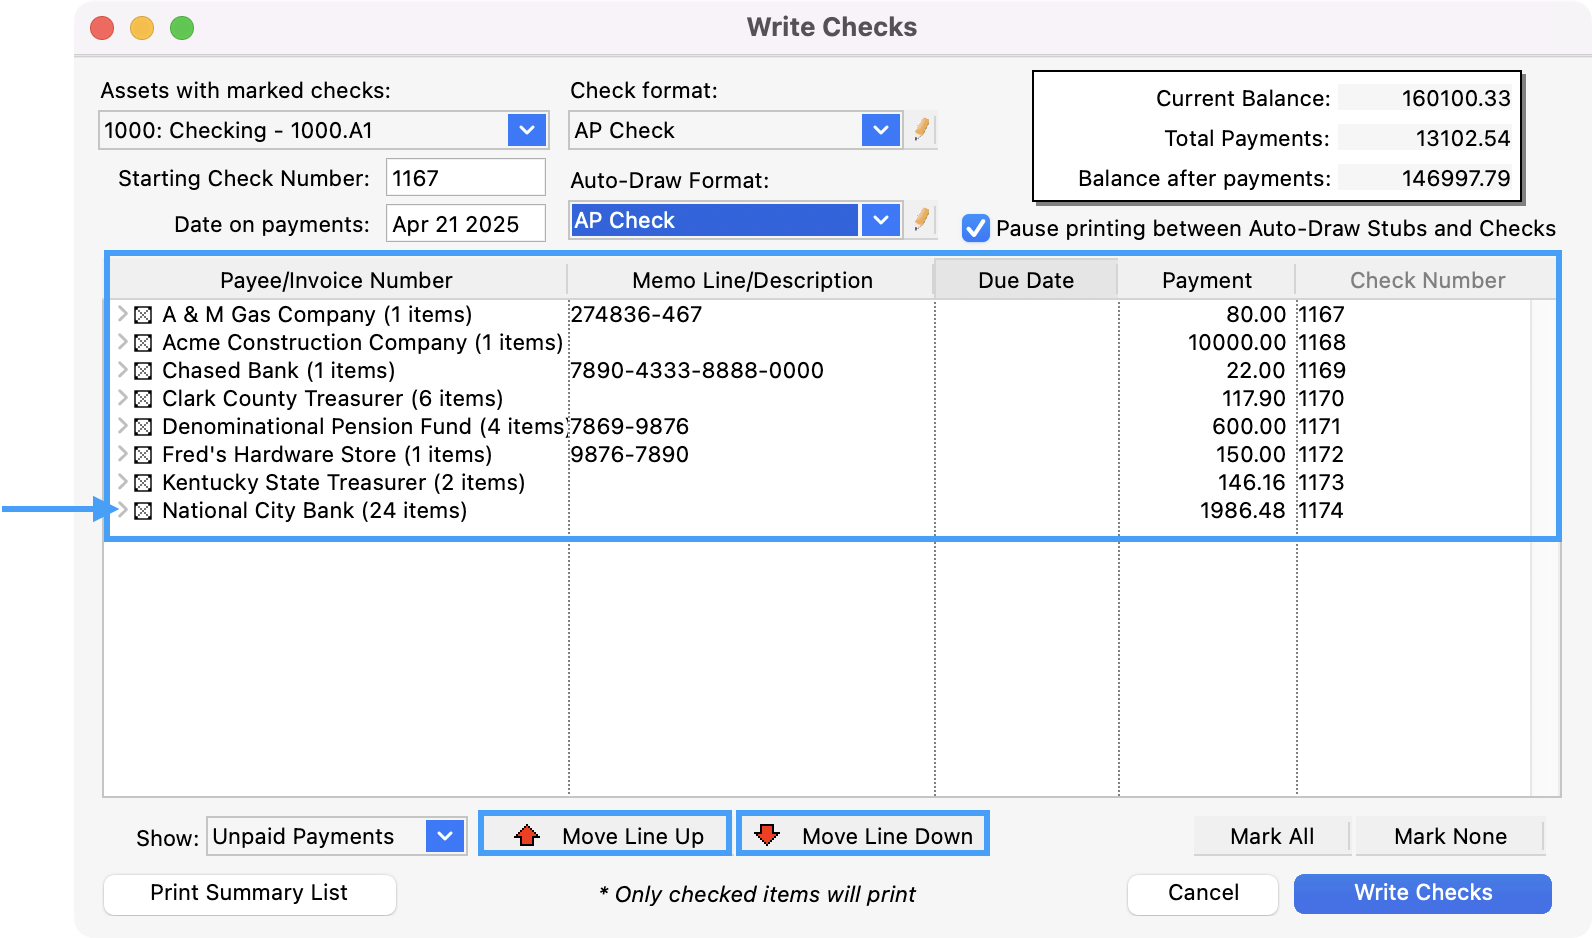
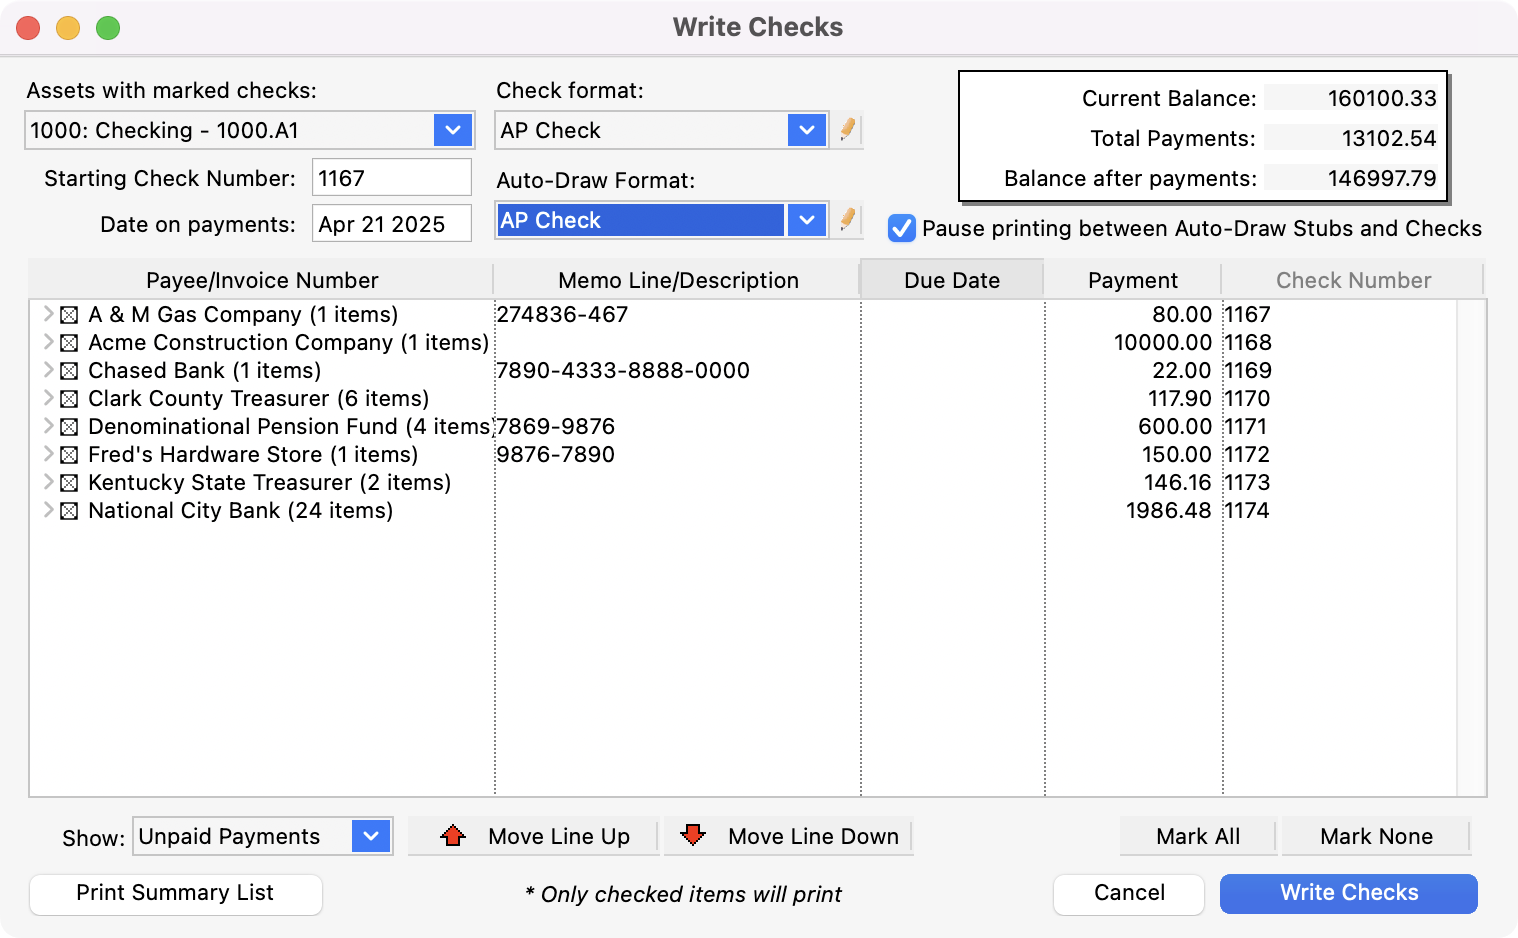
Confirm check listing, amounts, and check numbers. If a queued check is not to be issued then uncheck the box. Checks can be sorted by clicking on the heading or selecting a line and using the up and down arrows on the bottom of the screen. Once all of the checks have been printed, the window will display items as paid items, as noted on the bottom left of the window.
-
Click the Write Checks button in the bottom right-hand corner.
-
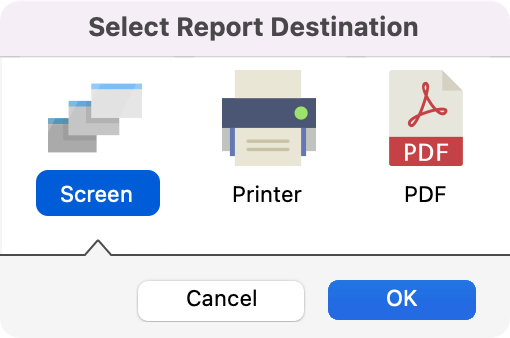
The Select Report Destination window will open. You may choose to print the checks to the screen to review them before sending them to your printer. Make your selection and click OK or press Return/Enter.

If you have chosen to print the checks to the screen first and you are satisfied that they are correct, click on the printer icon in the top left corner to send the checks to the printer.
-
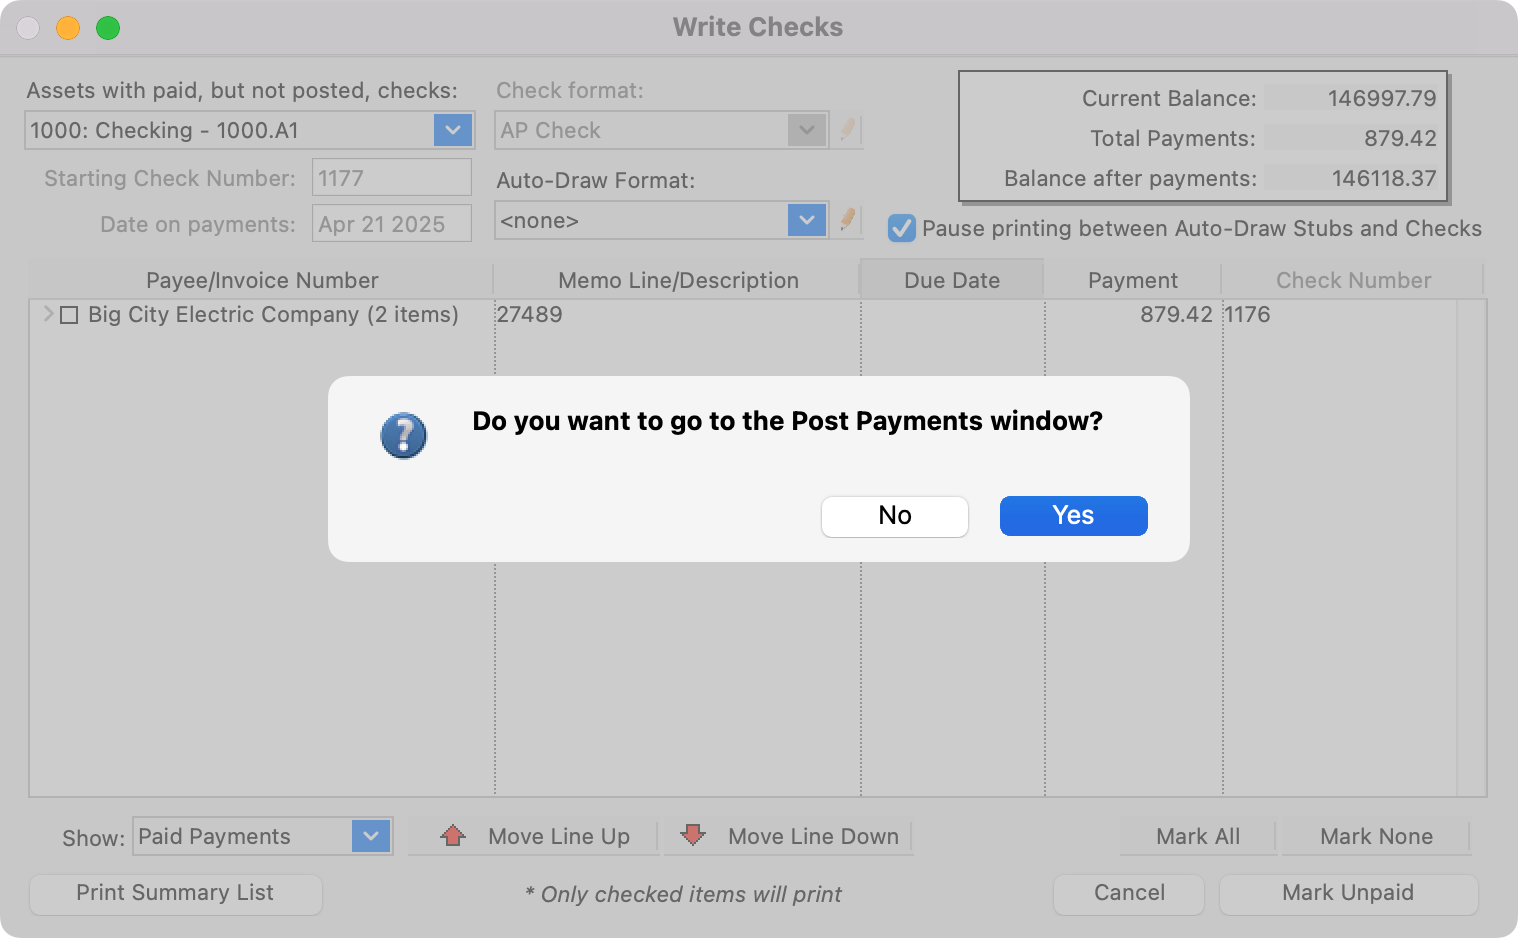
When the check are printed, CDM+ will ask Do you want to go to the Post Payments window? If all your checks printed correctly, click Yes. Otherwise, click No. You can post the check later by selecting Post to Ledger from the Payables menu or by clicking on the Post icon on the Accounting toolbar.

-
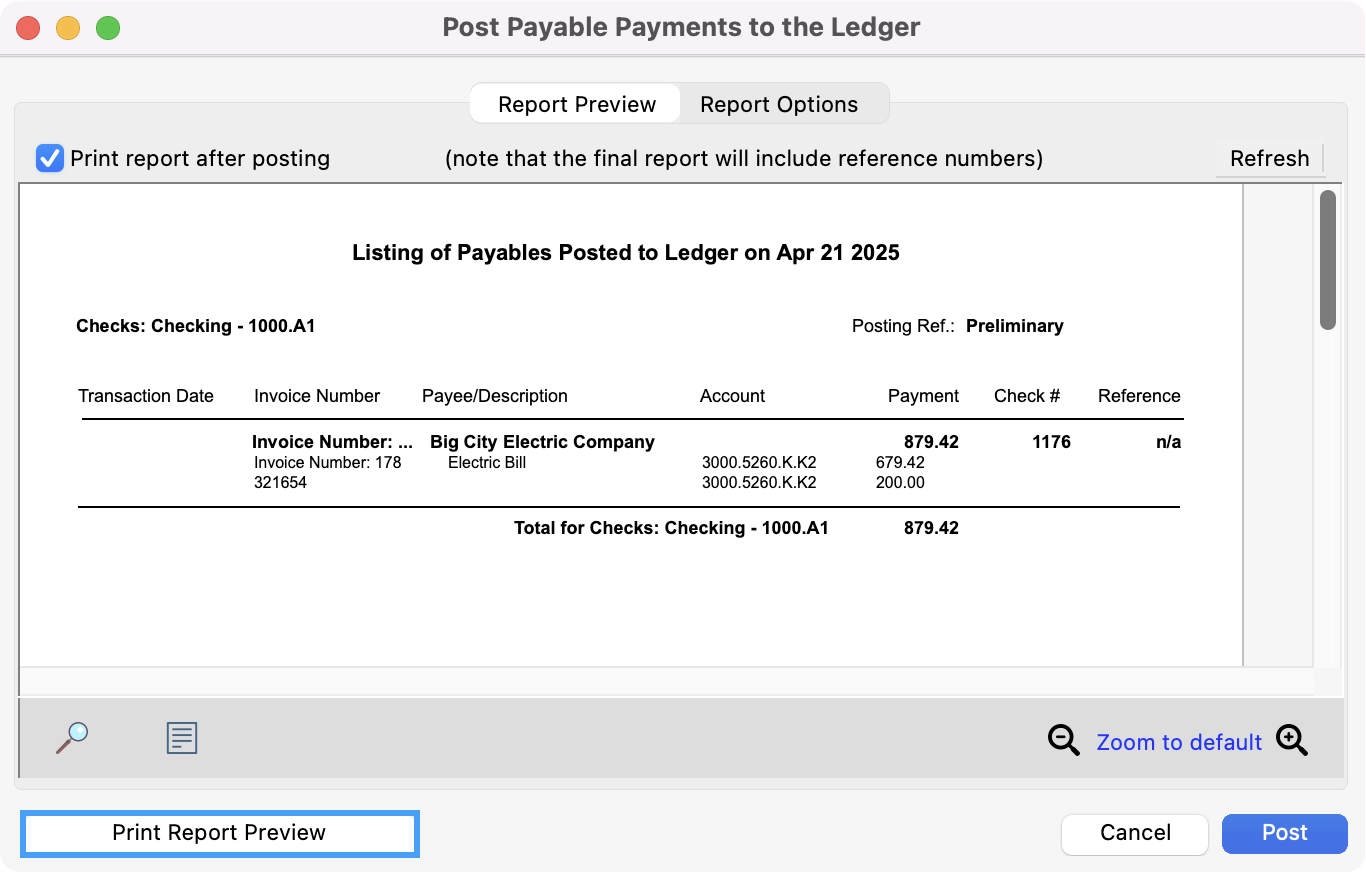
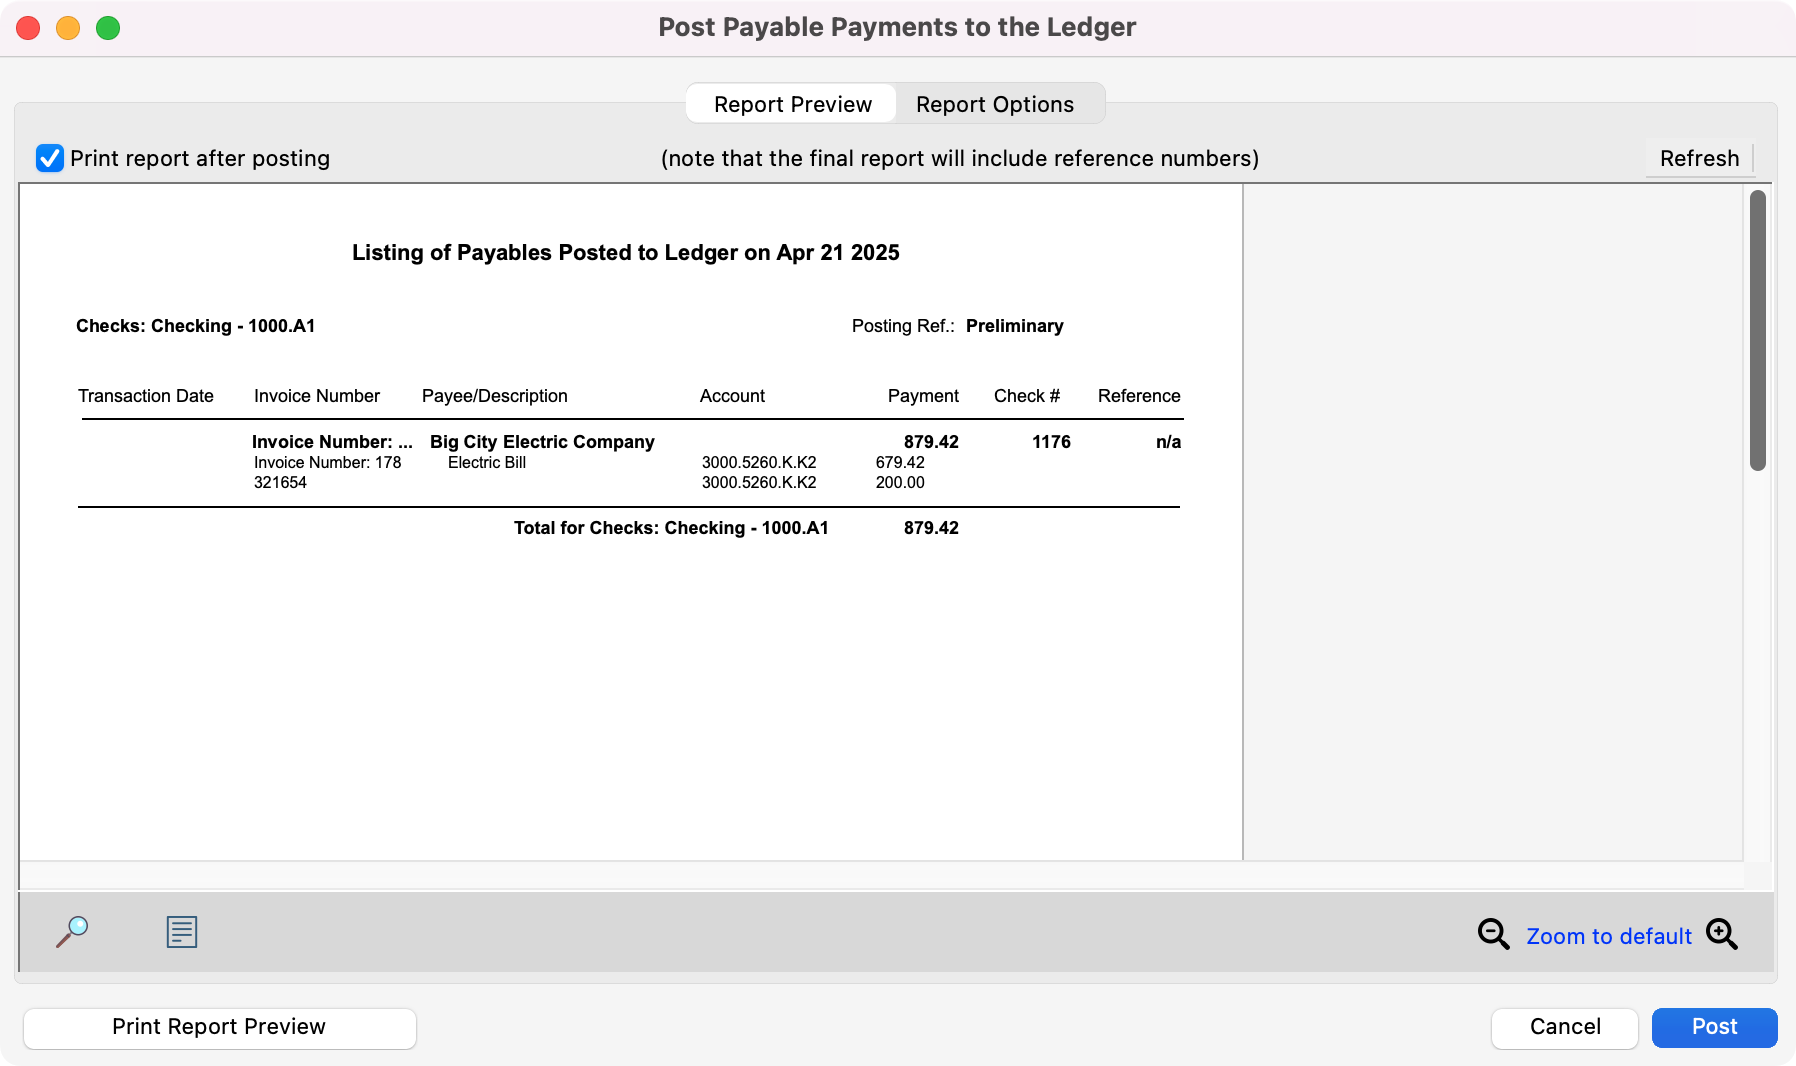
A preview of the posting report is displayed in the window. Print the preview by clicking Print Report Preview.
Make sure you review the posting report before proceeding - when in doubt DON’T POST!
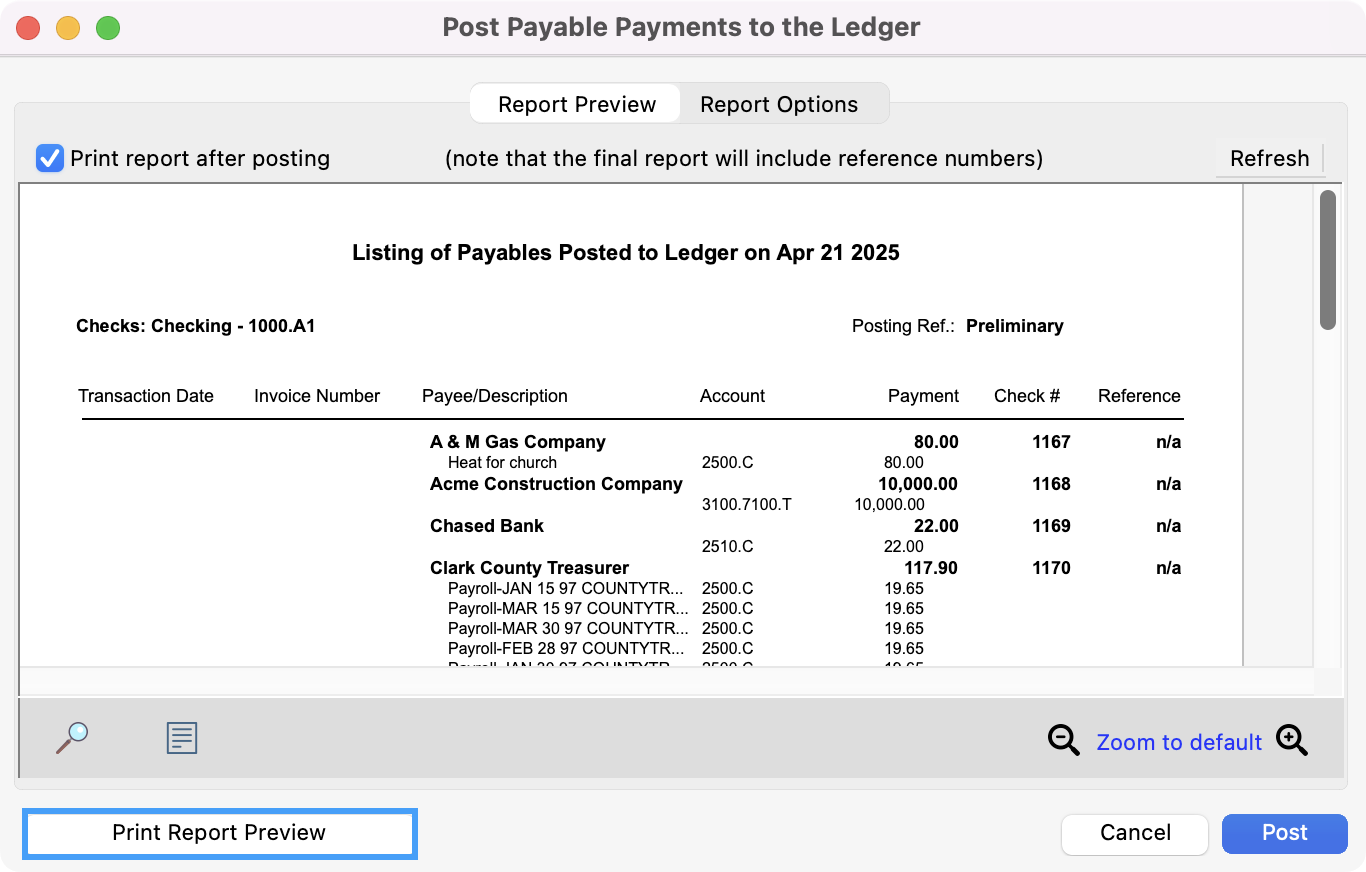
You will notice there are no Reference numbers on this report. They are assigned during posting and will appear on the final posting report.
-
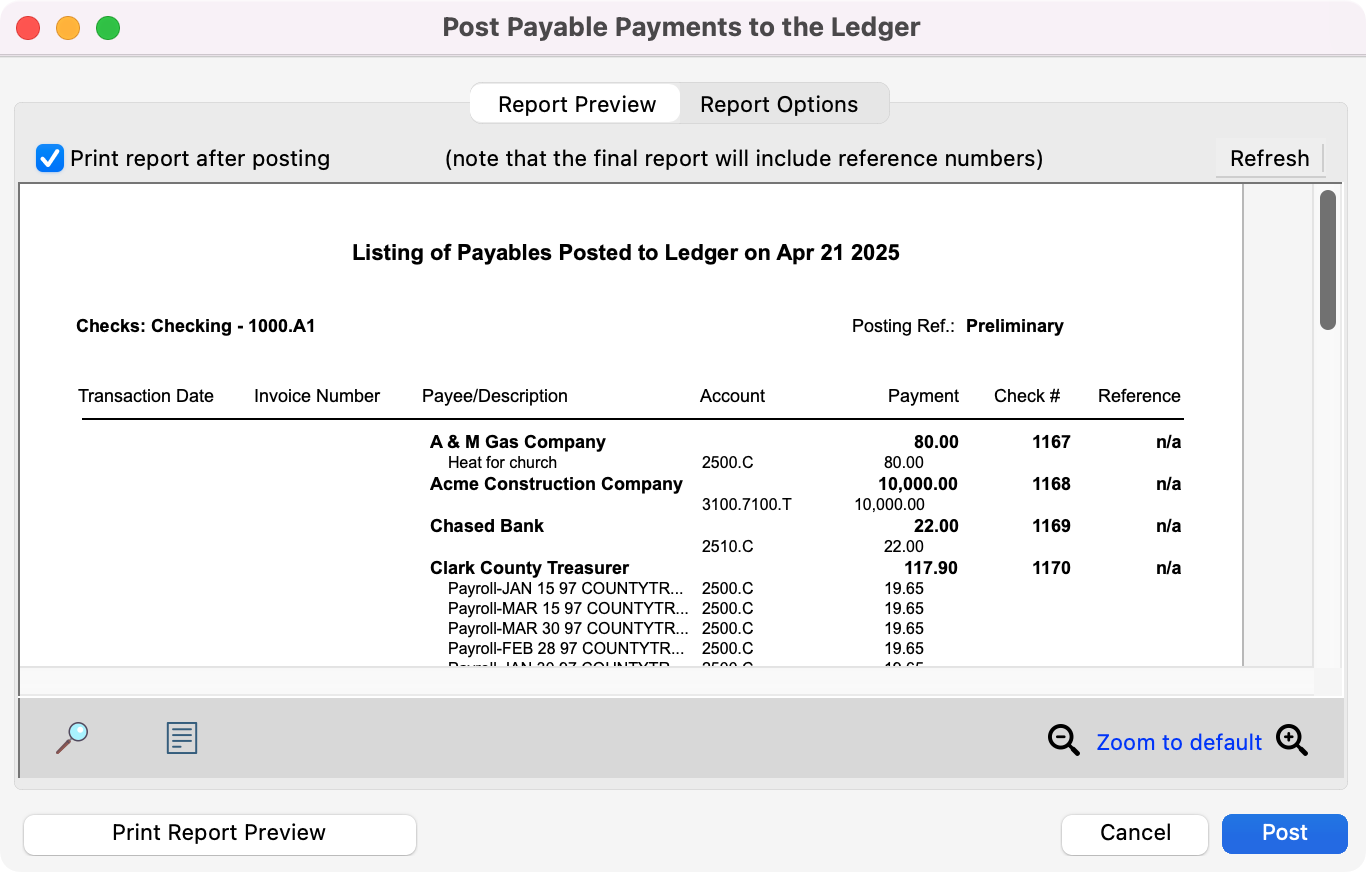
Review the report and the printed checks, making sure all the information is correct. Once you are satisfied that the report is correct, click Post.
-
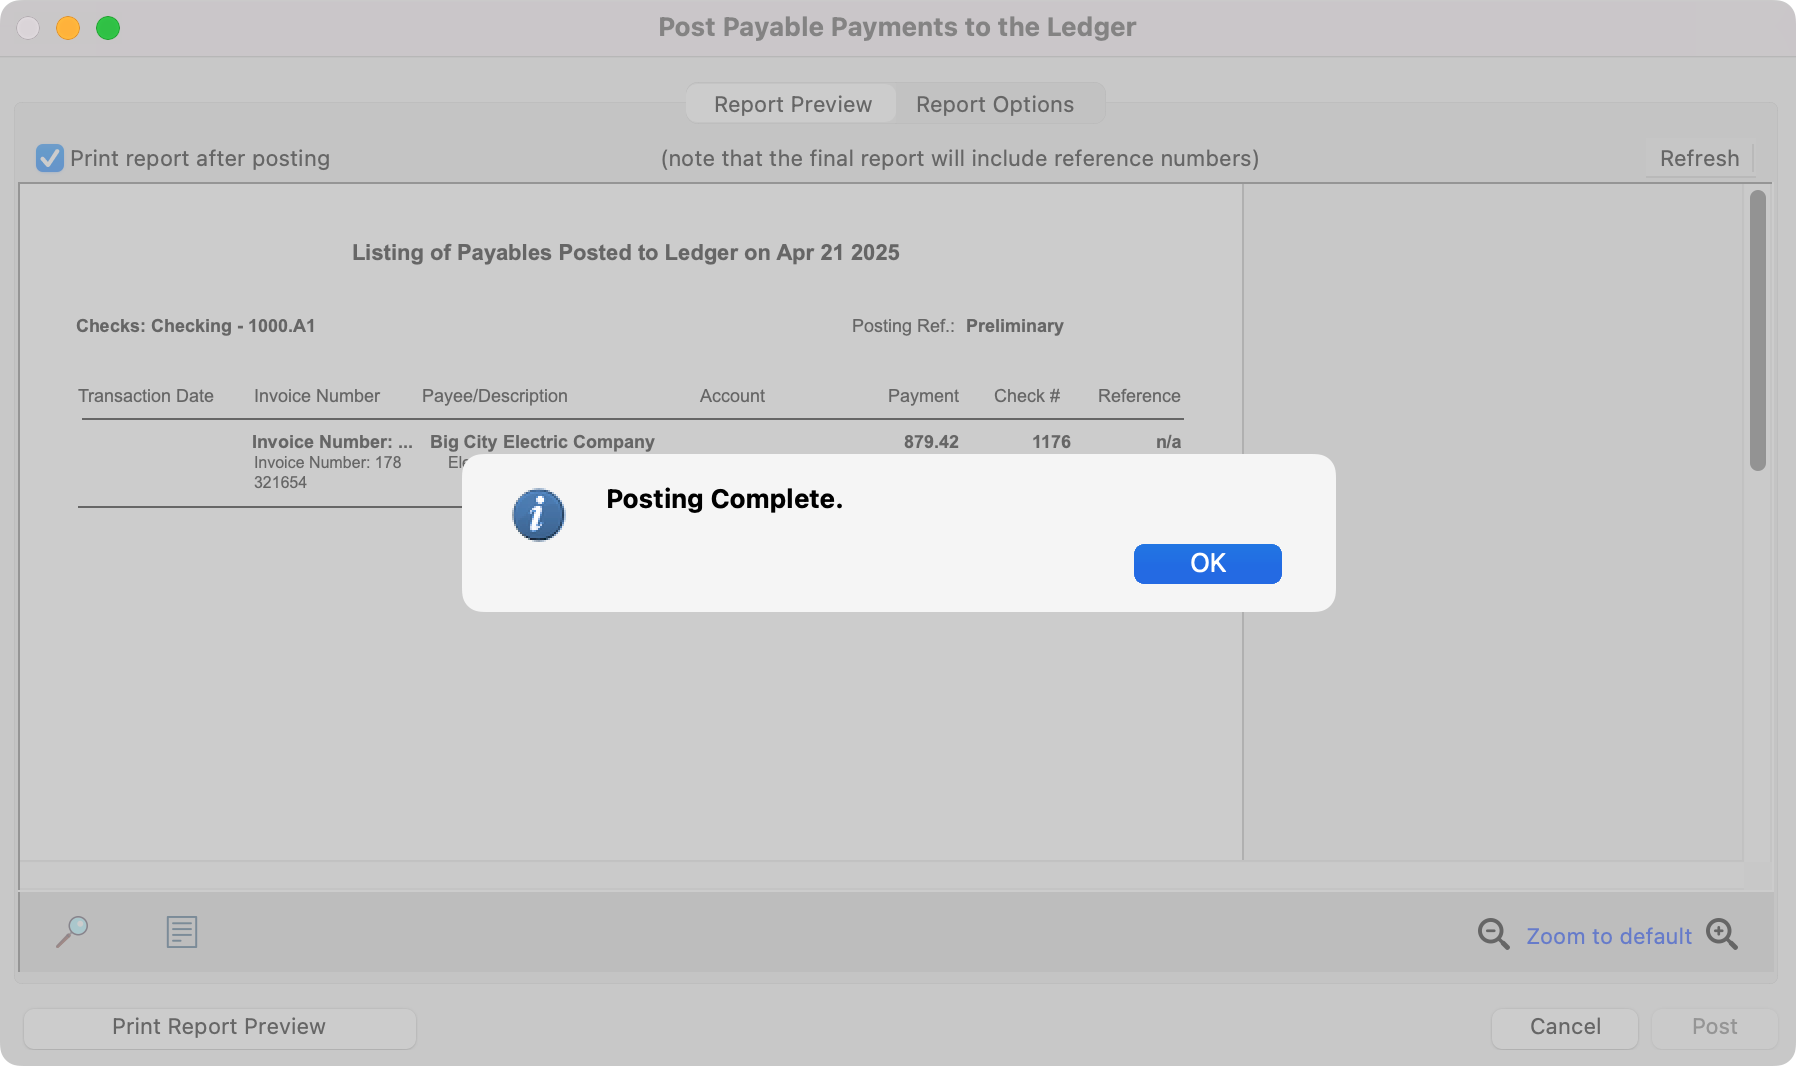
Choose the printer in the Select Report Destination window, and a report of the payables to be posted will be printed.

-
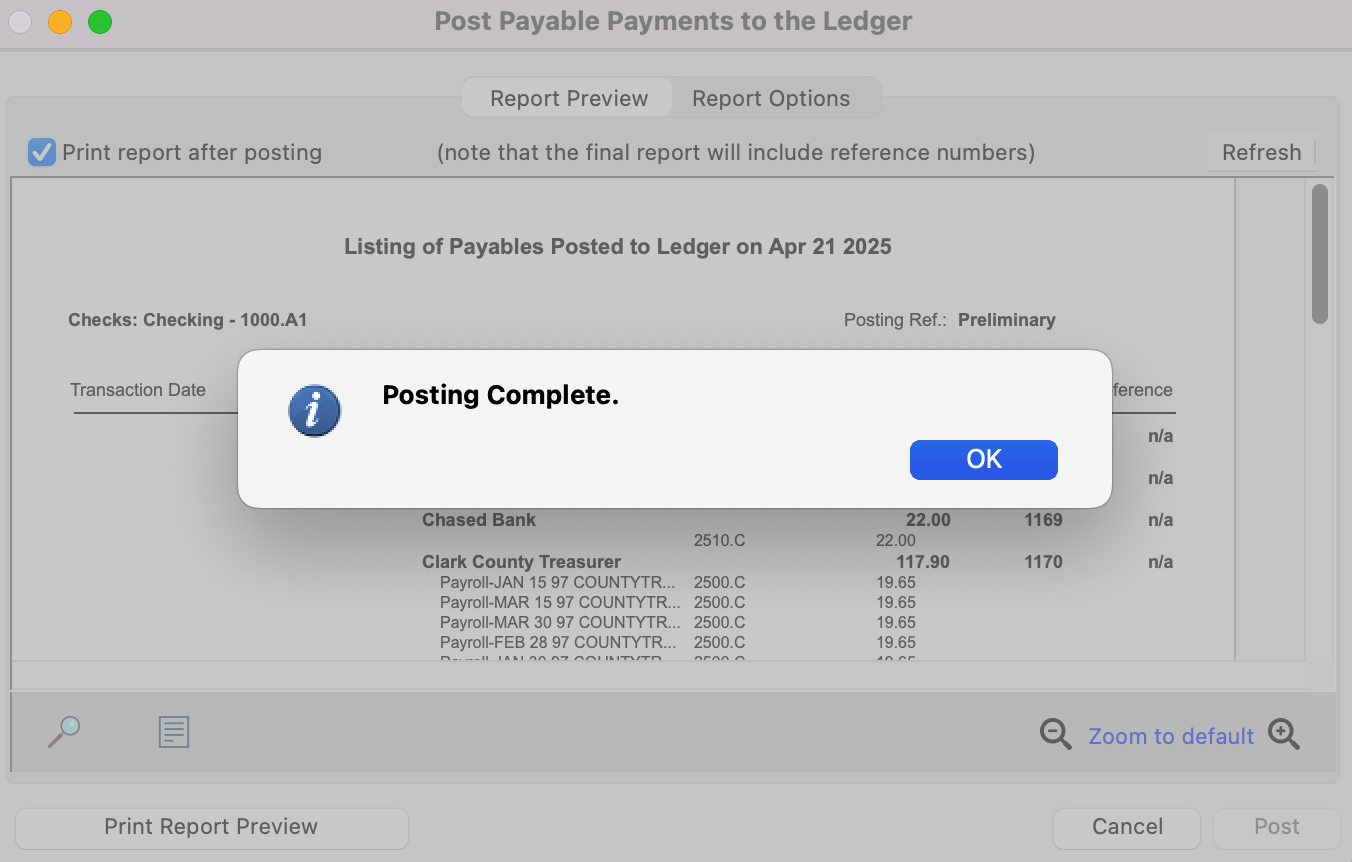
You’ll see a message letting you know posing is complete. Click, OK.
-
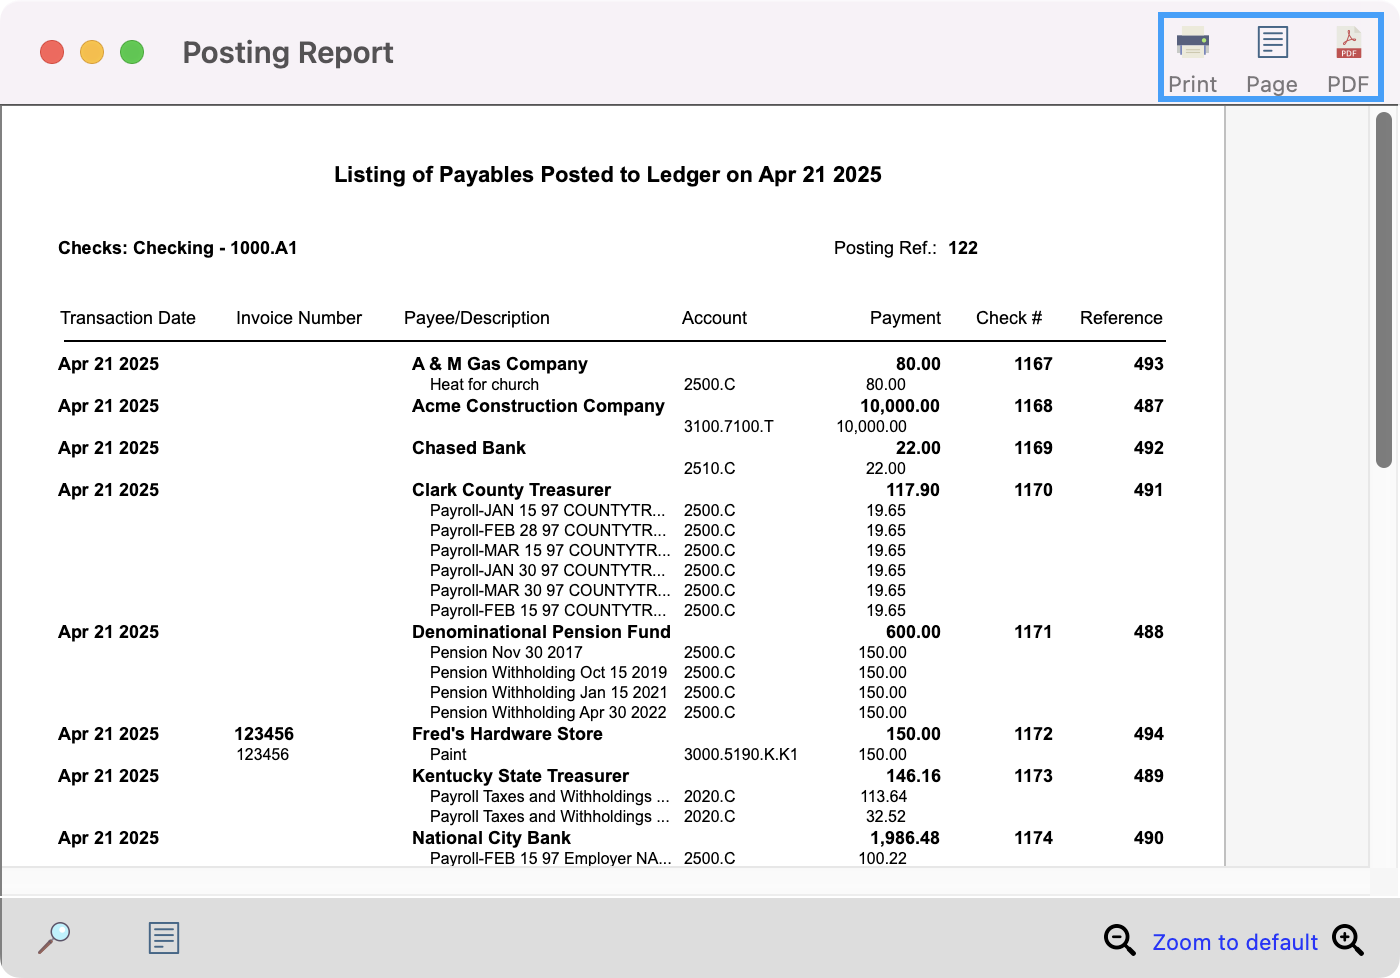
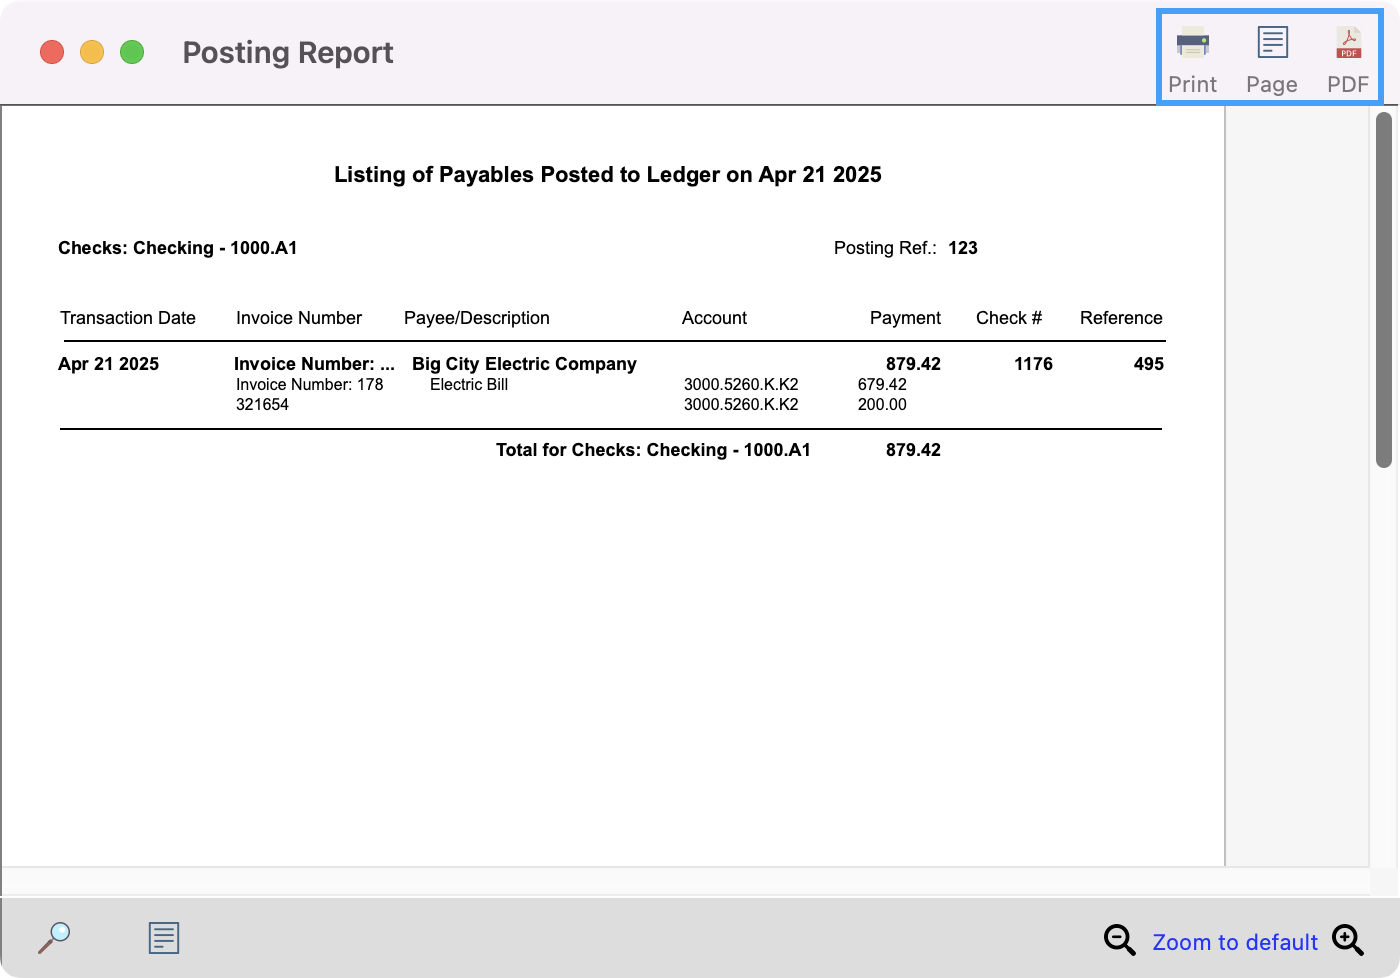
You’ll then be able to print or export your Posting Report.
Auto Stubs
One of the payment types in CDM+ is Auto-Draw. When making auto-draw payments, you can generate a printout for your records or to be sent to the payee. Auto-draw stubs are created using the check layout features. On the Write Check window you will see which auto-draw stub option is selected and can change it if necessary.
Reprinting Checks
-
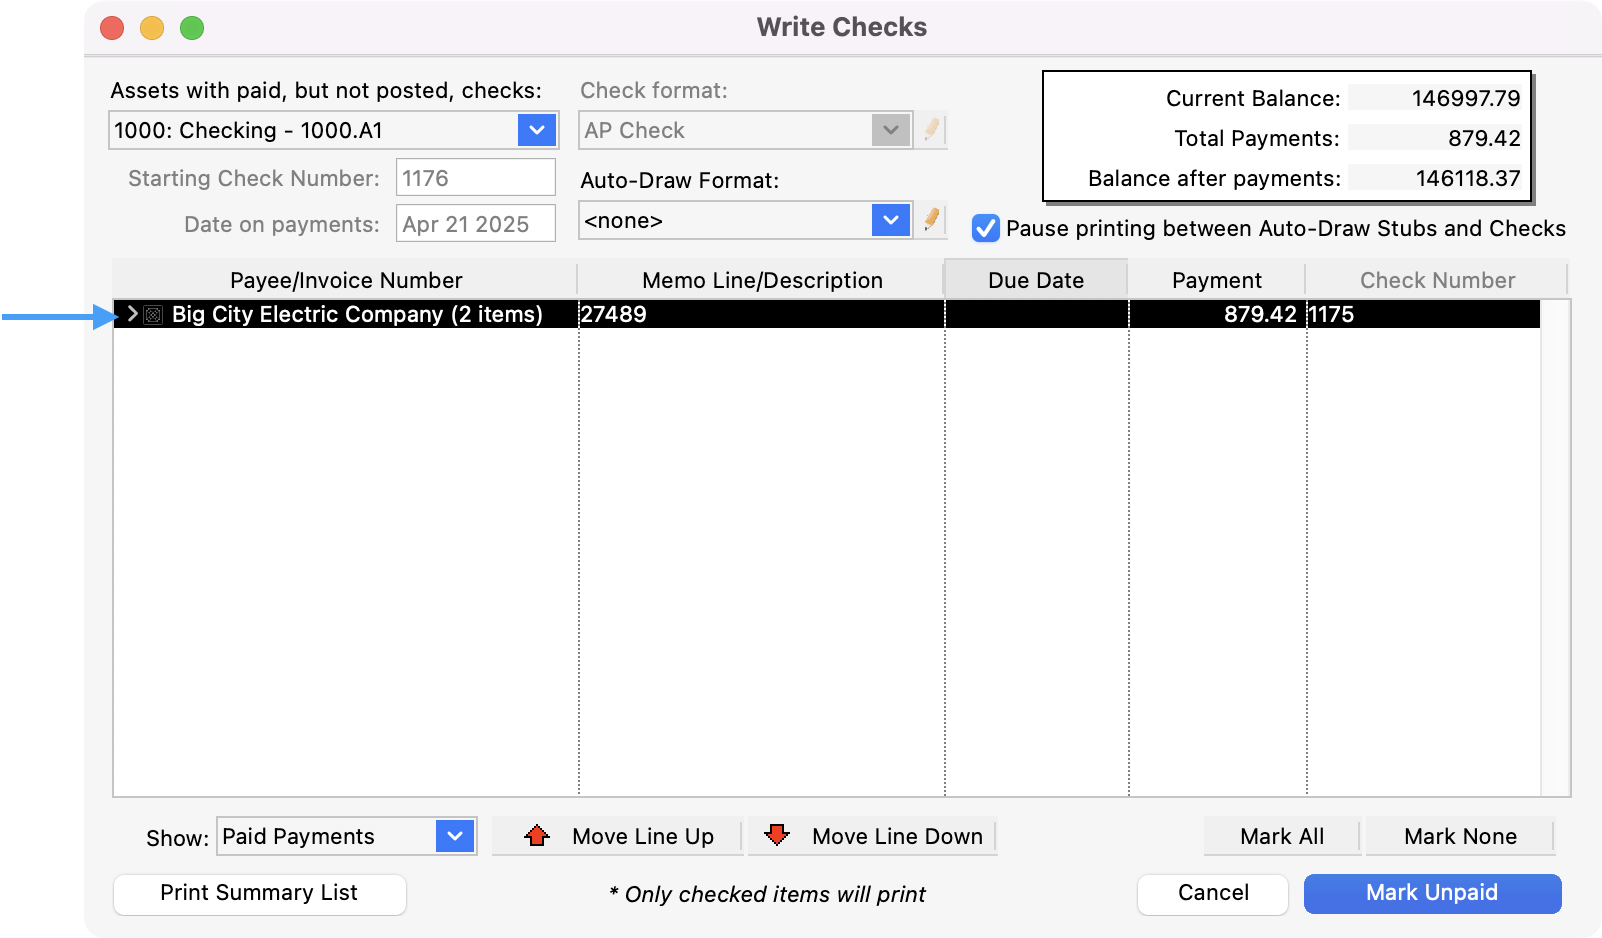
If you need to reprint a check or checks, open the Write Checks window and select Paid Payments from the Show drop list.

-
Check the box next to the check or checks you need to re-print.
-
Click the Mark Unpaid button in the bottom right-hand corner.
-
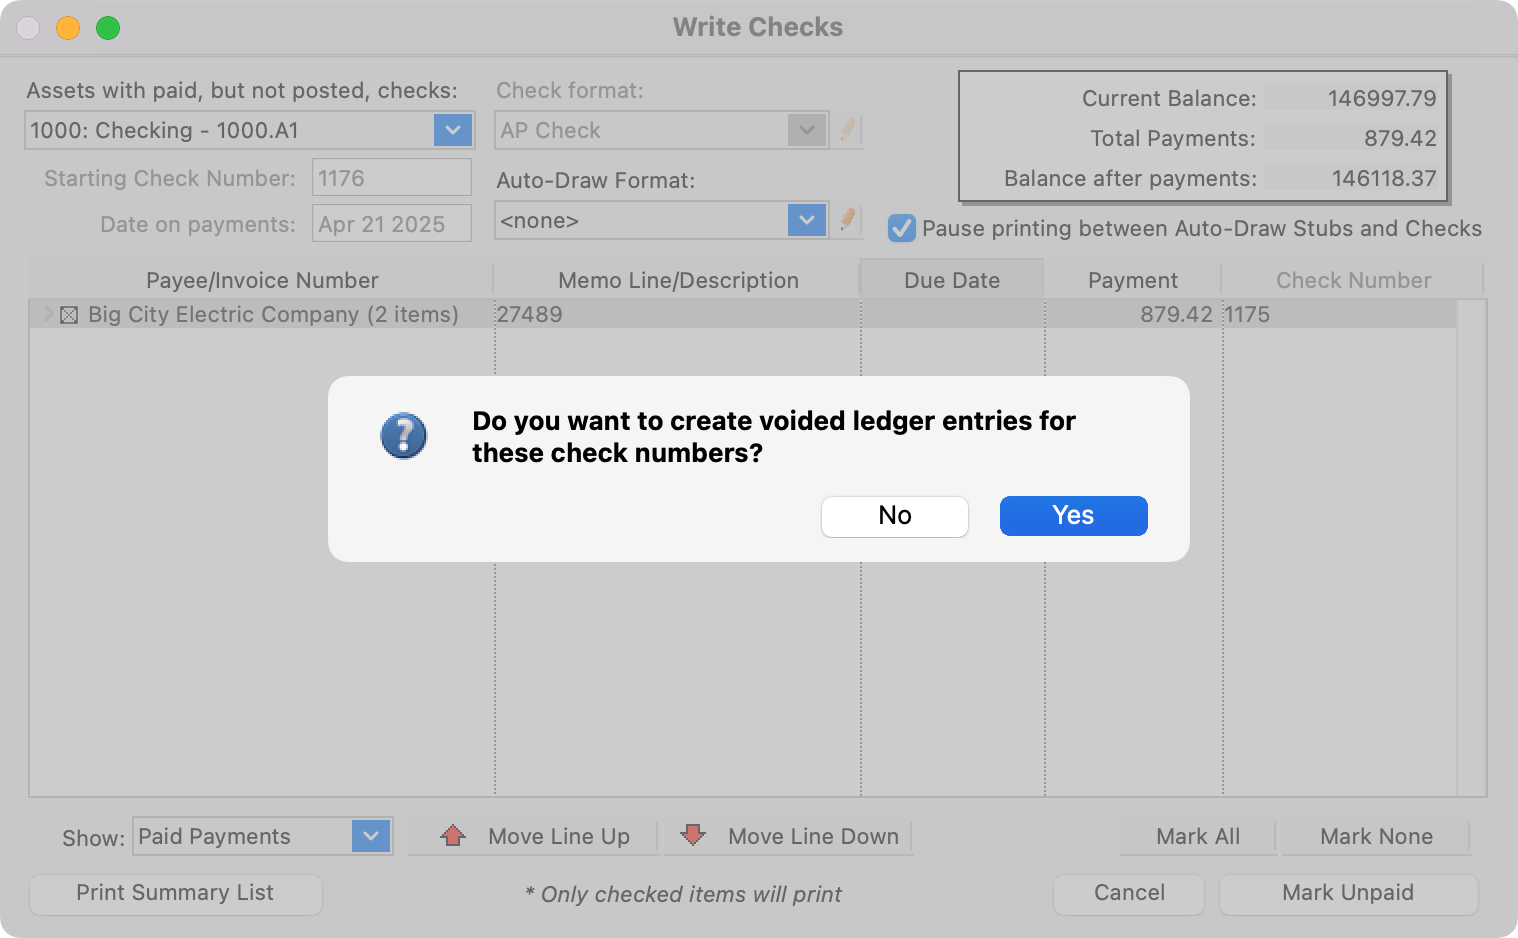
CDM+ Accounting will ask if you want to create a voided entry in the ledger when you mark checks to be reprinted. Click Yes to create an entry in the ledger with the assigned check number marked Void (for instance, if the check number in question was destroyed by the printer). Click No if you are able to reprint the check on the check number in question (for instance, if your printer mistakenly printed on plain paper and you still have the blank check number in question).
-
Click the Write Checks button in the bottom right-hand corner.
-
The Select Report Destination window will open. You may choose to print the checks to the screen to review them before sending them to your printer. Make your selection and click OK or press Return/Enter.https://help.cdmplus.com/payroll1/checks
You can print a test check by going to the Check Setup window. It is highly recommended that a test check be printed before printing your first checks out of CDM+.
-
When the check are printed, CDM+ will ask Do you want to go to the Post Payments window? If all your checks printed correctly, click Yes. Otherwise, click No. You can post the check later by selecting Post to Ledger from the Accounts Payable menu or by clicking on the Post icon on the Accounting toolbar.
-
A preview of the posting report is displayed in the window. Print the preview by clicking Print Report Preview.
-
Review the report and the printed checks, making sure all the information is correct. Once you are satisfied that the report is correct, click Post.
-
Choose the printer in the Select Report Destination window, and a report of the payables to be posted will be printed.
-
You’ll see a message letting you know posing is complete. Click, OK.
-
You’ll then be able to print or export your Posting Report.
If the check is not to be reprinted, then you will need to verify that the invoice is not marked to be paid. Proceed to Invoices to edit or delete the invoice.