Configure
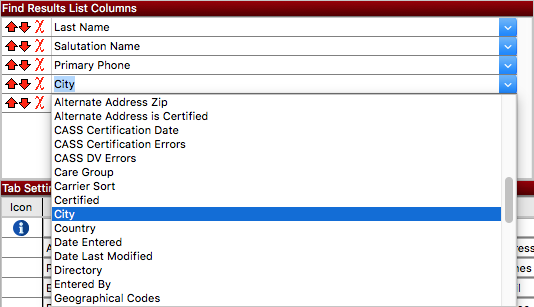
Each user of CDM+ can customize the display of find results on data entry windows in CDM+, choosing which fields to include and what order they display across the window. Selections made in Configure will be saved for that particular data entry window for a user until he/she changes them.

To change or add to the columns shown on a record window, click on the Configure button at the bottom left.

Click on the down arrow on the right to select a different or additional column header from the drop down list. Clicking on the red X will remove a column field. Click on the red up and down arrows to arrange the column order. Click on Revert to Defaults on the Configure window to return the view to the original columns.
When you have finished making your changes, click OK to save them or Cancel to discard them.
You can change the width of the columns. From the main window, move your cursor to the line between headers until it changes to a double line with an arrow on either side. Click and hold the mouse button down and you can make the column wider or narrower. You can also use the scroll bar at the bottom of the columned list window to view more columns, if necessary. To have CDM+ automatically size the columns to fit the contents of the results list, move your cursor to a line between columns and when it changes to a double line with an arrow on each side, double-click.
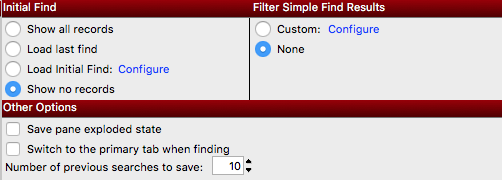
There are other things you can specify in Configure:
What you want displayed when this window is opened (Show all records, Load last find or Show no records)
Number of previous searches to save for quick access
Save pane in exploded state
Switch the view of a record window to the primary (left most) tab when finding

These settings are user-specific and tied to the user that is logged in. CDM+ will save your most recent settings when you log out of the program and automatically load them the next time you log in.
