The CDM+ ACH Direct Deposit Payroll feature allows you to easily create a file to send to your banking institution for direct-deposit of payroll. This option is included when you purchase Payroll.
Turn on ACH Payroll
To use ACH Payroll you’ll first want to configure this preference in CDM+.
-
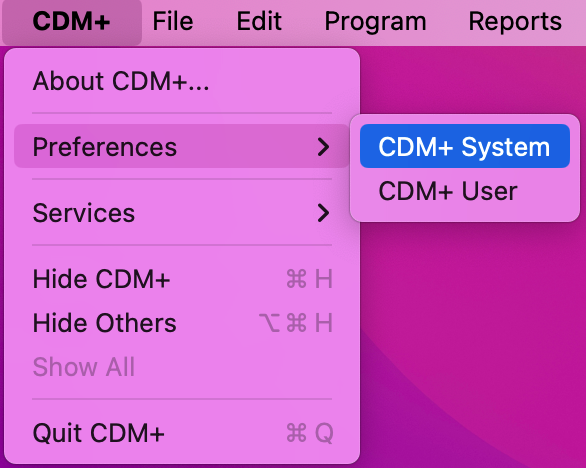
In CDM+, go to CDM+ → Preferences → CDM+ System (macOS) or File → Preferences → CDM+ System (Windows)
-
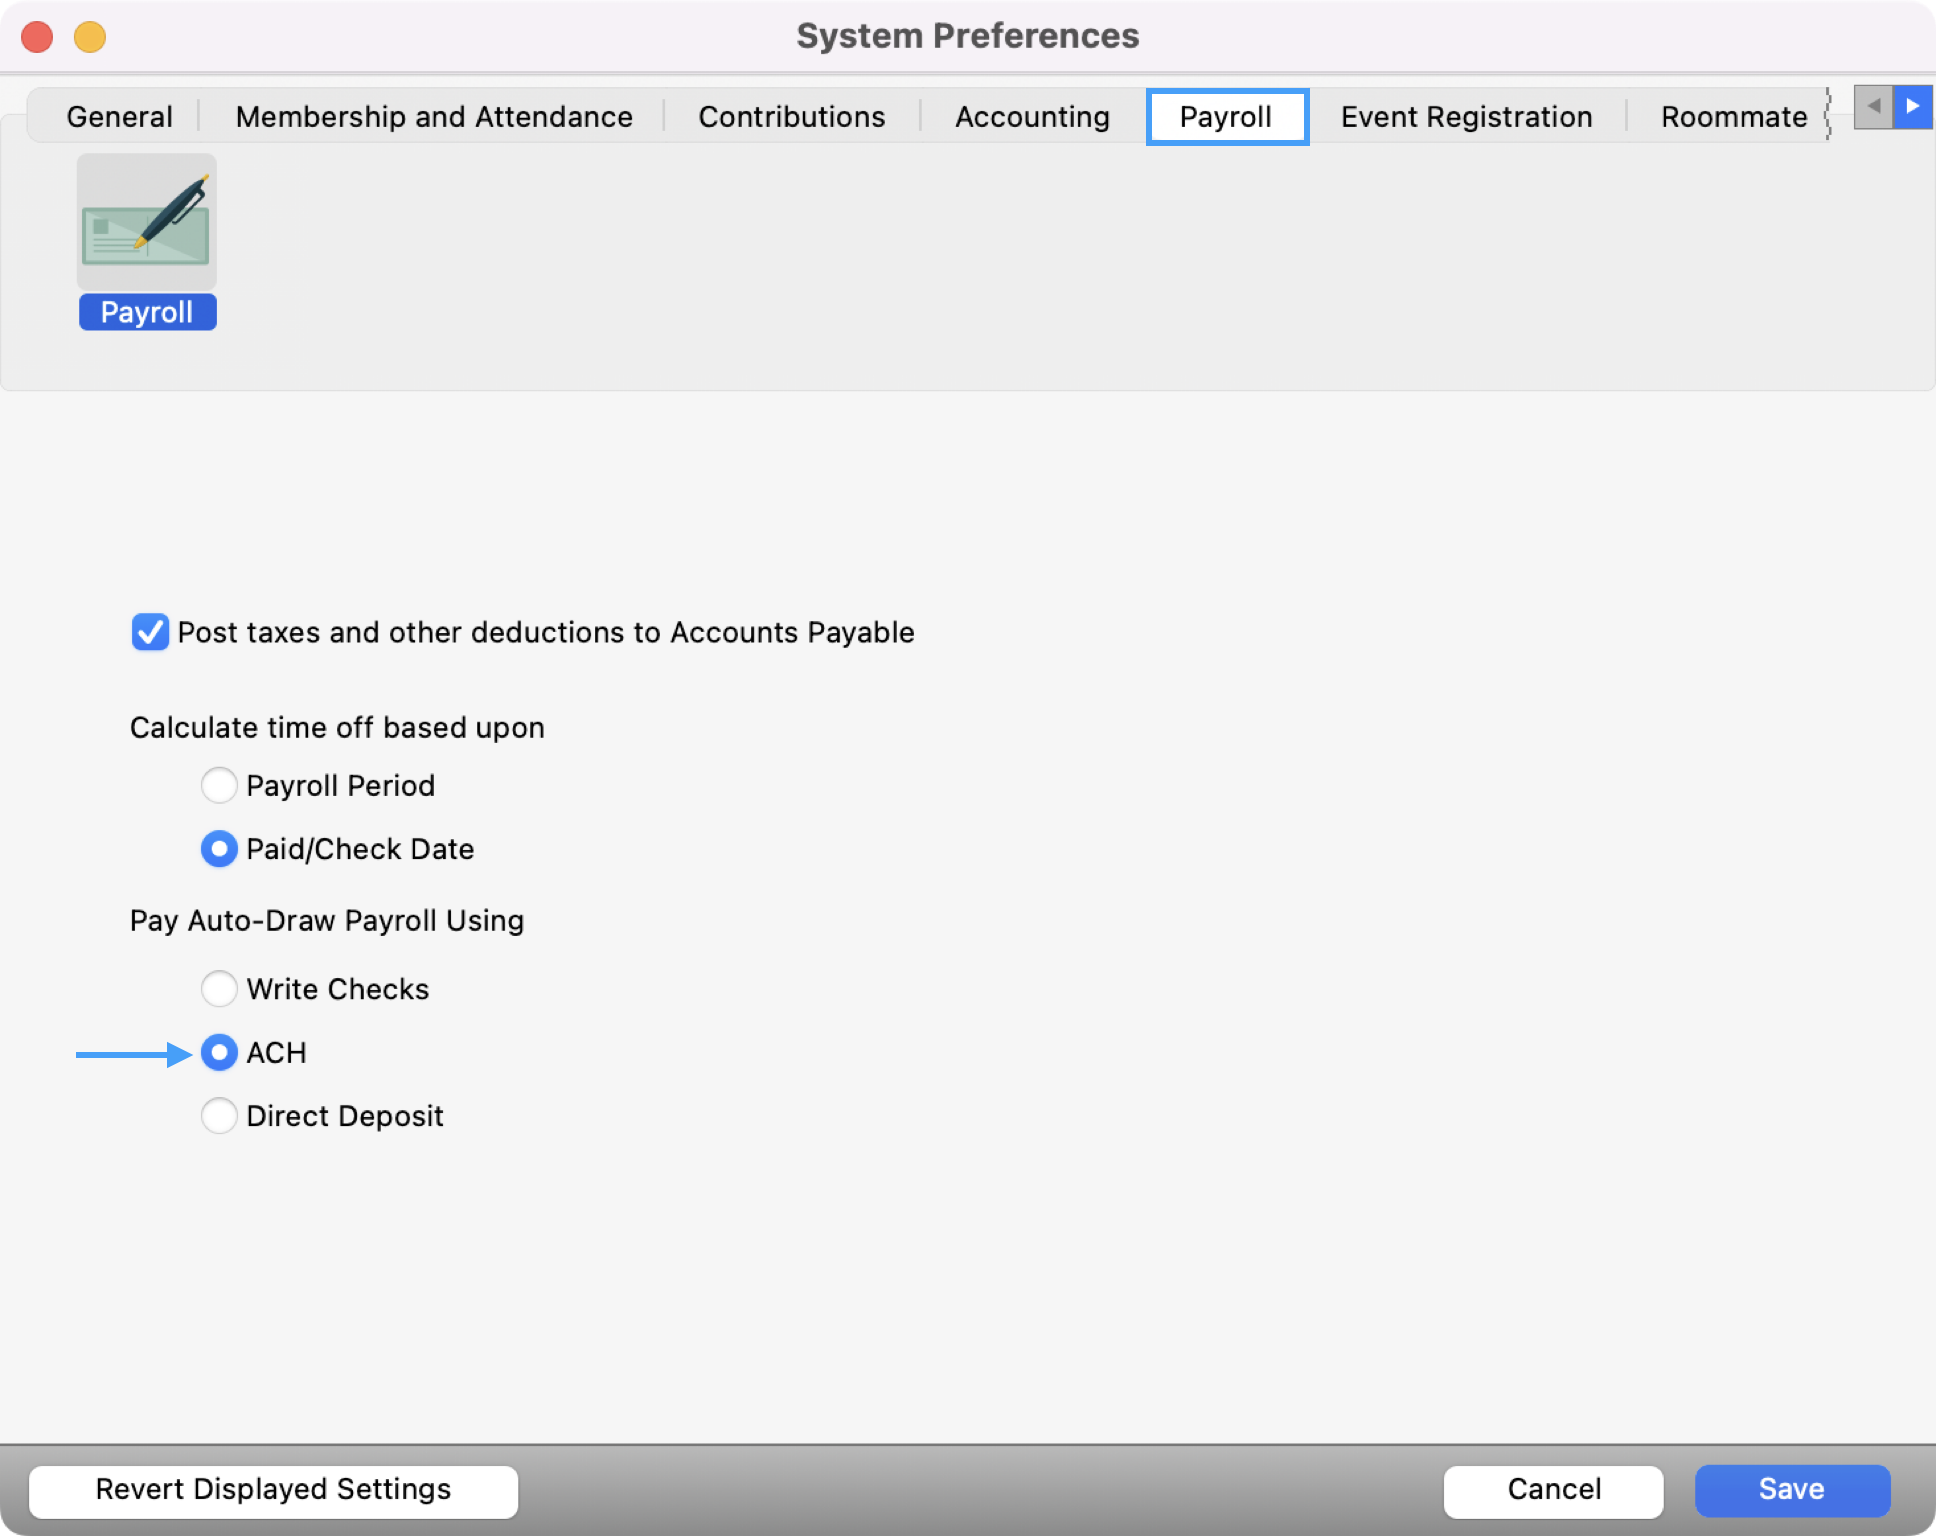
Click the Payroll tab, select ACH, and click Save.
ACH Payroll Setup
-
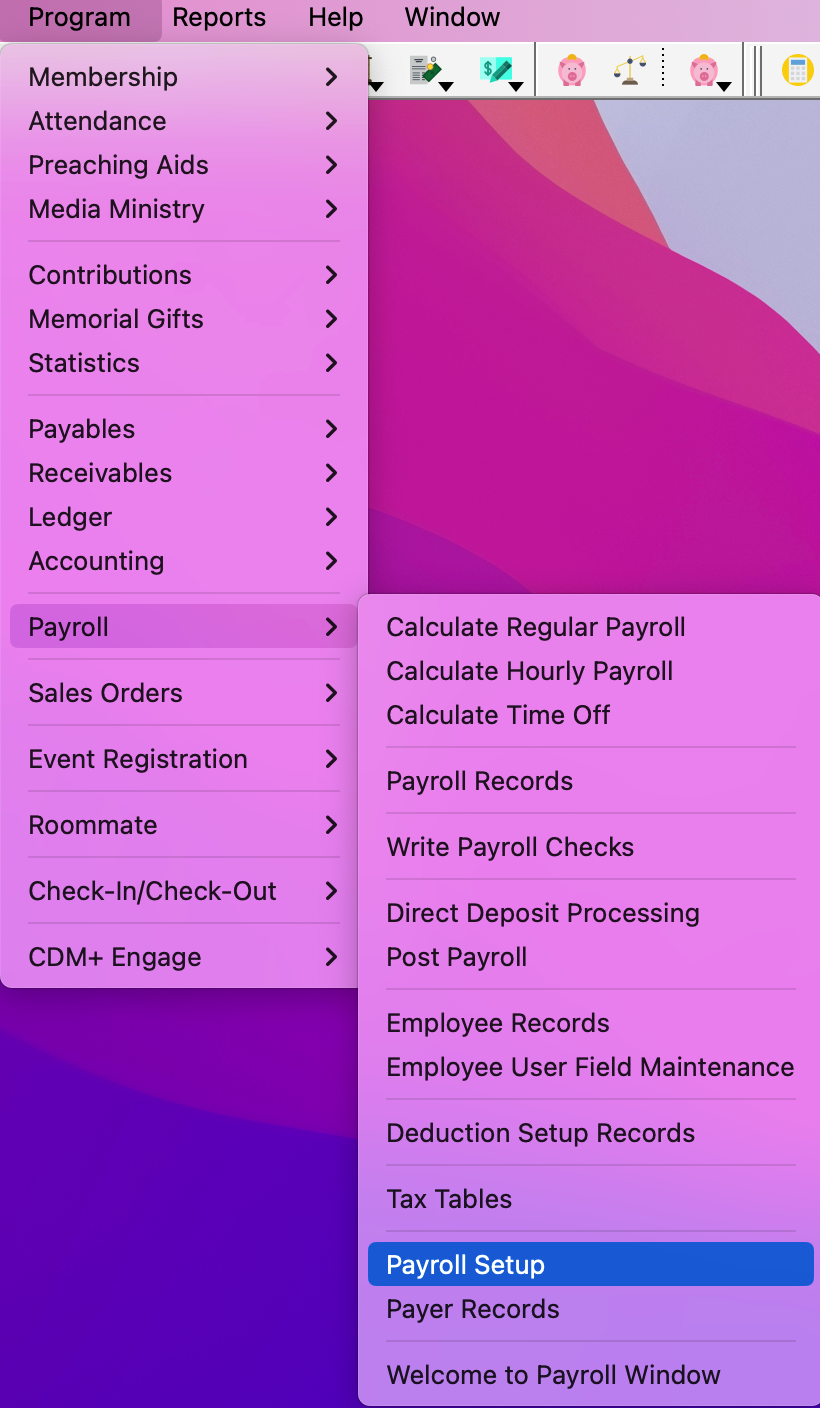
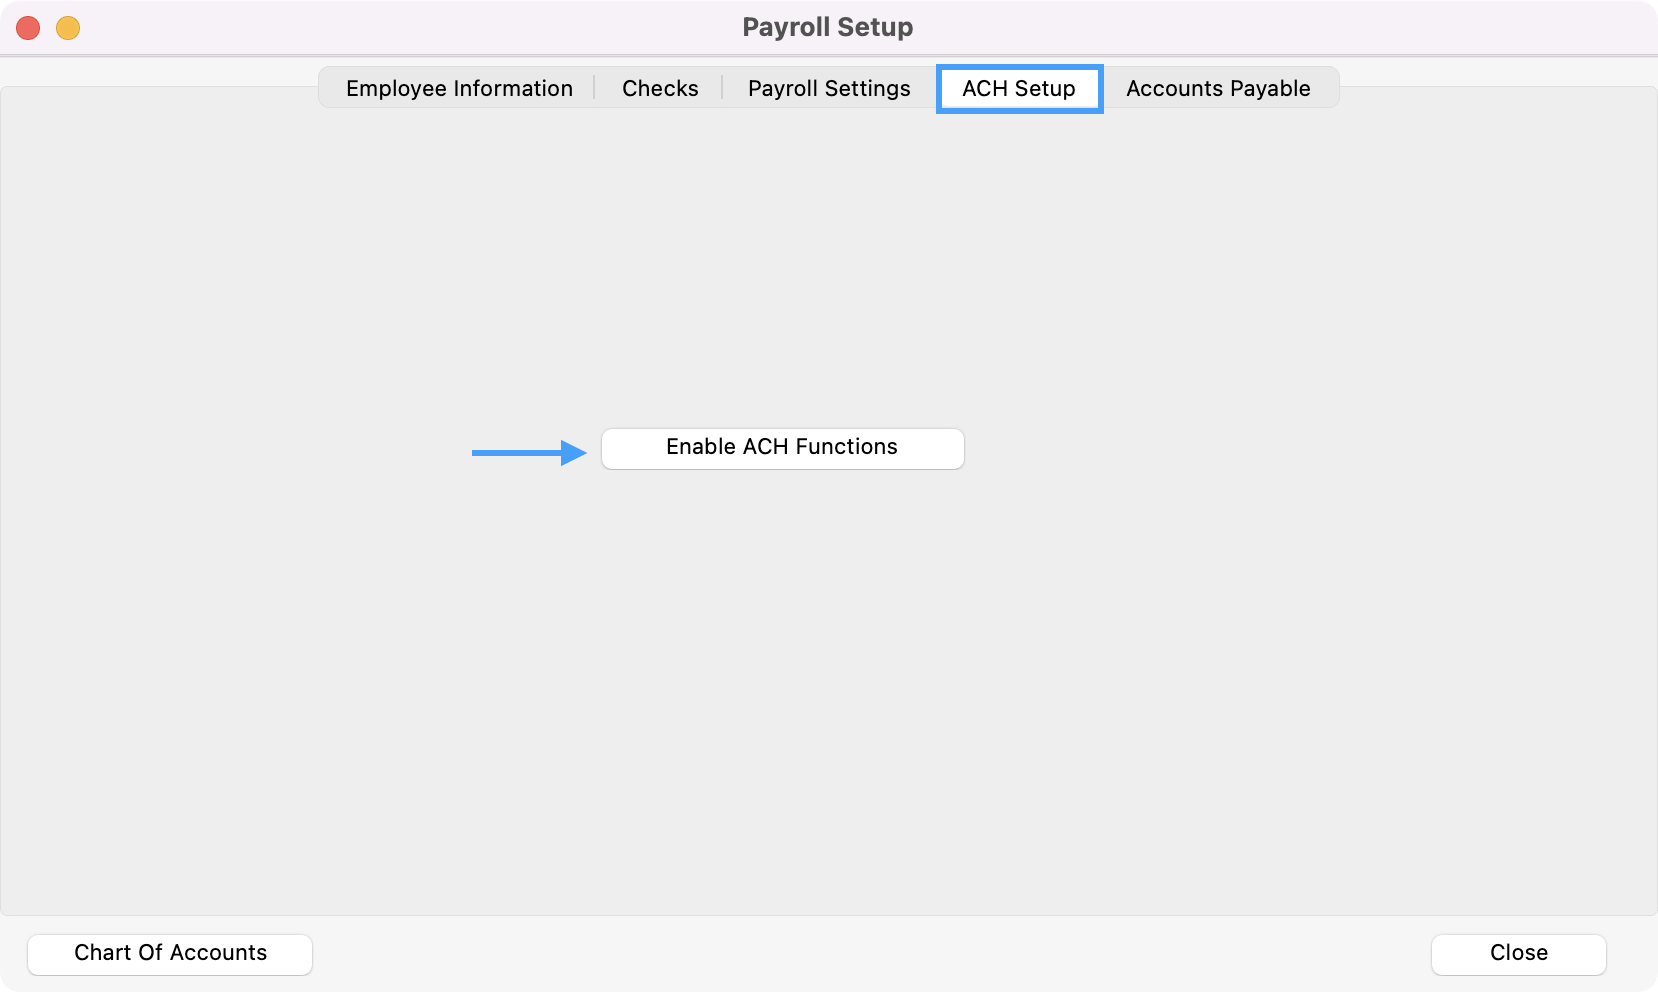
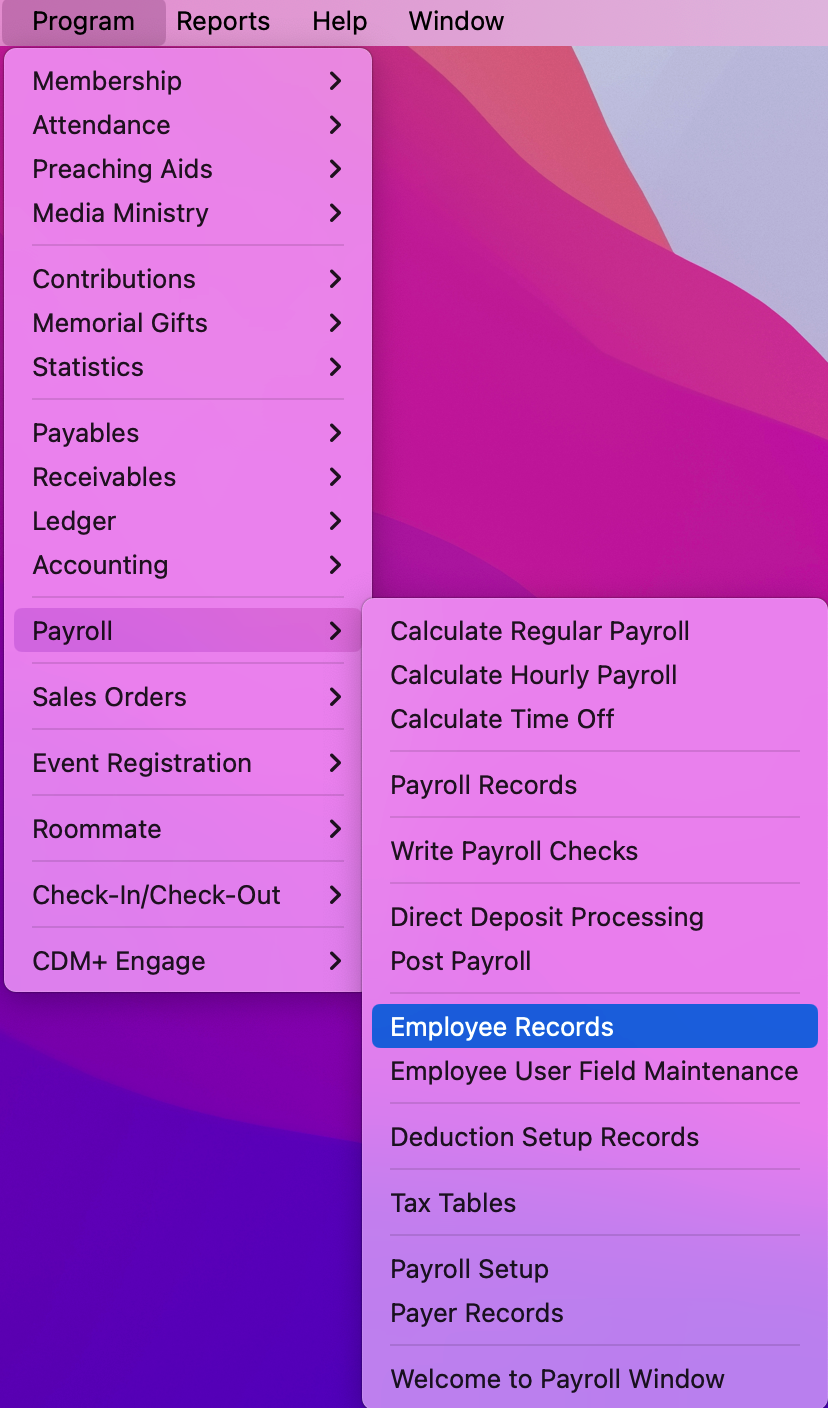
To navigate to ACH Setup go to Program → Payroll Setup.
-
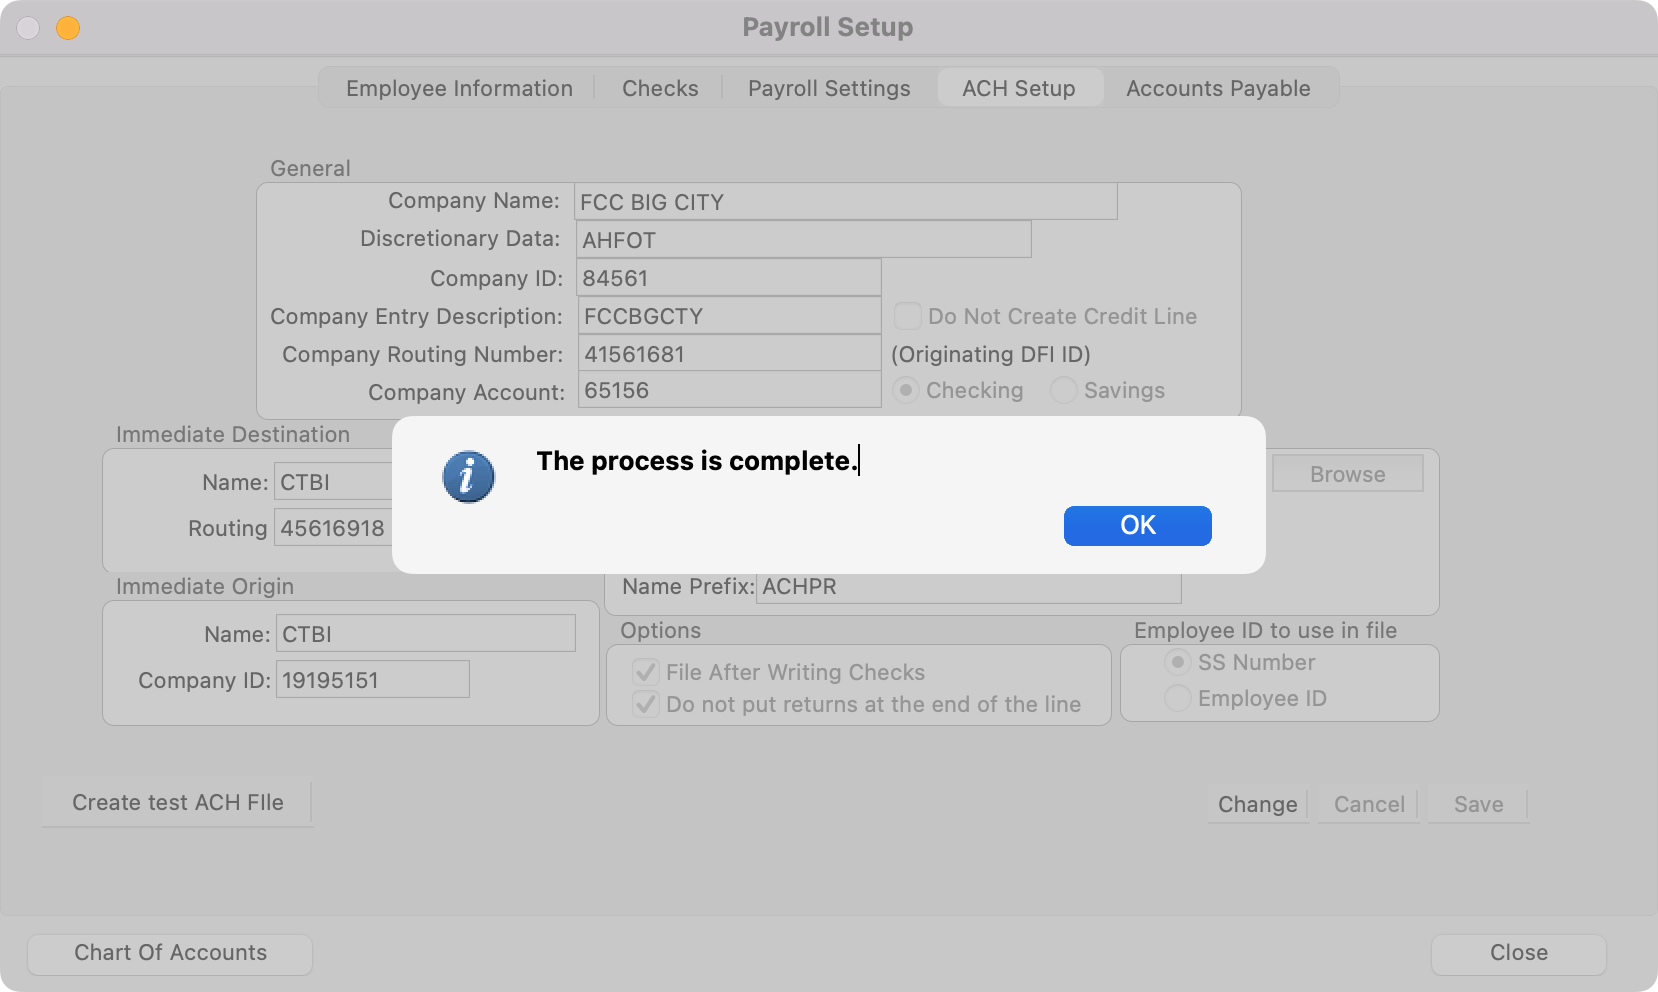
In the Payroll Setup window click the ACH Setup tab. Then, click Enable ACH Functions.
-
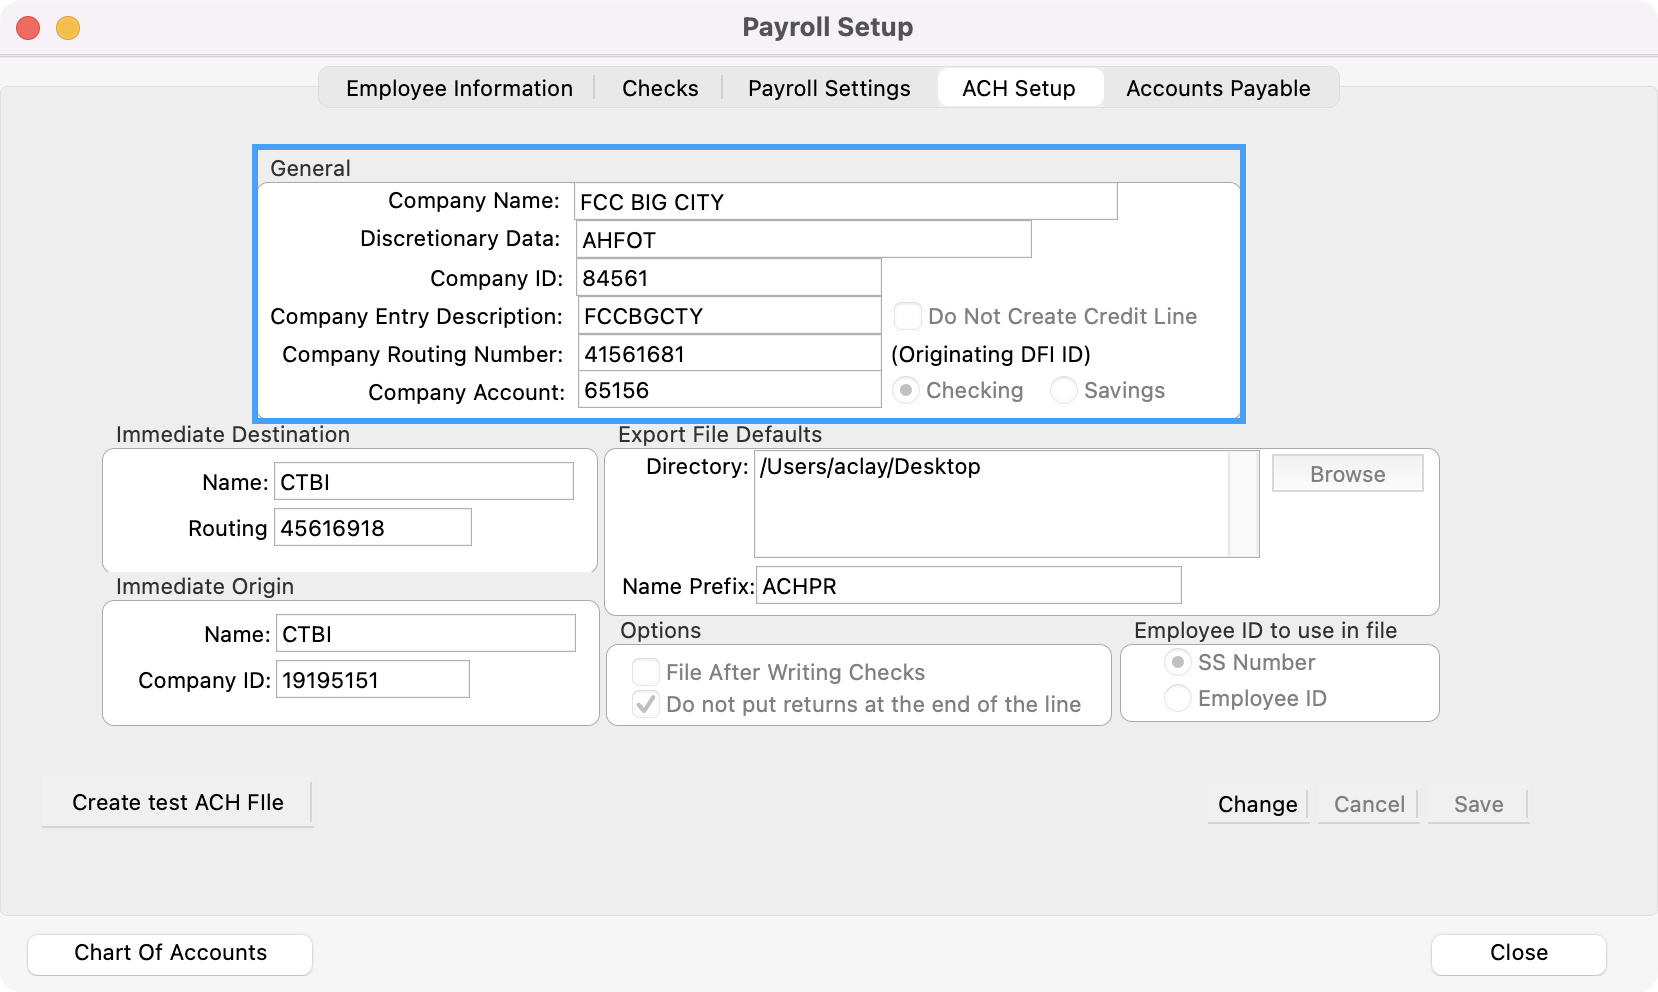
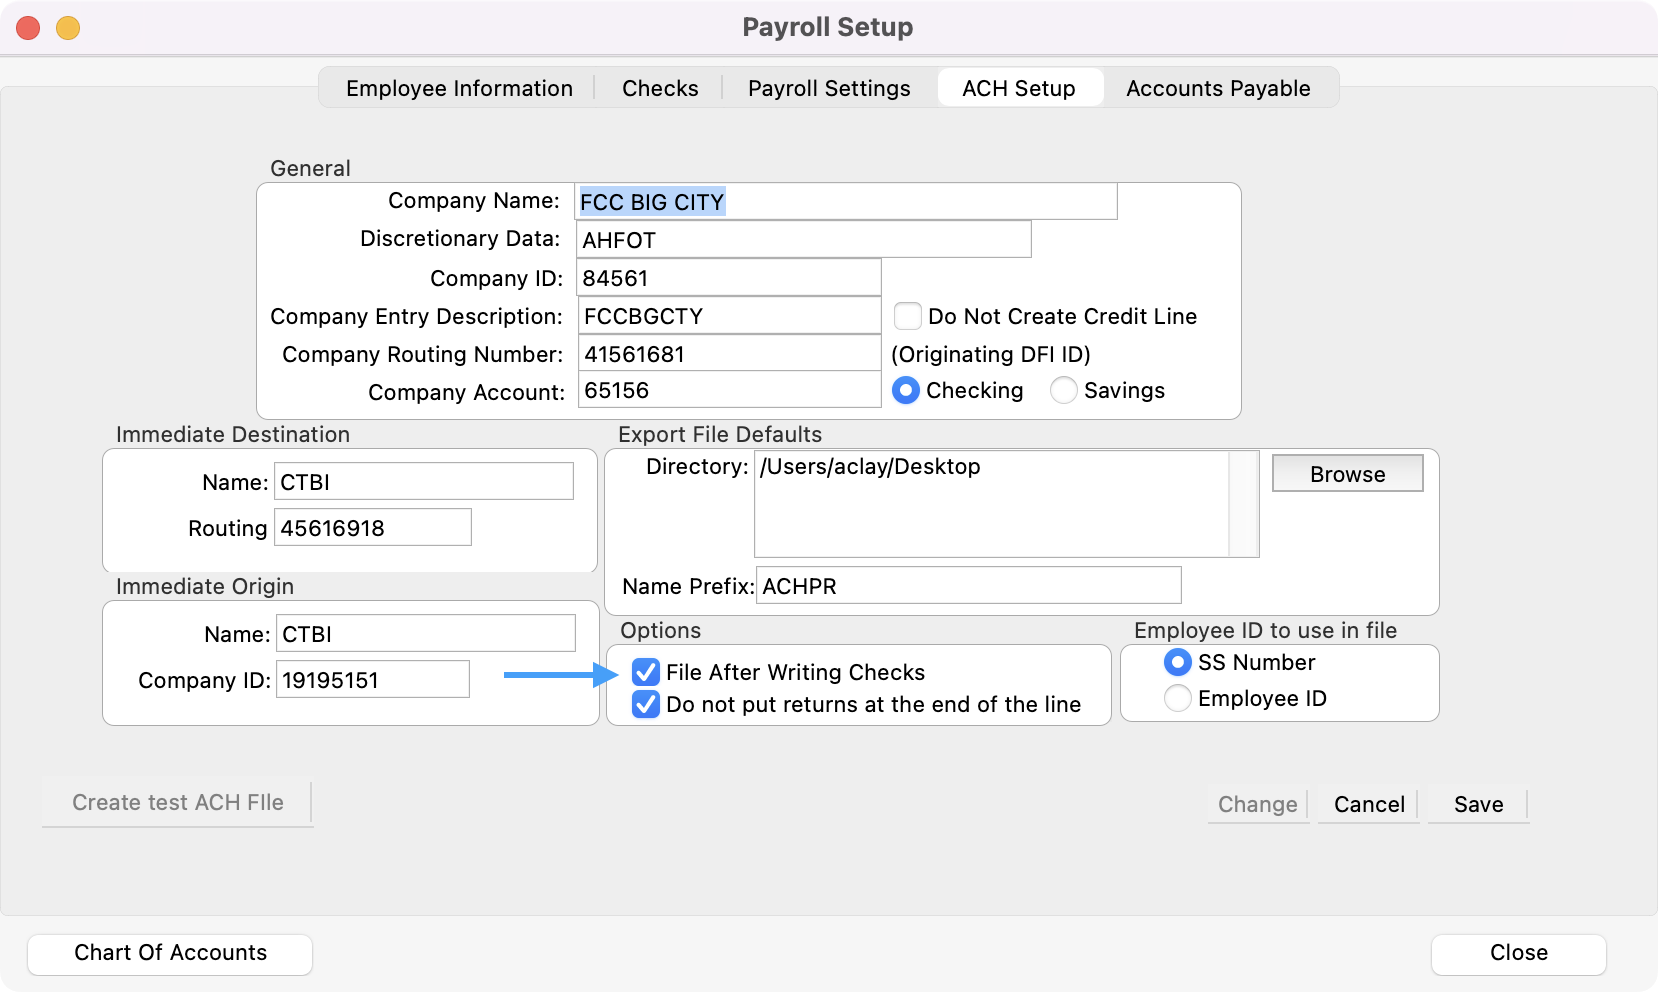
Using the information provided by your banking institution, complete the fields under General.
-
Company Name - Your Church Name - 16 Character limit, so you may need to abbreviate.
-
Discretionary Data (not required) - 20 Character limit - Example: Payroll
-
Company ID - Unique identifier assigned to you by your bank
-
Company Entry Description - 20 Character limit – Similar to Company name above
-
Do Not Create Credit Line – Normally this box is left unchecked. If your bank indicates that the file should not include a credit line at the end of the file then click this box on.
-
Company Routing Number - Provided by your bank
-
Company Account - The bank account number (not the CDM+ Account number) from which the money will be paid.
-
-
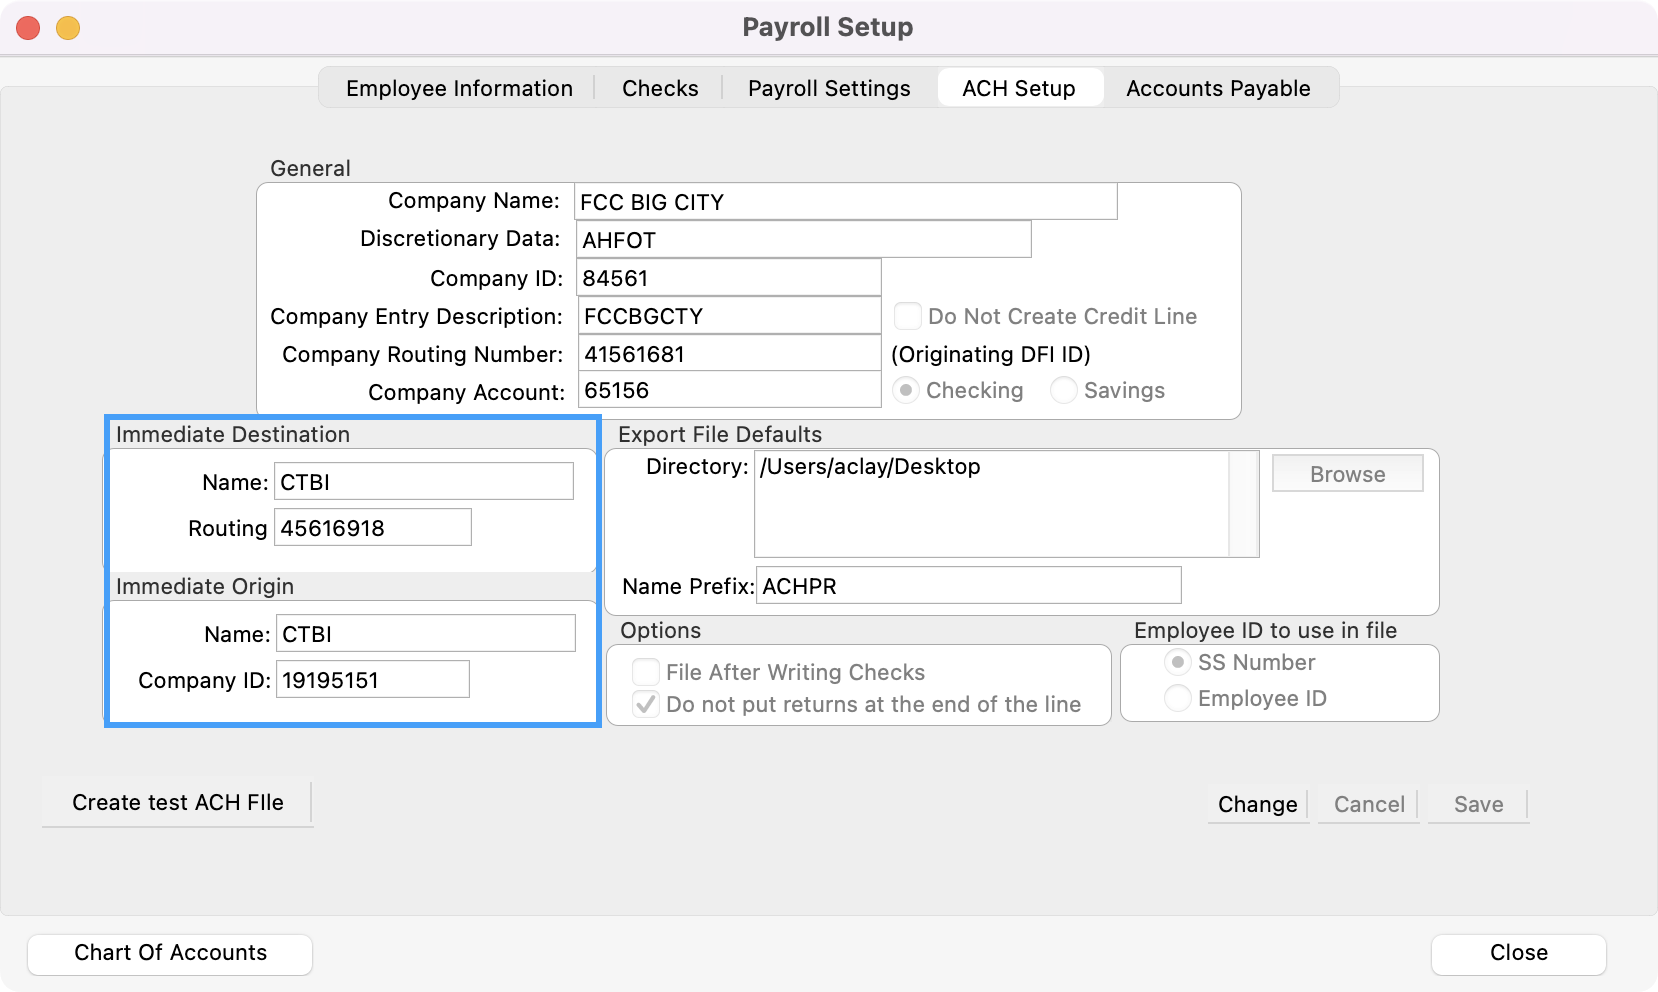
Next, fill in the fields under Immediate Destination/Immediate Origin. This identifies the name of the bank and the routing number is usually the same as entered under Company Routing Number. Name Example: BANKOFAMERICA, CHASE, etc.
-
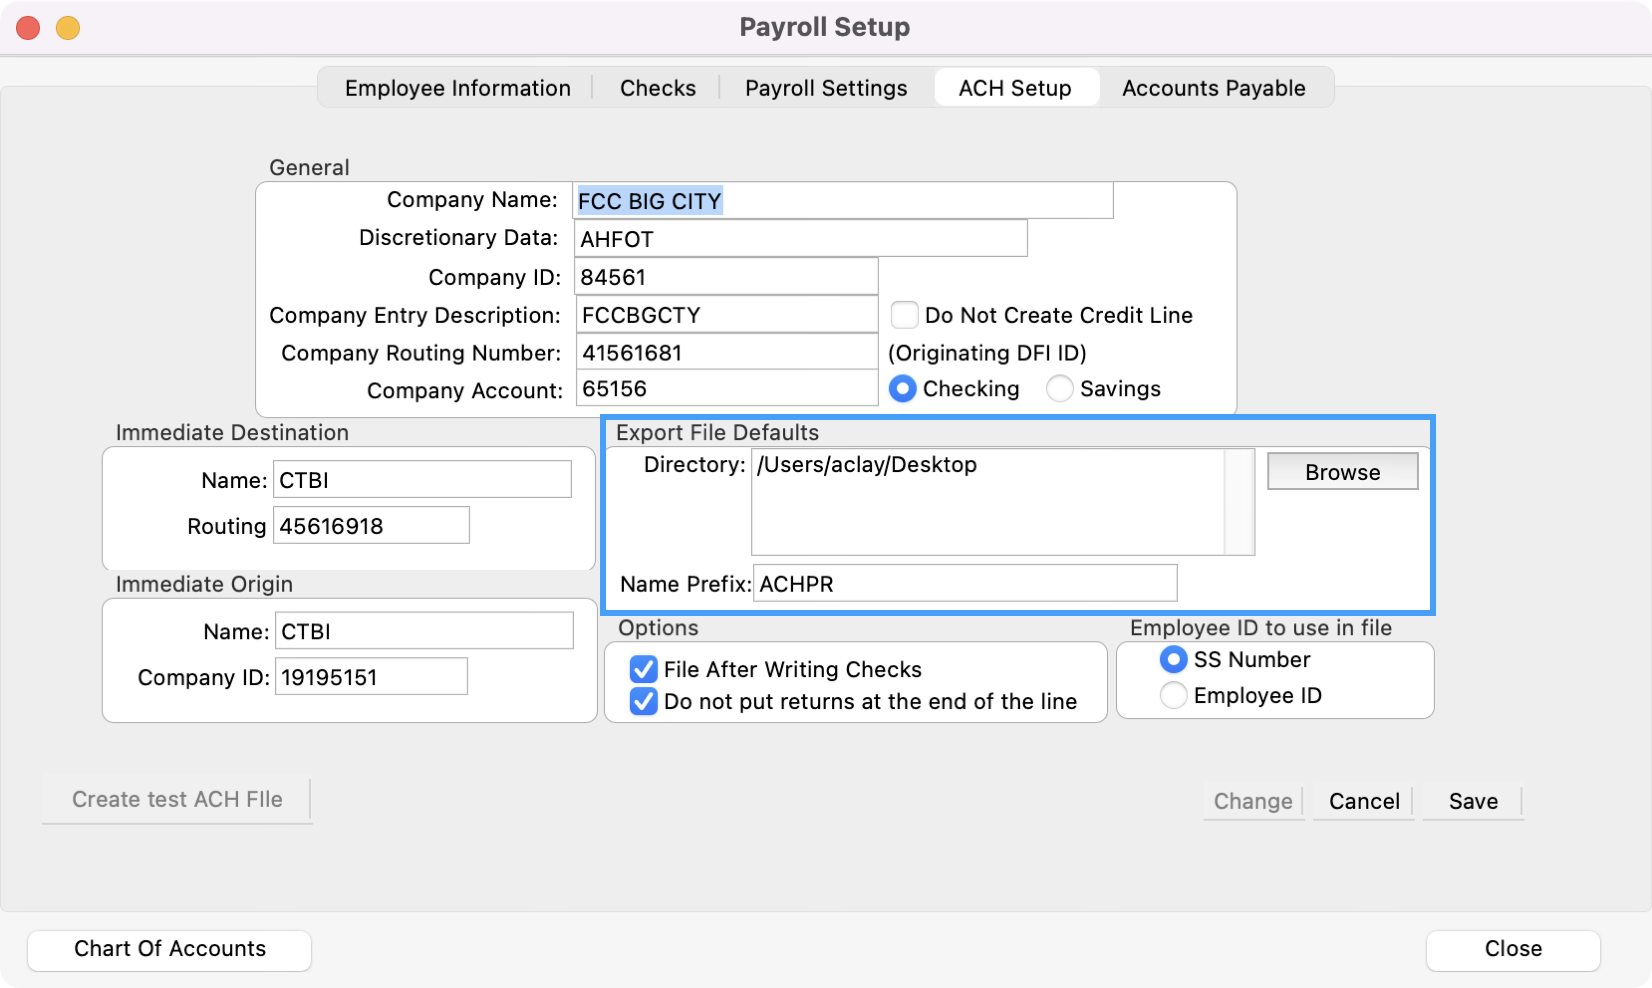
Then, you’ll need to setup your Export File Defaults.
Directory - The folder for the ACH file will be saved in this location after it has been created and prior to uploading to the bank. Consideration needs to be given to this folder location for following reasons:
-
Security - this file will include sensitive information, similar to the Information contained in CDM+. Therefore, this folder location must be protected where access is controlled.
-
Backup - you will want to maintain a backup of the ACH file prior to uploading to the bank. Once it has been uploaded and you have your confirmation of this, you may want to consider moving this ACH file to a different folder (e.g., “Processed ACH” folder) for a period of time allowing for all employees to receive their funds.
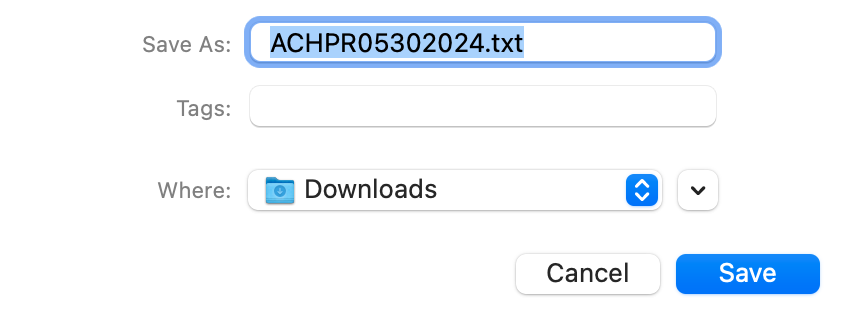
Name Prefix - The ACH file will be created with the date automatically included in the file name. However, you may prefer to insert a “prefix” to the default file name. Examples:
-
Church - file name would appear as “Church06112007.txt”
-
Daycare - file name would appear as “Daycare06112007.txt”
-
Mission - file name would appear as “Mission06112007.txt”
-
-
Under Options, put a check in the File After Writing Checks box. A check in this box would automatically open a window to create the ACH file after executing “Write Payroll Checks.” Without this box checked, you would have to use the Payroll menu item “Create ACH File” prior to posting the payroll to ledger.
-
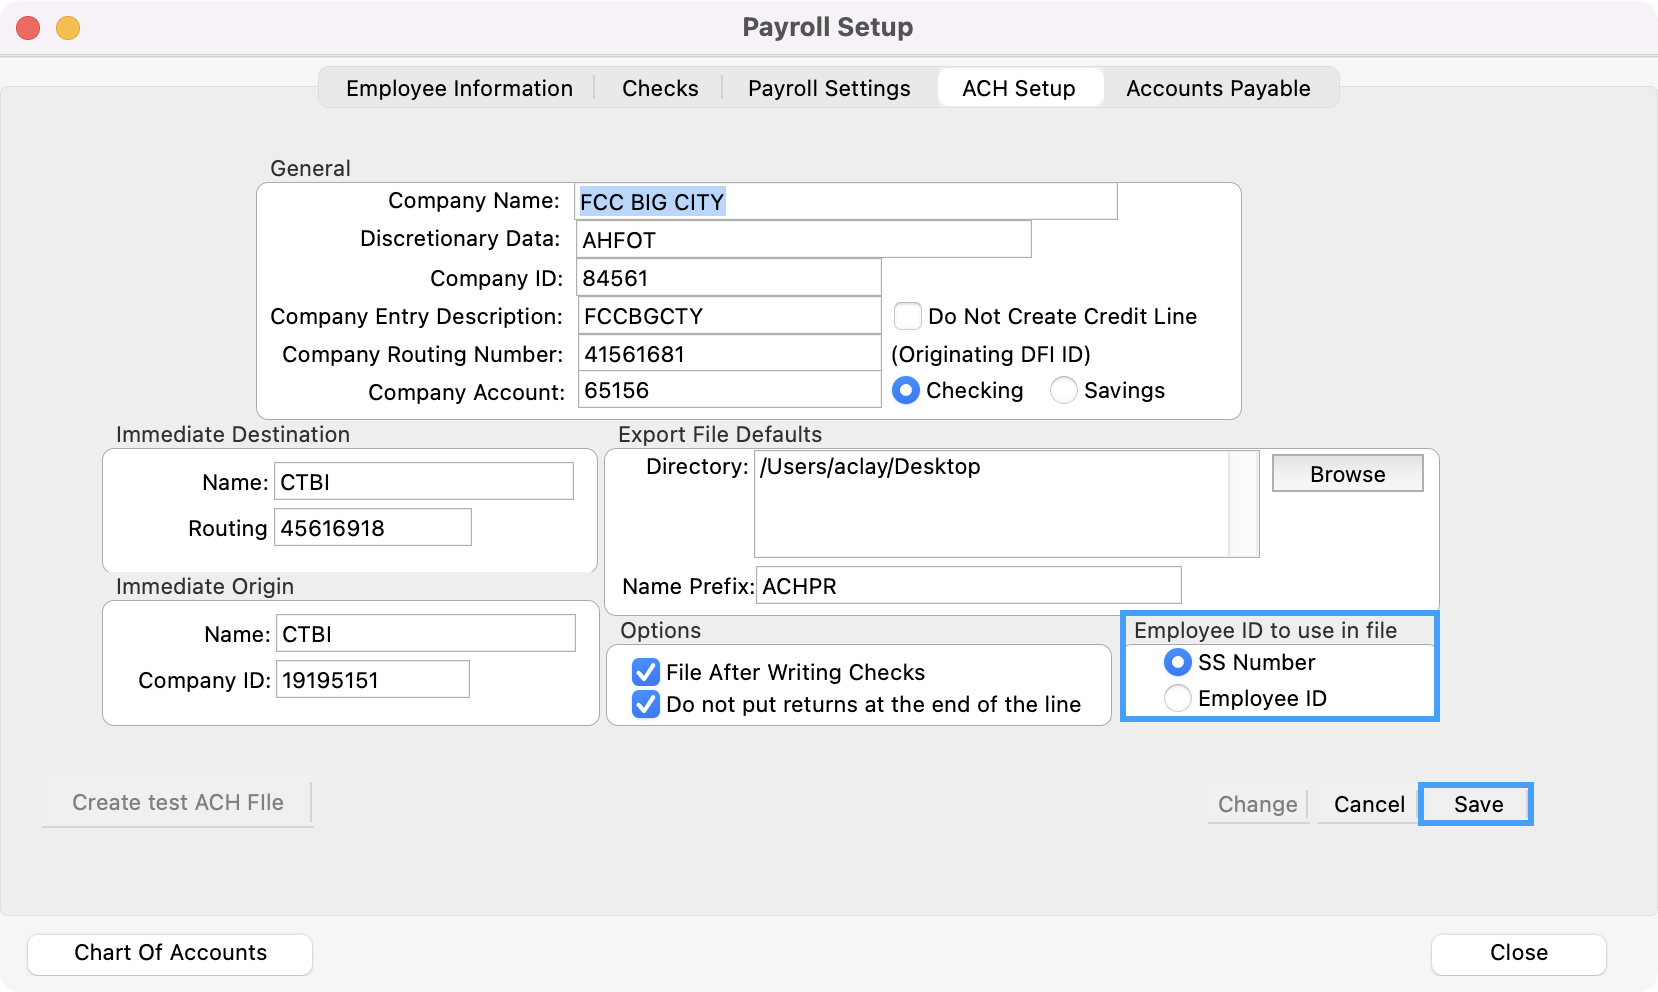
Next, under Employee ID to use in file, select SS Number or Employee ID. Then, click Save.
-
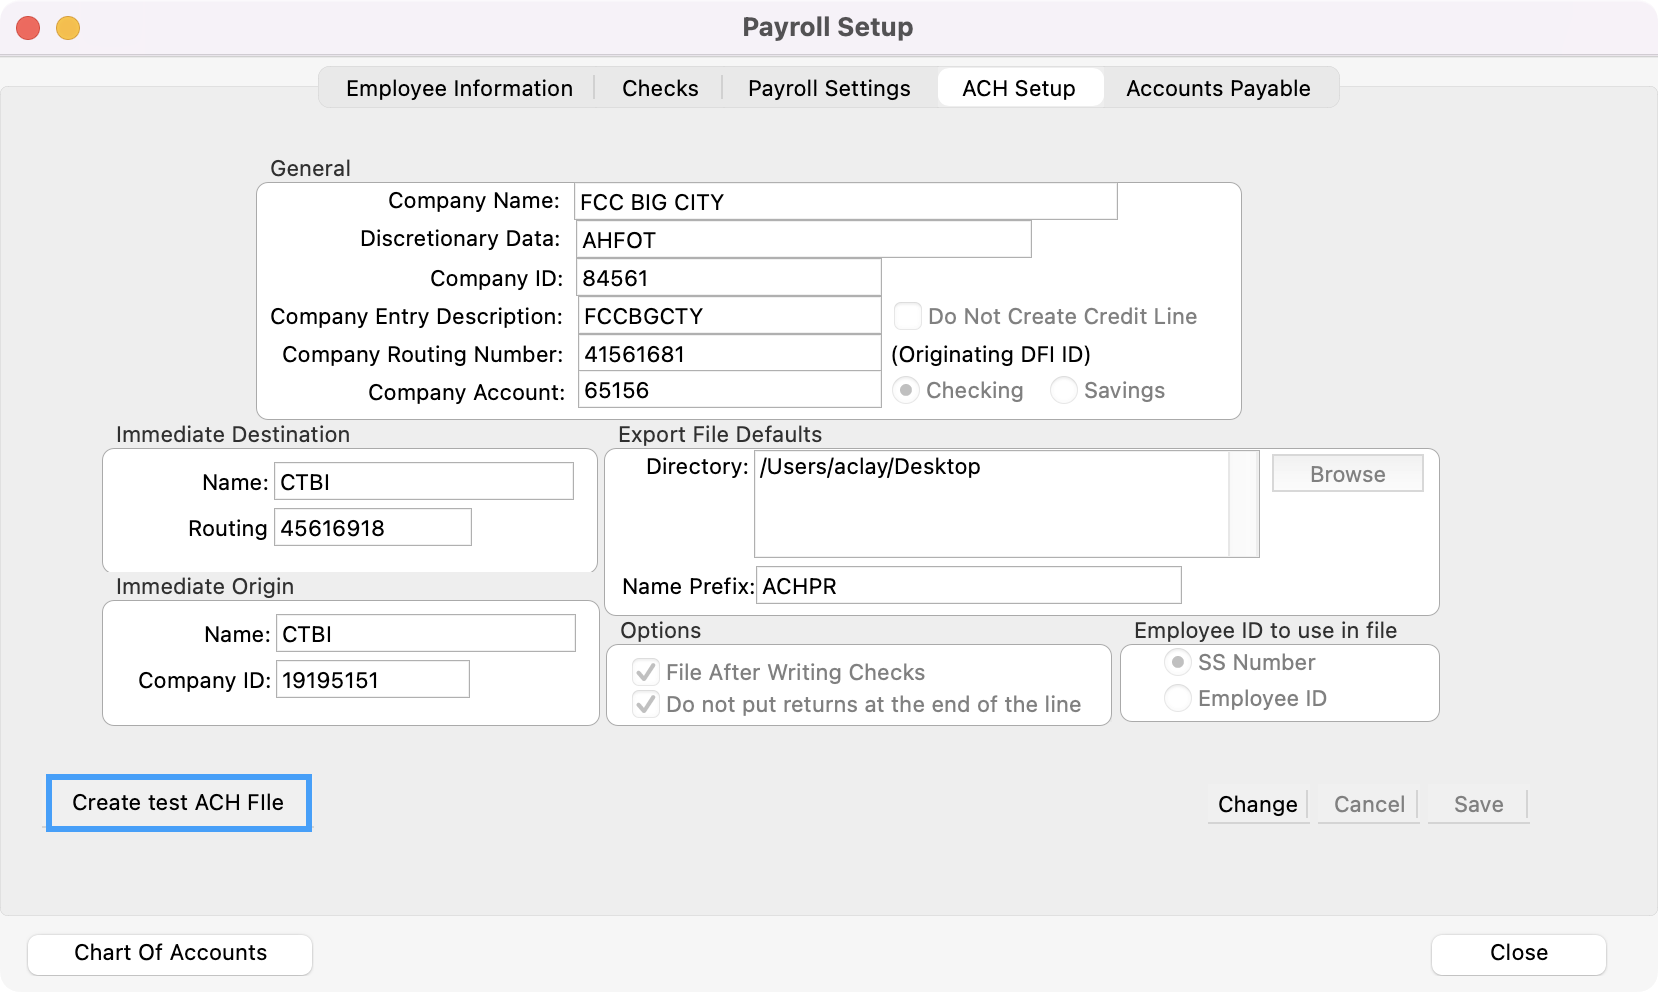
Lastly, if you have setup ACH Payroll for your employees under their Employee record , you can click Create test ACH File. This will generate a sample file for your banking institution.
DO NOT CREATE TEST ACH FILE UNTIL YOU HAVE SET UP EMPLOYEE INFORMATION. The ACH file is created only for employees with the "Auto Draw" option selected and contains required information from the "Accounts" tab.
-
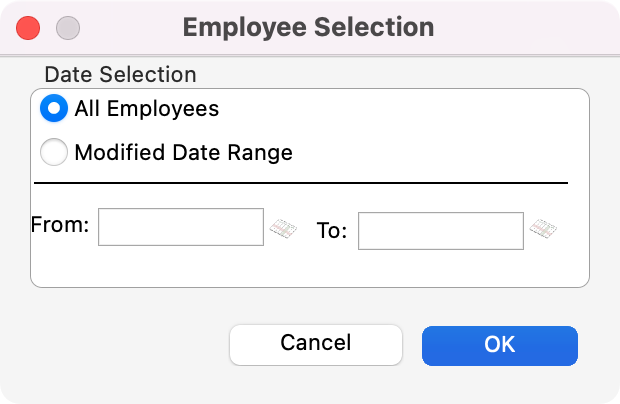
After clicking Create test ACH File, you can choose All Employees or Modified Date Range. Selecting All Employees will create a file that can be uploaded with zero dollar amounts to the bank for testing the routing numbers and bank account numbers for all employees with the auto draw feature selected. Should one of these be incorrect, your bank should notify you. Selecting Modified Date Range will create the ACH file for just those employees whose Employee Information file has been changed in the date range selected and they have the auto draw feature selected. Click Ok after making your selection.
-
Then, choose to Save your file to your computer.
-
You’ll get a message saying that this process is complete. Click Ok. You can then review this file with your bank.
Employee Setup for ACH Payroll
-
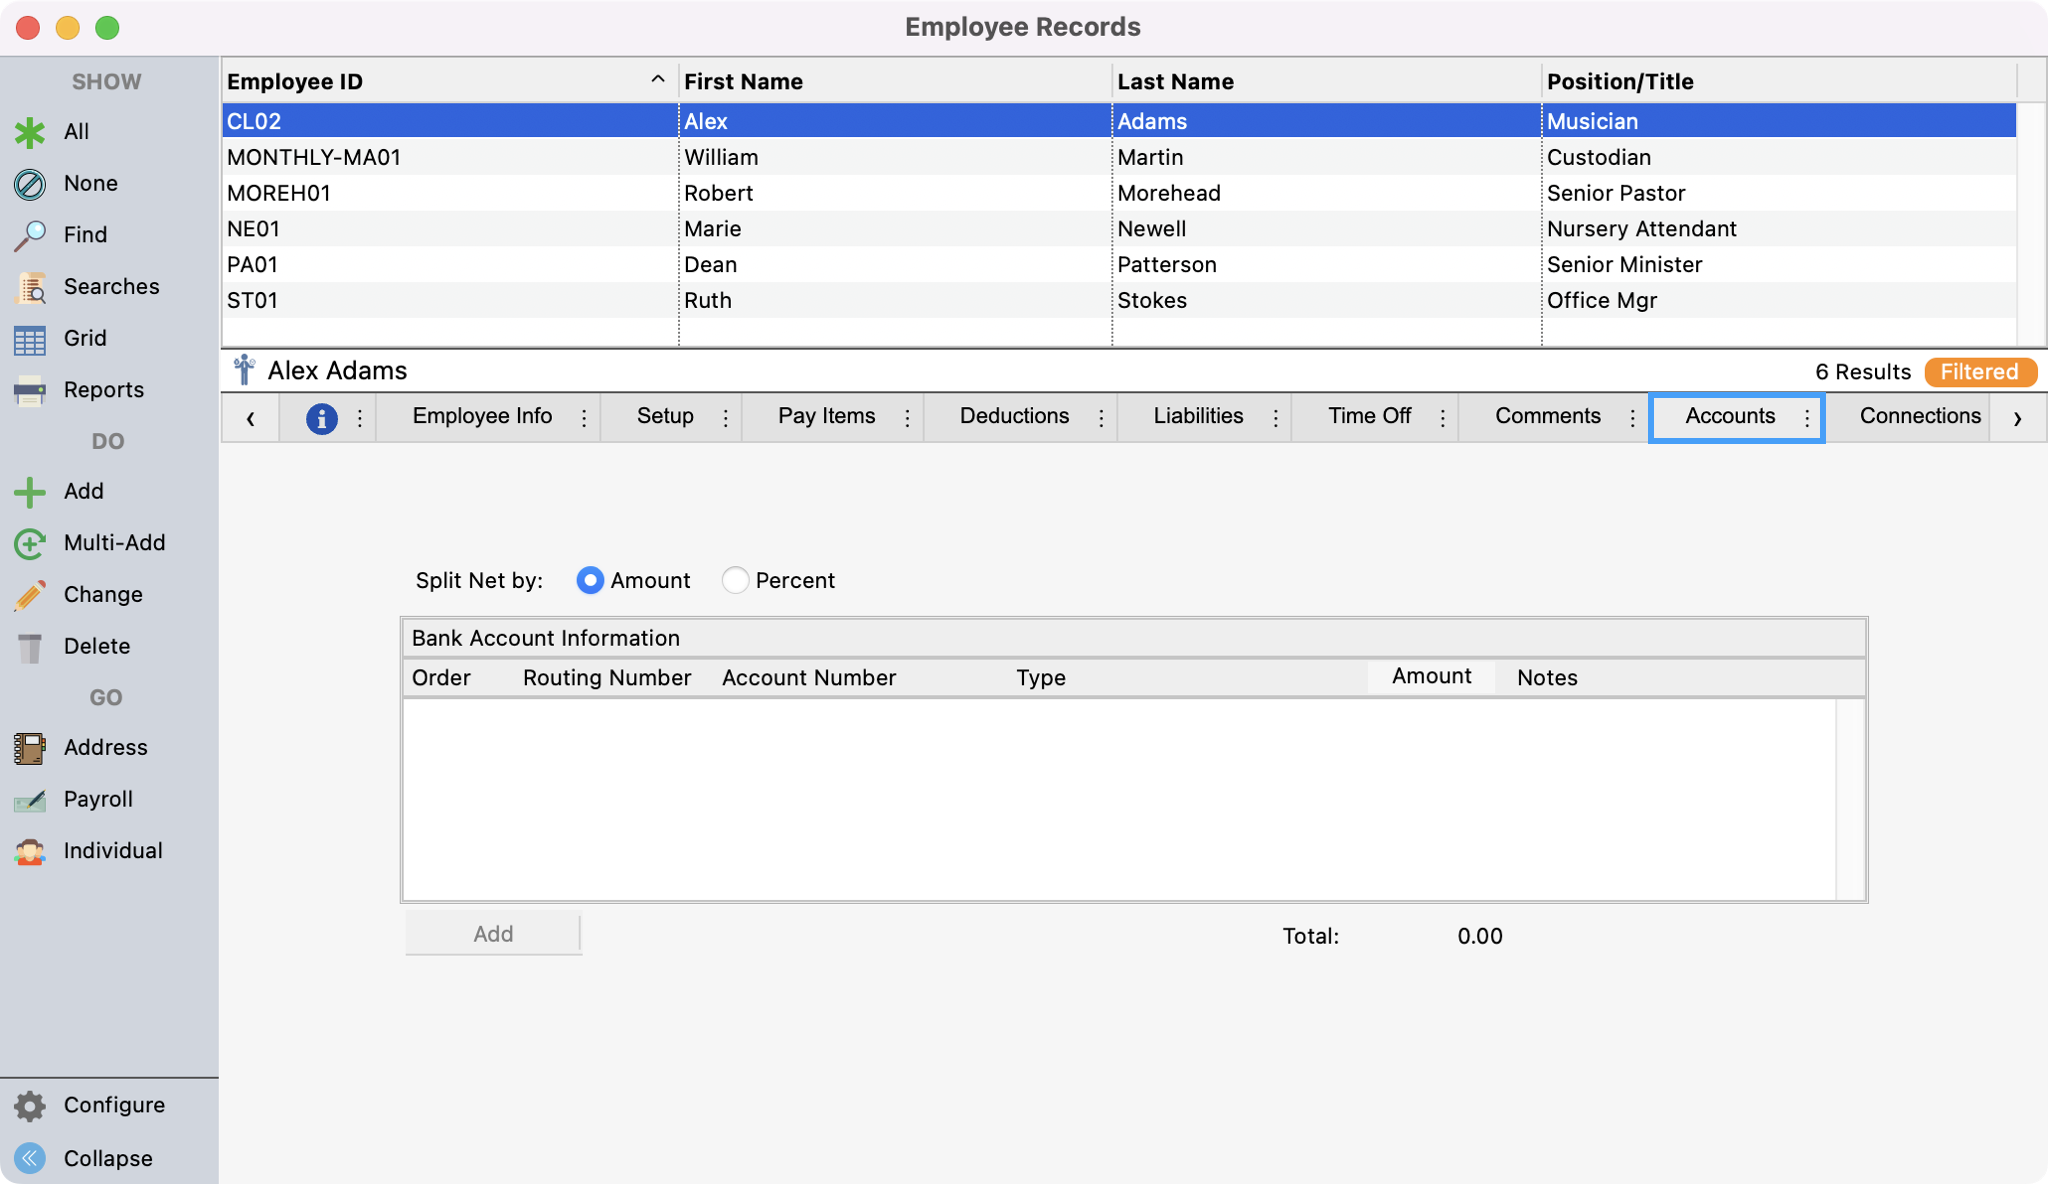
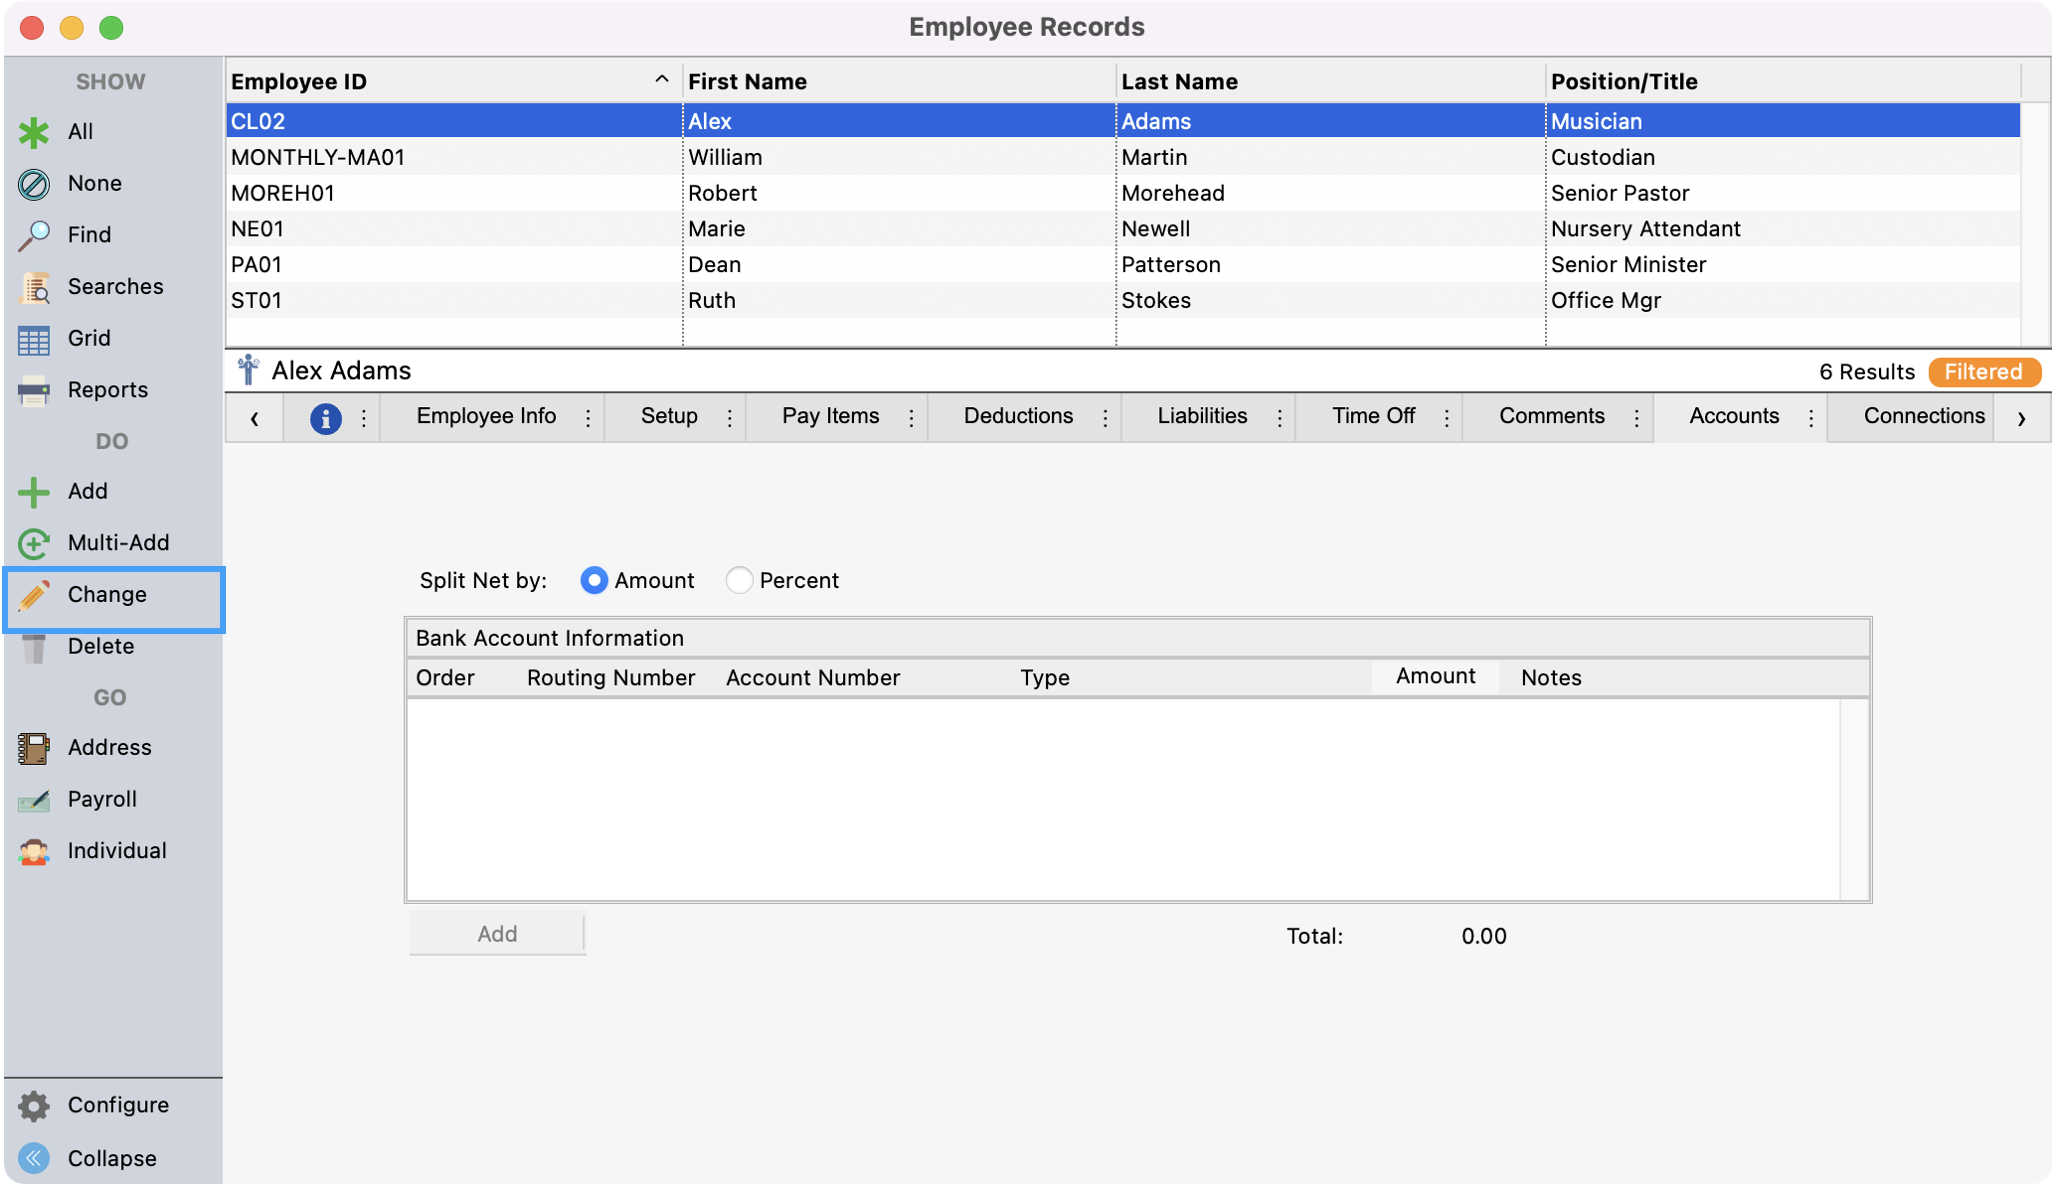
After the ACH Payroll feature is activated in CDM+, an Accounts tab will appear on the Employee Information window. To get to this window go to Program → Payroll → Employee Records.
-
Select an employee and click on the Accounts tab.
-
To add an ACH bank account for an employee, click Change from the left sidebar.
-
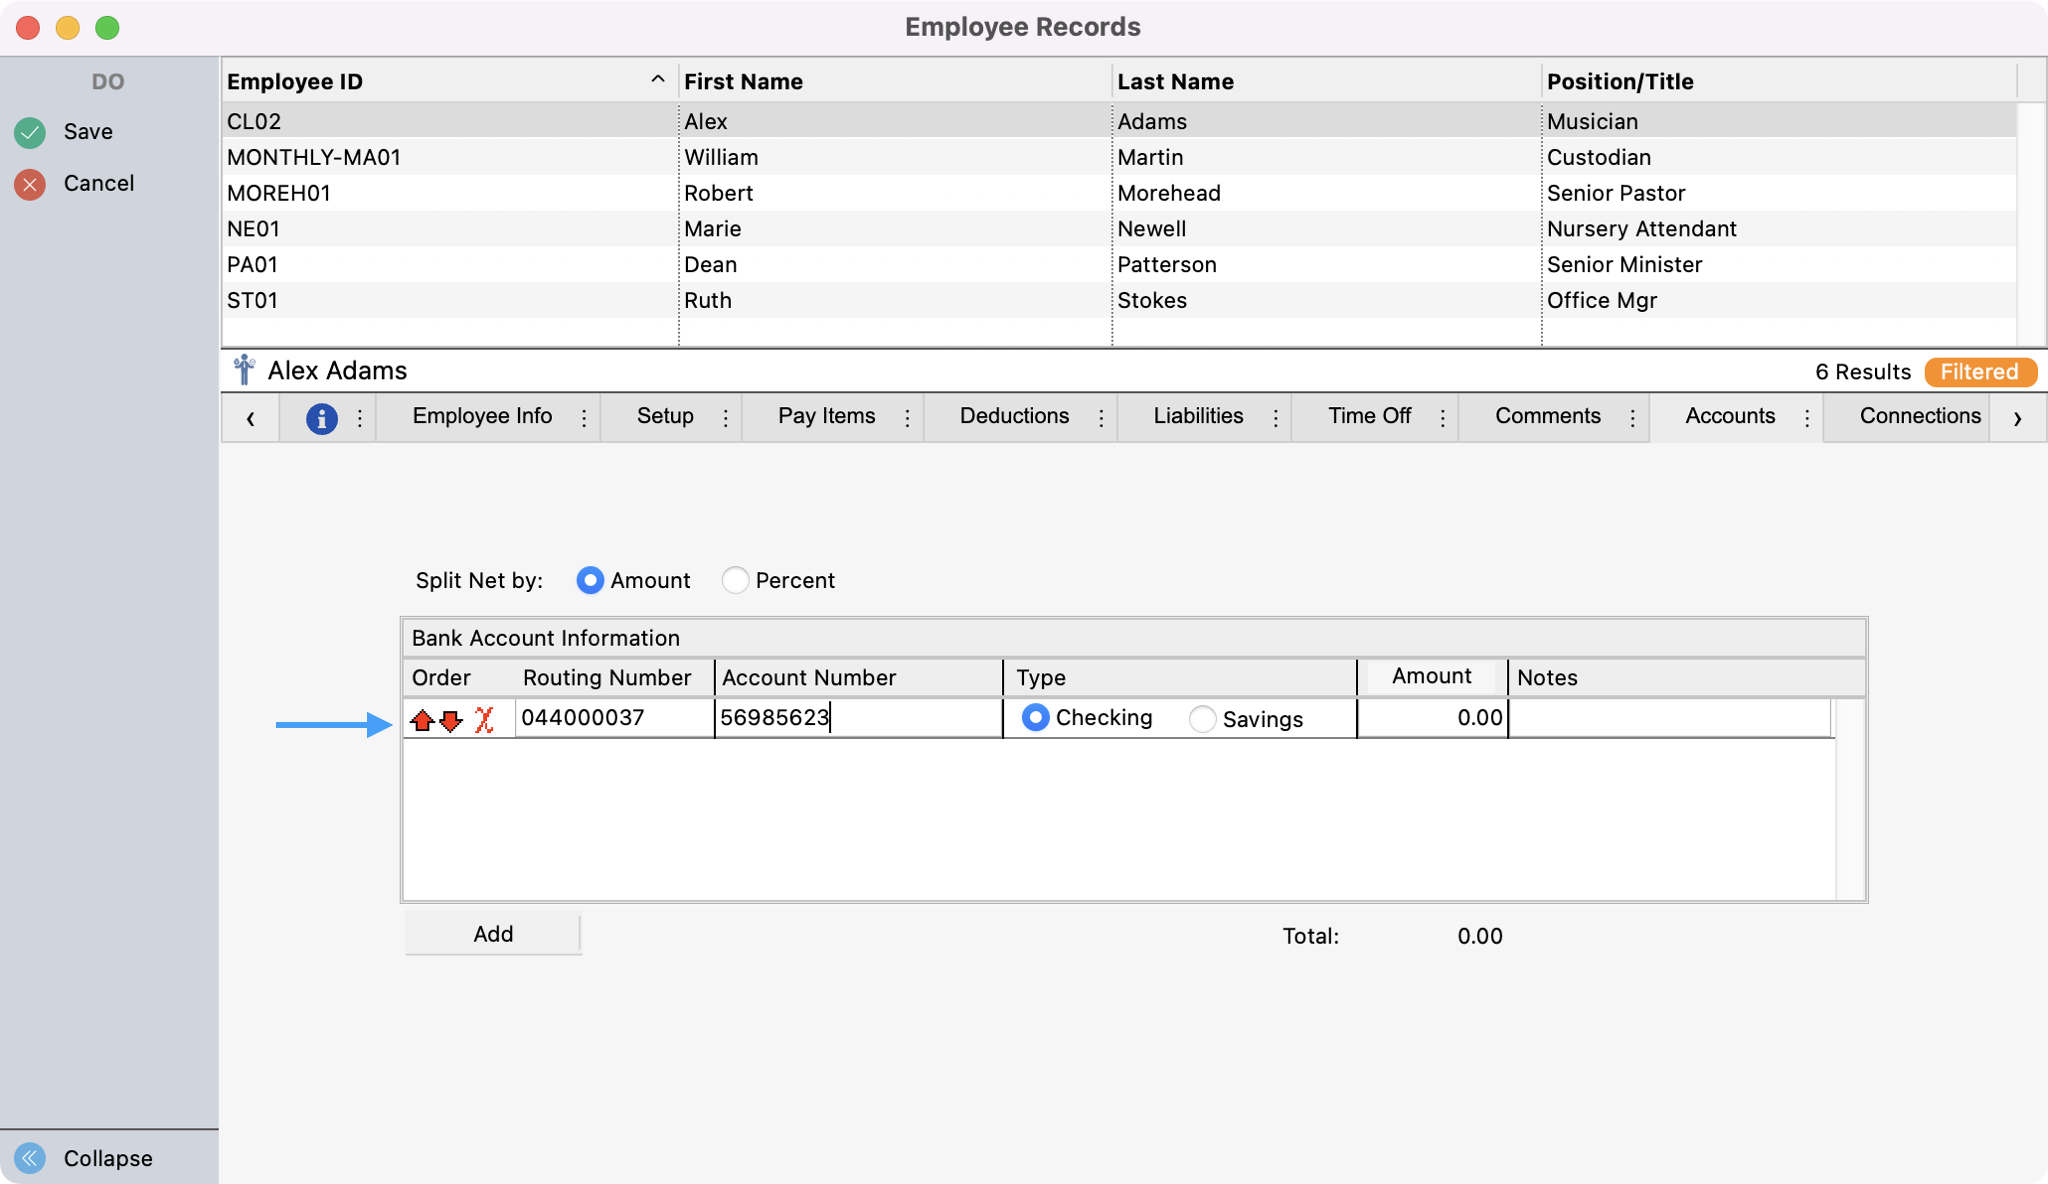
Next, click Add. You’ll see a row appear and you can enter the employee’s bank account information.

-
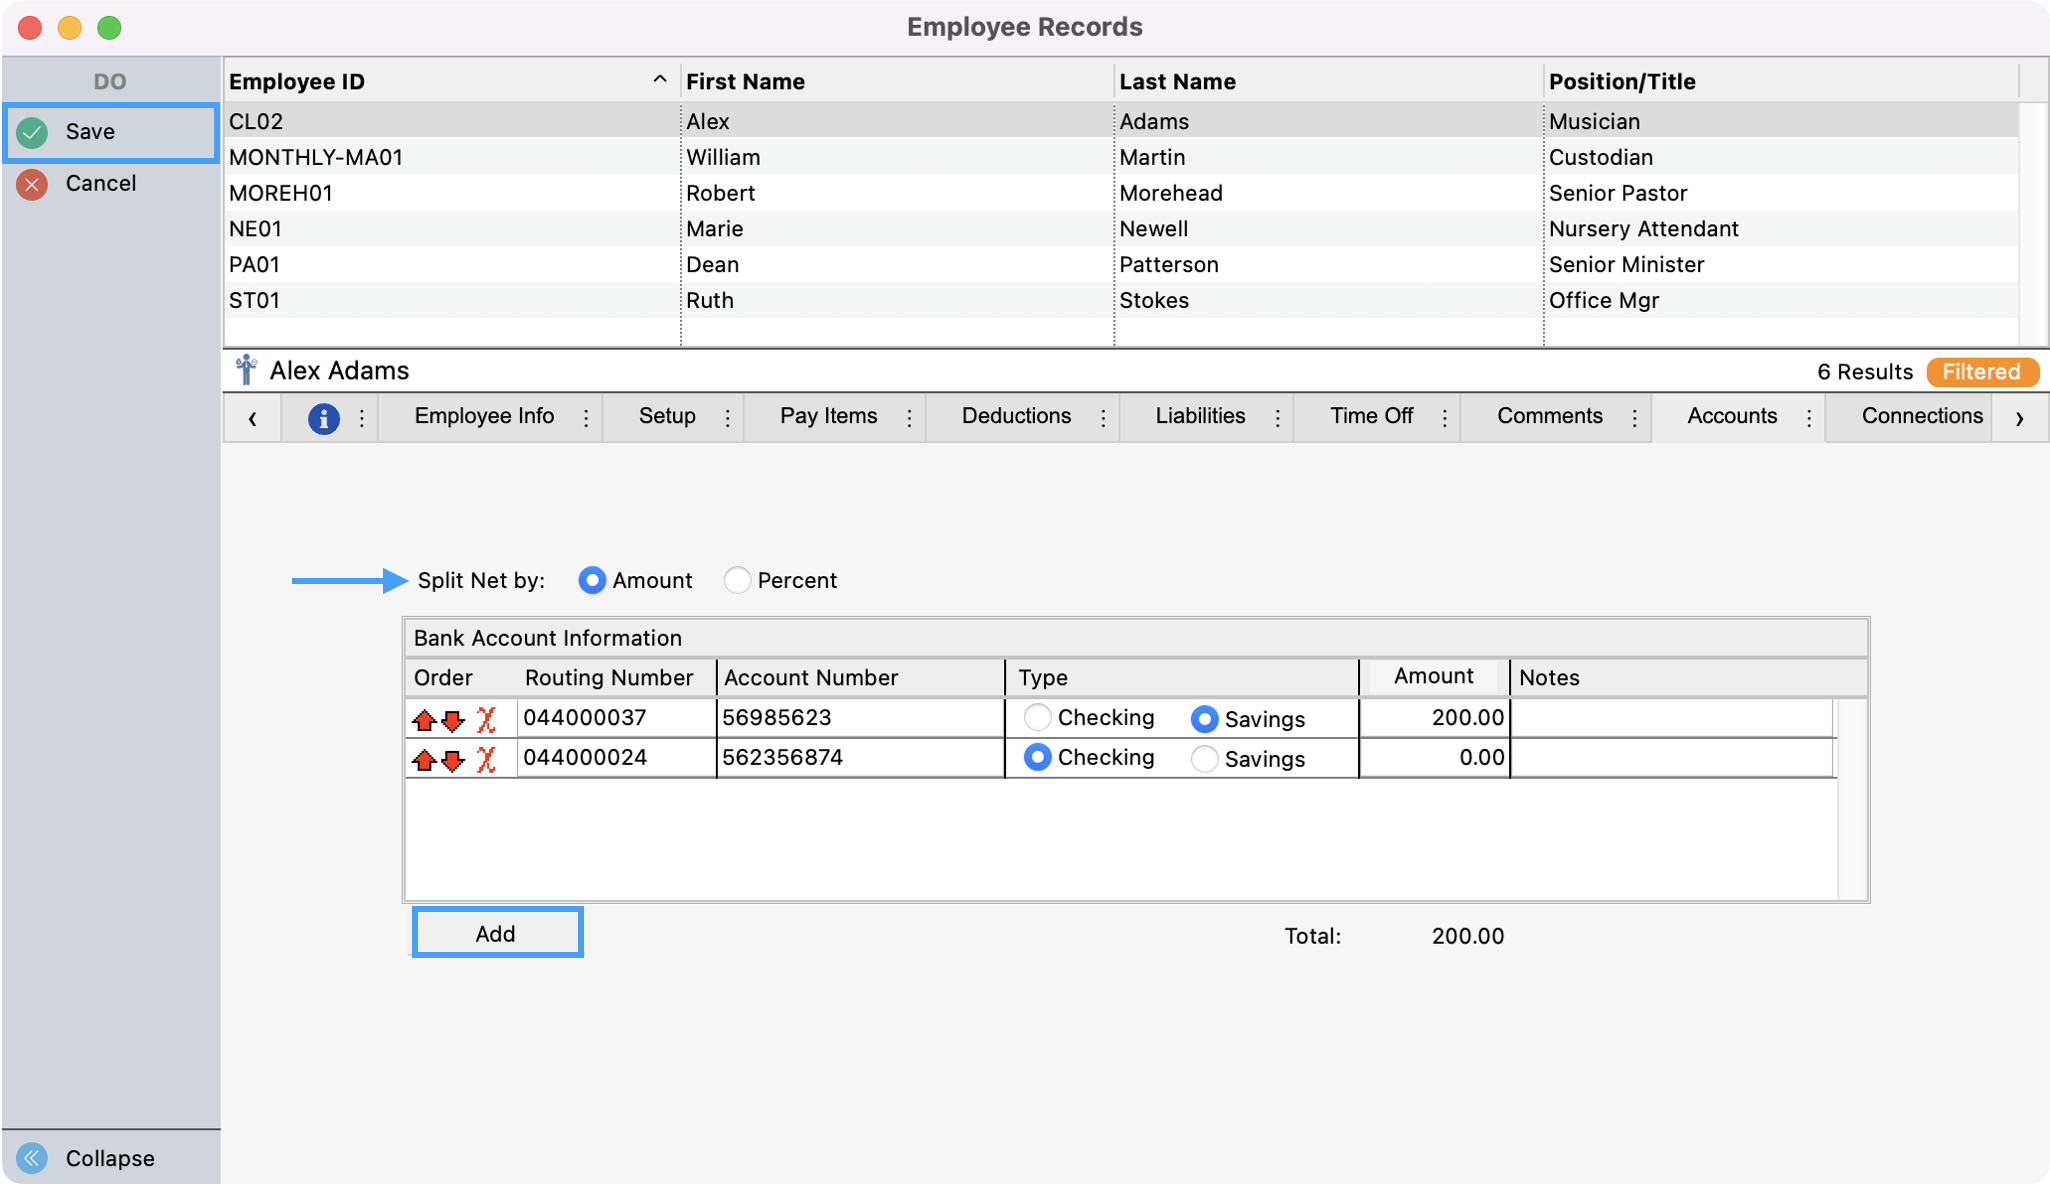
CDM+ allows for multiple deposits from one payroll. If an employee wants some funds to be distributed to a savings account and the remainder to go into a checking account, then you can click Add again to add another bank account. Splits can be done on a flat rate or a percentage basis. If there is no split, then the amount would be left zero so all funds will be deposited into the account listed.
If multiple splits are needed, then the amount for at least one account should be left blank. The amount remaining after the specified deposits are made would be deposited to the account with the blank amount. Save all your changes in the upper left-hand corner.
It’s important to setup a good process to add or change an employees payroll direct deposit bank account. We recommend that you require a form that the employee signs to make a change. We recommend that you never change a bank account for an employee based on an email that you may receive as this is a common scam practice.
Setup Tab
-
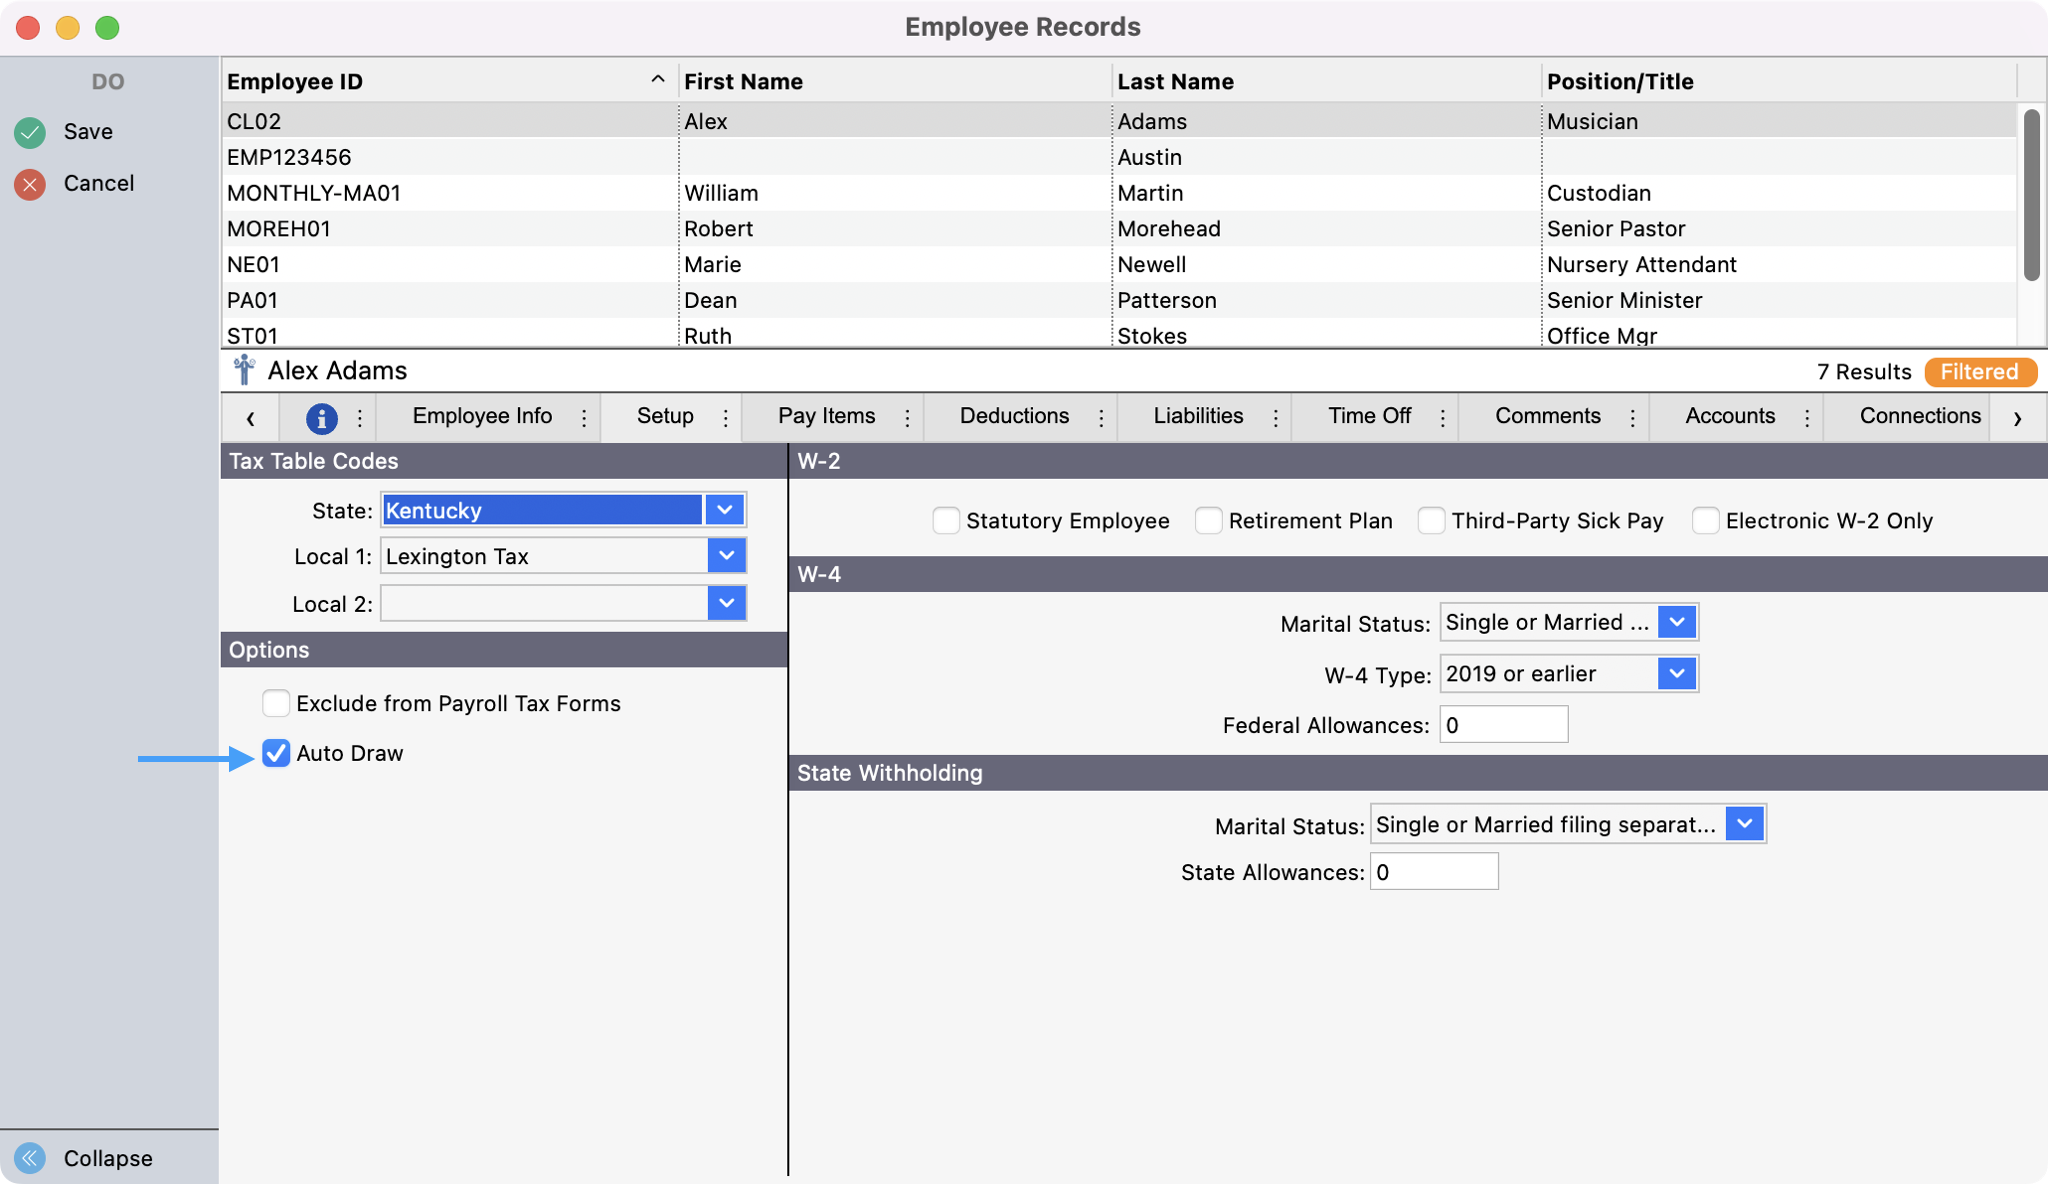
Next click the Setup tab. Here there is a check box for Auto Draw. Auto Draw must be checked when using ACH Payroll. Please note that when ACH Payroll is activated and Auto Draw is checked, the payroll calculated will not be available in the print checks window.
-
When finish click Save on the left sidebar and repeat these steps for any employees that want ACH Payroll.
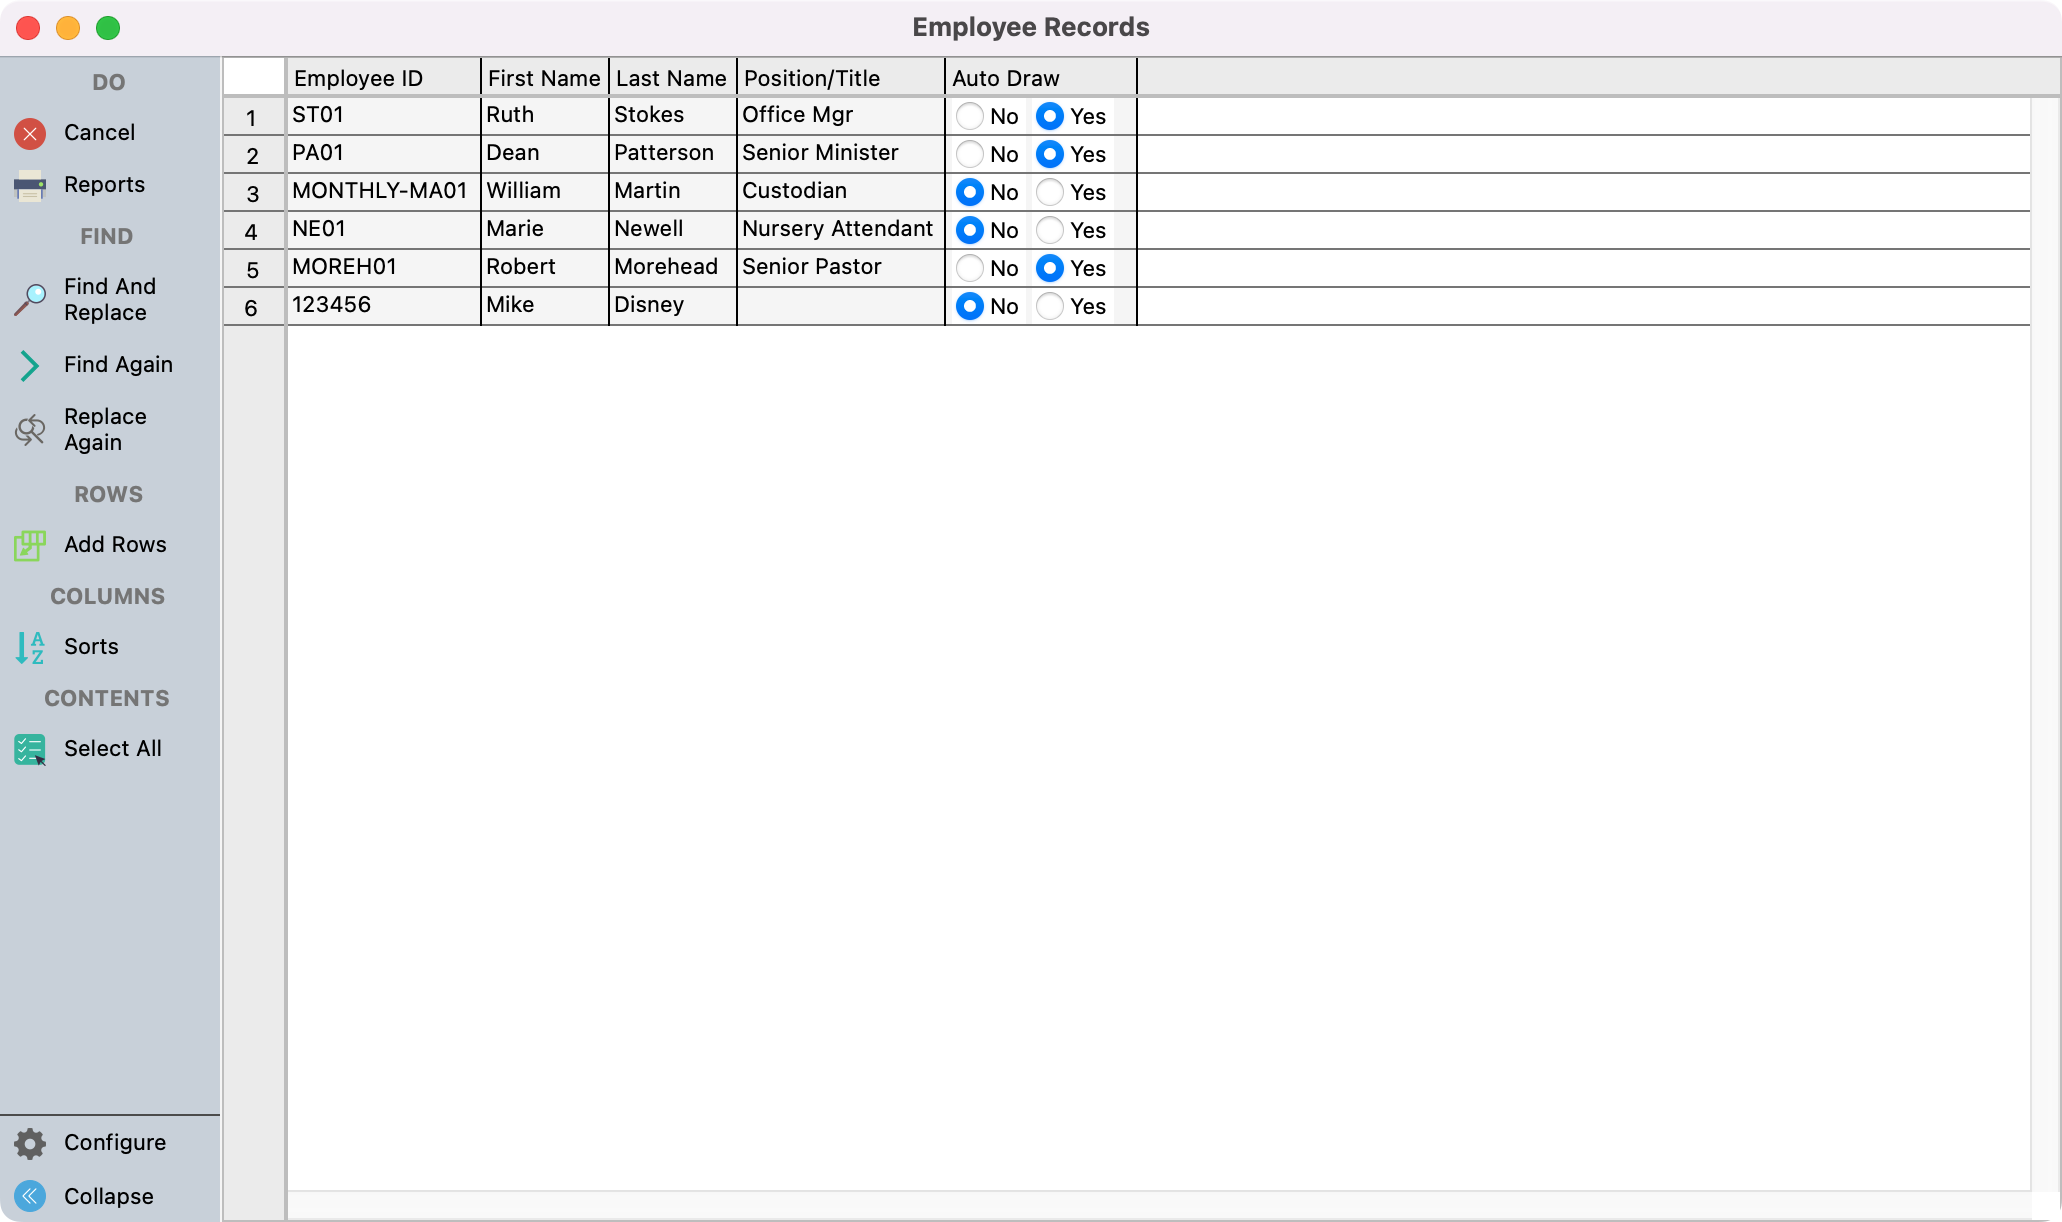
You can use the Grid feature to easily check to see which employees are setup to use Auto Draw. Then, make and save any necessary changes from this window.