You can create a custom-designed Chart of Accounts to meet the unique needs of your organization.
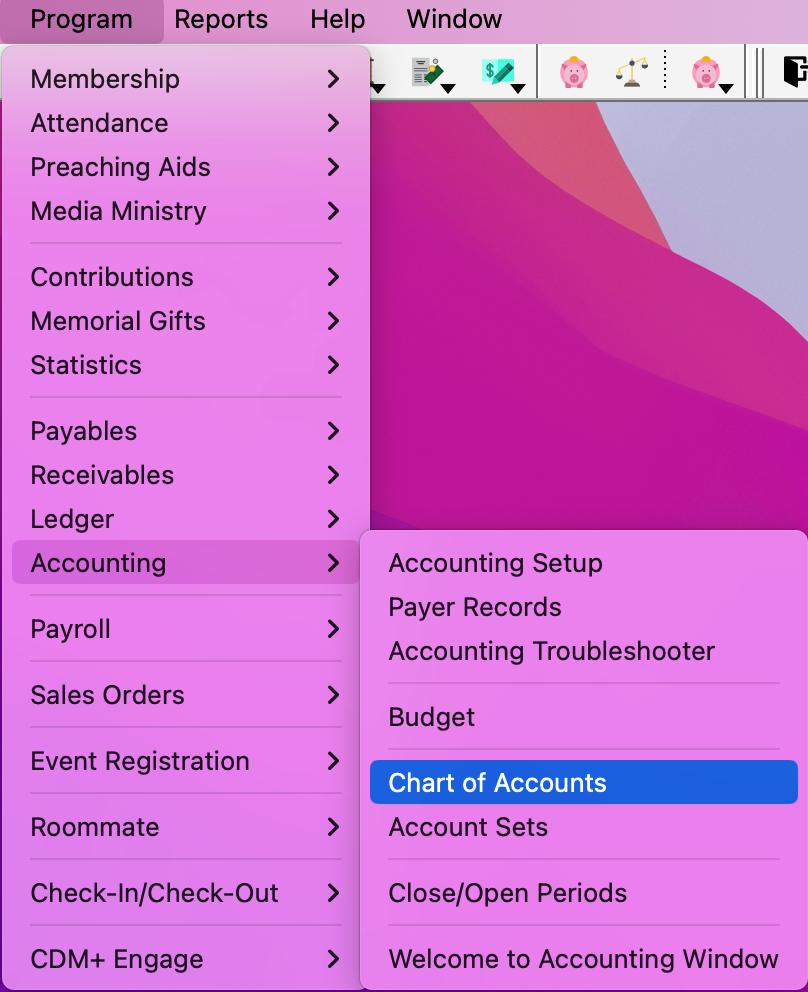
To create or access your Chart of Accounts go to Program → Accounting → Chart of Accounts.
Create a Chart of Accounts
We recommend that you work in this order:
-
Define Categories and Sub-categories
-
Balance Sheet Accounts
-
Income/Expenses
Define Categories and Sub-Categories
Categories and Sub-Categories are for grouping and totaling on Accounting reports and perform three major functions.
-
Group accounts together under the Category or Sub-Category
-
Structure report design by the order of Categories and Sub-Categories
-
Sub-total amounts on reports by Categories and Sub-Categories
As a rule of thumb, all accounts should have a category designation but are not required to have sub-categories.
For example, you can create a Category Code K for Property, then have a Sub-Category Code K10 called Utilities and K20 for General Property. This will enable you to have a separate line in your Chart of Accounts for phone, water, electricity, and gas and group these four accounts together to have a sub-total for Utilities.
Category and sub-category codes can be alphabetical or numeric (or a combination of both) and up to 4 characters in length. Use Categories/Sub-Categories to define areas of ministry, departments, or committees. The code will determine the order in which they print on reports (i.e., category code A will print before code B). When printing financial reports such as Ledger to Date, Monthly Comparisons, or Ledger to Budget, the print order of the accounts are grouped by:
-
Asset type
-
Category Code
-
Sub-Category Code
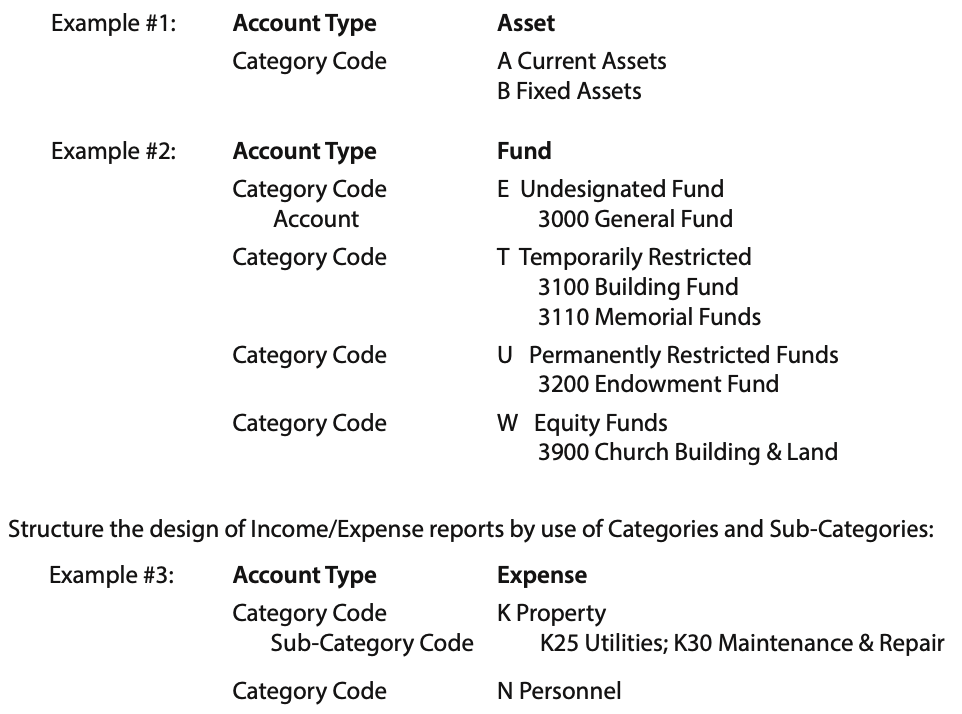
Examples of ways to structure the design of the Balance Sheet (Assets/ Liabilities/Funds) by use of Categories
-
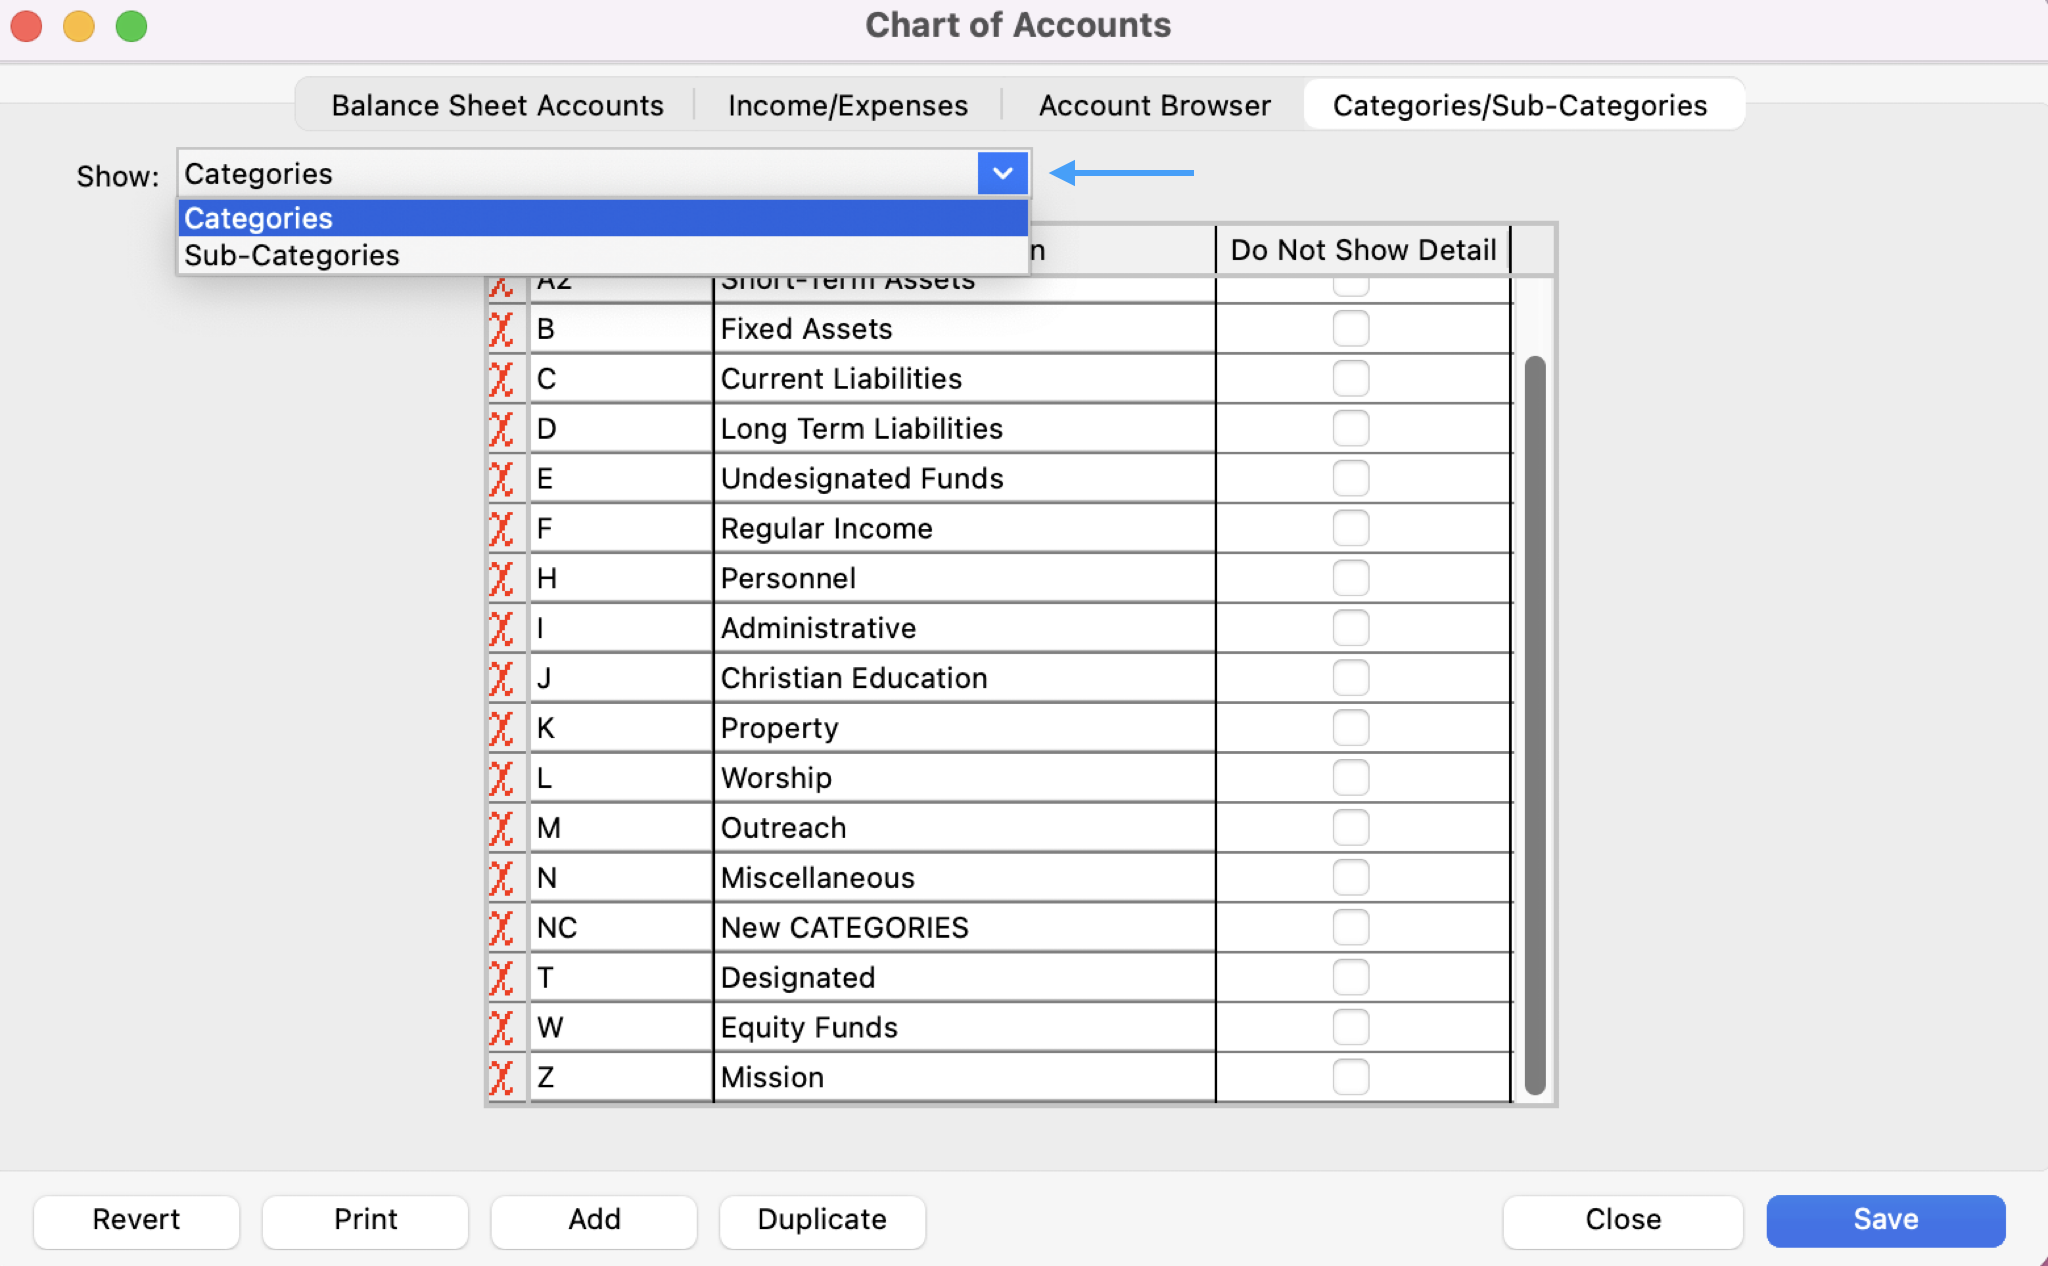
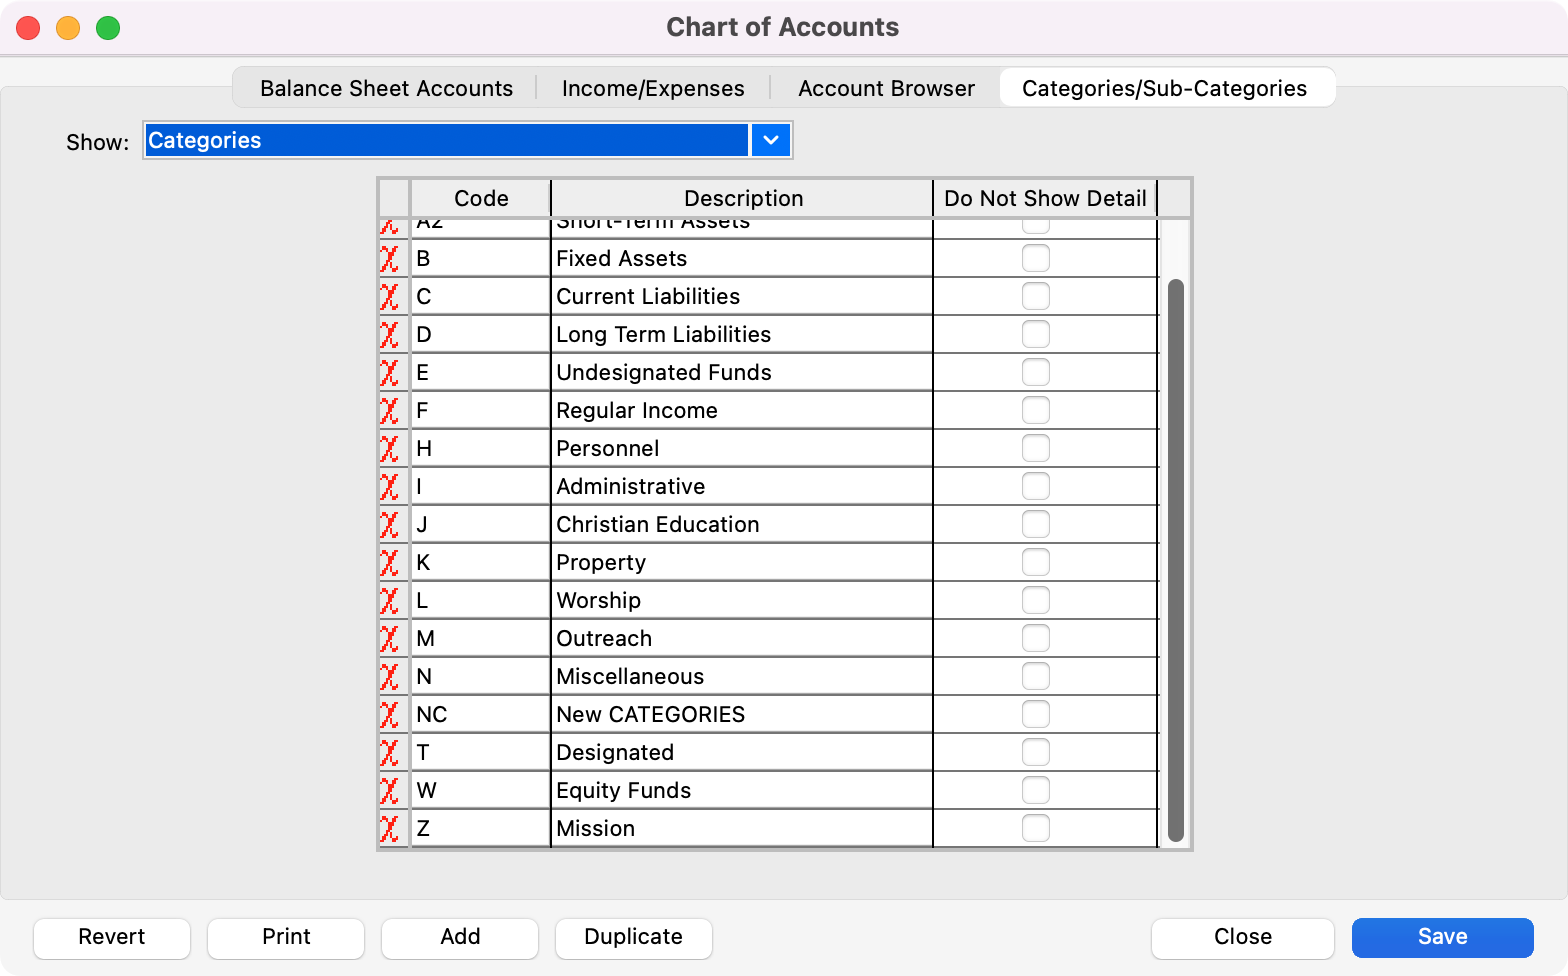
To create or access your Categories and Sub-Categories, click the Categories/Sub-Categories tab of the Chart of Accounts window.
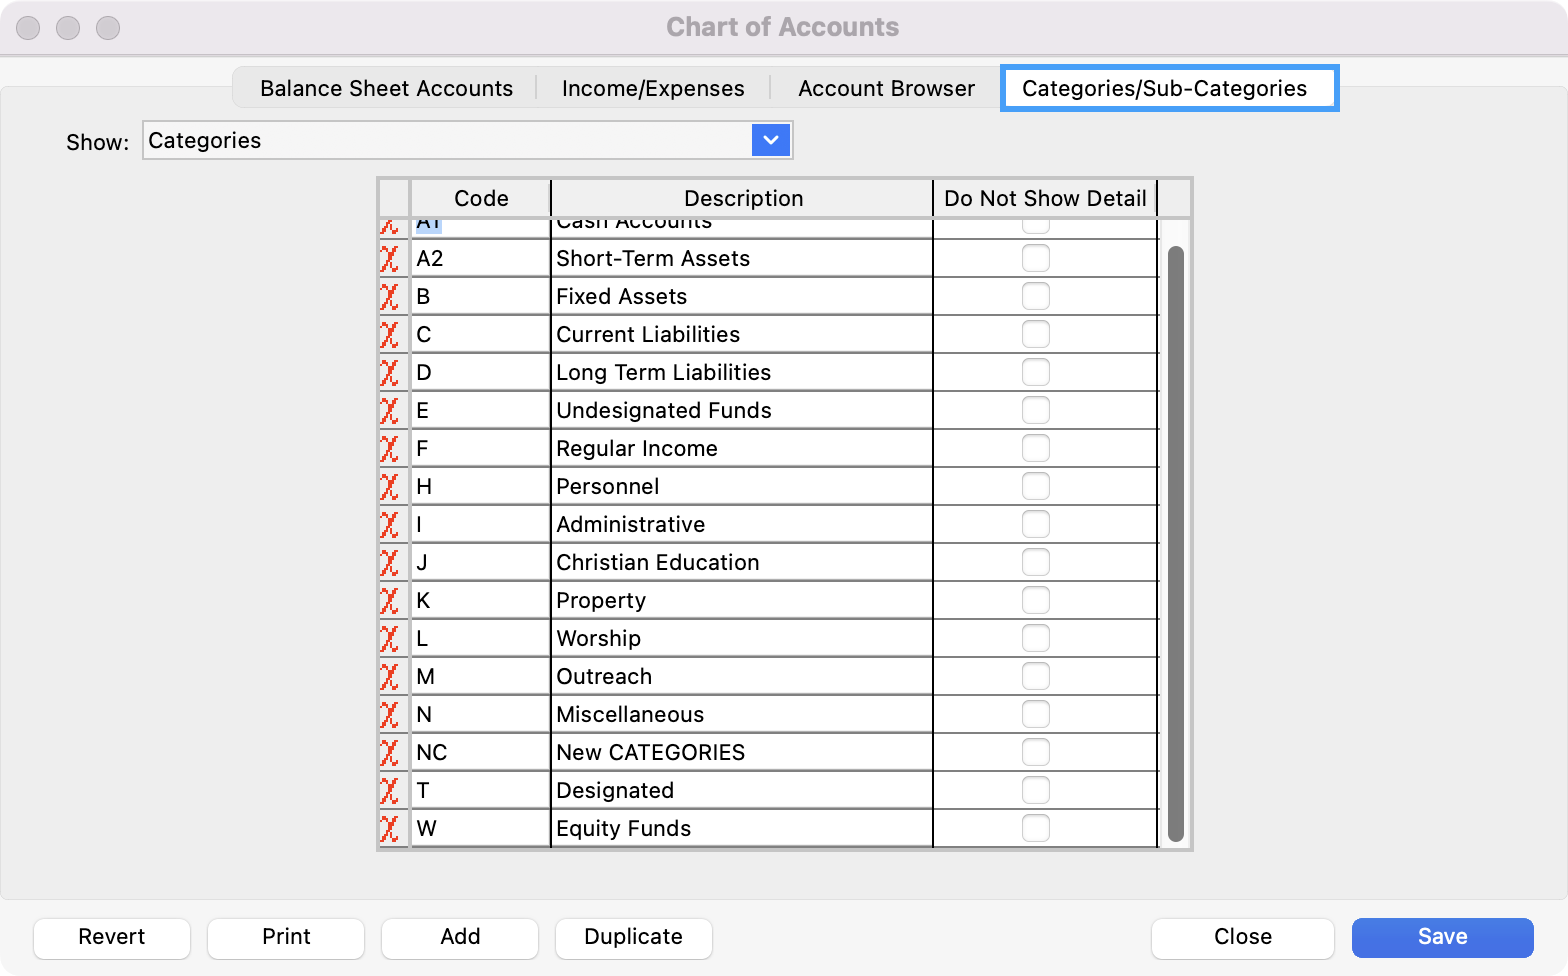
-
Click Add and type in the Code for the first category (e.g.—A) or sub-category (e.g.—A10).
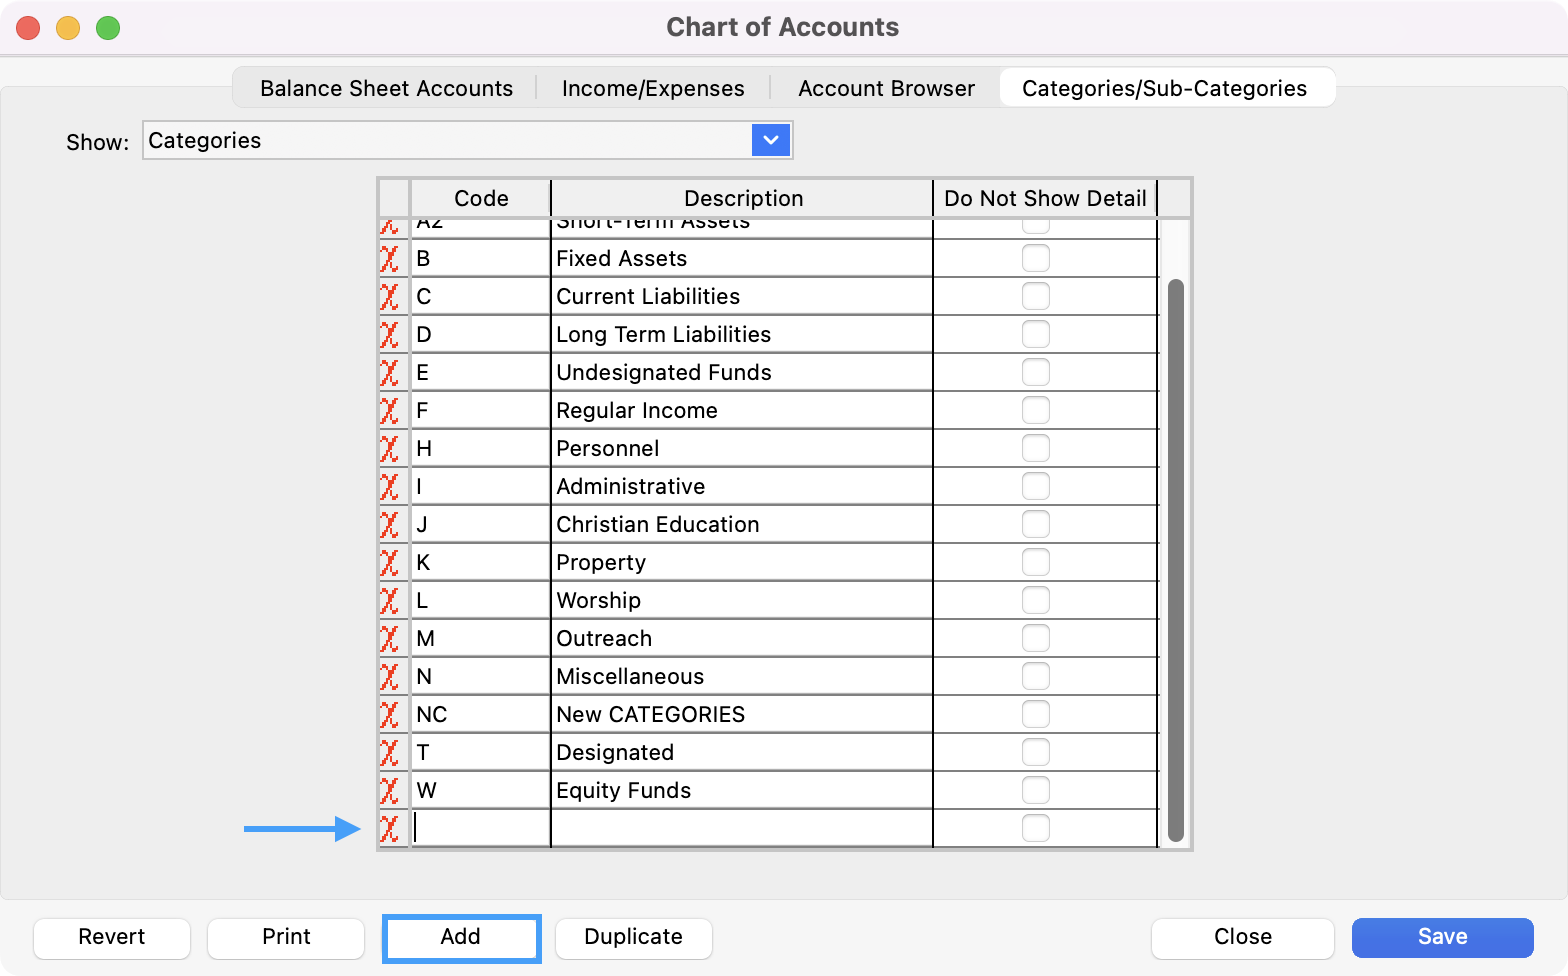
-
Press the tab key and type the category or sub-category title in the Description field (e.g.—Cash Accounts)
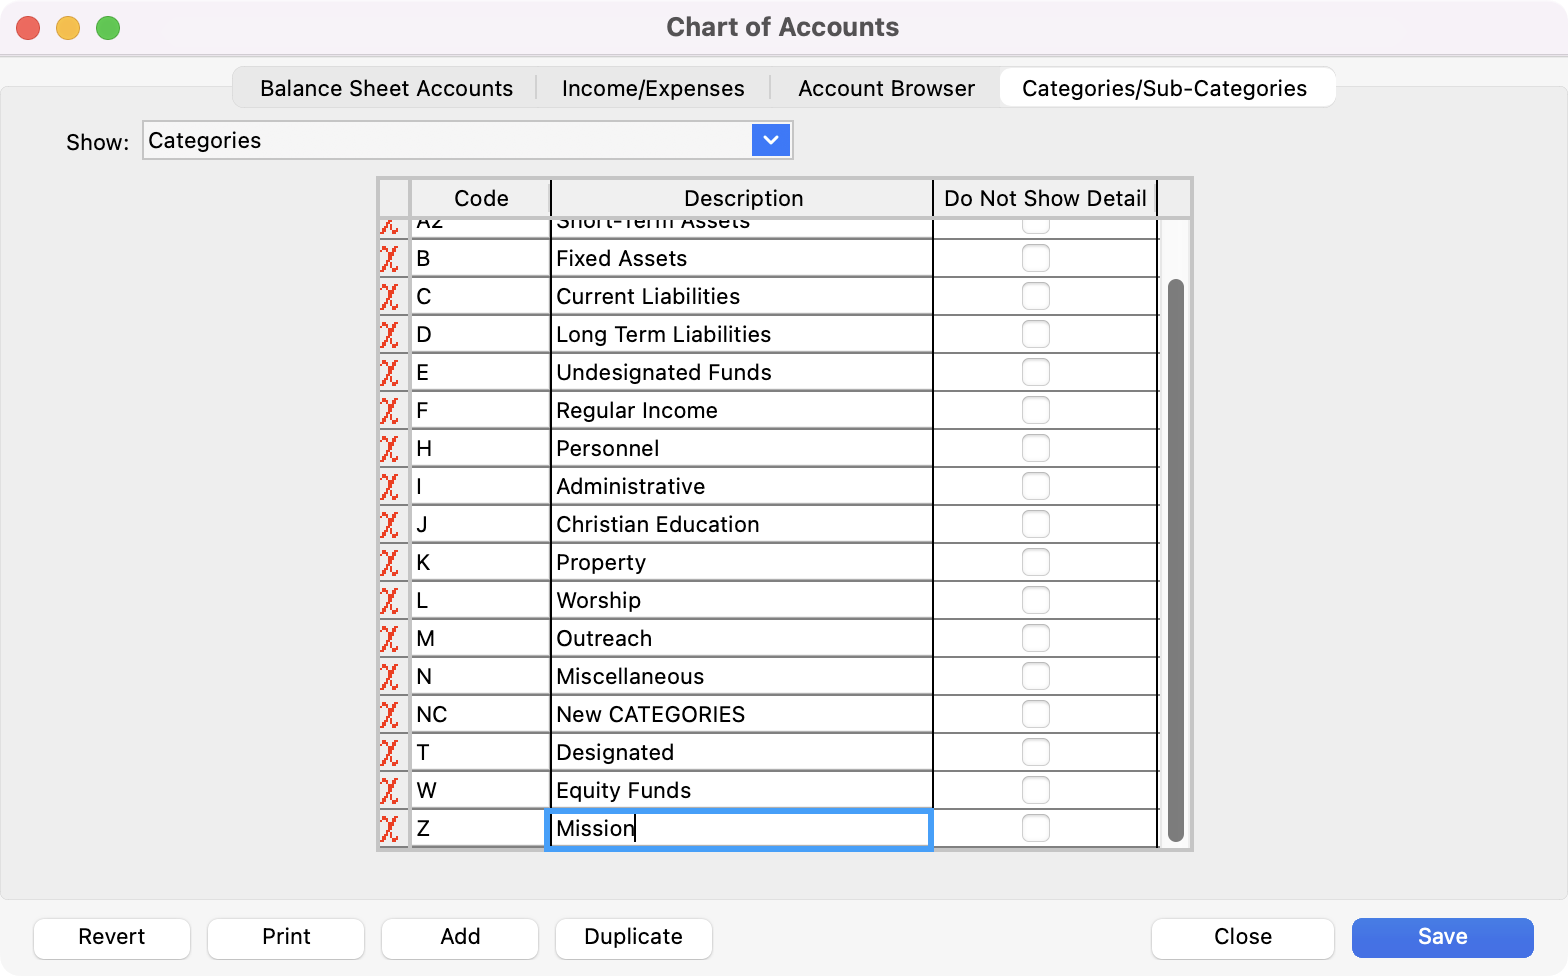
-
You can click the checkbox in the Do Not Show Detail column if you want to supress by default the printing on reports of the accounts within that Category or Sub-Category. There is an option to override this default when printing.
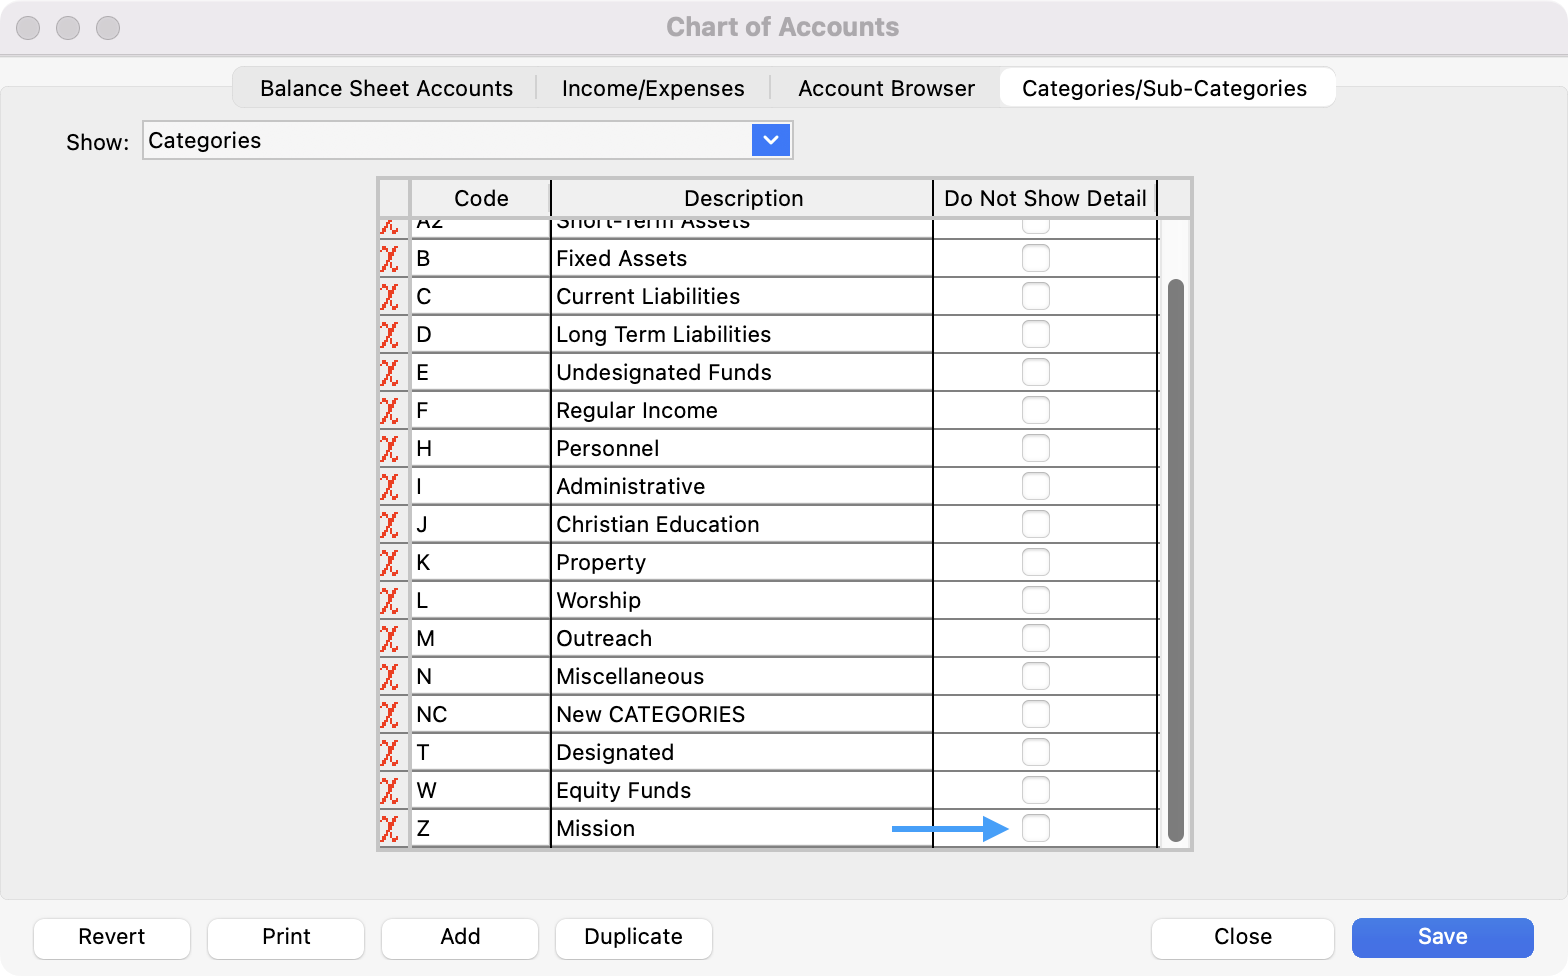
-
Make sure the right Type (Categories or Sub-Categories) is selected by using the Show drop list at the top of the window.
-
Press Return/Enter or click Save.
-
Repeat steps 2-6 until all desired Categories and Sub-Categories are entered.
Balance Sheet Accounts
Enter Assets, Liabilities, and Fund accounts here.
CDM+ Accounting allows for an unlimited number of accounts. You can also create 5-digit account numbers.
-
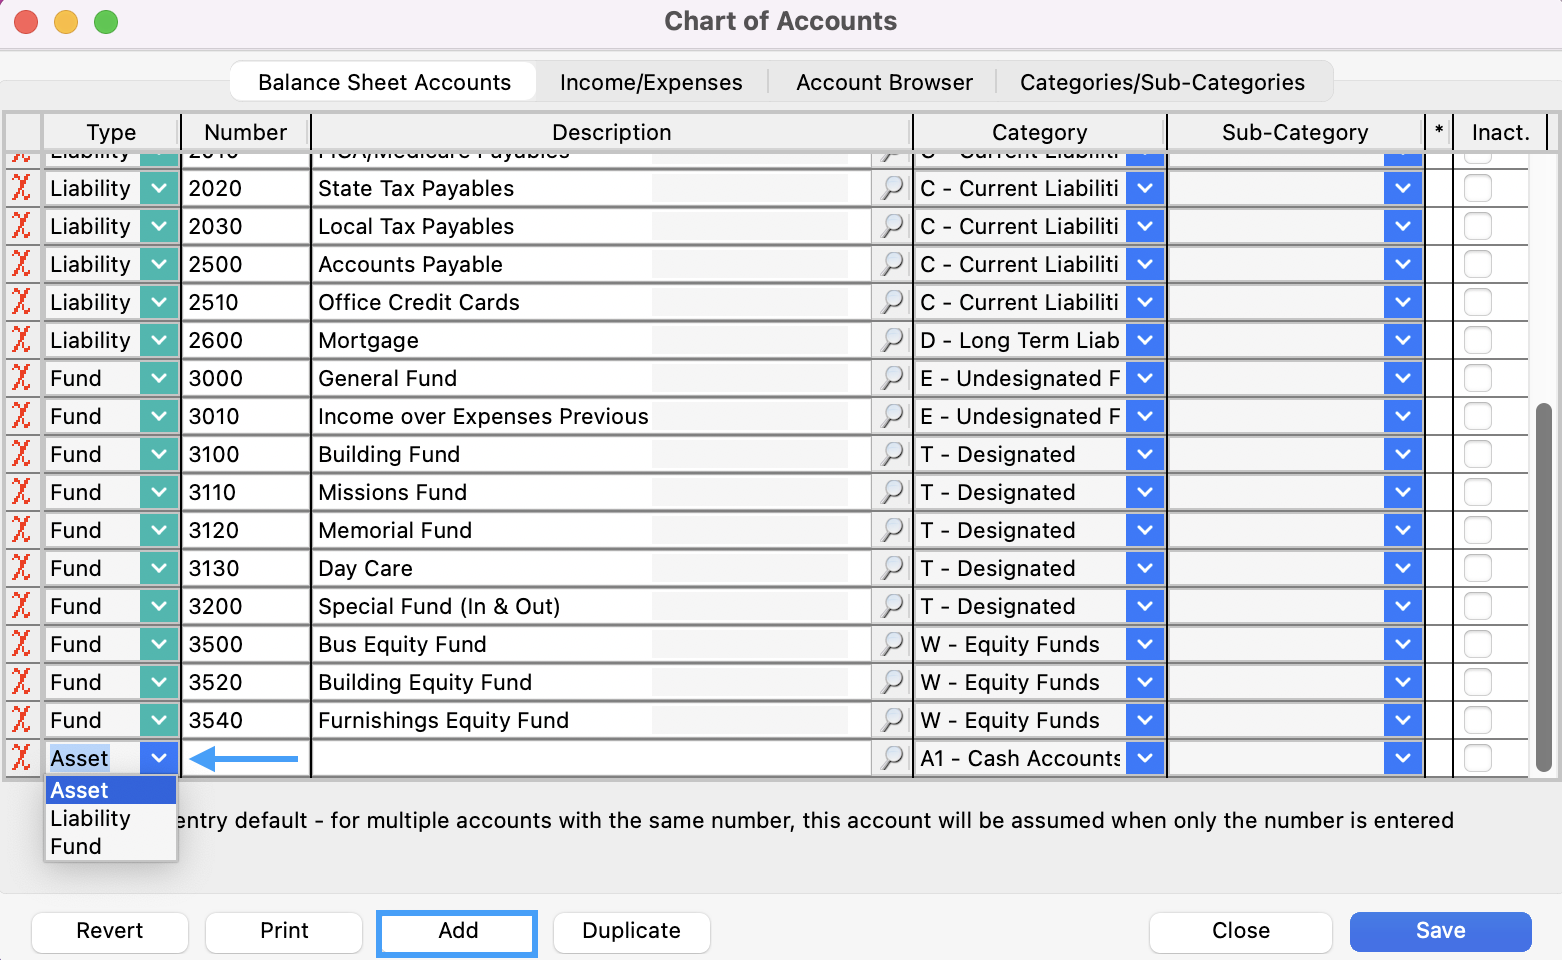
To create or access your Balance Sheet Accounts, click the Balance Sheet Accounts tab of the Chart of Accounts window.
Structure the design of the Balance Sheet (Asset/Liability/Funds) by use of Categories.
-
Click Add and click the down arrow under Type and select Asset, Liability, or Fund.
-
Press the tab key and type the account number in the Number field.
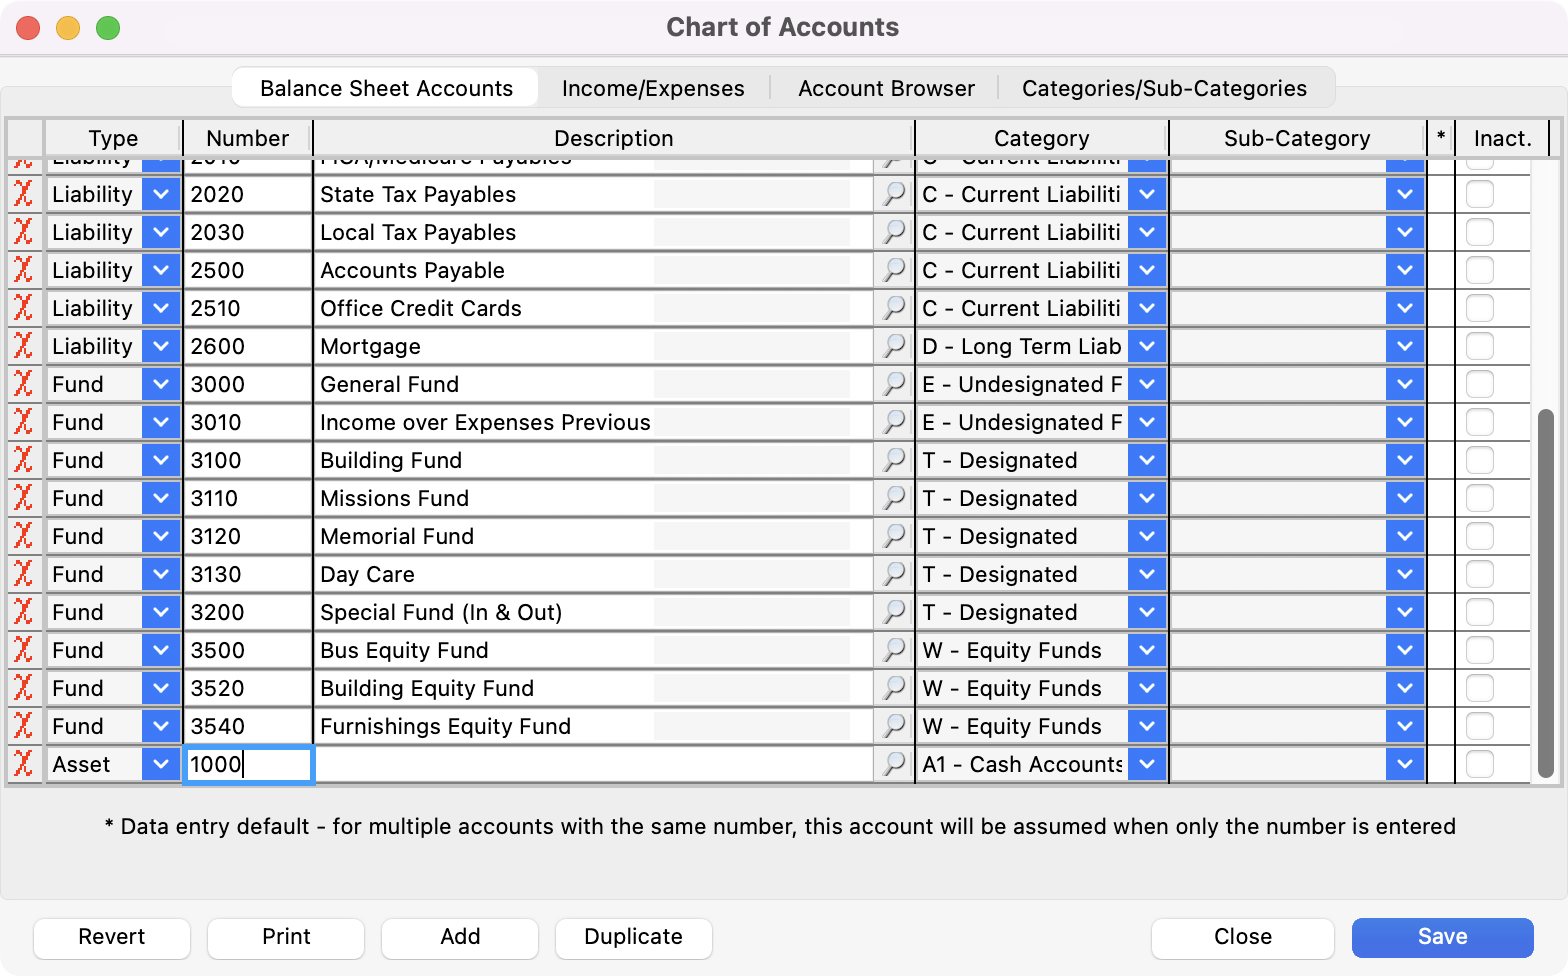
Common Balance Sheet Accounts number groupings:
-
Assets - 1000’s
-
Liabilities - 2000’s
-
Funds - 3000’s
-
Press the tab key and type the account name in the Description field.

-
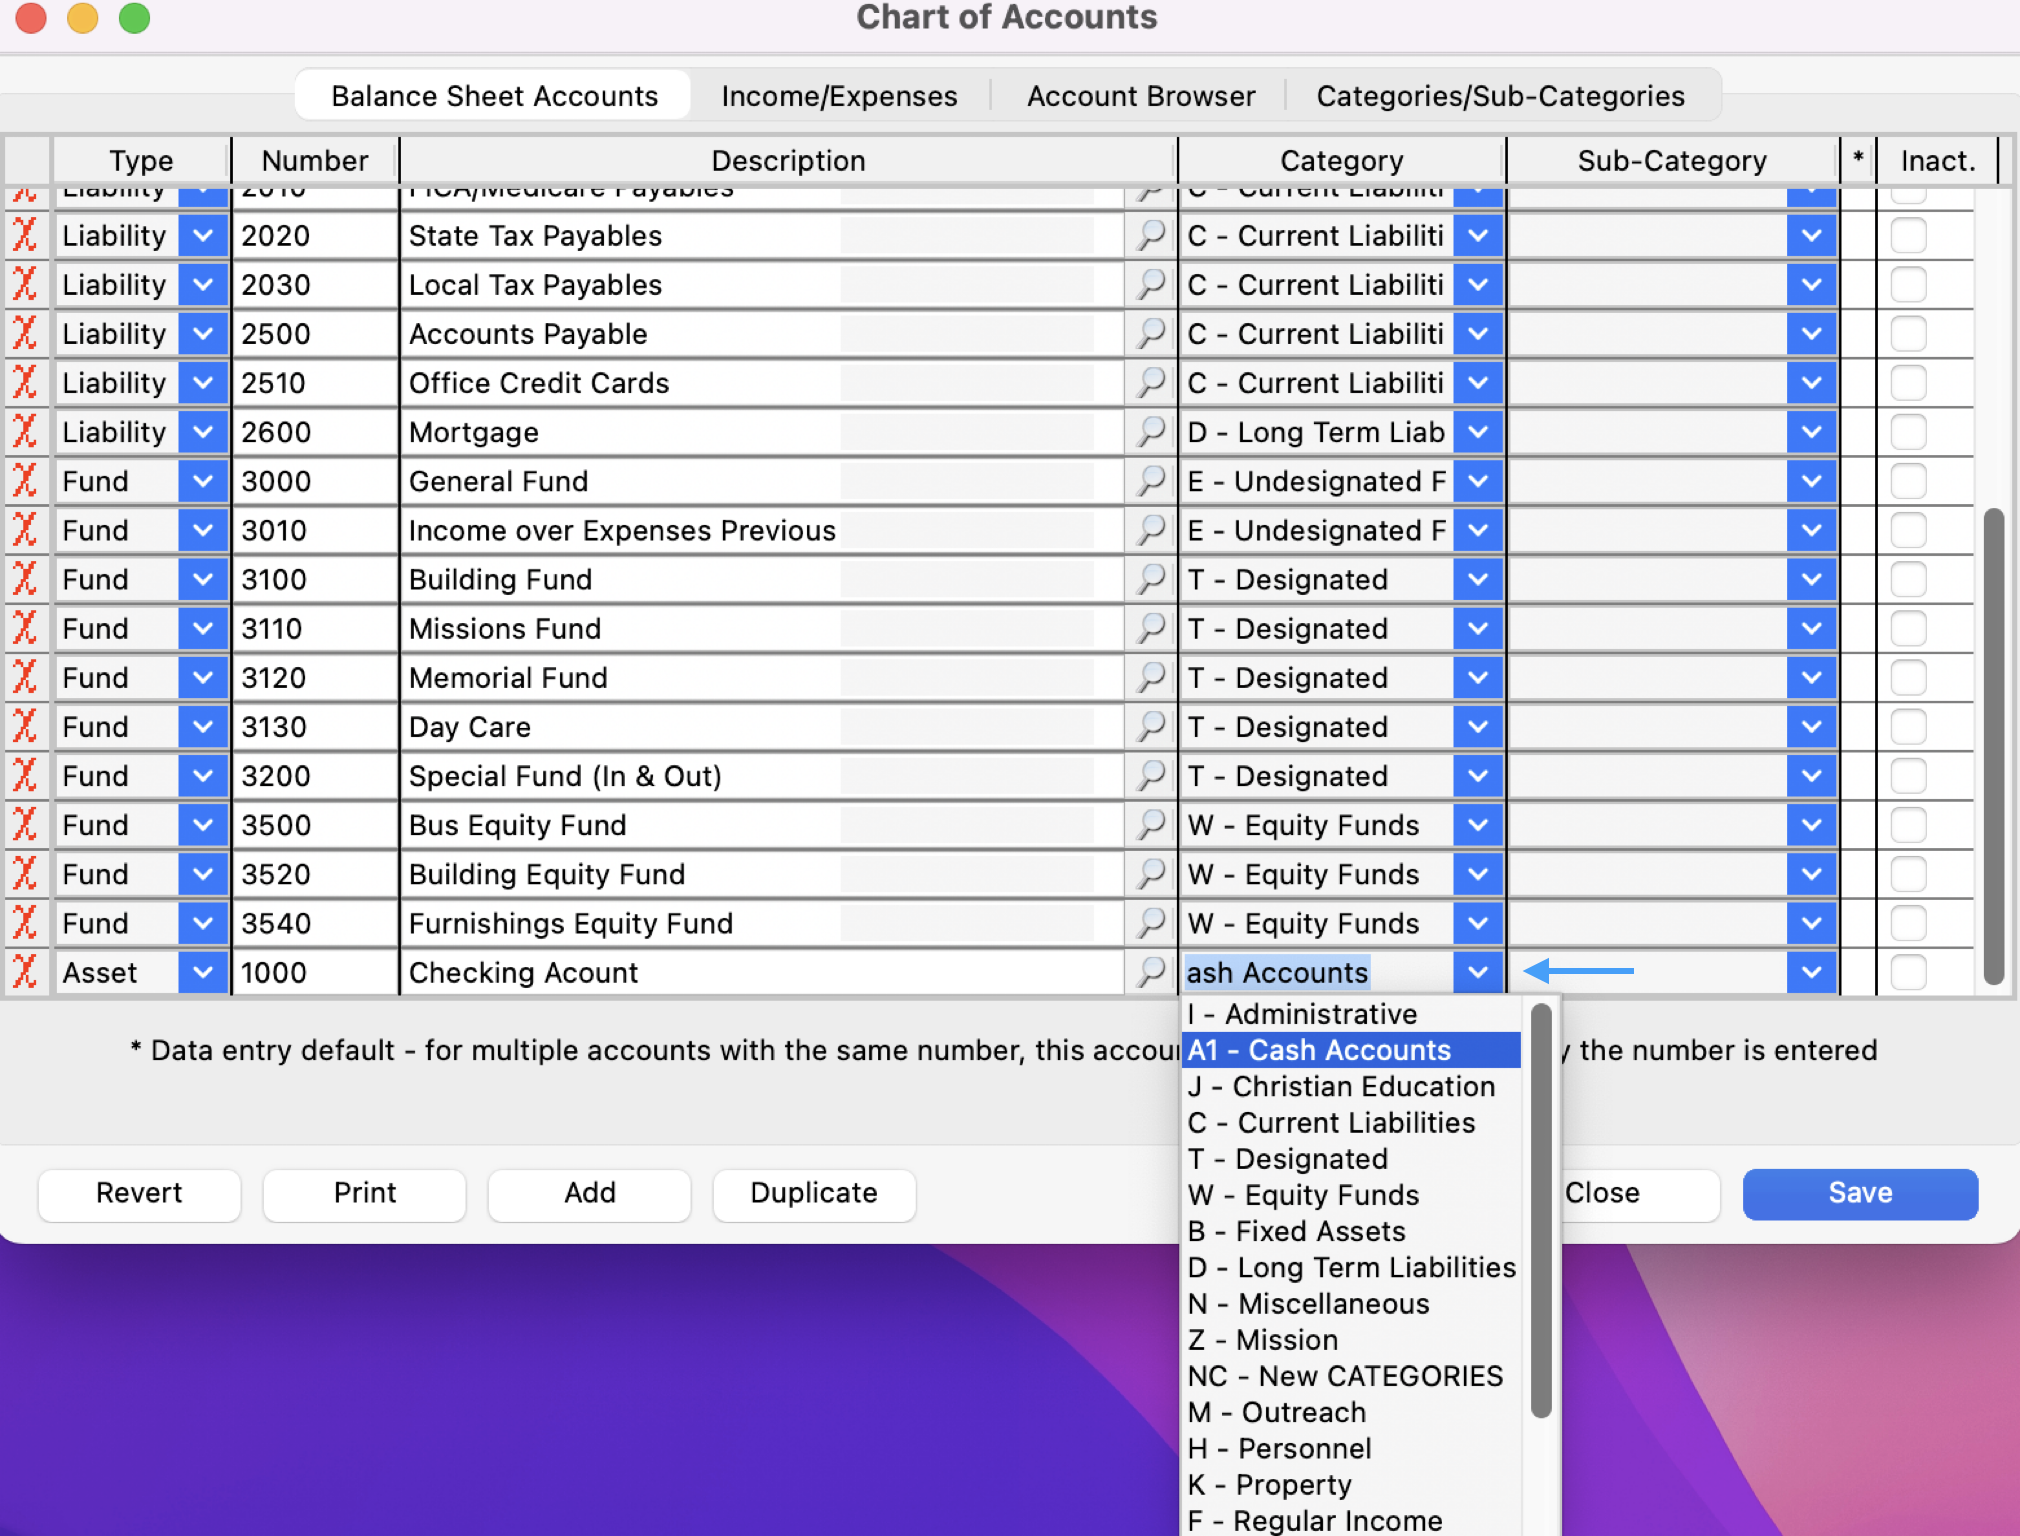
Press the tab key again and click on the down arrow to select the Category from the drop-list—for example, Cash Accounts. Or you can type the beginning of the item you want in order to jump to it.
-
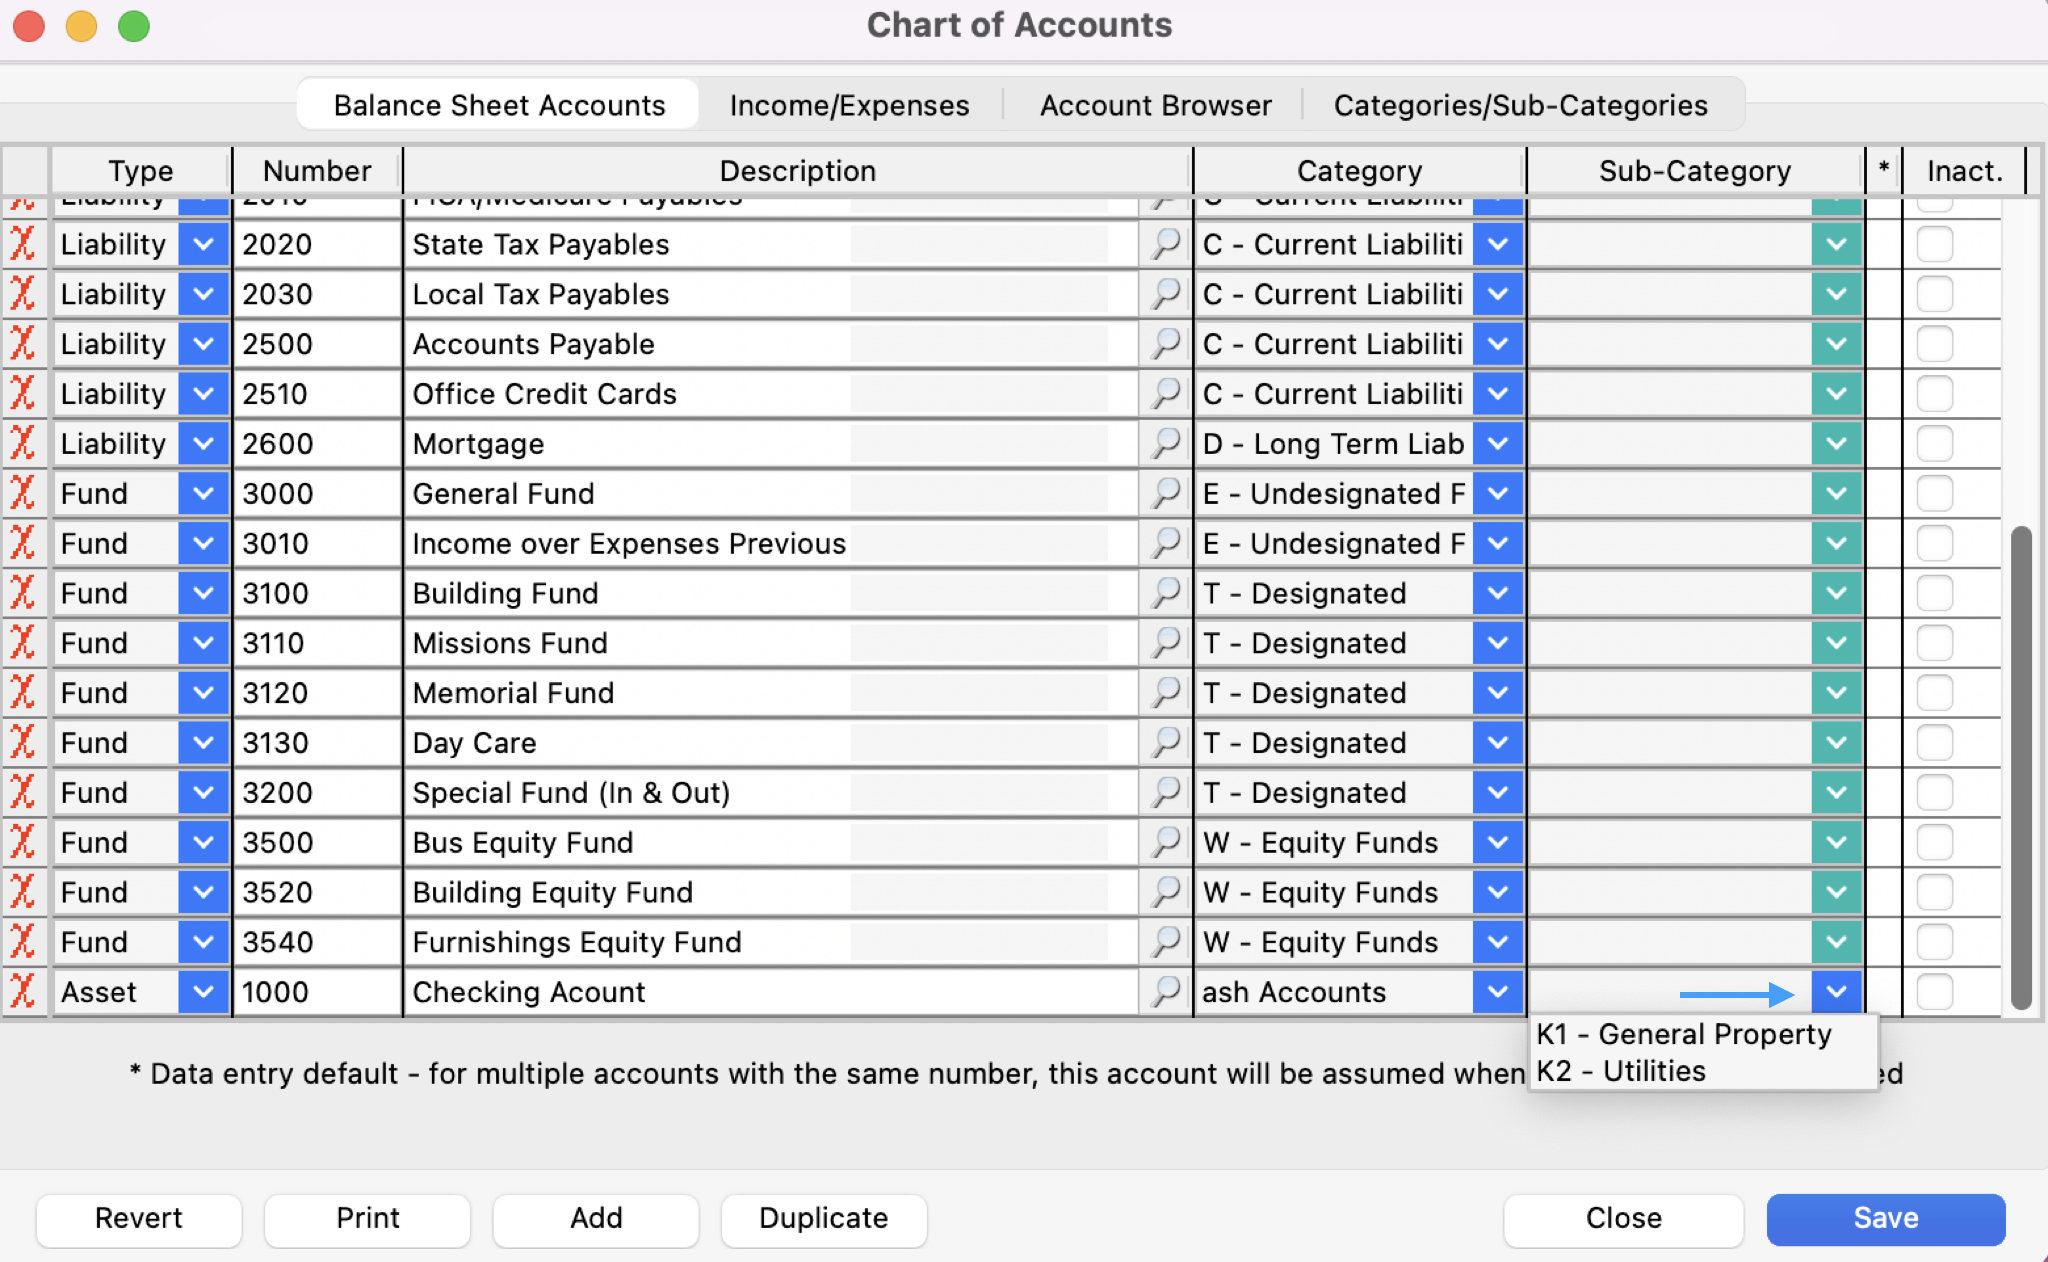
Press the tab key again and enter the Sub-Category in the same manner as the Category (if applicable).
-
Press the tab key and CDM+ is ready to accept the next entry. Repeat steps 2-6 to add as many accounts as you need.
-
When you are finished entering all Balance Sheet Accounts, click Save. Or, if you don't want to save your entries, click Close without clicking Save.
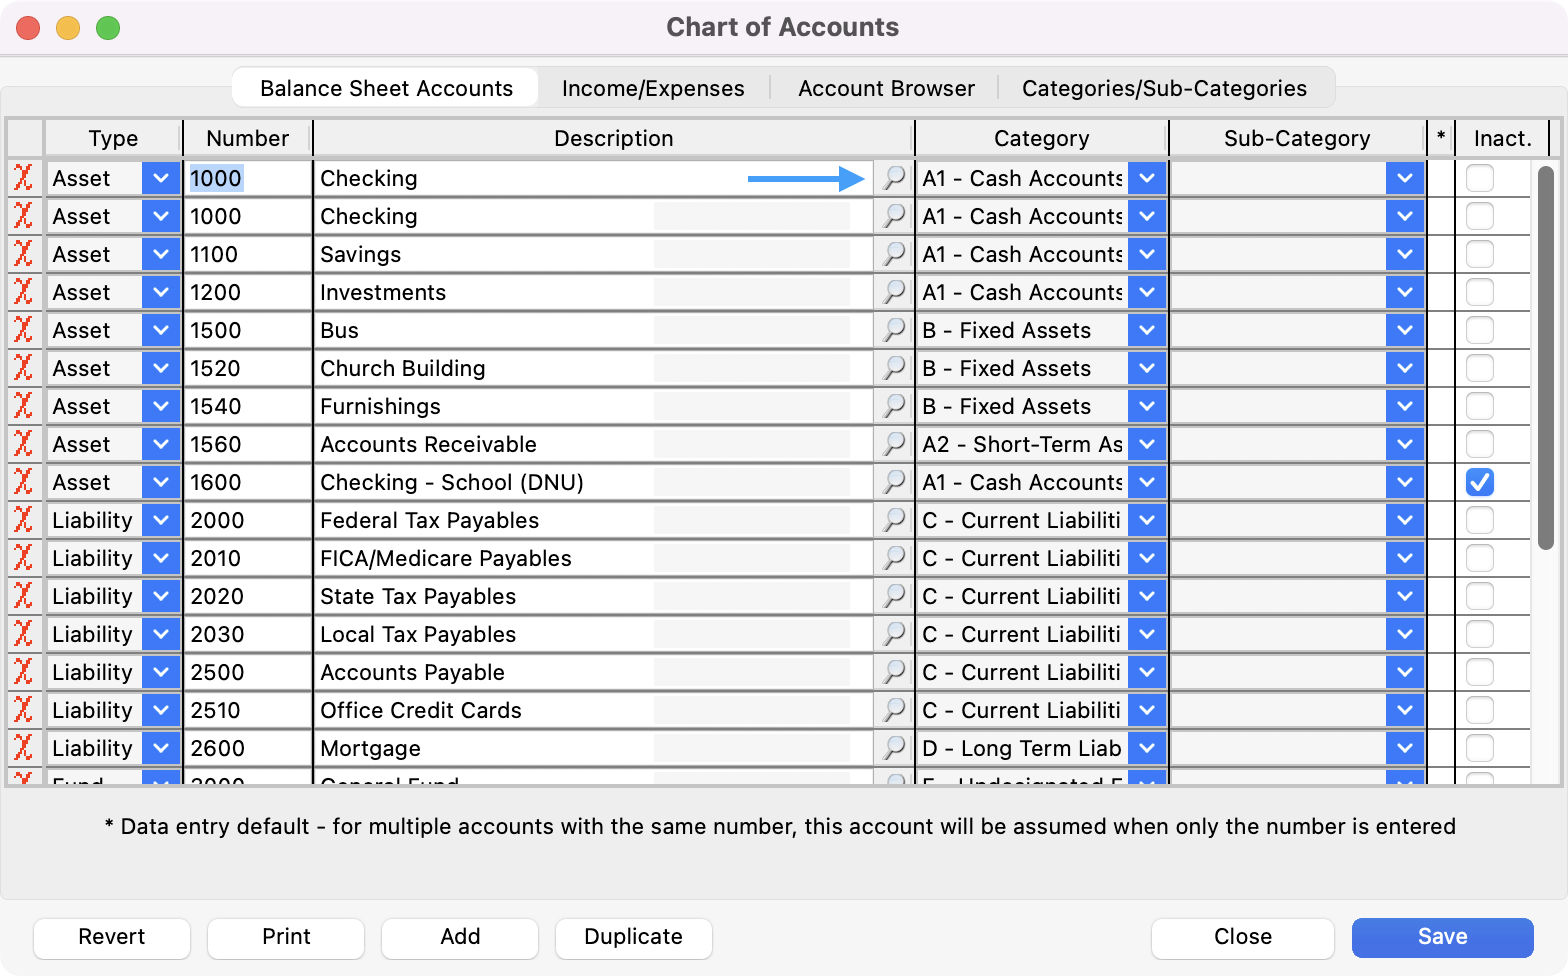
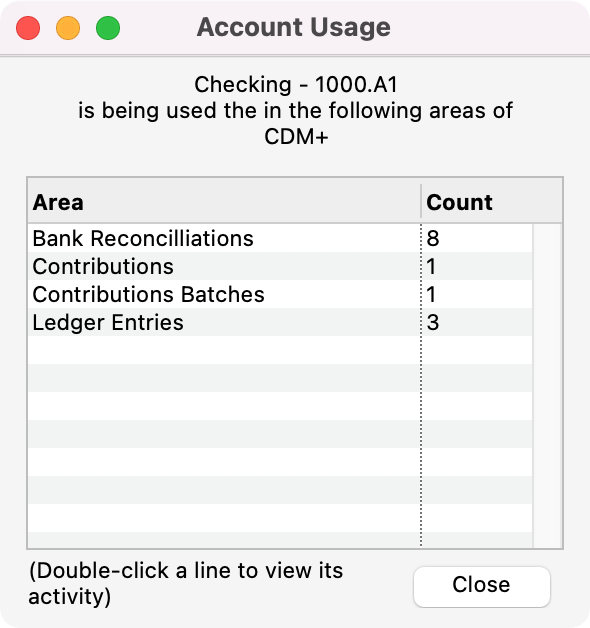
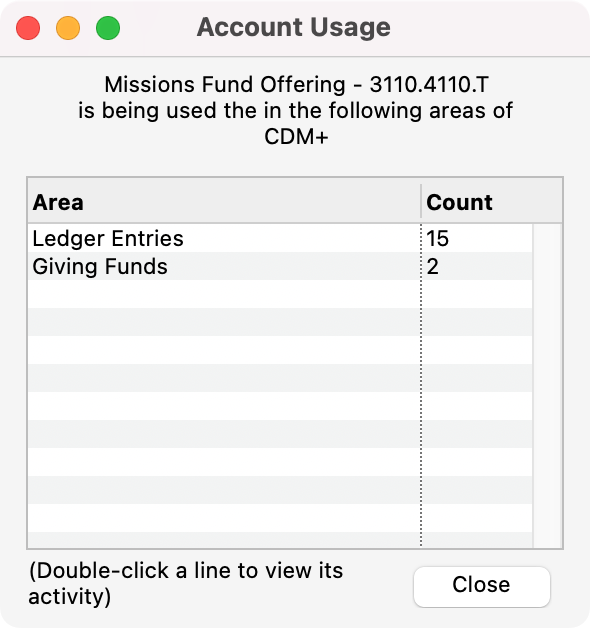
Once you begin to use an account in CDM+, clicking on the magnifying glass icon next to the account Description opens a window that lists all the places this account is being used in CDM+. Double-click on a line to view its activity.
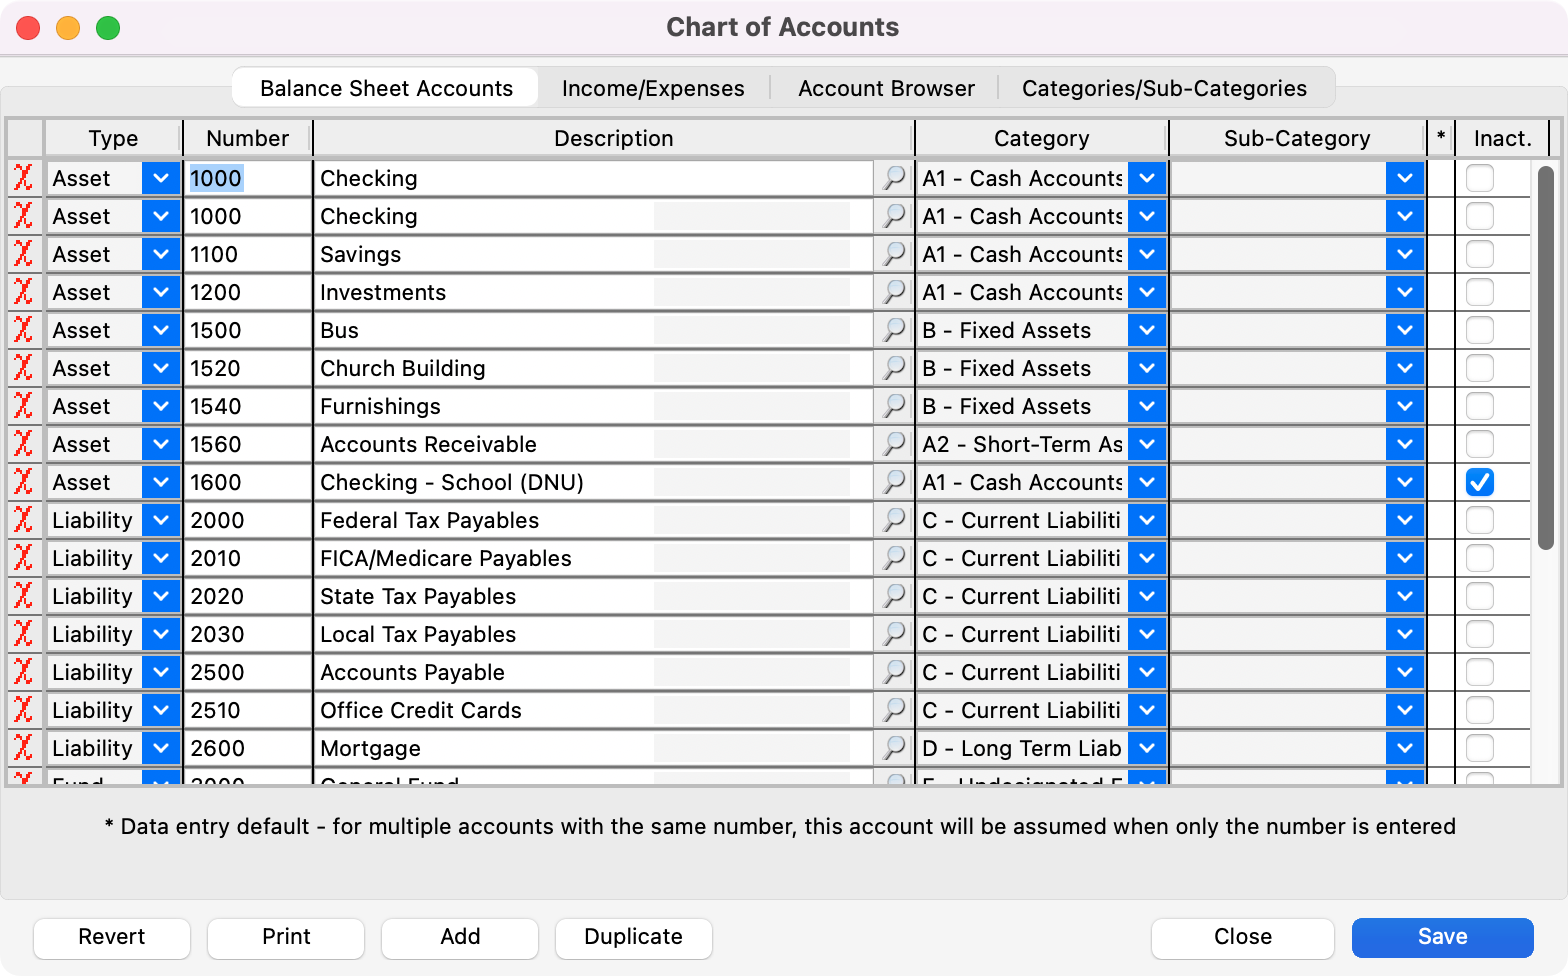
Once an account has activity in it, you cannot delete the account. Instead, mark the account as inactive, which will prevent that account from being used on new entries.
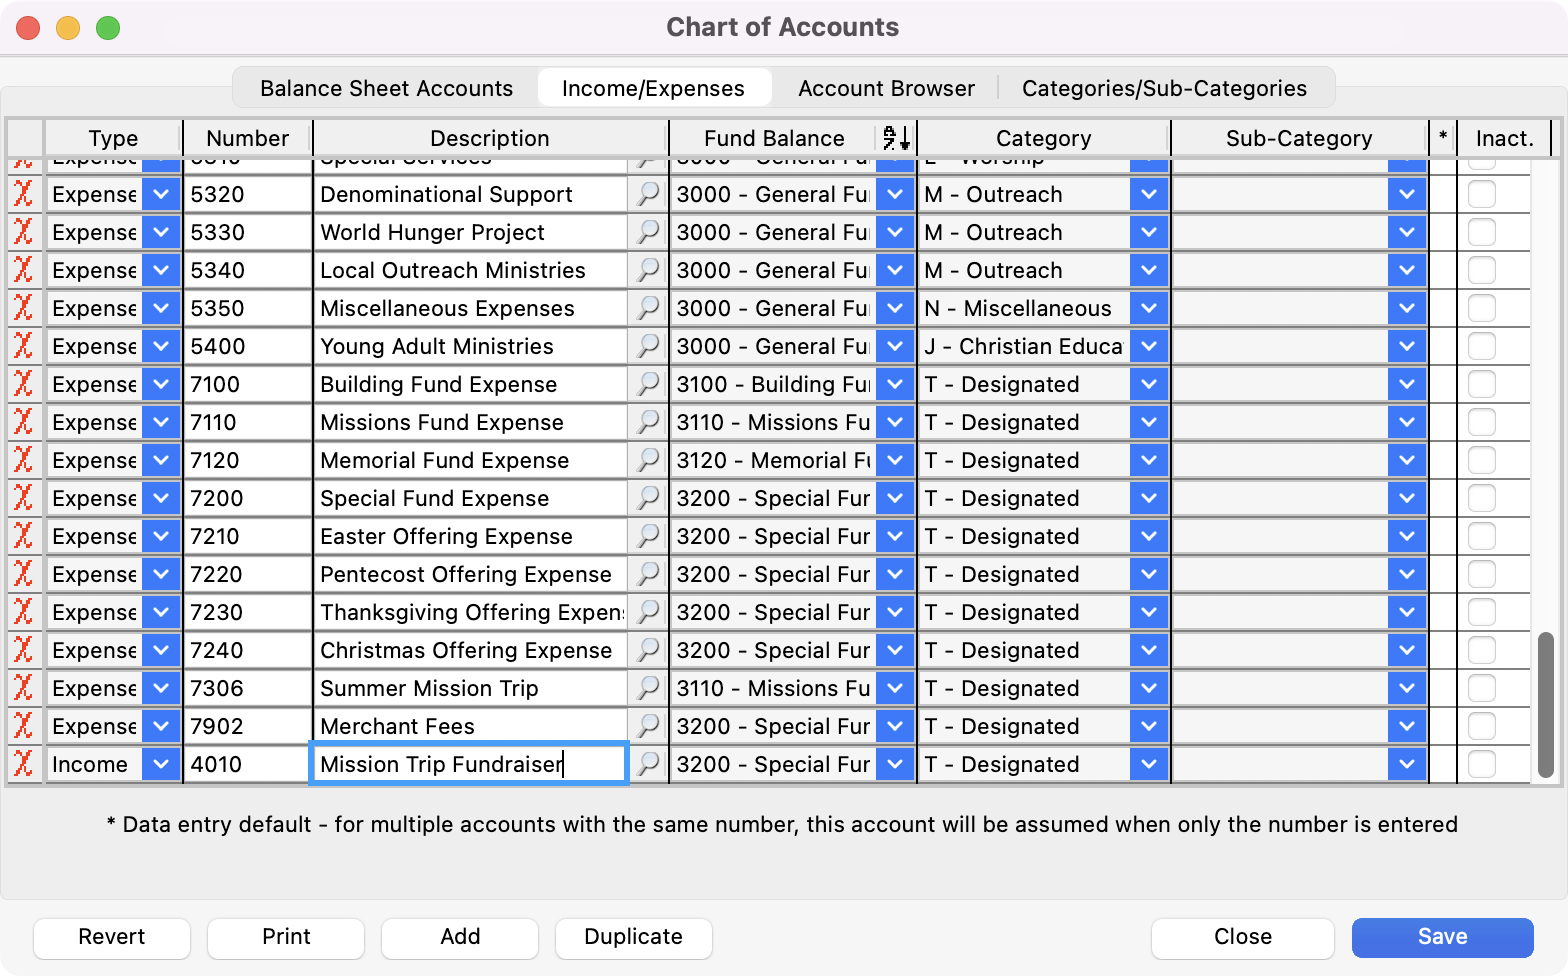
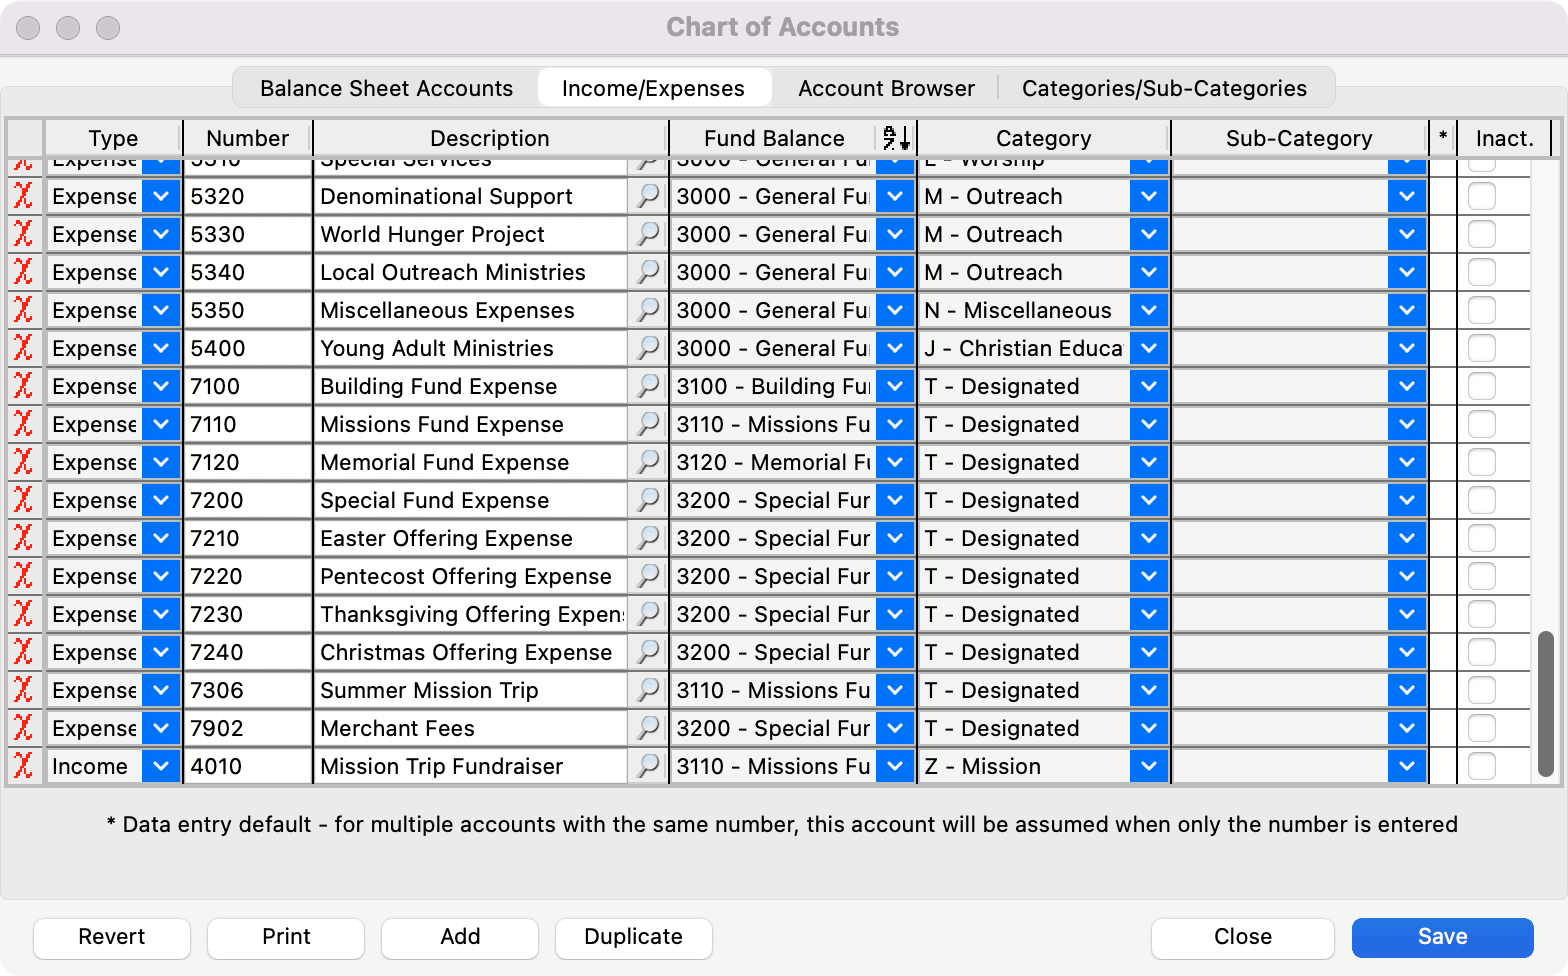
Income/Expenses
Enter Income and Expense accounts here.
-
To create or access your Balance Sheet Accounts, click the Income/Expenses tab of the
Chart of Accounts window.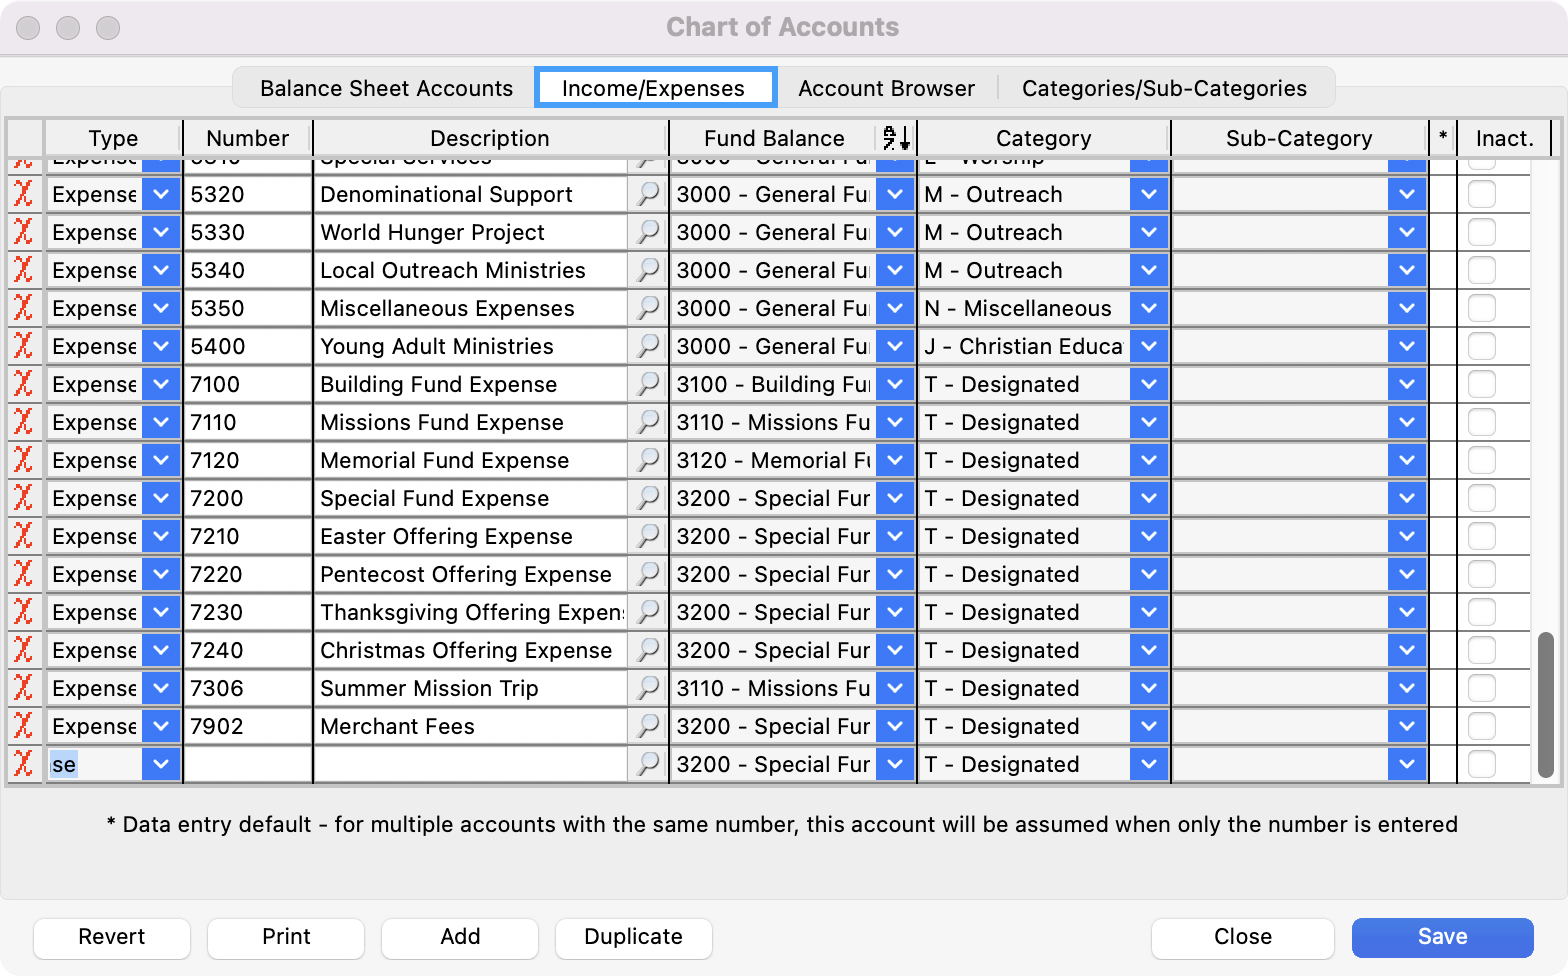
-
Click Add and click on the down arrow under Type and select Income or Expense.
-
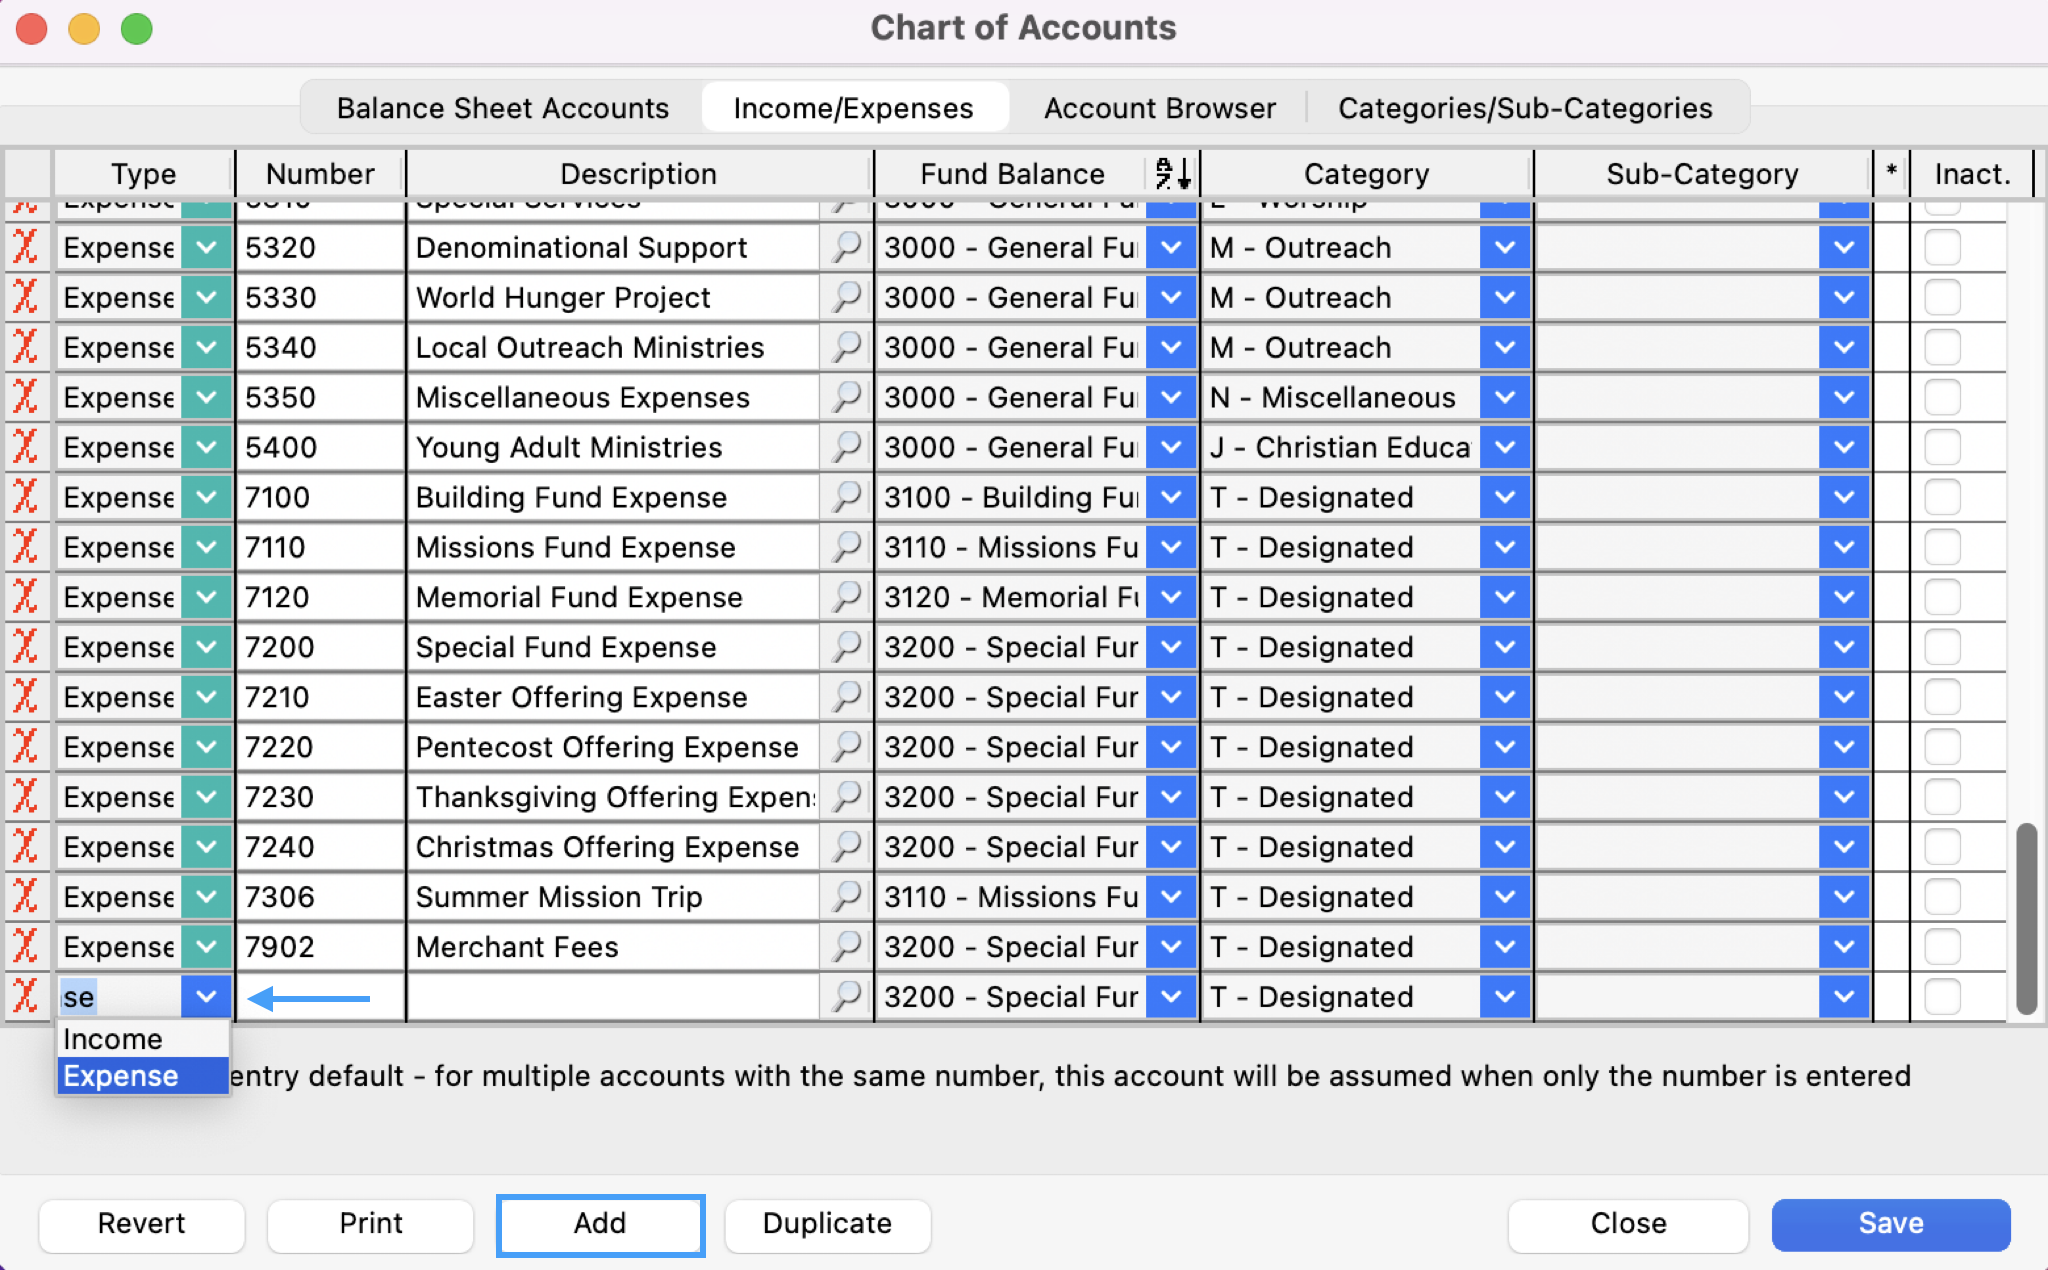
Press the tab key and type the account number in the Number field.
Common Income/Expenses account number groupings:
-
Income - 4000’s
-
Expense - 5000’s up
-
Press the tab key and type the account name in the Description field.
-
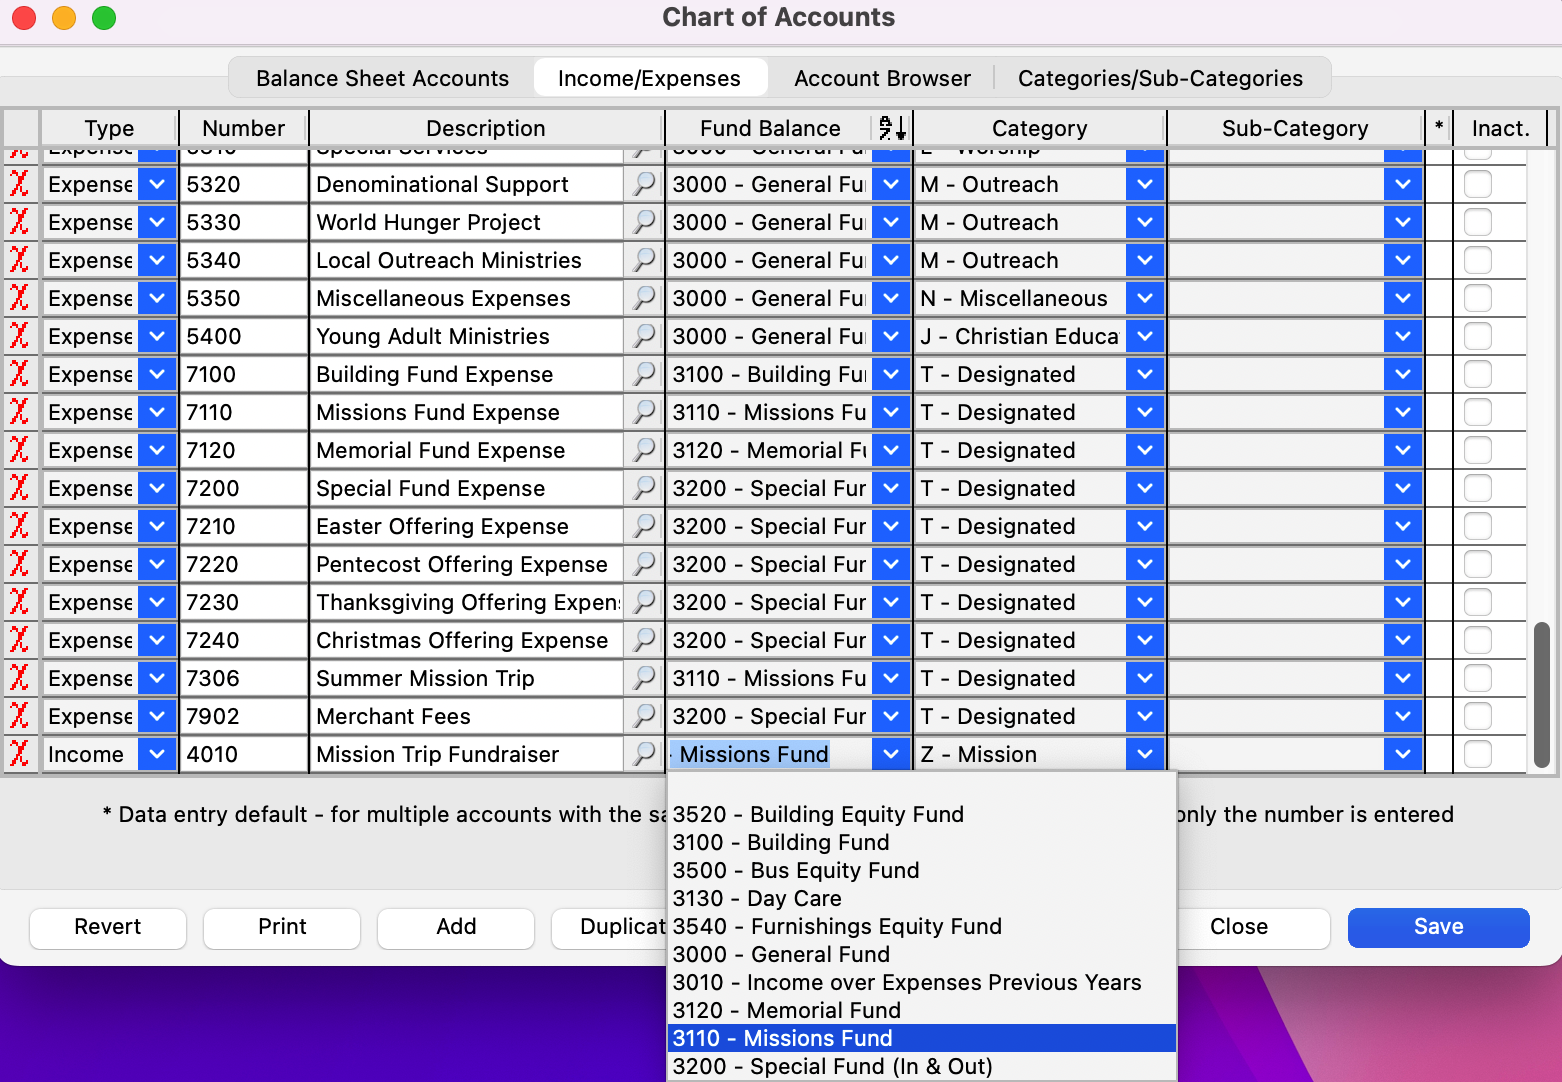
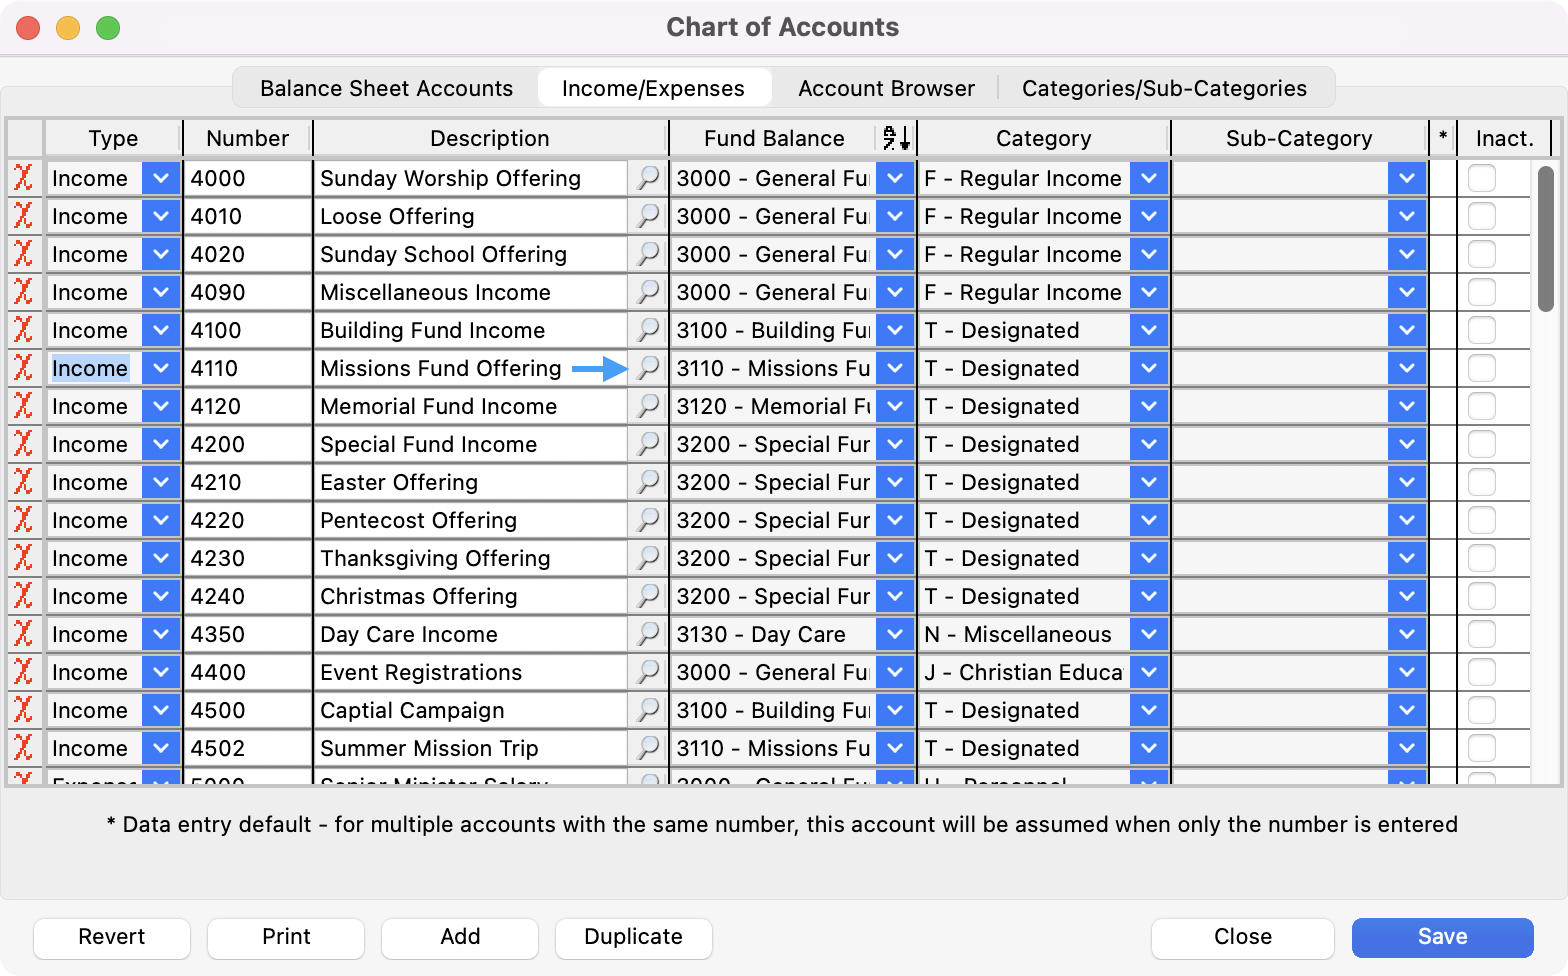
Press the tab key again and click on the down arrow to select the Fund Balance Account from the droplist—for example, General Fund. Or you can type a portion of the item you want and press the tab key to “auto-complete” the entry. This search is case-insensitive and works on any portion of the entry, not just the beginning letters.
-
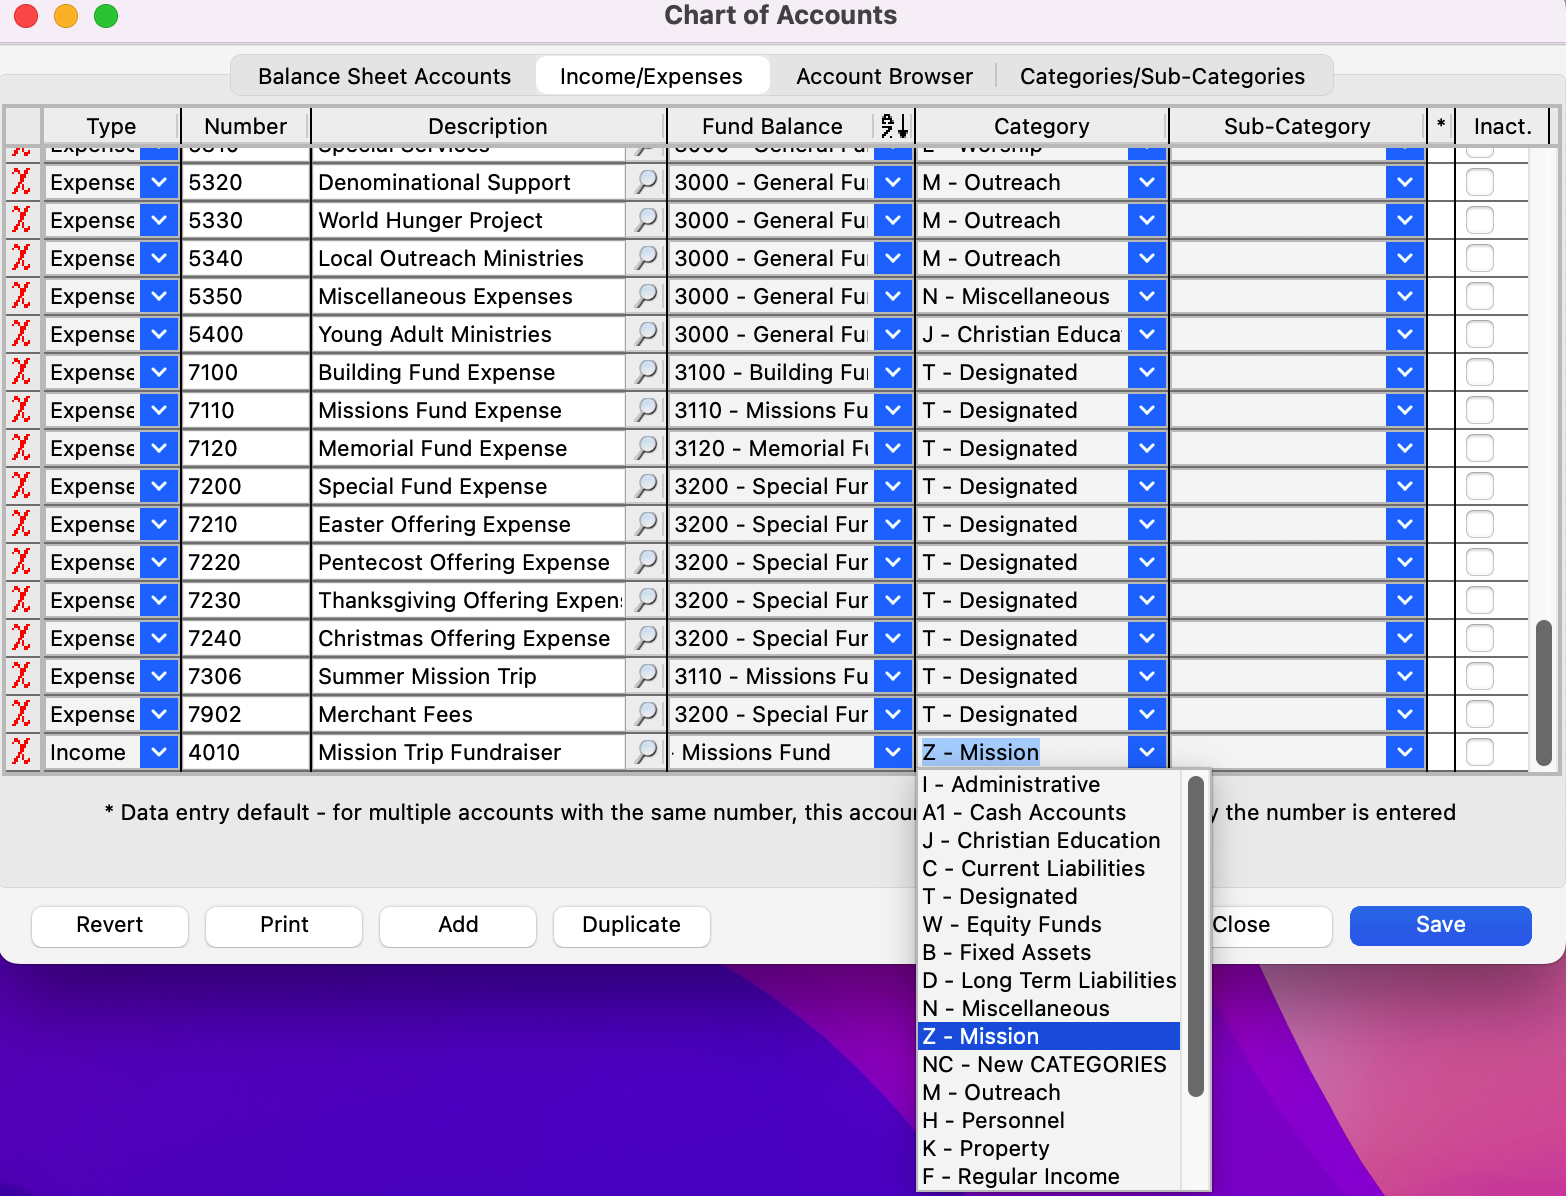
Press the tab key again and enter the Category—for example, Regular Income—in the same manner as the Fund (if applicable).
-
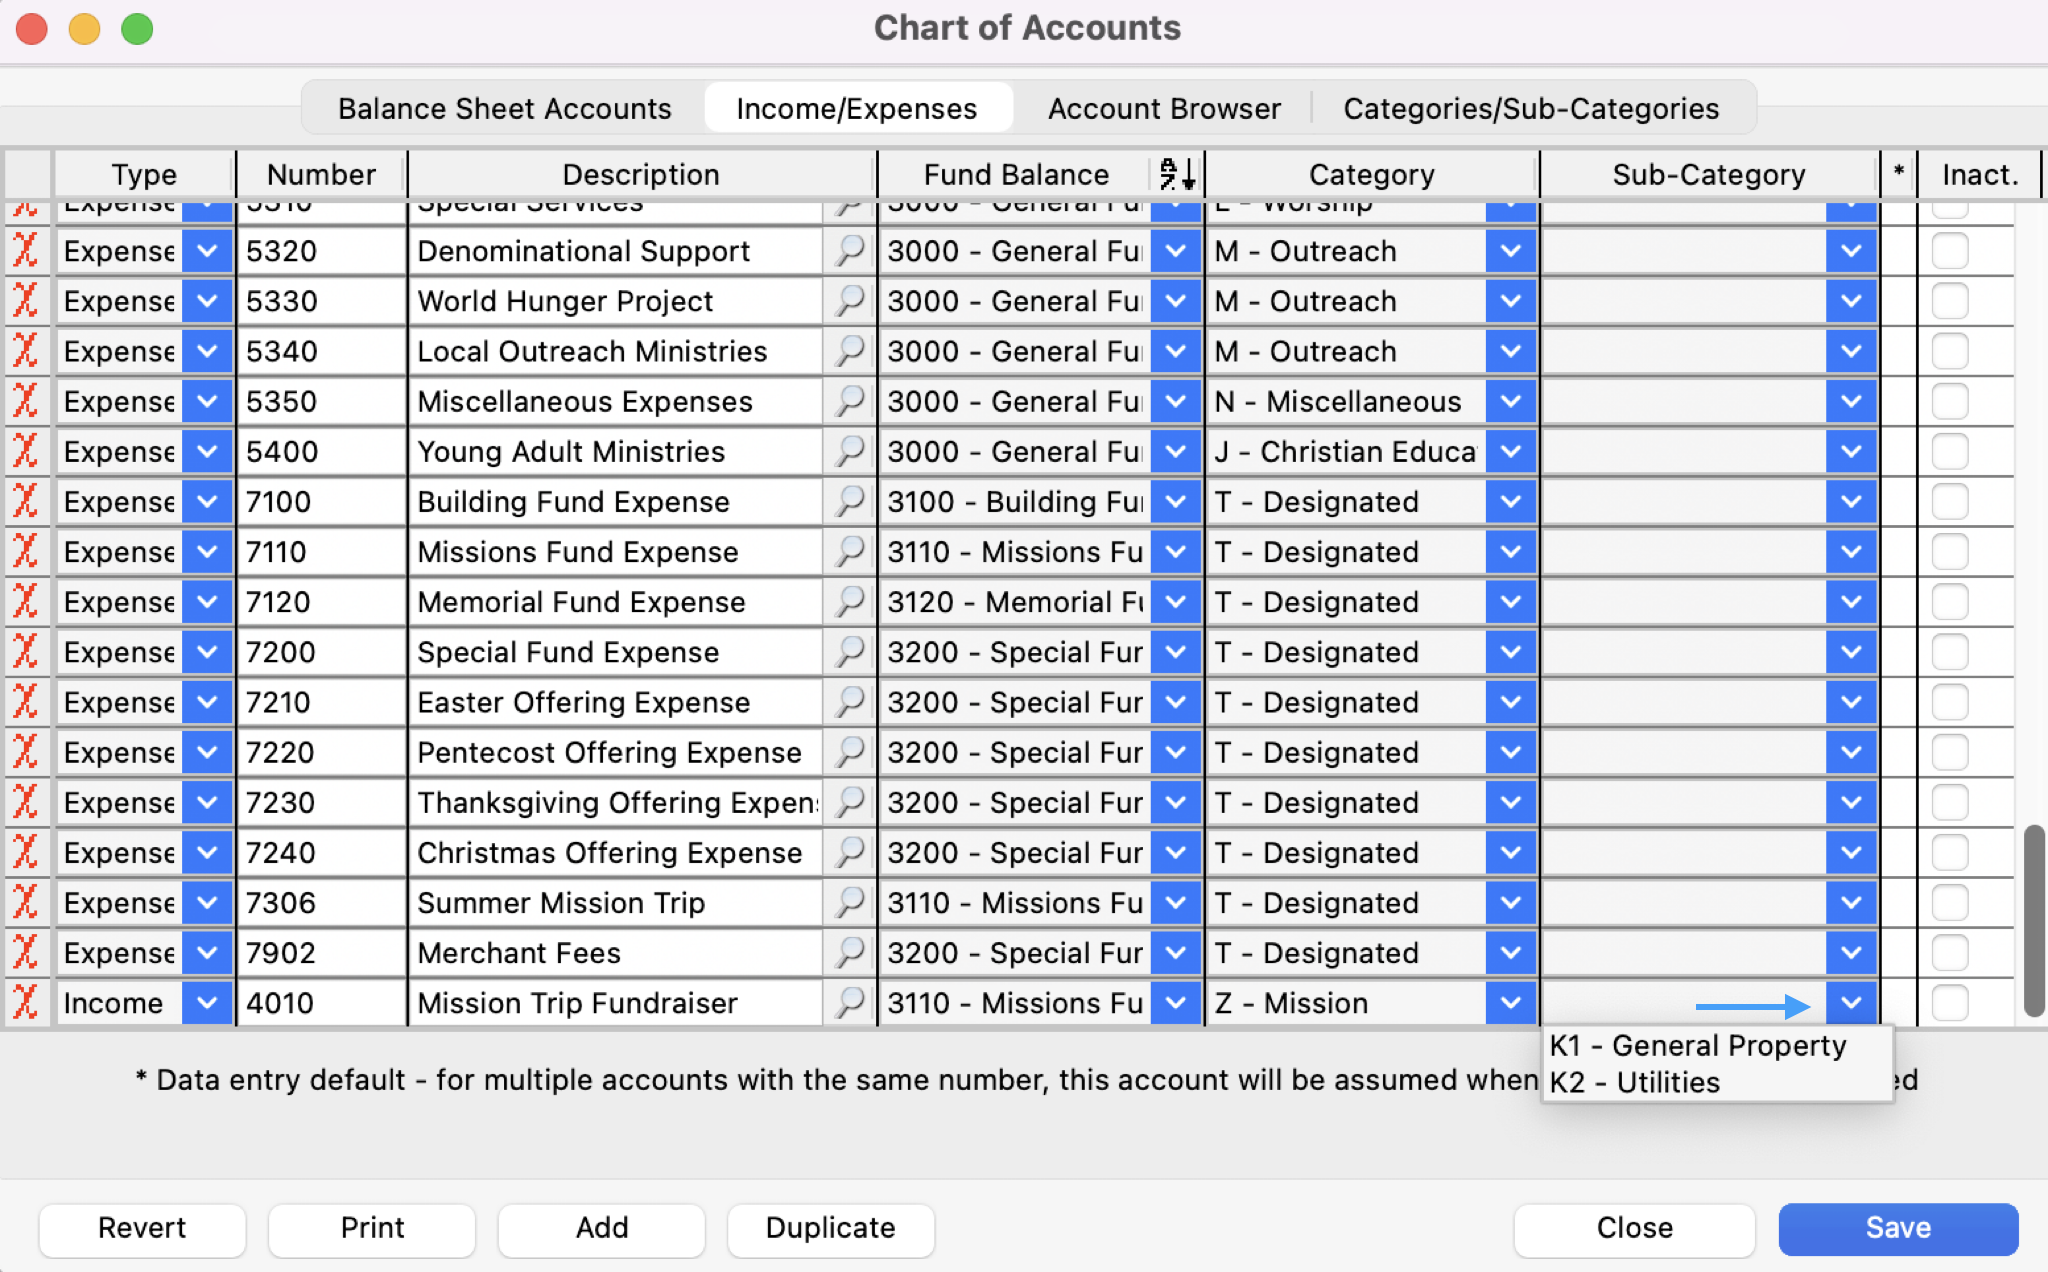
Press the tab key again and enter the Sub-Category in the same manner as the Category (if applicable).
-
Press the tab key and CDM+ is ready to accept the next Income/Expense entry. Repeat steps 2-7.
-
After all Income/Expense accounts are entered, click Save. Or, if you don't want to save your entries, click Close without clicking Save.
Once you begin to use this account in CDM+, you can click on the magnifying glass icon next to the account Description, opening a window that lists all the places this account is being used in CDM+. Double-click on a line to view its activity.
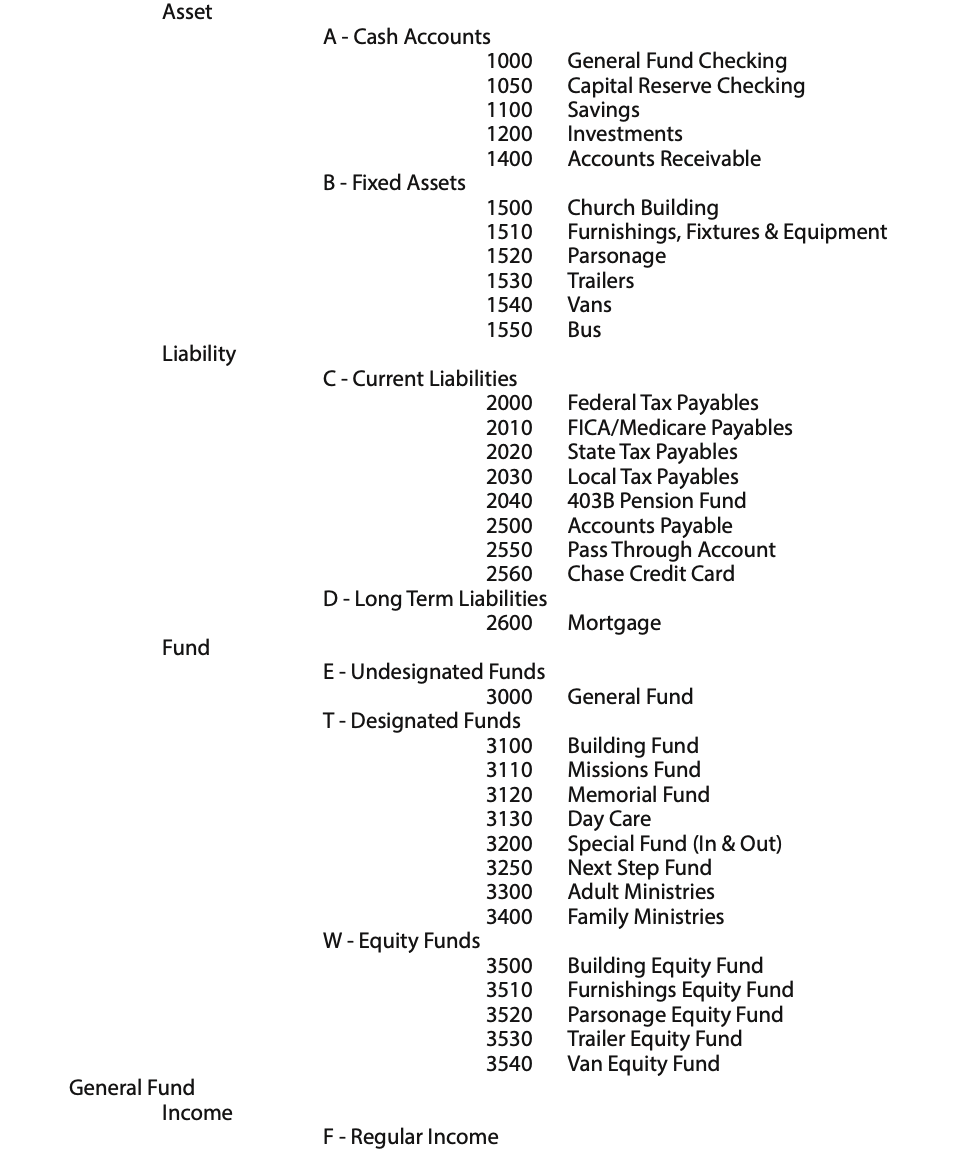
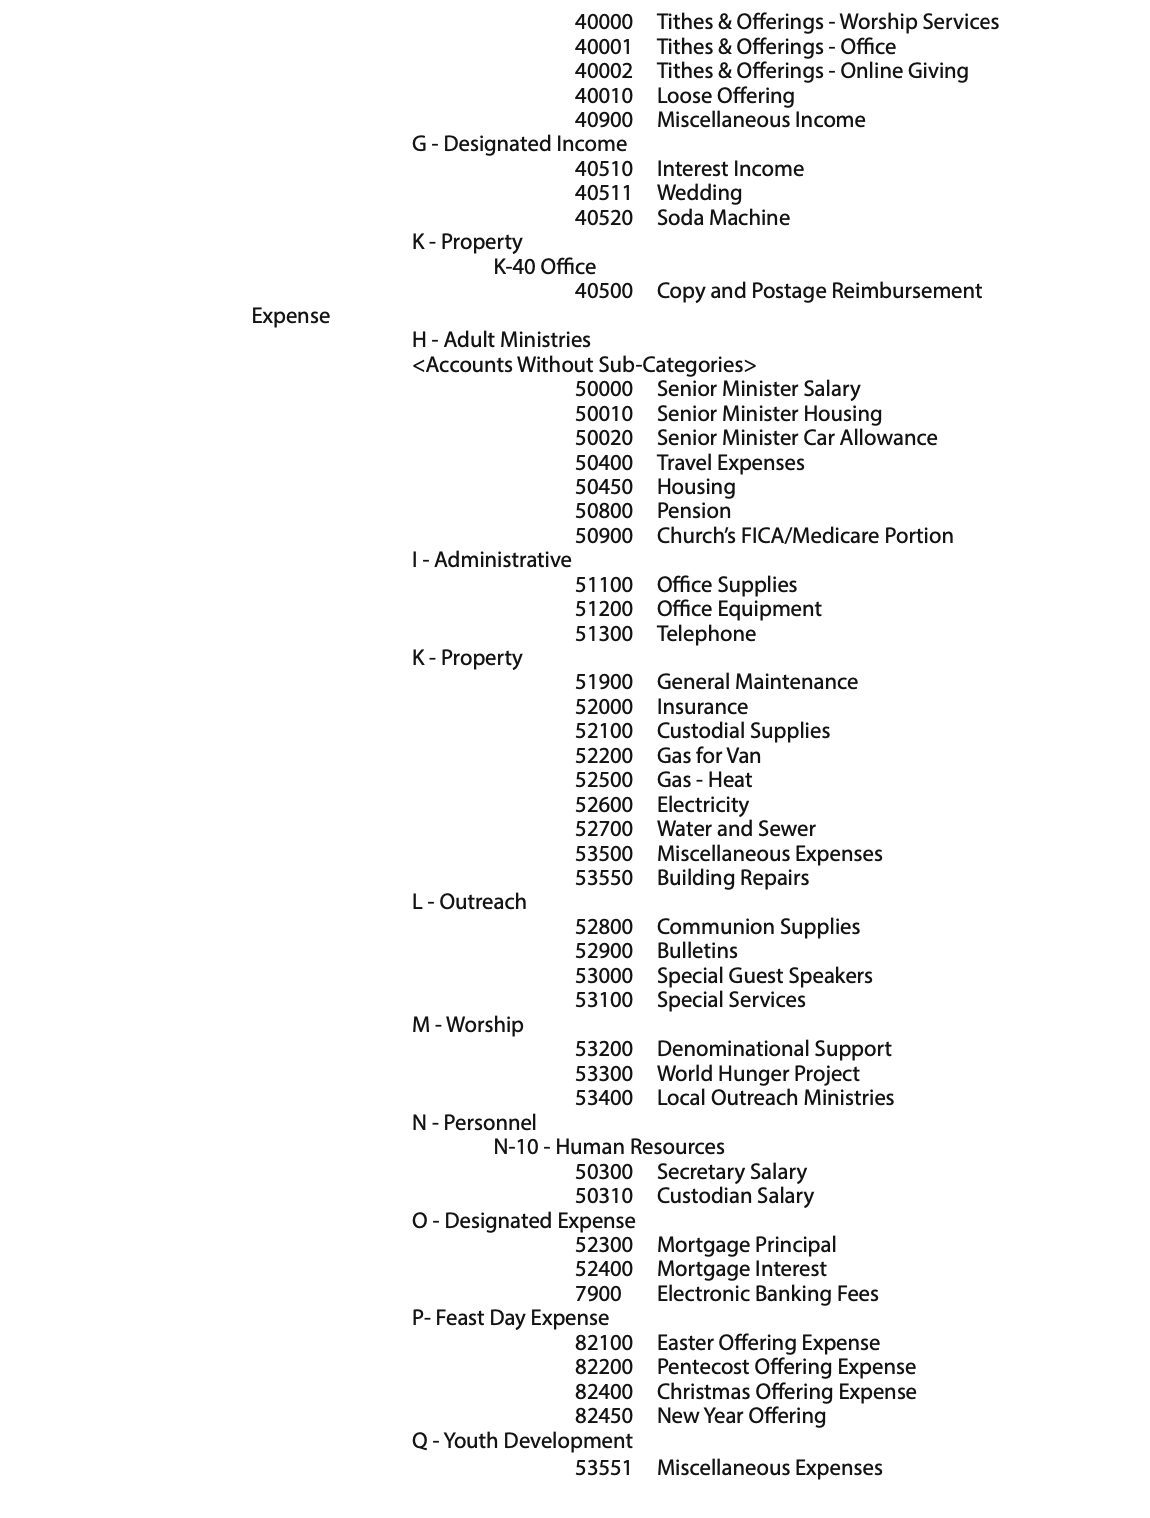
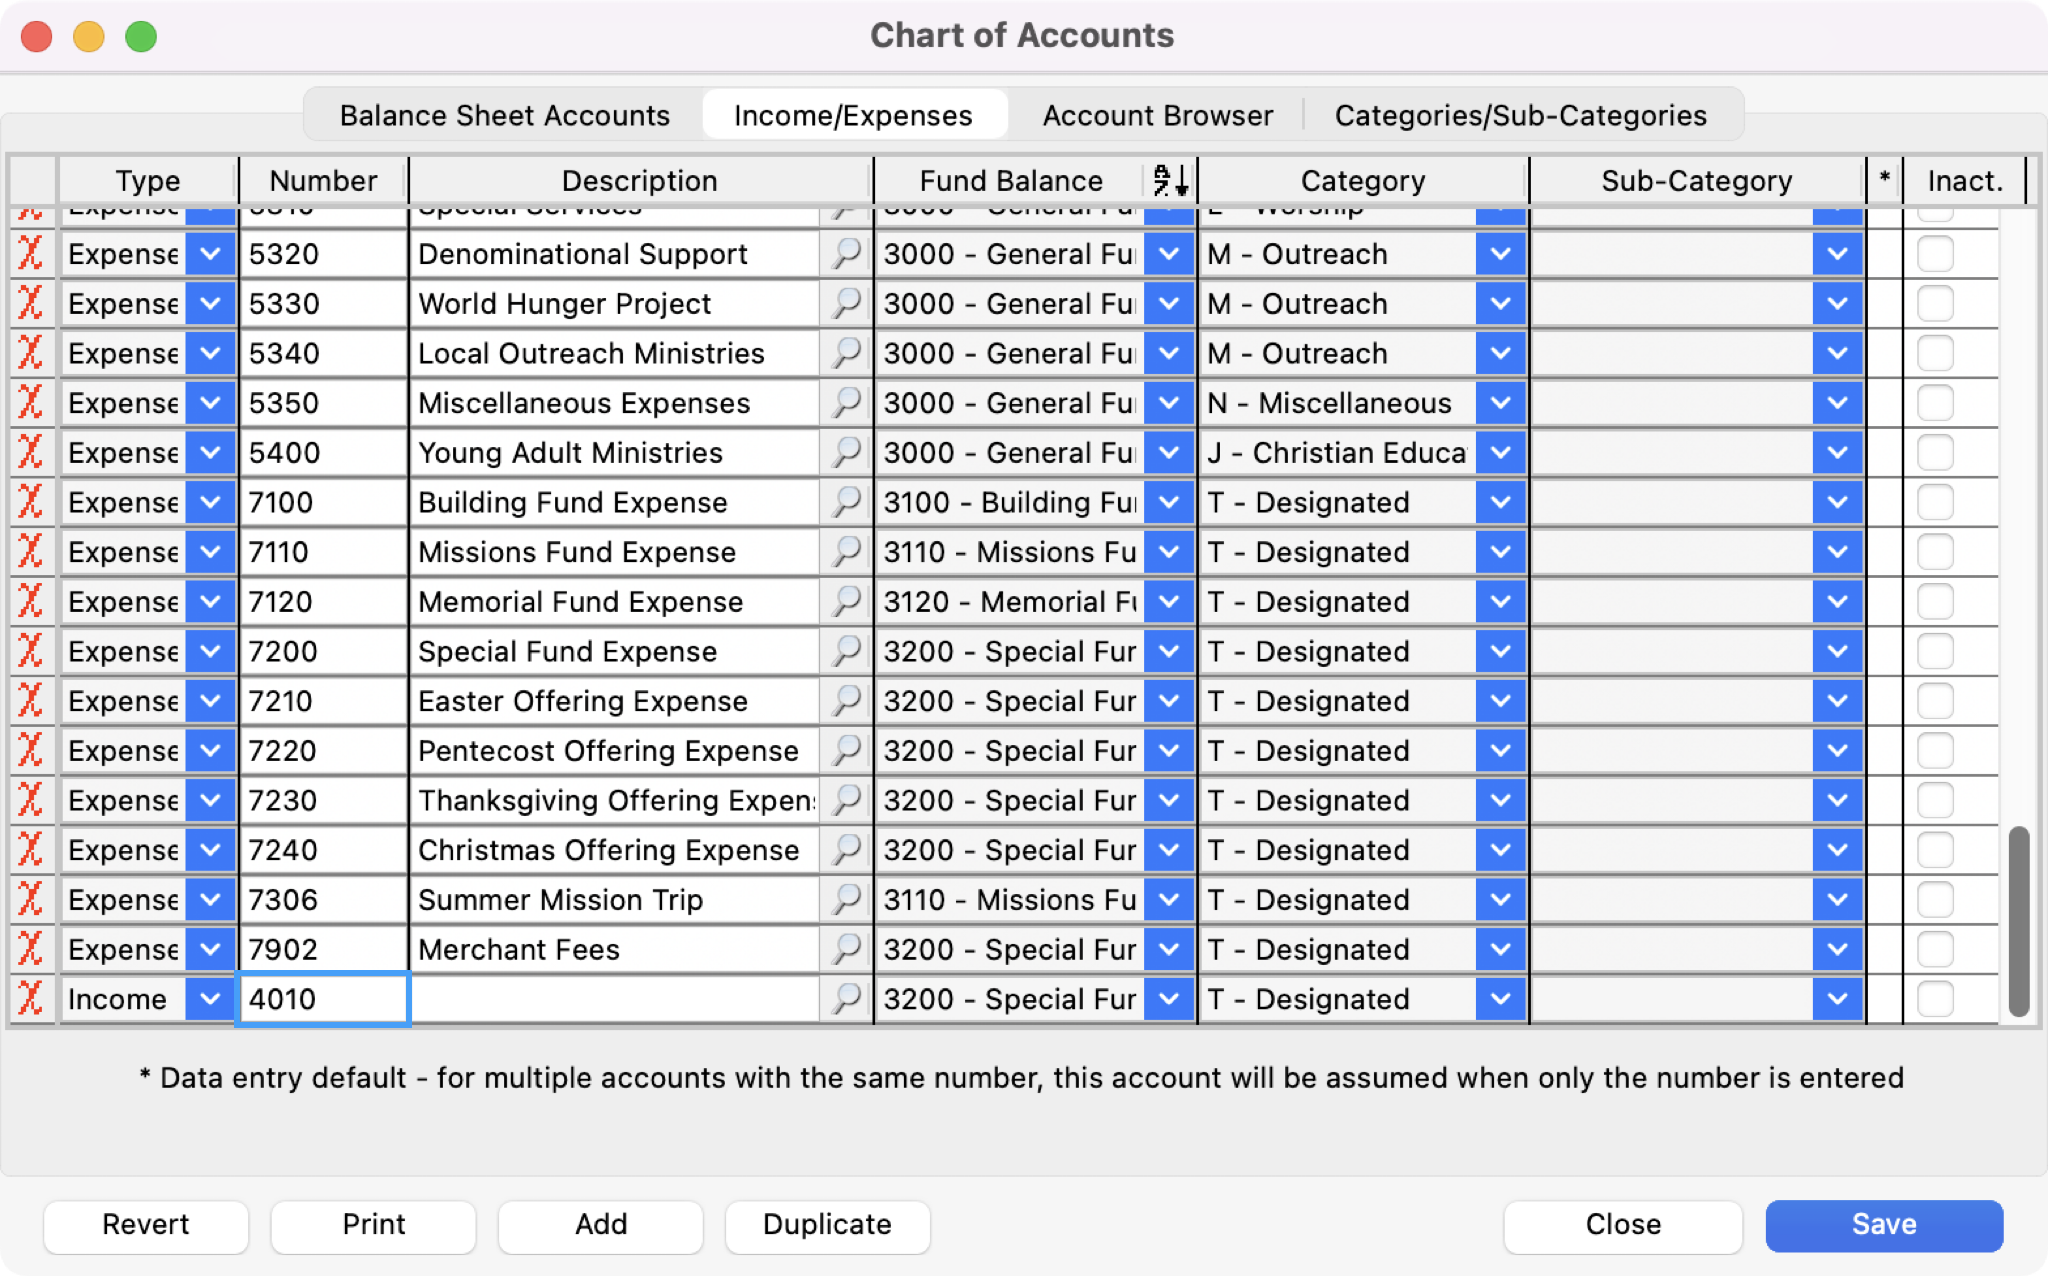
Sample Chart of Accounts