
-
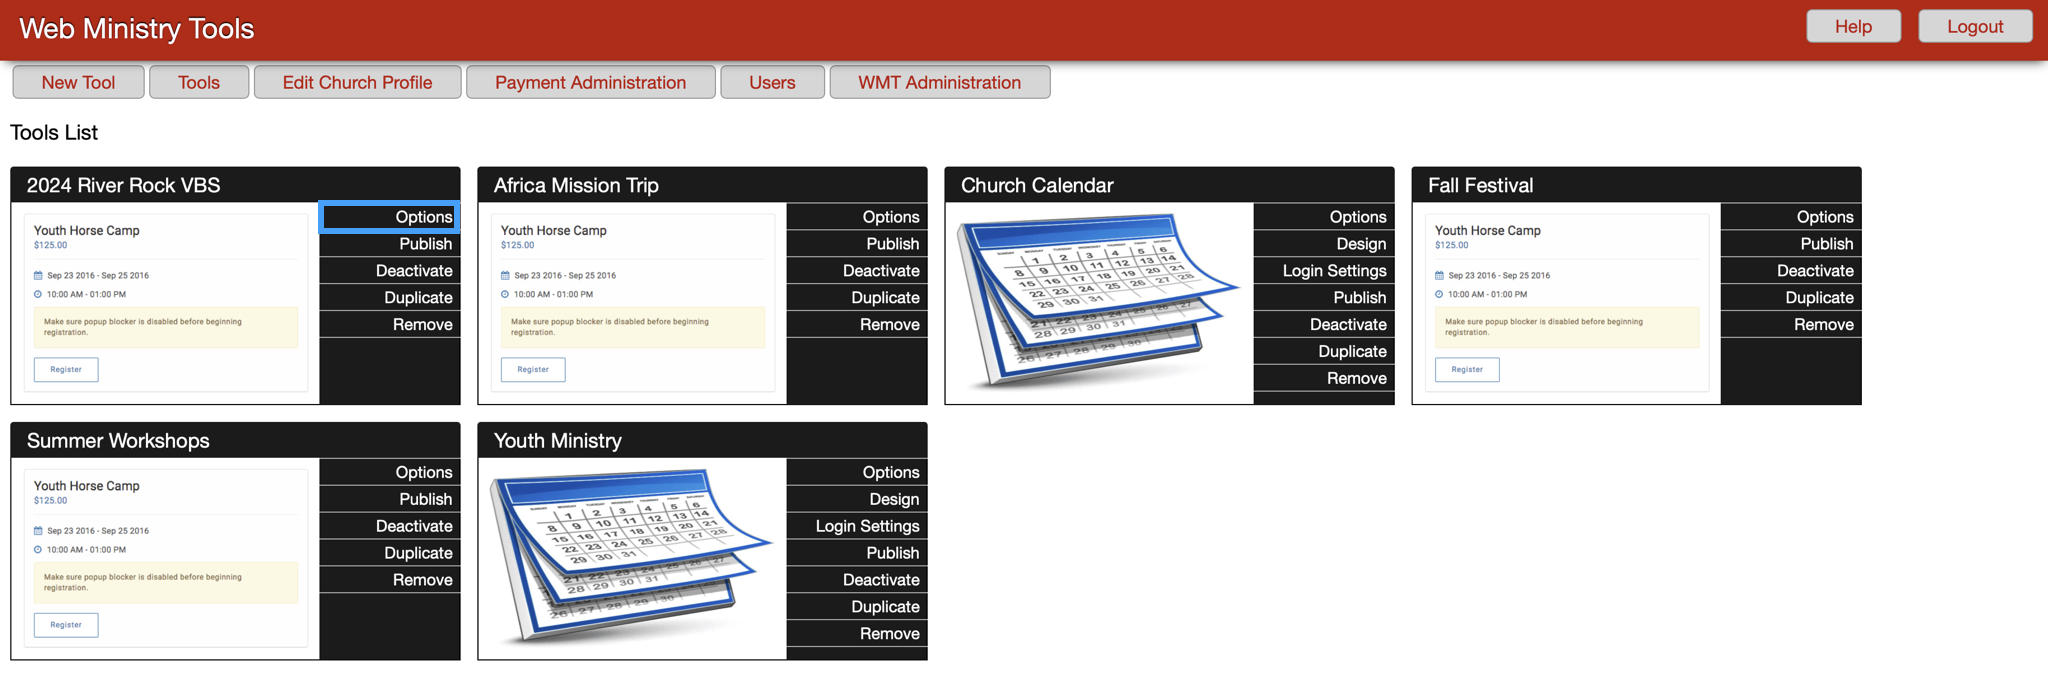
After creating a new Single Event Registration Tool on the WMT website, you will be automatically directed to the Options page. To go to this page at any time, click Options on the right of the tool in the Tool List.
-
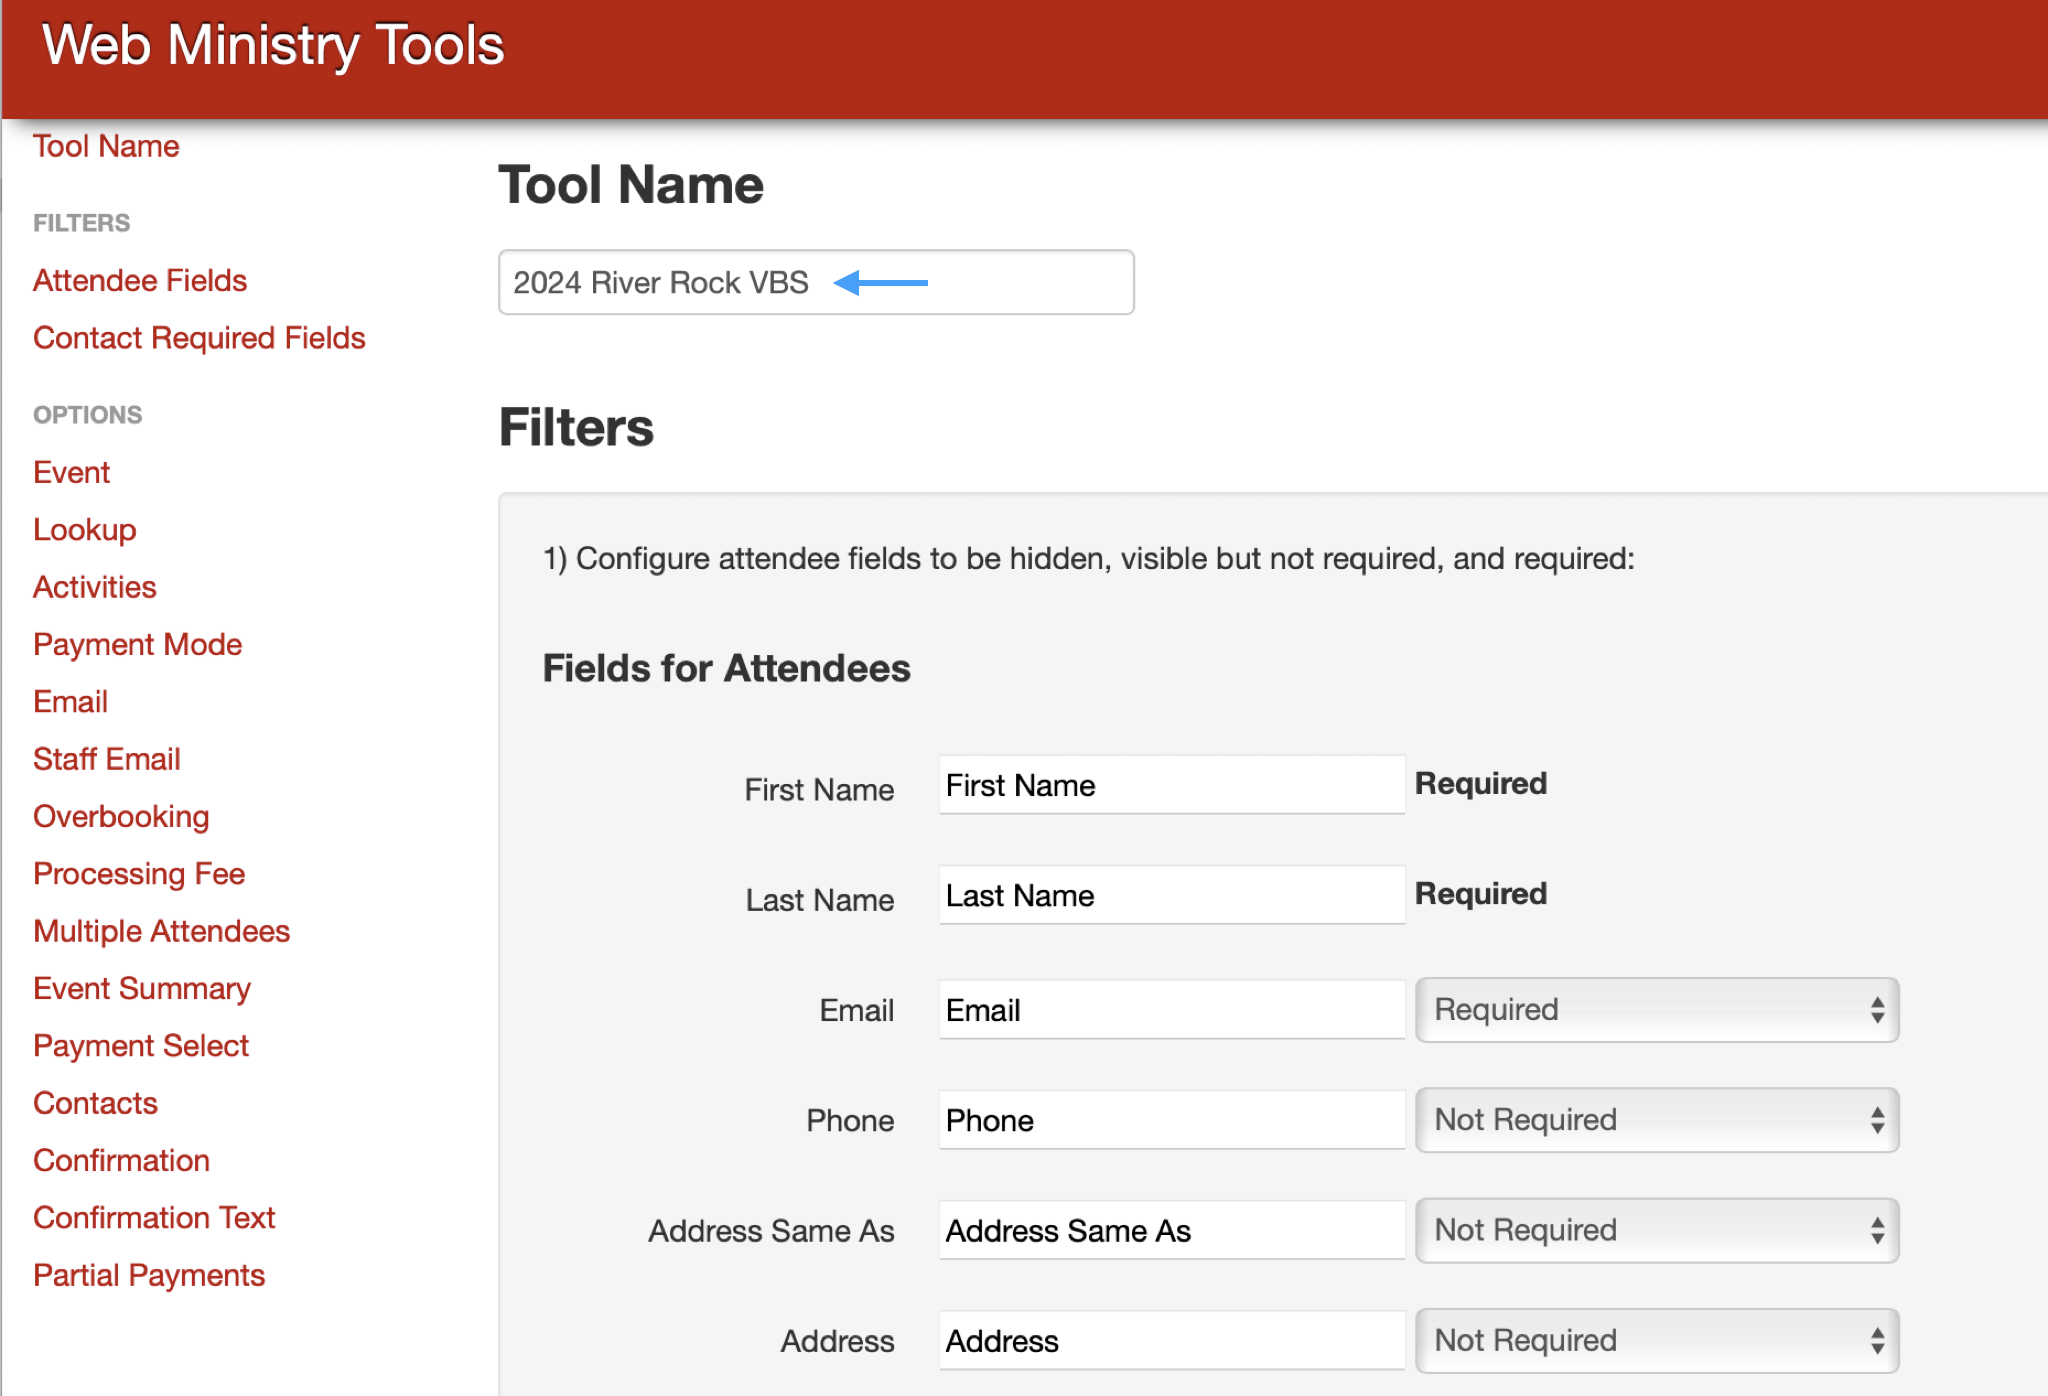
In the first section under Tool Name, give your tool a name that easily identifies it in the Tools List on the Web Ministry Tools website. This is not a name that people registering for the event will see.
-
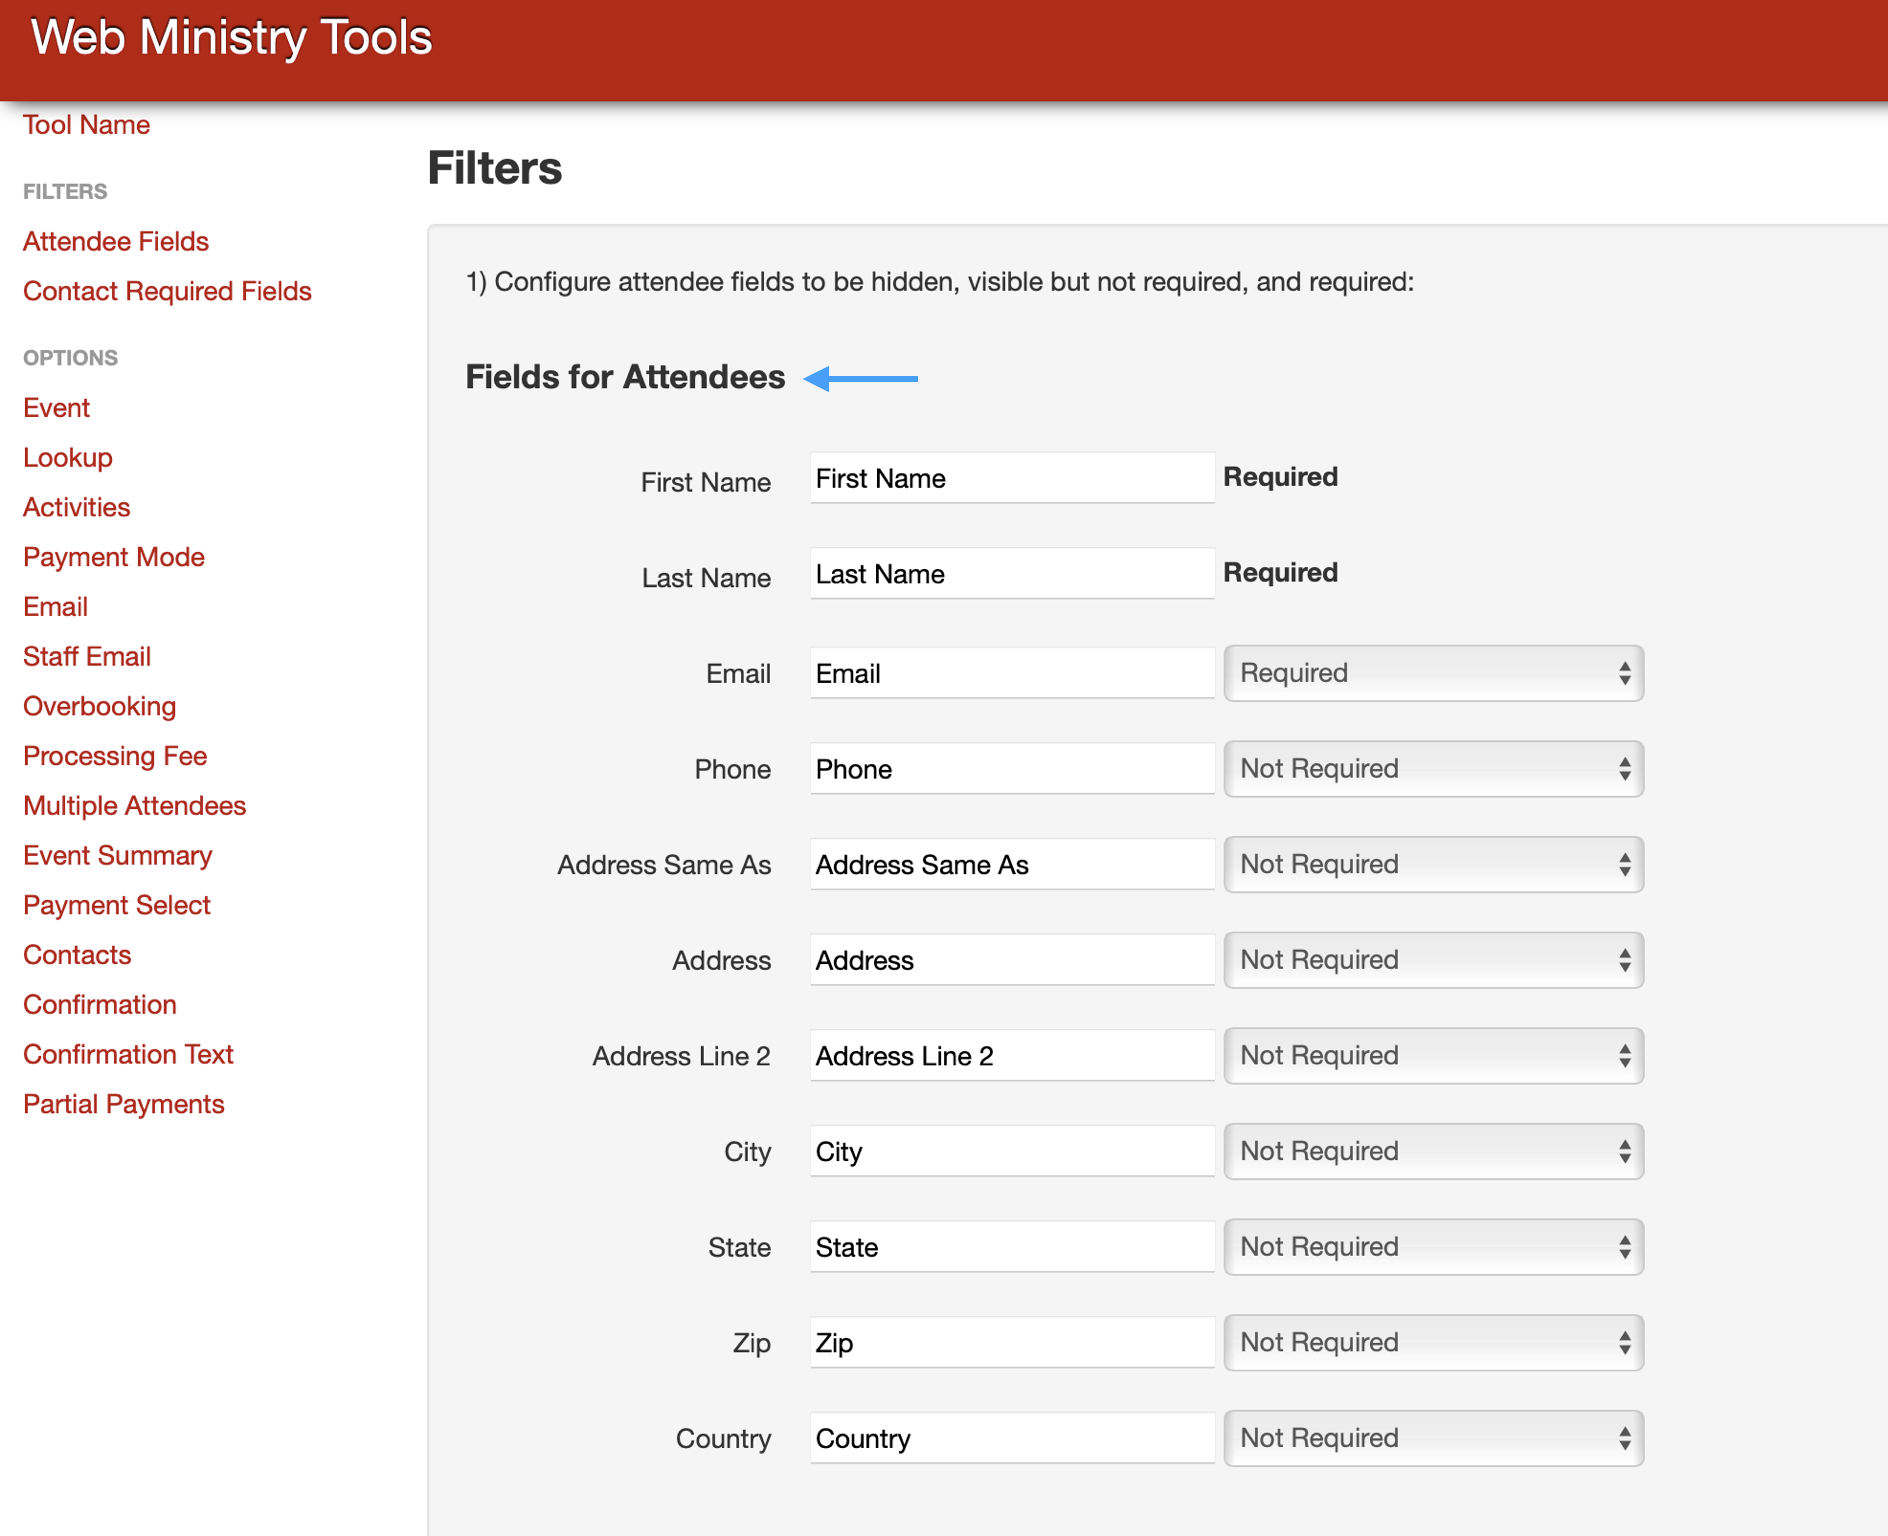
Next, under the Filters section, you can determine what information you want to gather from each attendee. The First Name and Last Name fields on the Attendees window will automatically be required.
For the remaining fields on the Attendees and Contacts windows, you have three options:-
Required: The field will be marked with an asterisk (*) and must be completed before the registrant can move on to the next step.
-
Not Required: The field will display, but completing it is optional.
-
Hidden: The field will not display on the window. Marking unnecessary fields as hidden will make the online registration process quicker and provide a better experience for your registrants.
-
For events that are marked as a Camp/Youth Event in CDM+ Event Registration you will see another filter for a Contact’s information. The First Name and Last Name fields for a contact will automatically be required. You can then choose what other information you want to gather and require.
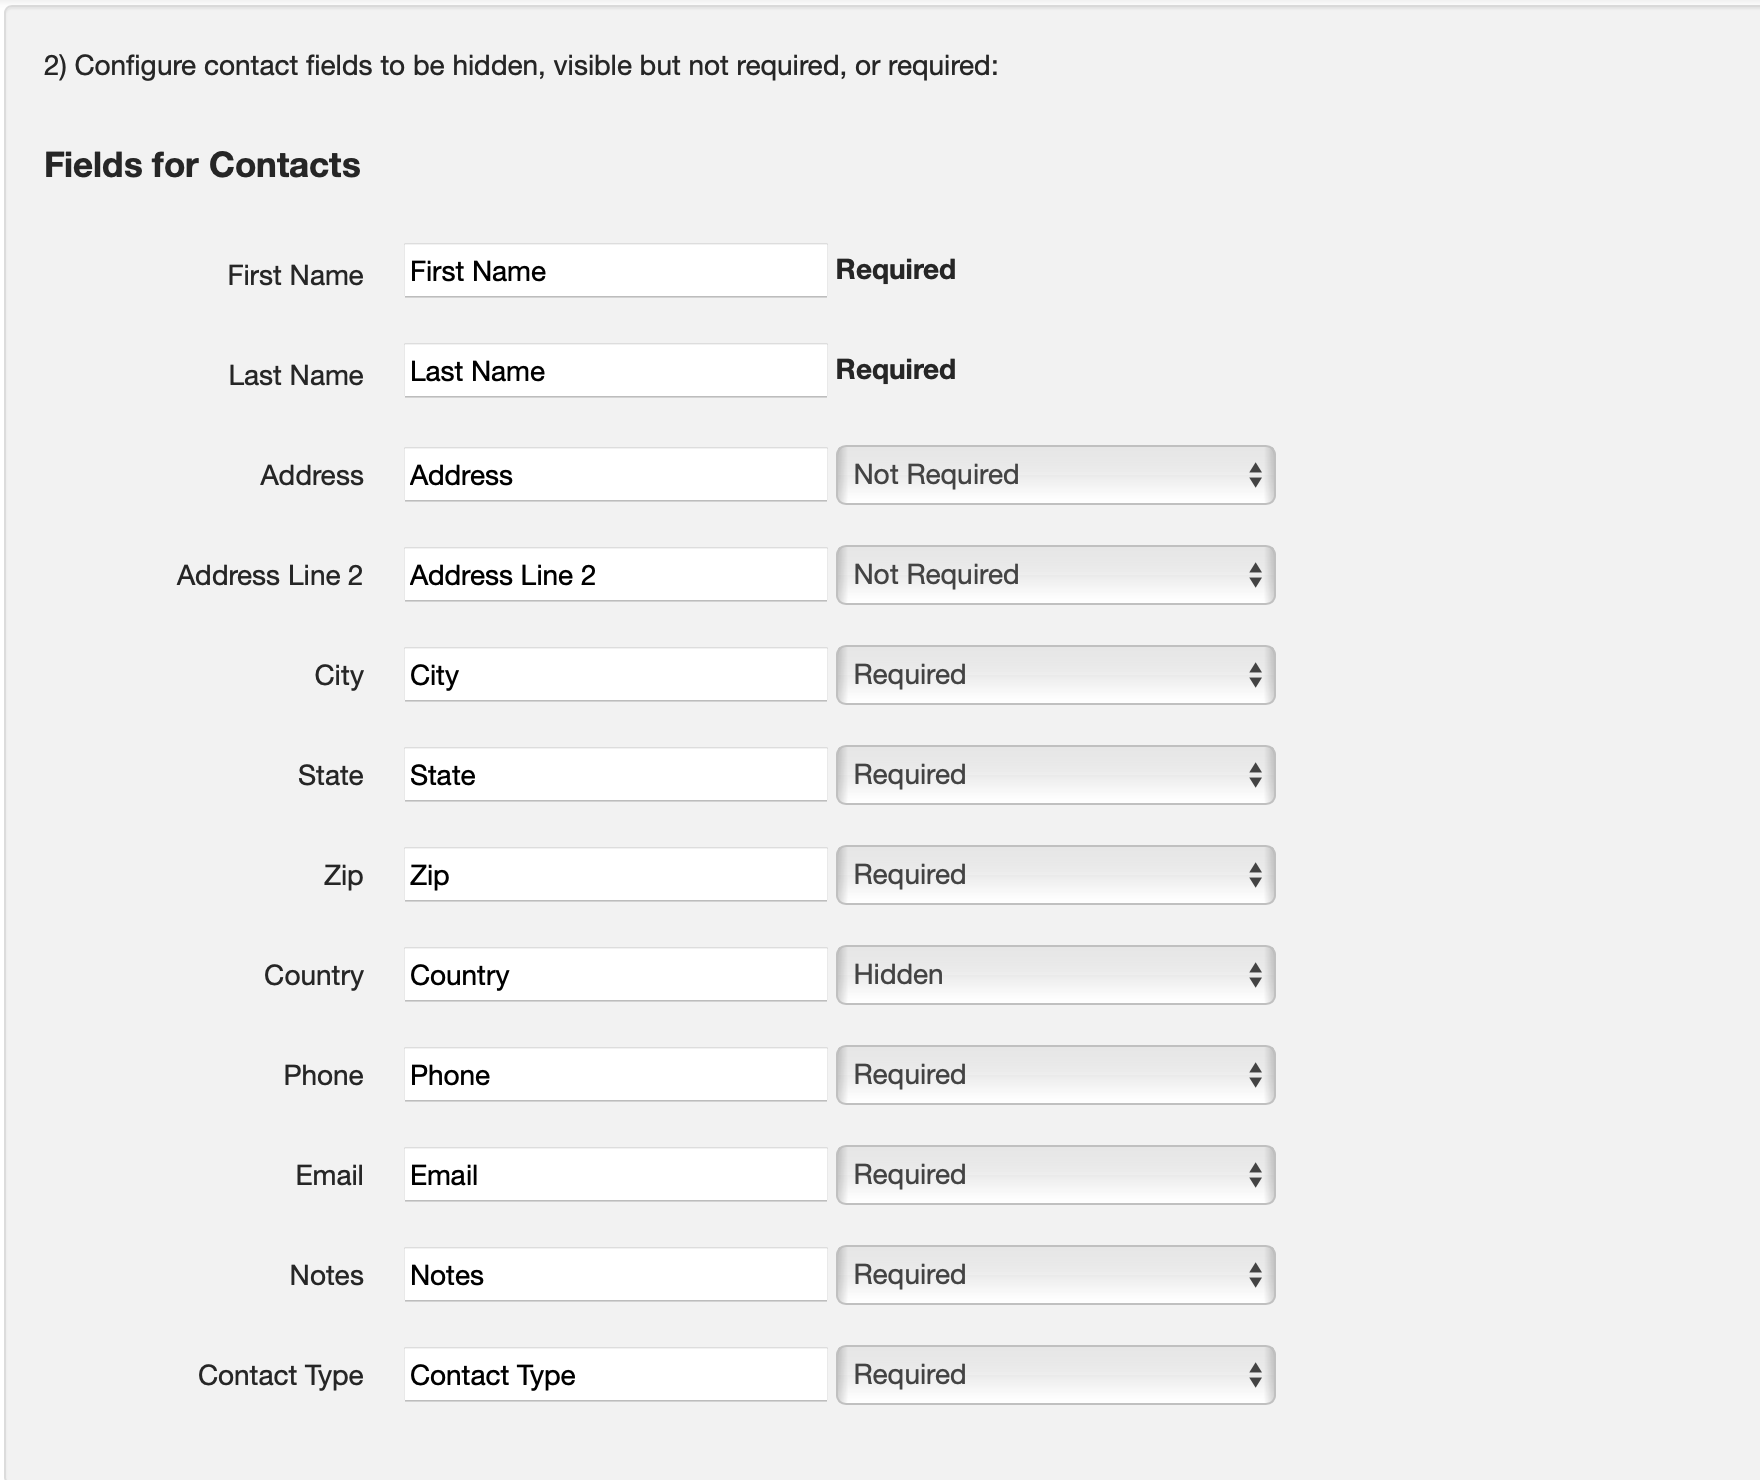
CDM+ Regional program users only have the option of showing a church selection drop list of all churches marked as "Congregation" in their CDM+ Regional Church Records.
Field labels can be changed in the tool's Designer.
-
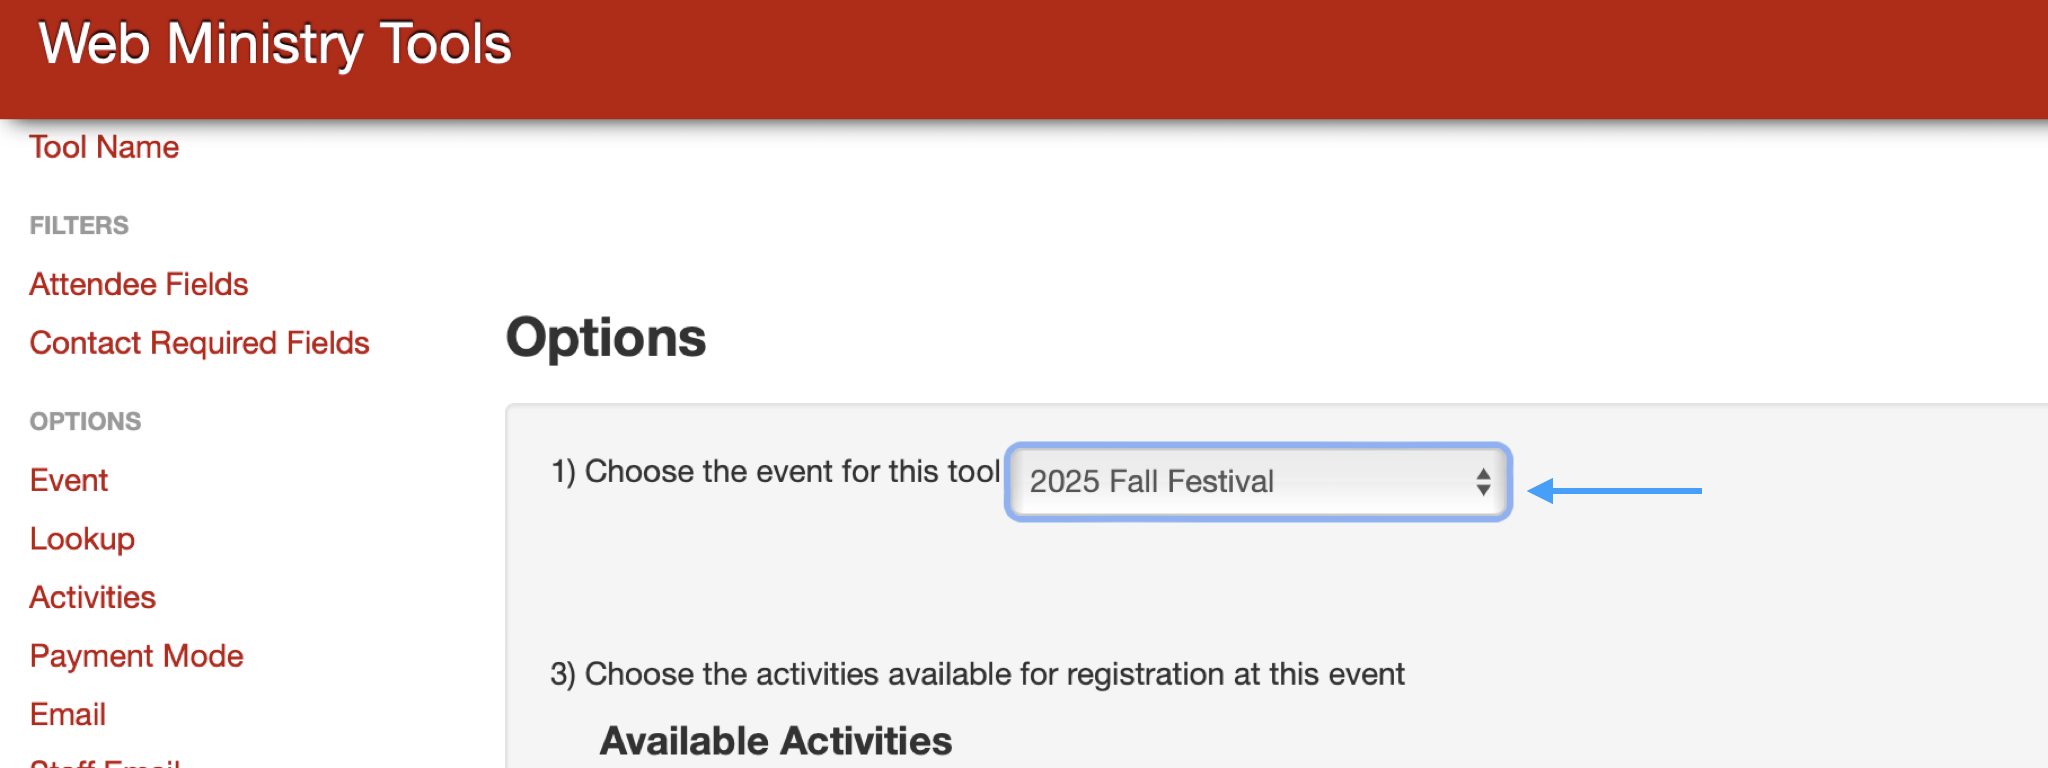
Then, choose the event for which you would like this tool to register participants by selecting an event from the drop-down menu. The events listed here come directly from your Event Records in CDM+ Event Registration.
-
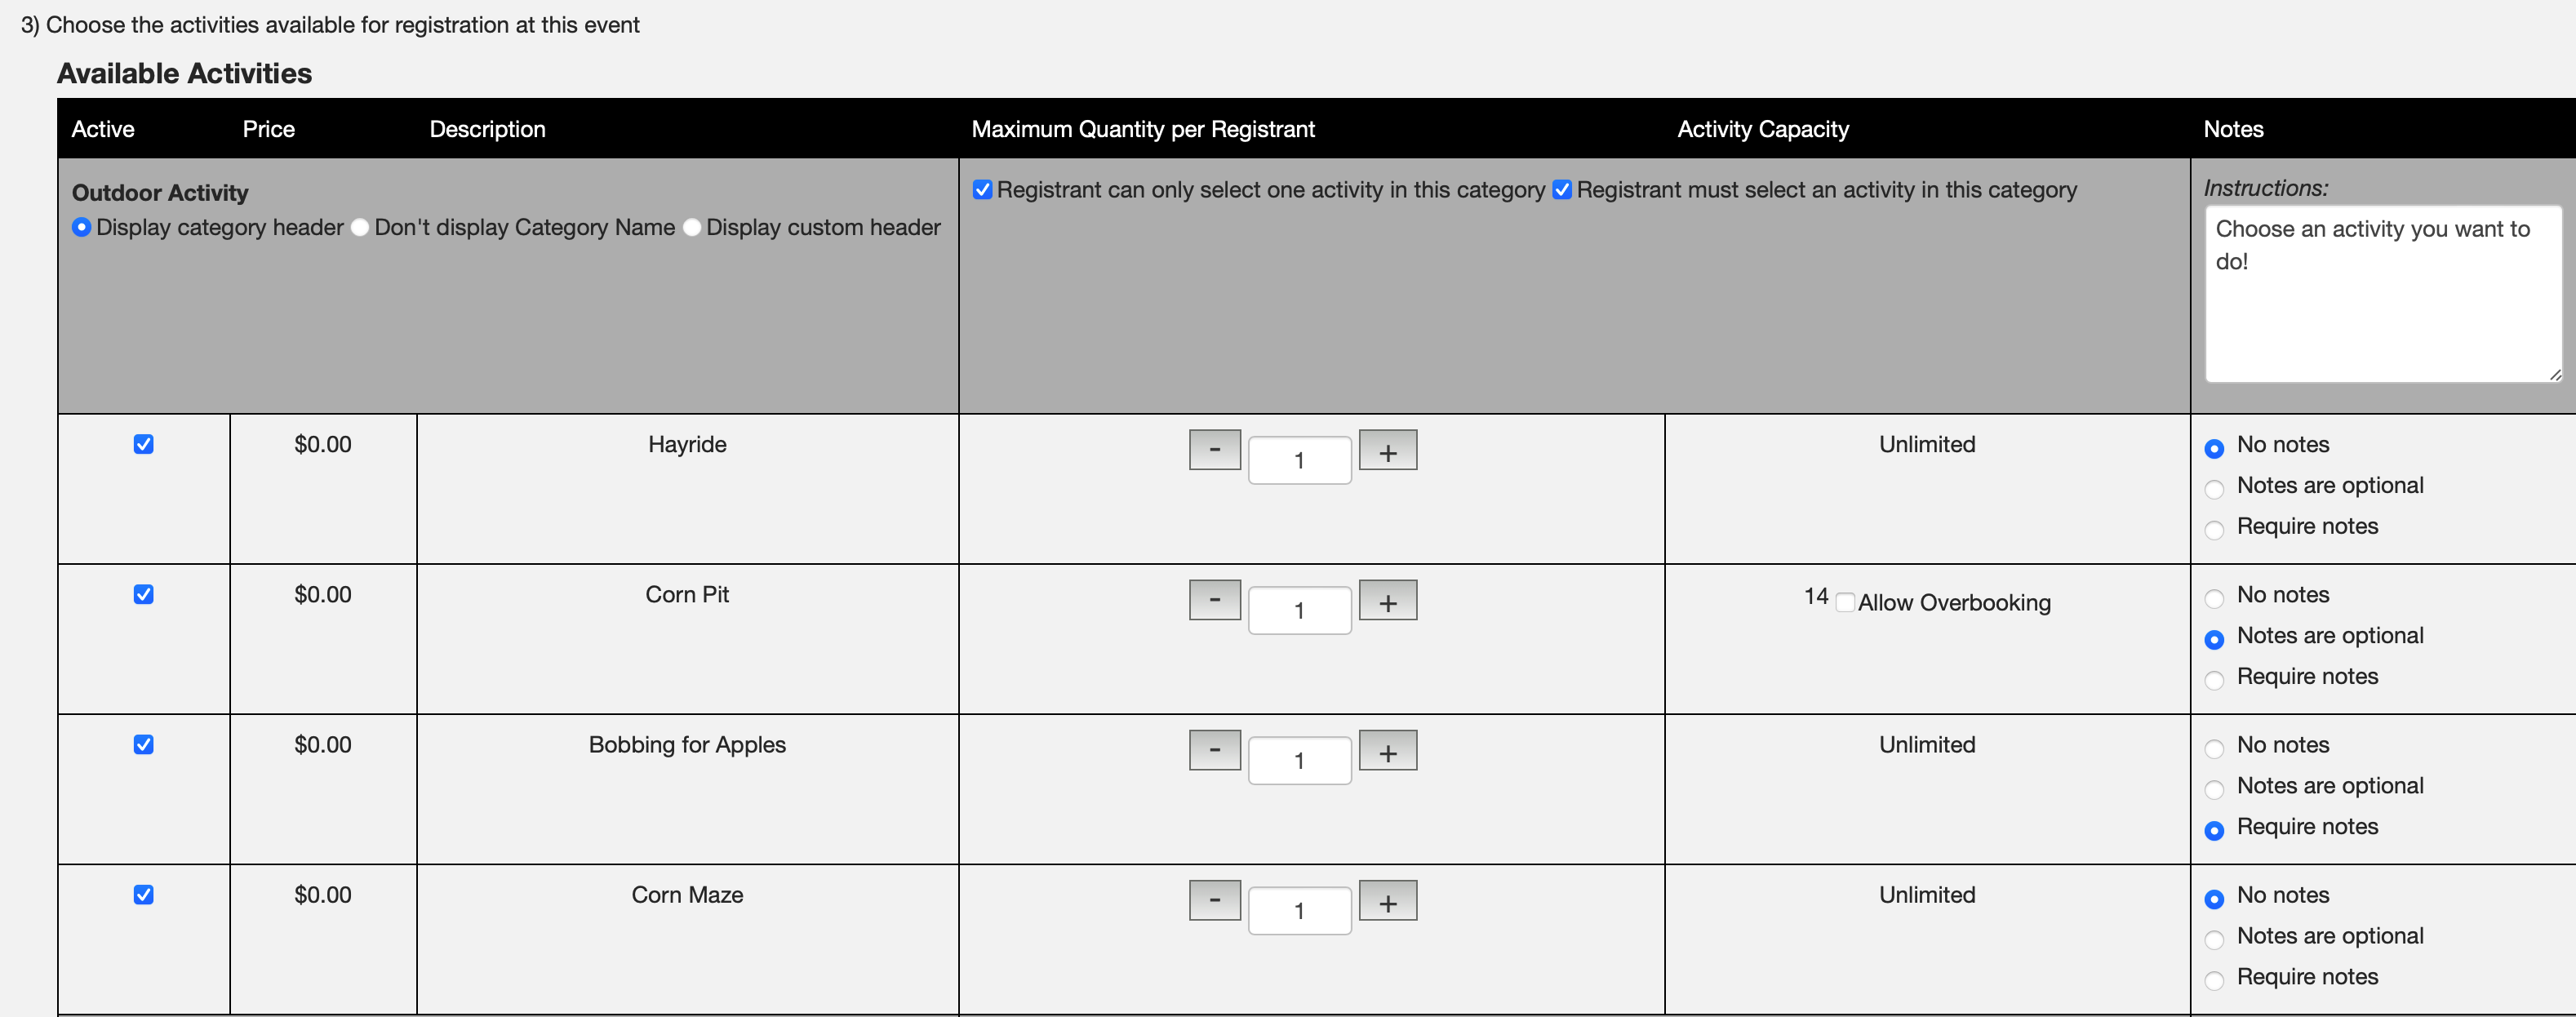
Next, choose the activities available for registration. The activities are arranged in a table, with each activity on one line.
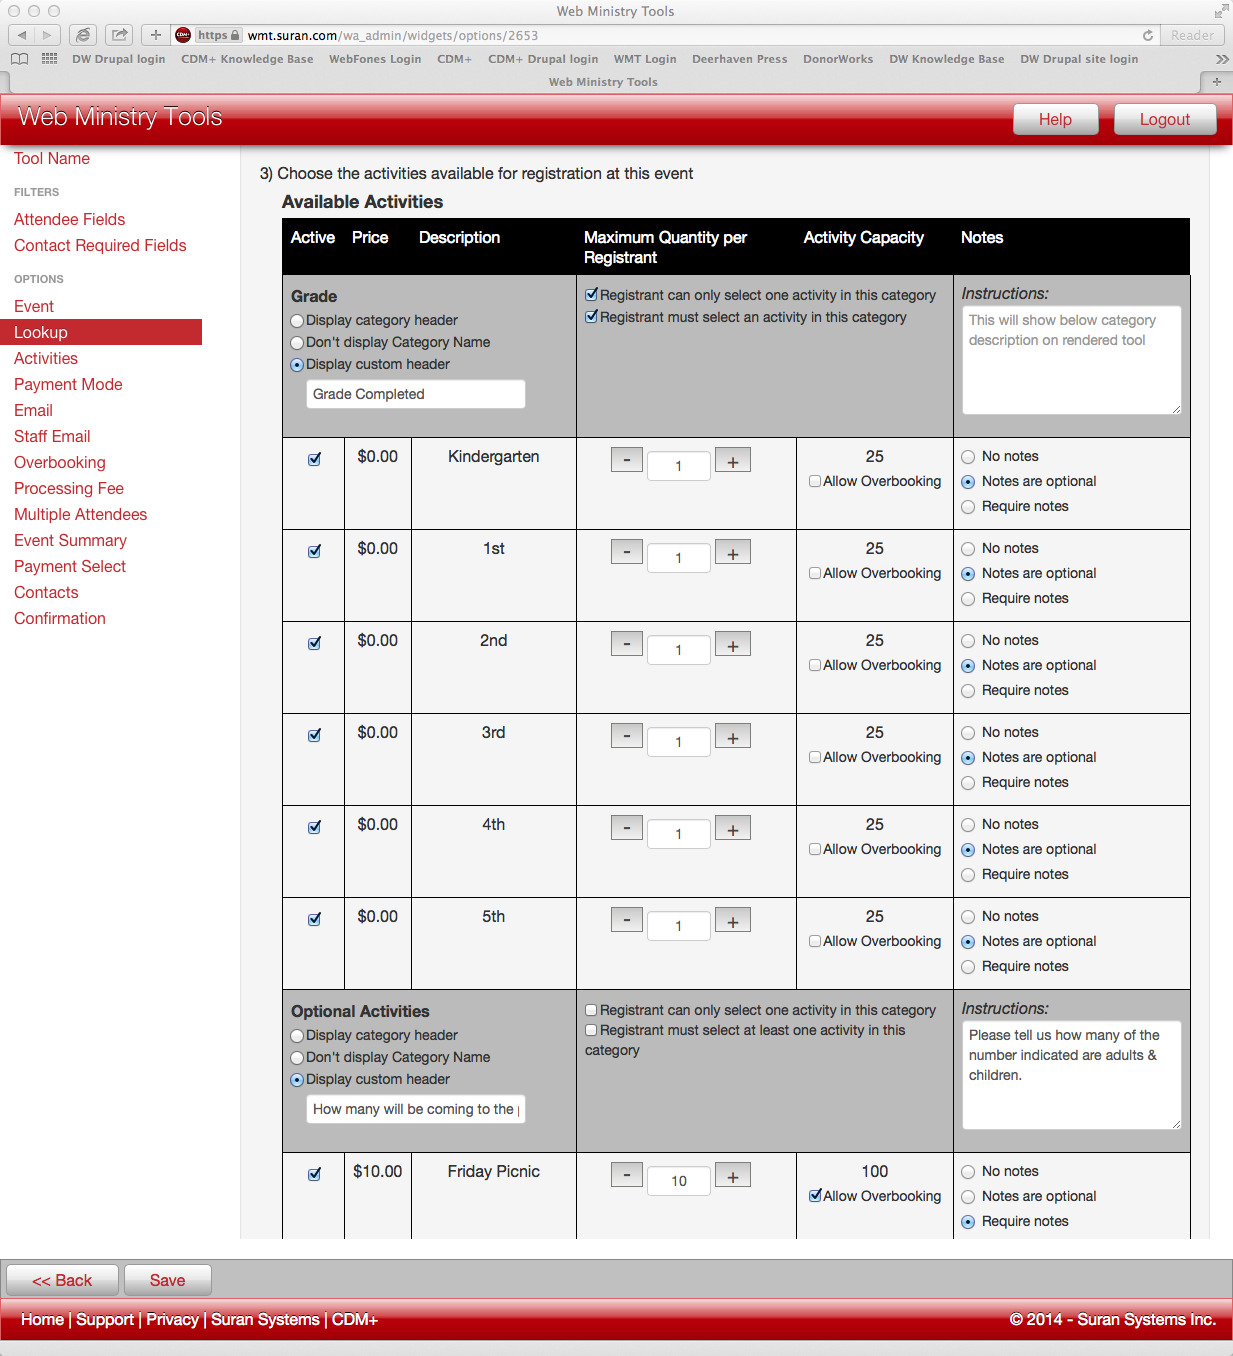
Only the activities with the checkbox checked in the Active column will be visible to the registrant. This allows you to add all your activities at once in CDM+ but then make them visible or not visible depending on the circumstance. For instance, you may have an activity with an Early Bird special. You can make this activity visible during the Early Bird special time frame and then uncheck it when you no longer want it to show. Another example would be if an activity is full and you no longer want to make that option visible to registrants, or if an activity was added for internal purposes only.
-
When adding an activity in CDM+, you can assign it a category. These categories allow you to group activities together in Web Ministry Tools.
For each category, you have three heading options:
-
Display category header: This option will simply show the Category name as it is defined in the CDM+ Master Coding System in a heading above the activities in this category.
-
Don't display Category Name: Choosing this option will result in just a list of available activities with no heading.
-
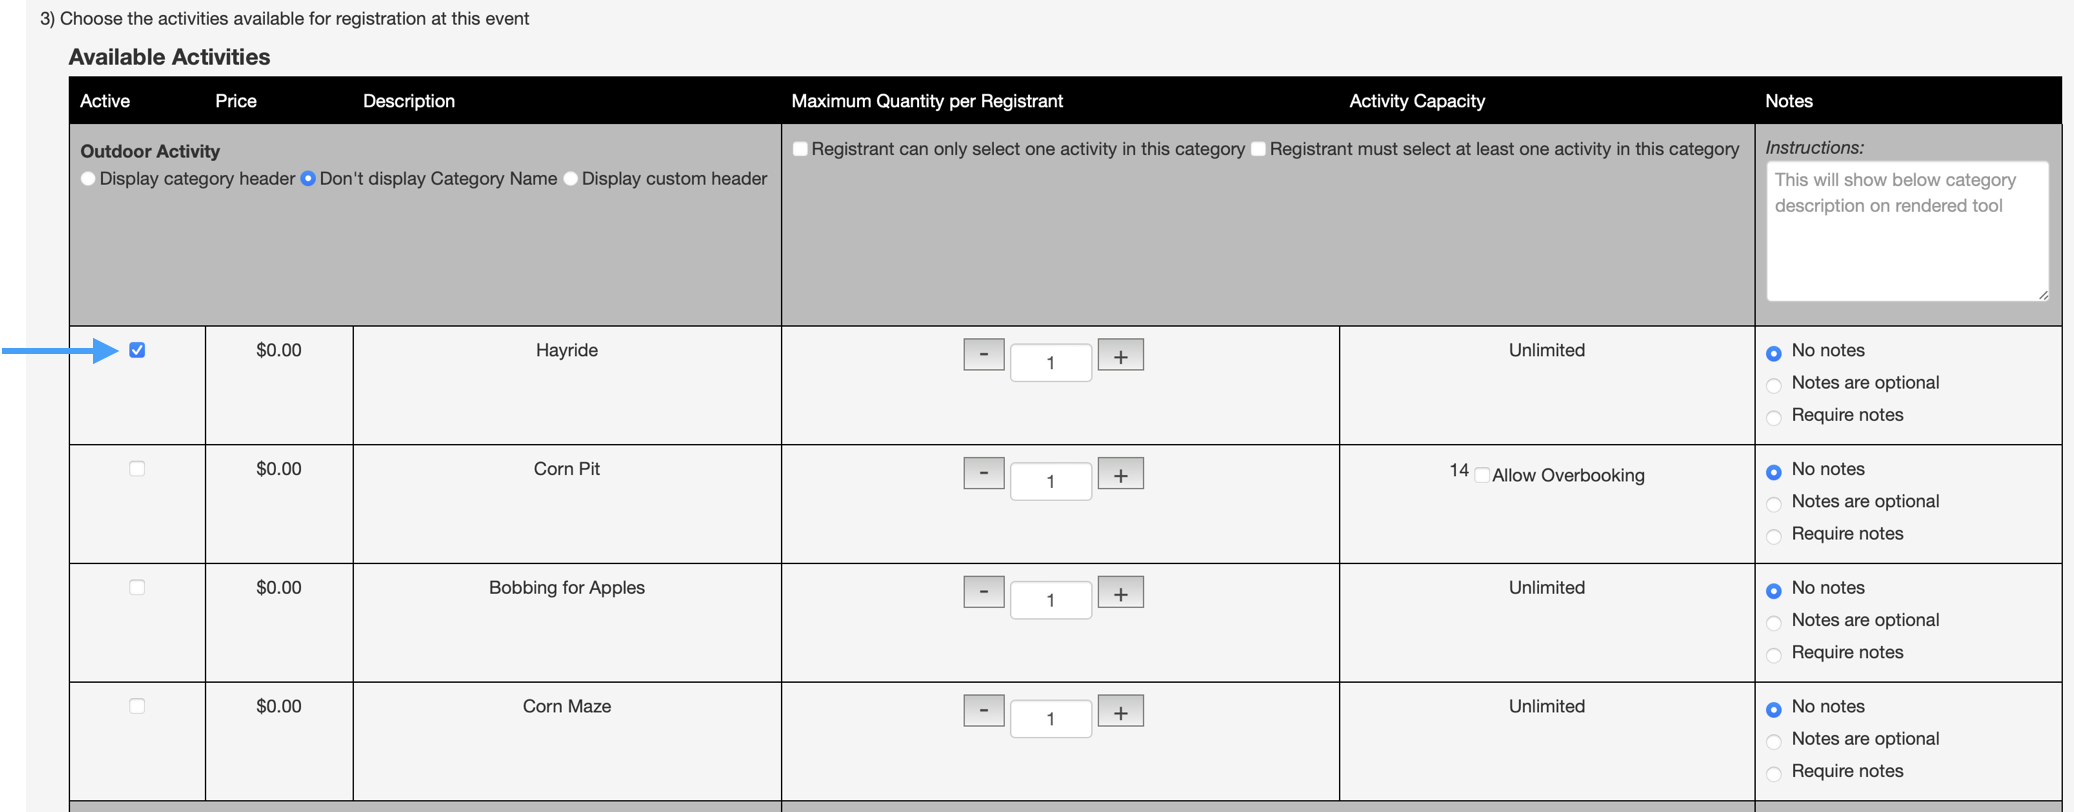
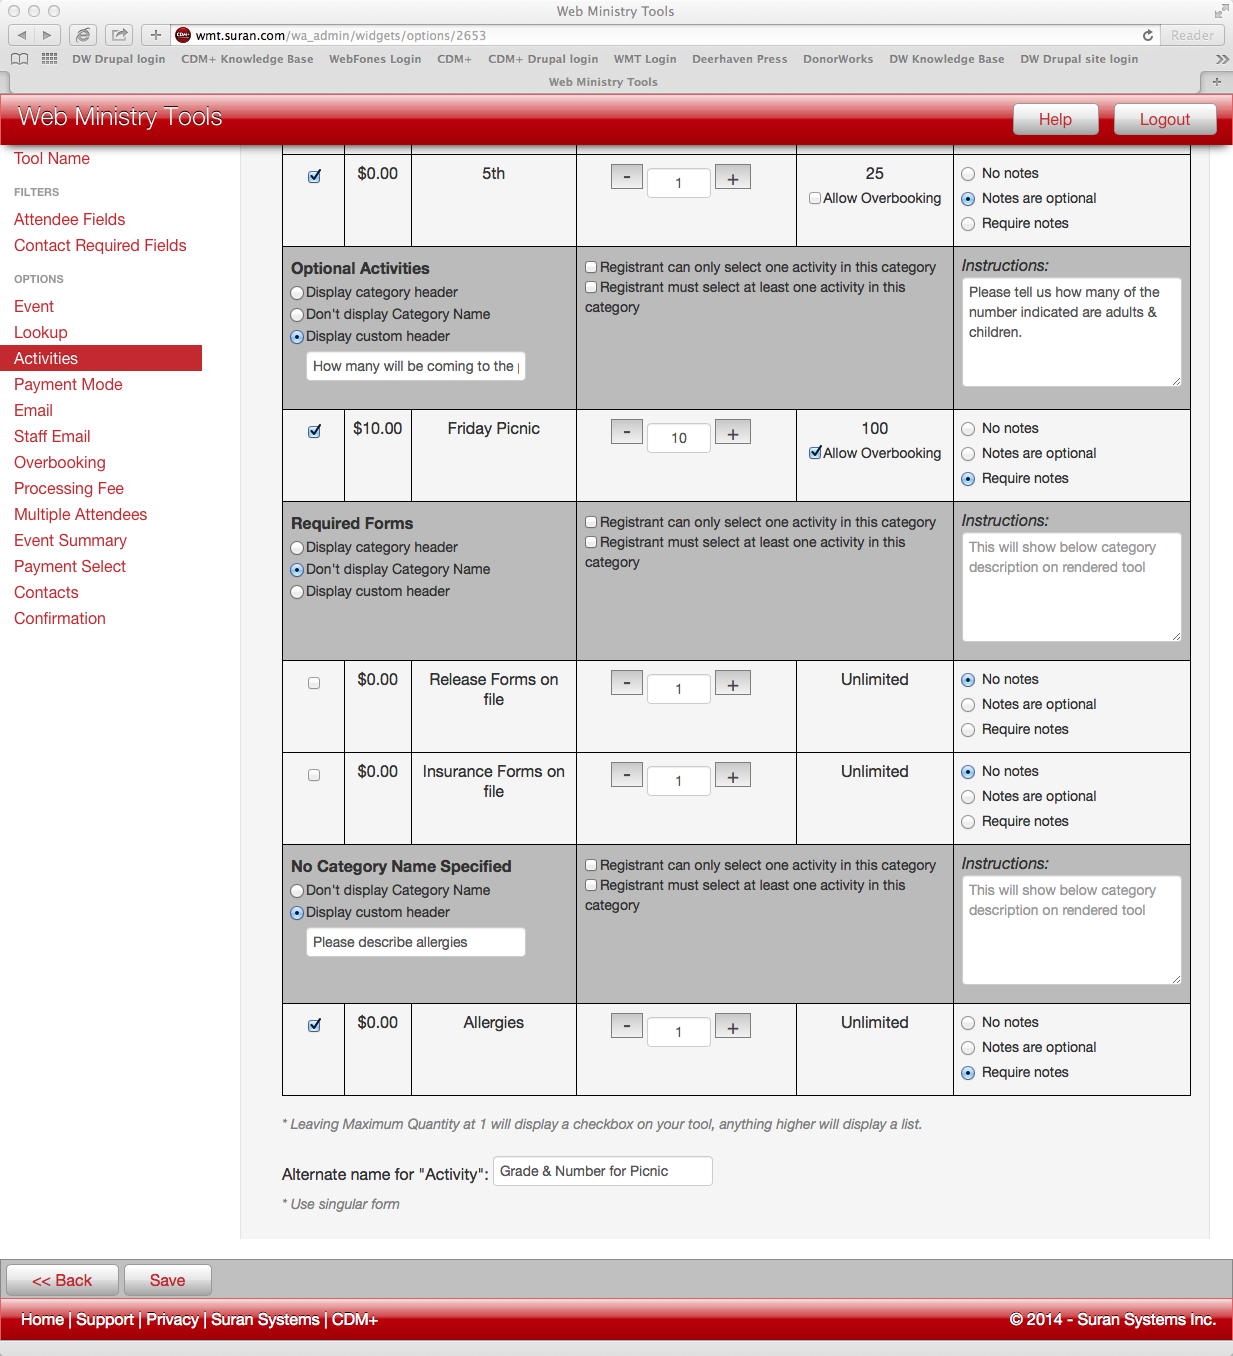
Display custom headers: This option allows you to enter alternate text to display in the header for a category of activities. In the example below, the header will read How many will be coming to the picnic? for the Friday Picnic activity instead of the category Optional Activities.
For each category, you may choose to limit a registrant's choice to one activity and/or force registrants to choose at least one activity. If you do not check, Registrant must select at least one activity in the category, although they would be registered for the event, a person could click through the Activities window in your tool without registering for an activity. Checking both boxes will force registrants to choose one, and only one, activity in the category.
To include instructions for the category, simply type them in the box below Instructions. The text you enter will appear below the category header on the Activities page of your registration tool.
-
In the Maximum Quantity per Registrant column, you can increase/decrease the number of each activity or item each registrant may purchase or enroll in. For example, you might allow each registrant to buy up to 5 T-shirts, but they may only purchase one set of books/materials. Use the + and - buttons in this column to adjust the quantities for each activity. Putting a 1 in this field will display a checkbox for the activity. Entering any higher number will cause the tool to display a drop list from which the registrant can choose a number.
-
Next, you have the capacity/overbooking column. Here, you can opt to allow overbooking for an activity that has a specified capacity by placing a check in the box. If an activity does not have a set capacity, this column will say "Unlimited Capacity." Changes to capacities are made in CDM+ Event Registration; this column only allows you to opt for overbooking for each activity.
-
The Notes column allows you to indicate whether you wish to allow users to enter notes for an activity. Activity note boxes have no character limitations and are browser expandable. Notes entered here will be included on the confirmation page and in the staff notification.
-
Finally, you can choose to have your tool display an alternate name for the Activities that you set up on the CDM+ Event Record. For example, if all the activities of an event are classes, you could enter Class.
-
To accept payments for this tool, put a check in the checkbox for Accept payments for electronic payment.

-
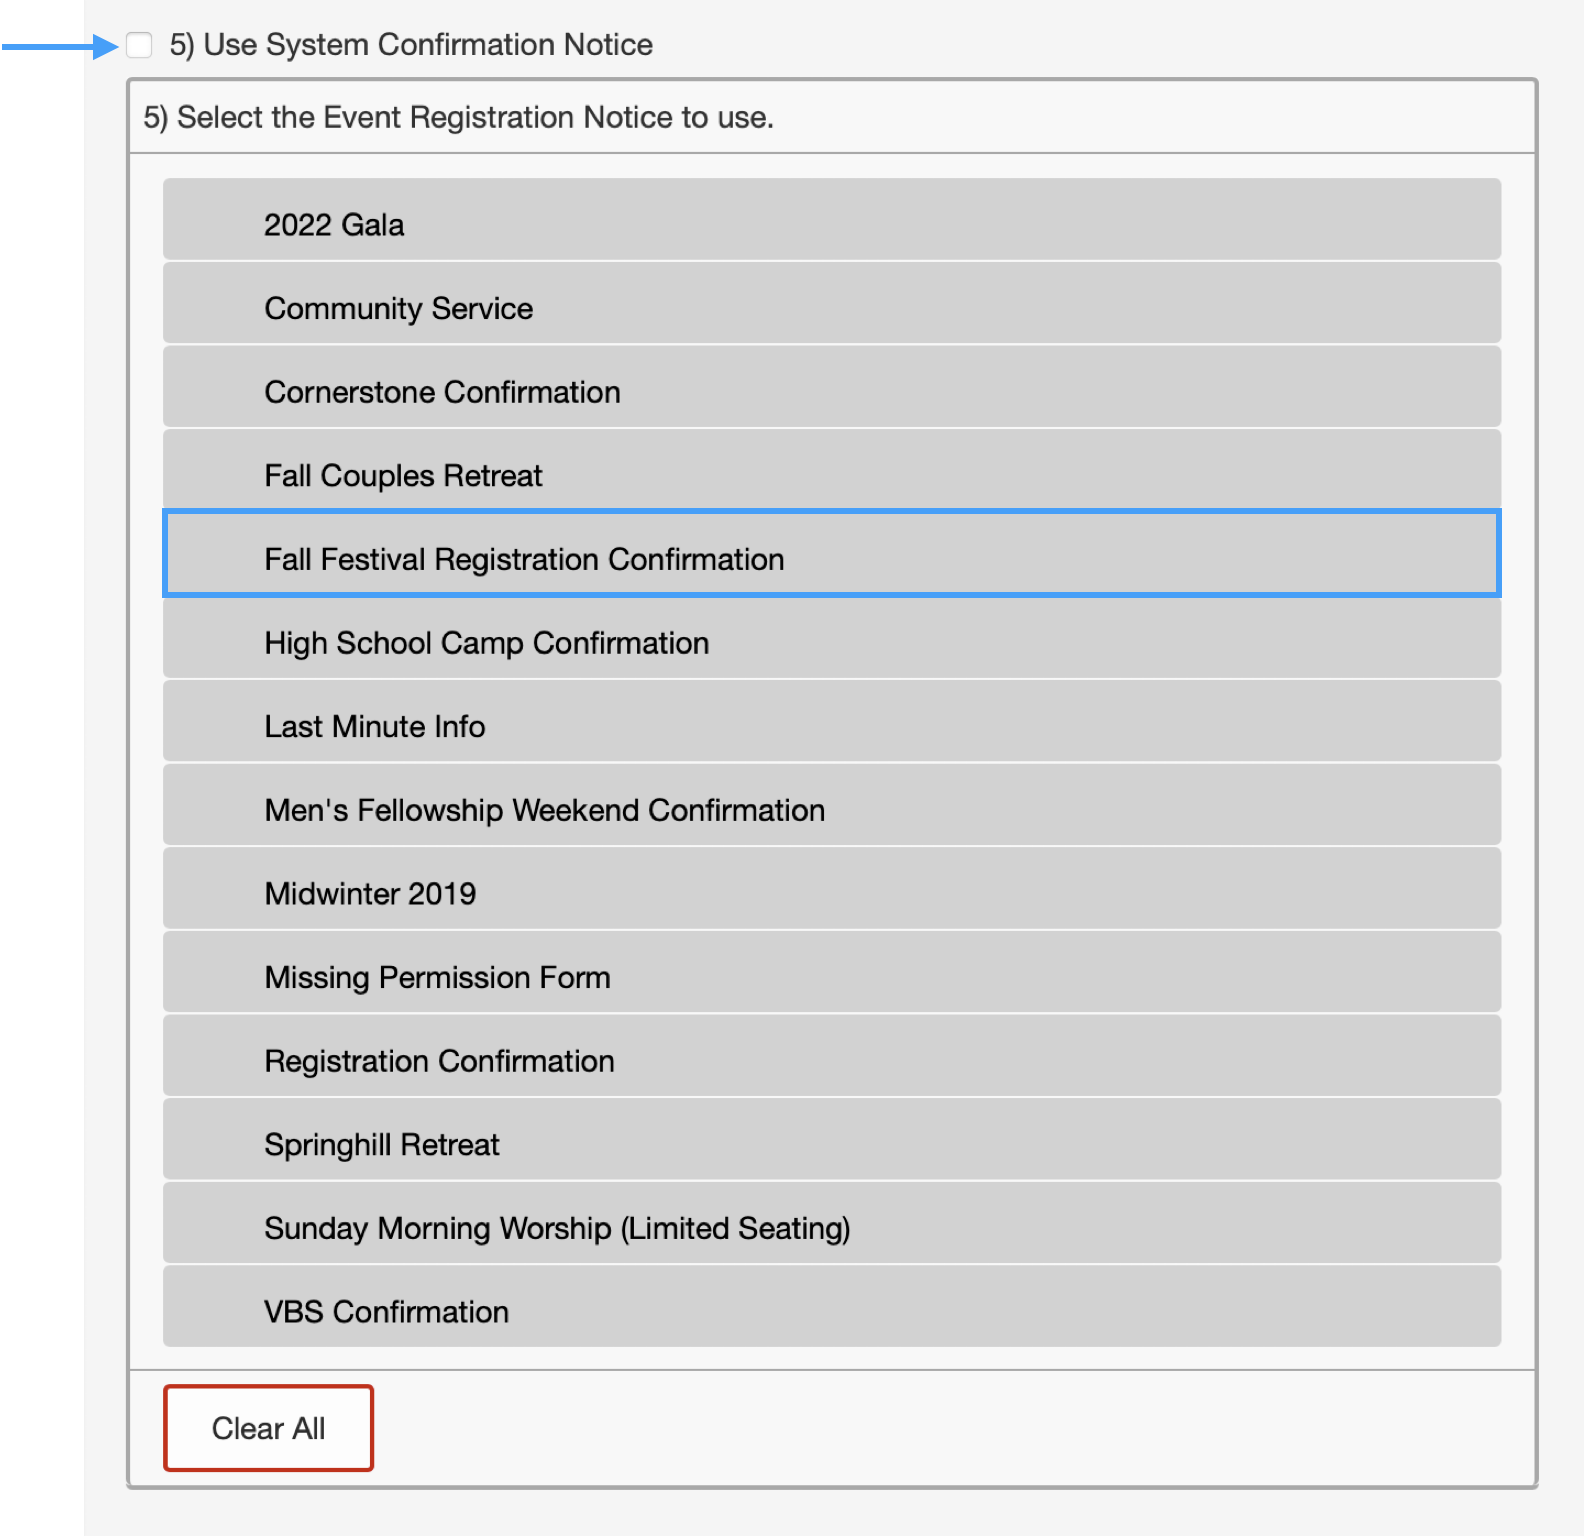
You can choose to use the System Confirmation Notice by checking the checkbox on step #5 or use an Event Notice that you have created by selecting the notice you want to use. If you don’t want to send a confirmation notice, keep the box unchecked and don’t select a notice to choose.
-
Opt to send registration notifications to staff by entering email addresses in the space provided. Separate addresses with commas only, no spaces. An e-mail will be sent to each staff person with an address in this field each time someone registers for the event.

-
Opt to allow overbooking for the event. Check the box if you would like to allow overbooking for the entire event. If not, make sure the box is empty. If the event has been set up in CDM+ with unlimited capacity, there will not be a box to check.

You can opt whether or not to allow overbooking for specific activities on the activities table.
-
If you elect to charge a processing fee per credit card transaction, enter the amount. If you do not wish to charge a fee to the registrants, enter an amount of 0.00.

Please note that the transaction fee added is a flat single rate for the entire transaction. So if you add a $5.00 processing fee, $5.00 would be added to the total regardless of if 1 or 10+ people are being registered.
-
Choose whether users may register multiple attendees in the same session. Select your preferred option by clicking the circle to put a dot in it. Allowing users to register multiple attendees also allows them to pay for all the registrants on one transaction. When entering multiple attendees, the user may also indicate that an attendee has the same address as a previously entered attendee.

-
Choose whether the tool should show the Event Summary Page. This page appears first in the sequence and provides event details prior to starting the registration process. Again, click the circle to select the desired option.

-
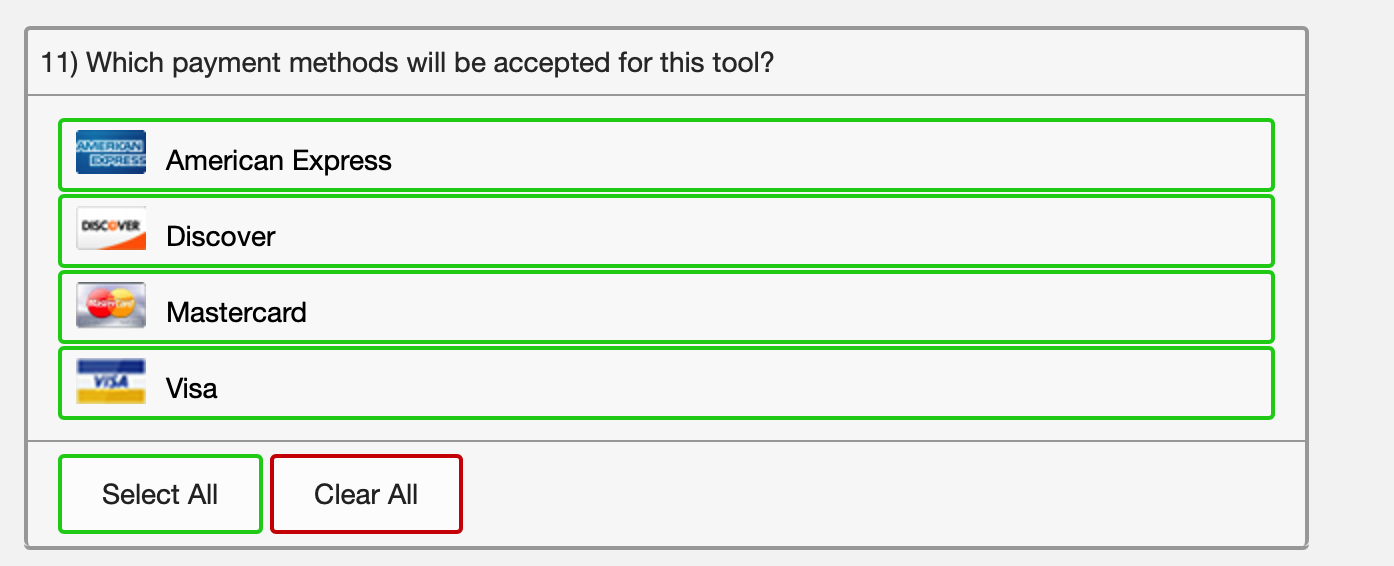
If you elected to receive electronic payments, you can now choose the payment types for this tool. You may opt to only accept certain types of credit cards or ACH debiting of Checking and/or Savings bank accounts.
-
For tools linked to events designated in CDM+ Event Registration as Youth/Camp events only, you have several options for users to enter contacts. First of all, you choose whether to show the Contacts Page at all. If you do choose to show it, you can set the tool to require 0, 1, or 2 contacts.

-
Choose whether or not to show the Confirmation Page. If you elect to show it, choose whether or not to require the registrant to check the box for Electronic Signature.

-
Choose whether to allow Partial Payment. If you allow partial payment, you must specify a minimum payment amount. To require payment in full, choose the Disable Partial Payment radio button.

-
Click Save when finished.
