
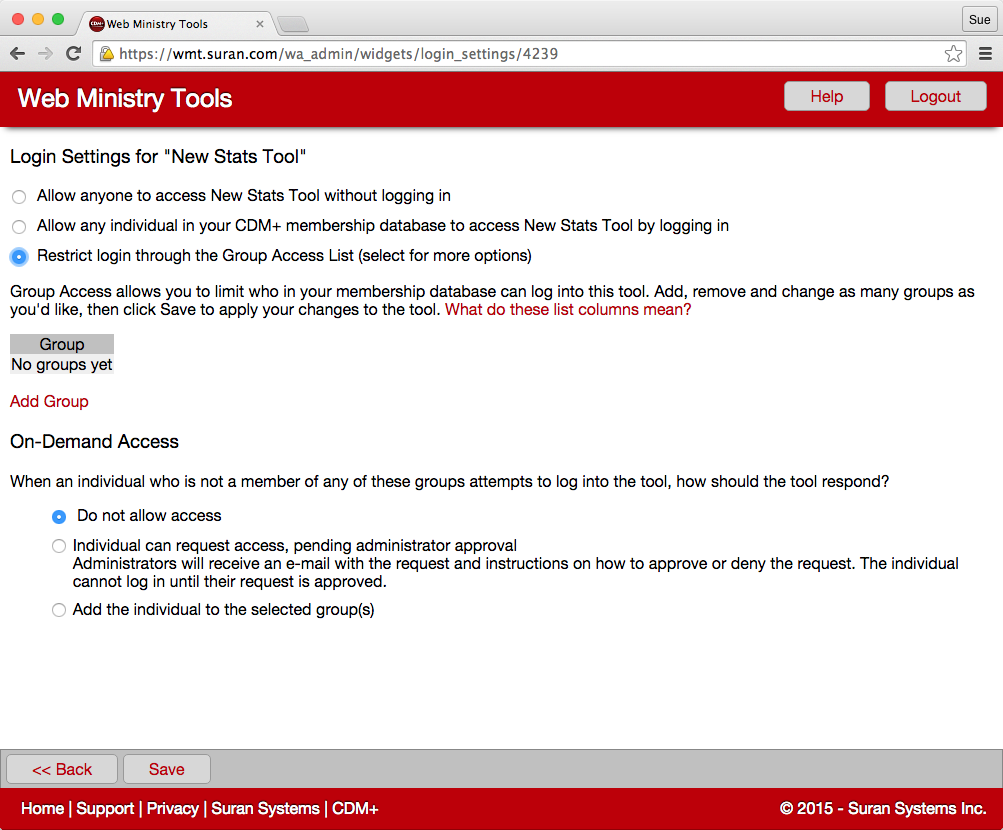
Group Access allows you to limit who in your CDM+ Membership database can log into a tool with Restricted Login Settings. You must have Option 3 Restrict login through Group Access List selected in order to see the options below.
Adding and Selecting Groups
Start by clicking the Add Group button. Then choose the Group Type and Group Code from the drop-down menus. To select multiple groups, click the Add Group button again and another table row will appear.
Click the Remove button at the end of a row to deselect only that group. If you change your mind and have not saved your changes since clicking the Remove button, you can click the Cancel button (which took the place of the Remove button on the row) to restore the group row.
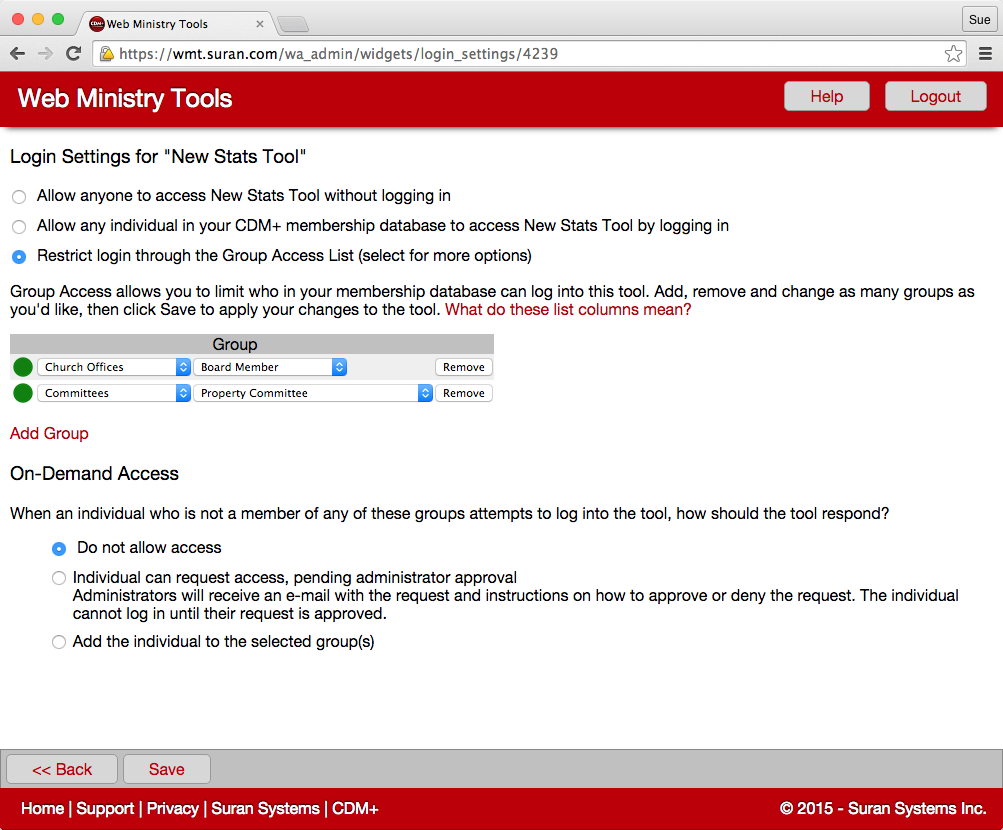
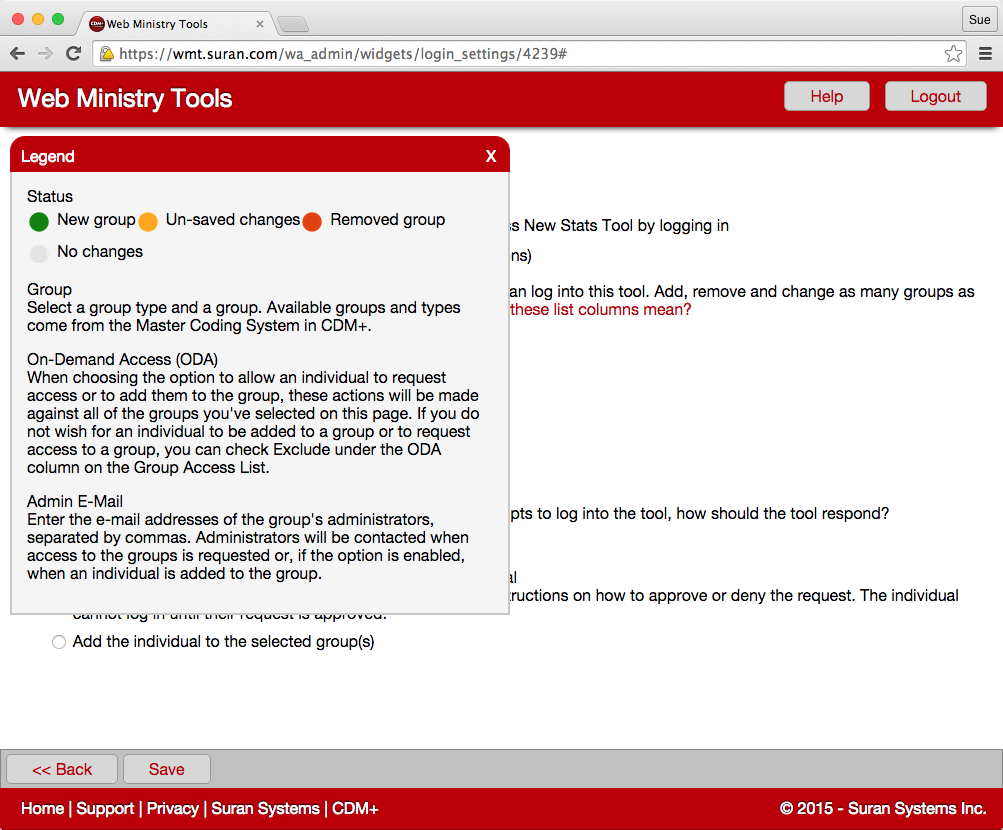
The colored circles at the beginning of each row will help you to keep track of your changes to this section.
-
Green = New Group
-
Yellow = Unsaved Changes
-
Red = Removed Group
-
Gray = No Changes
You can also view this legend by clicking "What do these list columns mean" above the group table.
Individuals can access a tool if they are in any of the groups selected. They do not have to be in all of them.
The available Group Types and Group Codes come from the Master Coding System in CDM+.
On-Demand Access
When using Group Access Lists to restrict tool login, you also need to tell the tool what to do when someone who is not in any of the selected groups tries to access the tool.
You have three options:
-
Do not allow access
-
Individual can request access, pending administrator approval
-
Add individual to the selected group(s)
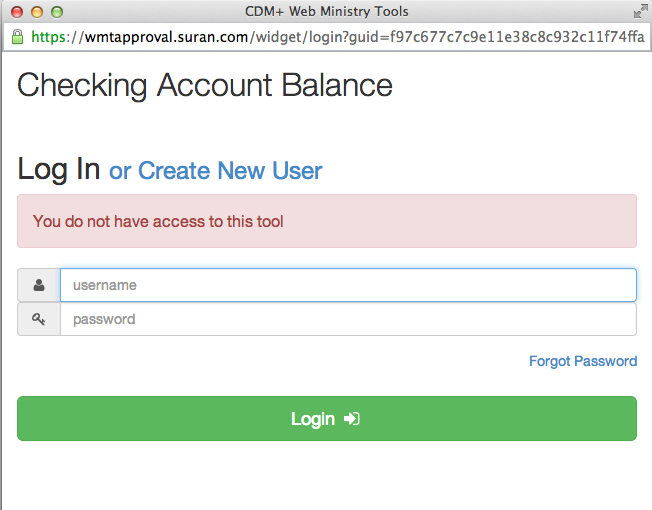
Option 1: Do not allow access
Any individual who is not in any of the selected groups will not be allowed to access the tool. With Option 1 selected, a user not in any of the defined groups would get the following message:
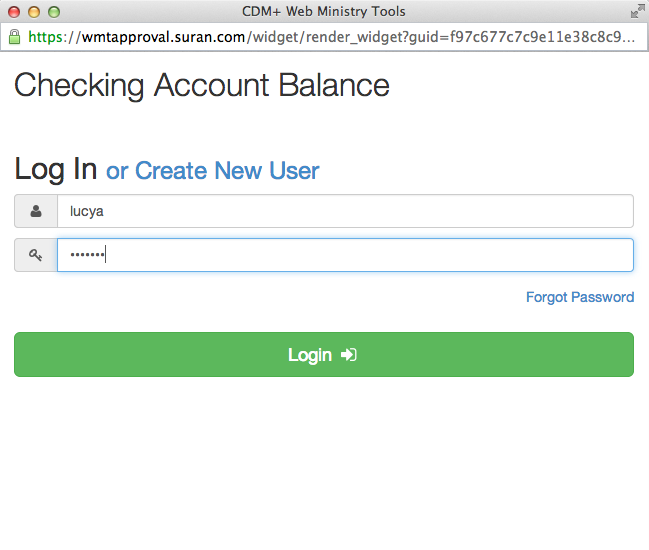
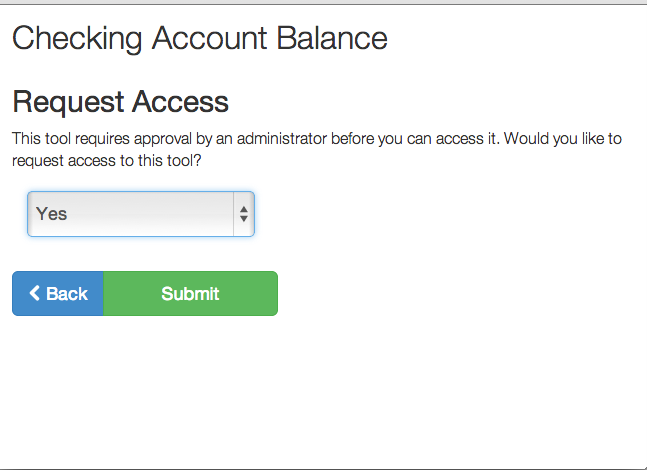
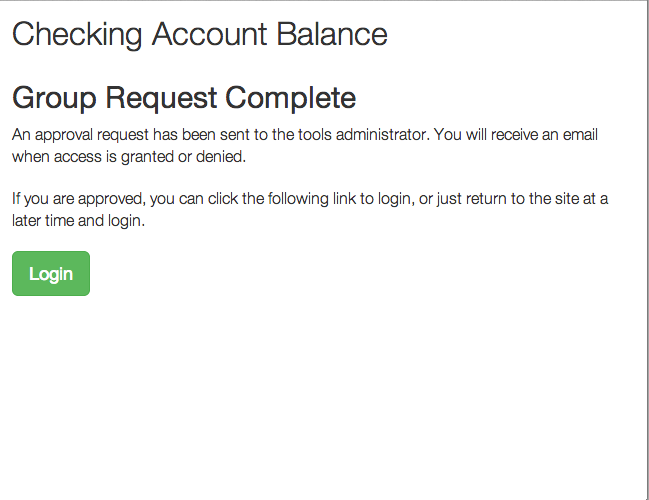
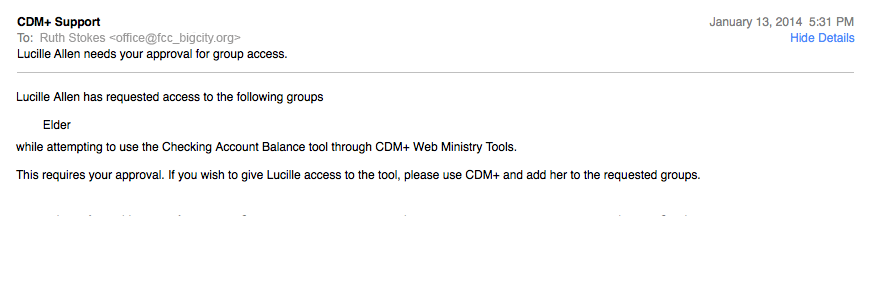
Option 2: Individual can request access
With a few more options, you can set up a process in which individuals can be granted access to the tool on a case-by-case basis. When you select this option, you must also enter at least one administrator email address in the space provided.

The tool will prompt the individual to enter information and an email will be sent to the administrator's email address(es) you entered. This email will include instructions to the administrator to go into CDM+ and add the individual to a group. Once the individual has been added to the group, he or she will be able to access the tool.
Click the image below to view a slide show of this process:
Option 3: Add individual to selected group(s)
Any individual who does not have access to a tool will be given access and be automatically added to one or more of the selected groups.
When you select this option, you must also select the group(s) to which you want the individual to be automatically added. A table will appear when you select this option. Click the checkbox beside a group to select it, thereby indicating that you want the individuals to be added to the group(s).
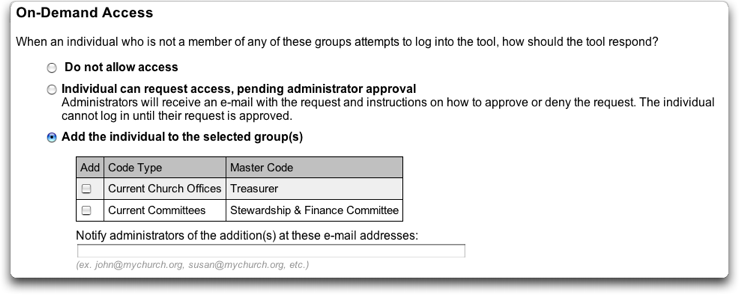
You can also enter administrator email addresses that will be sent notification when a new person is added to the groups and given access to the tool.
The email to the administrator will look like this:
