The Primary Record and Related Records finds use the same interface for building searches. This means that the skills you learn when creating a Primary Record find can also be used when creating Related Records finds.
This section explains the features that the Primary Record and Related Records finds have in common. For information specific to using Related Records, see the Using Related Records section.
Although an Advanced Find can include one Primary Record find and multiple Related Records finds, the following sections use the term find to refer to a single Primary Record find unless otherwise noted.
The Primary Record
A find is made up of one or more search lines and sub-groups.
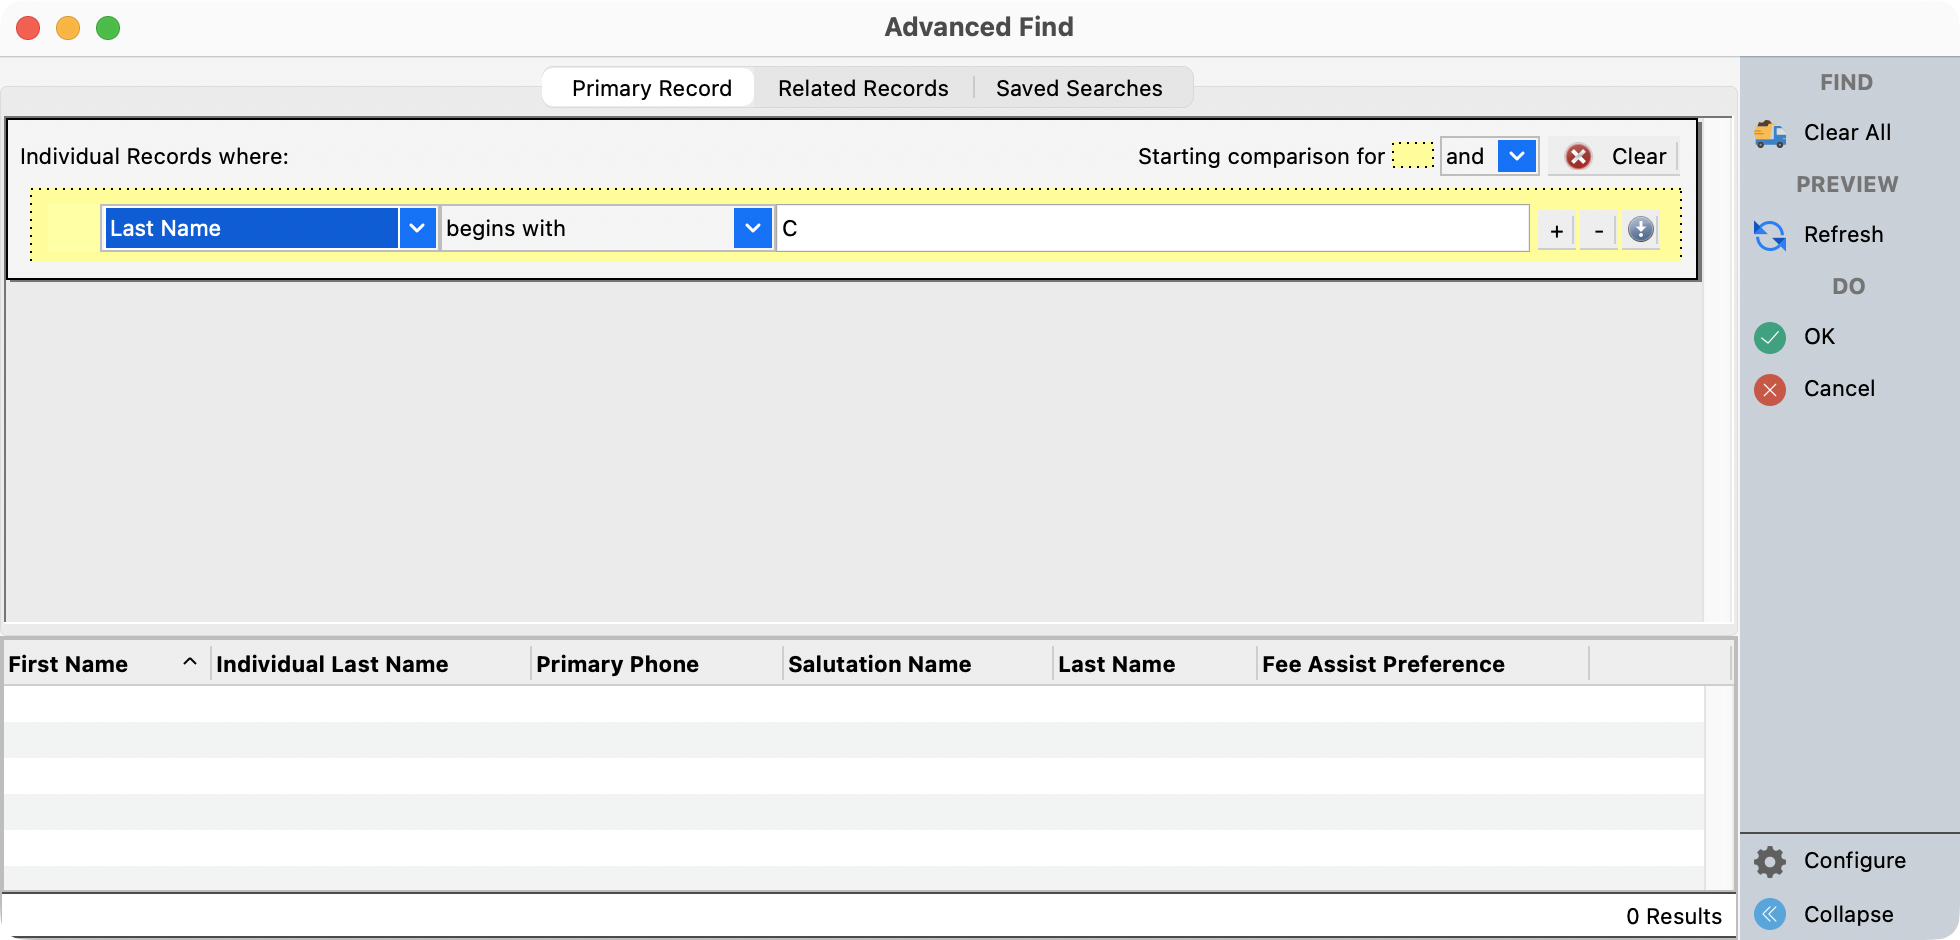
The simplest find contains a single search line. For example:
-
Last Name begins with C
More advanced finds can include multiple search lines and several levels of nested sub-groups.
Even complex finds are easy to understand when they are broken into smaller, organized sections. A sub-group can contain multiple search lines and additional sub-groups. Each sub-group is treated as a single search line within the larger find. This concept is explained in more detail later in this guide.
To create a search line:
-
Select a find field.
-
Choose a modifier.
-
Enter the criteria.
Using the example above:
-
Find Field: Last Name
-
Modifier: Begins with
-
Criteria: C
To add another search line, press Tab while in the Criteria field. If the Criteria field is not available, such as when using a list-based find interface, press Tab from the Modifier field instead.
You can also click the plus (+) button to add a new search line.
Adding additional search lines allows you to make your find more specific.
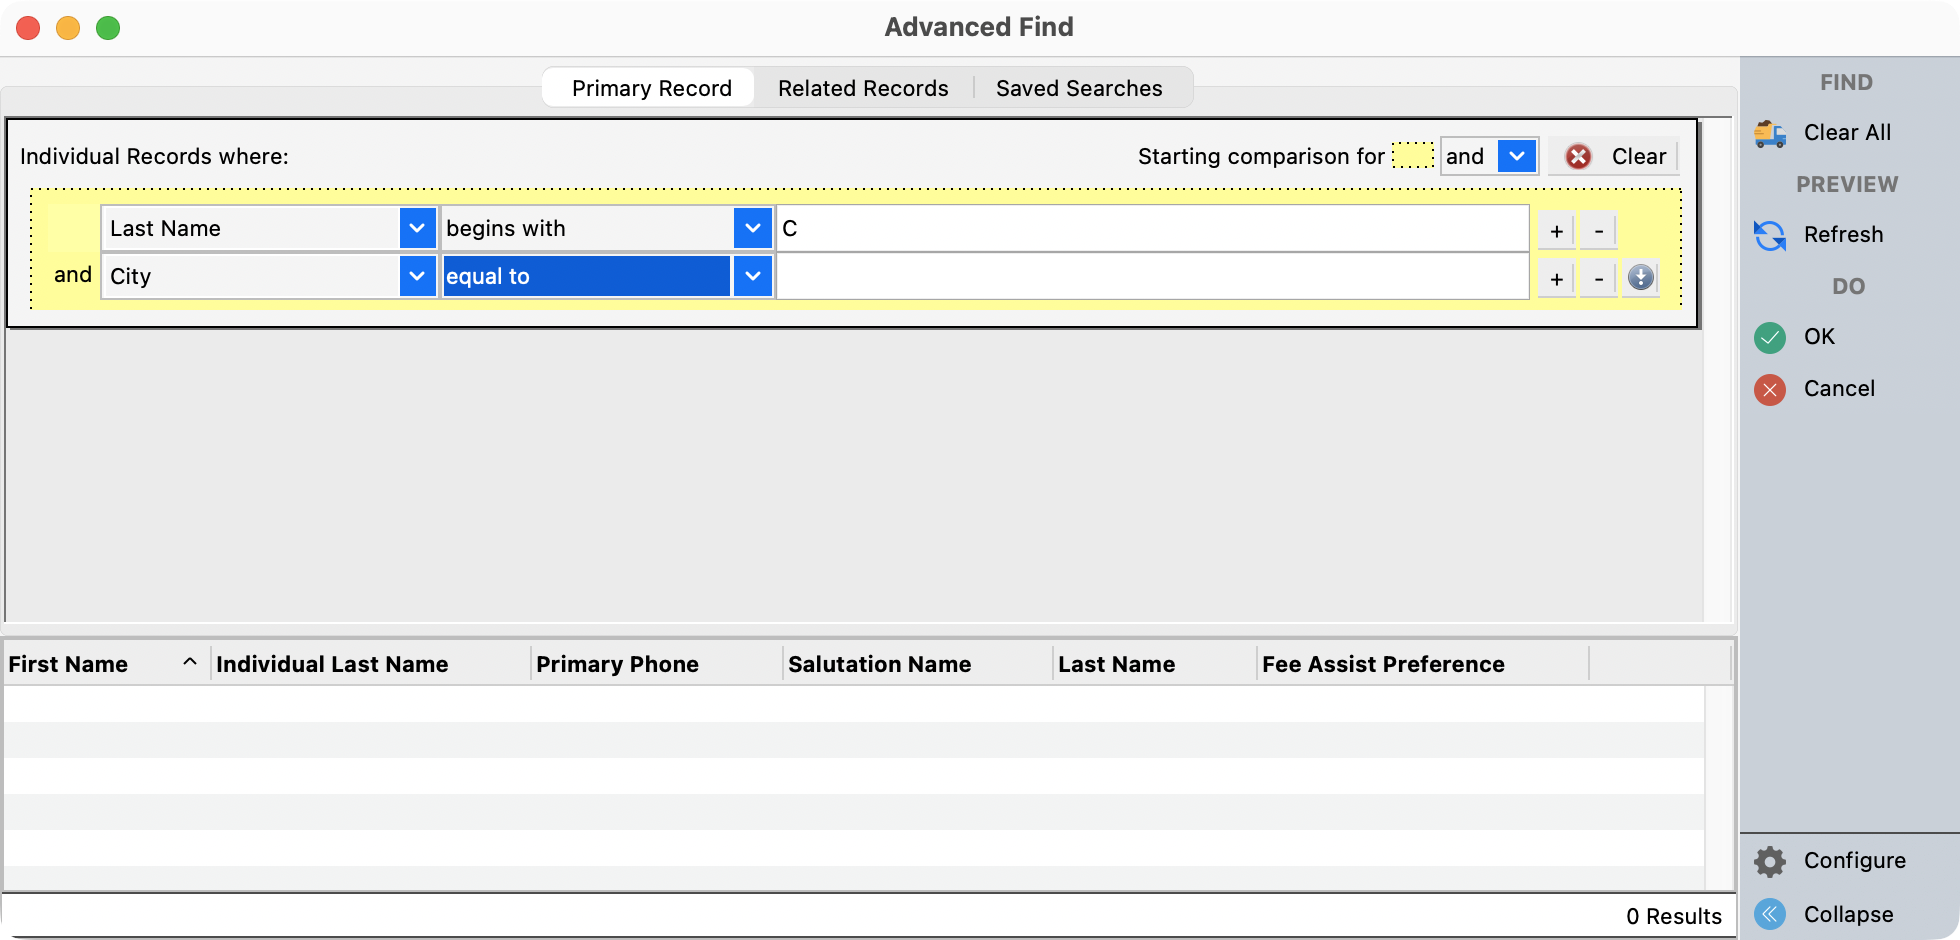
For example, if a search for Last Name begins with C returns five families, but you only want to see those who live in Big City, add another search line:
-
City equals Big City
Your find will now return only the families whose last name begins with C and who also live in Big City.
Using Sub-Groups
Sub-groups allow you to create more advanced searches by combining AND and OR conditions within the same Advanced Find.
A good rule to remember is:
-
If your search uses only AND conditions, you do not need a sub-group.
-
If your search uses only OR conditions, you do not need a sub-group.
-
You only need a sub-group when your search contains both AND and OR conditions.
How Sub-Groups Work
Every sub-group contains search criteria that all use the same comparison—either AND or OR.
Even the main Advanced Find is considered a sub-group. It is displayed inside the large colored box, and any additional sub-groups you create appear as separate colored boxes nested within it. These visual groupings make it easier to understand how your search is being processed.
Example
Suppose you want to find families whose:
-
Last Name begins with C
-
City is Big City or Versailles
This search uses both AND and OR, so you'll need a sub-group.
Think of the search like this:
-
Last Name begins with C
-
AND
-
City is Big City OR Versailles
The two city conditions belong together because they are connected with OR. Those conditions should be placed inside their own sub-group.
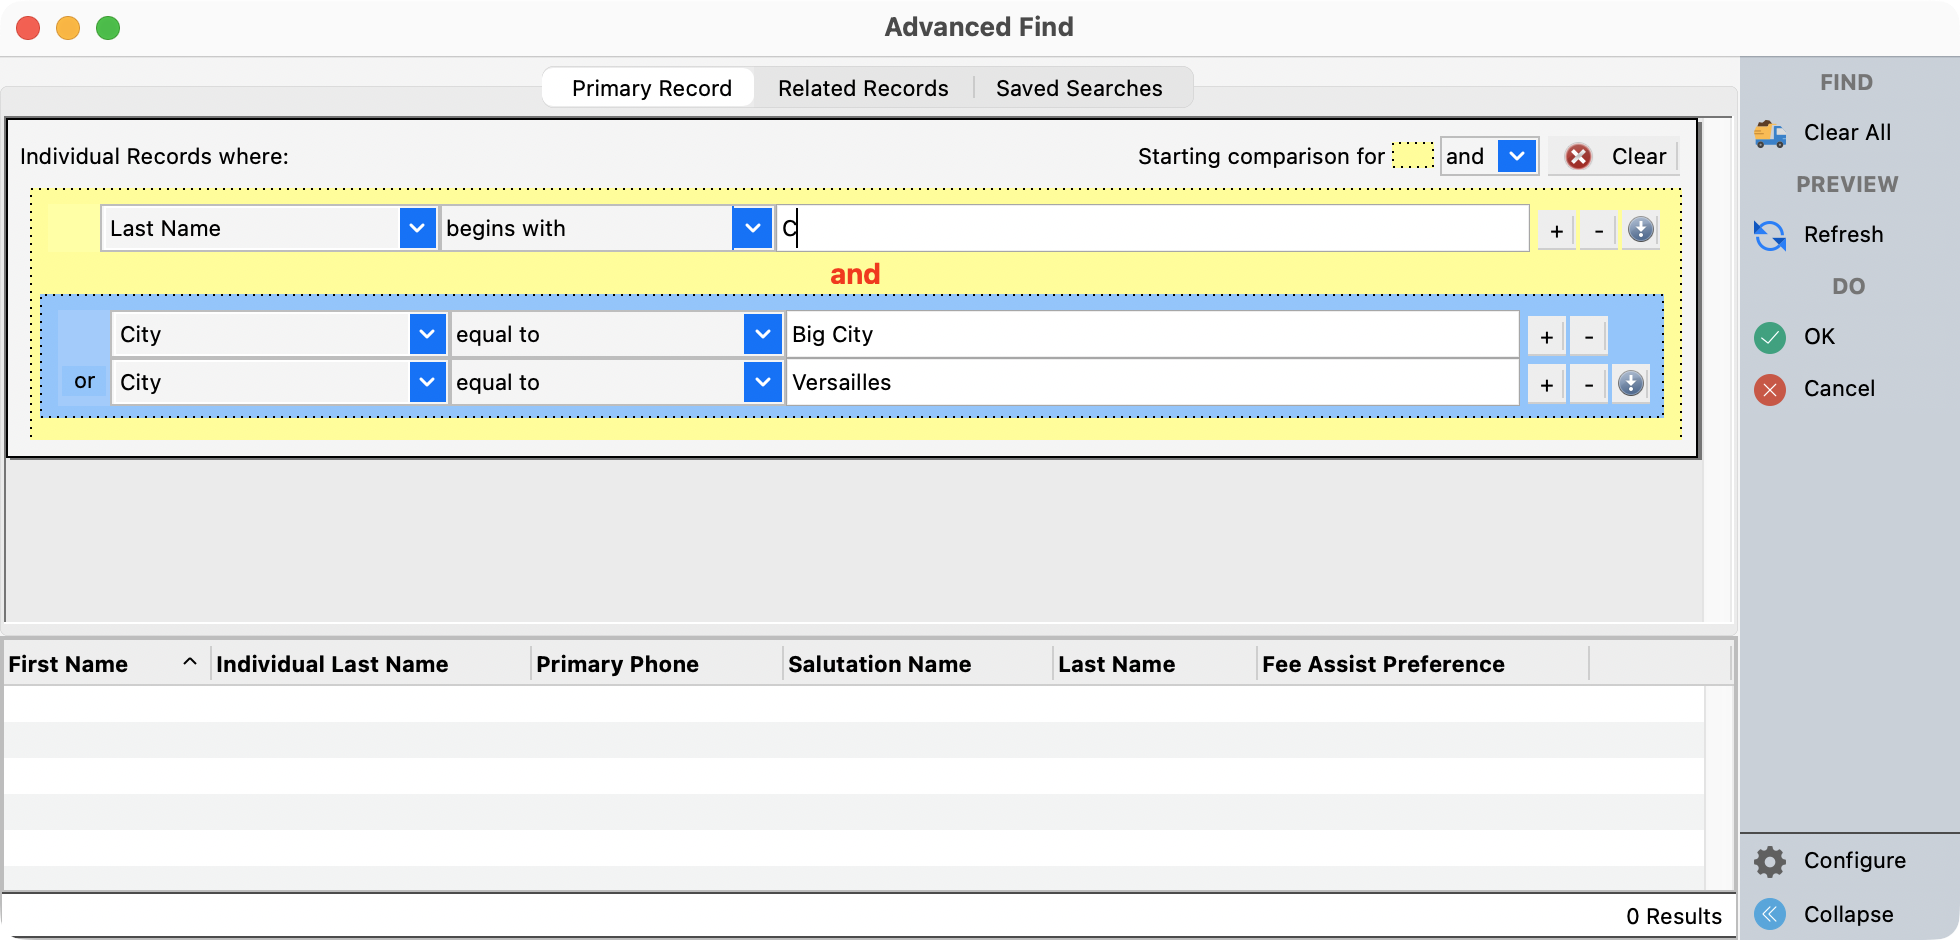
Your search would look like this:
Main Search (AND)
-
Last Name begins with C
-
City Sub-Group
City Sub-Group (OR)
-
City equals Big City
-
City equals Versailles
This tells CDM+ to find families whose last name begins with C and who live in either of the two cities.
Creating a Sub-Group
-
Create your first search condition (for example, Last Name begins with C).
-
Click New Sub-Group.
-
Inside the new sub-group, add the search conditions that should be grouped together.
-
Set the comparison within the sub-group to OR.
-
Add your search lines:
-
City equals Big City
-
City equals Versailles
-
CDM+ will evaluate the city conditions together first, then combine those results with the rest of your search using the AND condition.
Using Related Records
Related Records is a powerful feature in CDM+ that lets you refine your search by combining information from multiple areas of the program.
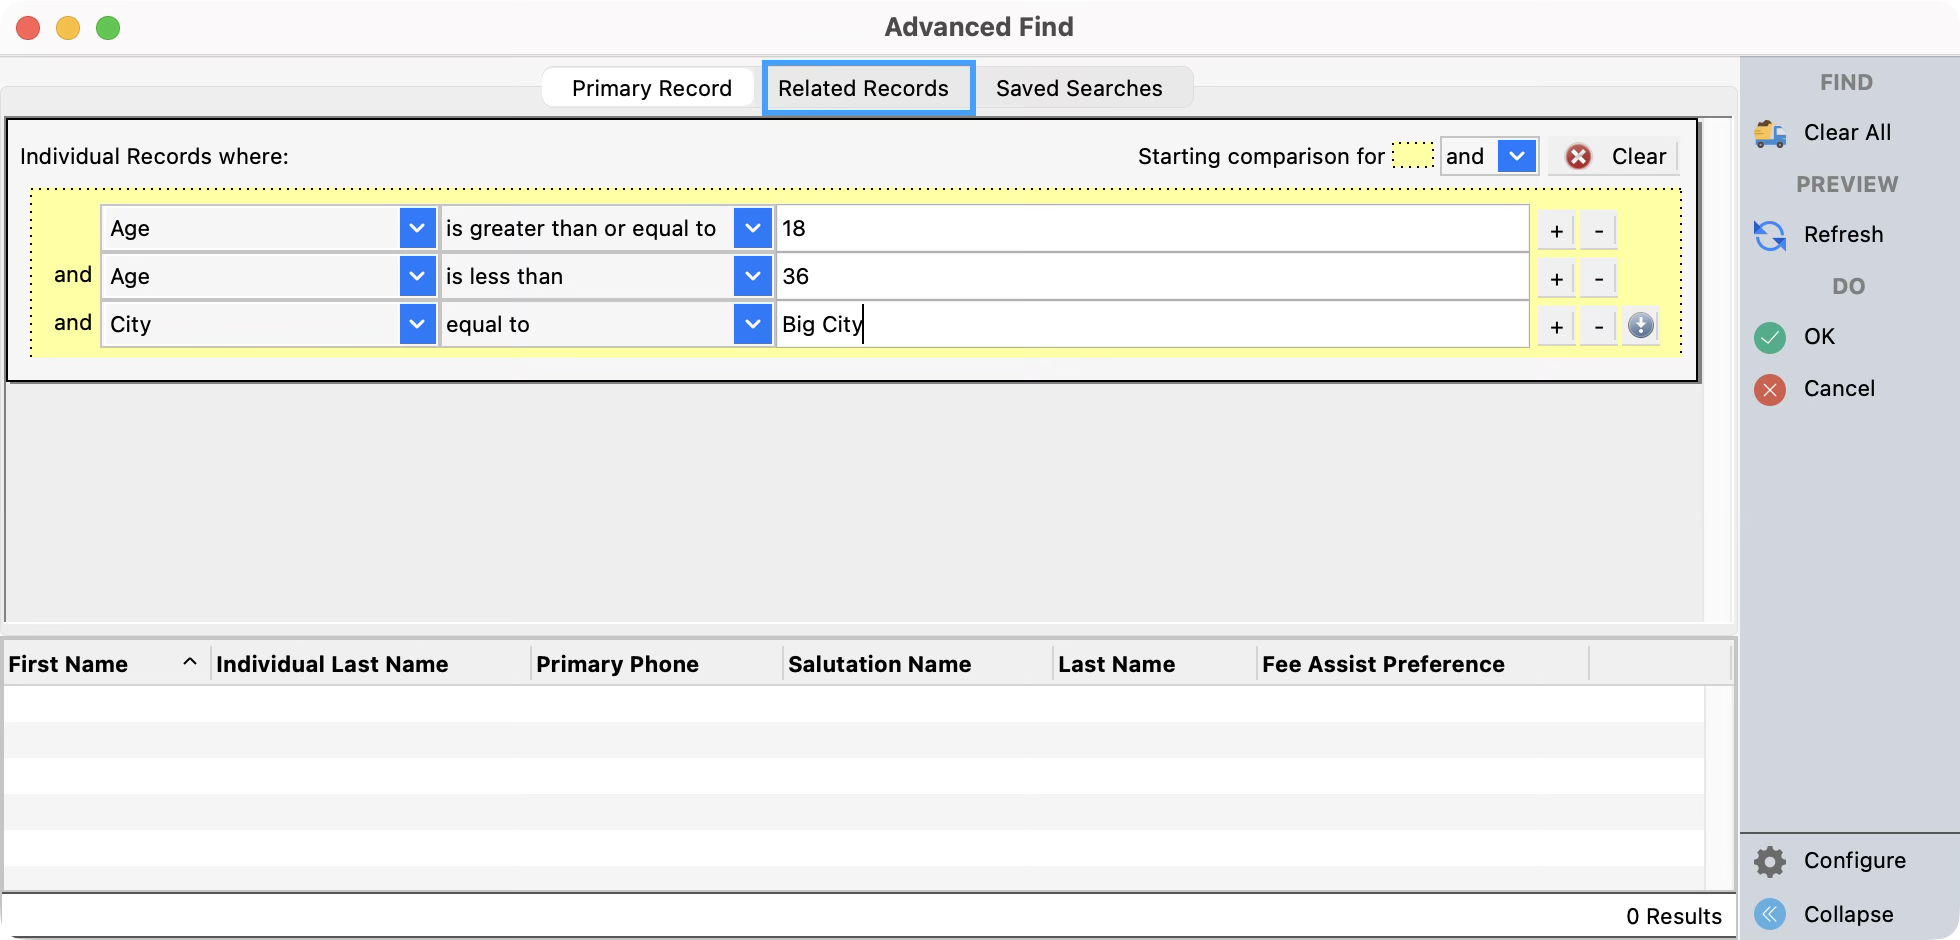
For example, you might first create a Primary Record search to find people who:
-
Are between 18 and 35 years old
-
Live in Big City
You can then use Related Records to further narrow those results. For example, you could find only those people who:
-
Attended church this month
-
Have an active pledge
-
Are registered for an upcoming retreat
-
Have specific Other Information values
-
Have certain phone numbers or email addresses
This allows you to create very specific searches without manually comparing records.
Adding a Related Record
-
Open the Related Records tab.
-
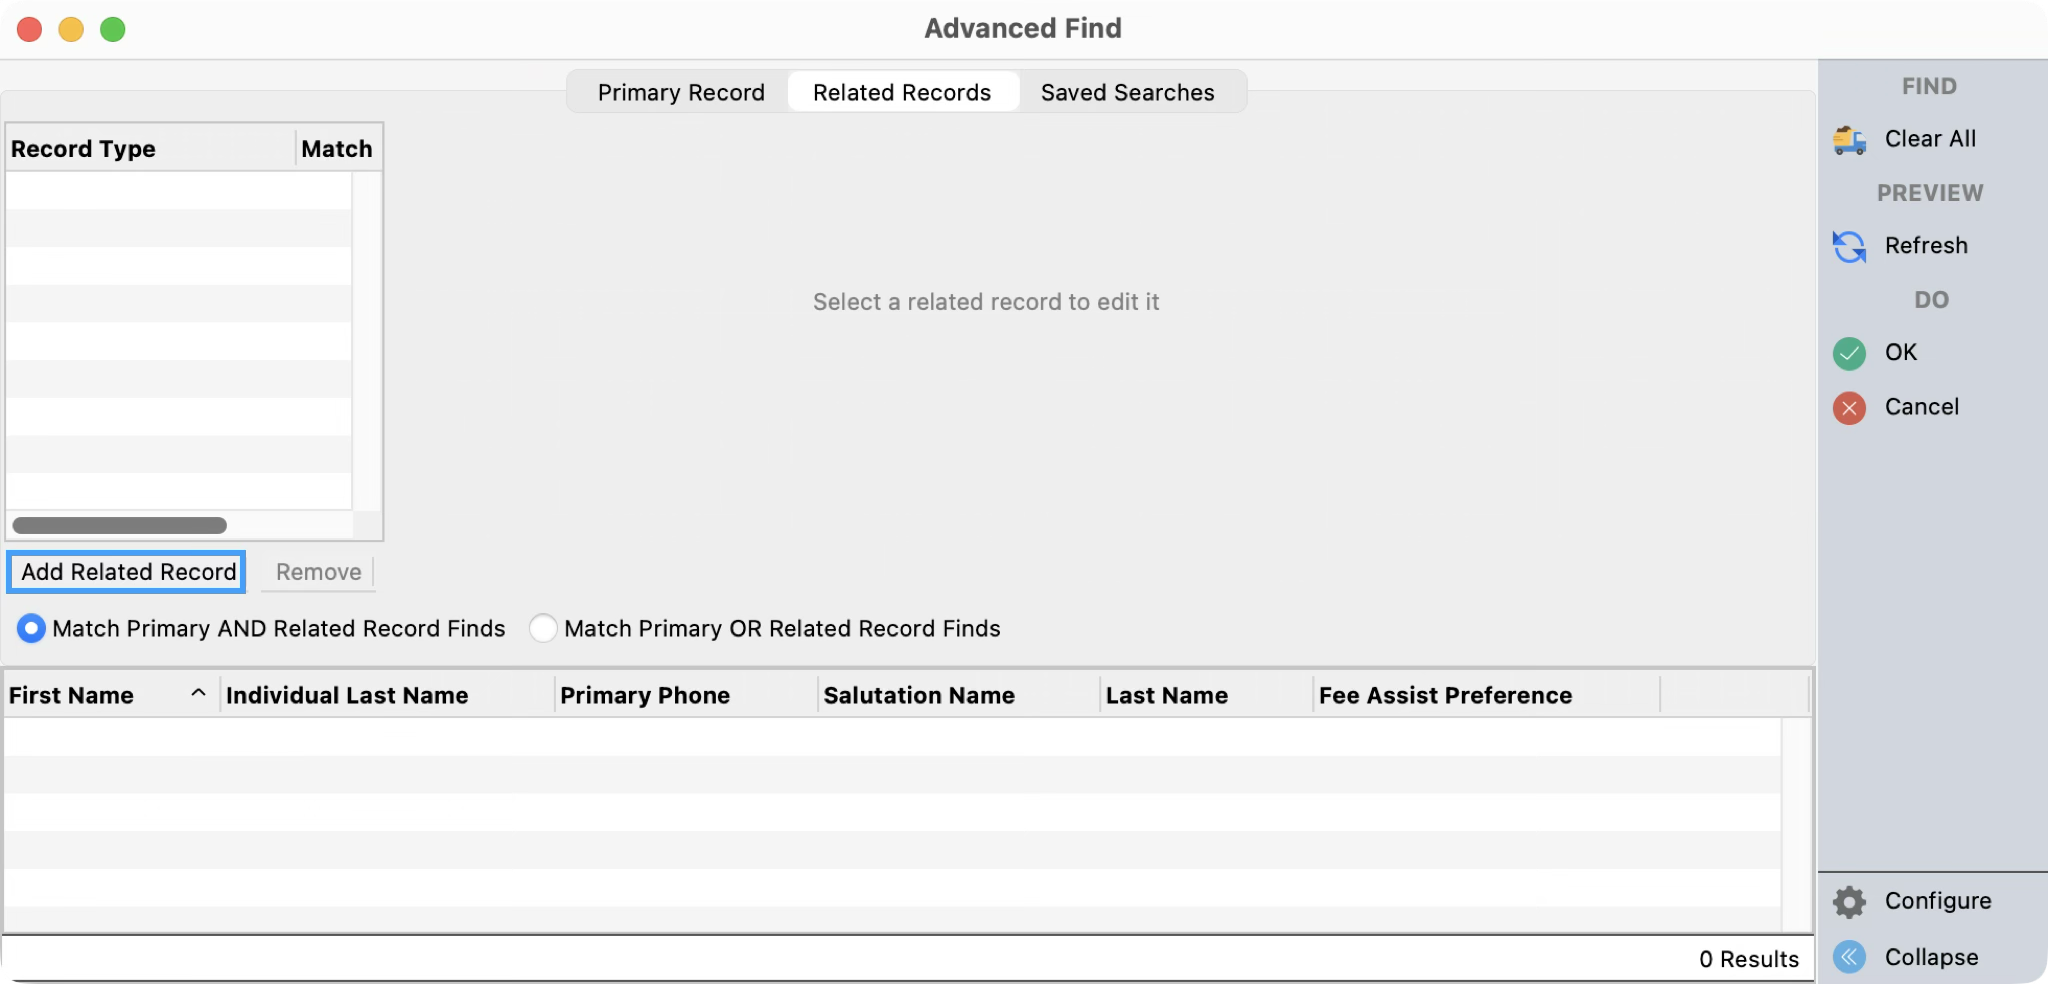
Click Add Related Record.
-
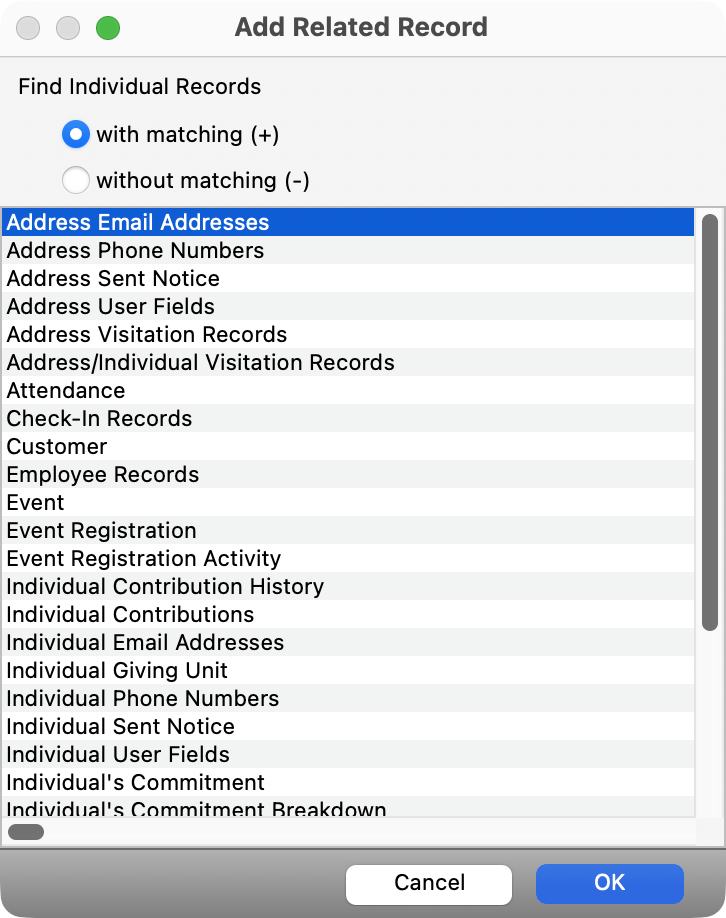
Select the type of related record you want to use from the list that appears.
Understanding With Matching and Without Matching
You can add multiple Related Record searches to an Advanced Find. Each type of related record can be added up to two times:
-
Once using With Matching
-
Once using Without Matching
This gives you flexibility to include or exclude records based on different criteria.
When you add a Related Record, you'll choose how it should work with your Primary Record search.
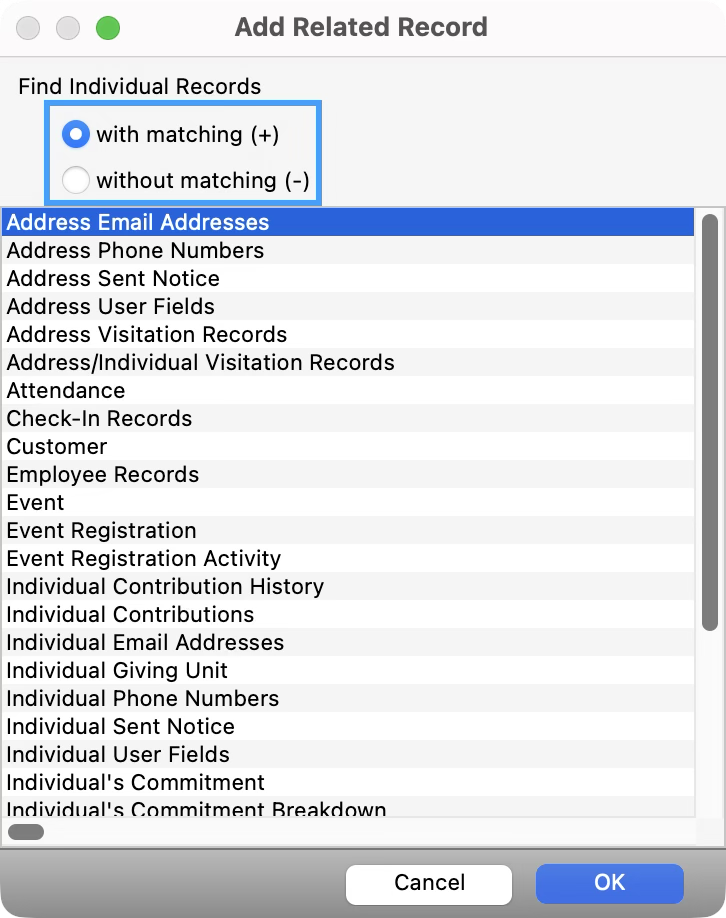
With Matching (+)
Use With Matching when you want records that meet both the Primary Record criteria and the Related Record criteria.
Example
Your Primary Record finds people who:
-
Are 18–35 years old
-
Live in Big City
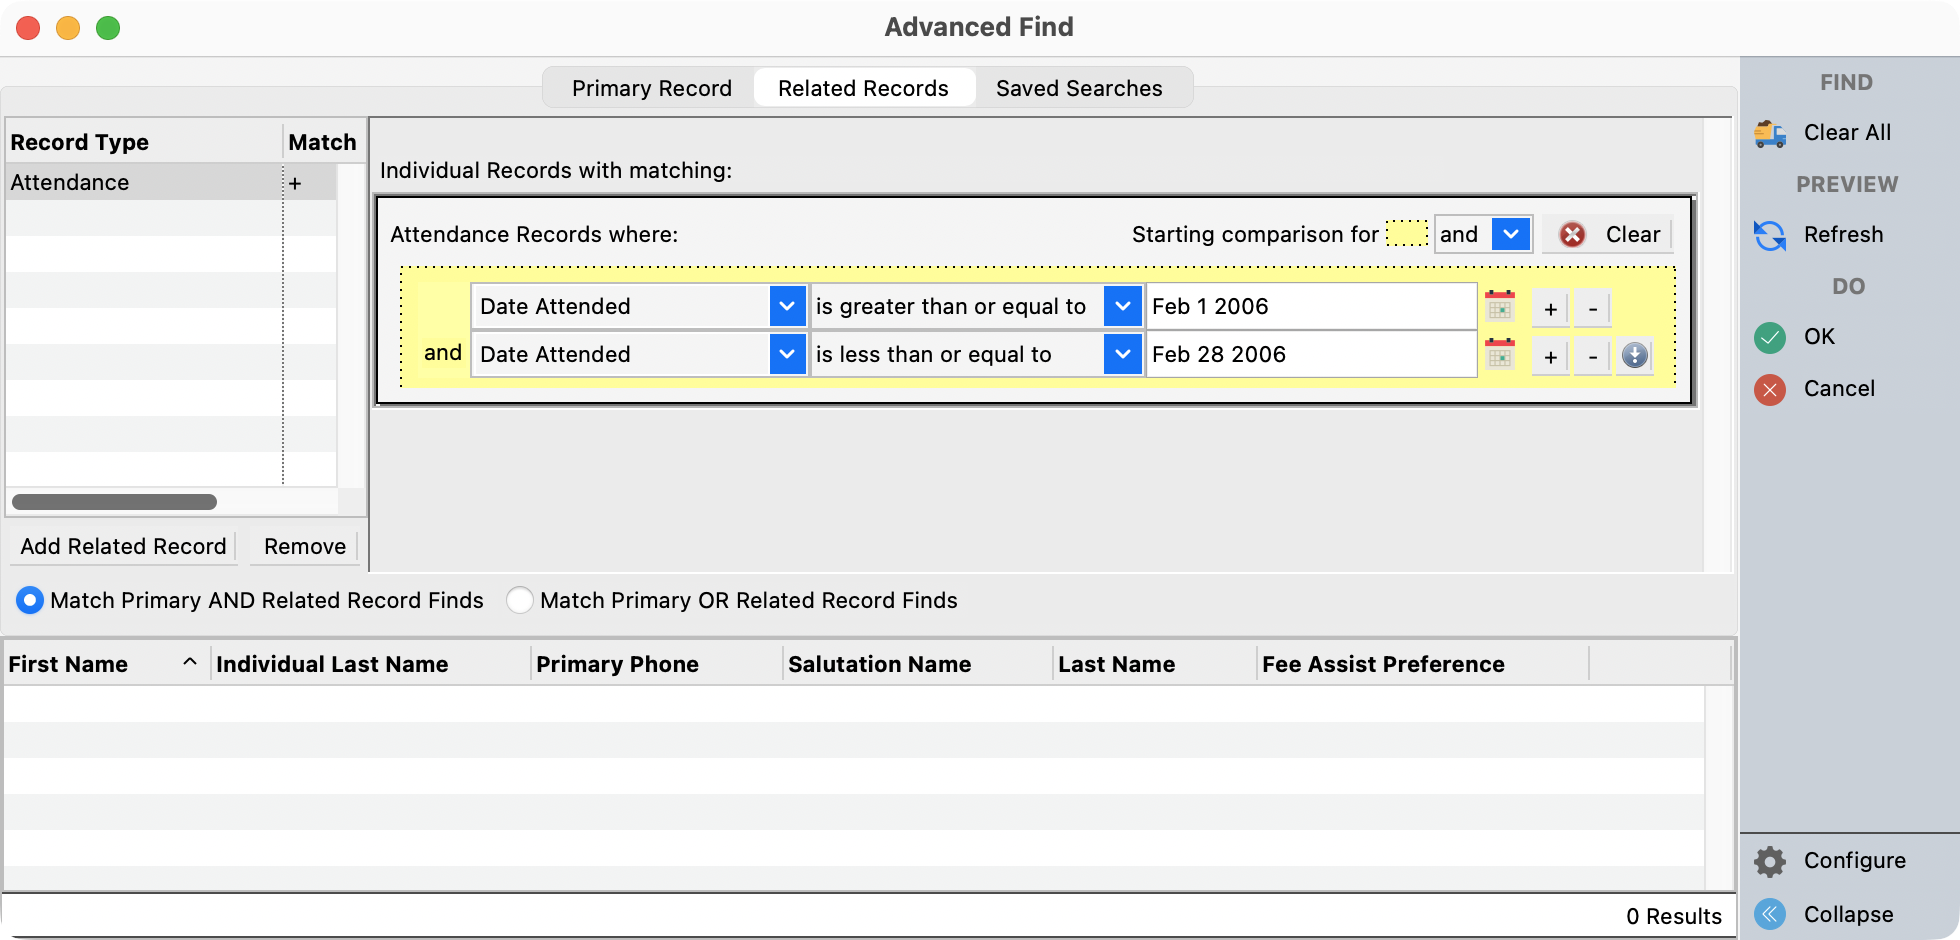
Your Related Record finds people who:
-
Attended in February
Using With Matching returns only people who:
-
Are 18–35 years old
-
Live in Big City
-
Attended in February
Without Matching (–)
Use Without Matching when you want records that meet the Primary Record criteria but do not have the related record.
Using the same example above, Without Matching returns people who:
-
Are 18–35 years old
-
Live in Big City
-
Did not attend in February
Because you can add the same Related Record twice (once as With Matching and once as Without Matching), you can create advanced searches. For example, you could find people who:
-
Attended during February of this year, but
-
Did not attend during February of last year
Changing the Matching Option
When adding a Related Record, select either With Matching or Without Matching using the radio buttons.
After the Related Record has been added, you can change its setting at any time by double-clicking it in the Related Records list.
The current setting is displayed in two places:
-
A + indicates With Matching
-
A – indicates Without Matching
The selected option is also displayed above the Related Record criteria.
Removing or Clearing Related Records
-
Remove – Deletes the selected Related Record from your search.
-
Clear – Removes the criteria from the selected Related Record but leaves the Related Record itself in place.
-
Clear All – Removes all Related Record finds from the Advanced Find.
More Search Options
https://help.cdmplus.com/ucd/finding-data-on-record-windows