
Begin by choosing Custom Listing from a Reports menu (often, but not always, found on a Listings submenu). In the example below, we will create an Individual Custom Listing of individual records in the database. This particular report is accessed from the Membership Reports > Listings menu, but Custom Listing reports are found throughout CDM+.
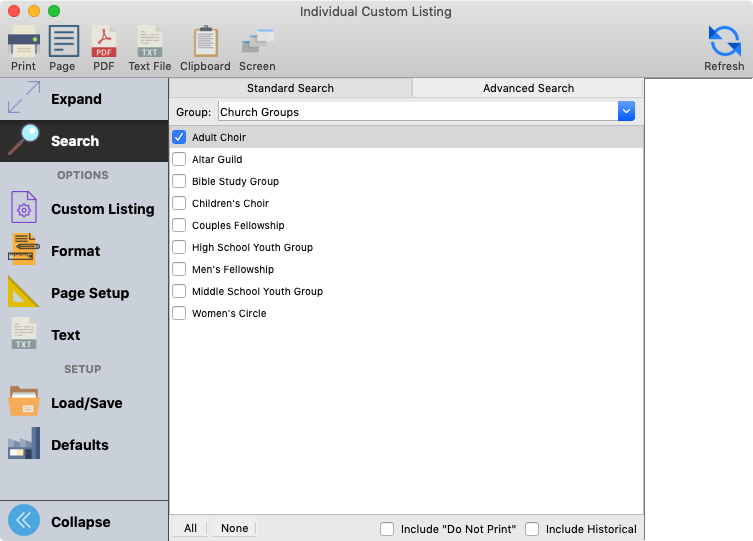
The report setup window will open on the Search tab. Sometimes it is helpful to think of custom listings and exports as spreadsheets with rows and columns of information. Use the Search tab to select the rows or records that you want to include on the listing, for example, members of a particular group.
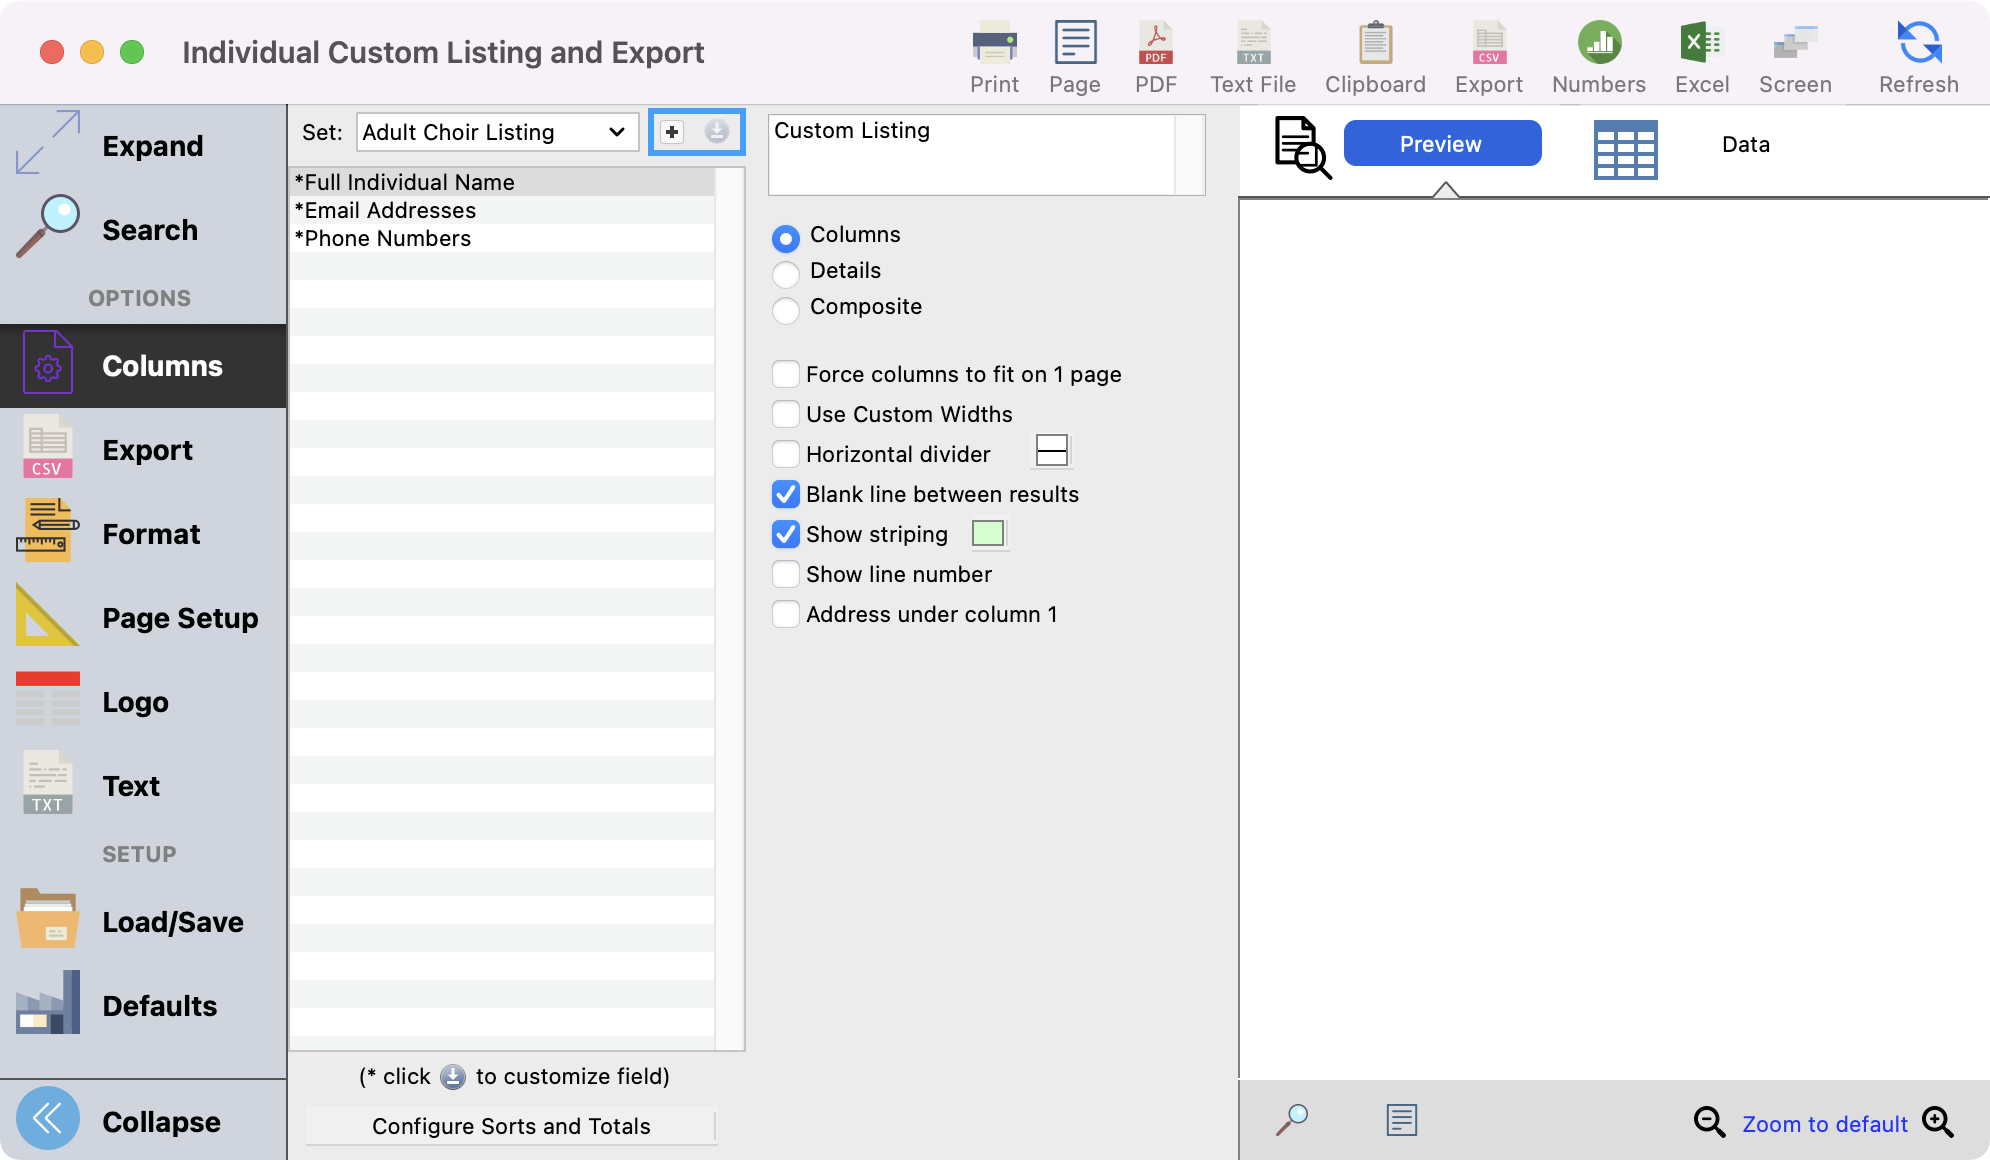
To choose the columns for the custom listing, go to the Custom Listing tab.
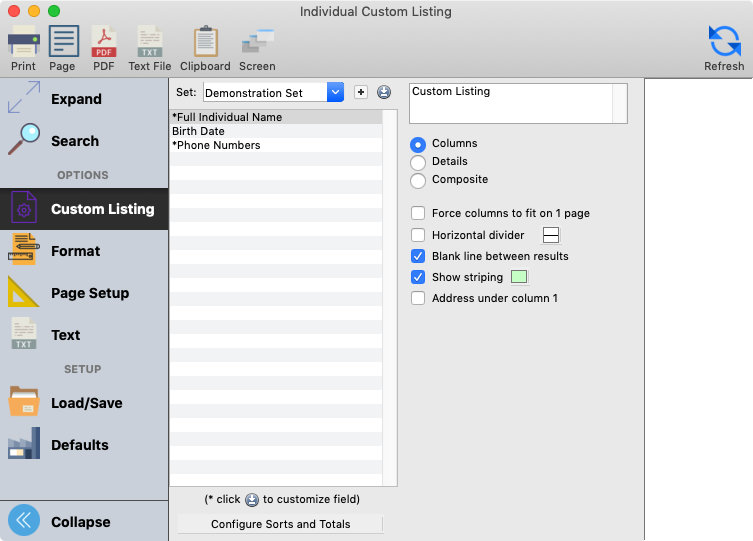
You can choose an existing set of columns by selecting a set from the drop list next to Set. You can also create a new set by clicking the plus button. If you are the owner of the selected set, you can modify the set by clicking the blue circle with down arrow button.
Creating and Modifying Sets
When you click on the plus button, CDM+ will ask you to name the set and then open the Modify Sets window. The name of the set is shown in the upper left corner of the window. When you select a set and click the blue circle with down arrow button, CDM+ opens the Modify Sets window with the selected set loaded.
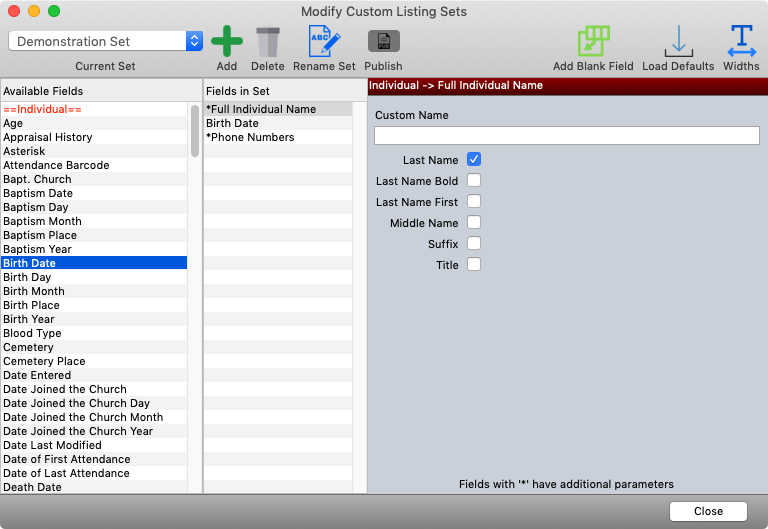
In the Modify Sets window, double click field names in the Available Fields column to move them into the set. Double click field names in the Fields in Set column to move those fields out of the set. You can also click and drag between the columns.
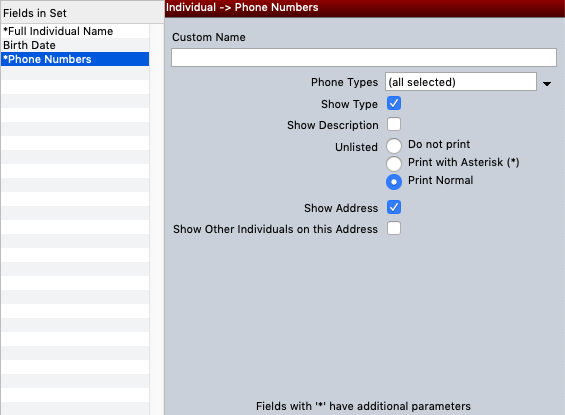
Click and drag fields in the Fields in Set column to change the order.
Formatting Fields
Some fields, when added to the Fields in Set column, have additional parameters that can be used to format the output. These fields are marked with an asterisk (*). For example, when Full Individual Name is added to the Fields in Set list, additional parameters offer formatting options to display the name with the last name first, include the middle name, and include suffixes and titles.
Phone Numbers and Email Addresses, when added to the Fields in Set list, can be formatted to specify which phone or email types to include, whether to show the type and description, how to handle numbers and addresses marked Unlisted. You can also choose whether or not to include all numbers connected to the address and numbers for the other individuals in the household.
The Giving Unit Custom Listing has a field named Total Contributions that allows you to total contributions for a specific date range and giving fund(s).
On the Modify Custom Listing Sets window you may add, delete, rename and publish sets.
To create another set, click Add and enter a set description.
To delete a set, click Delete, select the set(s) to delete, click Delete and click Yes. Note that deleting a set will remove it from both exports and custom listing report setup windows.
To rename a set, select it from the Current Set list, click Rename Set and enter a new name.
When you create a set in for a CDM+ custom listing or export, by default it will be fully available to all other users of your database. If you don’t want other CDM+ users to be able to modify or delete your set, click Publish once to de-select it (the icon will change from dark to light). Making this change limits other users to read-only access to your set.
Note that while sets you create are available by default to all users of the system, only the creator or owner of a set can modify or delete it.
Setting Column Widths
You can customize the widths of the columns by clicking the Widths button in the top bar of the Modify Sets window. CDM+ will open the Column Widths window. To adjust the width of a column, click and drag the divider between the field names. You double-click on a field name to have CDM+ determine the column width based on the data in the column. That column box will turn gray to indicate that this option has been selected.

Adding Blank Columns
You can also add blank columns to the custom listing, perhaps to provide space to check off lines or write in information. To add a blank column, click the Add Blank Field icon, enter a name for the blank column and click OK.
Load Defaults
Click on Load Defaults to load a default set of database fields in the Fields in Set column. The default fields are hard-coded into CDM+ and will vary depending on the CDM+ program in which you are working. Clicking on Load Defaults can be a helpful starting point in creating a new set; you can delete any of the default fields and add other fields as you wish.
Click Close when finished working in the Modify Custom Listing Sets window. Your changes will be saved.