
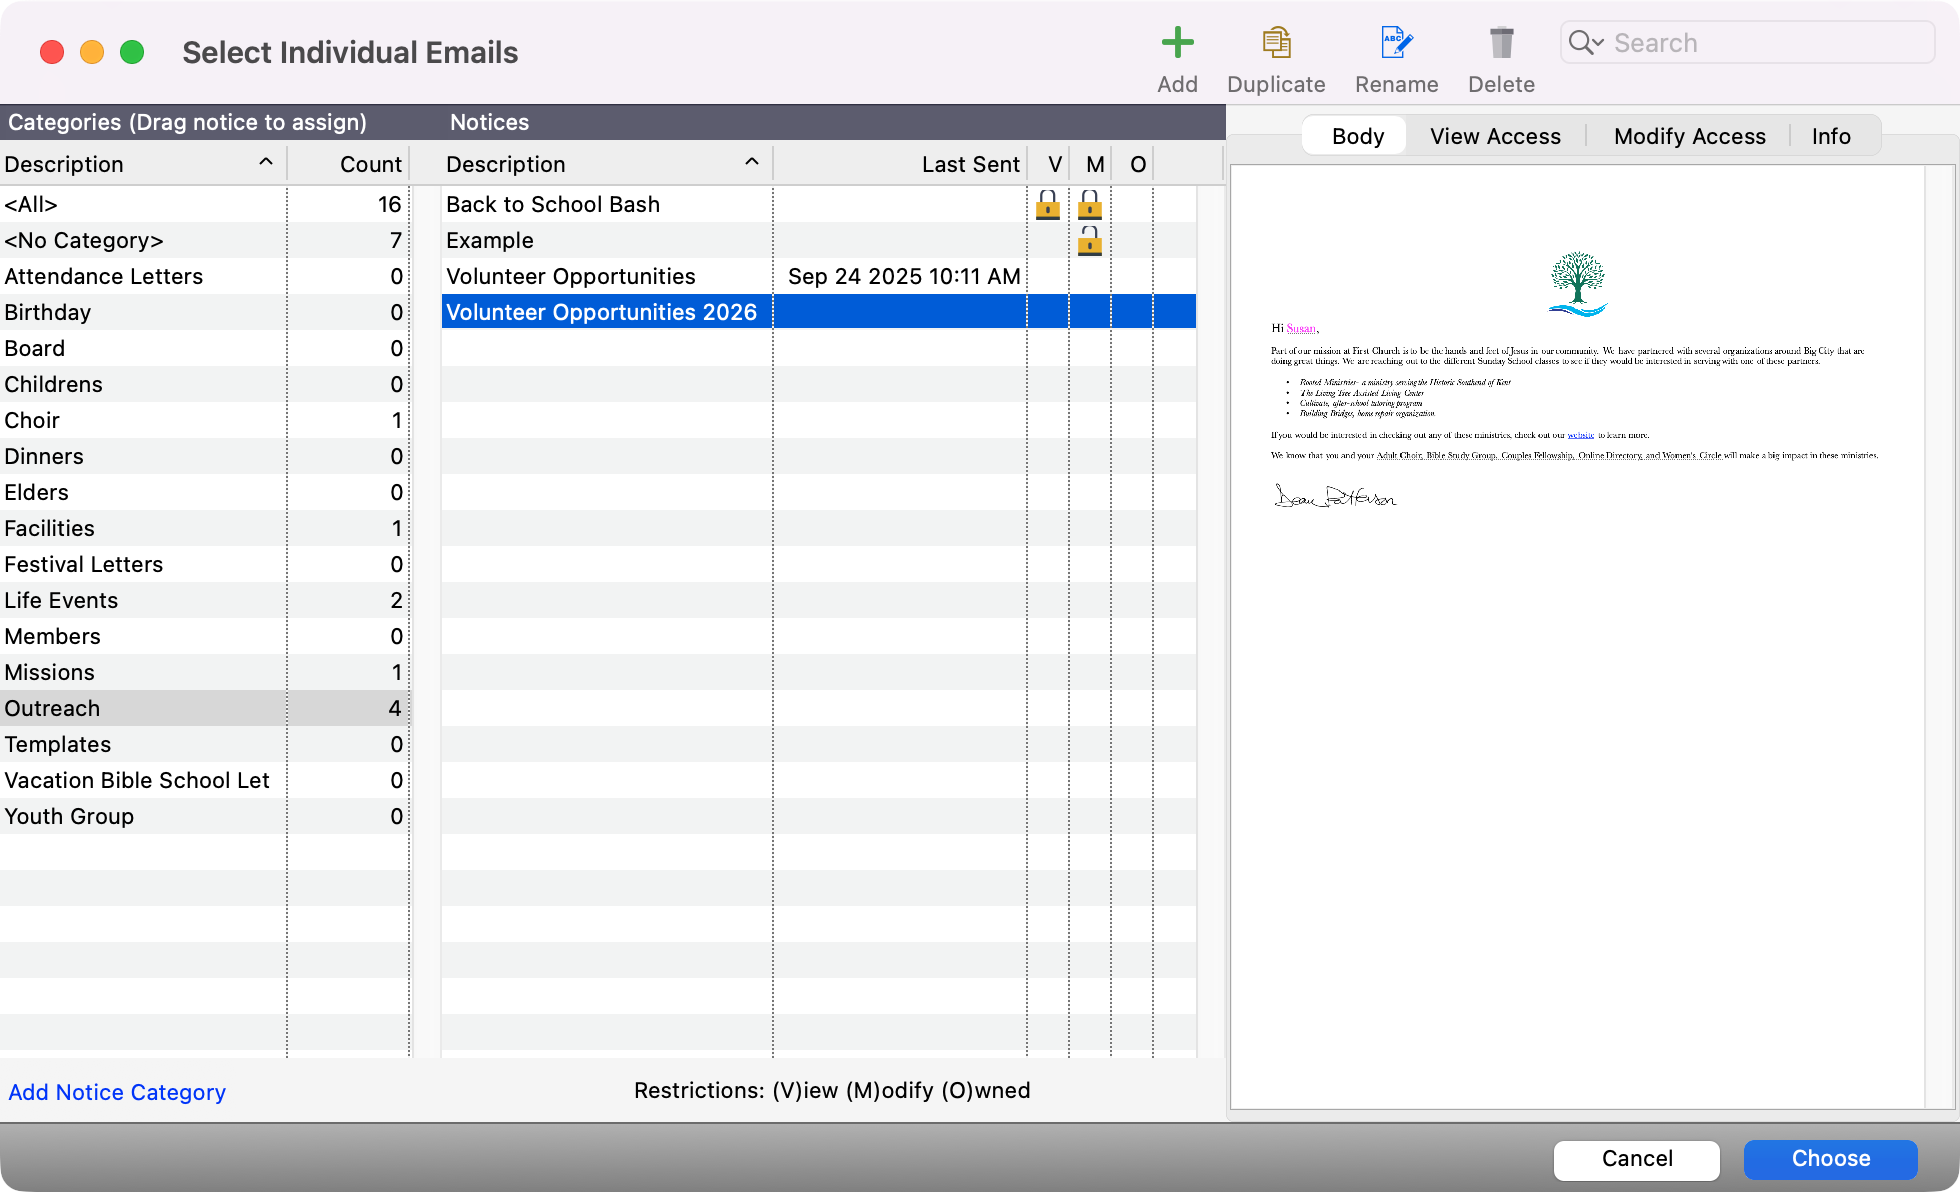
The person who creates a notice or has ownership of it can control whether other users can view, modify, or see the information about a notice. This is done by the tabs on the Select Notice window. Click once on the desired notice to highlight it.
Ownership
-
First, in the Select Notice window, click to select a notice.
-
To check for ownership, look under the column labeled O. If it is blank, you own it.
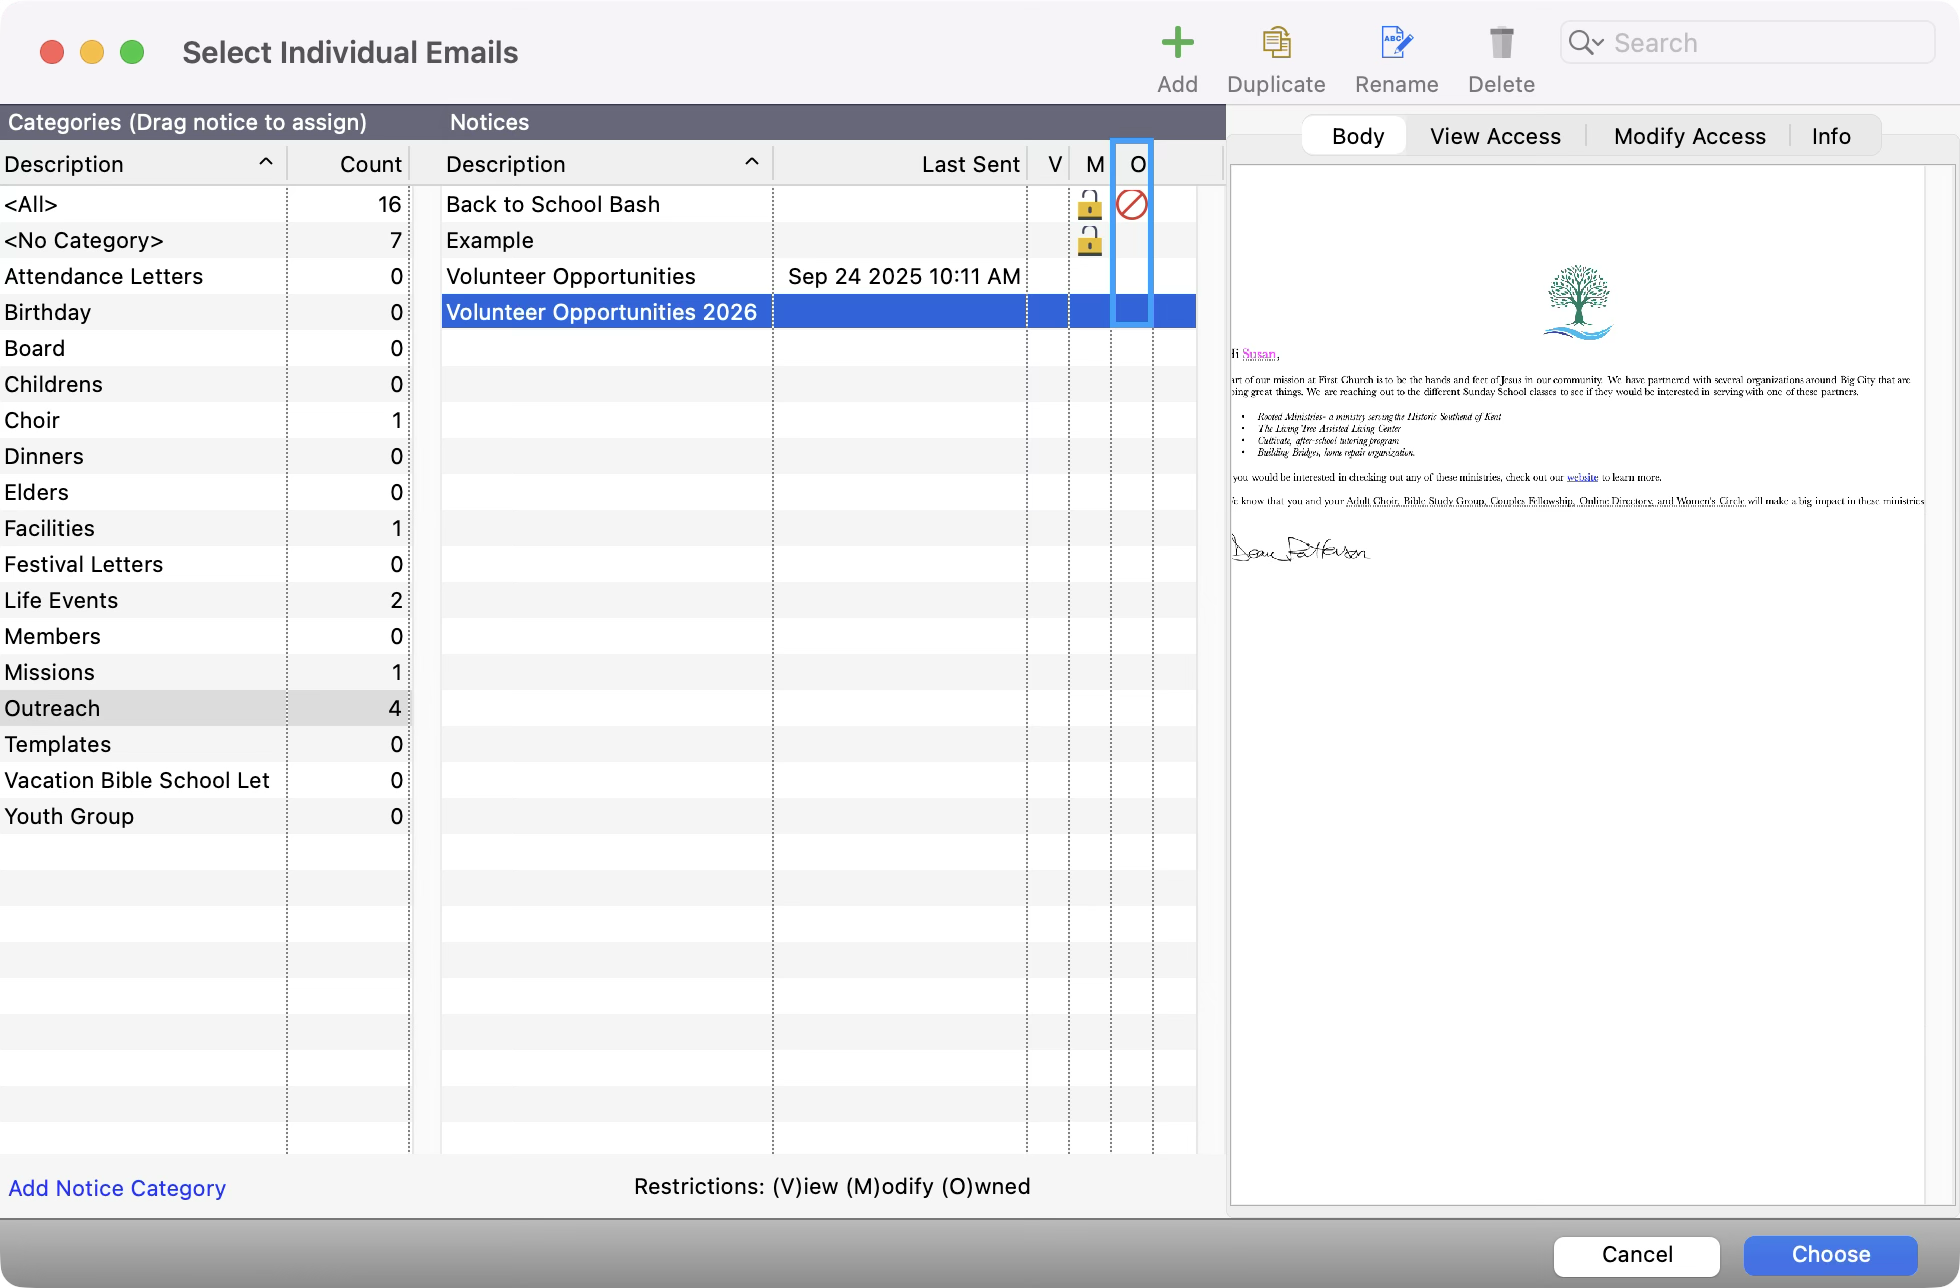
If you don’t see this column, widen your window, and you will see it appear.
-
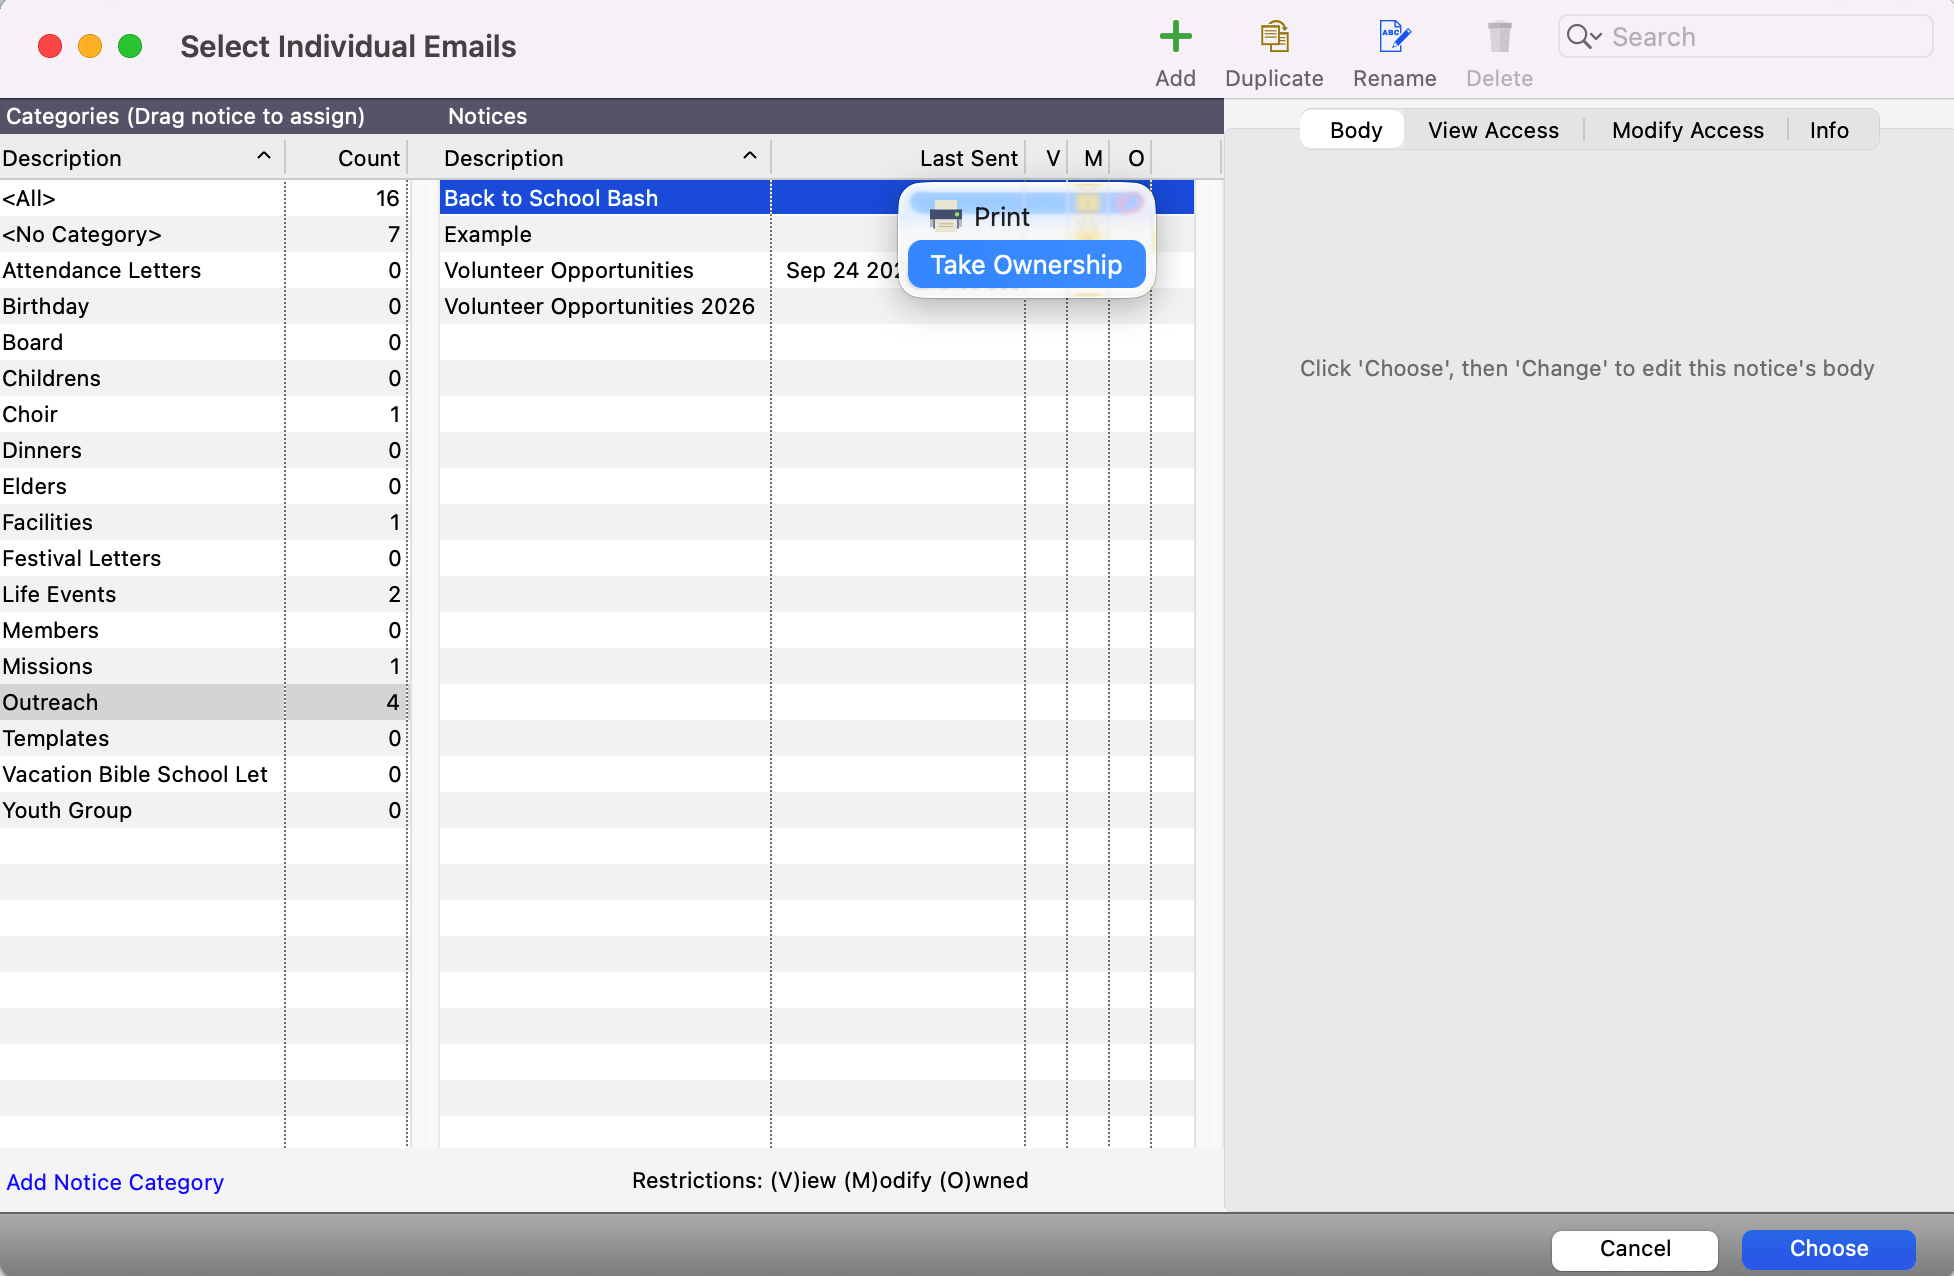
You can transfer the ownership to you if you have Administrative abilities. Right-click on the notice and select Take Ownership.
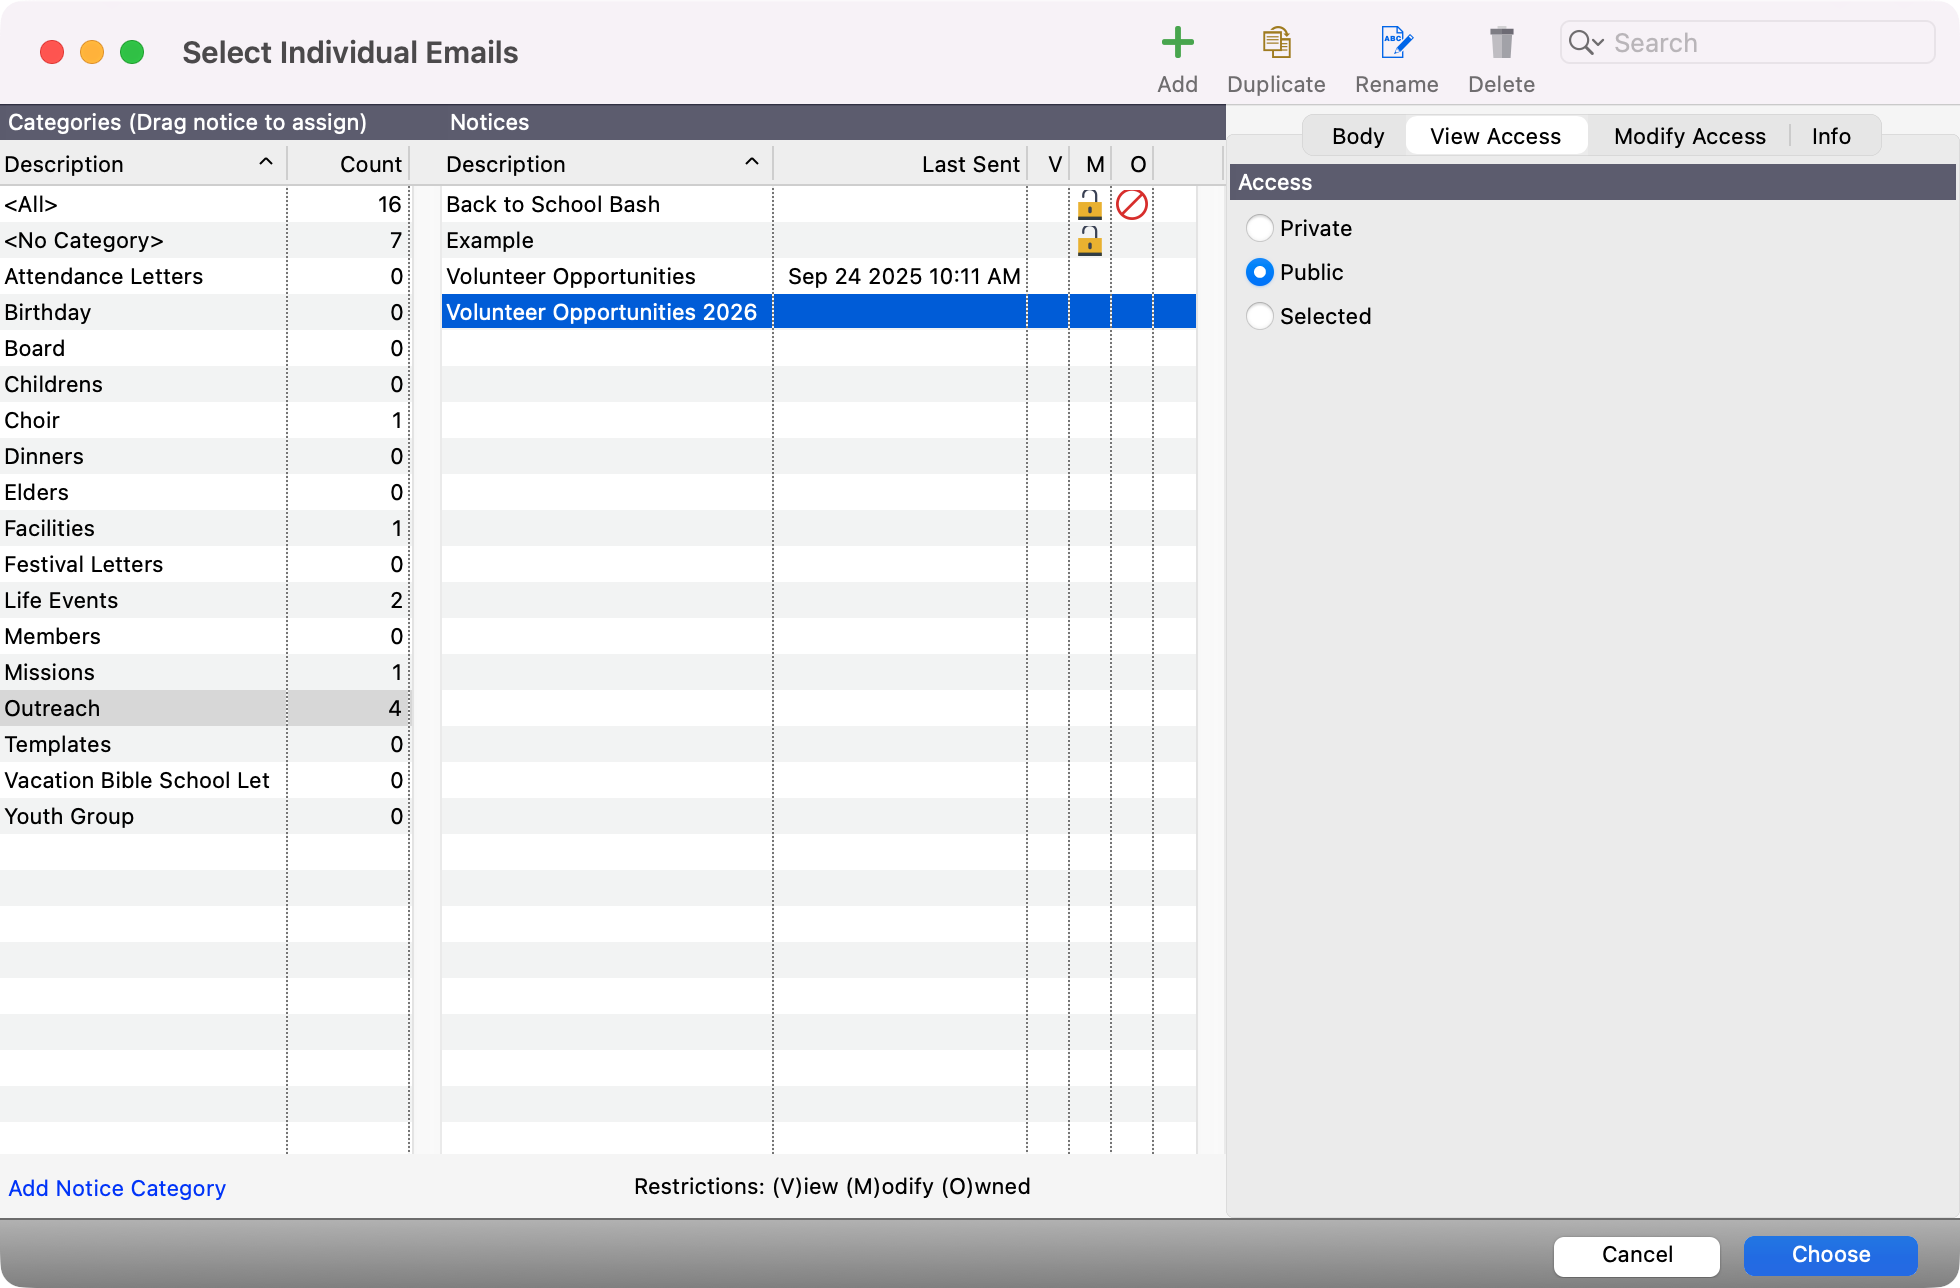
View Access
-
To see View Access permissions for a notice, look at the V column. If there is a lock, it means it is private. If it is blank, it is public.
-
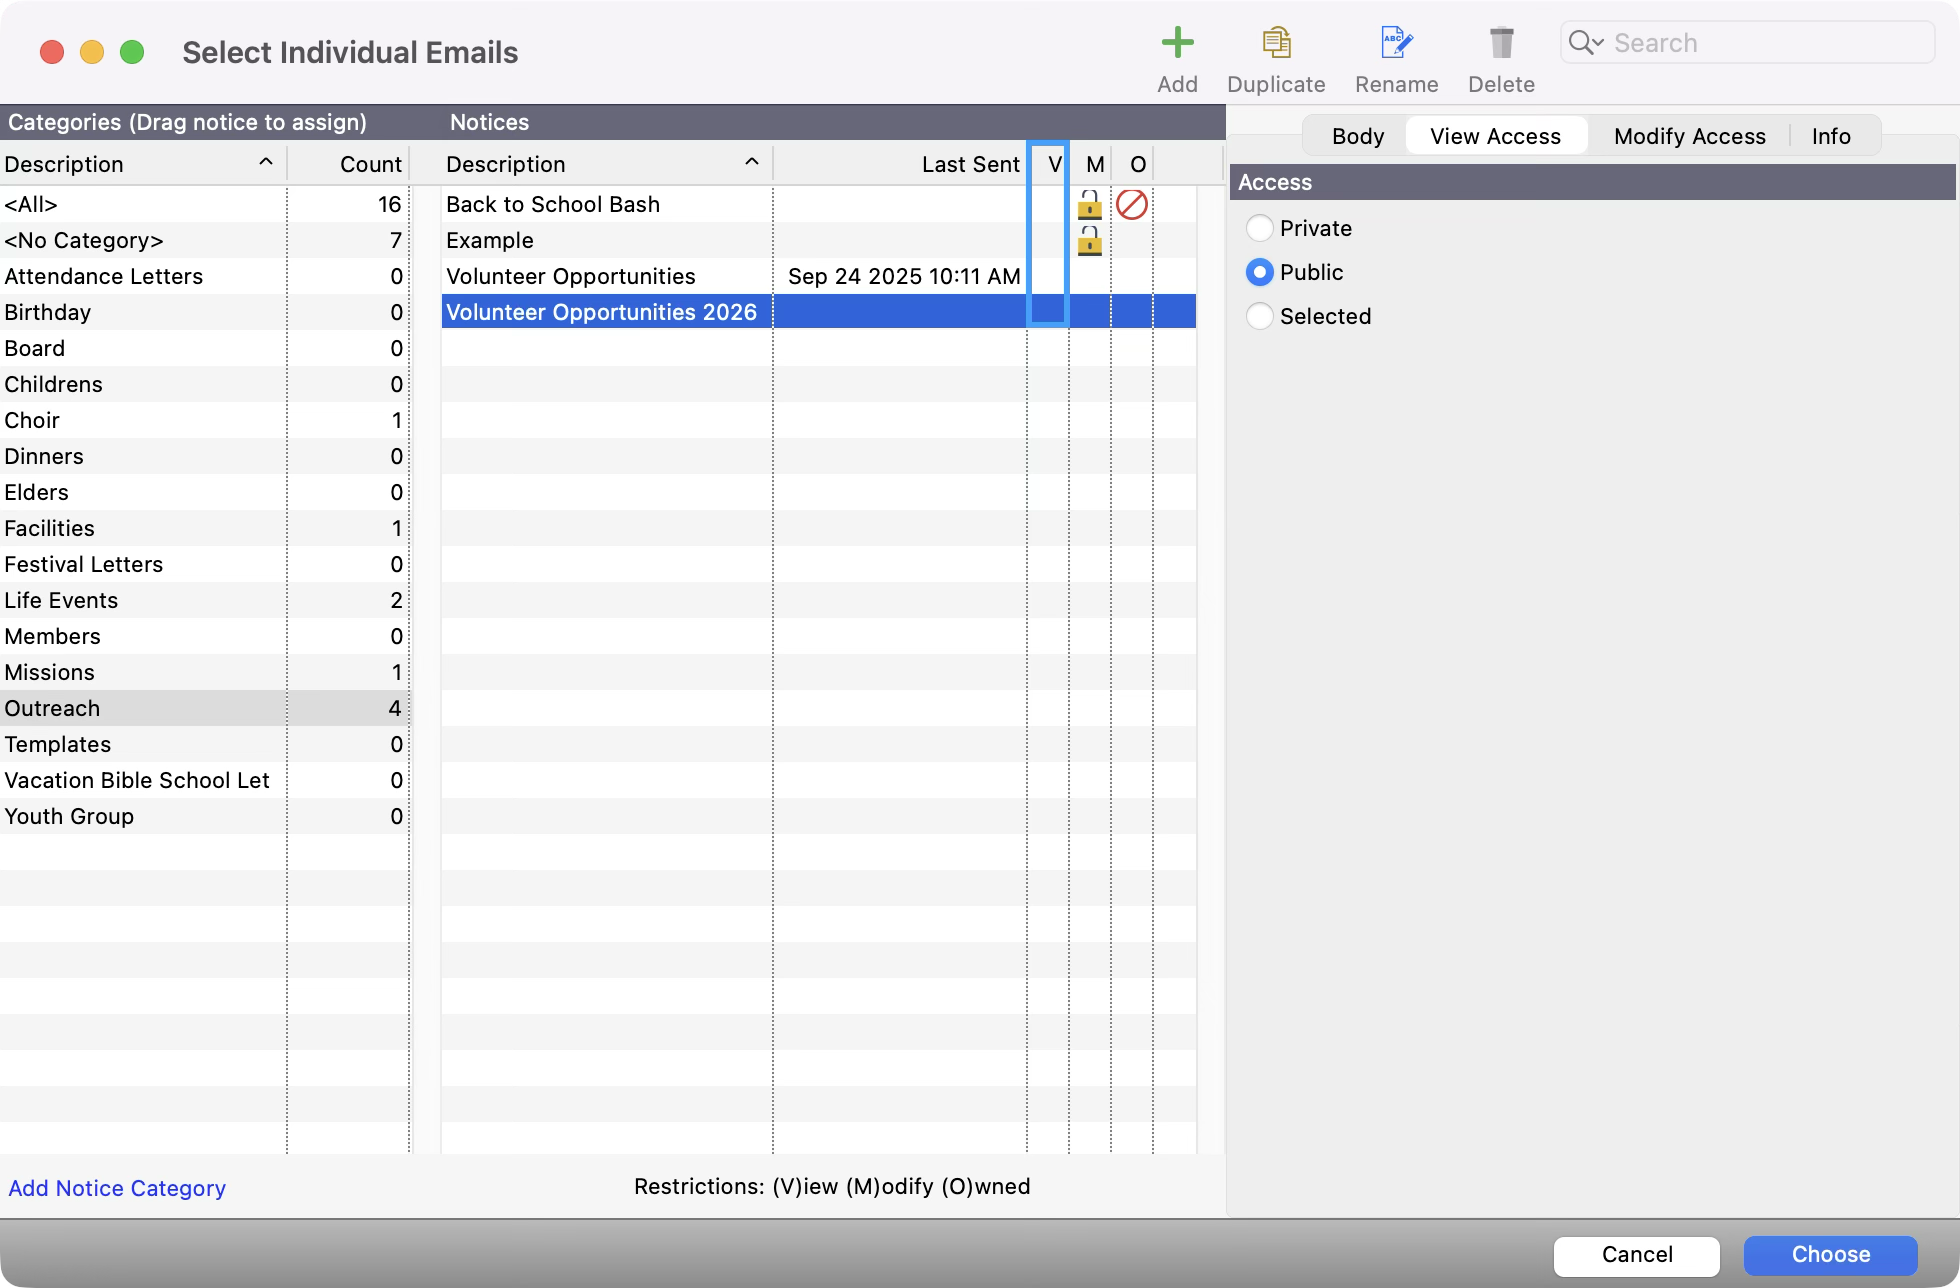
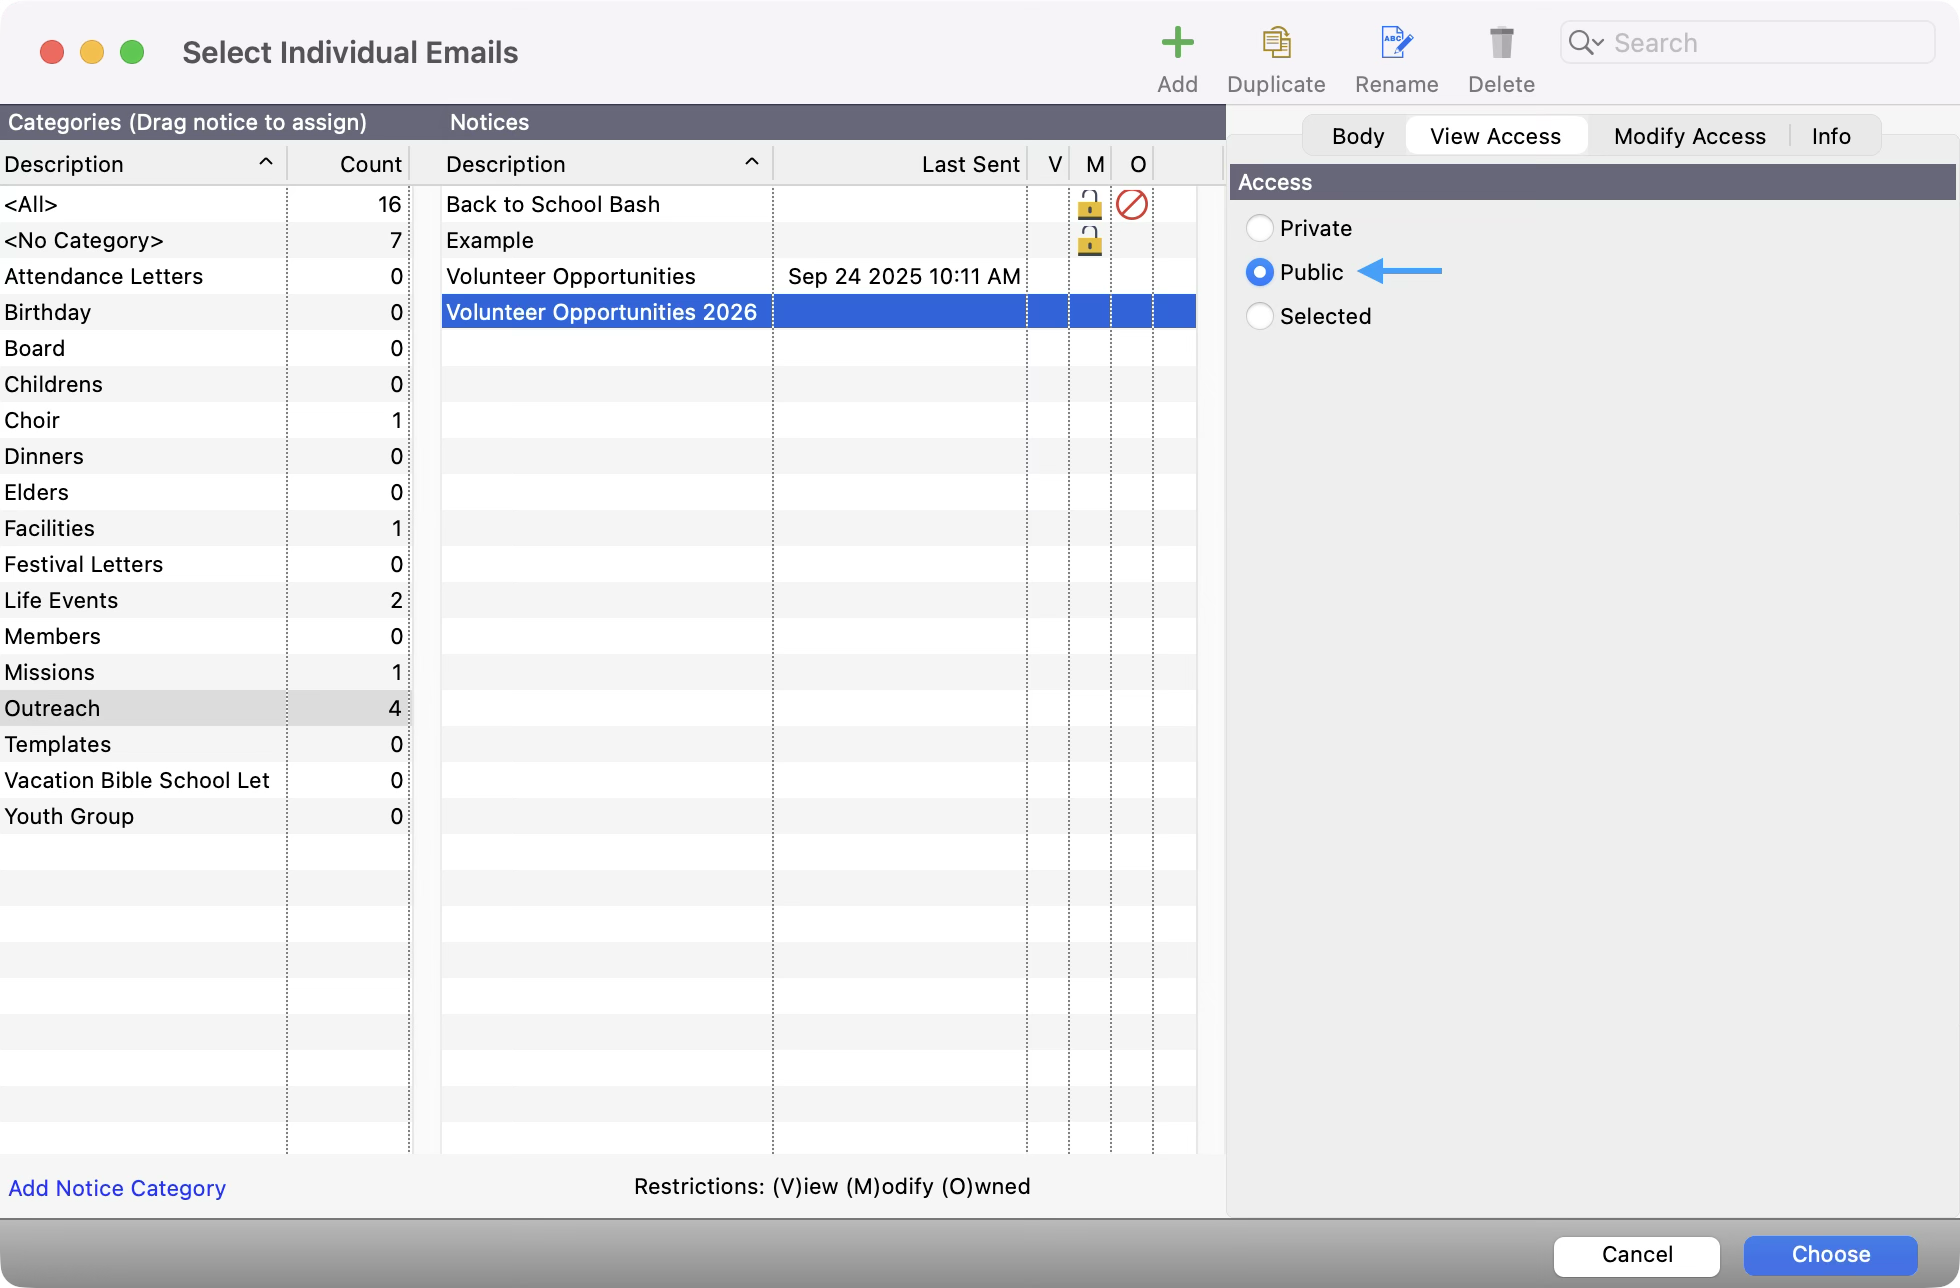
To see and change, view access, click the View Access tab. This setting restricts who can see and use this notice.
-
If you set it to Private, it will only appear in the Notices list for you when you are logged in. No other users will even know this notice exists.

-
If you set it to Public, all CDM+ users will see this notice displayed in the Notices list and can use the notice as you created it.
-
If you set it to Selected, you will see a list of users appear to the right. Put a check in the box next to the user's name you want to assign view access to.

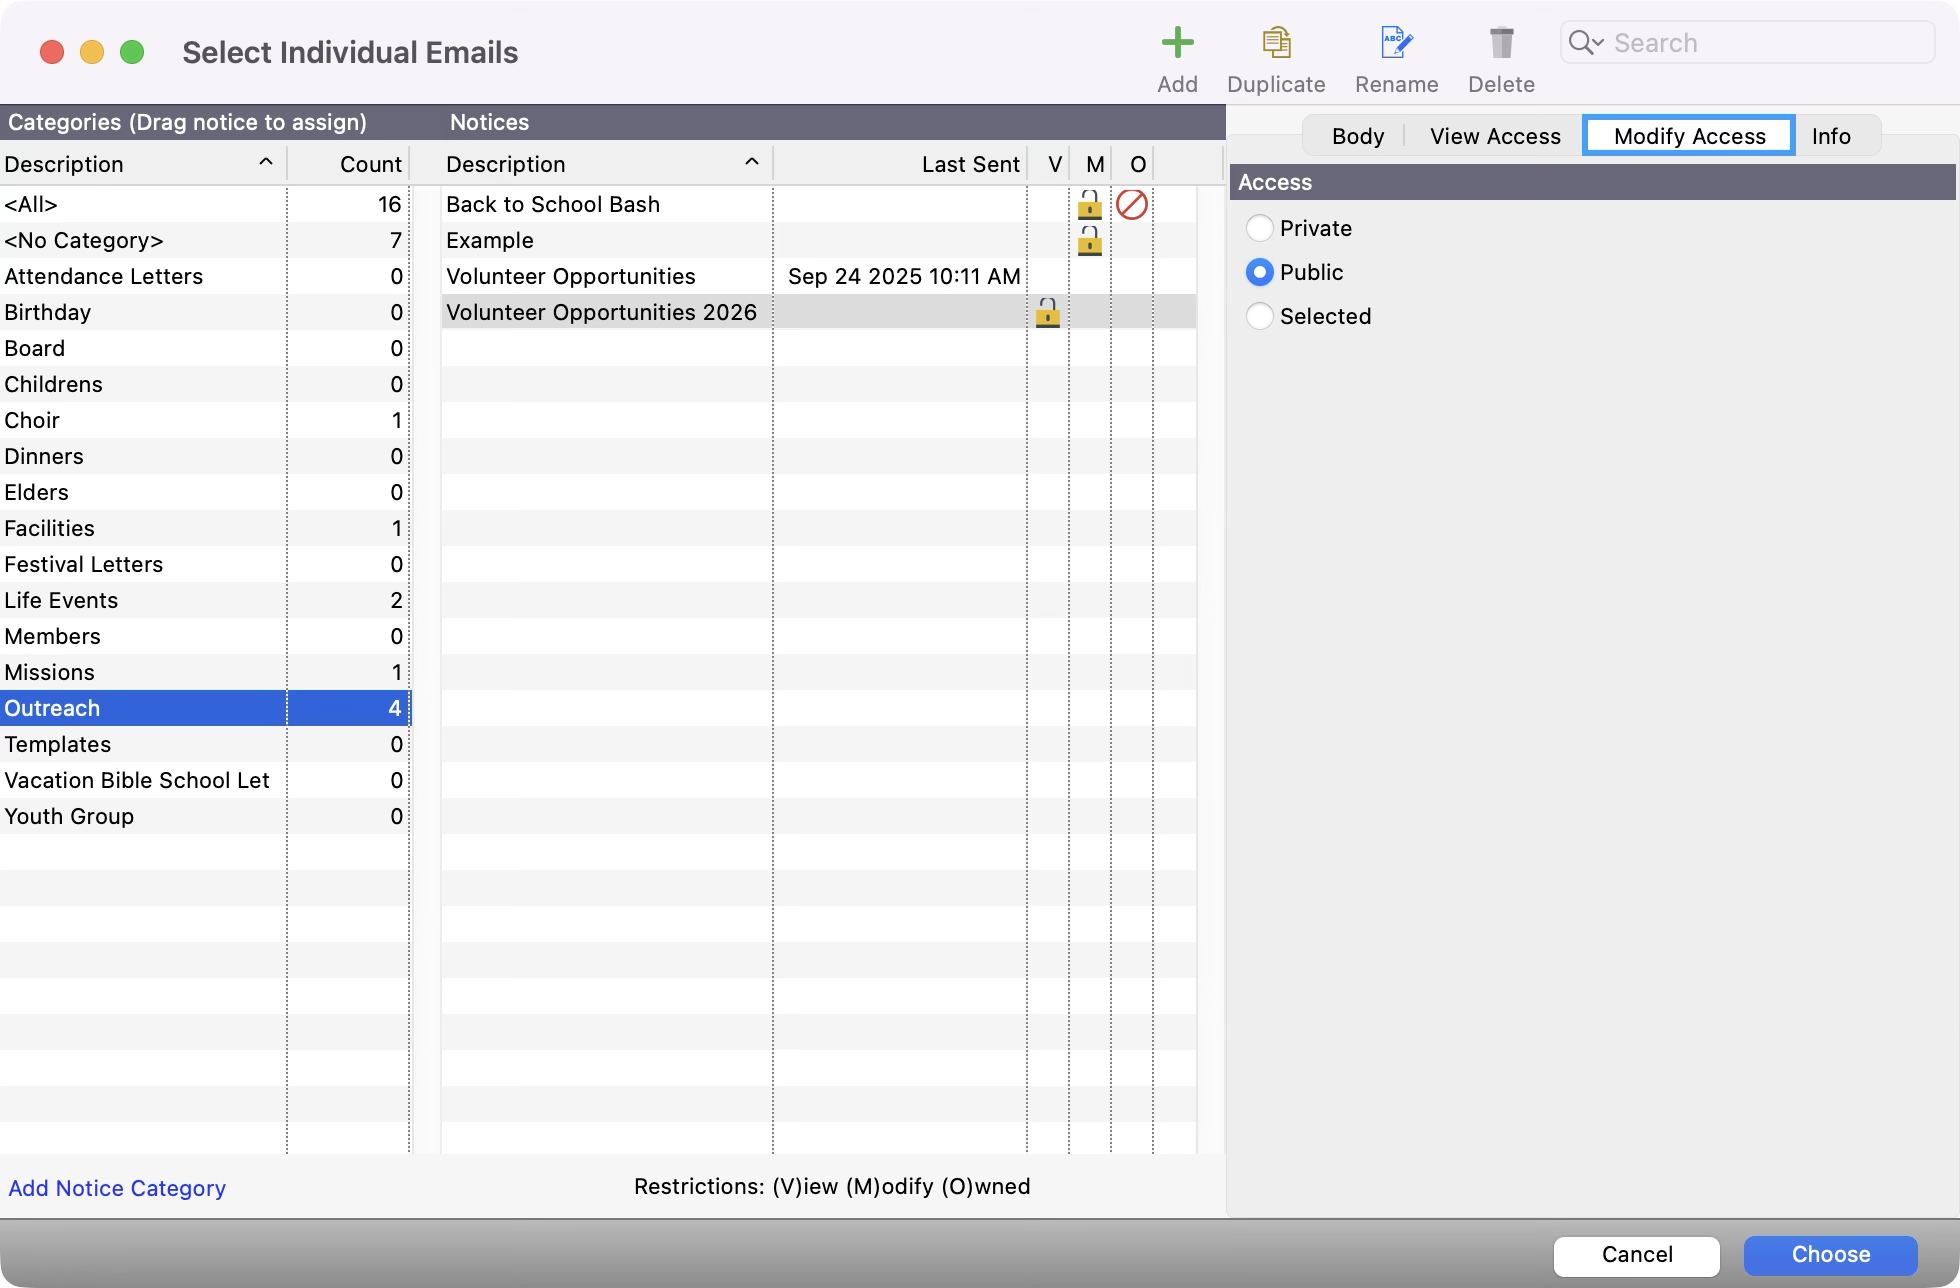
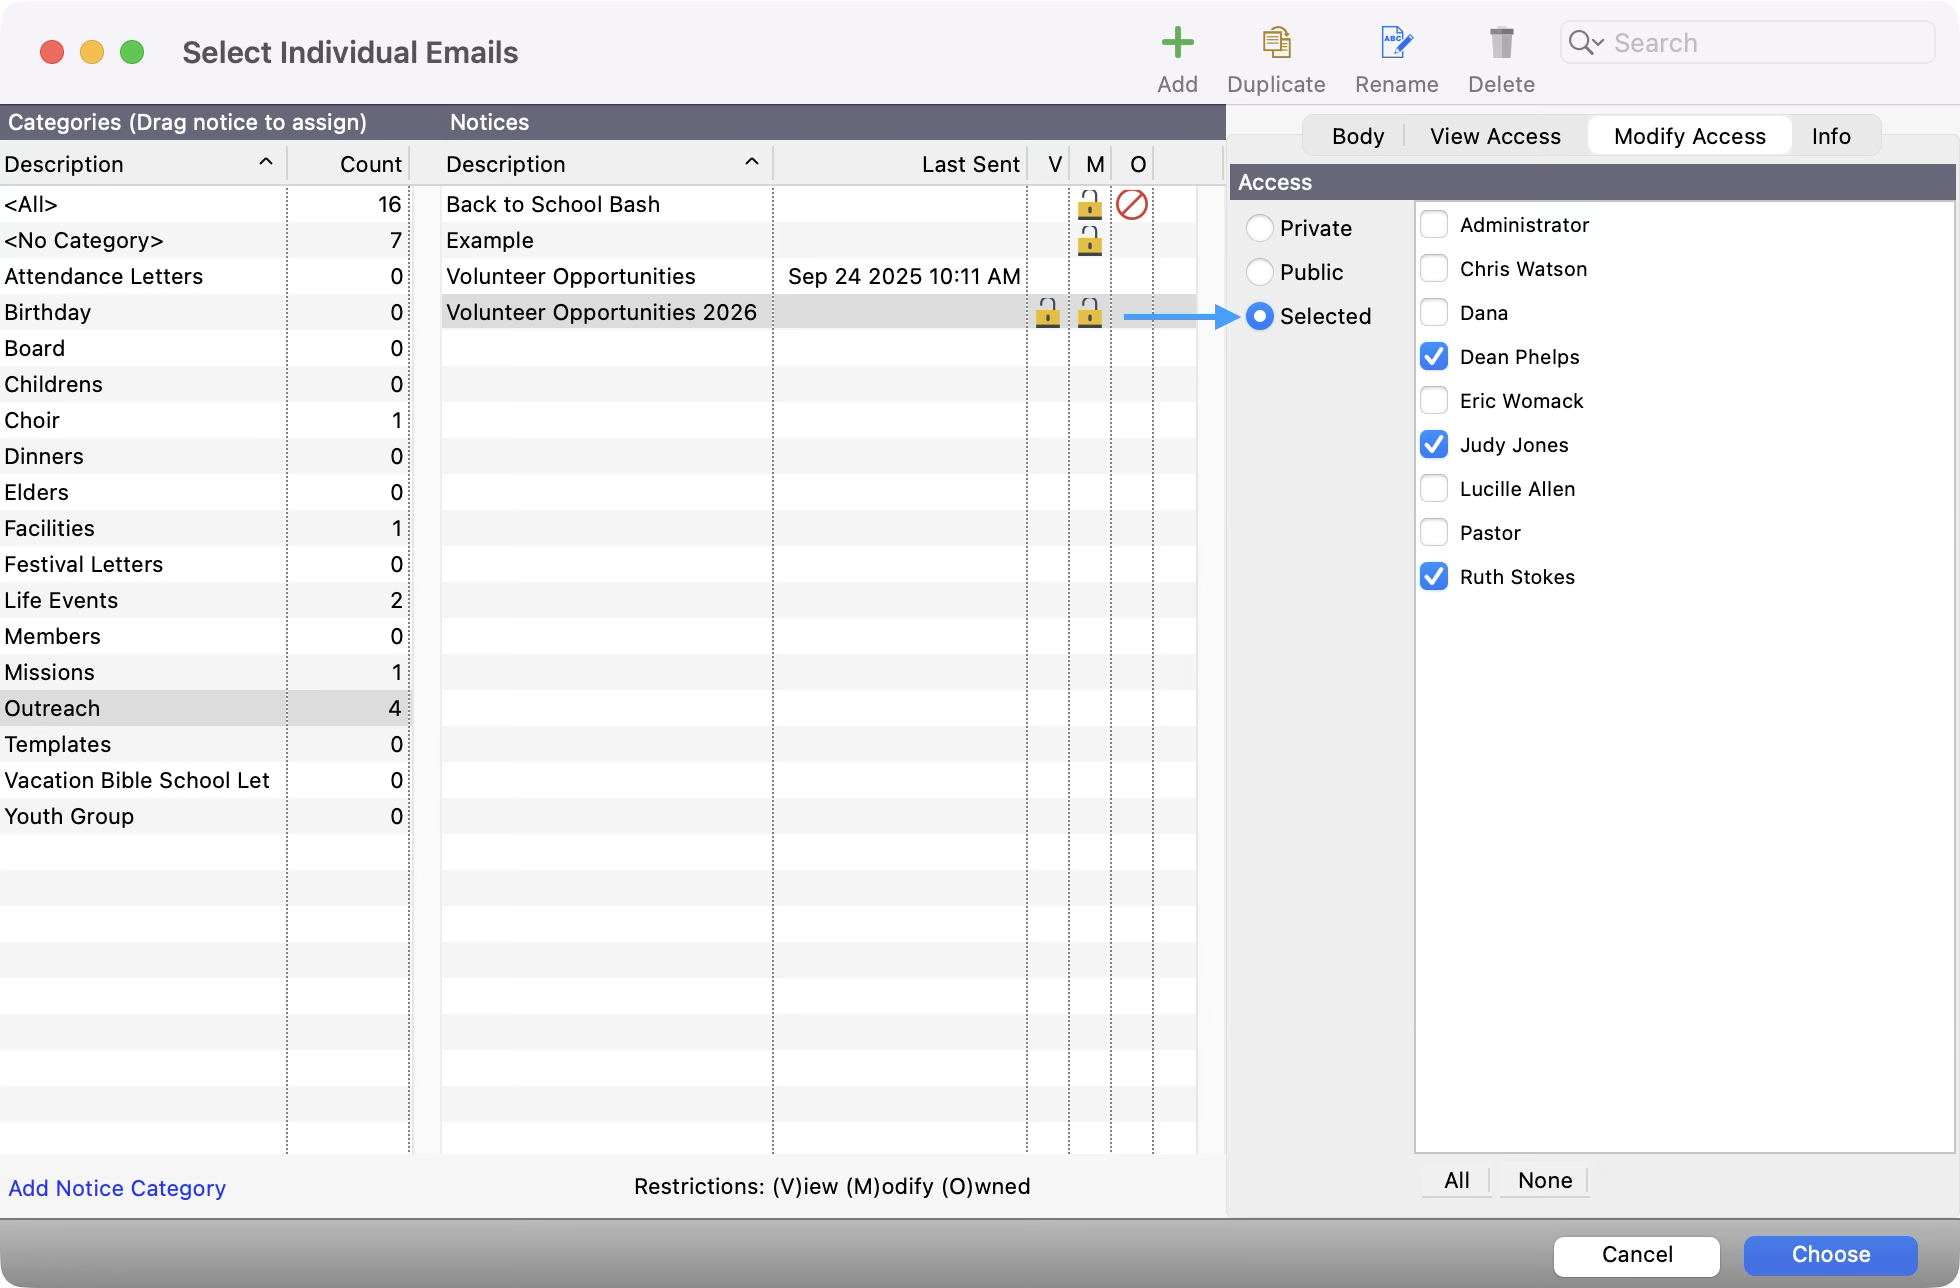
Modify Access
-
To see Modify Access permissions for a notice, look at the M column. If there is a lock, it means it is private. If it is blank, it is public.

-
To see and change, modify access, click the Modify Access tab. This setting restricts who can modify and use this notice.
-
If you set it to Private, it will only appear in the Notices list for you when you are logged in. No other users will even know this notice exists.

-
If you set it to Public, all CDM+ users will be able to make changes to this notice.

-
If you set it to Selected, you will see a list of users appear to the right. Put a check in the box next to the user's name you want to assign modify access to.
Info
-
Under the Info name, you can see more information and details about this notice.
