
The Address Records window will open with the Address pane showing.
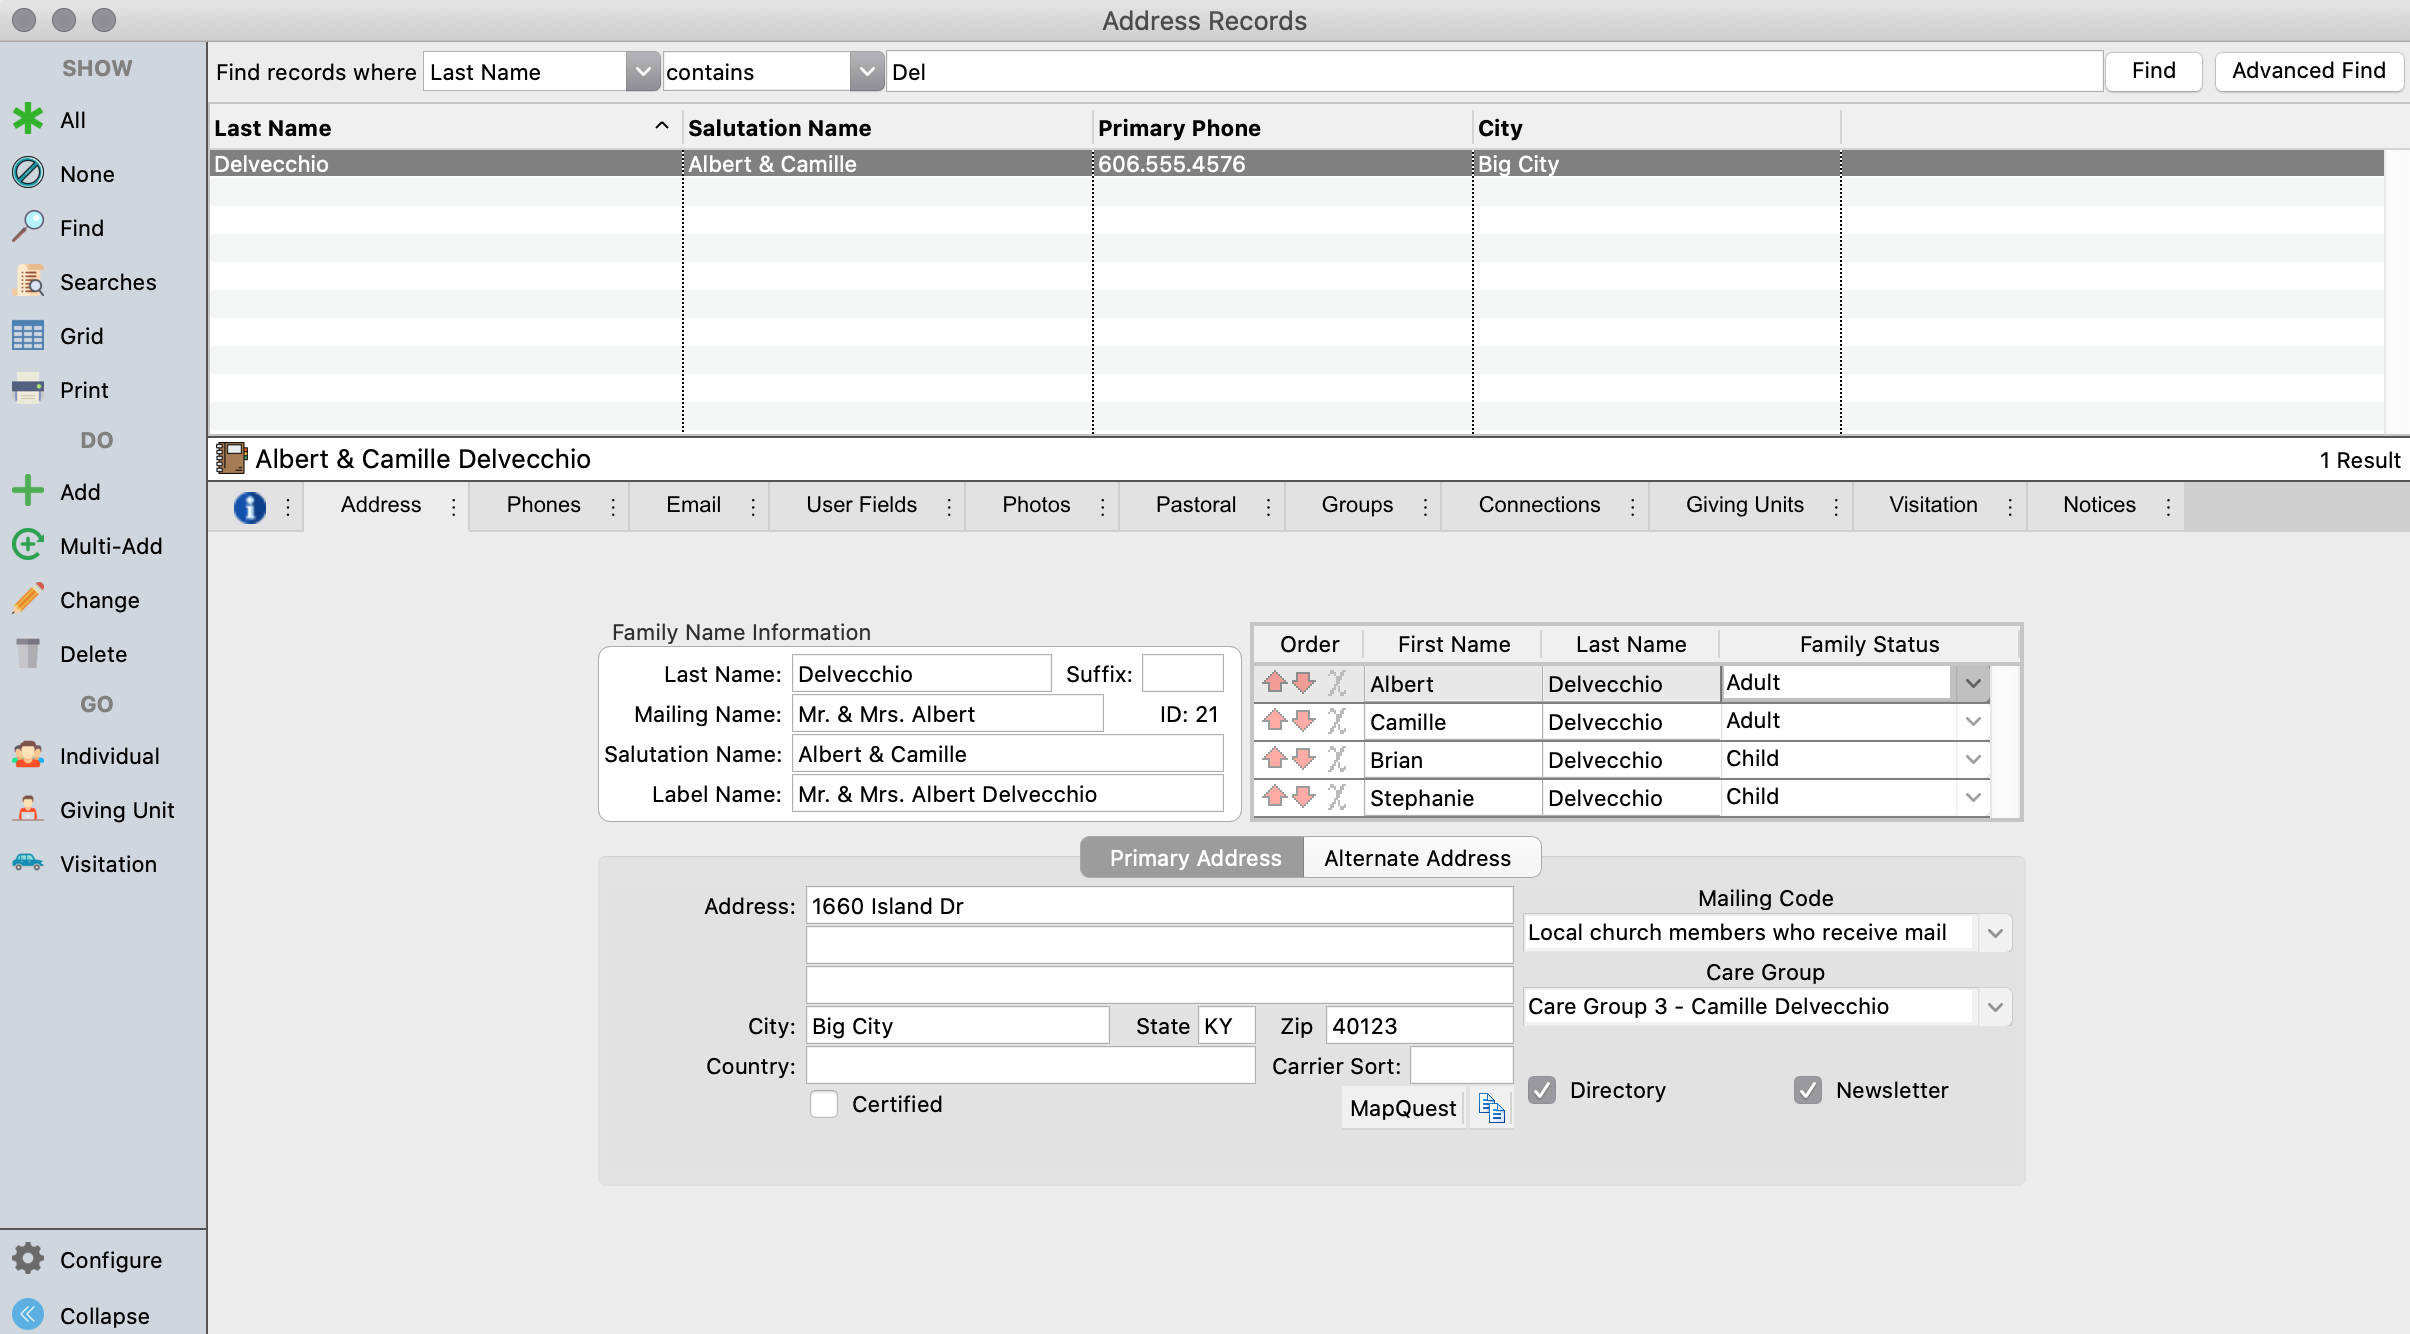
Click on the Add button at the left side of the window. Or, if you are entering multiple records, you may click on the Multi-Add button. This will allow you to enter new records without clicking on Add each time. Click the Save button after each record and click the Finish button to complete the session.
Family Name Information
When adding a new Address Record, the Last Name field in the Family Name Information pane will be highlighted and will contain a blinking cursor. Type the information, pressing the Tab key to move to the next field (Shift+Tab to move back) or using the mouse to click in the desired field.
If you inadvertently press Return/Enter instead of Tab, CDM+ will save the record. Just click on the Change button at the bottom of the window and resume entering information. (If you are in the Multi-Add mode, you would need to click on Finish, find the record, and click on Change.
The Mailing Name consists of the first name or names you would use to address mail to a family. Some examples are “Mr. and Mrs. Michael” or “Michael and Susan”.
Salutation is the name you would use to begin a letter to a family. Some examples are “Mr. and Mrs. Disney” or “Mike and Susan”.
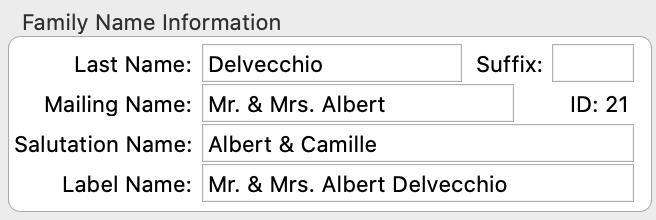
Once you type the Mailing Name and press Tab, CDM+ will enter a default Label Name for this family, which is the Mailing Name+Last Name. It may be changed. For example, you may wish to enter “The Disney Family”. Think of the Label Name as the name information to use when addressing an envelope to this household.
When printing reports, including labels and envelopes, you have the option of using either the Mailing Name, Salutation, or Label Name. If you choose either the Mailing Name or Salutation, CDM+ will add the Last Name to it. The program does not add the Last Name to the Label Name on reports.
Enter all information in upper and lower case. Mailing labels can be printed in the USPS-preferred all caps.
After completing the Family Name Information pane, pressing Tab will place the cursor in the first address line of the Primary Address pane.
Address Standards
Before entering any addresses, let’s talk about the address format. Many of the addressing rules that most of us learned in school do not conform to the U.S. Postal Services addressing standards. Why is it important to follow those standards? Very simply put, your mail is more likely to be delivered in a timely manner if you do. Plus, if you take advantage of the CDM+ CASS certification service in order to do bulk mailing at lower automation postage rates, addresses that conform to the USPS standards are much more apt to certify and qualify for those low automation postage rates.
To understand the way the Post Office wants us to write addresses, it helps to know how an address is read by the postal service. Addresses are always read from the bottom line up—beginning with the line with the ZIP Code, state, and city, then the delivery address line (street, PO Box or rural route & box numbers). Note that in the address below, the apartment number is on the same line as the street address. If you think about it, you'll see why apartment, suite or unit numbers should be placed at the end of the same line as the street, not on a line below. Following that "reading from the bottom up" rule, an apartment number without a street address makes no sense.
Here is a properly formatted address (according to the USPS):
Mr. and Mrs. Robert Jones
3200 S Royal Palm Ct Apt 316
Sarasota FL 34234-3850
If you do not know the “official” USPS abbreviation for a street, it is best to spell it out completely. For example, a town may have both a US Highway 60 and a County Highway 60. If you type only “Hwy 60”, the address is incomplete. Also be sure to include any directional modifiers: e.g., East, West, North, or South, which may be abbreviated as E, W, N, and S. Always leave a space between a highway route number and its directional: e.g., US Highway 60 E.
A correct ZIP Code is very important since it is the first piece of information read. A 5-digit ZIP code tells the postal service the city or section of a city for this address. A 9-digit ZIP code also includes street information. If you do not know the ZIP Code for an address you can phone your local Post Office or, better yet, visit the USPS web site (www.usps.com) and click on “Look up a ZIP Code” to quickly get the 9-digit ZIP code (and correct address format) for any address in the U.S.A.
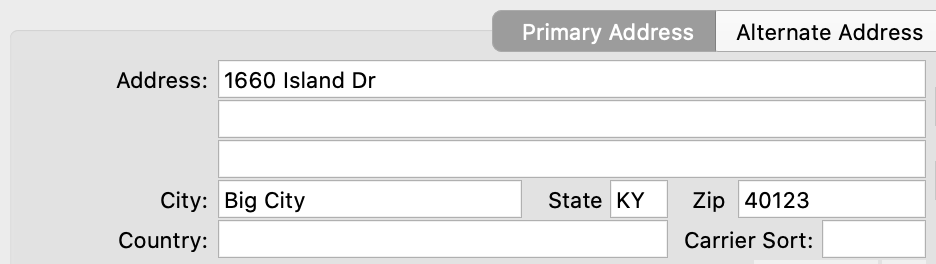
Entering an Address
Despite the U.S. Postal Service’s standardized mailing address having only 3 lines (Recipient Line, Delivery Address Line and Last Line [City/State/Zip fields in CDM+]), CDM+ provides 3 address lines in additional to the name fields and City, State and Zip fields. This is to provide space for additional information, such as a company name or a nursing facility and room number. When entering addresses, keep in mind the “read from the bottom up” rule. Type any extra information in the lines above the delivery address line (street address or PO Box). Note that apartment or suite numbers should be included with the street number and name in the Delivery Address Line. For example:
If an address has no “extra” information, you may use either whichever line you choose for the delivery address—CDM+ will correctly format addresses on labels and reports regardless of your choice. However, being consistent in entering mailing addresses in the same address line makes finding a record based on the mailing address easier.
If you have entered a default City, State and/or Zip under the Membership & Attendance System Preferences, they will be displayed.
Specifying default addresses elements is especially useful if the majority of your addresses have a common City, State and ZIP code. If the addresses in your database are spread over multiple ZIP codes, you may choose to define only the default city and state. You would then tab through those fields when adding a new Address Record and type the correct ZIP code.
Tab through the fields if they are correct or highlight a field and type over the existing entry to change it.
Do not enter your own country in the Country field. It is only used for foreign addresses.
The Carrier Sort field is used only if you sort your bulk mail by Carrier Routes. If you do, the appropriate Carrier Route number would be entered here.
Mailing Code
Pressing Tab again will place your cursor in the Mailing Code field. Here is where you define what type of address this is for mailing purposes. If you have already set up Mailing Codes in the Master Coding System window (see Master Coding System), they will appear in the drop list when you click on the down arrow.
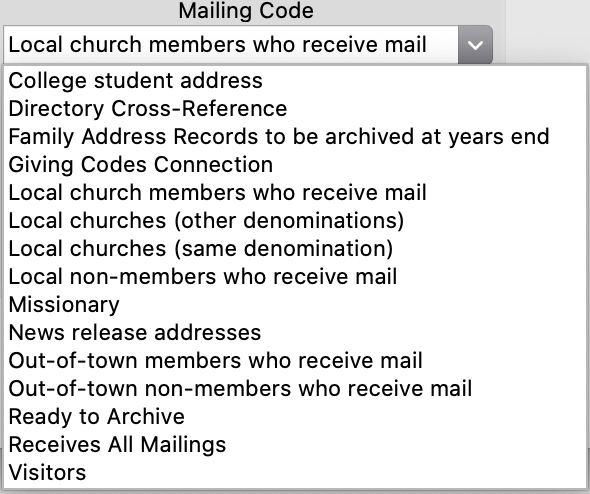
Or, you can place your cursor in the box and type a portion of the item you want and press Tab to “auto-complete” the entry. This search is case-insensitive and works on any portion of the entry, not just the beginning letters. For example, to find “Local Church Members Who Receive Mail”, you can type “members who receive”, press Tab, and you’ll get the first item that contains the words “members who receive.”
If you have not set up Mailing Codes, or wish to add a new code, you can do it here. Just type the new Mailing Code and either press Return/Enter or click Save. A popup window will appear asking if you want to add the new mailing code. Click on Yes and the new Mailing Code is immediately added to the drop list.
Care Group
The Care Group field works similarly to the Mailing Code field. This field is designed to assign a code specific to the address. For example, Shepherding Groups or Stewardship Canvassing Teams.
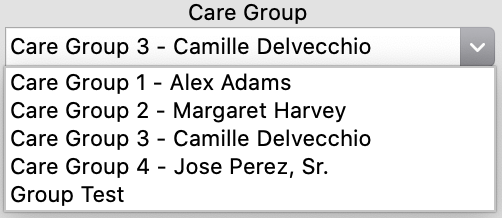
You can change the title of this field in the Fields section of the Membership & Attendance tab in System Preferences.

Pressing Tab again will take you out of the Primary Address pane. However, before we leave this section there are a few other items to cover.
Newsletter/Directory — Address Labels/Envelopes can be printed just for those addresses that have either or both of these boxes checked. These checkboxes are on the Visitor Records window also.
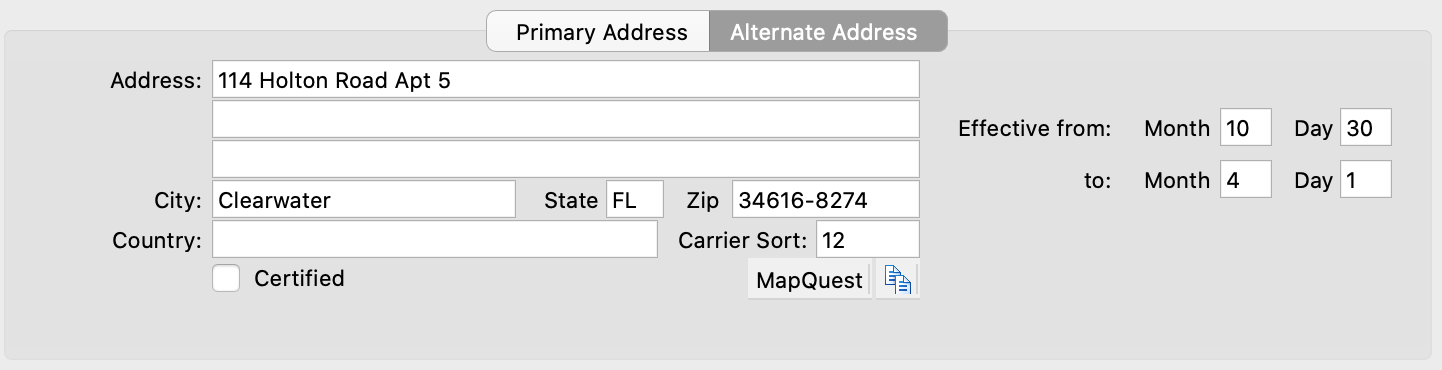
Alternate Address
If this family has an alternate address, such as a different winter or summer address or a college address, click on the Alternate Address tab and enter that address and phone number. Enter the effective dates for this address. CDM+ will automatically select the correct address based on these dates when using the “Current” address option on reports.
The Swap button is available when you are Change mode, but its use is mutually exclusive from the effective date range . It is not necessary to set the effective date range and then click on the Swap button; one or the other will suffice.
Both the Primary and Alternate Address panes also have the following items:
-
Certified
-
MapQuest
Individuals List
After completing the address section of the window, place your cursor in the First Name field of the Individuals list.
Type the first name of one of the individuals at this address. Press Tab and CDM+ will automatically fill in the Last Name from the Family Name Information pane to the left. If this individual has a different last name, you may type it, replacing the existing name.
Select the Family Status from the drop list by clicking on the down arrow.
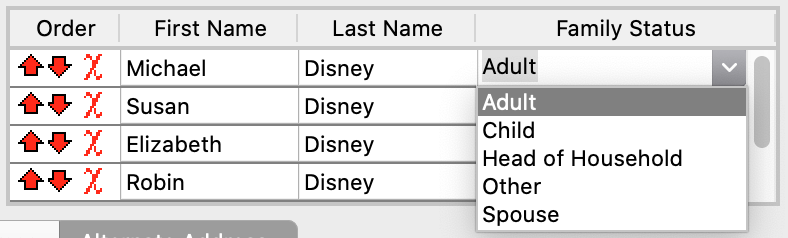
The Family Status is not exclusive. For example, you may designate two or more individuals as Head of Household.
Or, you can type any portion of the item you want and press Tab to auto-complete the entry. This search is case-insensitive and works on any portion of the entry, not just the beginning letters. For example, typing “head” will bring up Head of Household.
If you wish to create a new Family Status code, you can do it here. Just type the new code and press Tab. You will see the following message:
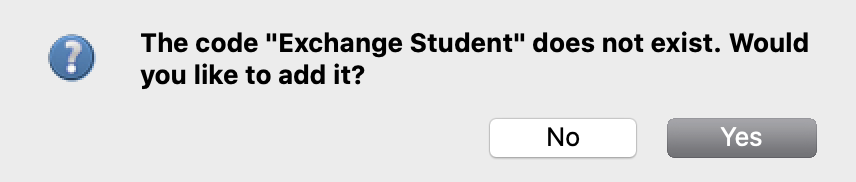
Click on Yes and the new Family Status code is immediately added to the drop list.
To change the order of individuals in the list, click on the red up and down arrows at the left. This will affect the order in which the individuals are listed on some reports. To delete an individual from the list, click on the red X.
You have now entered the basic information for a family. Additional information can be entered through the other panes of the Address Records window, by clicking on the tabs to the right of the Address tab. It is not necessary to enter all information at one time. At any point you can add or change information on an Address Record by finding the correct record and clicking on Change at the bottom of the window. When you are finished entering or editing information, click Save.
If, after entering basic information, you are finished entering family information, use the Individuals button in the sidebar jump to adding Individual Record information for the individuals in this household.