
List Maintenance of both Address Records and Individual Records provides a quick and easy way to assign records to lists. Common uses for List Maintenance include:
-
Assigning/changing mailing codes to Address Records through Address List Maintenance
-
Assigning individual membership and status codes
-
Adding individuals to groups, offices, and committees, etc.
-
Adding individuals to Church School Classes
Select either Address List Maintenance or Individual List Maintenance from the Membership menu.
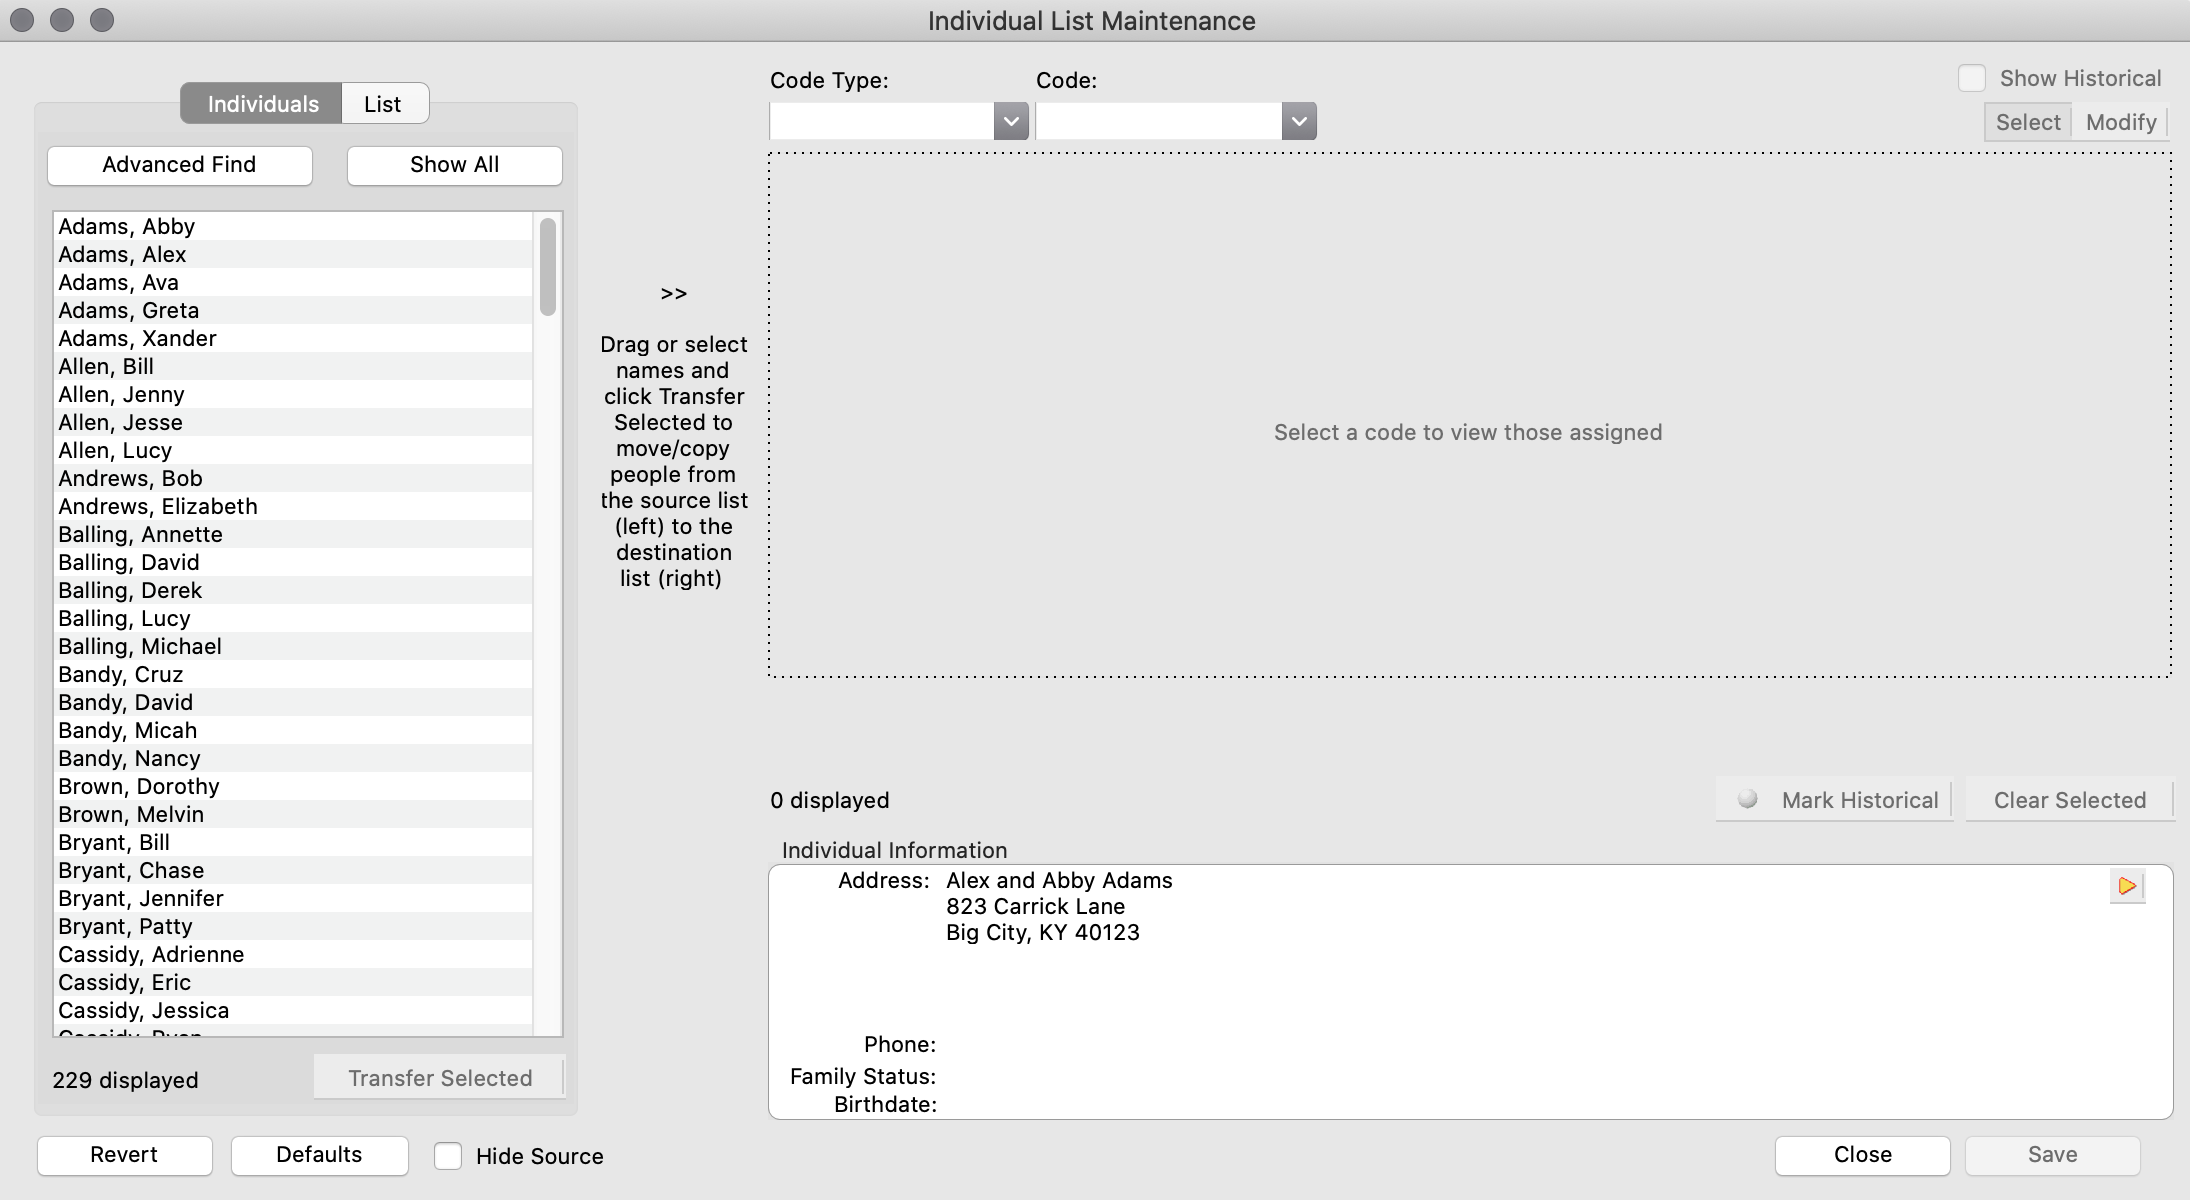
On the left side of window you will see tabs for Addresses/Individuals and List. With the Addresses/Individuals tab selected, you may either Show All records or use the Advanced Find to query for a specific list of records. With the List tab selected, you may choose an existing list. Click on the down arrow and select a Code Type, such as Current Church Offices. Then click on the down arrow and select a Code, such as Board Member. The list of all records with that assigned code will appear below.
Either way, once you have a list on the left side you may move or copy items to another list. Select a Code Type and Code using the drop lists on the right.
Double-click an item on the left-hand list to transfer it to the right-hand list. Or you may select multiple items and transfer them by dragging or clicking on the Transfer Selected button.
There are two modes of transfer—Move and Copy. Click on the radio button to select one. An item that is moved will be clear from the original list; one that is copied will remain.
Move will be disabled if mixing a built-in source code type with a different destination code or group type. To clear records from a built-in code type, select the code in the destination list and use the Clear Selected button to remove records from that code.
To move an item in the right-hand list back to the original list, simply double-click on it or highlight it and click on Transfer Selected. To clear an item without putting it back on the original list, highlight it and click on Clear Selected.
As long as you have not saved your changes, you can undo all the transfers by clicking on the Revert button.
Click on Save when you have finished moving items.
Detail Tracking in User-Defined Groups
This feature tracks group membership history, including terms, dates enrolled and de-enrolled, and position for each Individual group, Address group, Visitor group or Giving Unit group. Detailed Tracking for a code type (group) must be turned on in Master Coding System as described here.
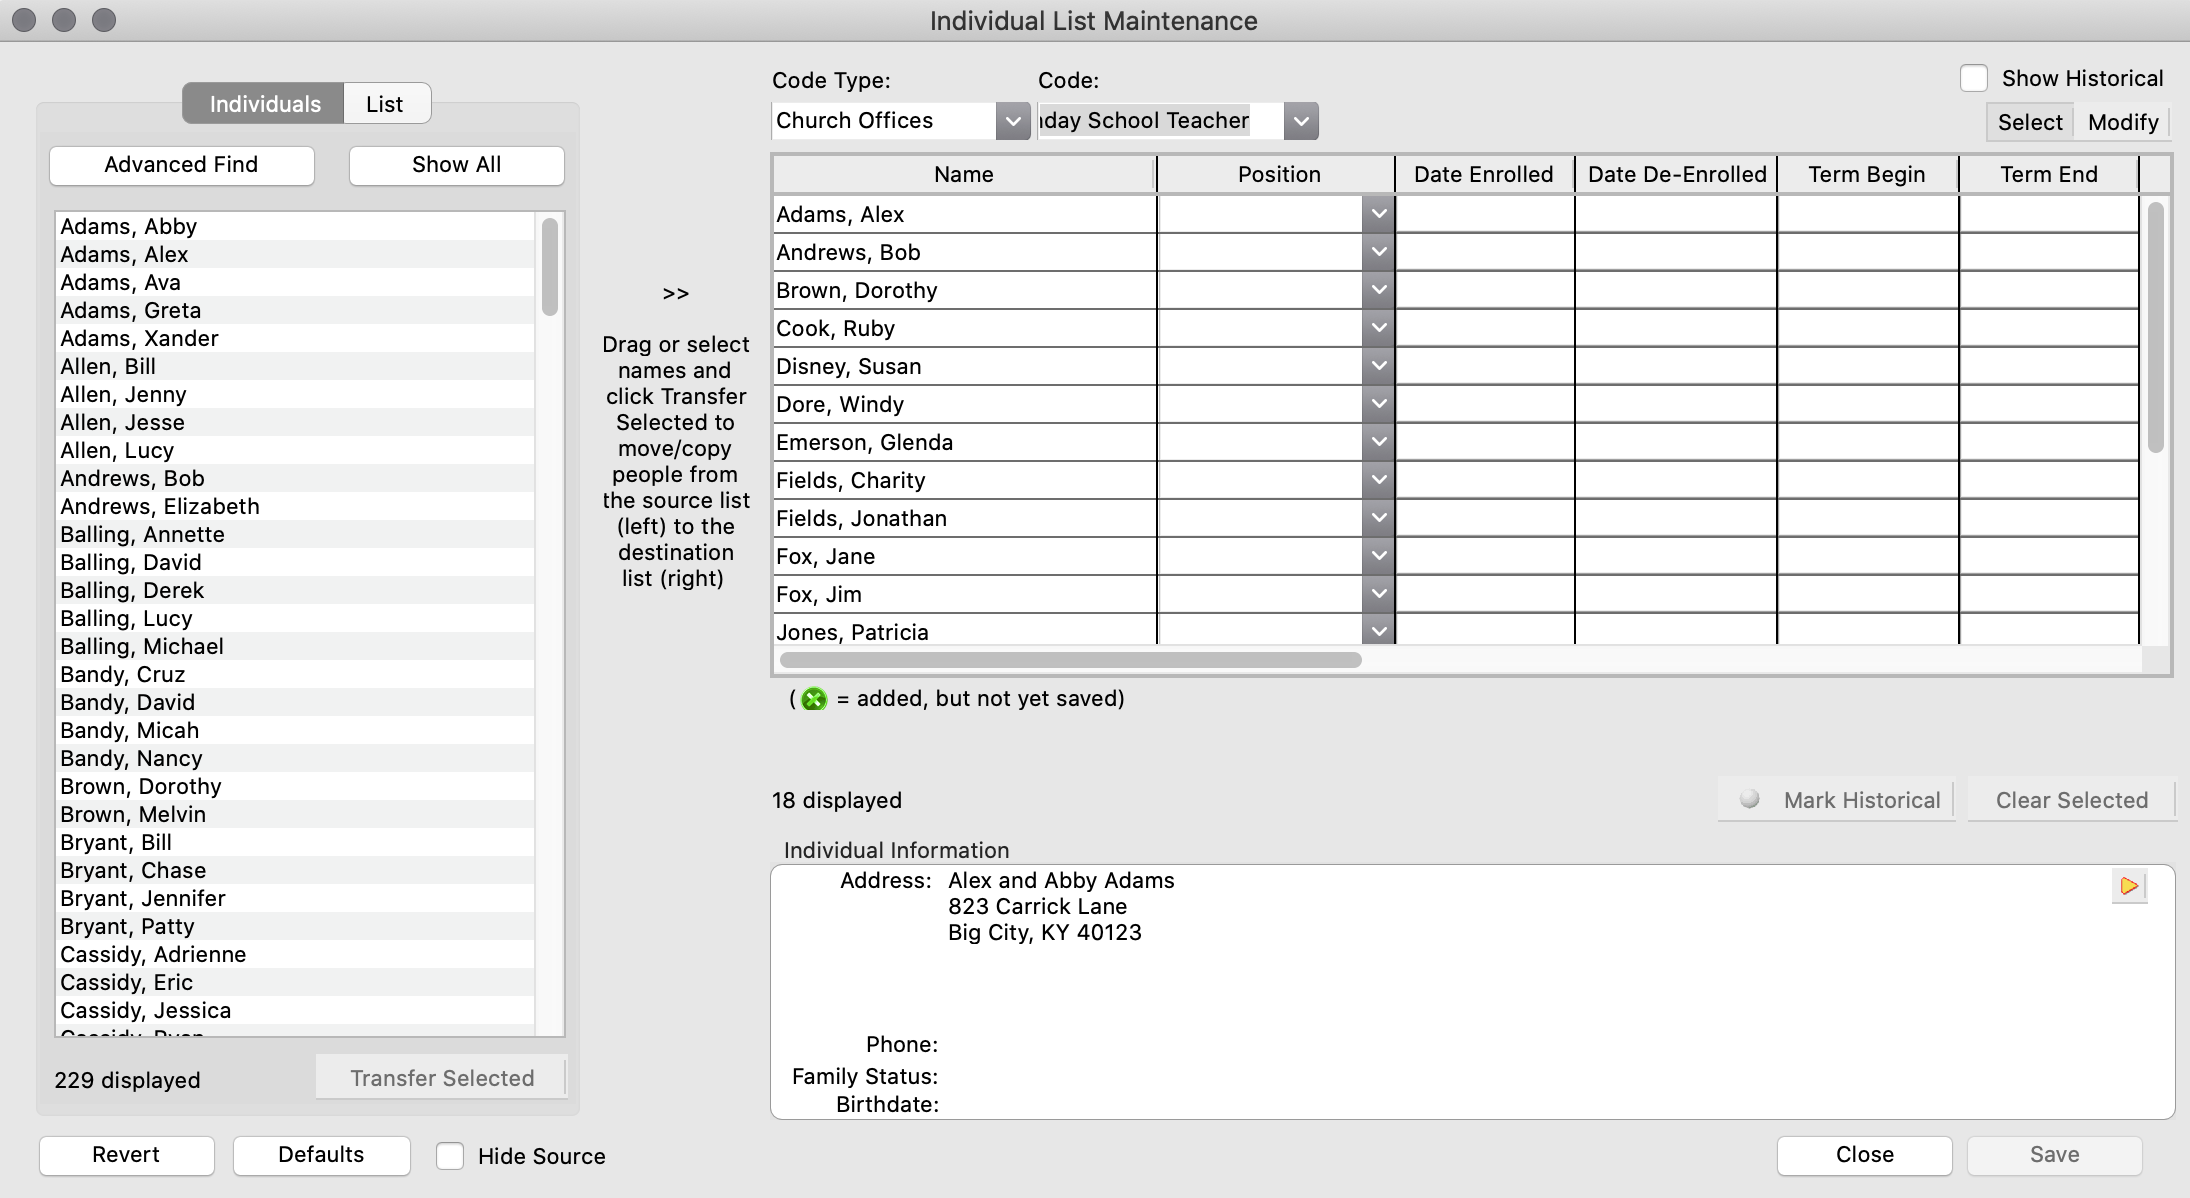
To add detail for codes (groups) assigned to individuals, open the Individual List Maintenance window and select one of the codes (groups) for which you checked the DT box on the Master Coding window.
![]()
To the right of the list of individuals assigned to this code are columns for Position, Date Enrolled, Date De-Enrolled, Term Begin and Term End. This is the detailed information you can now track. Click on the Modify button to change information for existing individuals. Select a Position from the drop list or type to add a new Position code, such as Member or Chair.
While working on the list you may choose to hide the source list on the left, which allows you to expand the window to the right to avoid scrolling. To do this, just click the Hide Source check box.
Default values - You may set default values for any or all 5 fields that are tracked. Click the Defaults button to open a pop-up window.
Enter the desired information, click OK, and those fields with default values will auto-fill when you add a new individual to the group. To change all individuals in the group to one or more default values, check the Reset box next to the desired field(s) and click the Reset button.
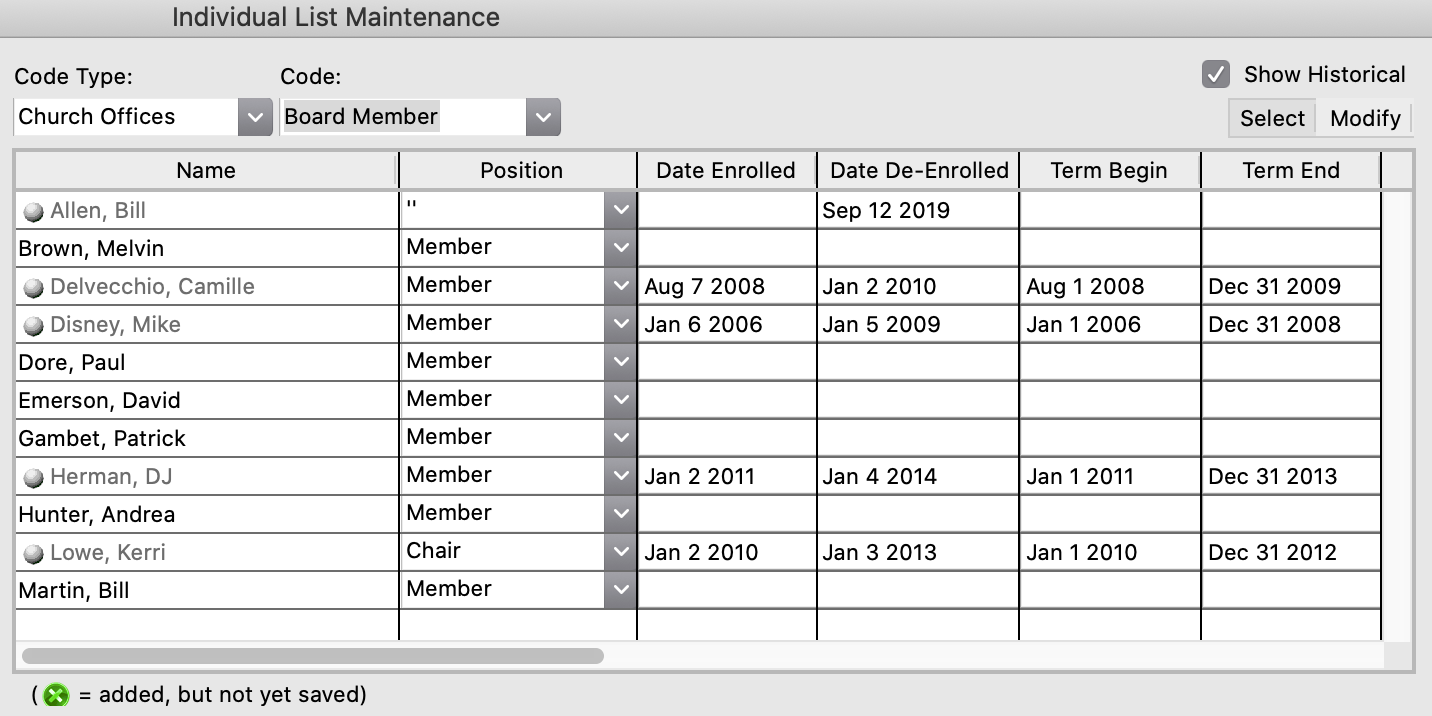
Historical entries - You may choose to display Historical entries by clicking the Show Historicalcheck box in the top right corner of the Individual List Maintenance window. Historical entries will display with the name grayed out and an gray circle next to the name. An entry becomes Historical either when a Date De-Enrolled is entered or by clicking the Mark Historical button below the list.
The detailed tracking information entered in the Individual List Maintenance is available on the Individual Record window. For example, if you choose to enable Detail Tracking for Current Church Offices, when you select the Groups tab on an Individual Record window, you will see a two person icon next to the groups listed under that type. Click on the people icon to see details of this individual’s membership in the group.
