Address/Individual Field Maintenance
Address Field Maintenance and Individual Field Maintenance allow you to quickly make additions or changes to multiple records from one window. You can narrow your list of records based on a query (Standard or Advanced Find) or you can show all records in the database.
As an example, we’ll walk through changing a ZIP code in Address Records. Although our example is using the Address Field Maintenance, the Individual Field Maintenance works in exactly the same way.
Select Address Field Maintenance from the CDM+ Membership menu.
Since the US Postal Service has changed 40123 ZIP codes in Big City, KY to 40125, we will first use the Find function at the top of the window to find all addresses that have a 40123 ZIP code. Since some ZIP codes entered in CDM+ may have their +4 extensions, we will search for records where Zip“begins with” 40123, rather than “is equal to” 40123.
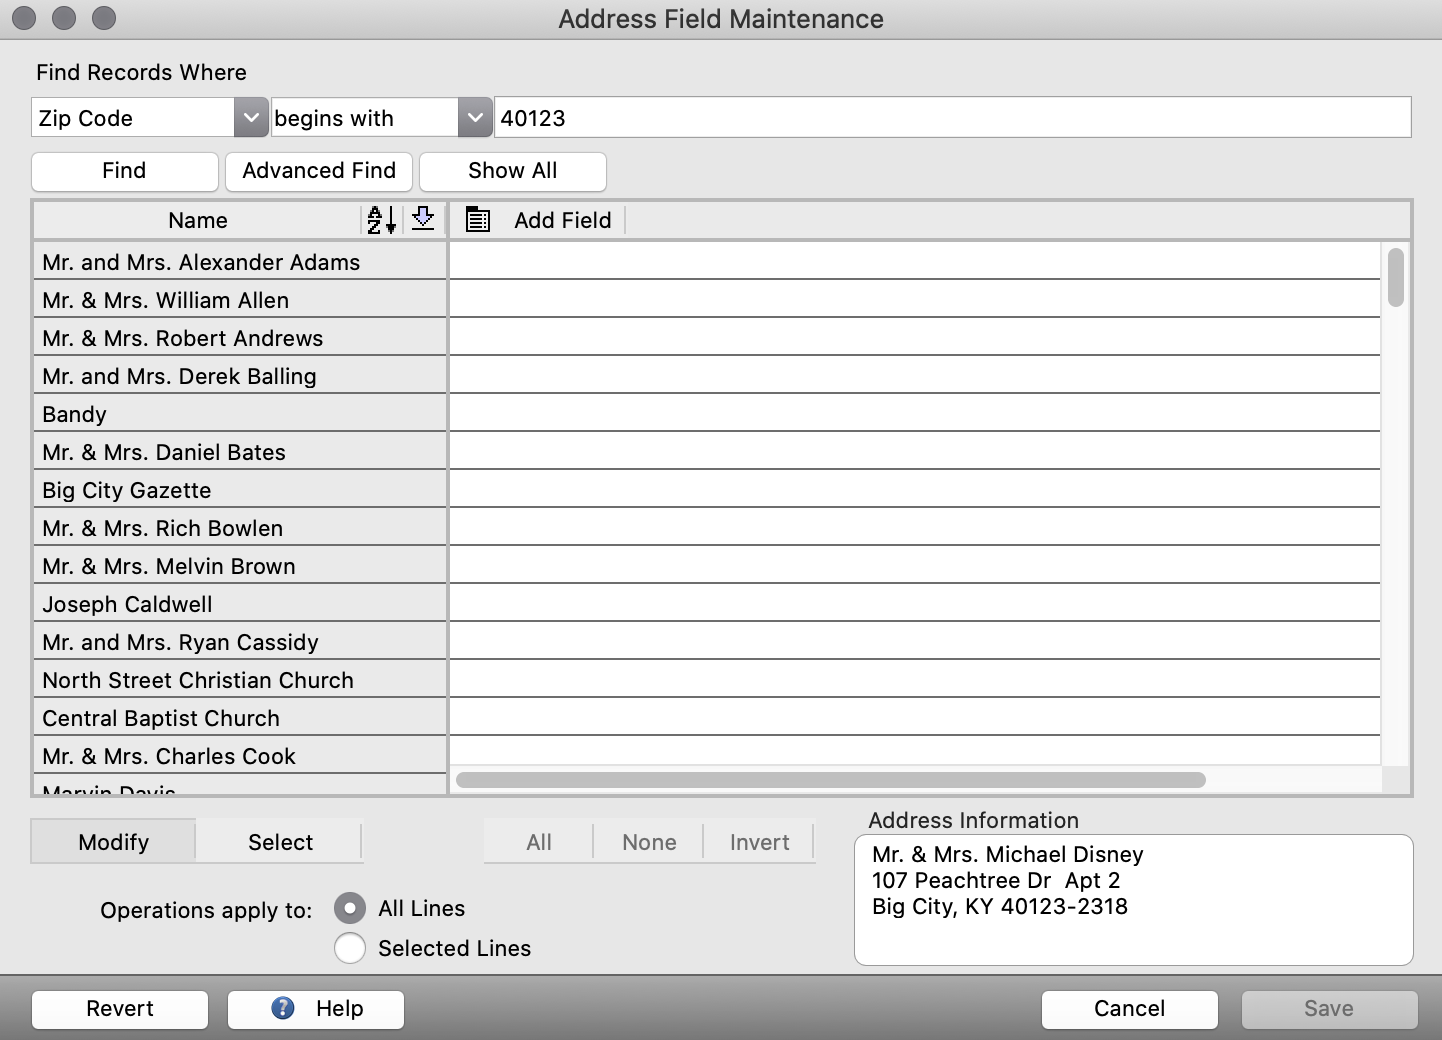
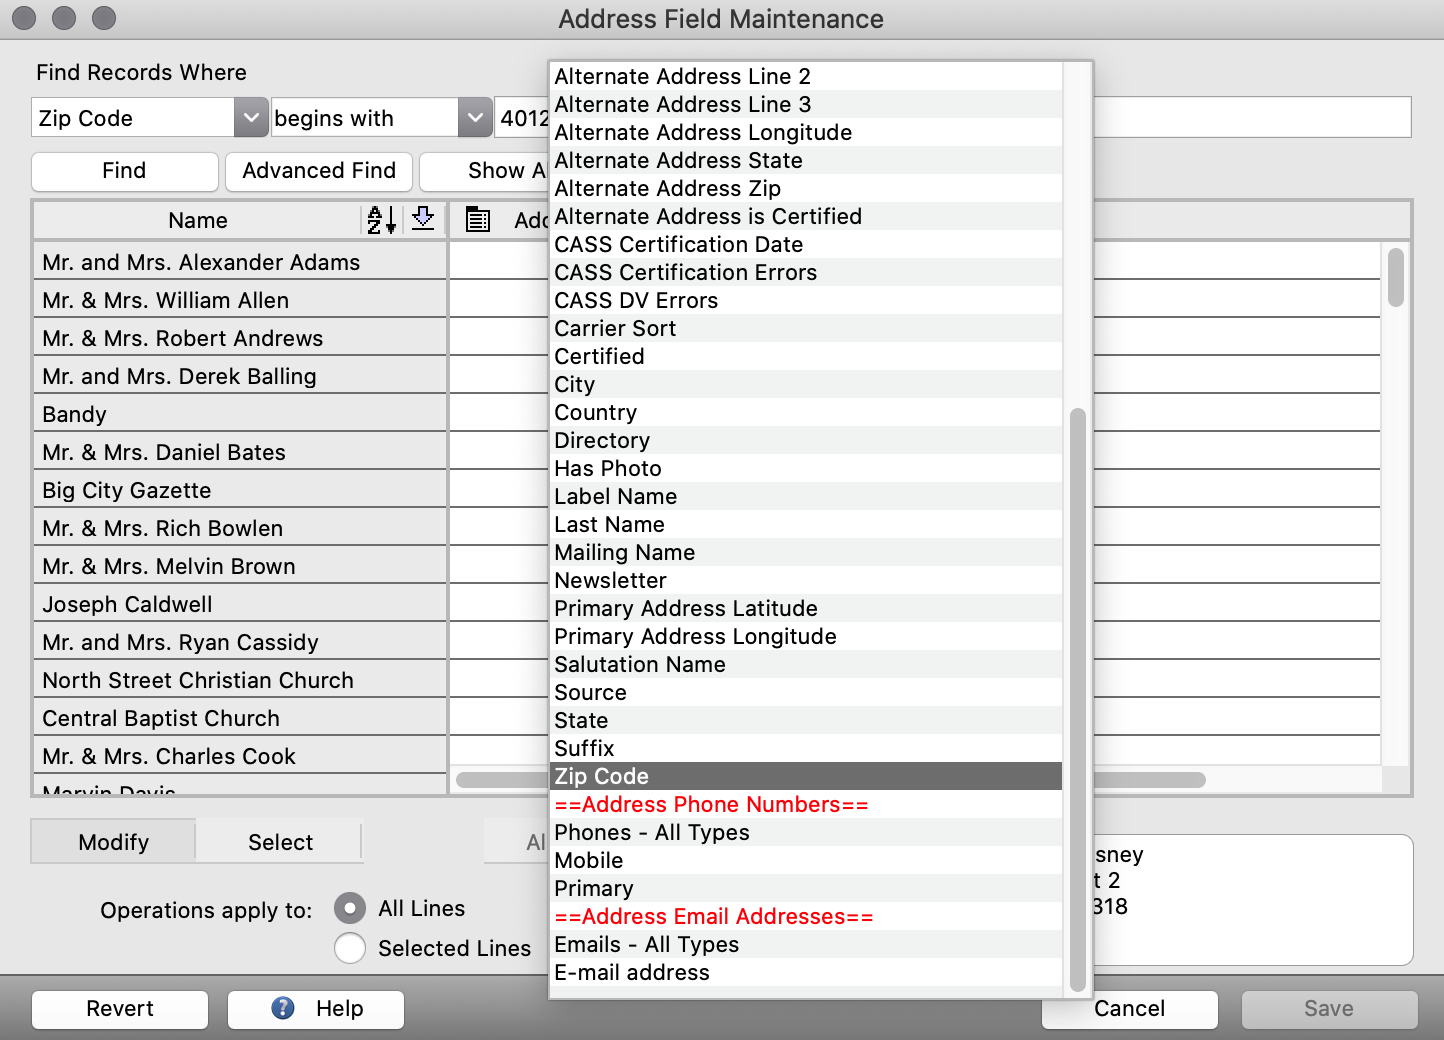
A list of Address Records appears in the first column on the left. Since we want to work with the ZIP code field of these records, we click on the Add Field icon at the top of the column and select Zip from the drop list.
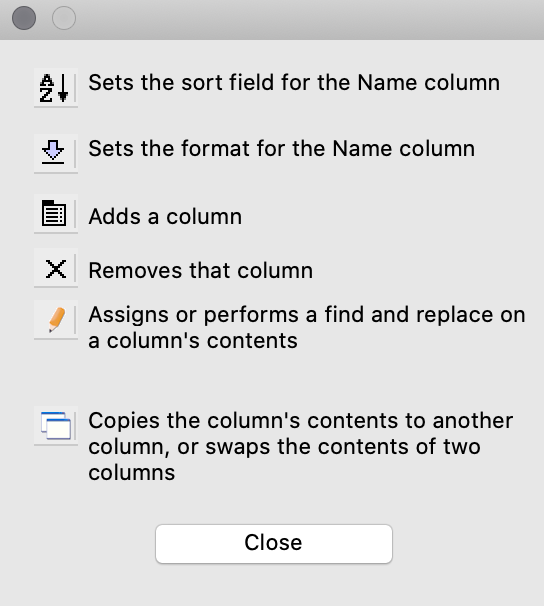
Now that we have the columns of ZIP codes, we can work with them. You will notice several icons at the top of the columns in the window. Click on the ? Help button at the bottom of the window to see the resulting functions if you were to click on each icon.
We could click on the pencil icon for Assign, select Assign Columns from the options, and type the new ZIP code assigned by the Post Office: 40125.
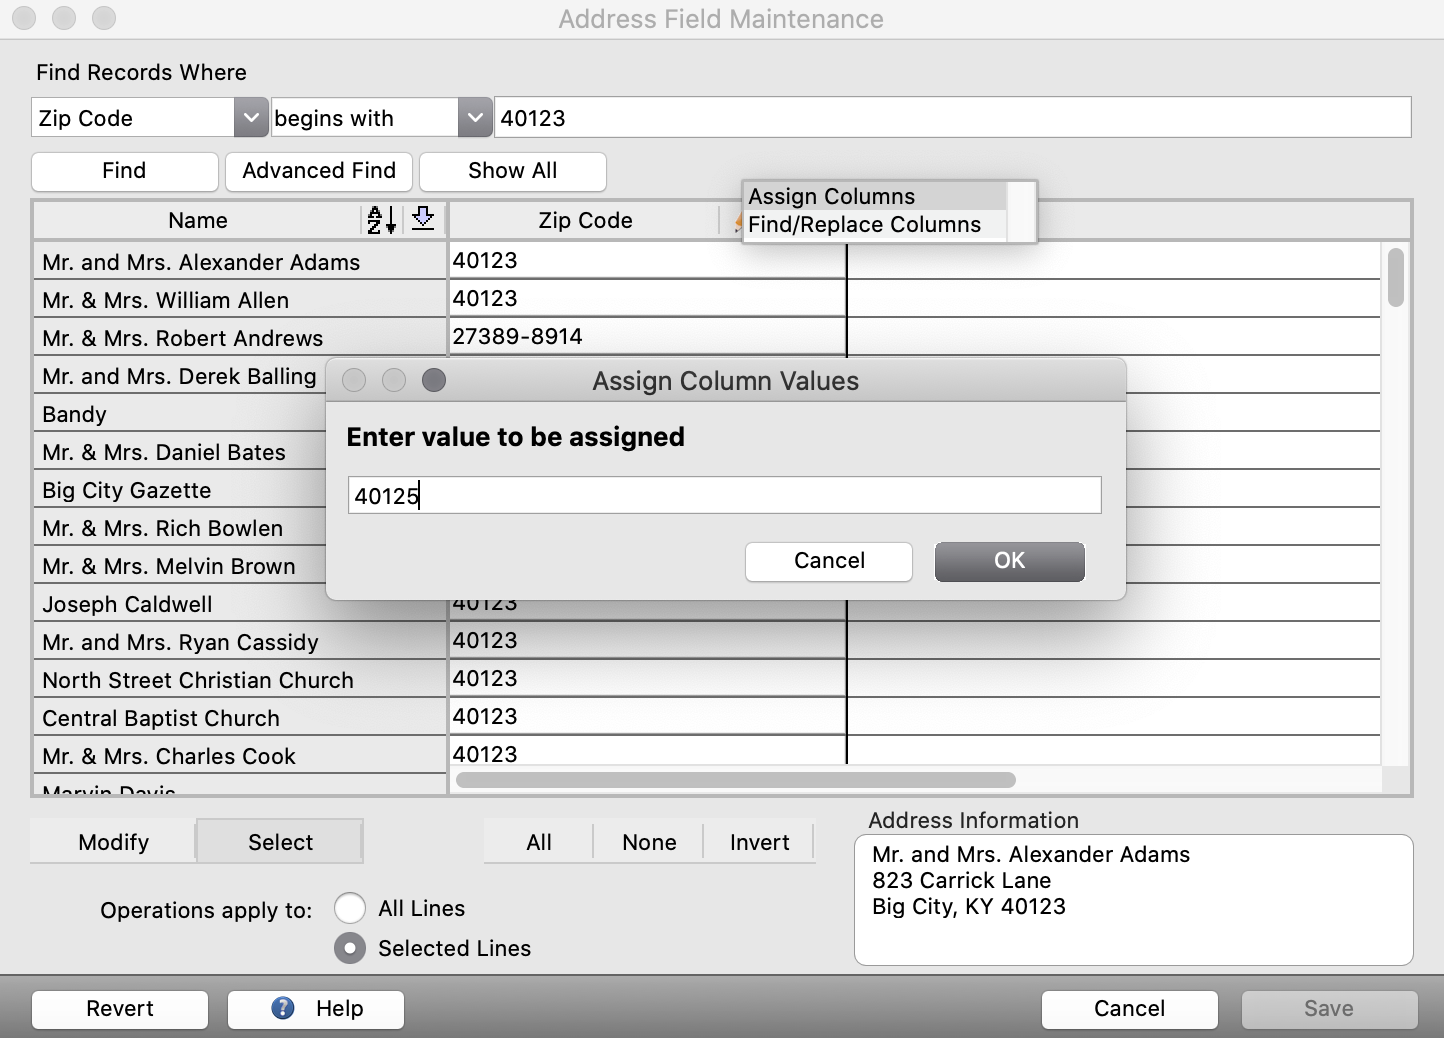
But, since we’ve been told that the +4 extensions to ZIP codes will not change, we only want to change the 40123 portion of the ZIP codes. So, we will click on the pencil icon for Assign, select Find/Replace Columns, and specify to replace only the 40123 text with 40125. This will preserve the +4 extension to the ZIP code.

You will note that the radio button next to Operations apply to: All Lines is selected. If we want to make this change on only some of the records, we could select only certain lines. To do this, first click on the Select button. You will notice that this makes active 4 other buttons: All, None, Invert, and Search. Now you may select one or more records to modify by clicking on the appropriate line(s).
To change all but a few records, select the few that do not change and click on Invert. This will select all but the few you first selected. You can then proceed to perform the Find/Replace.
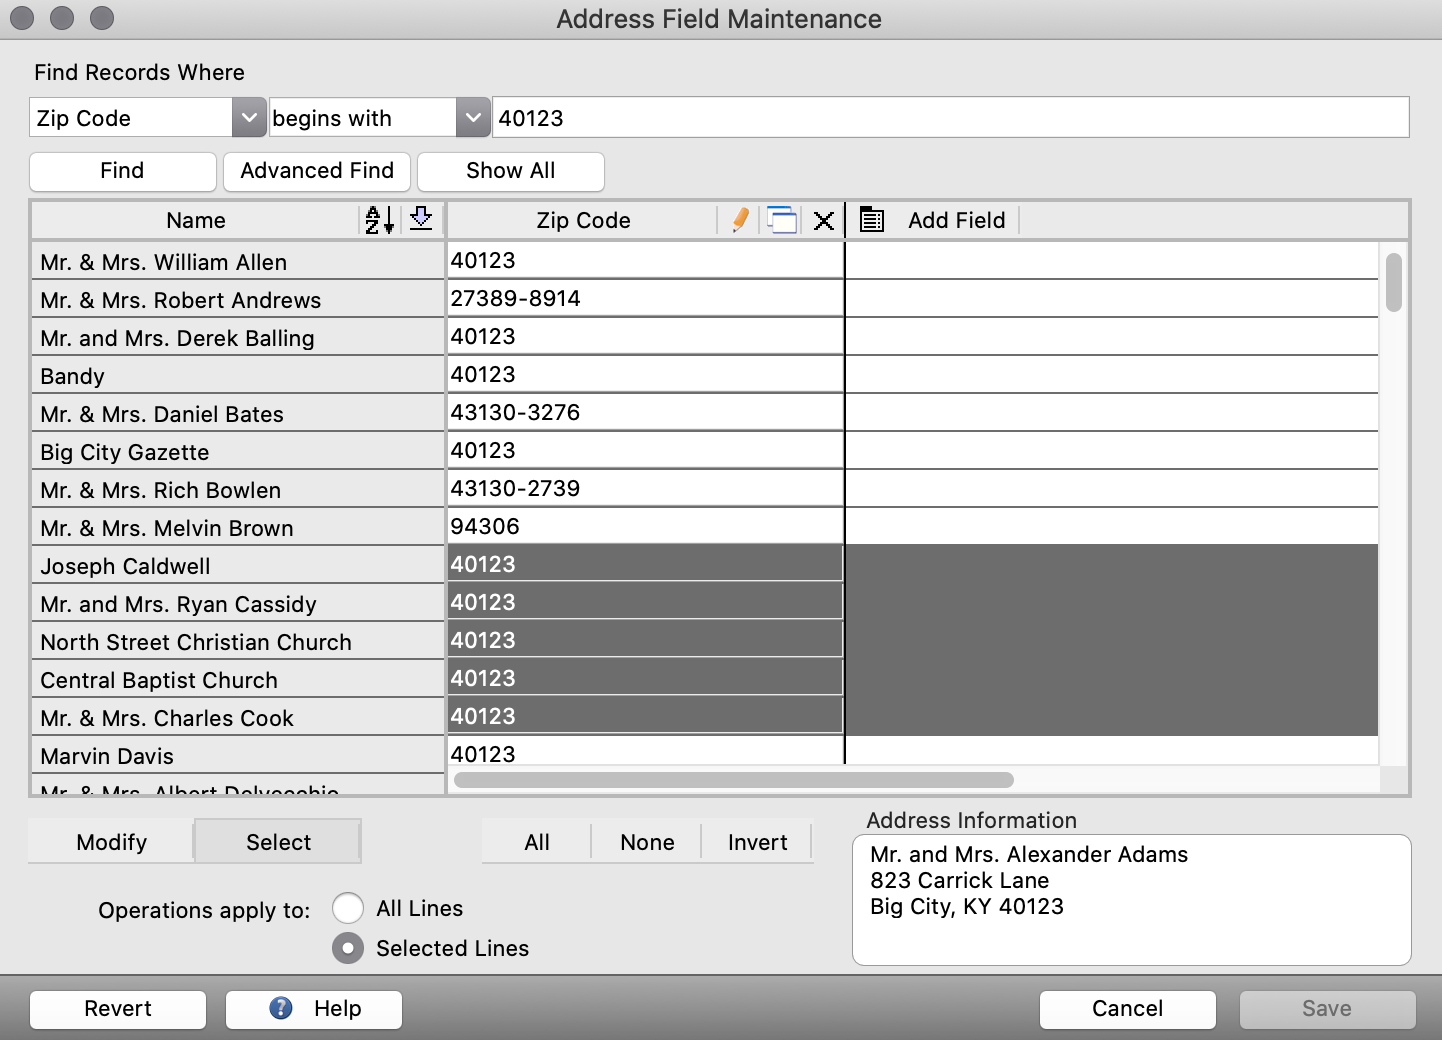
Clicking on the Search button opens an Advanced Find window which will select records based on a query.
With the Modify button selected, you can add or change data directly in Field Maintenance. Just click in the desired field and type. Click Save when you have finished.
