-
In the CDM+ desktop software, go to Program --> Check-In/Check-Out --> Name Badge Print Server.

-
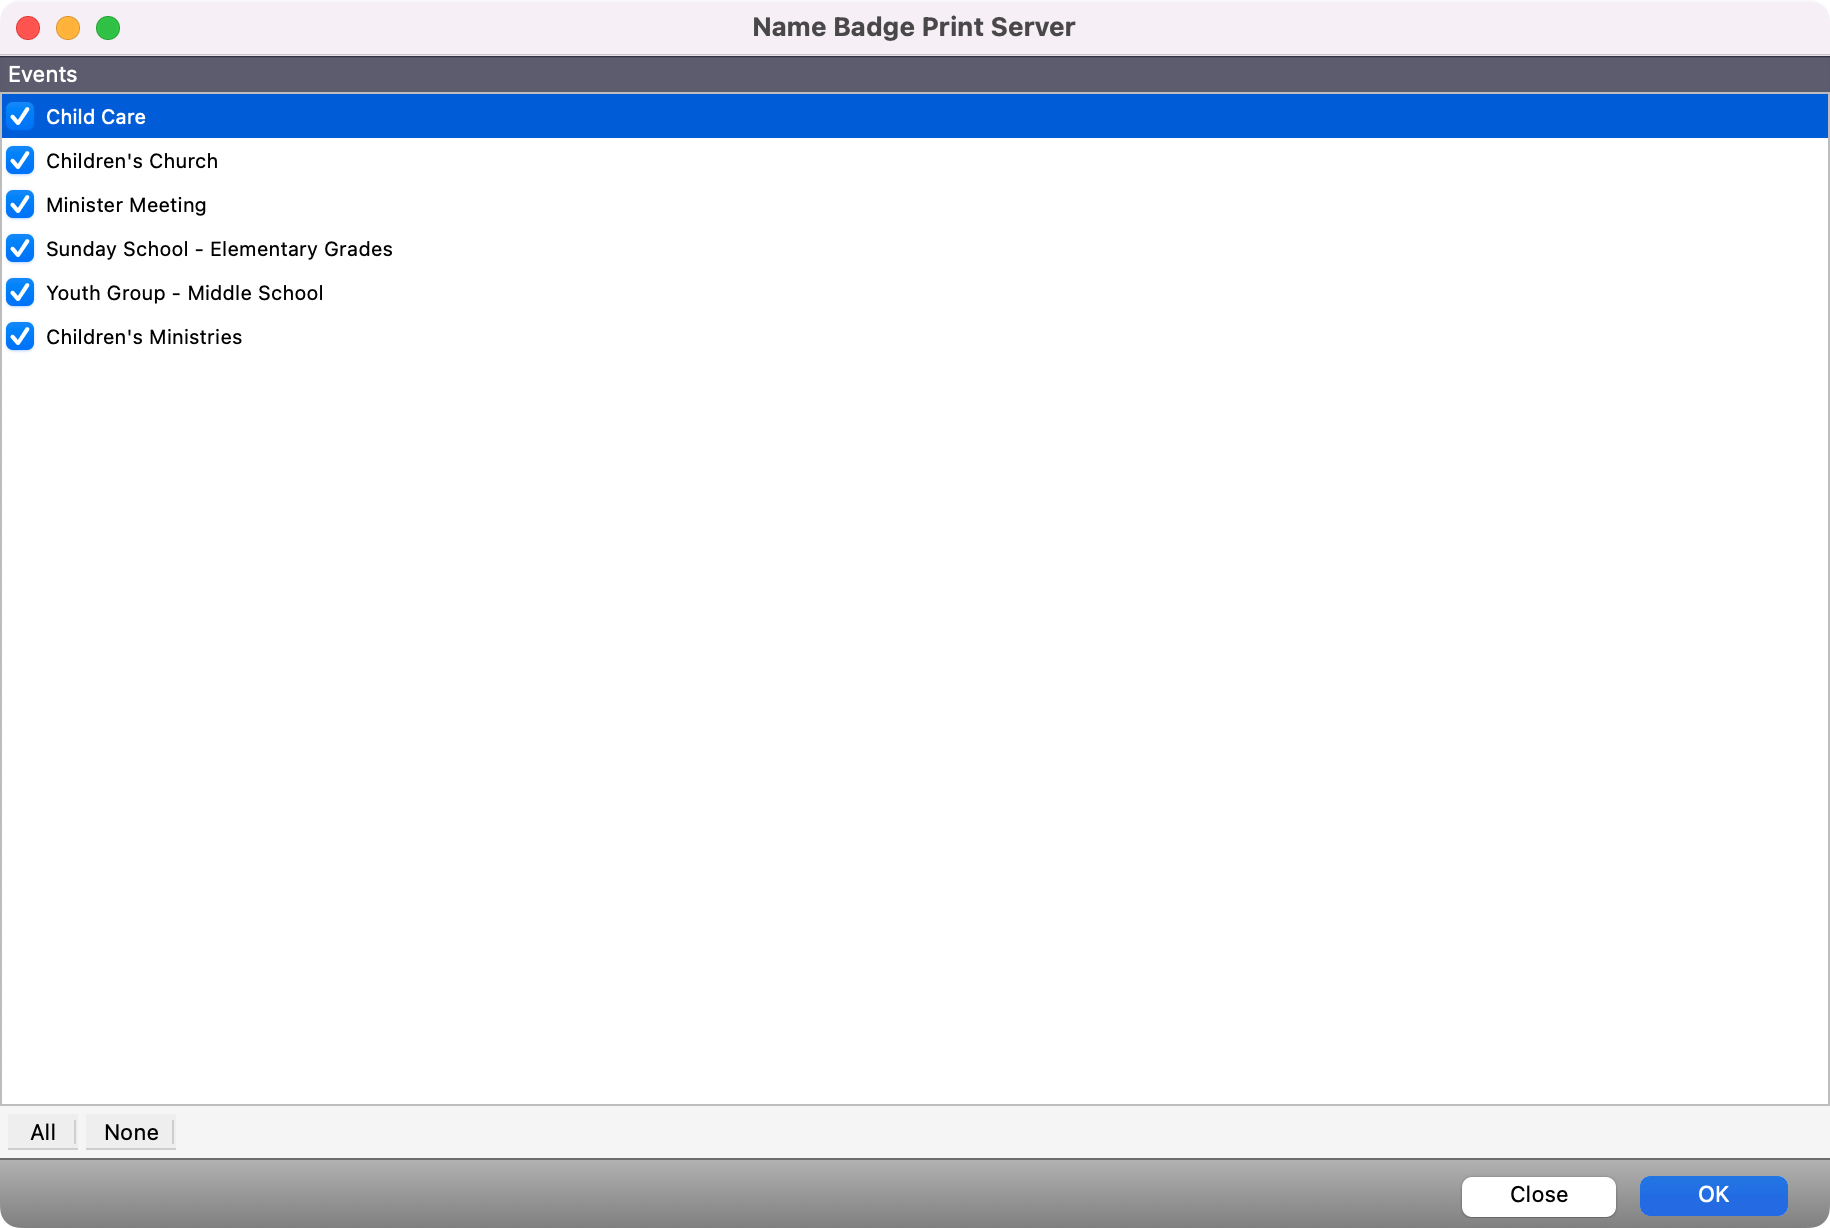
Select the Events for which you want to have this computer print badges and click OK.
-
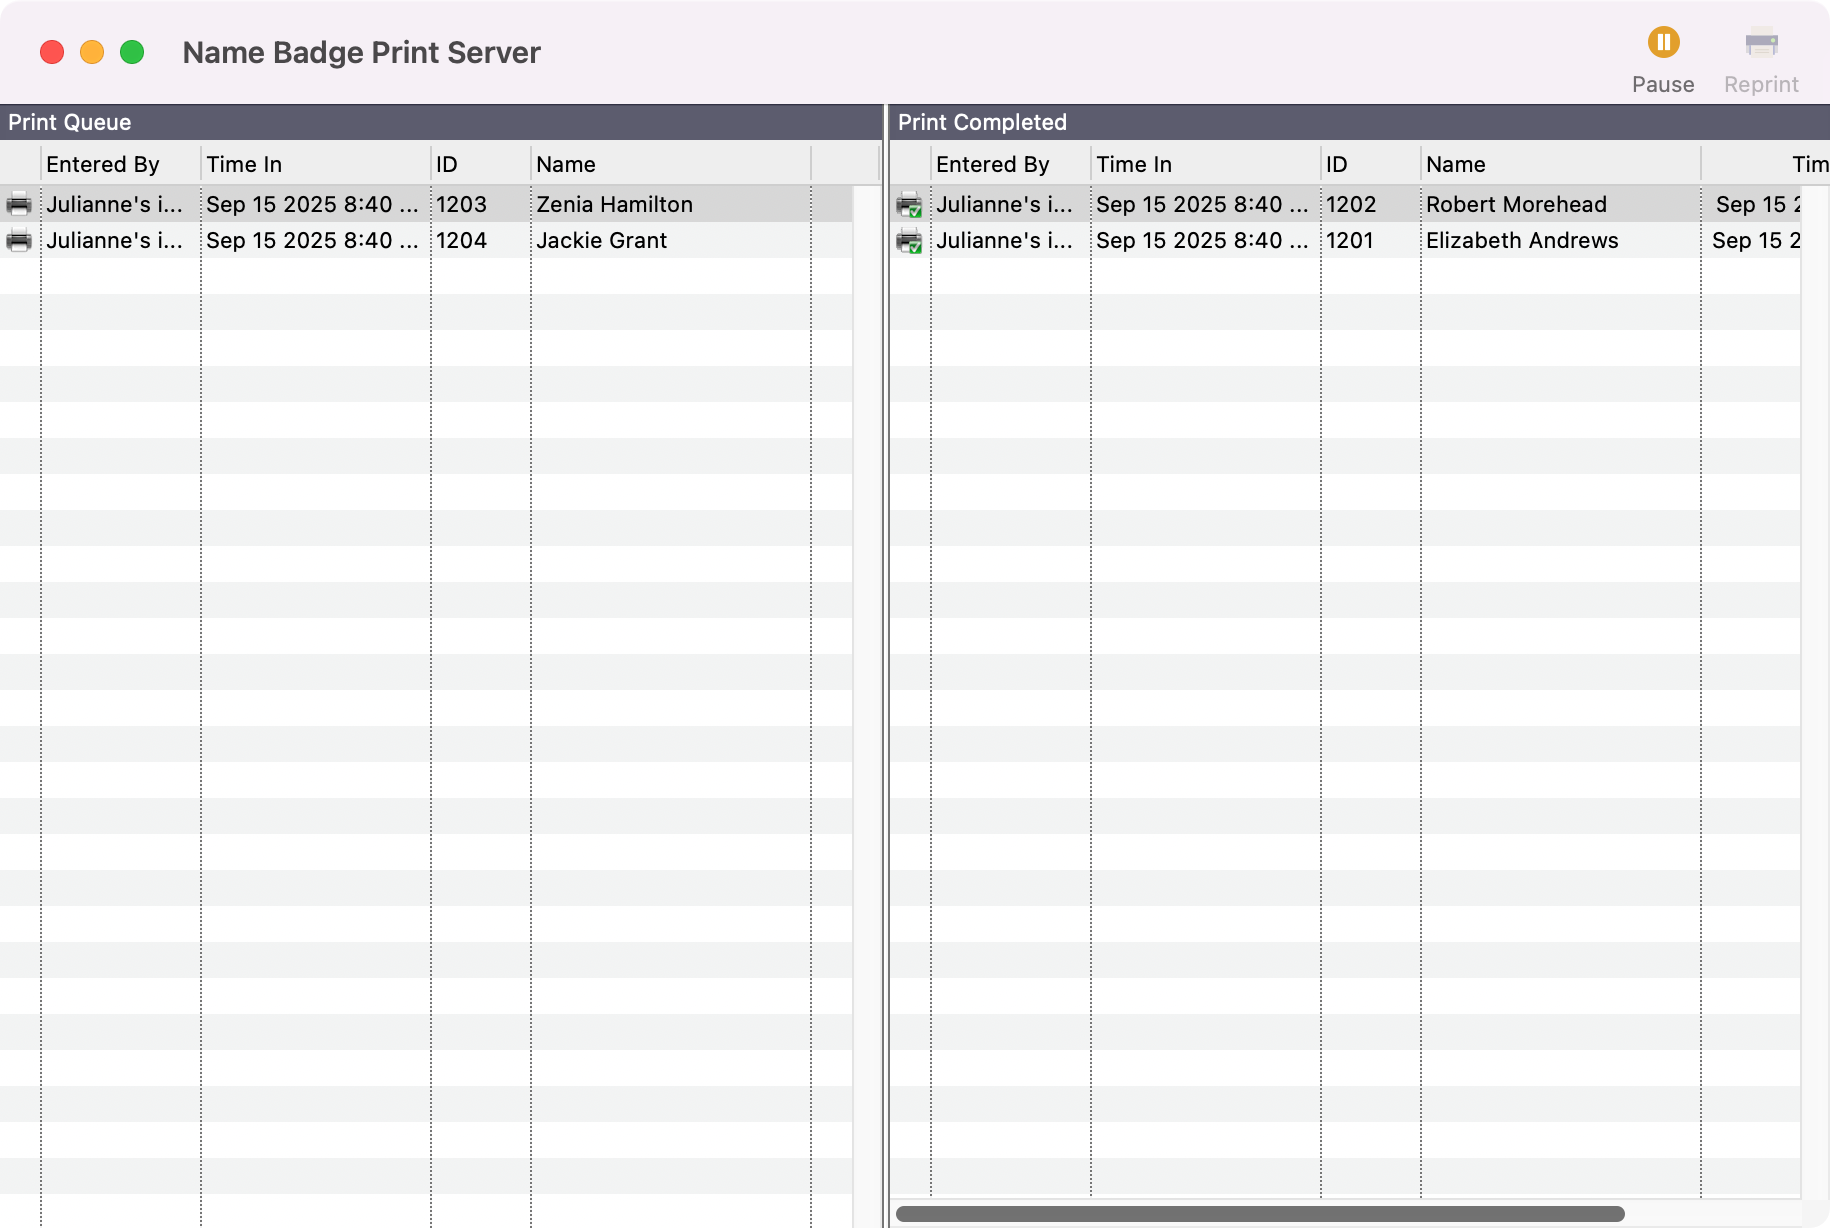
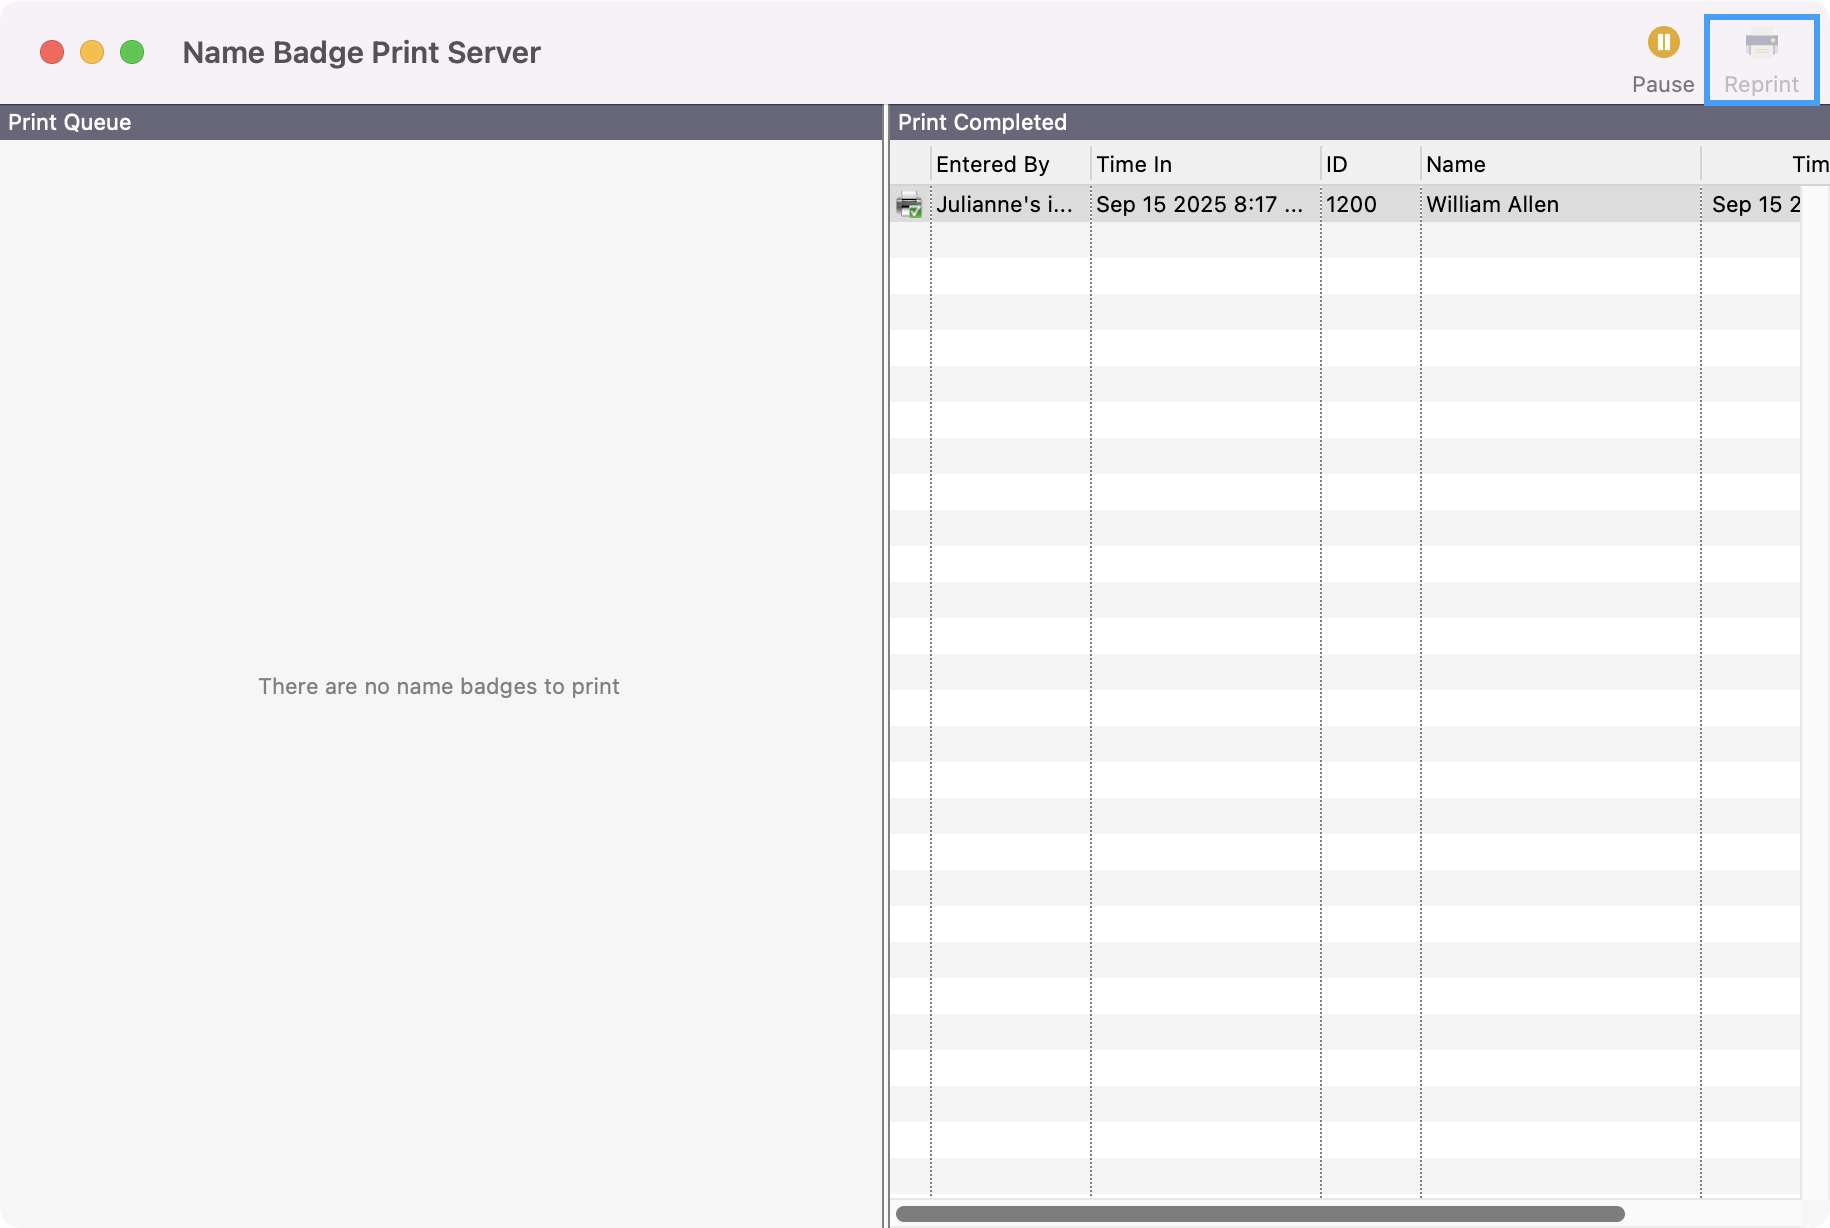
The Name Badge Print Server will then automatically grab everyone in the database that needs a badge printed for them. Once a badge is printed, it will be moved from the Print Queue list to the Print Completed list.
-
If a badge needs to be reprinted, you may select the badge in the Print Completed list and click Reprint. At any time, you may click the Pause button to pause the printing process.
The badges will be printed at the default printers set up for the given event/class/group.
It will only be printed if the computer running the name badge print server can see the printer.
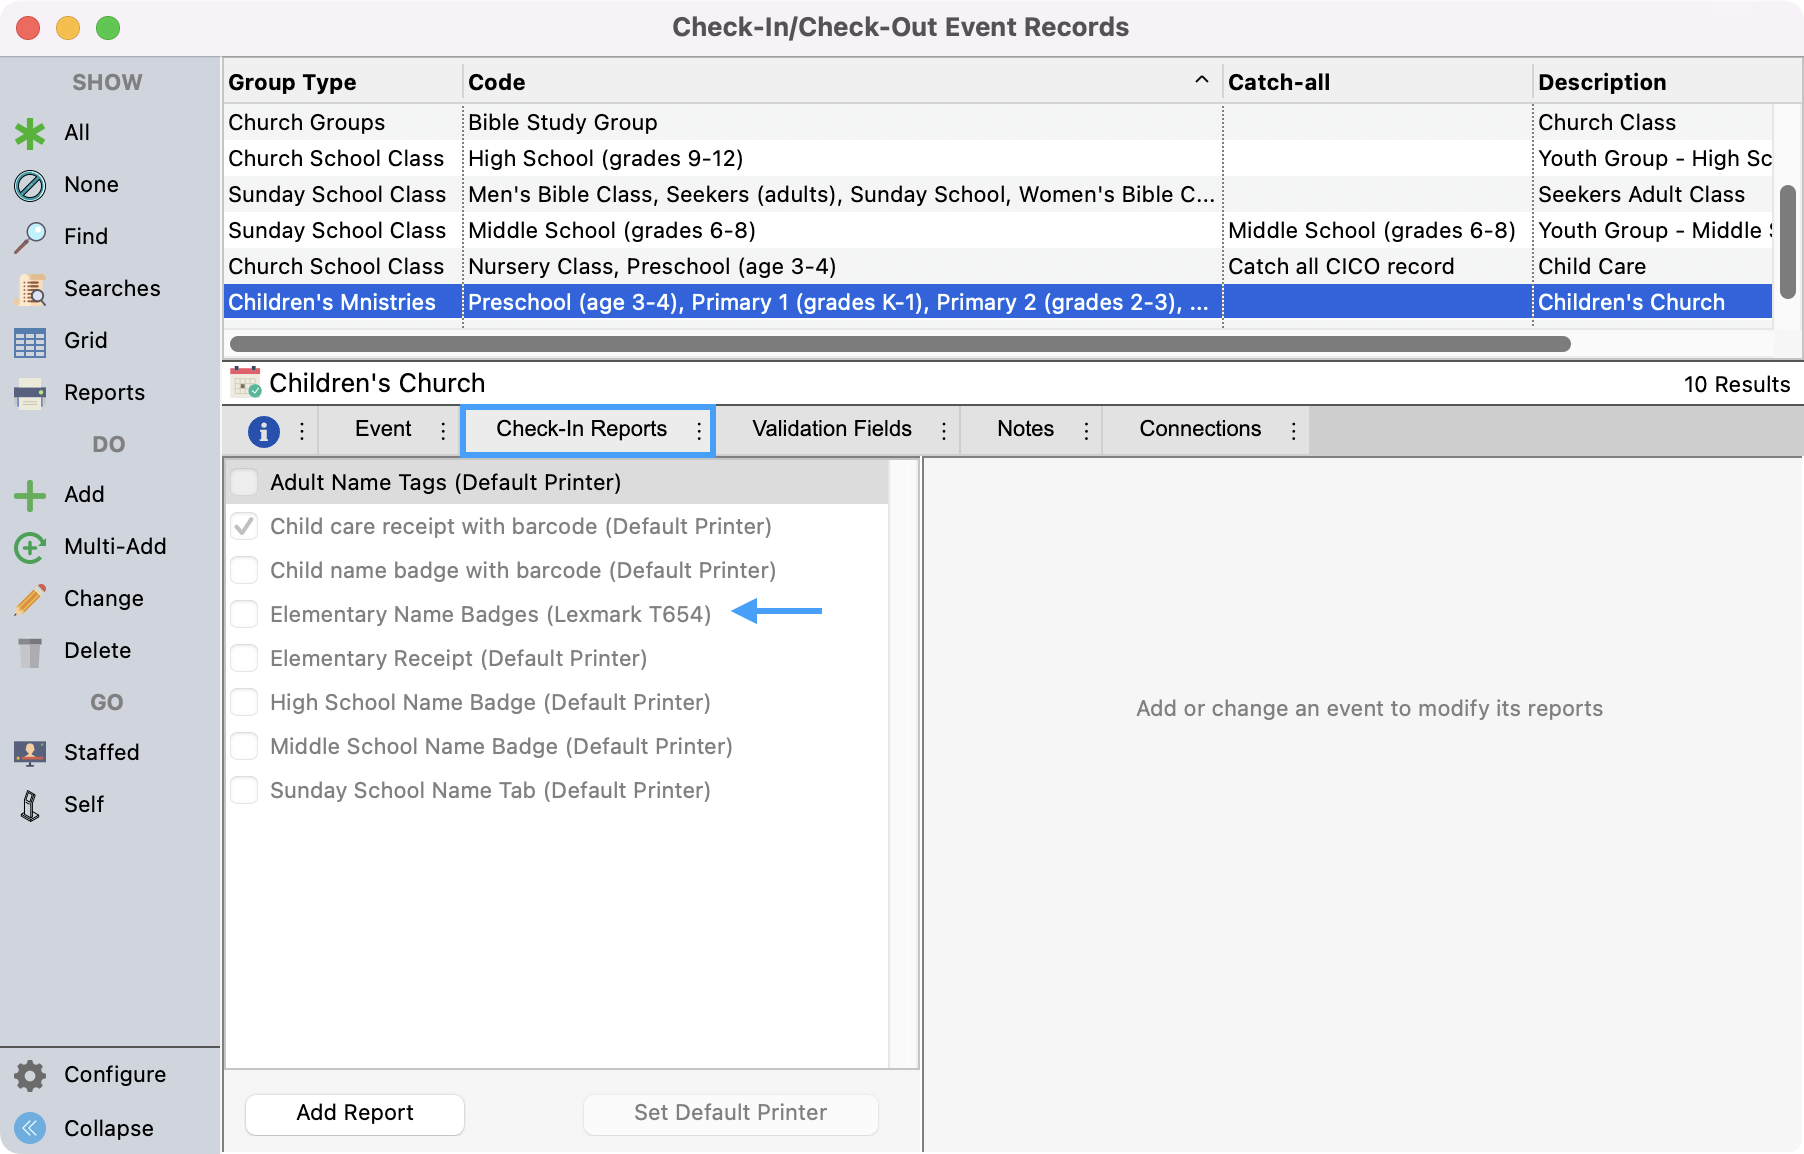
You can see/set the default printer by going into Program --> Check-In/Check-Out --> Check-In/Check-Out Event Records--> [The event record] --> Check-In Reports. If a report is selected, the default printer will be displayed next to the report in parentheses. You may change this by going to Change --> Set Default Printer --> [Choose the printer you want to print from].