
Aatrix on macOS cannot produce a W-2C, the form used to submit corrections to a submitted W-2 form. If you have access to a Windows environment, it is recommend to generate W-2 forms using CDM+ on Windows to allow for future corrections.
If you do not anticipating needing W-2C forms or are comfortable submitting a W-2C you create manually, proceed to create W-2 and W-3 forms on macOS.
Before we begin the processing of W-2's, we want to ensure that specific areas of CDM+ Payroll are set up properly. These areas will include:
-
Payroll Payer Records
-
Deduction Setup
-
Employee Records Setup and Housing Allowance pay item
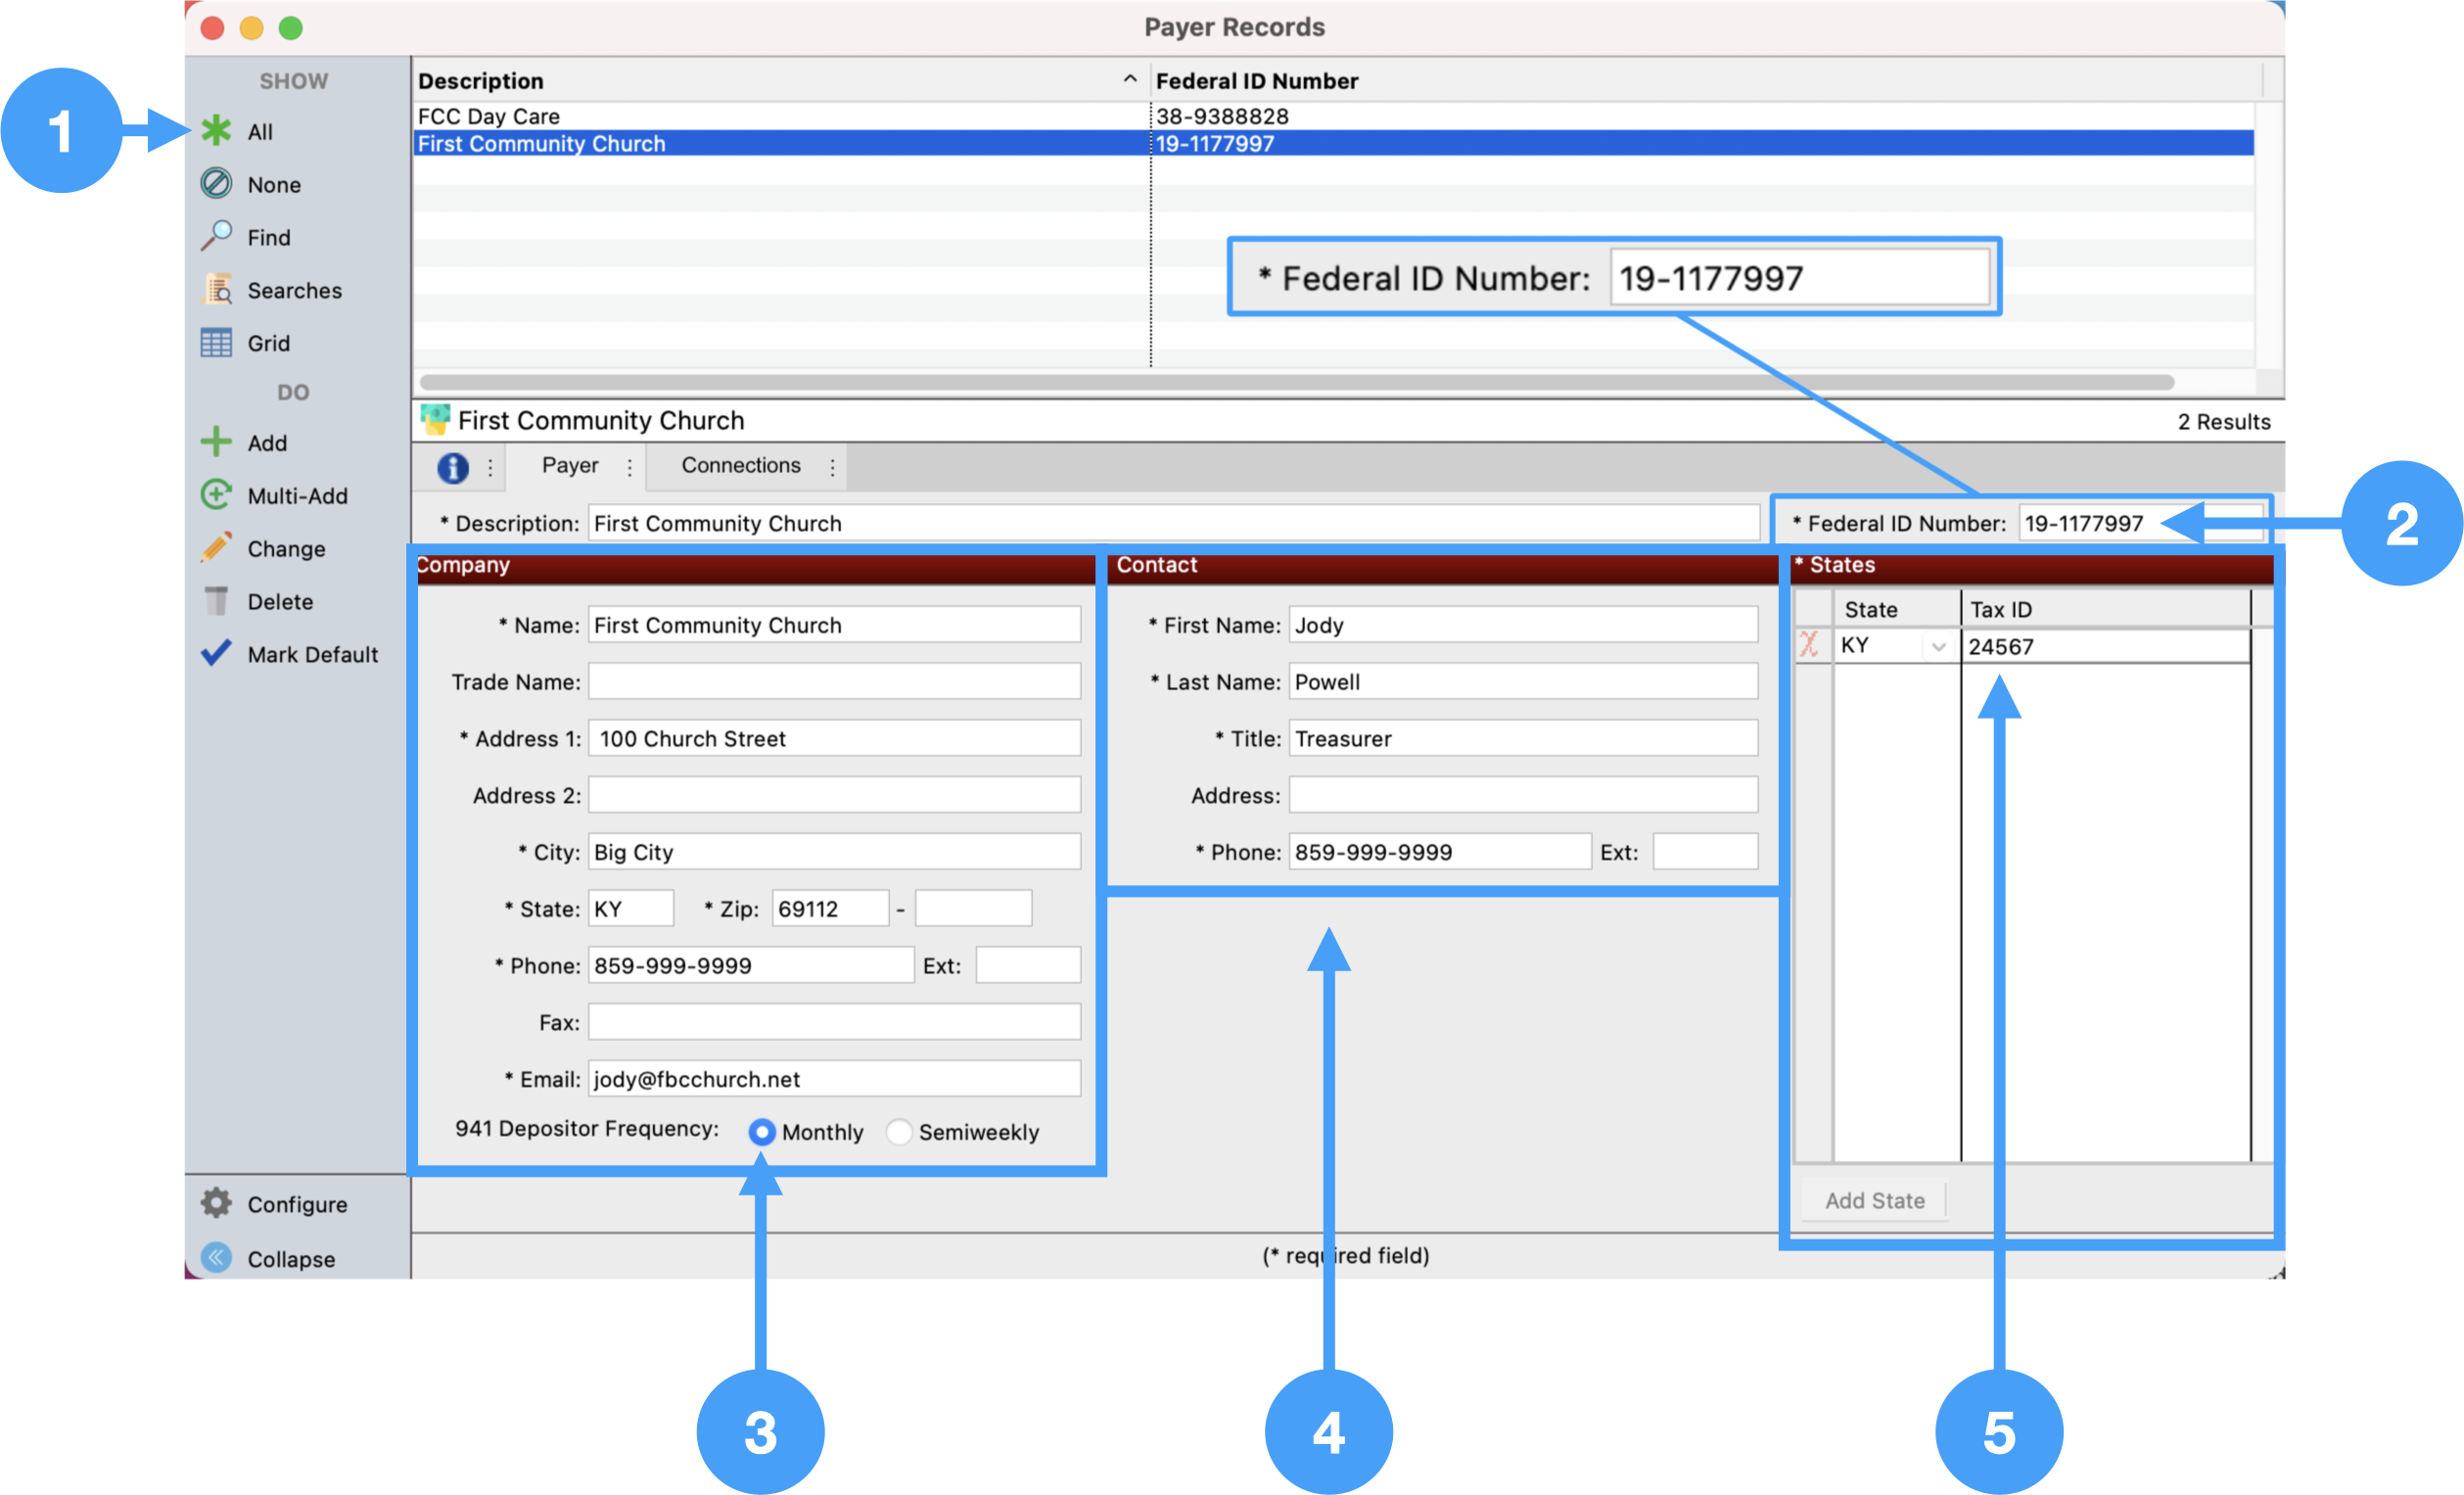
Review Payer Records
Program → Payroll → Payer Records
-
Click All in the lefthand sidebar to see all of the created payer records. Select the record used to create this past year's payroll.
-
Ensure Federal ID Number is correct.
-
Review Company information and make sure it is correct.
-
Review Contact information and ensure that it is correct.
This information can be updated in the Aatrix Form Viewer, however, this does not update the information in CDM+.
Also, ensure that the proper 941 Depository Frequency is select. If you file a Schedule B form, then select 'Semi-weekly.' In our example, the church does not file a schedule B so 'Monthly' is selected.
-
Ensure that State is selected and the State's Tax ID is correct.
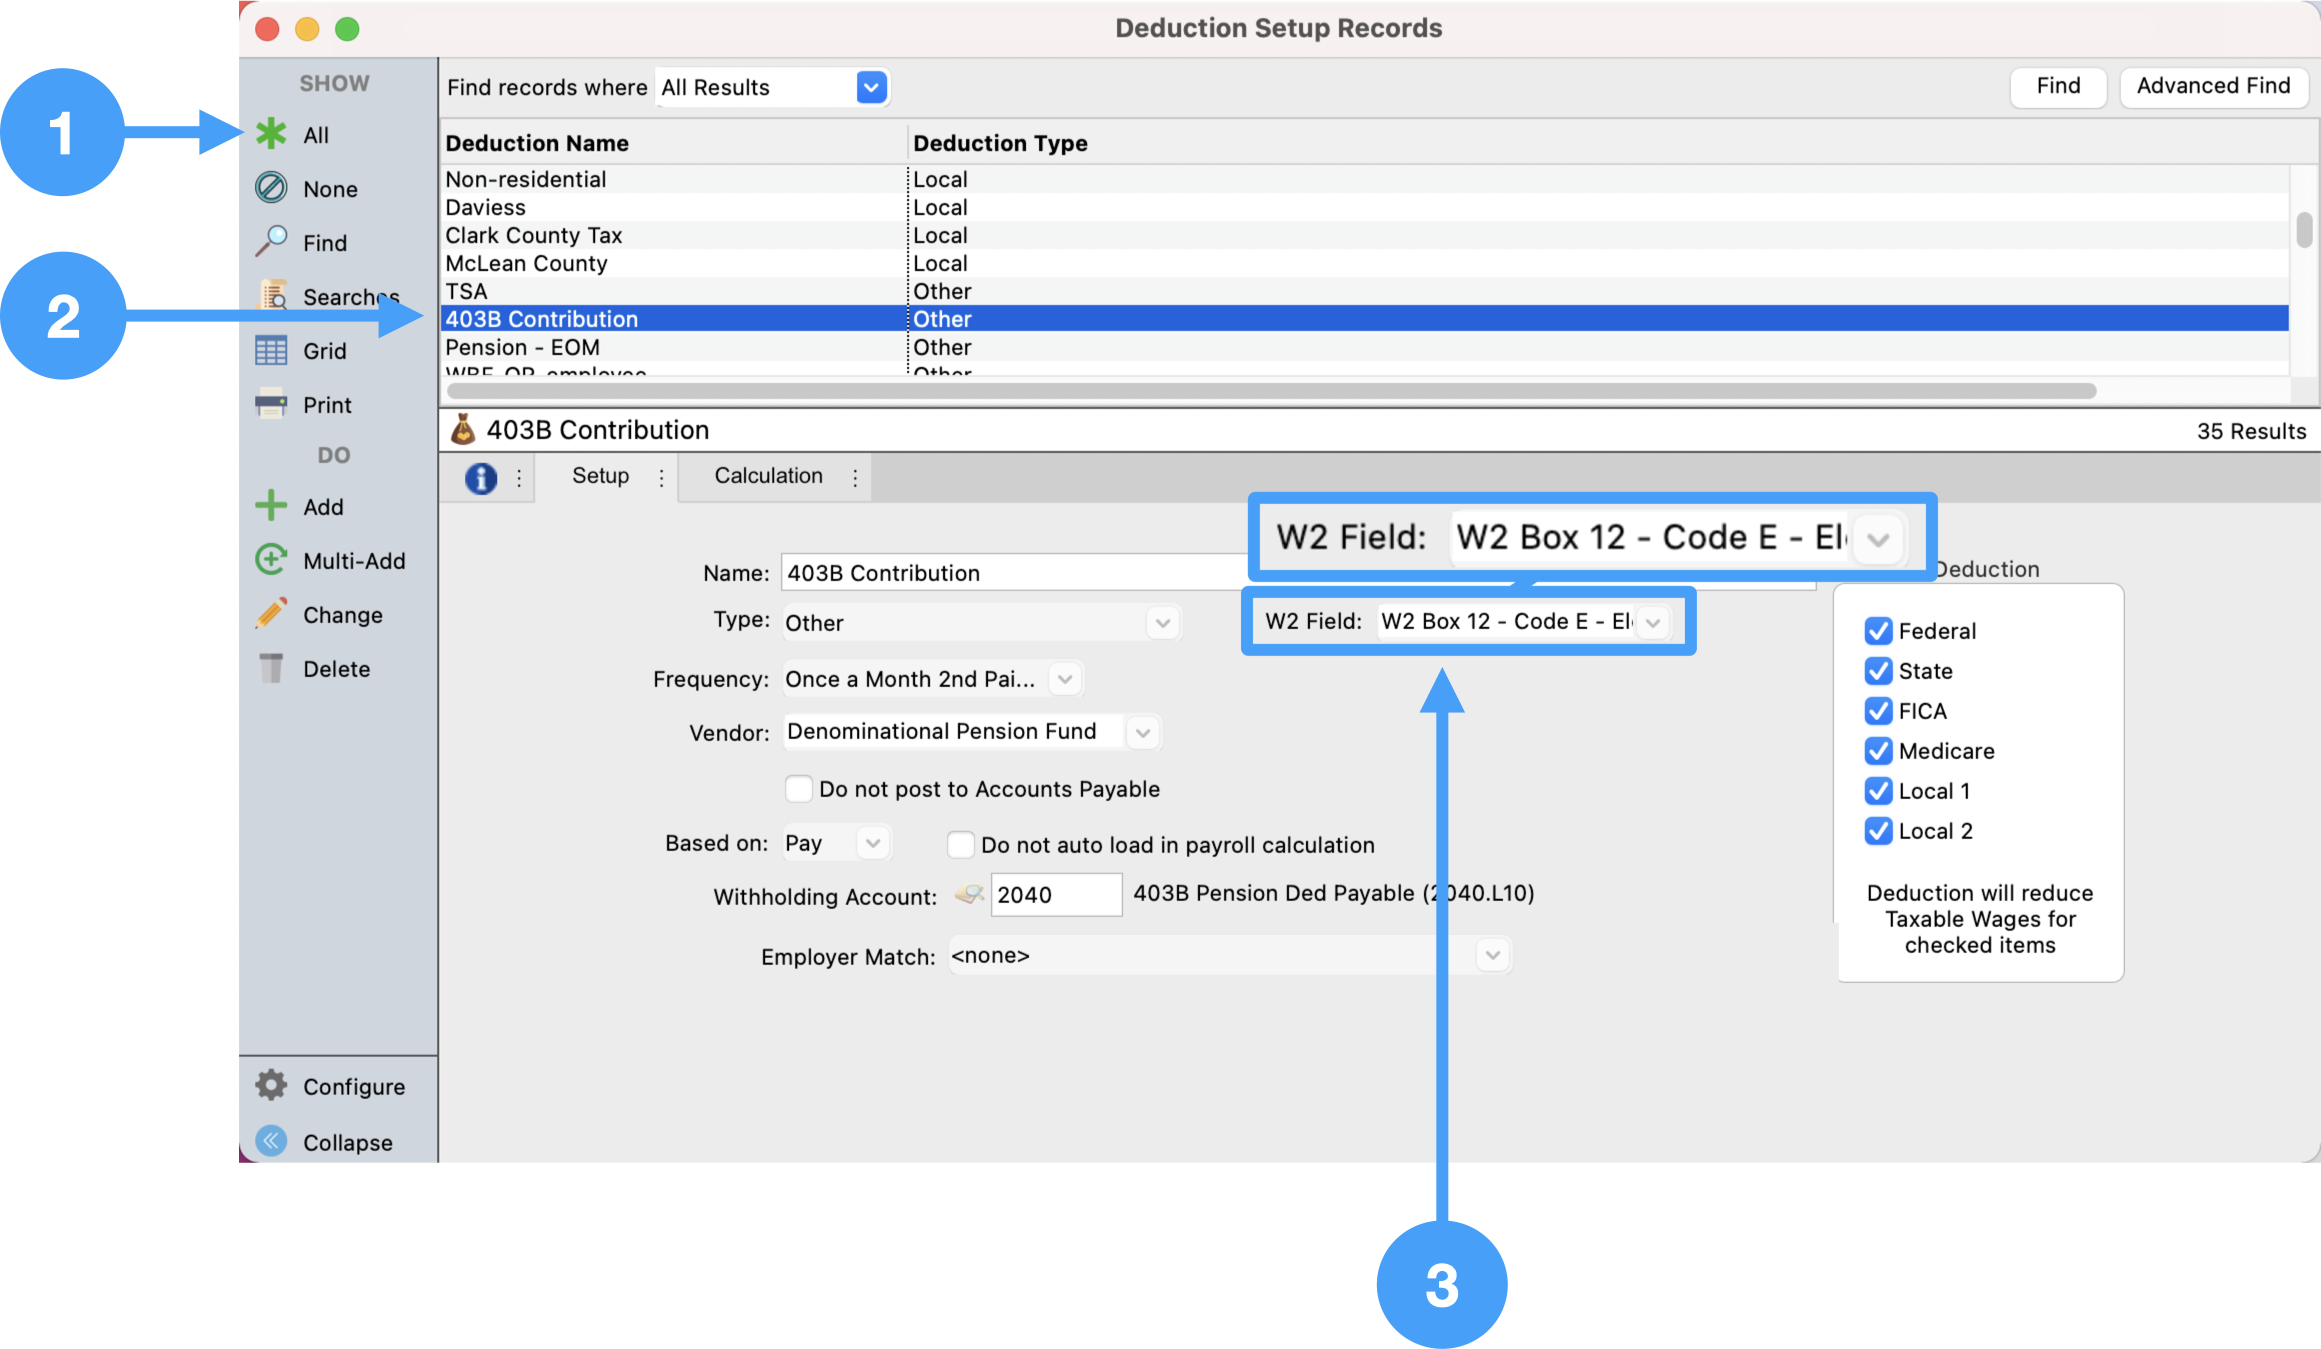
Review Deductions
Example: 403-B Deductions to be printed on W-2's
Program → Payroll → Deduction Setup Records
-
Click All in the lefthand sidebar to see all of the created deductions.
-
Select the 403-B Contribution record in the Results List.
-
Ensure the W-2 Form field is set to 'W2 Box 12 - Code E.'
You could also perform a simple search to find a specific deduction, by clicking on the Find option in the lefthand sidebar.
Example: Local Tax Setup
-
Select the local tax deduction in the Results List. In our case, the local tax is named Clark County Tax.
-
Ensure the Tax Form field is set to 'Local Withholding.'
-
Ensure the correct local tax account number is correct.
-
Ensure the correct Local Type is selected.
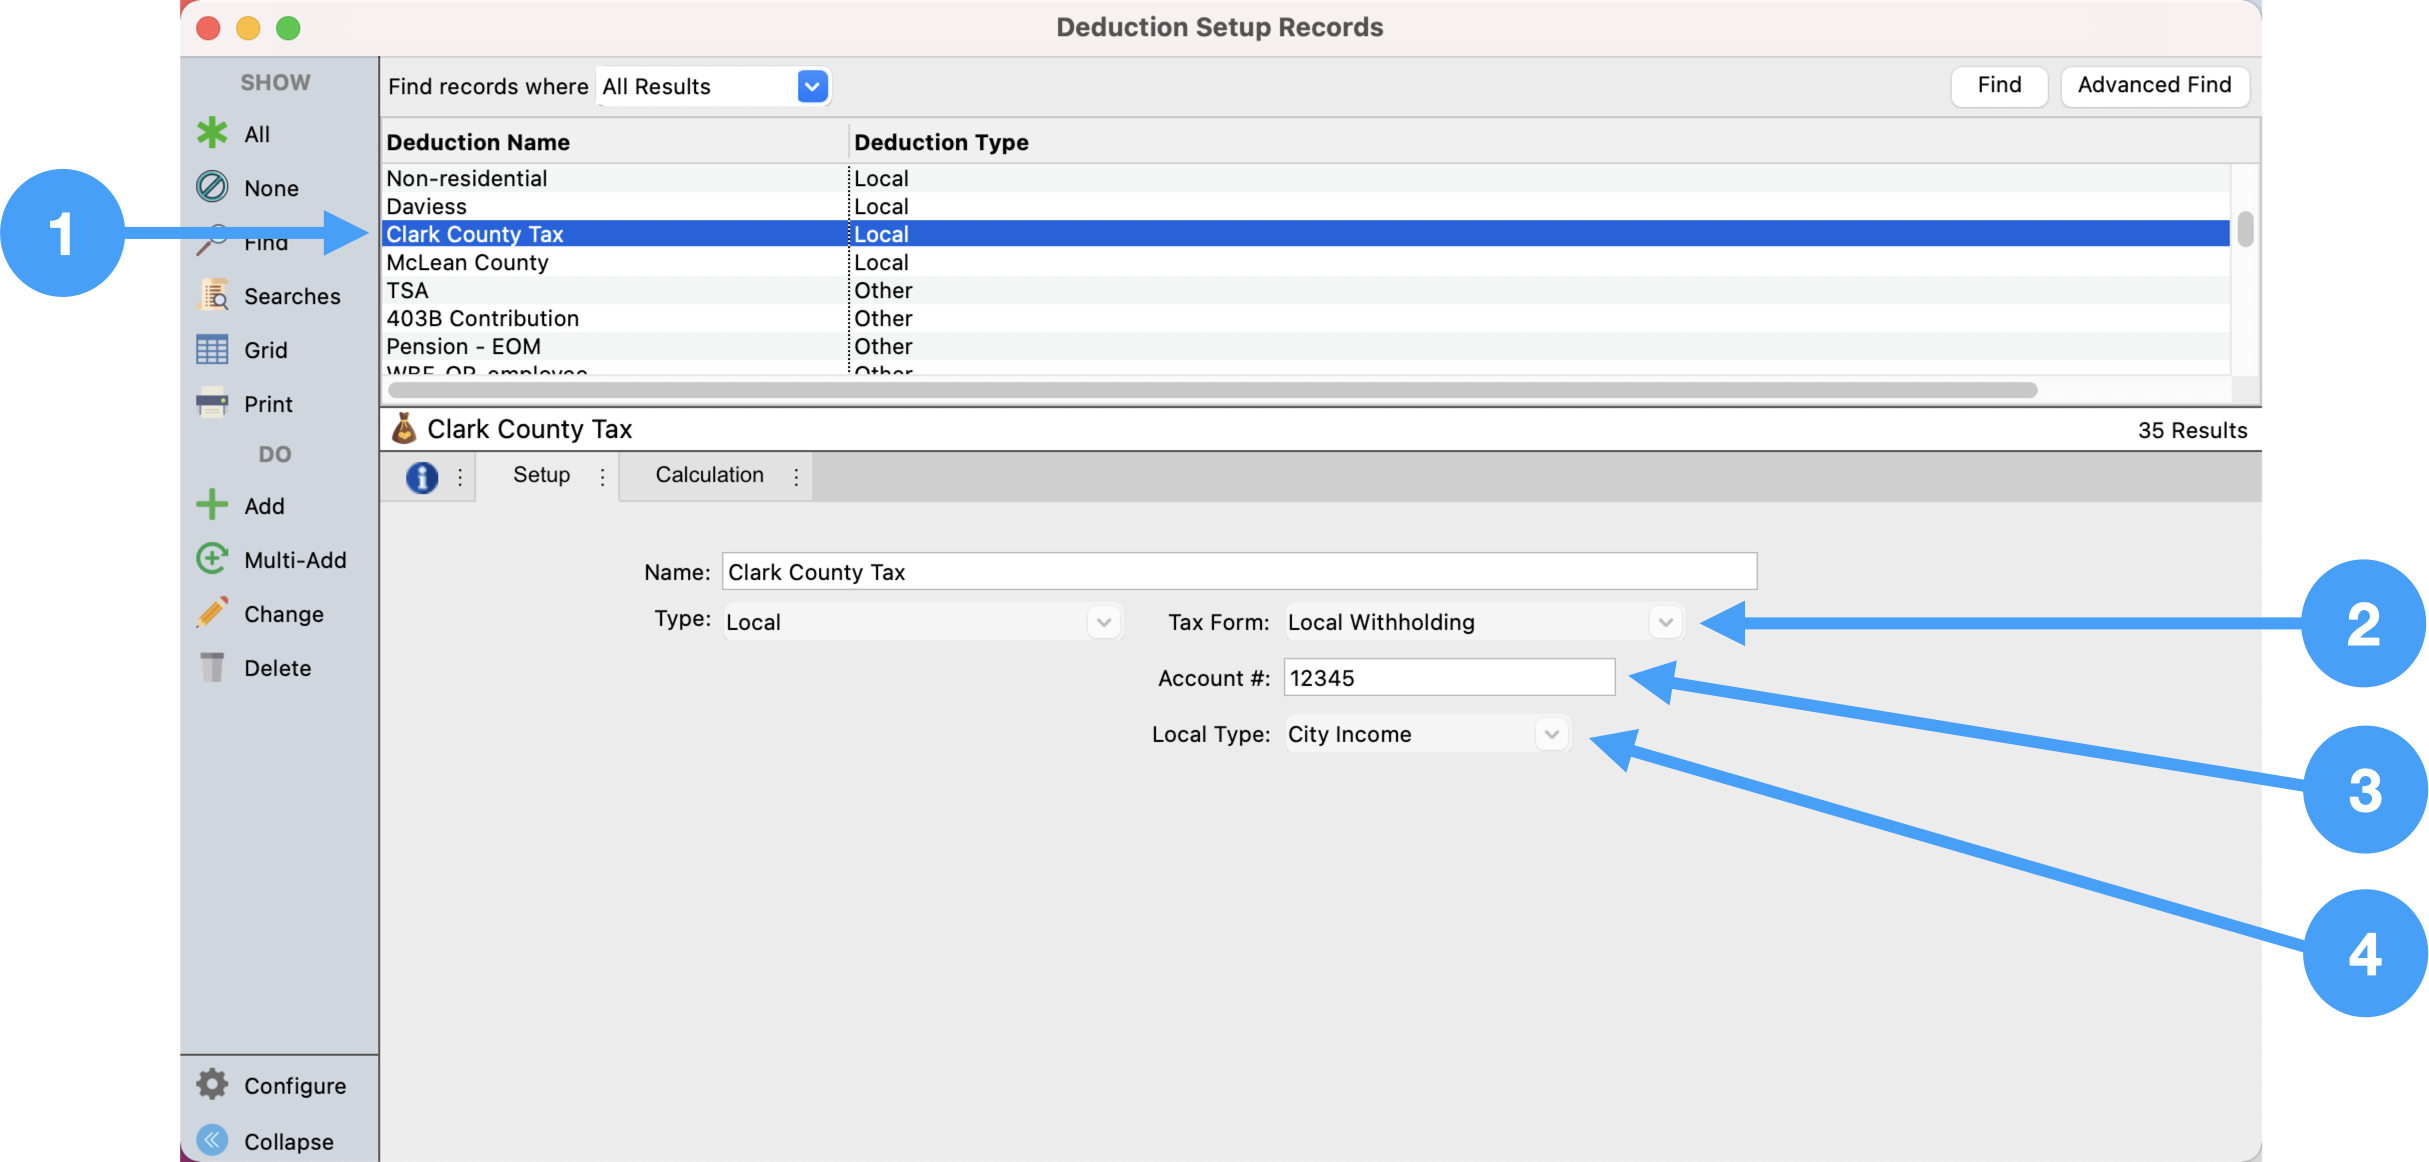
Review all deductions that will be reported on your W-2's to ensure that the W-2 field has the appropriate option selected. Contact a Tax Professional if you are unsure of the appropriate selection.
Review Employee Record Setup
Program → Payroll → Employee Records
-
Open Setup tab of Employee Record window.
-
Review the information under the W-2 section of the Employee Records Setup tab. For example, if an employee is contributing to a retirement plan, then the checkbox 'Retirement Plan' must be checked. In addition, if the employee has elected to only receive their W-2's electronically, then the checkbox labeled 'Electronic W2 Only' must be checked.
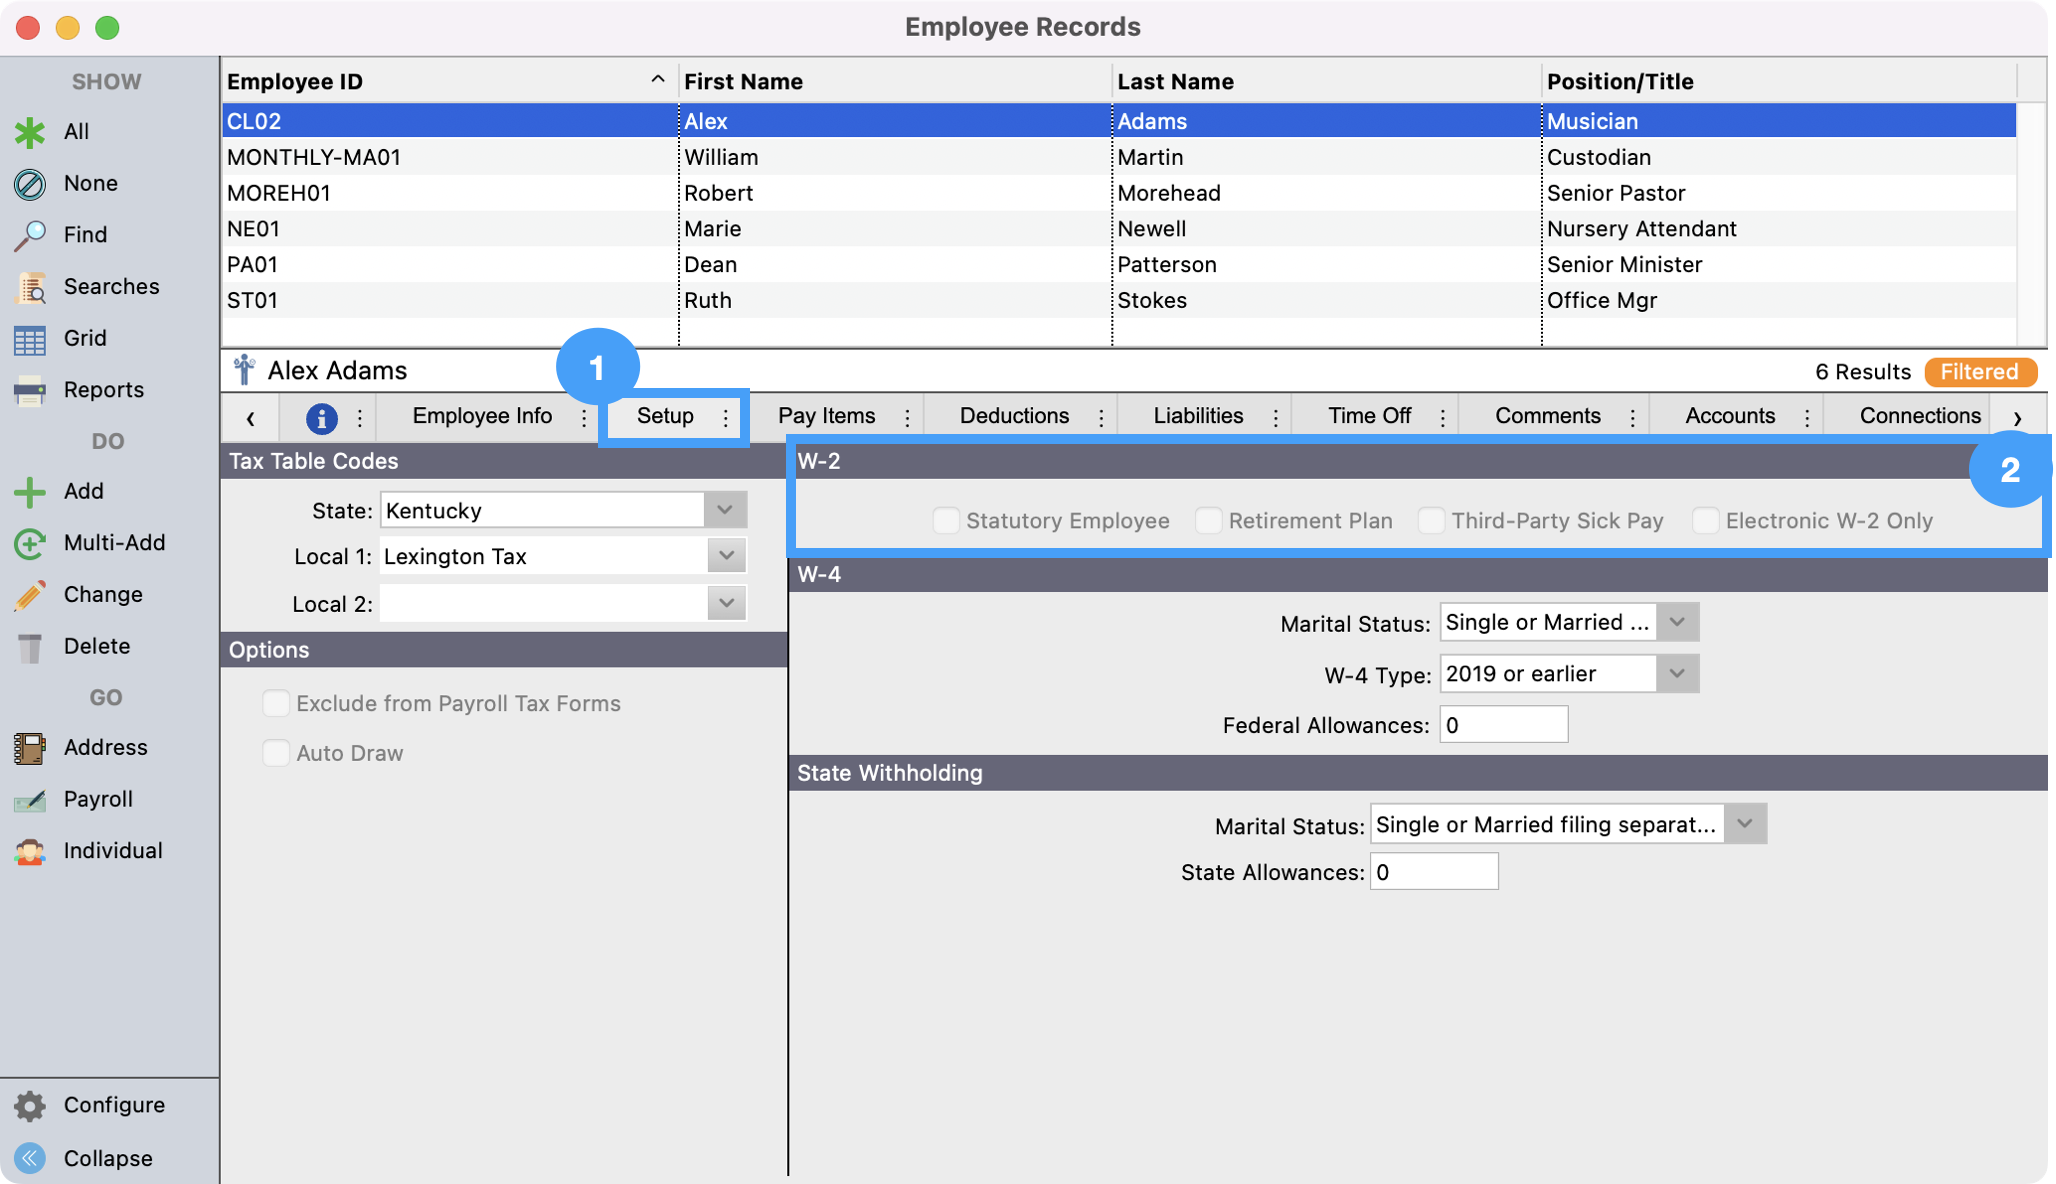
The Electronic W2 Only option requires that you have signed authorization forms for each employee electing to receive electronic W-2's only. Note: NO paper W-2's are generated when this is selected.
-
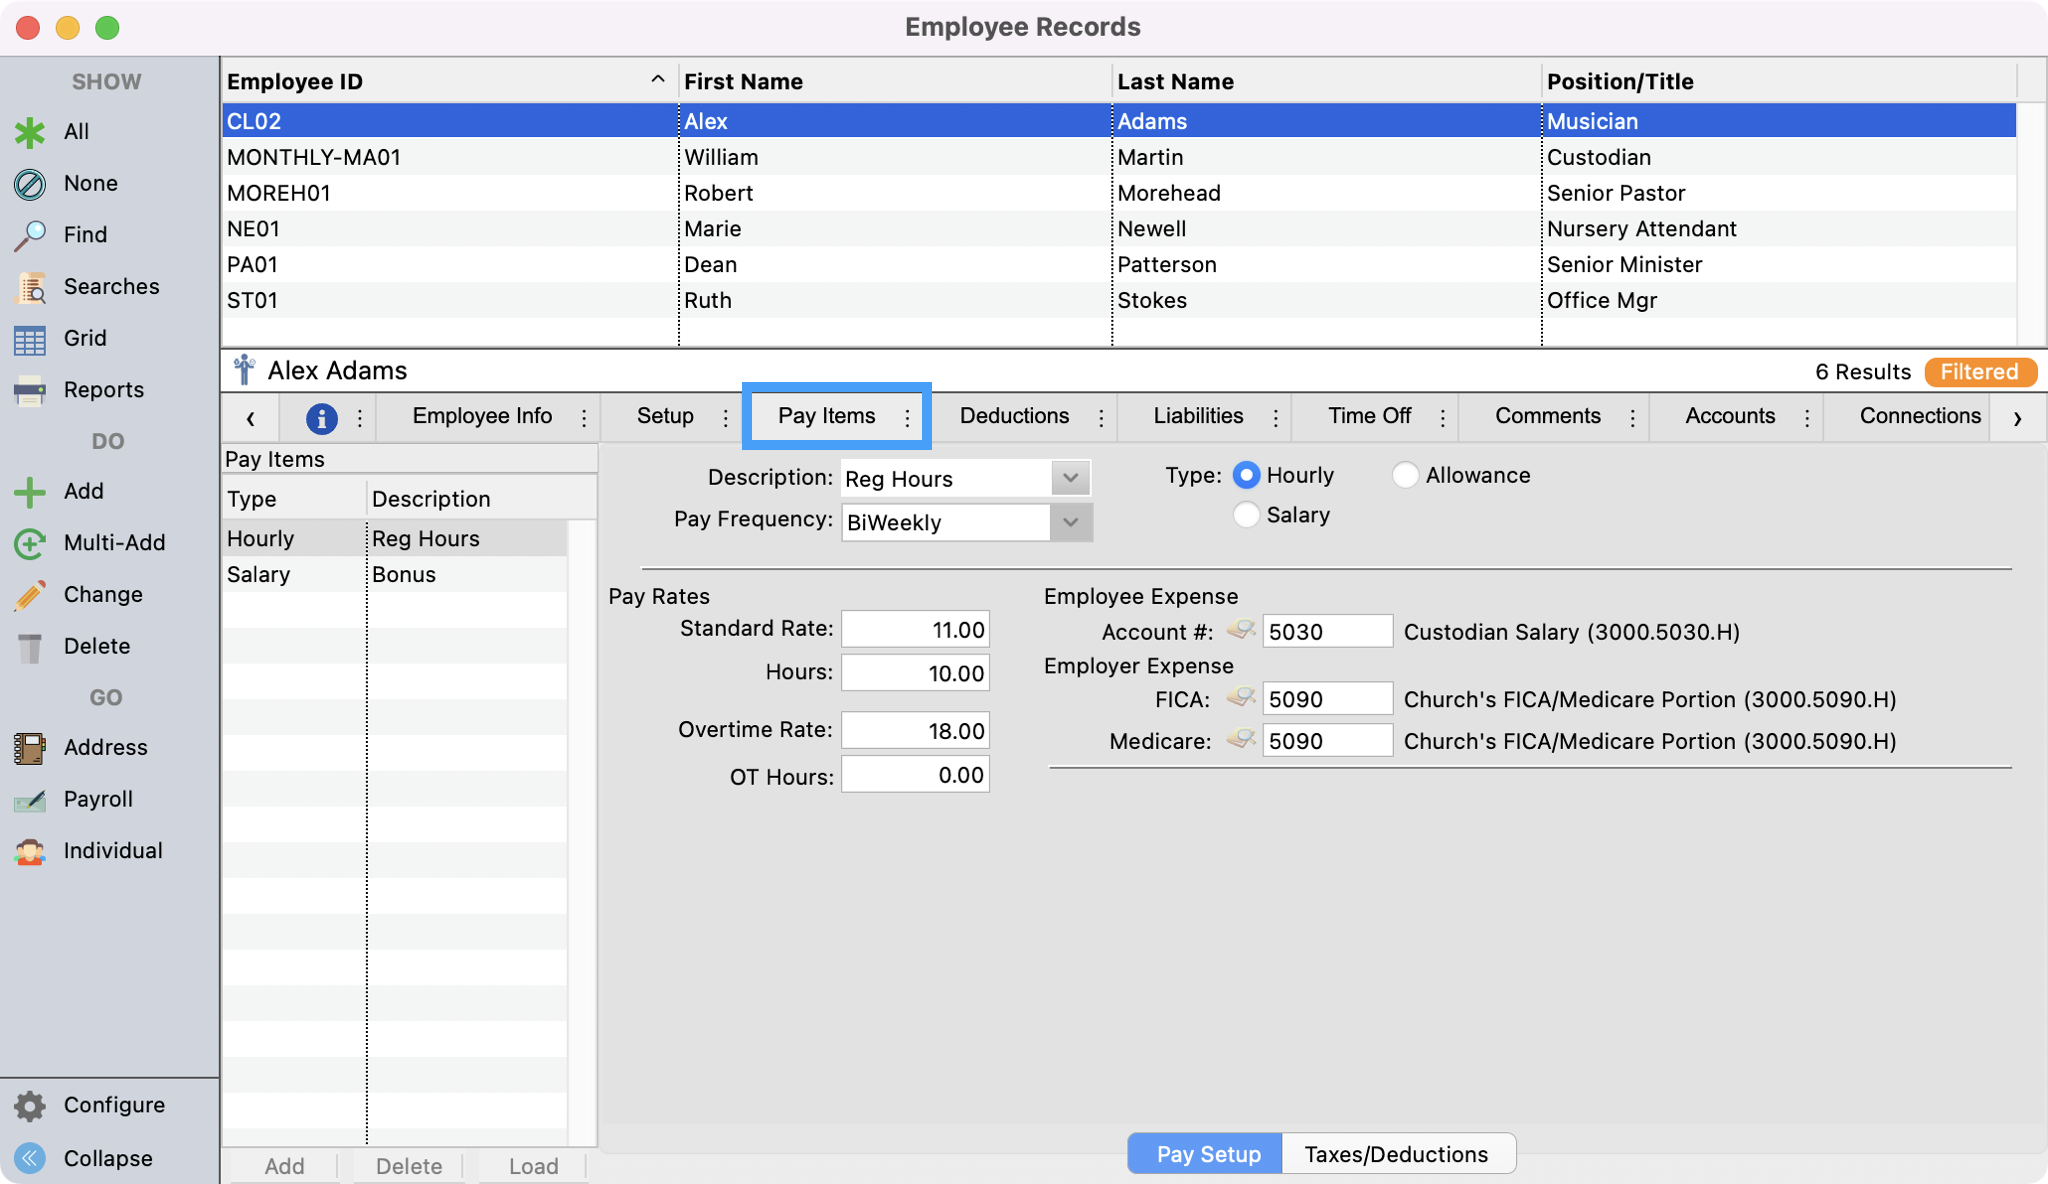
Now, let's look at the Housing Allowance Pay Item. Click on the Pay Items tab.
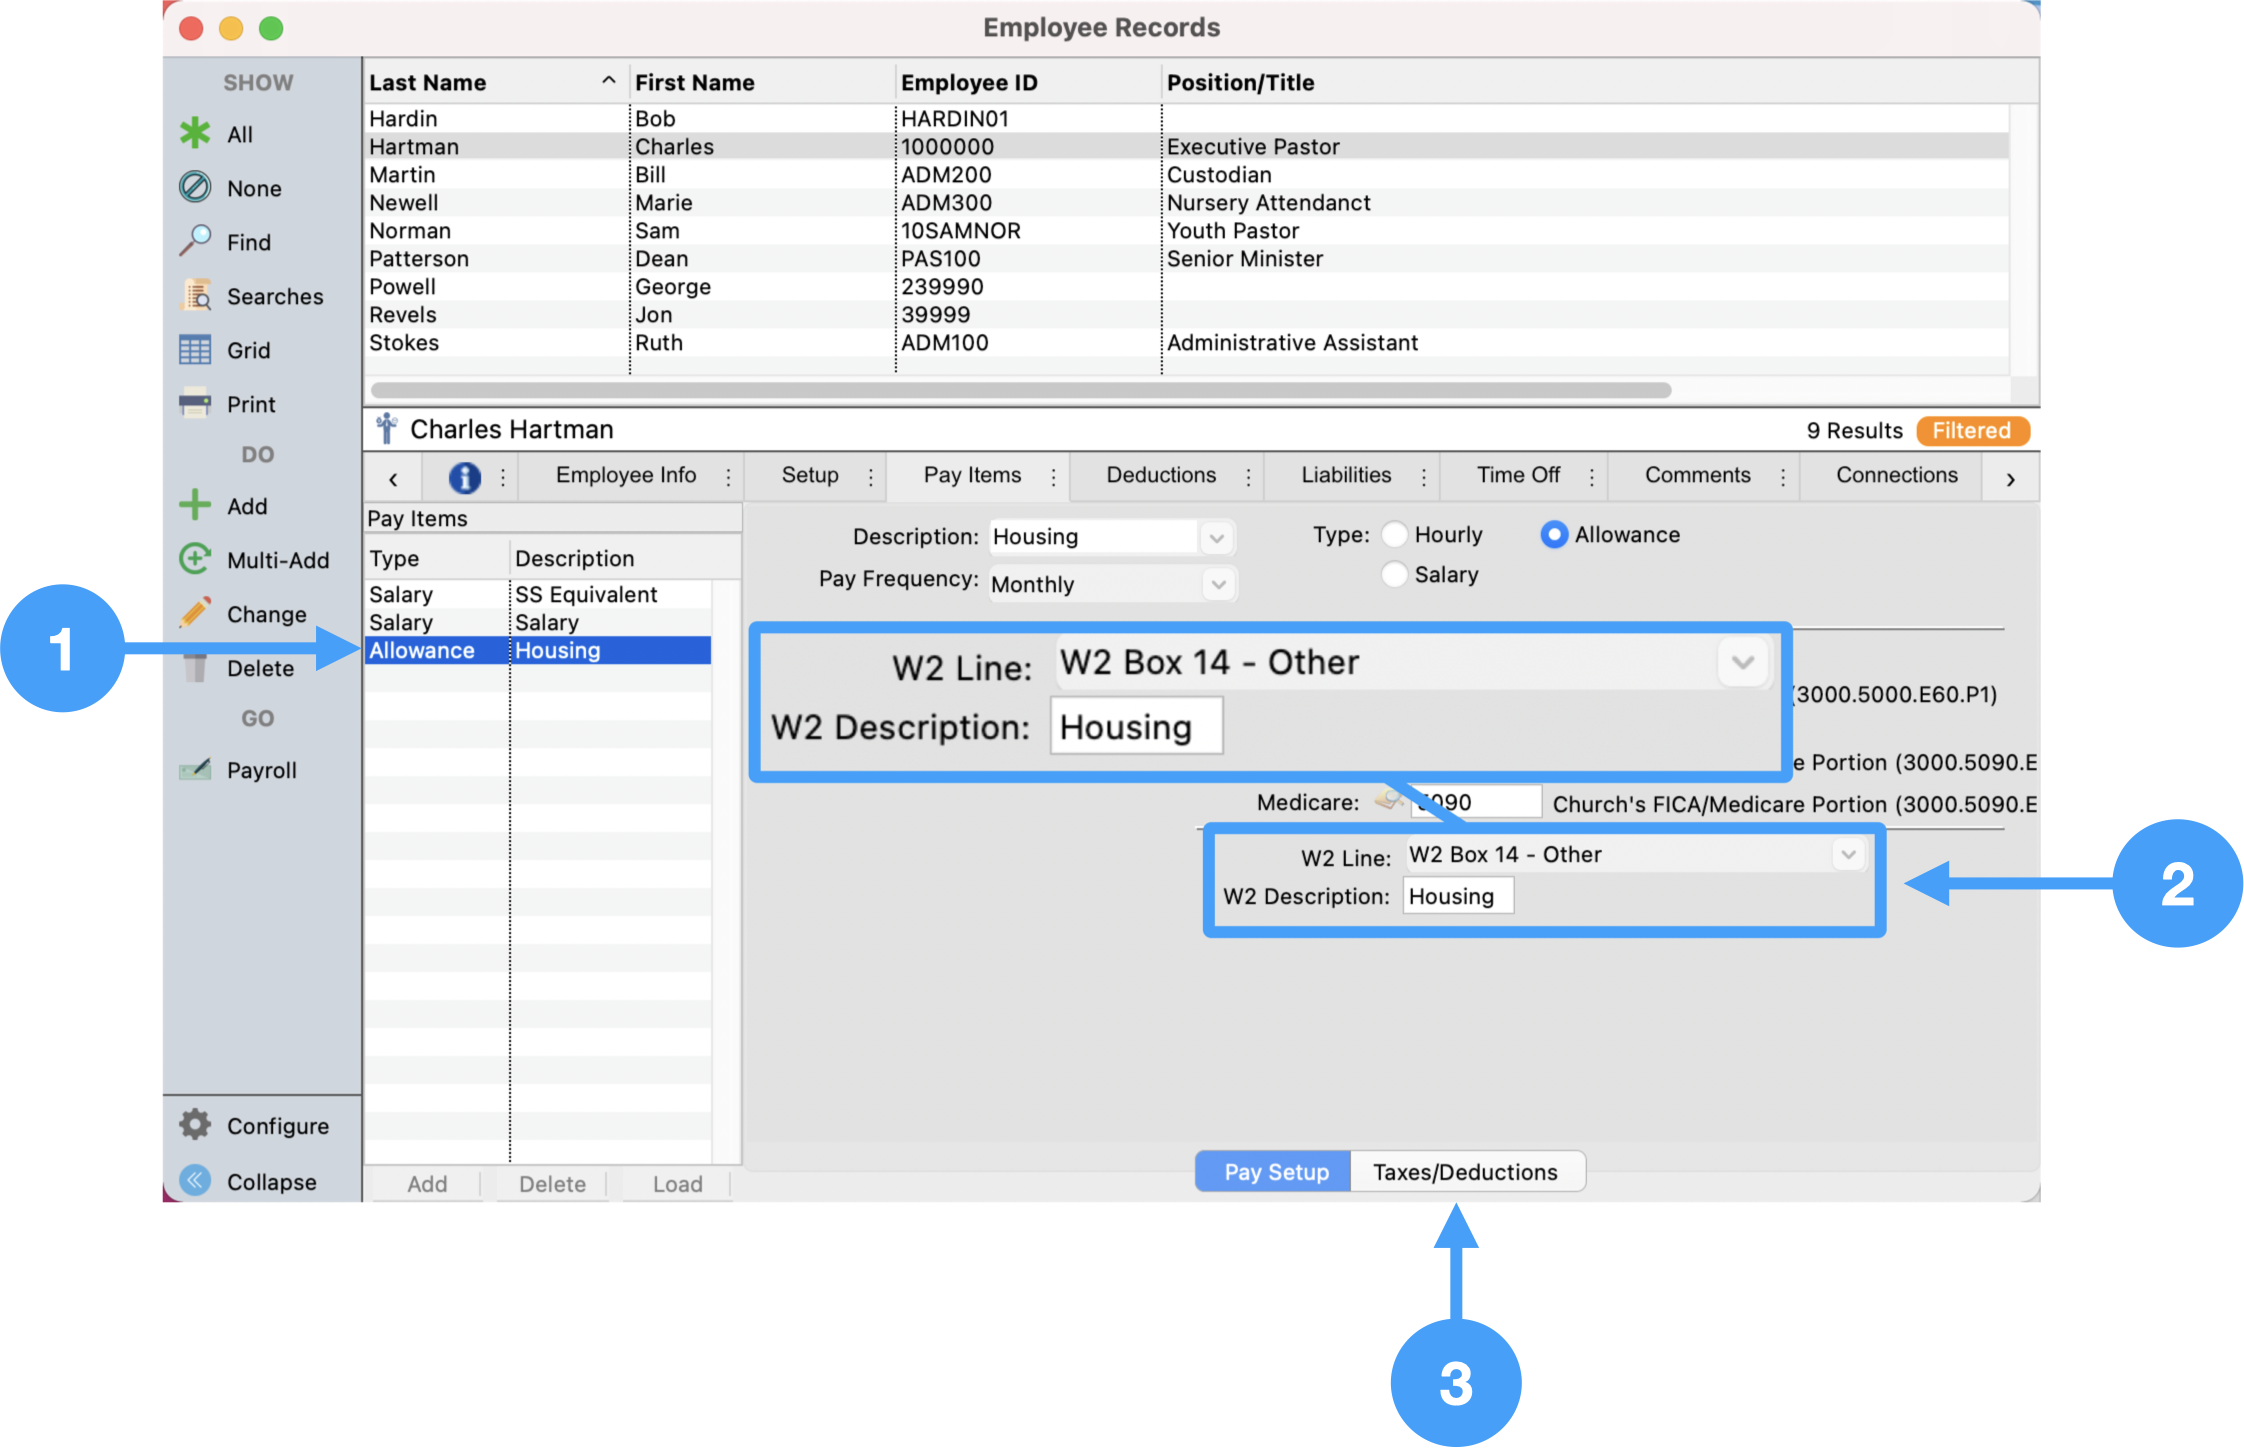
Review Employee Record Housing Allowance Pay Item W-2 Field Setup
-
Select the 'Housing' pay item under the Pay Items list.
-
Ensure that the W-2 Line for the Housing Allowance is set to 'W2 Box 14 - Other' and the W2 Description reads 'Housing.'
-
Click on the Taxes/Deduction tab.
Review Employee Record Housing Allowance Pay Item Setup under Taxes/Deductions
-
Ensure all tax items are set to 'Exempt' and all of the checkboxes for 'Exclude from W-2' under Status are checked.
Note: The 'Exclude from W-2' can be thought of as excluding this item from Box 1 on the W-2.
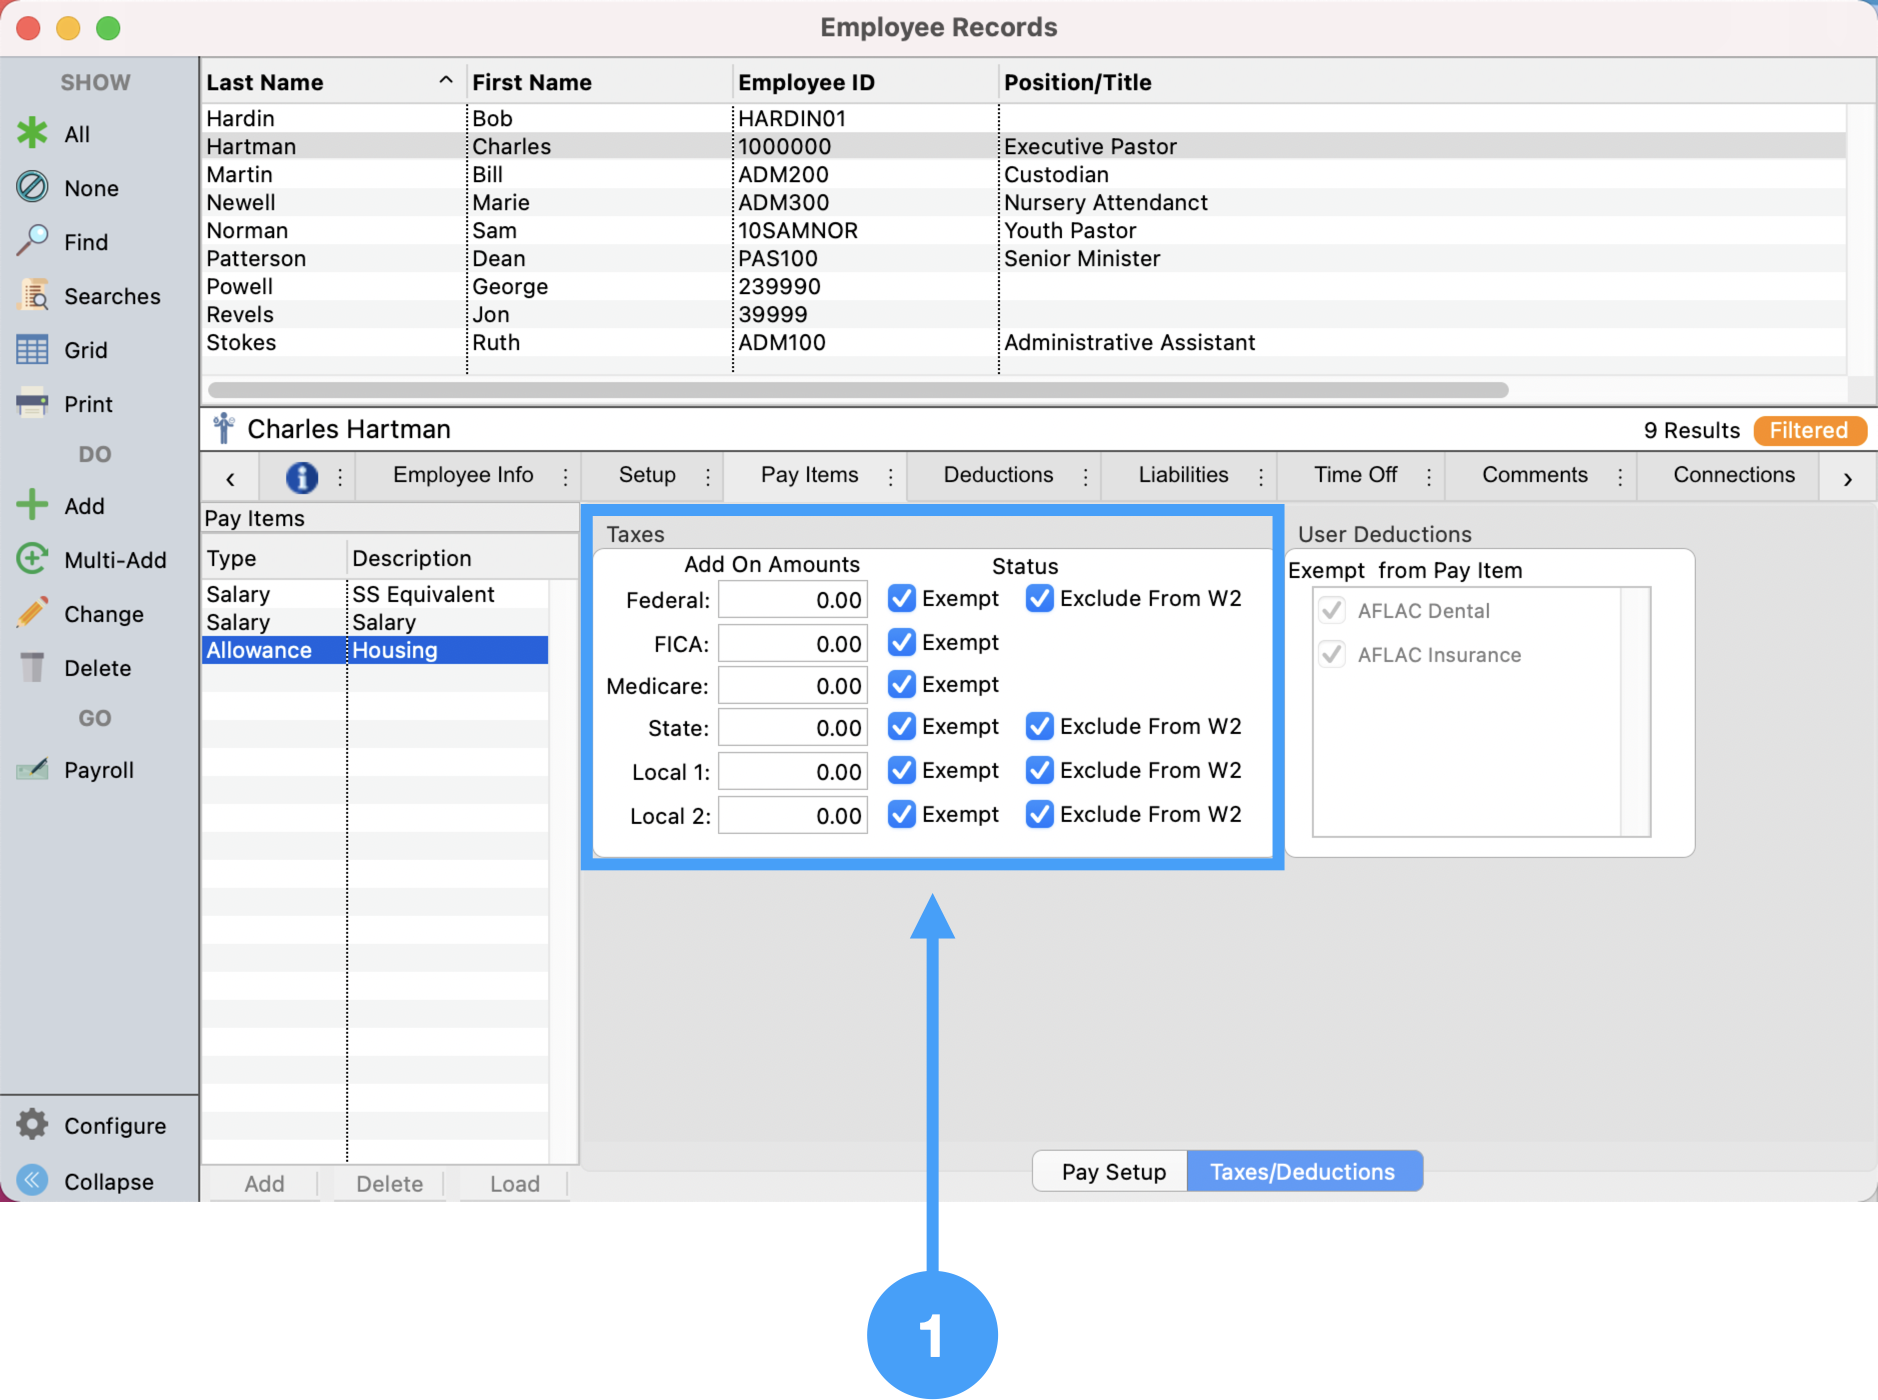
Ensuring that the checkboxes under Status are checked is critical. If these checkboxes are not checked, then the Housing Allowance will be included in Box 1 of the W-2 and Box 14 which will overstate your income in Box 1.
Begin the W-2 Process
With the above items complete, we are ready to begin the processing of this year's W-2's.
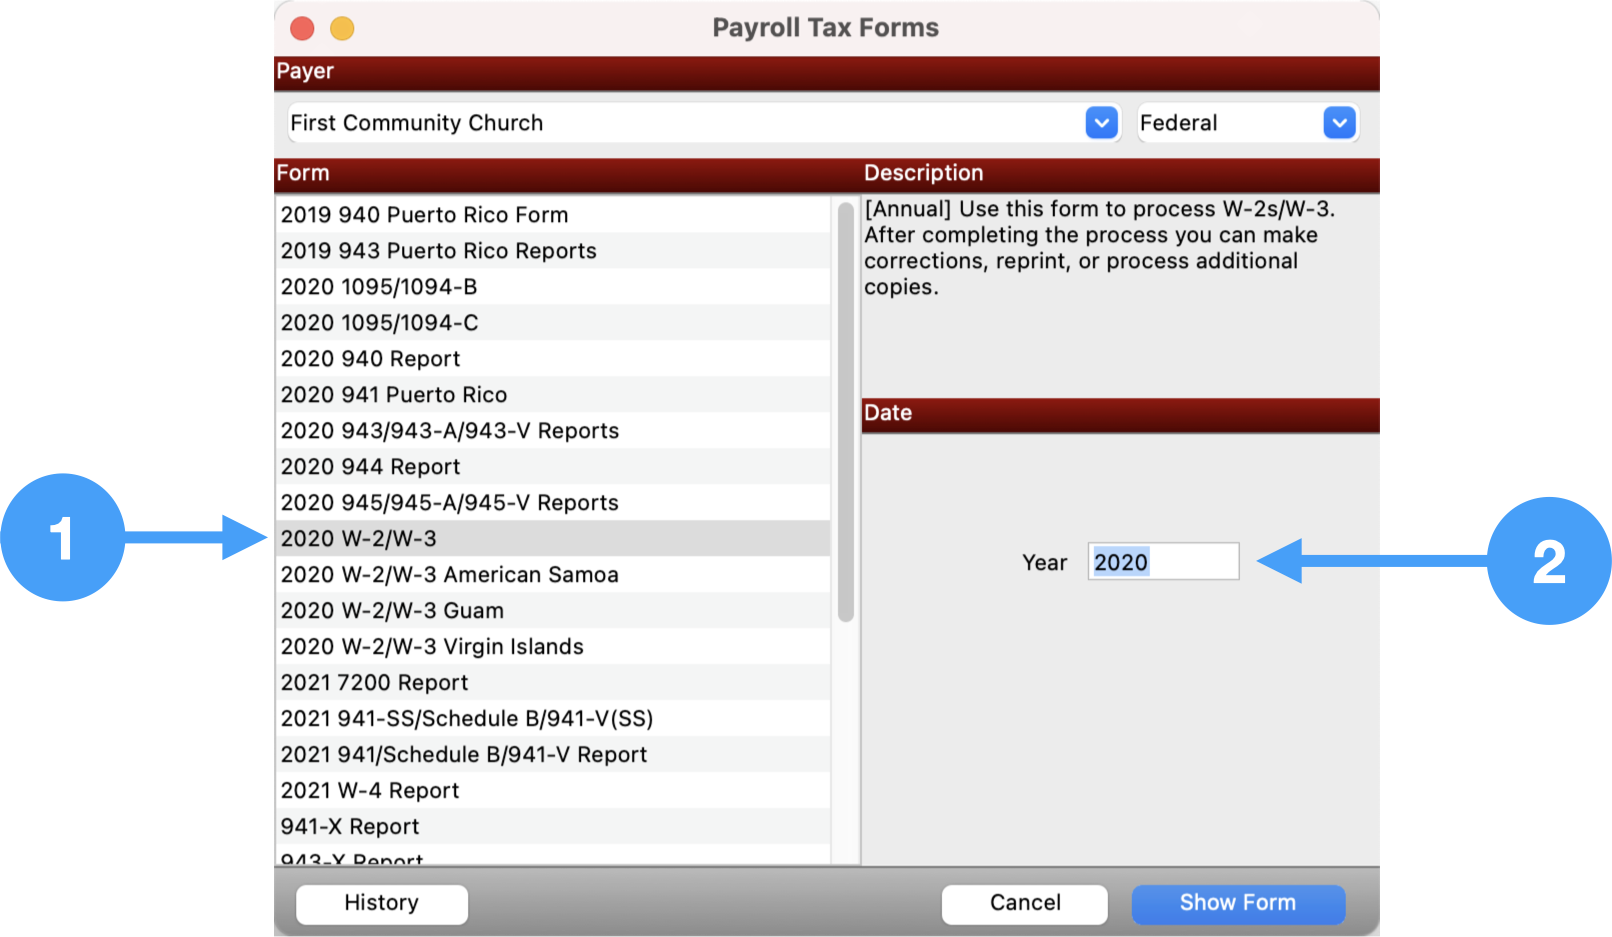
Reports → Payroll Reports → Payroll Tax Forms
-
Select 'the past year's W-2/W-3.'
-
Enter 'the past year' in the Year field.
Upon opening the Aatrix Forms Viewer, we jump right into the verification process.
Processing a Report
-
Look over the process listed in this window and when ready, click OK.
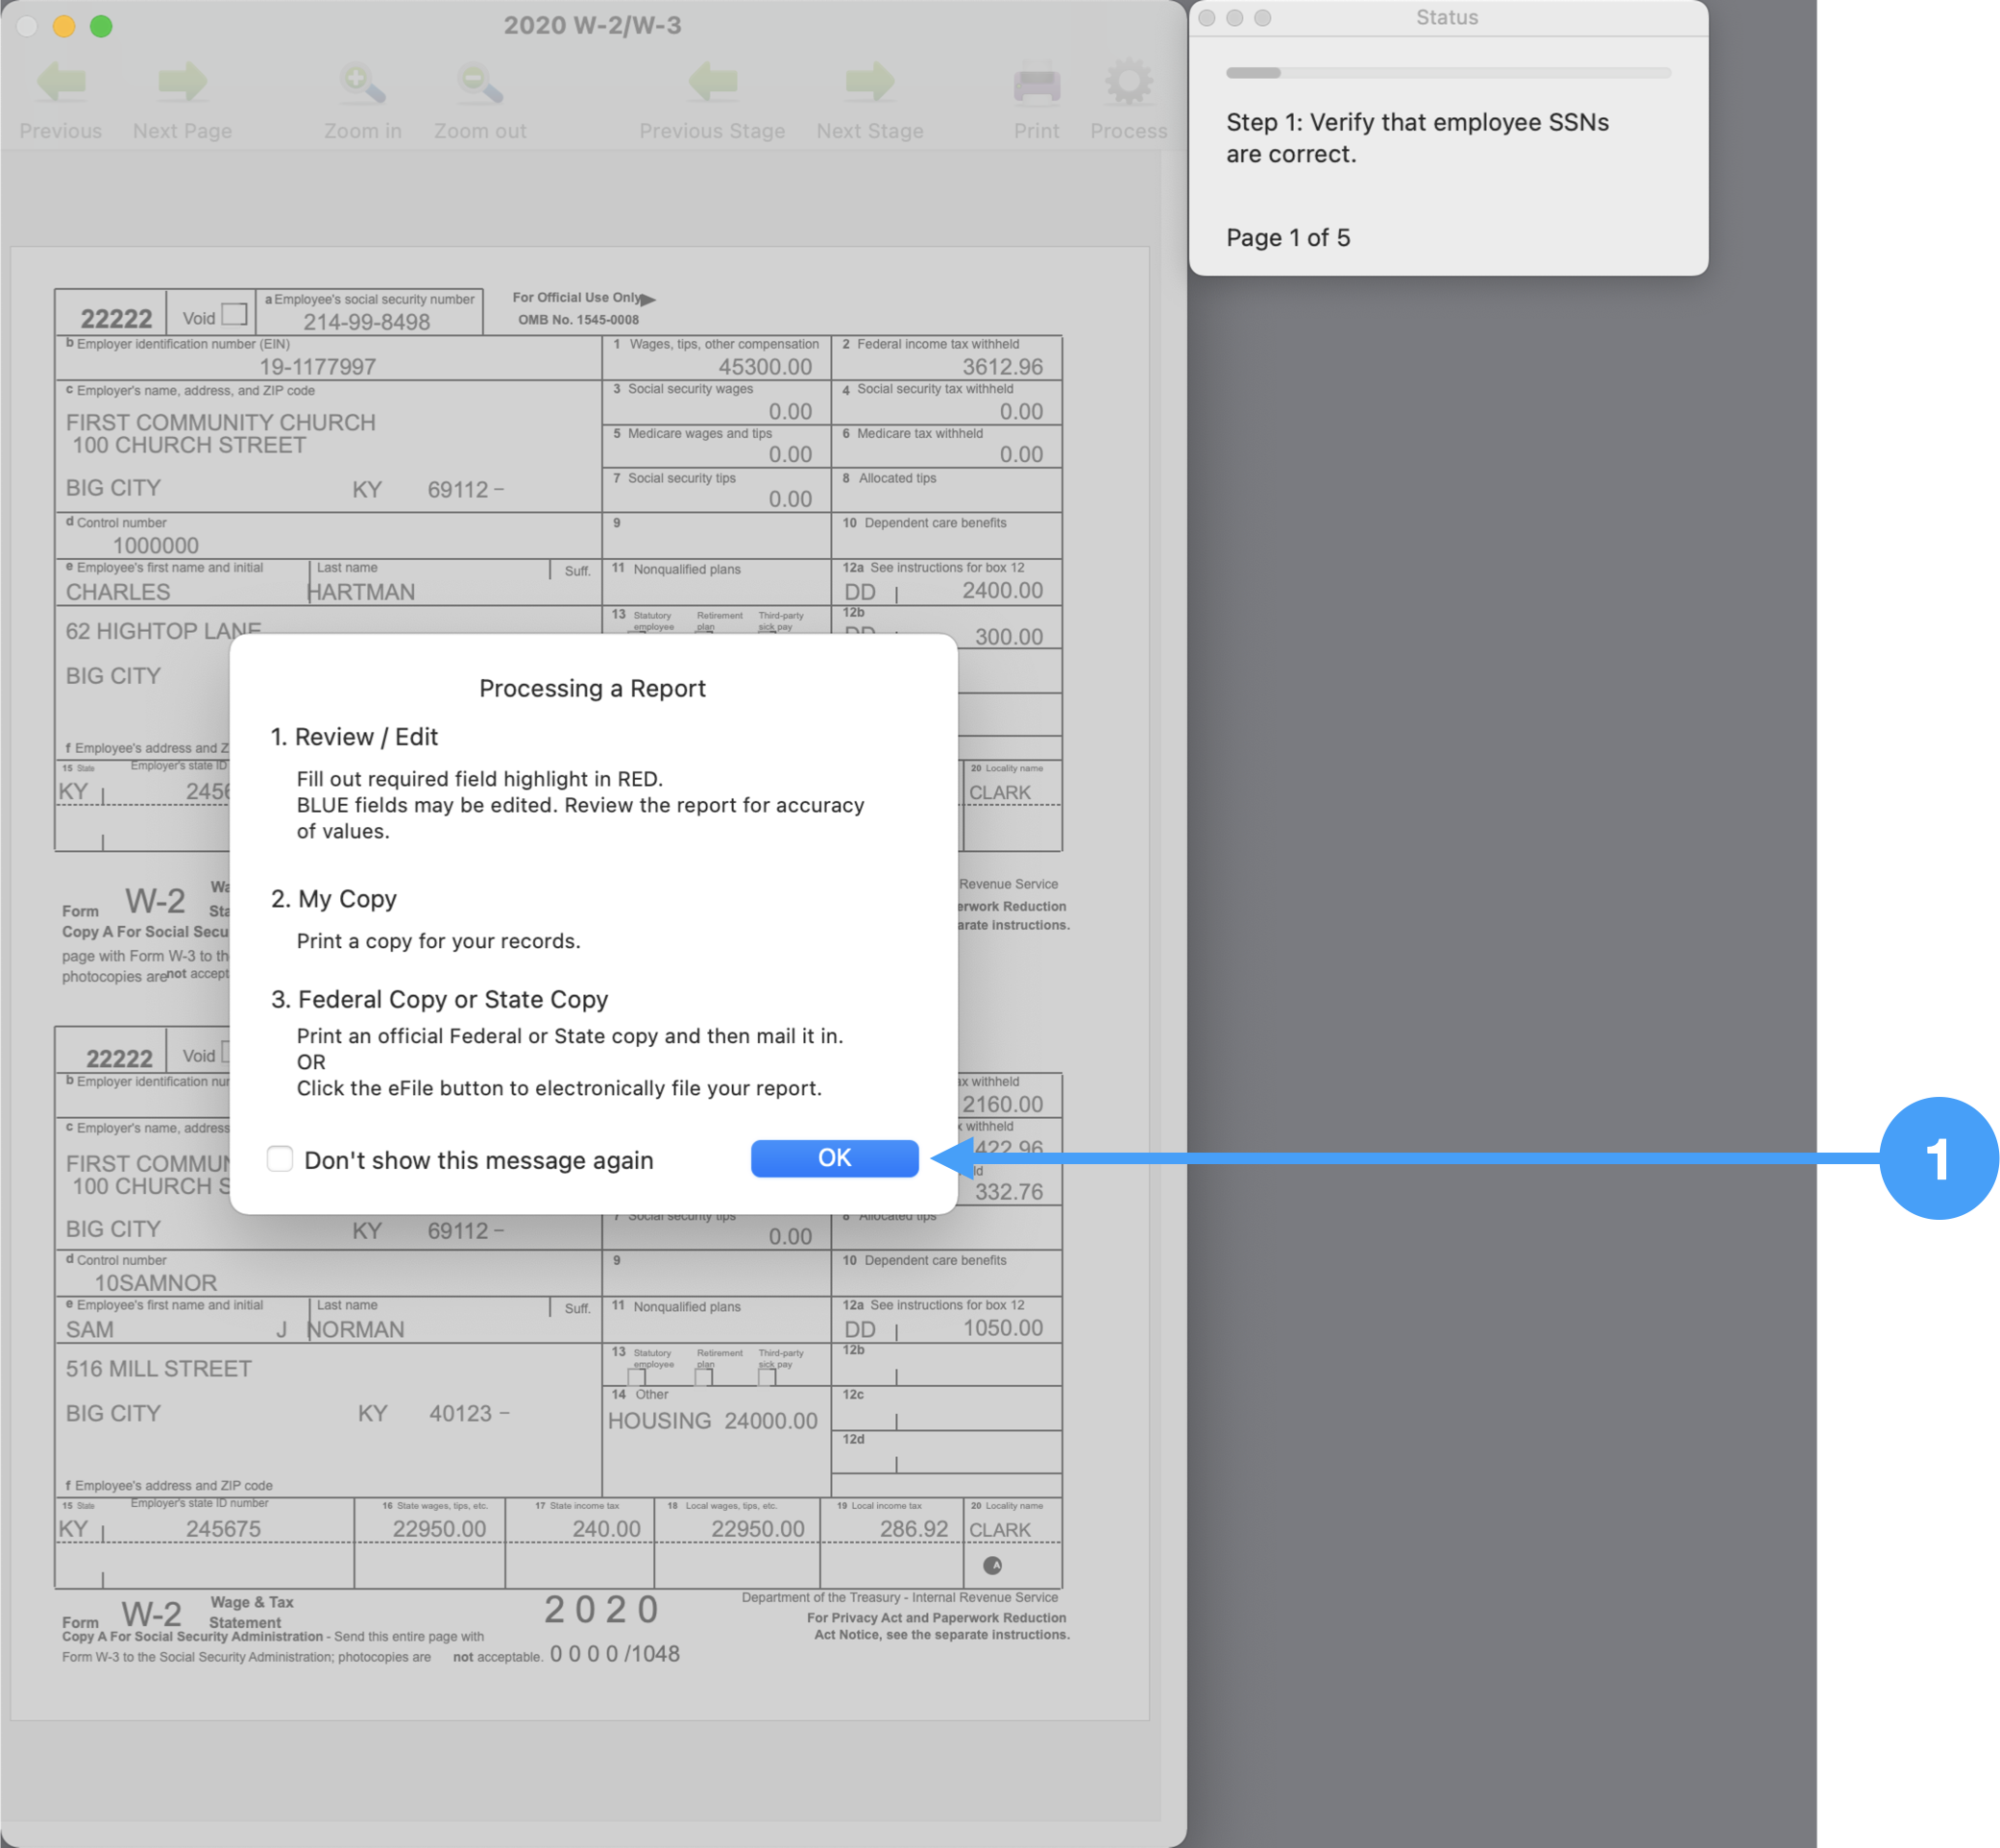
Step 1: Verify Employee Social Security Numbers
-
During this step, you use the Next Page and Previous buttons to page through the pages of the forms. As you move to each page, review the employee social security numbers for accuracy.
-
When done, click Next Stage.
Aatrix Forms Viewer analyzes your data
Going through each step allows the Aatrix Forms Viewer to check the data. If any issues are found, they will be highlighted in red.
Step 2: Verify Employee Names and Addresses
-
During this step, use the Next Page and Previous buttons to page through all of the pages and review the names and addresses for each employee.
-
When done, click Next Stage.

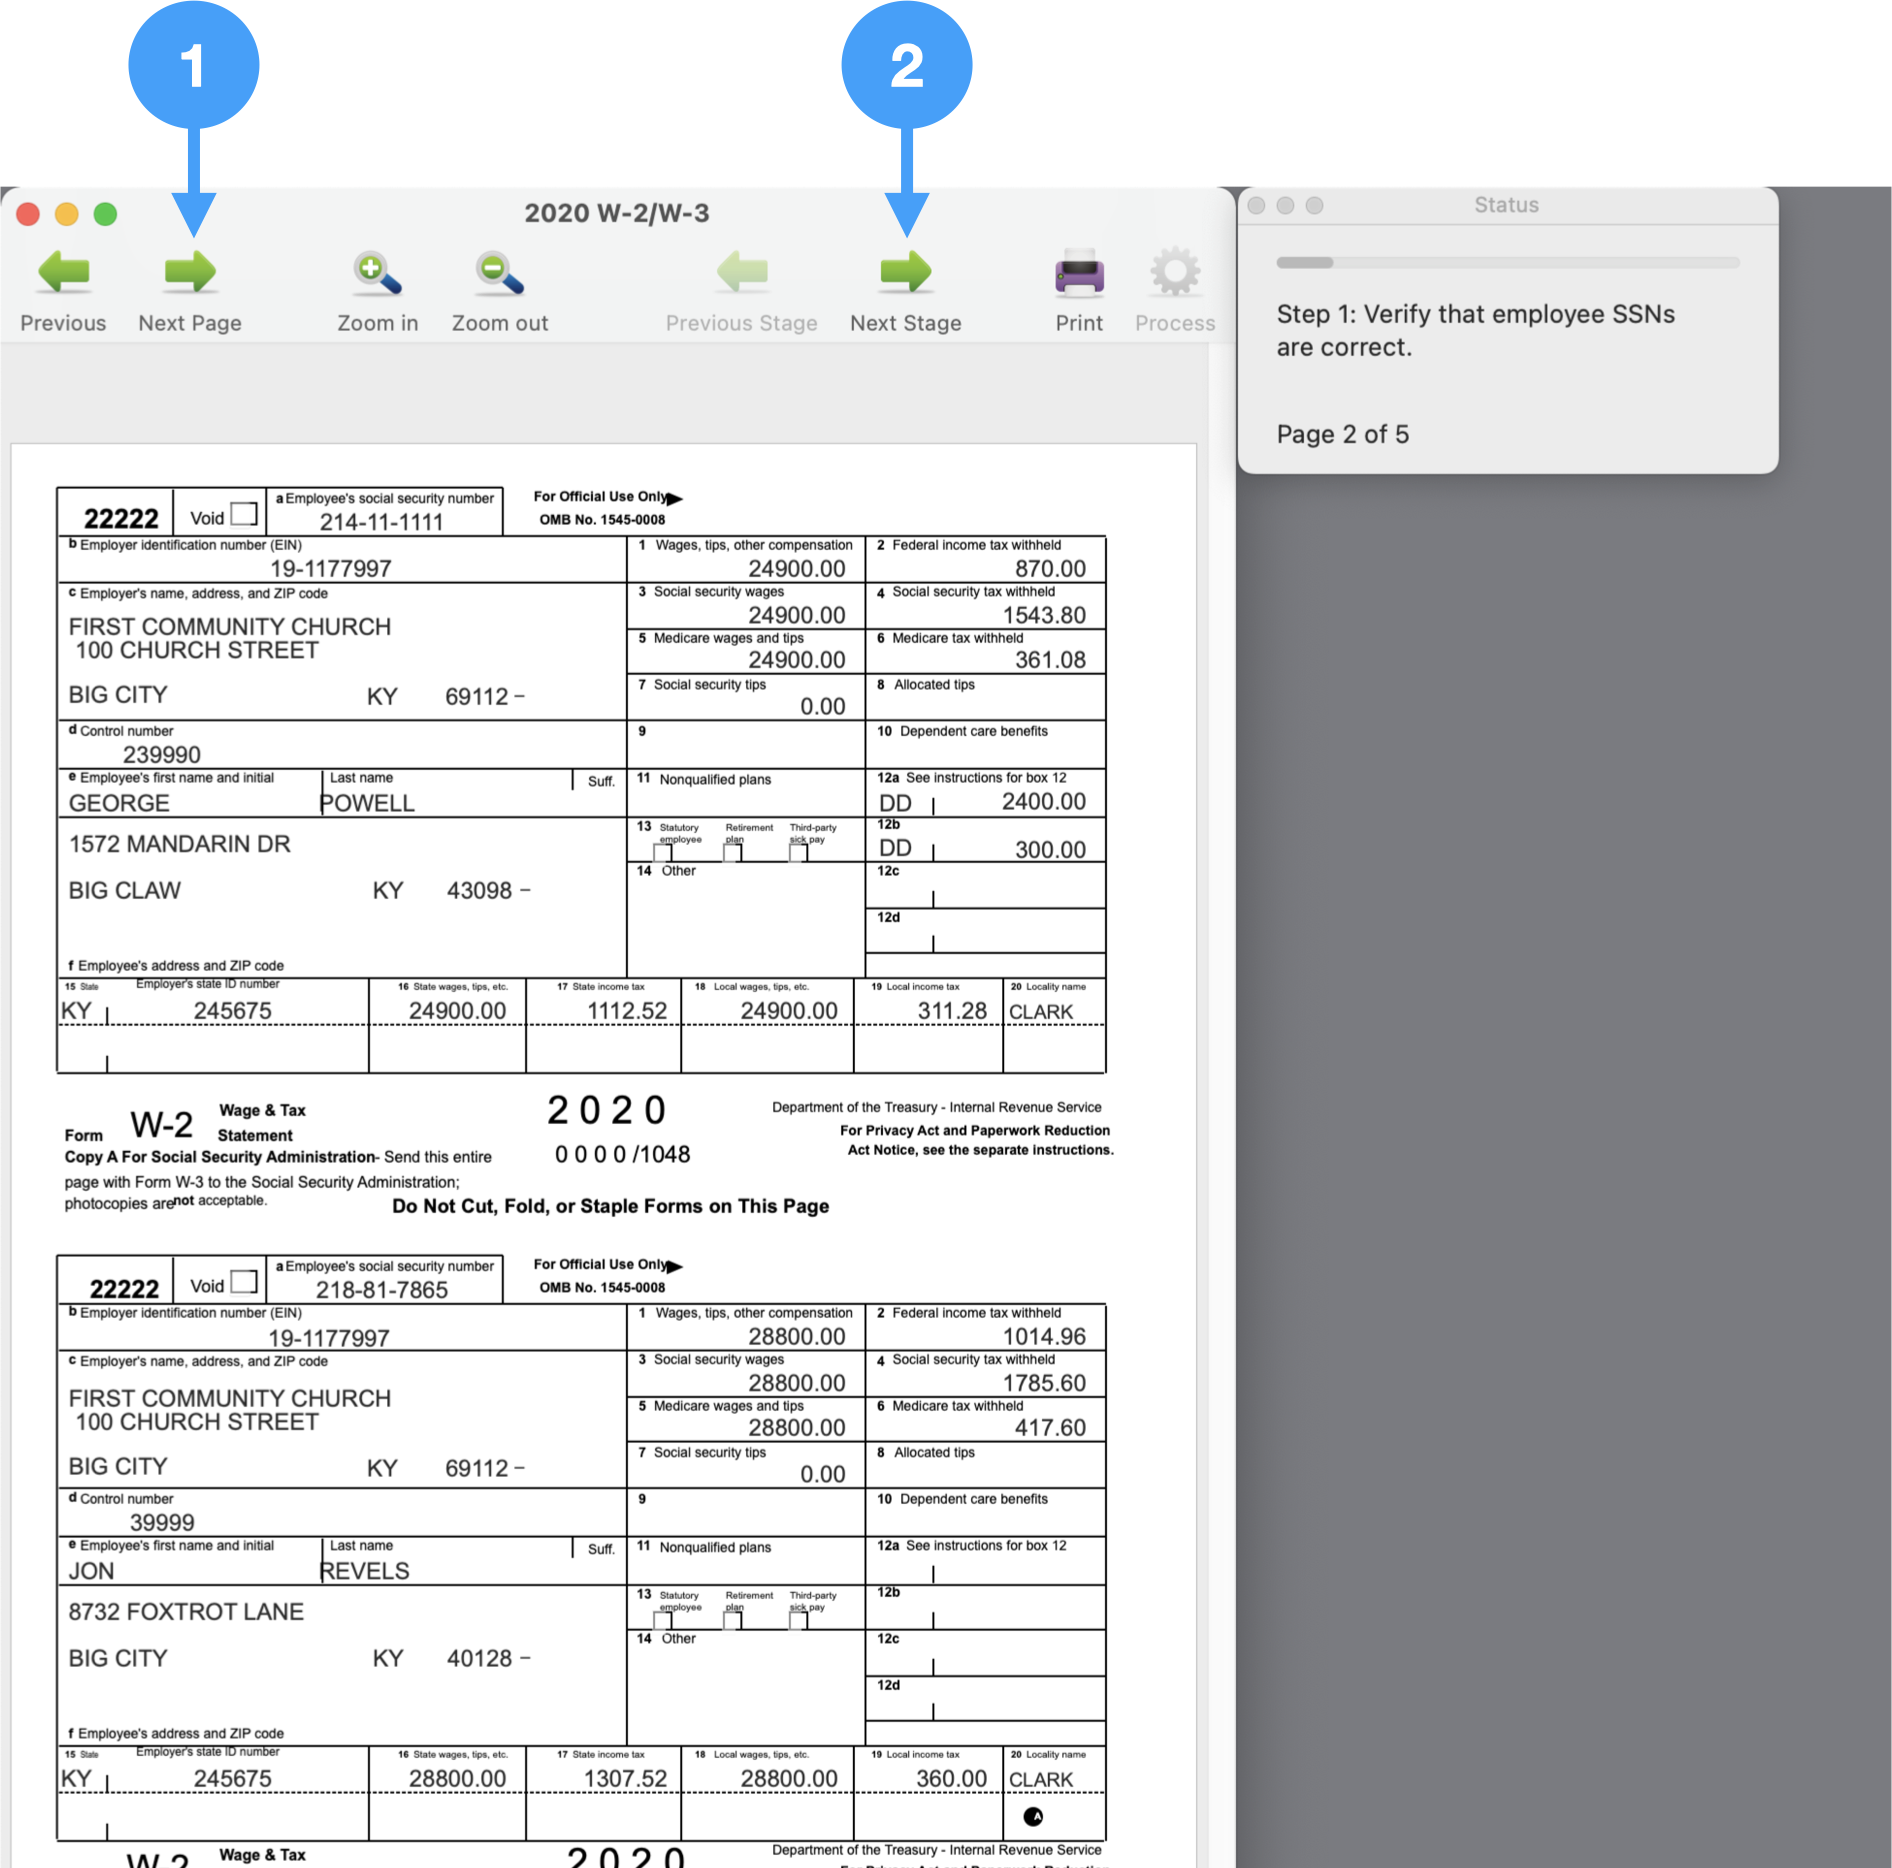
Step 3: Verify Federal Wages
-
As you move through the pages, review and verify the federal wages for each employee.
-
When this is complete, click Next Stage.

Step 4: Verify State Wages
-
In this step, you will move through all of the form pages verifying the state wages for all of your employees.
-
When done, click Next Stage.

Step 5: Verify Medicare and Social Security Wages
-
Once again, you will page through the forms reviewing Medicare (Box 5) and Social Security (Box 3).
-
When you have verified this information, click Next Stage.

Step 6: Verify Social Security Withholdings
-
Verify that multiplying the Social Security Wages in Box 3 by 6.2% equals the amount held in Box 4 (Social Security Withheld).
-
When satisfied that Box 4 is correct for all employees, click Next Stage.

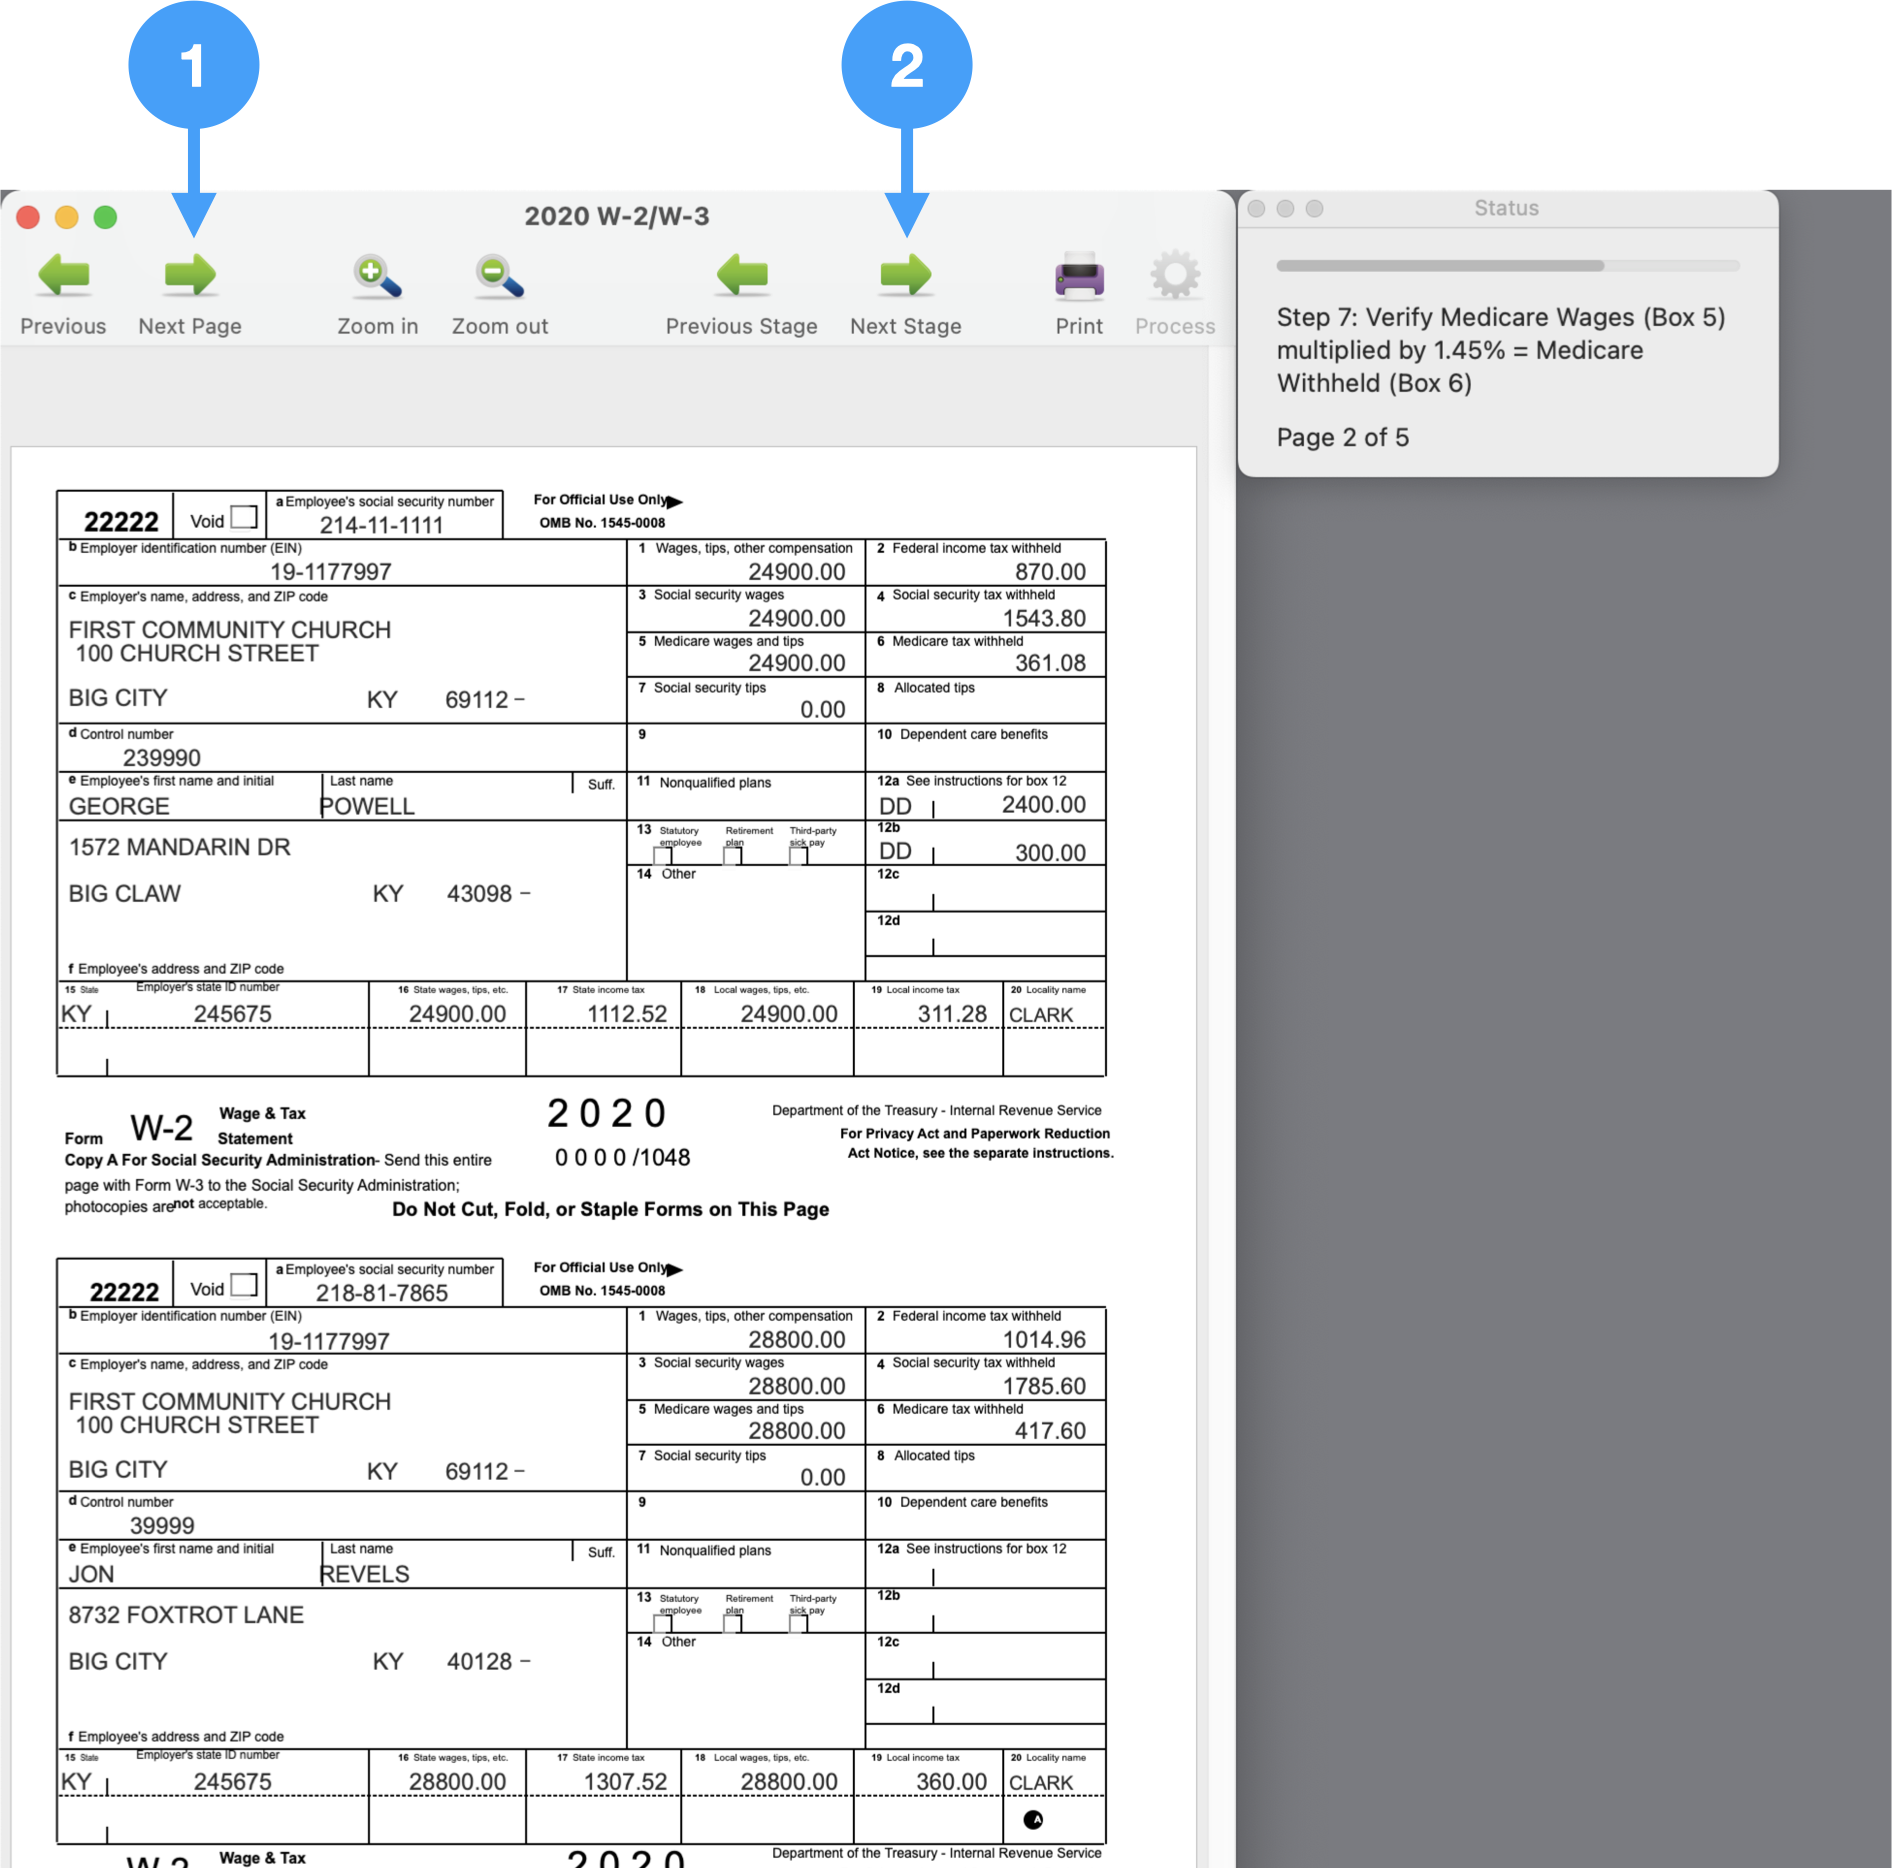
Step 7: Verify Medicare Withholdings
-
Verify that the Medicare withholdings for each employee are correct. It should be 1.45% of Medicare Wages in Box 5.
-
When done, click Next Stage.
Step 8: Verify all the items in Box 8 through 14
-
Go through each page verifying the items in Box 8 through 14.
-
When satisfied that the information is correct, click Next Stage.

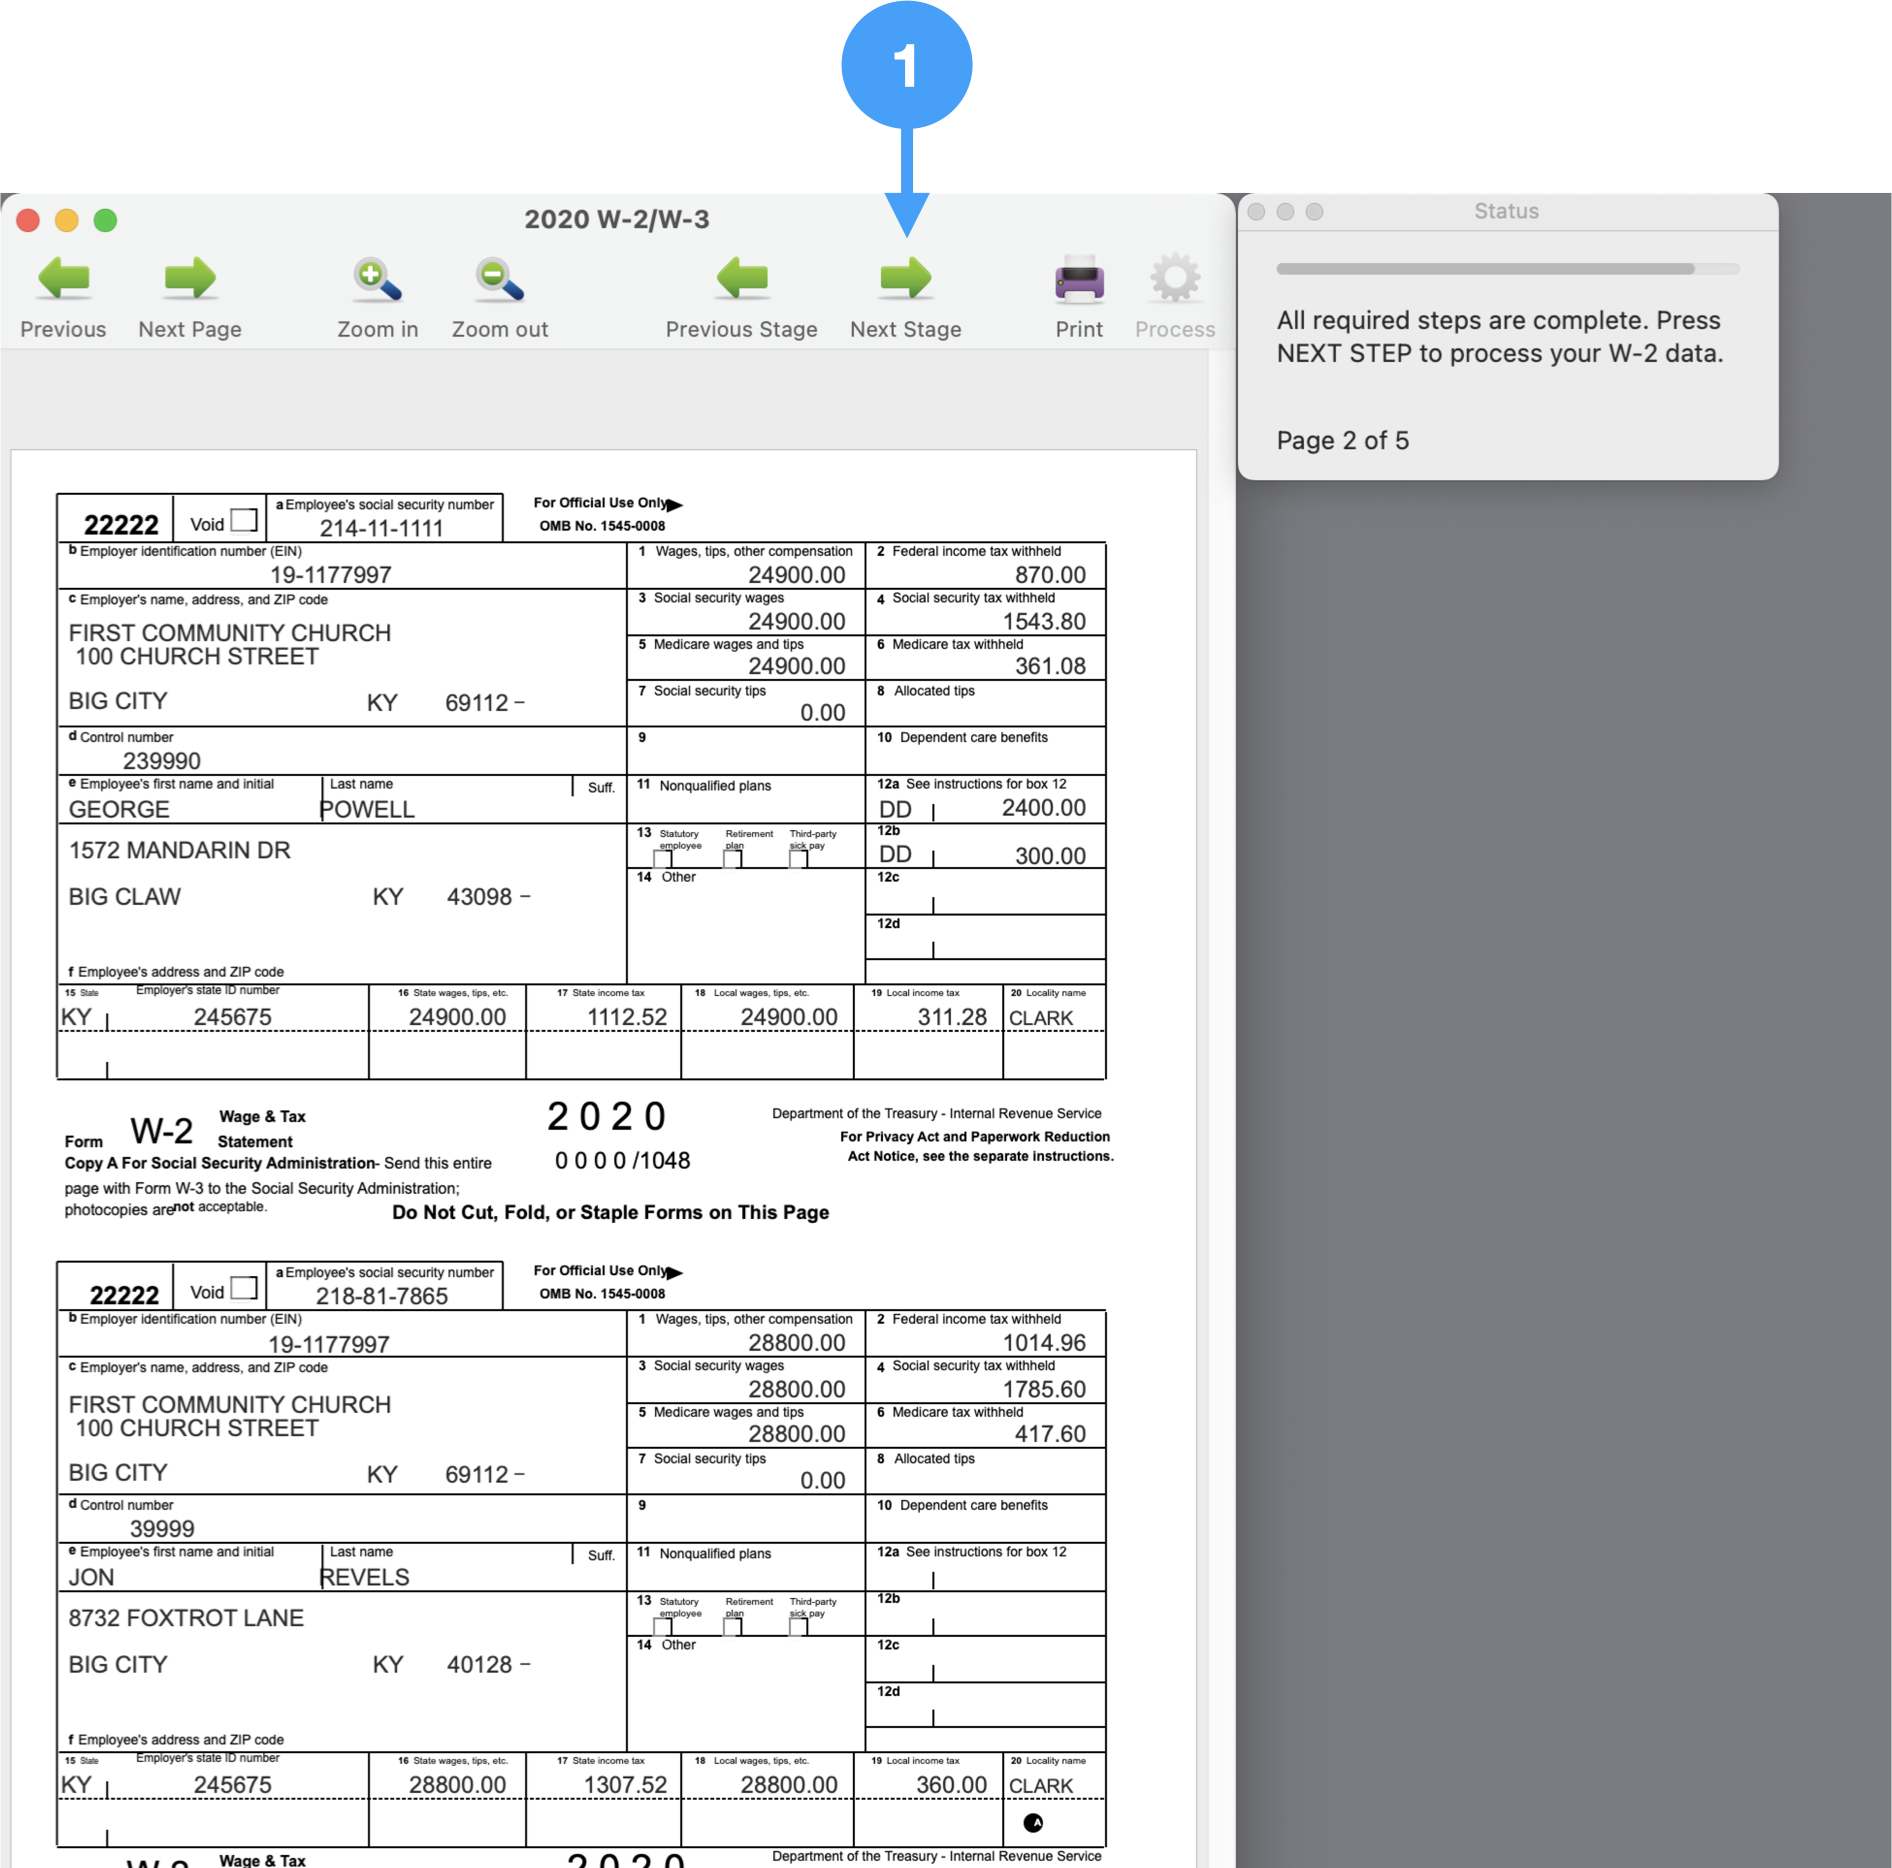
All Steps Complete
-
All of the required steps are complete. You are ready to begin processing your W-2's. Click Next Stage.
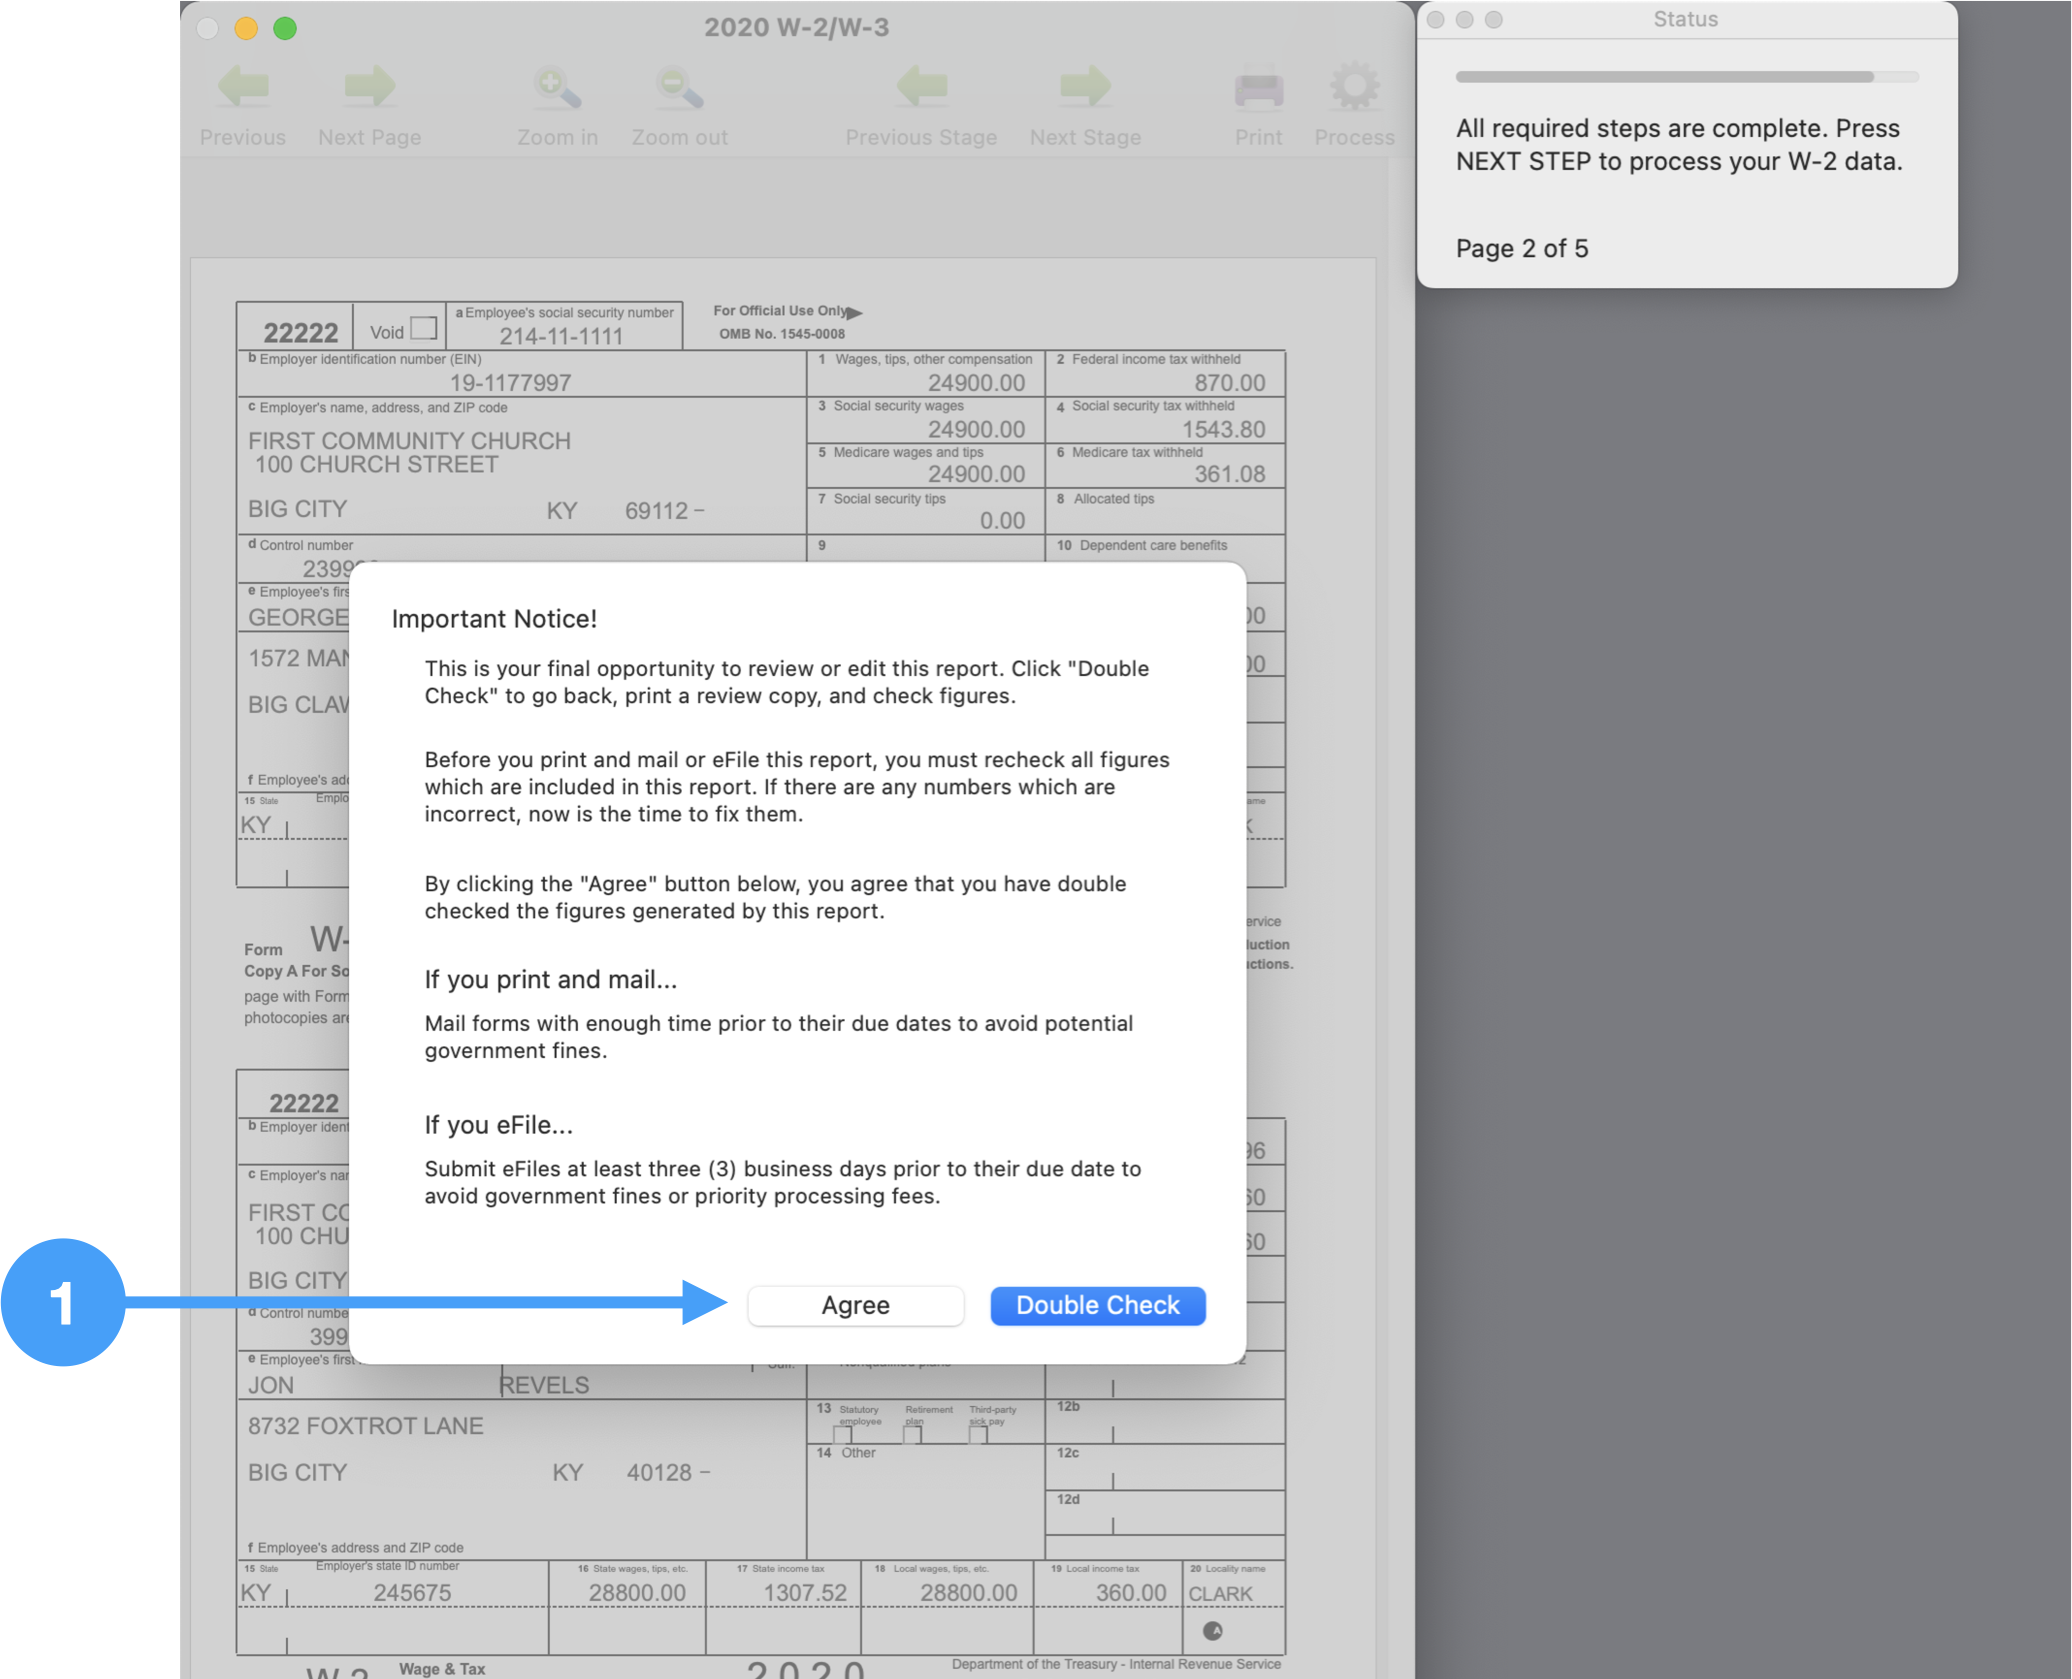
Agree that you are done reviewing
-
This step gives you one more opportunity to go back and review your data before the processing begins. If you are certain that all of the data is correct, click Agree.
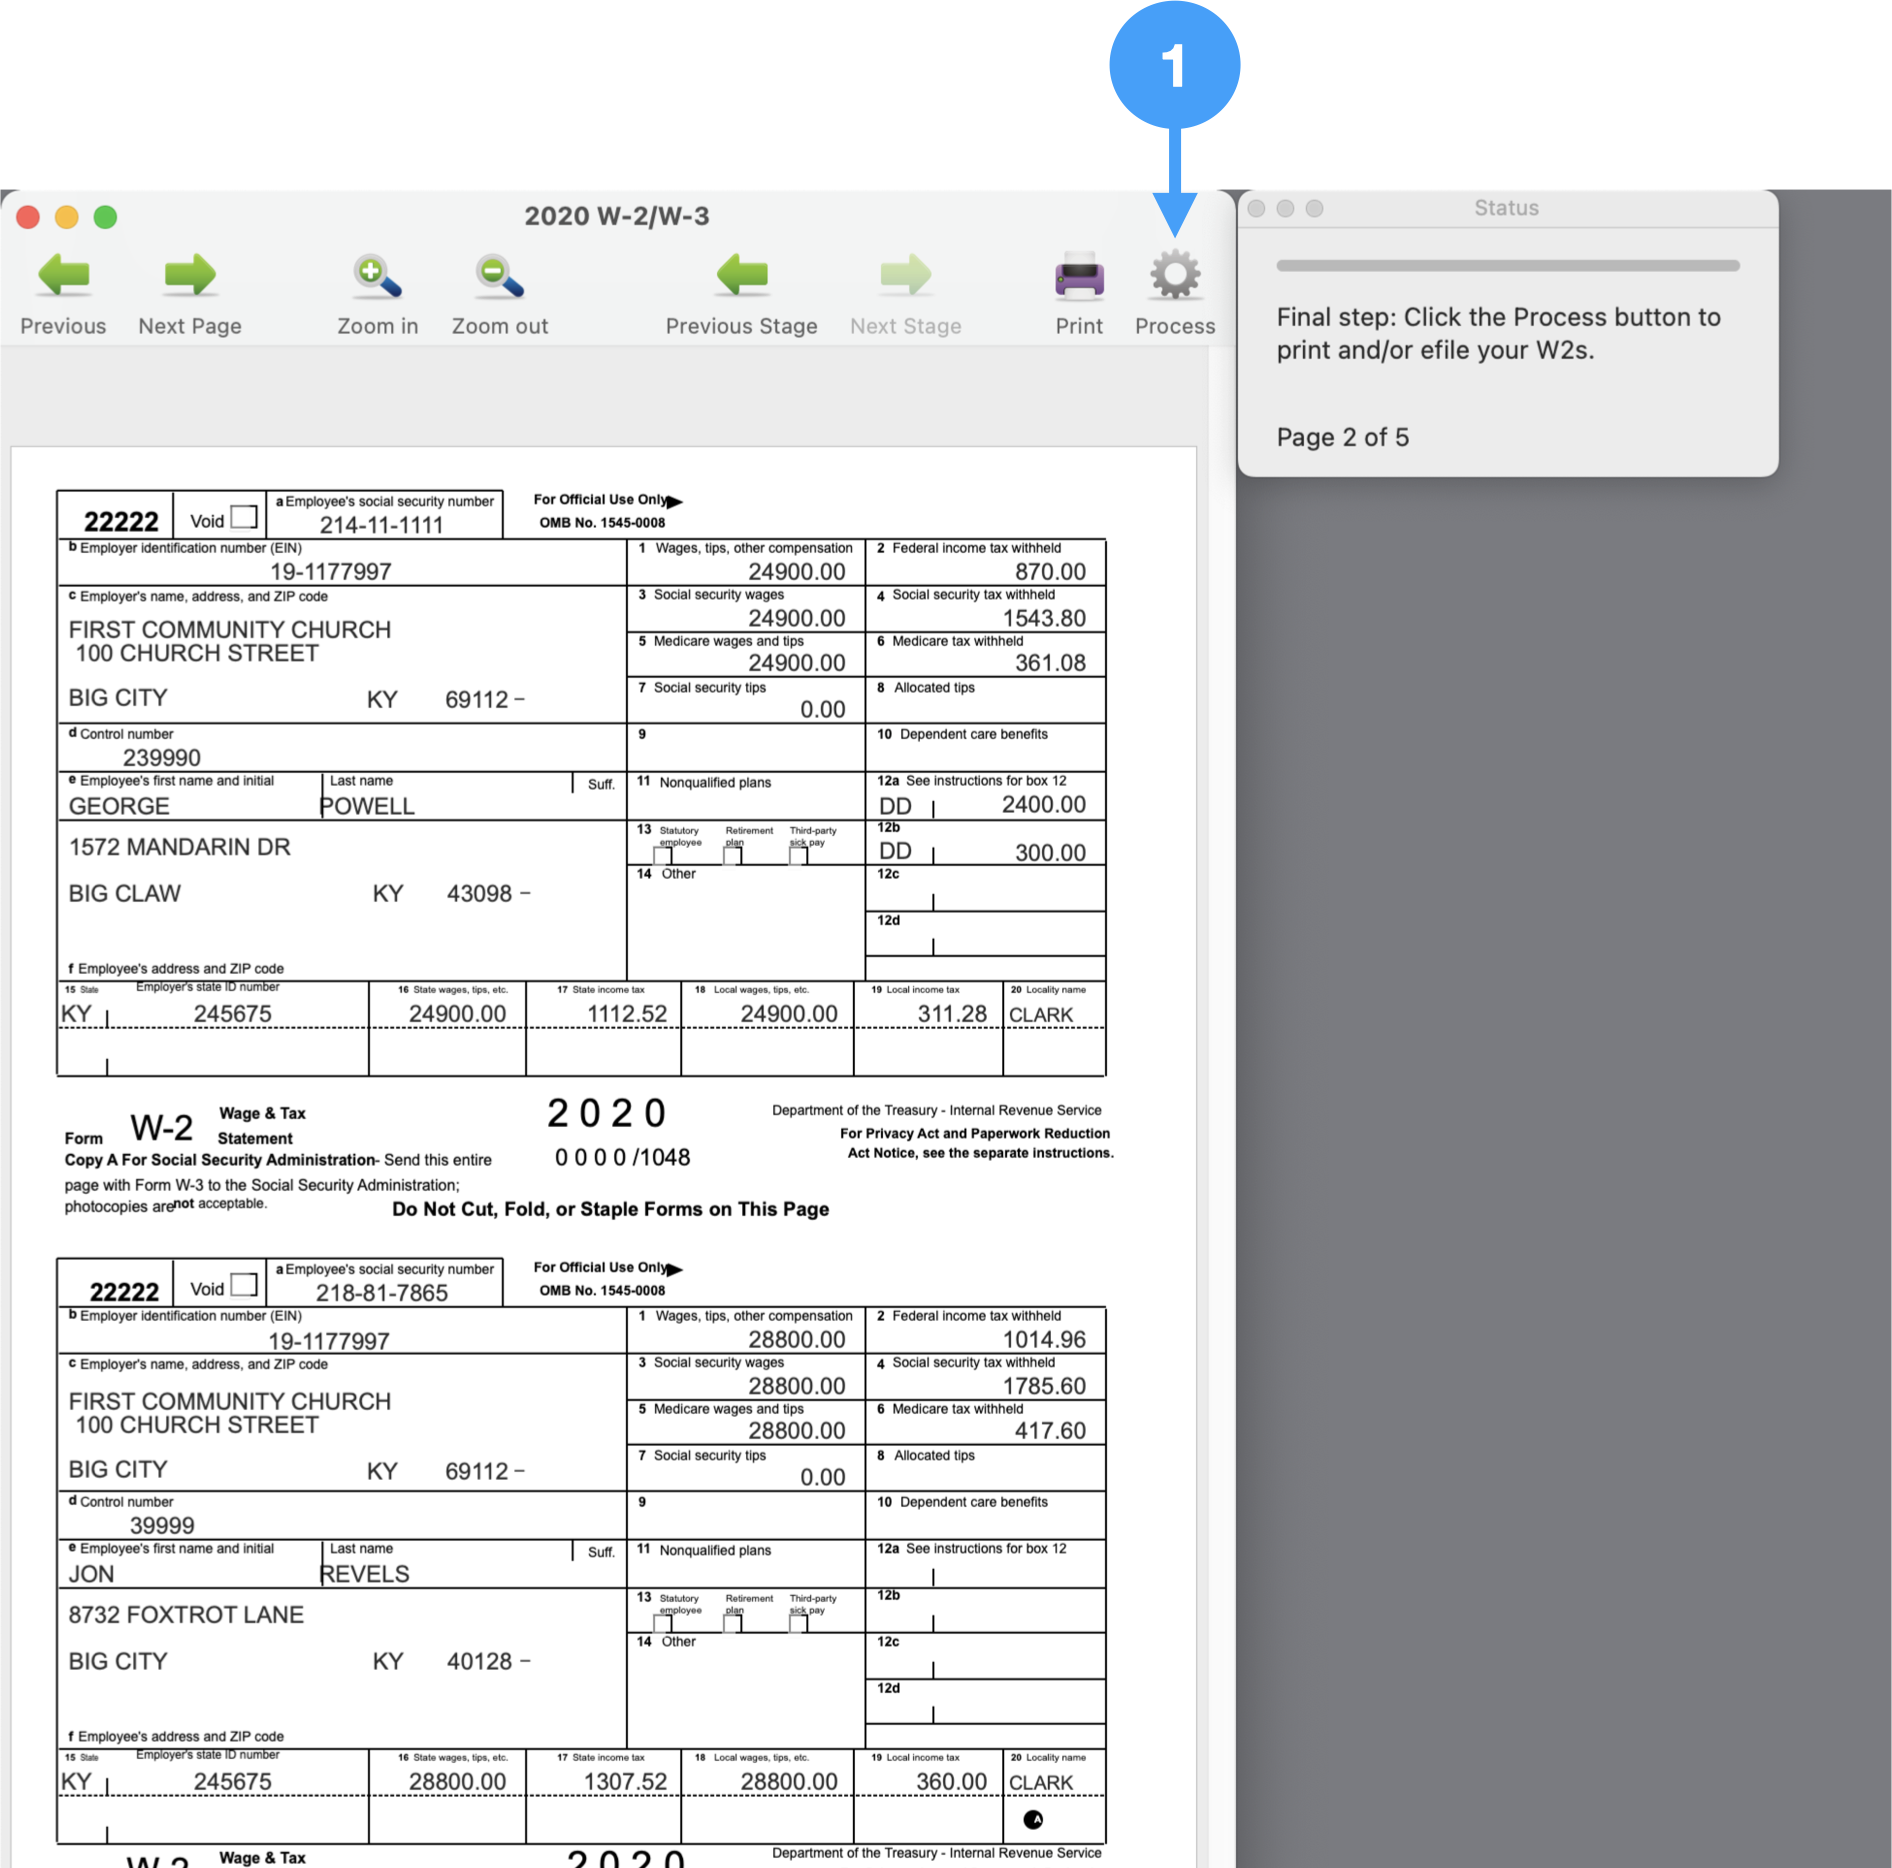
Begin the process of printing or eFiling your W-2s
-
Click Process.
Video for Verification Process
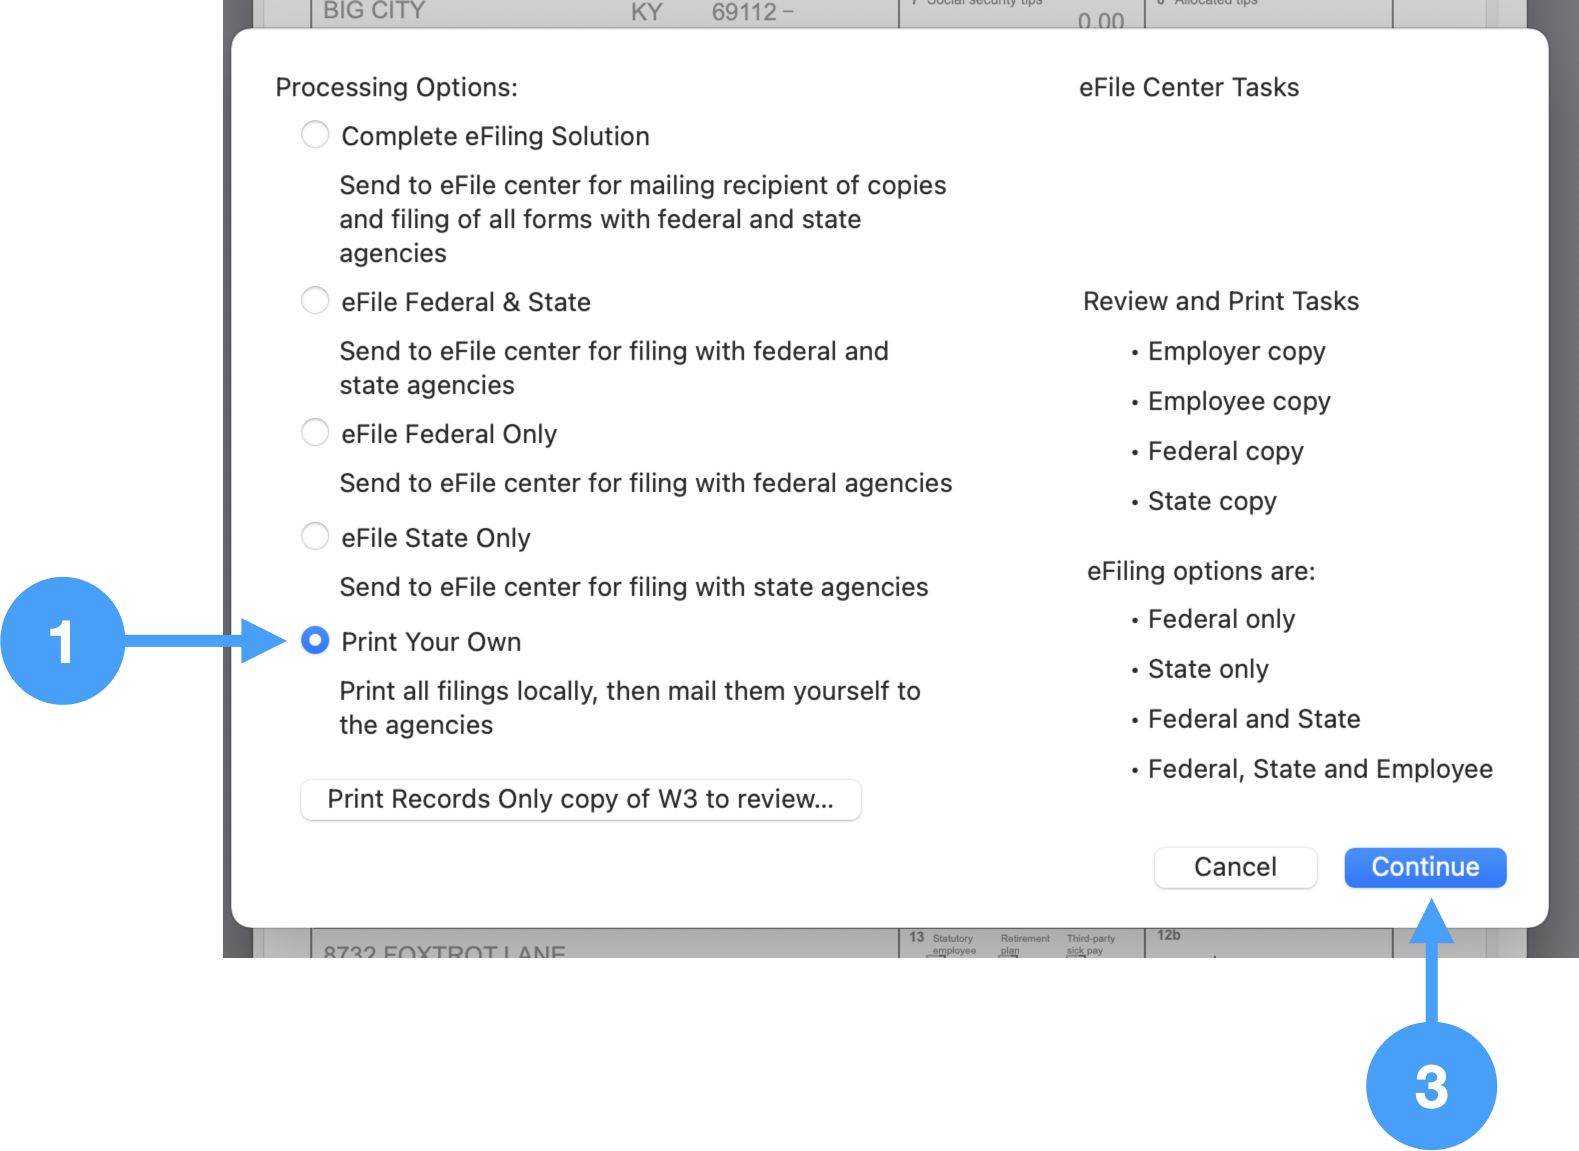
Processing Options
-
In order to print your own W-2/W-3 forms, select the radio button labeled Print Your Own.
-
Click Continue.
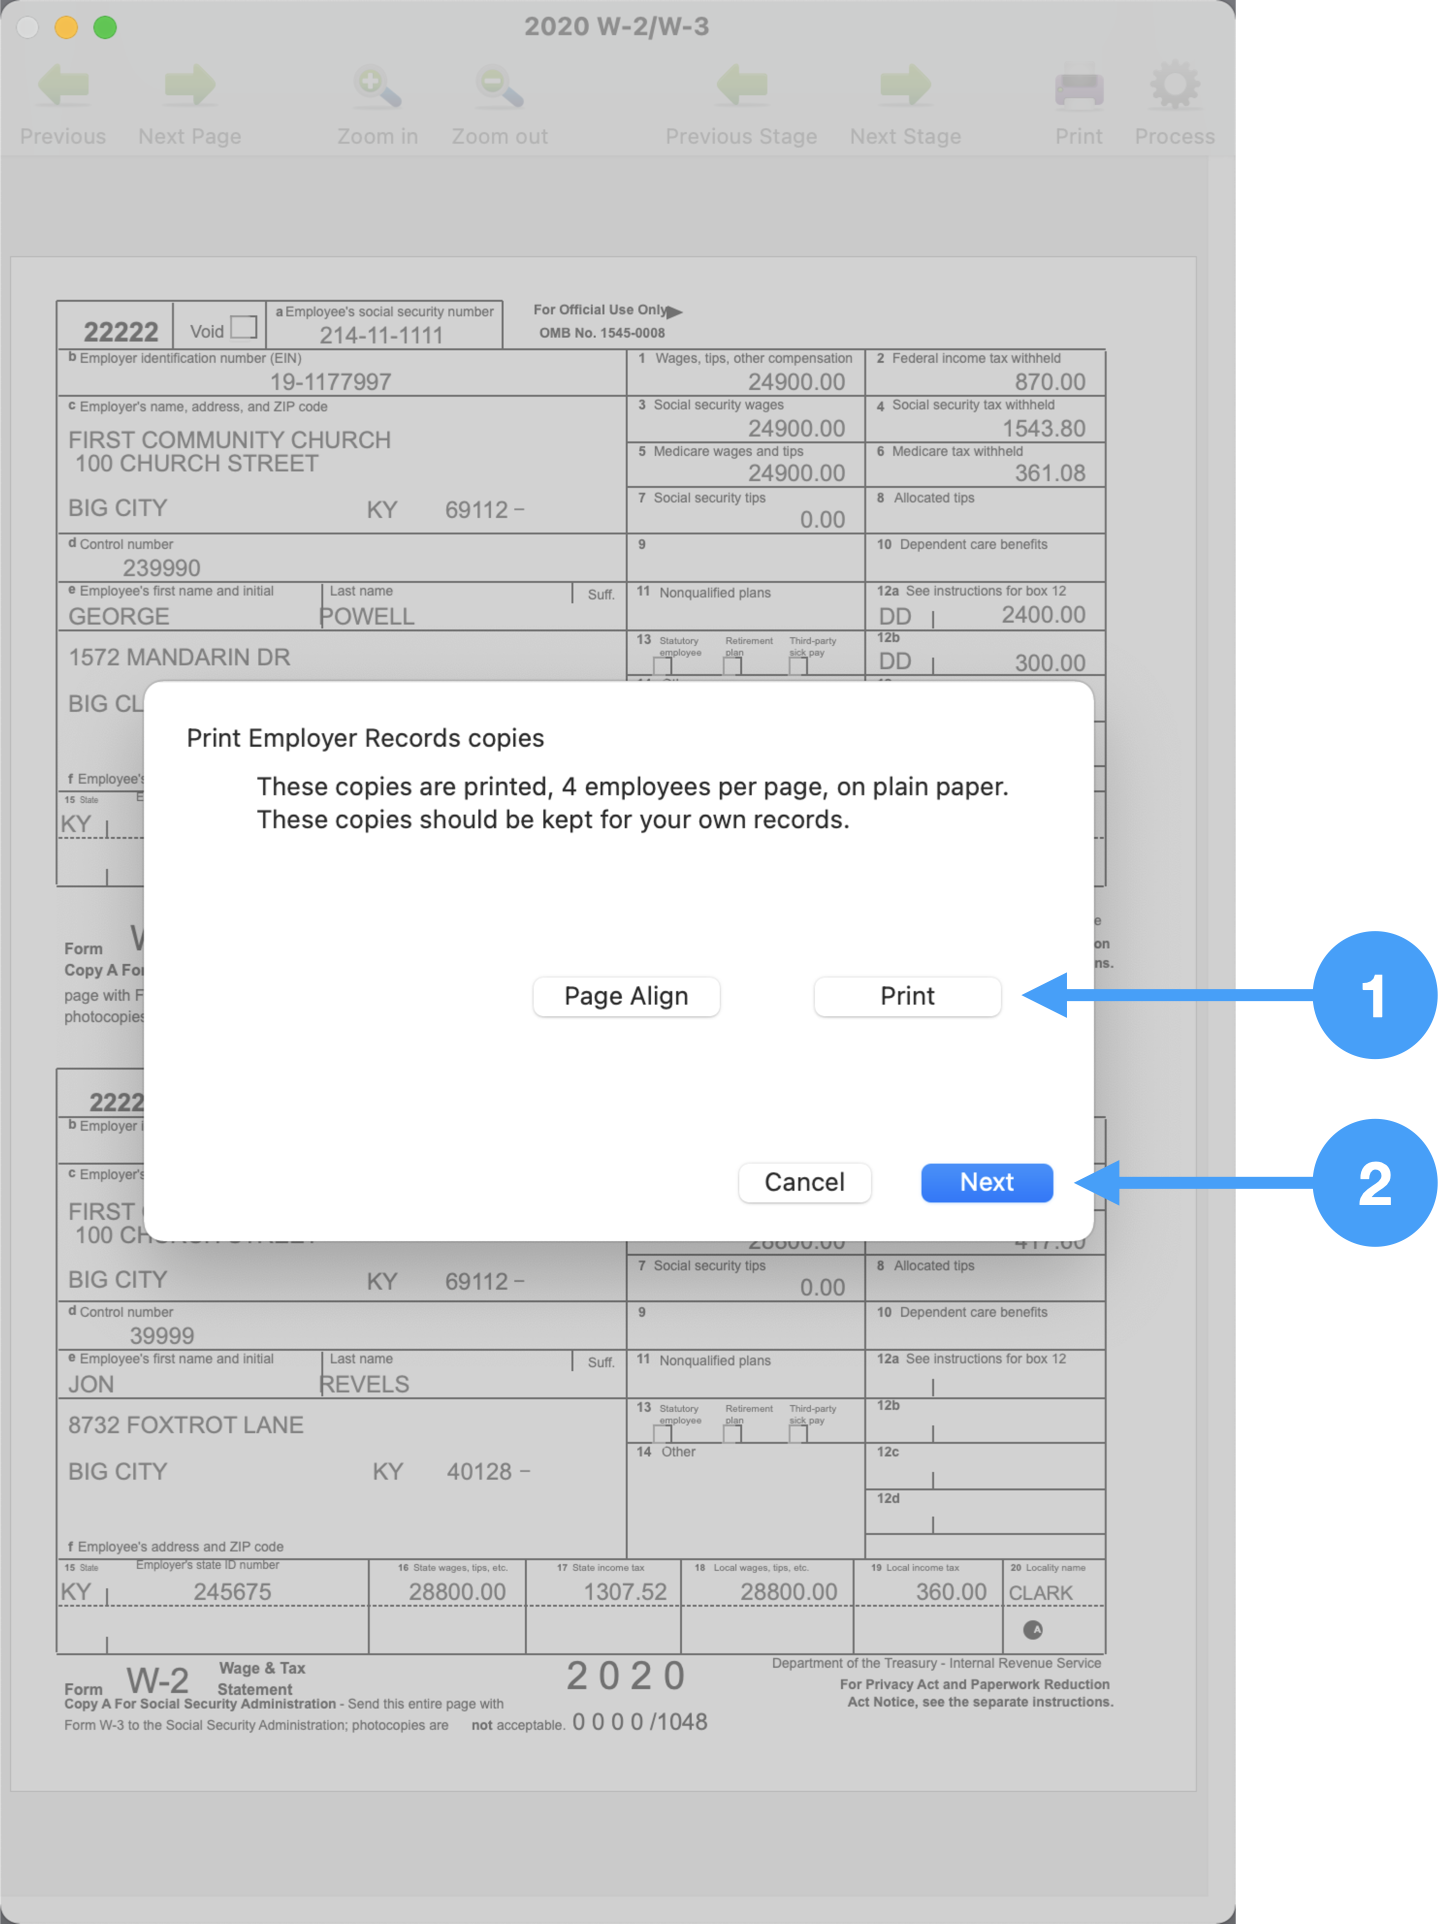
Printing W-2/W-3 Forms
During this process, the following forms will be printed:
-
Employer Records (Final Copy)
-
Federal SSA (Final Copy)
-
State (Final Copy)
-
Employee (Final Copy)
-
SSA Notice to Employees
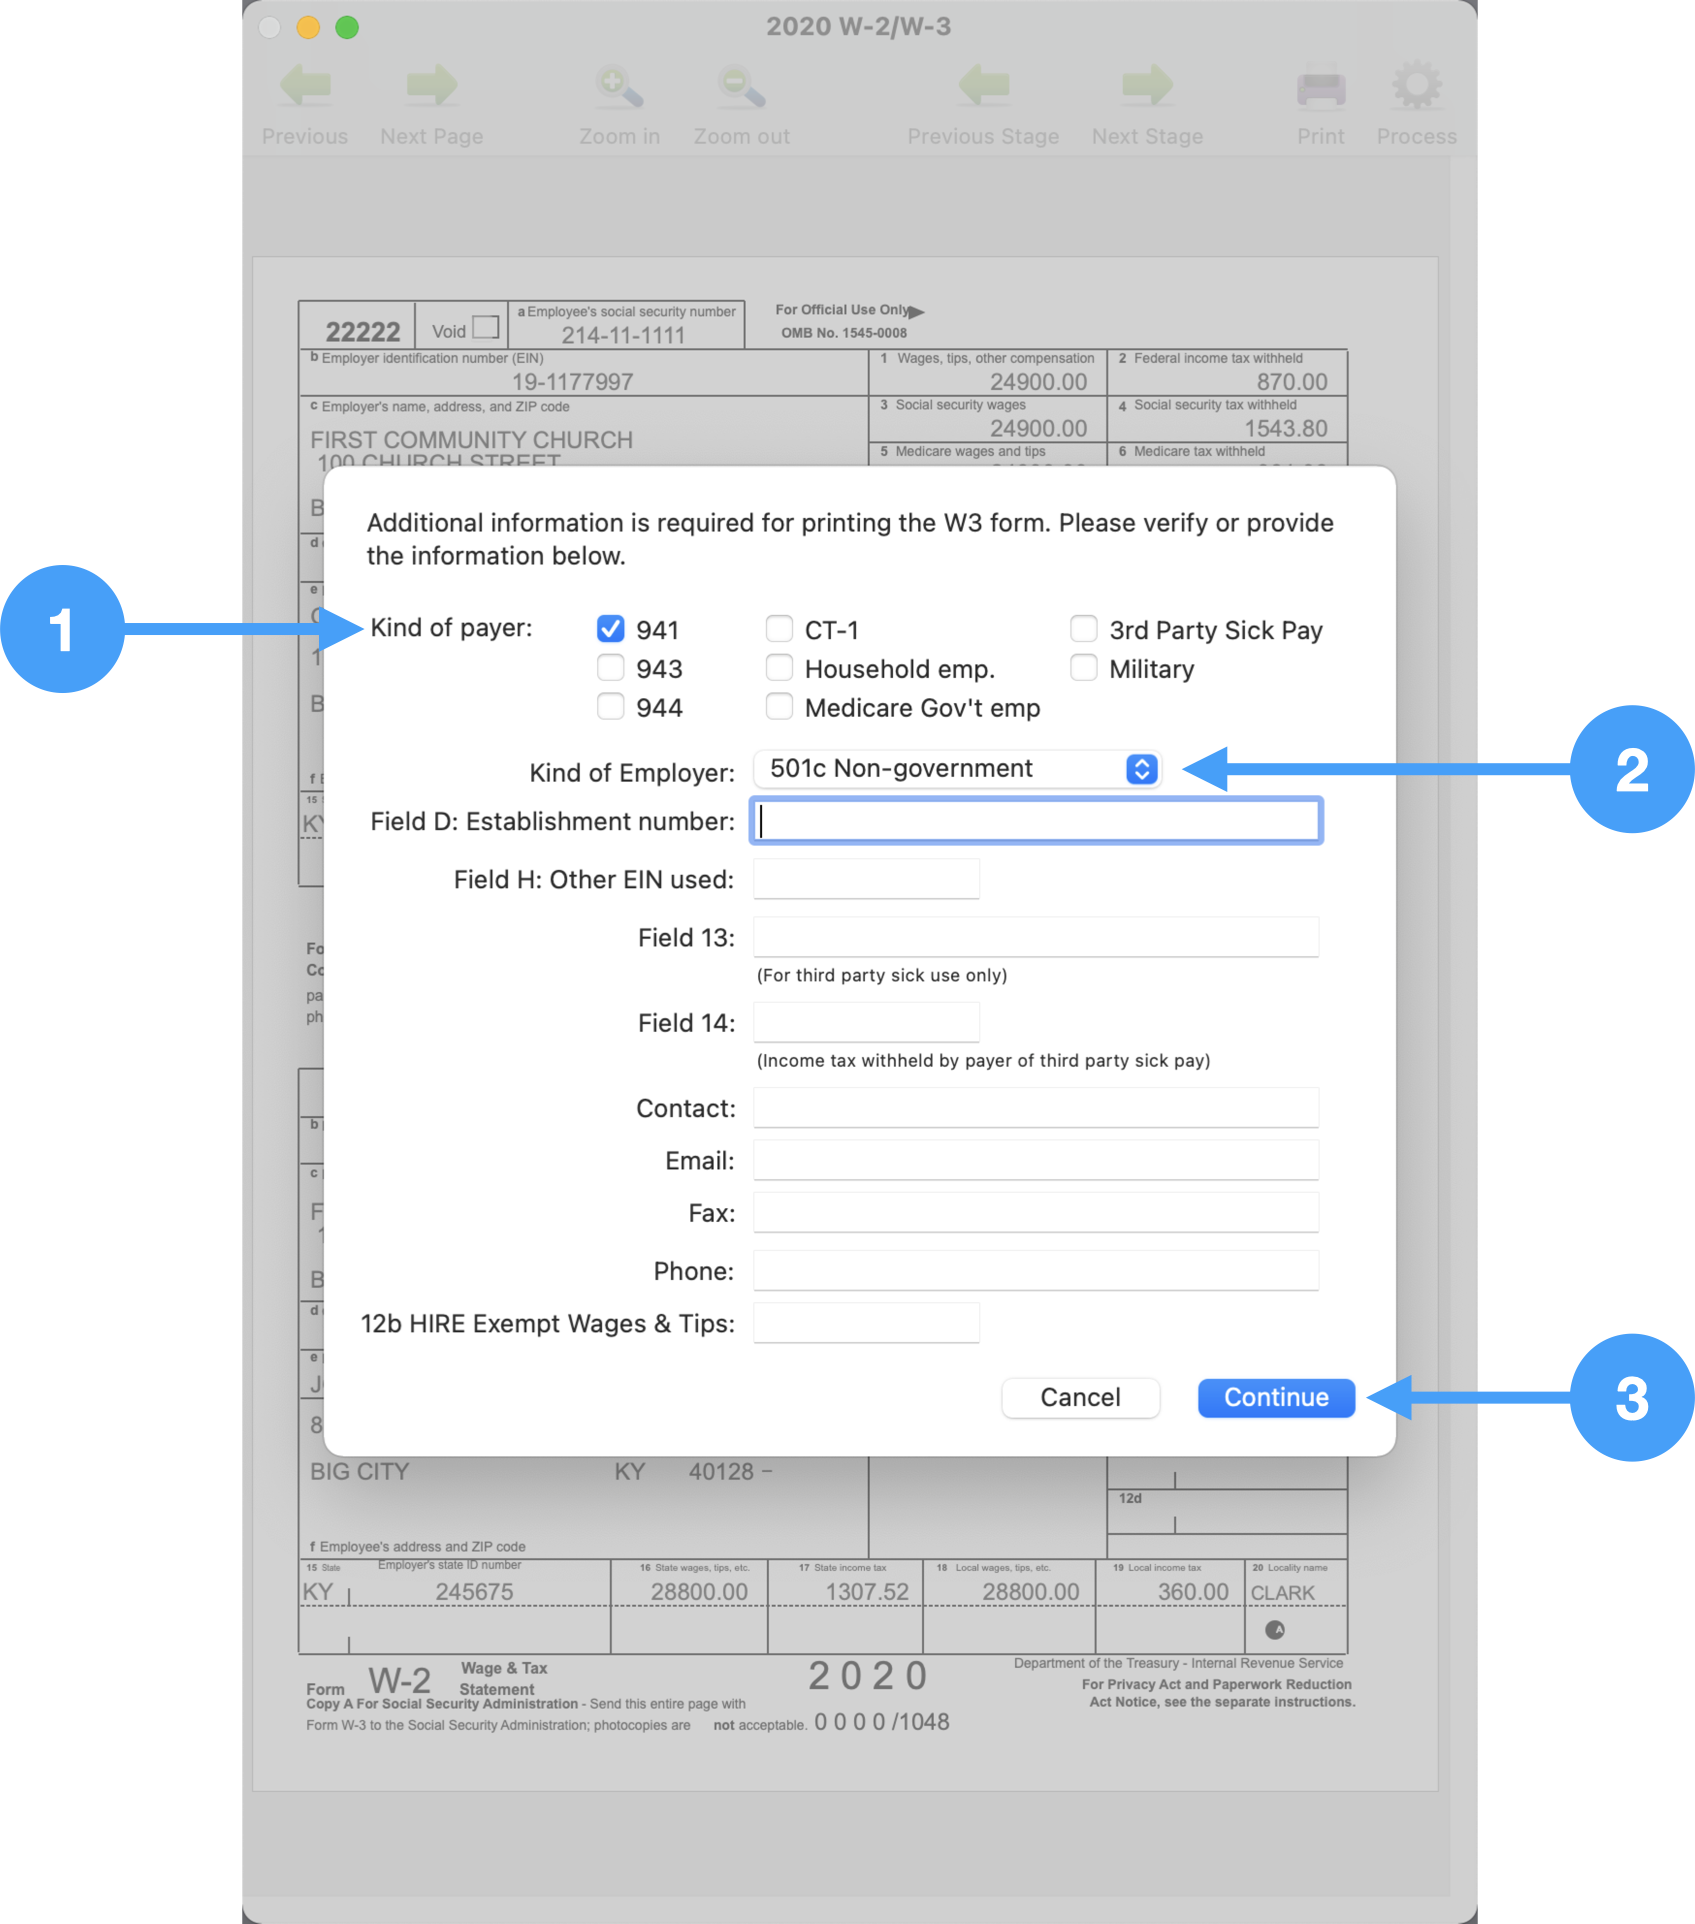
Printing W-3 Form
Prior to printing the W-3 Form, you need to set up the W-3 information.
-
Select the Kind of Payer. In our case, it is 941 payer.
-
Select the Kind of Employer. In this example, it is '501c Non-government.'
-
Click Continue
Now, you will be able to print your W-3 Form properly.
Video for Printing Your Own Forms