
There are four stages to eFile Forms 1099-NEC and 1096 on Windows:
-
Prepare CDM+ Records
-
Setup Aatrix
-
Review Forms
-
Submit Forms
This guide will walk you through each of these stages.
Most stages include a video showing the instructions in action. You can follow either the written instructions or the video and will follow the same steps.
Prepare CDM+ Records
Reviewing Vendor Records
Program → Payables → Vendor Record
-
Ensure Name and Address are correct.
-
Ensure the state is exactly two characters.
-
Ensure 1099-NEC is selected.
-
Ensure 1099 Recipient's ID number is correct.

Prepping Your 1099
It is an IRS requirement that Vendors using a SSN must have the first and last name fields completed on the form.
If you notice the the Contact First Name and Contact Last Name fields are black, click Change from the left sidebar.
-
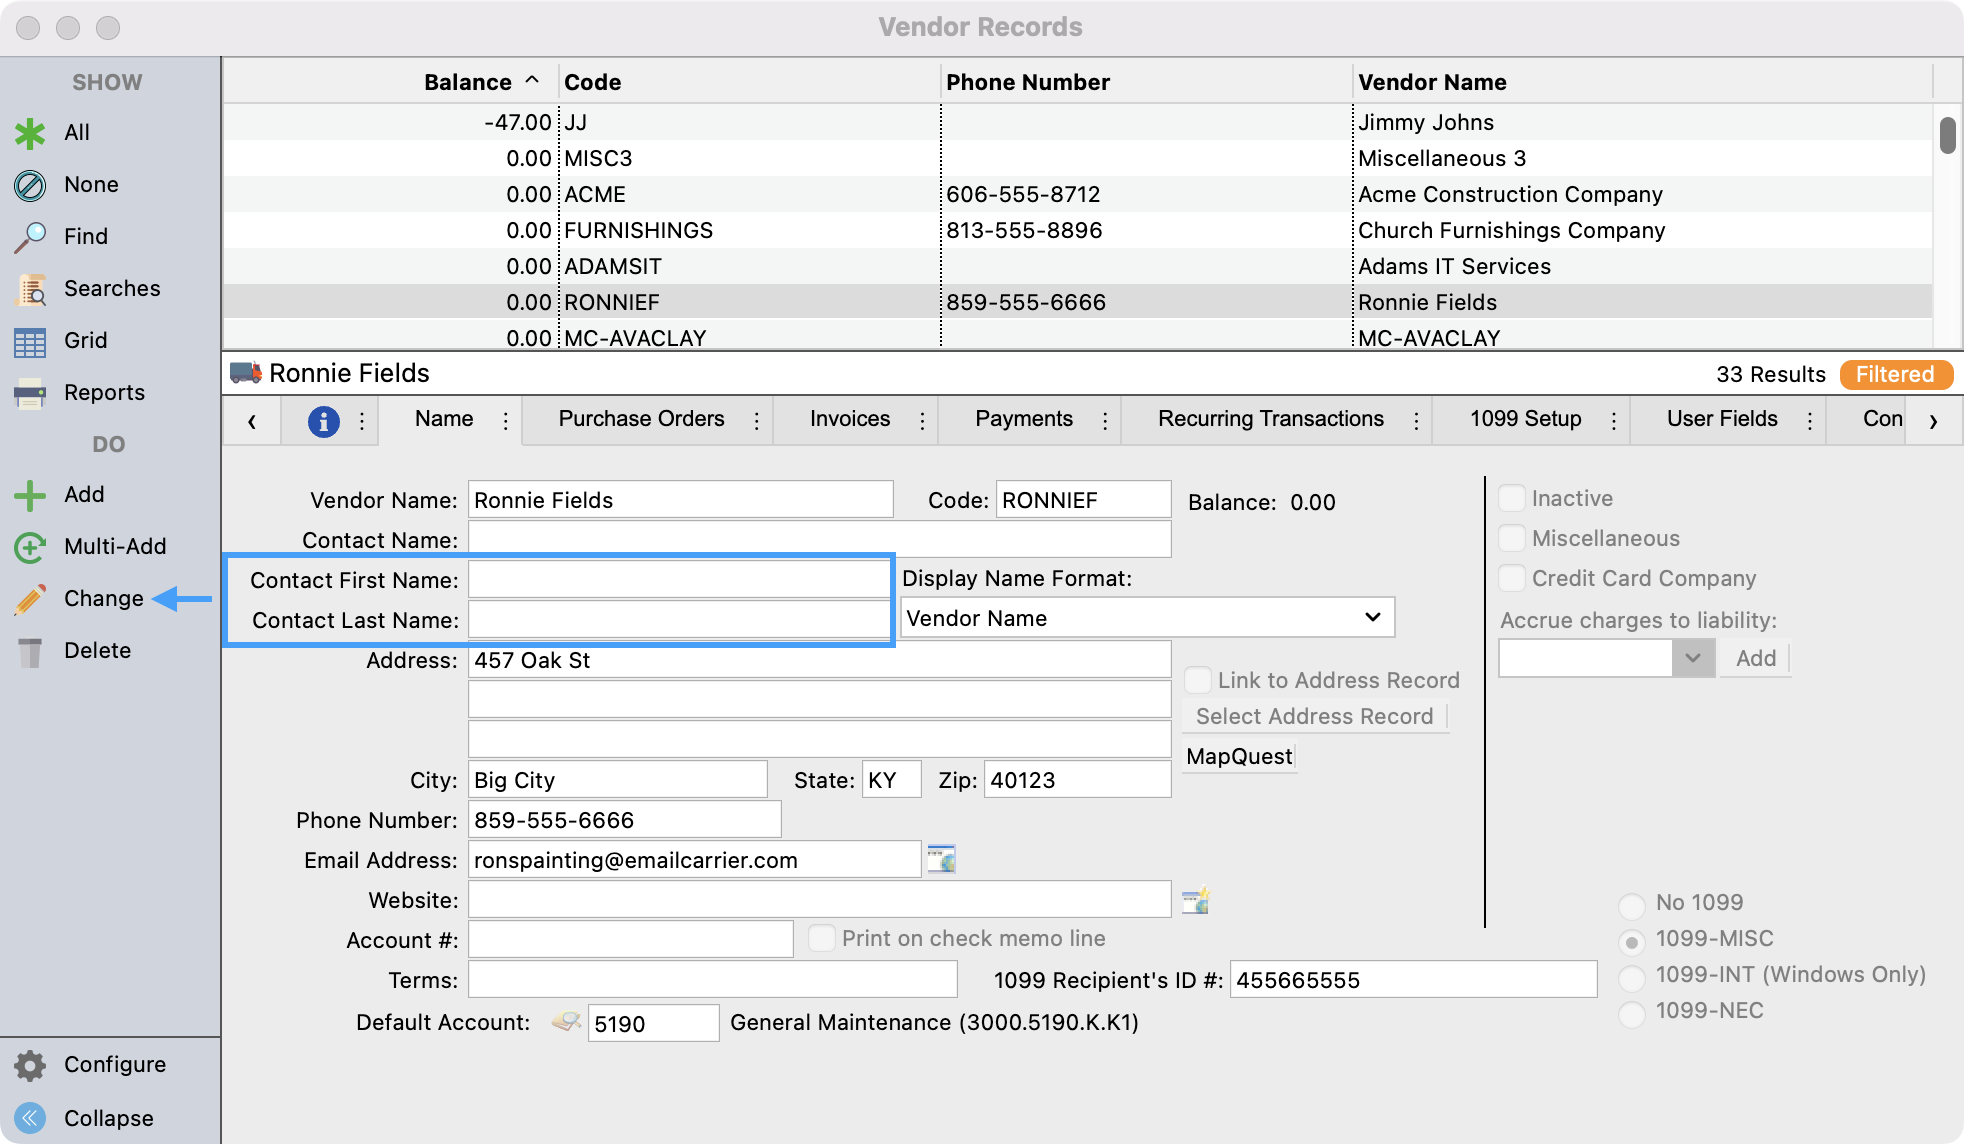
Fill in these required fields and then Save your changes.
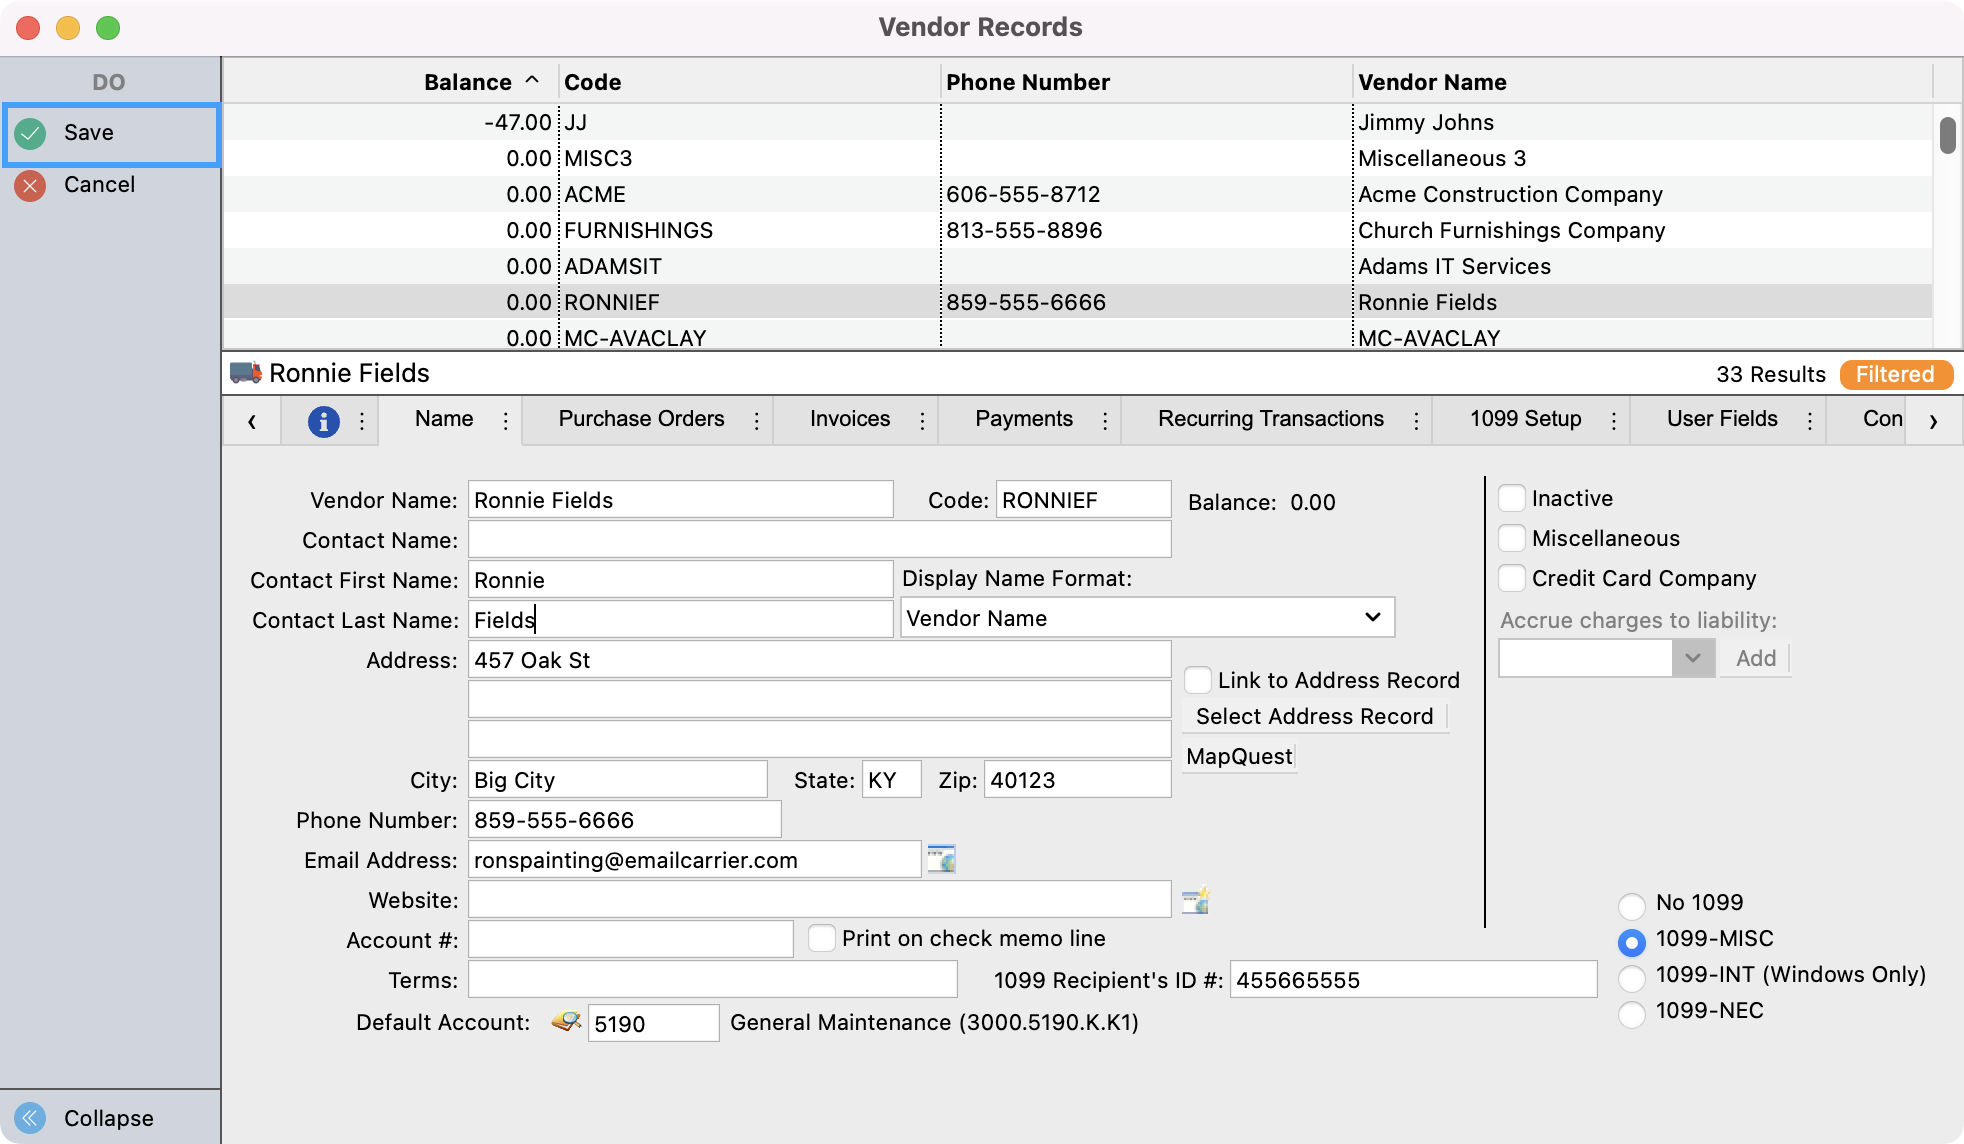
Once this information is filled it you can run your 1099’s like normal.
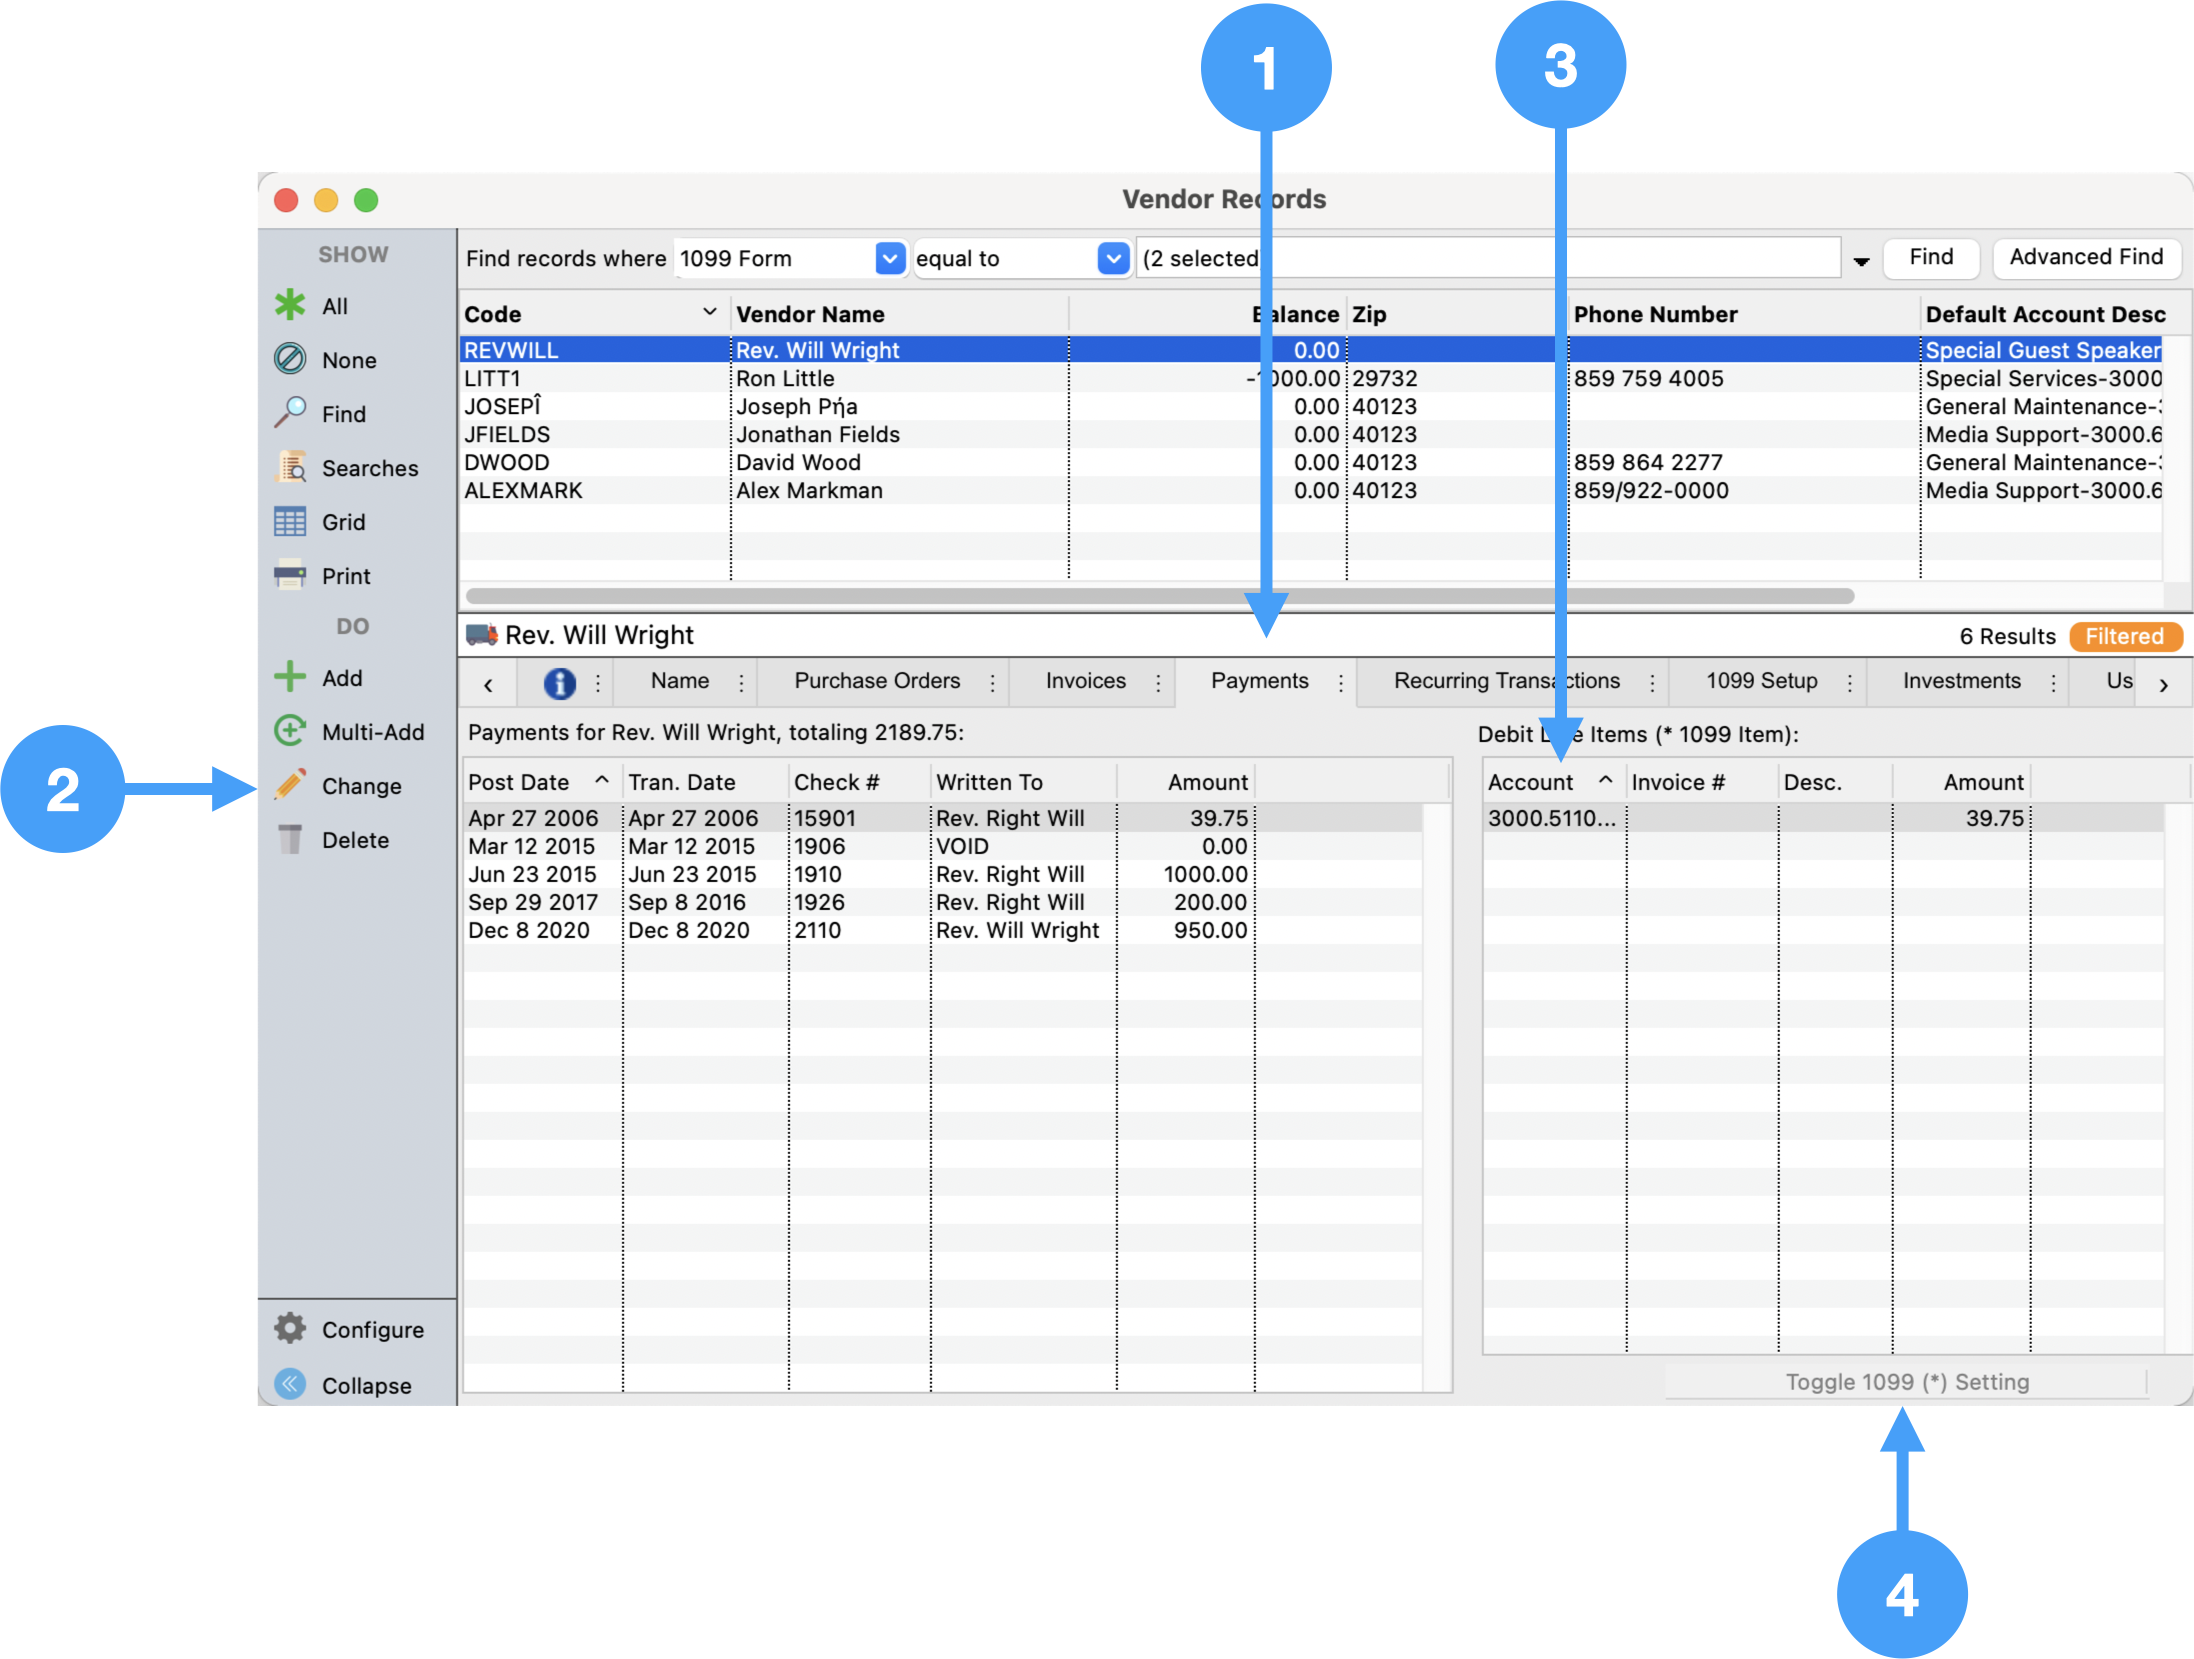
Vendor Records - Payments Tab
Ensure Expense accounts are tagged as 1099 showing an asterisk beside the account number. This is visible in the table on the right side of the Payments tab.
-
Select Payments tab
-
Click Change in Sidebar
-
Select the expense line you want to toggle.
-
Click Toggle 1099 ( * ) Setting
-
Click Save
Below is an animation of the process in action:
If a payment to the vendor does not appear on the Payments tab, find the payment under Program → Ledger → Ledger Entry Records and ensure the vendor is selected in the Vendor field.
Vendor Records - 1099 Setup Tab
There is no setup required under the 1099 Setup tab for 1099-NEC forms.
Payer Records
Program → Accounting → Payer Records
-
Ensure the Company information is correct.
-
Ensure the Contact information is correct.
-
Ensure State is selected.

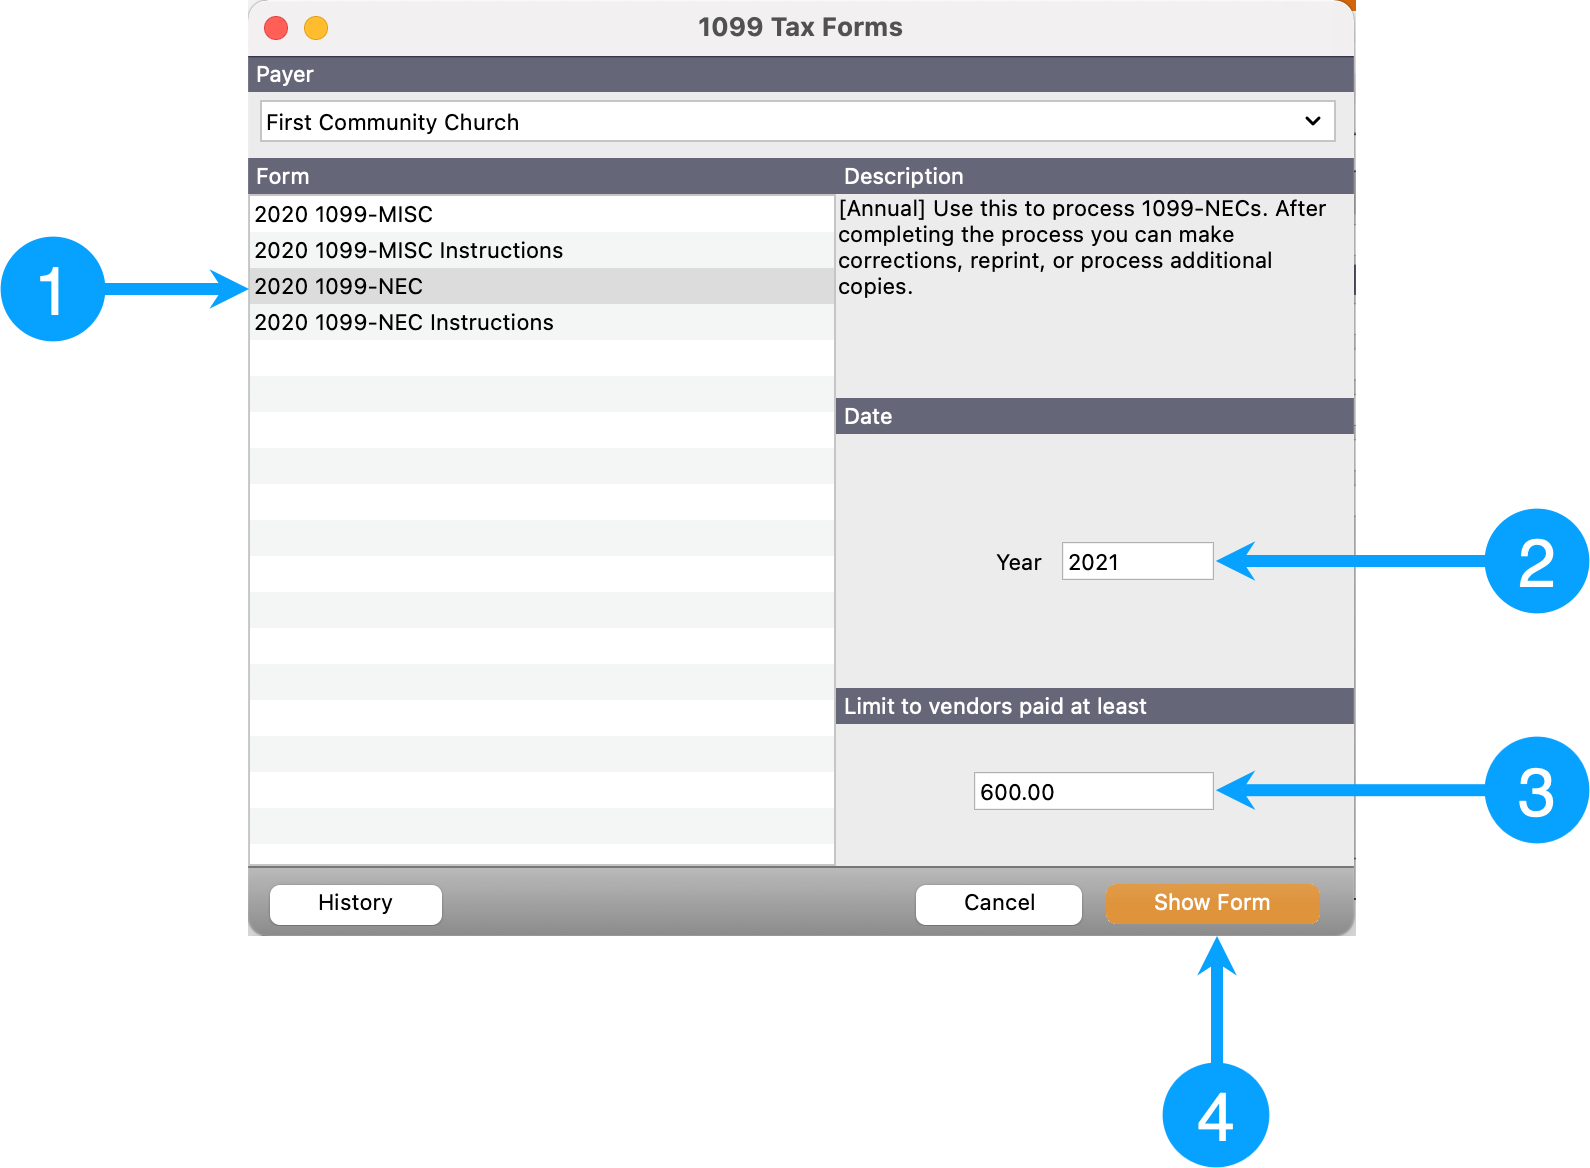
Processing 1099-NEC Forms
Reports → Payables → 1099 Forms
-
Select 1099-NEC
-
Enter 2020 for the Year field.
-
Ensure Vendor Limit is set to '600.00'
-
Click Show Form
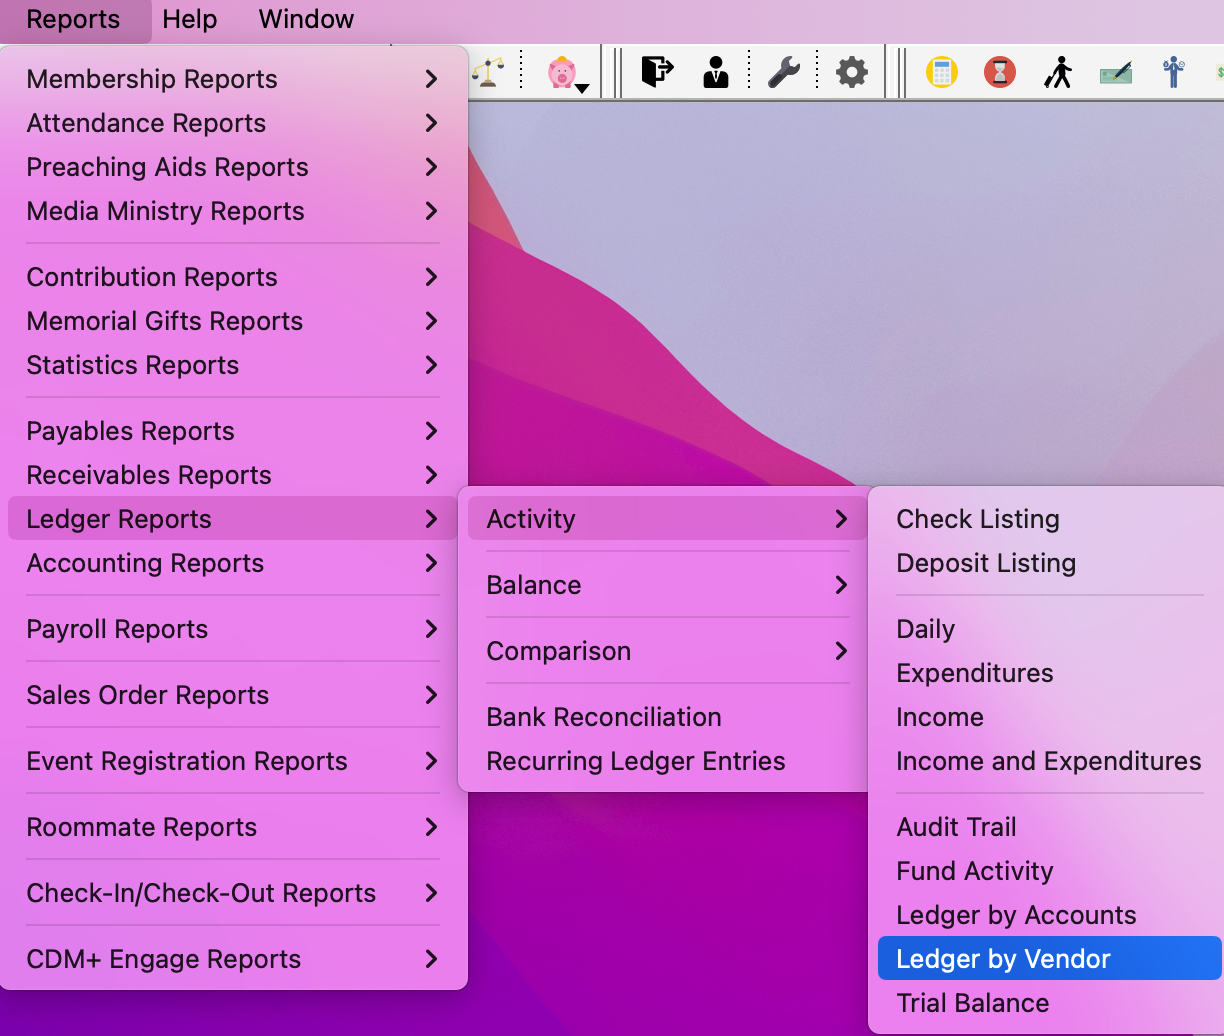
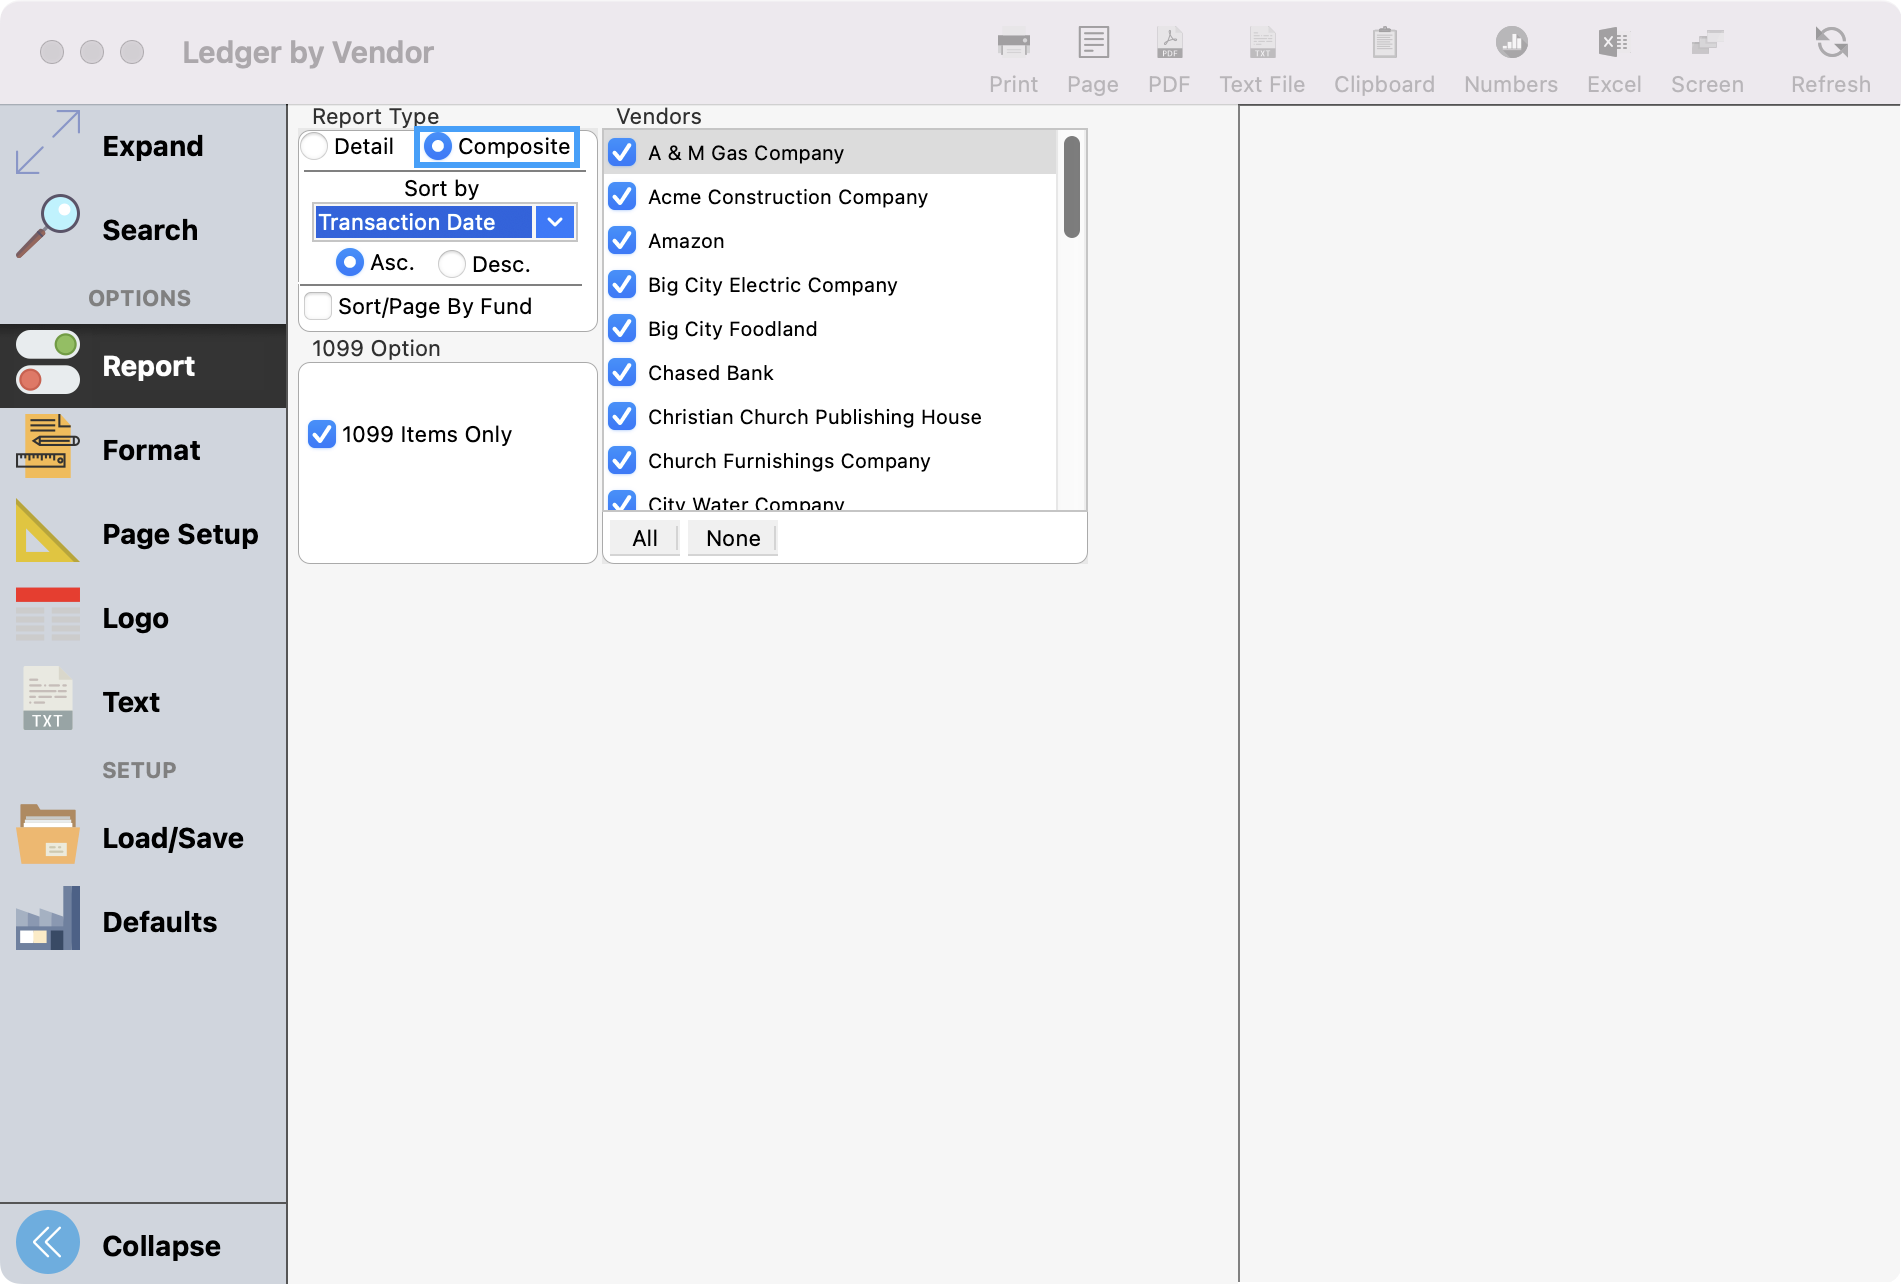
Print a report use when reviewing 1099 form data
-
Go to Reports → Ledger Reports → Activity → Ledger by Vendor.
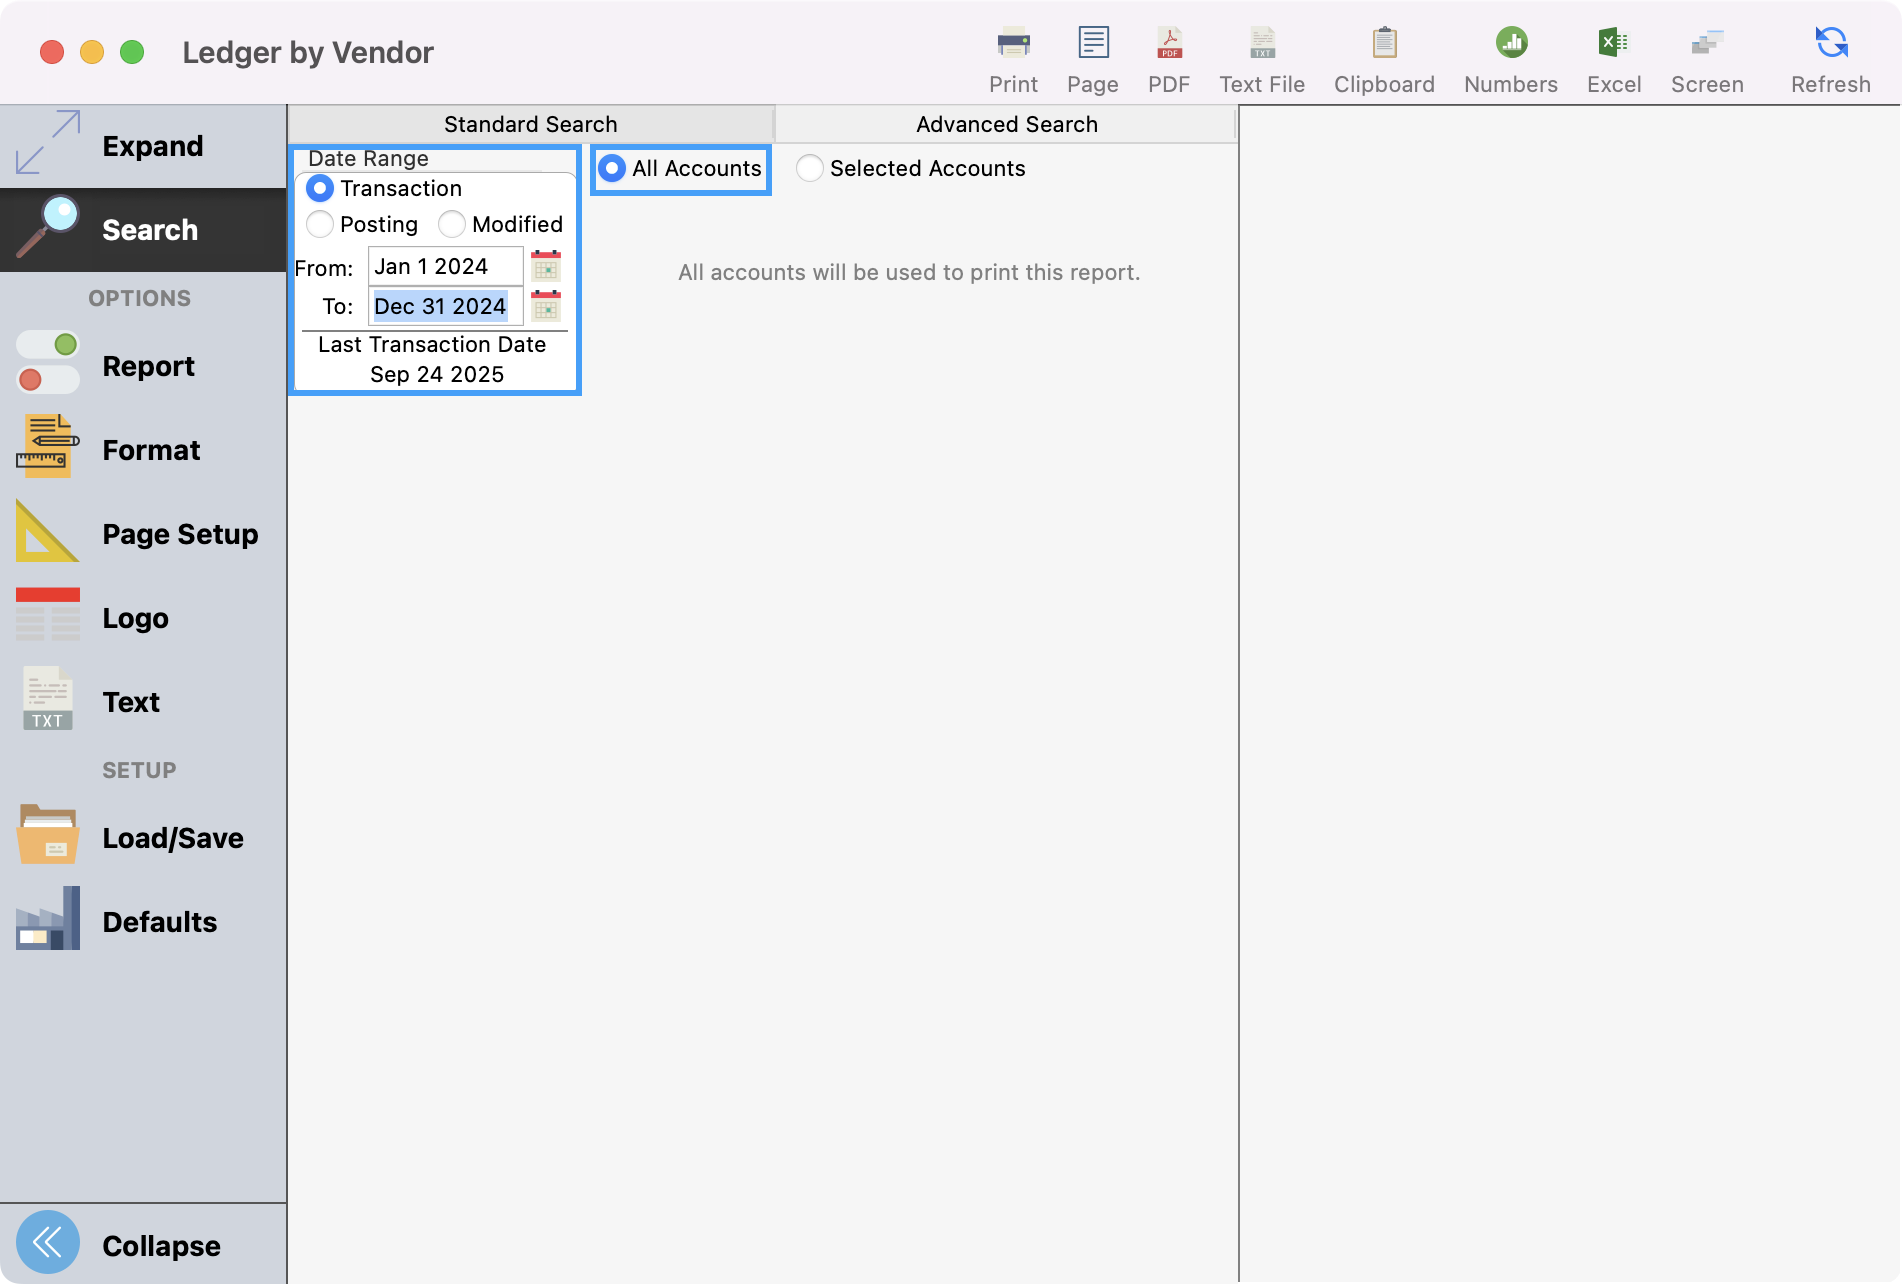
-
Set up your search to use the Transaction date for the calendar year (January 1 to December 31) and select the radio button for All Accounts.
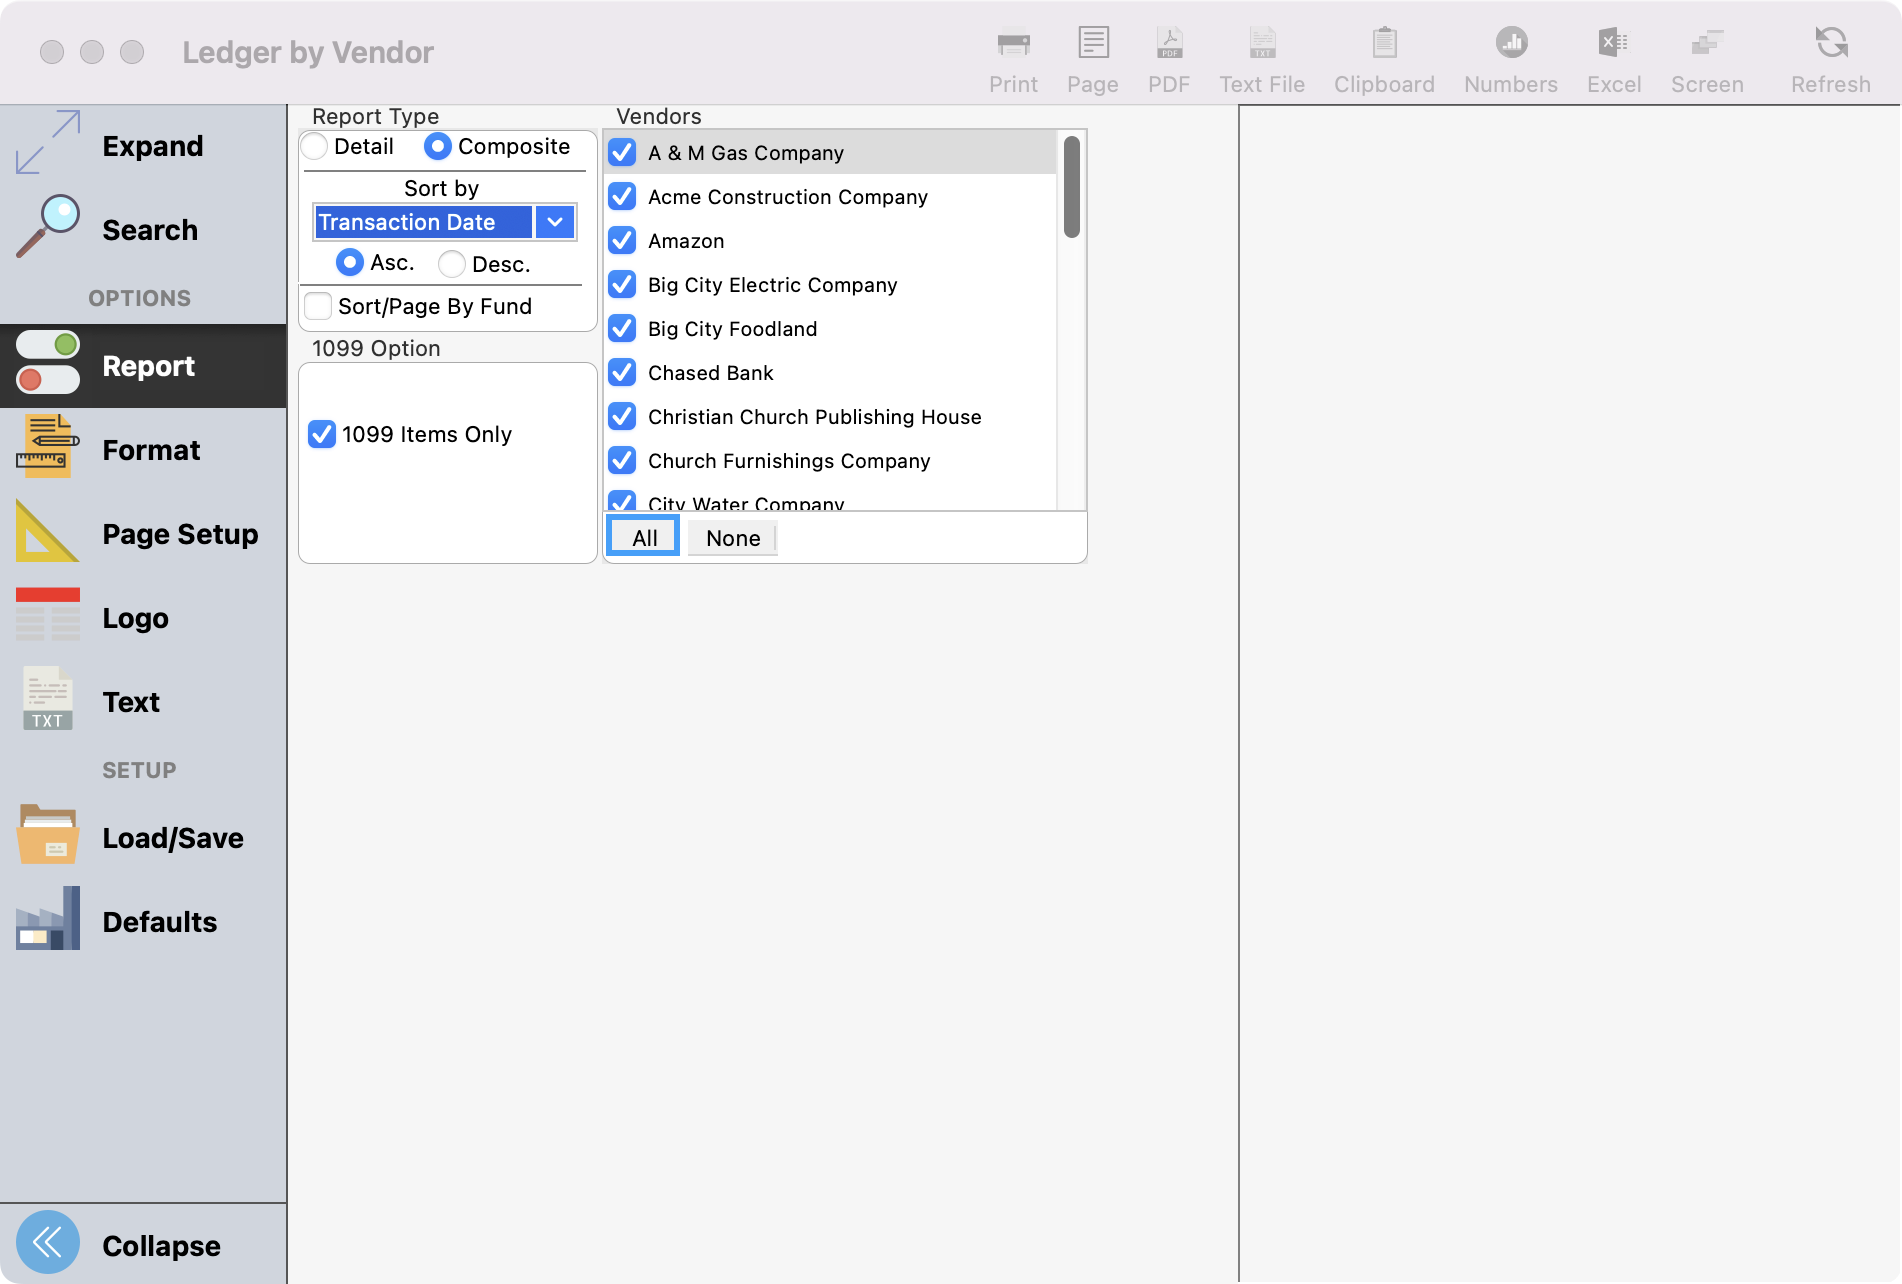
-
Click Reports under Options in the left-hand sidebar and click All under Vendors.
Our set up will only print those that have 1099 payments for the transaction date range you entered so you do not need to select individual vendors unless that is your preference.
-
Choose the Composite Report Type.
-
Put a check in the 1099 Items Only checkbox.

-
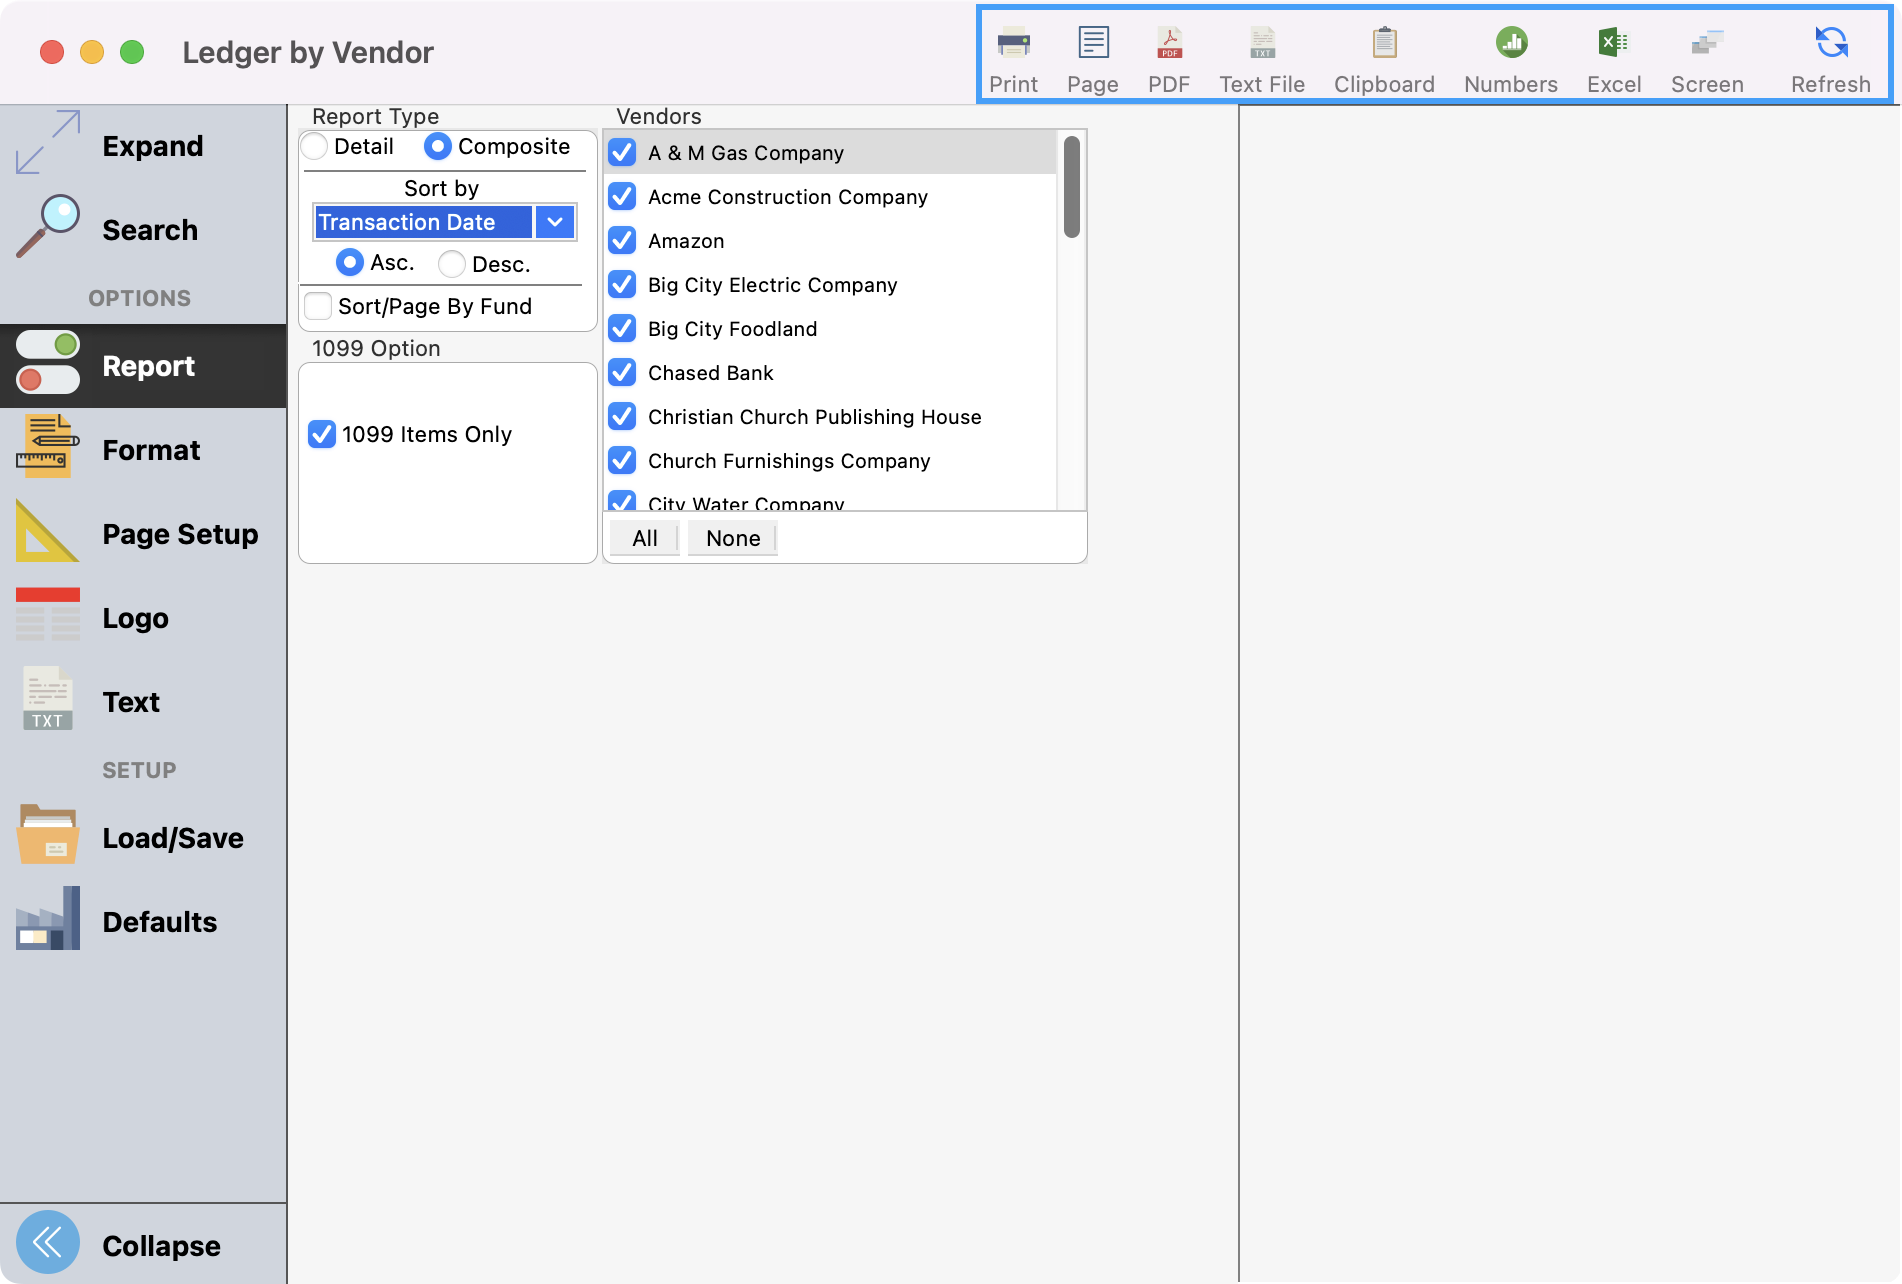
Select how you wish to print the report.
-
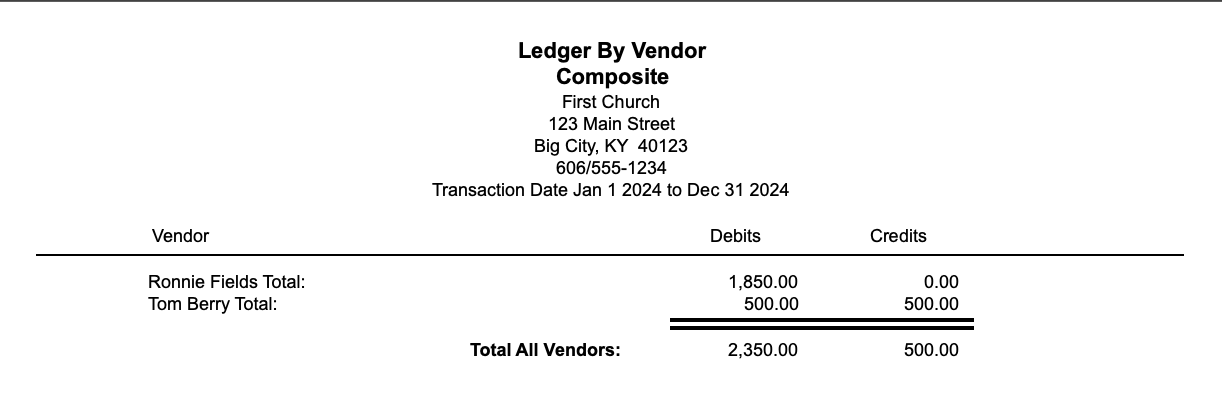
The selected report will look something like this:
Setup Aatrix
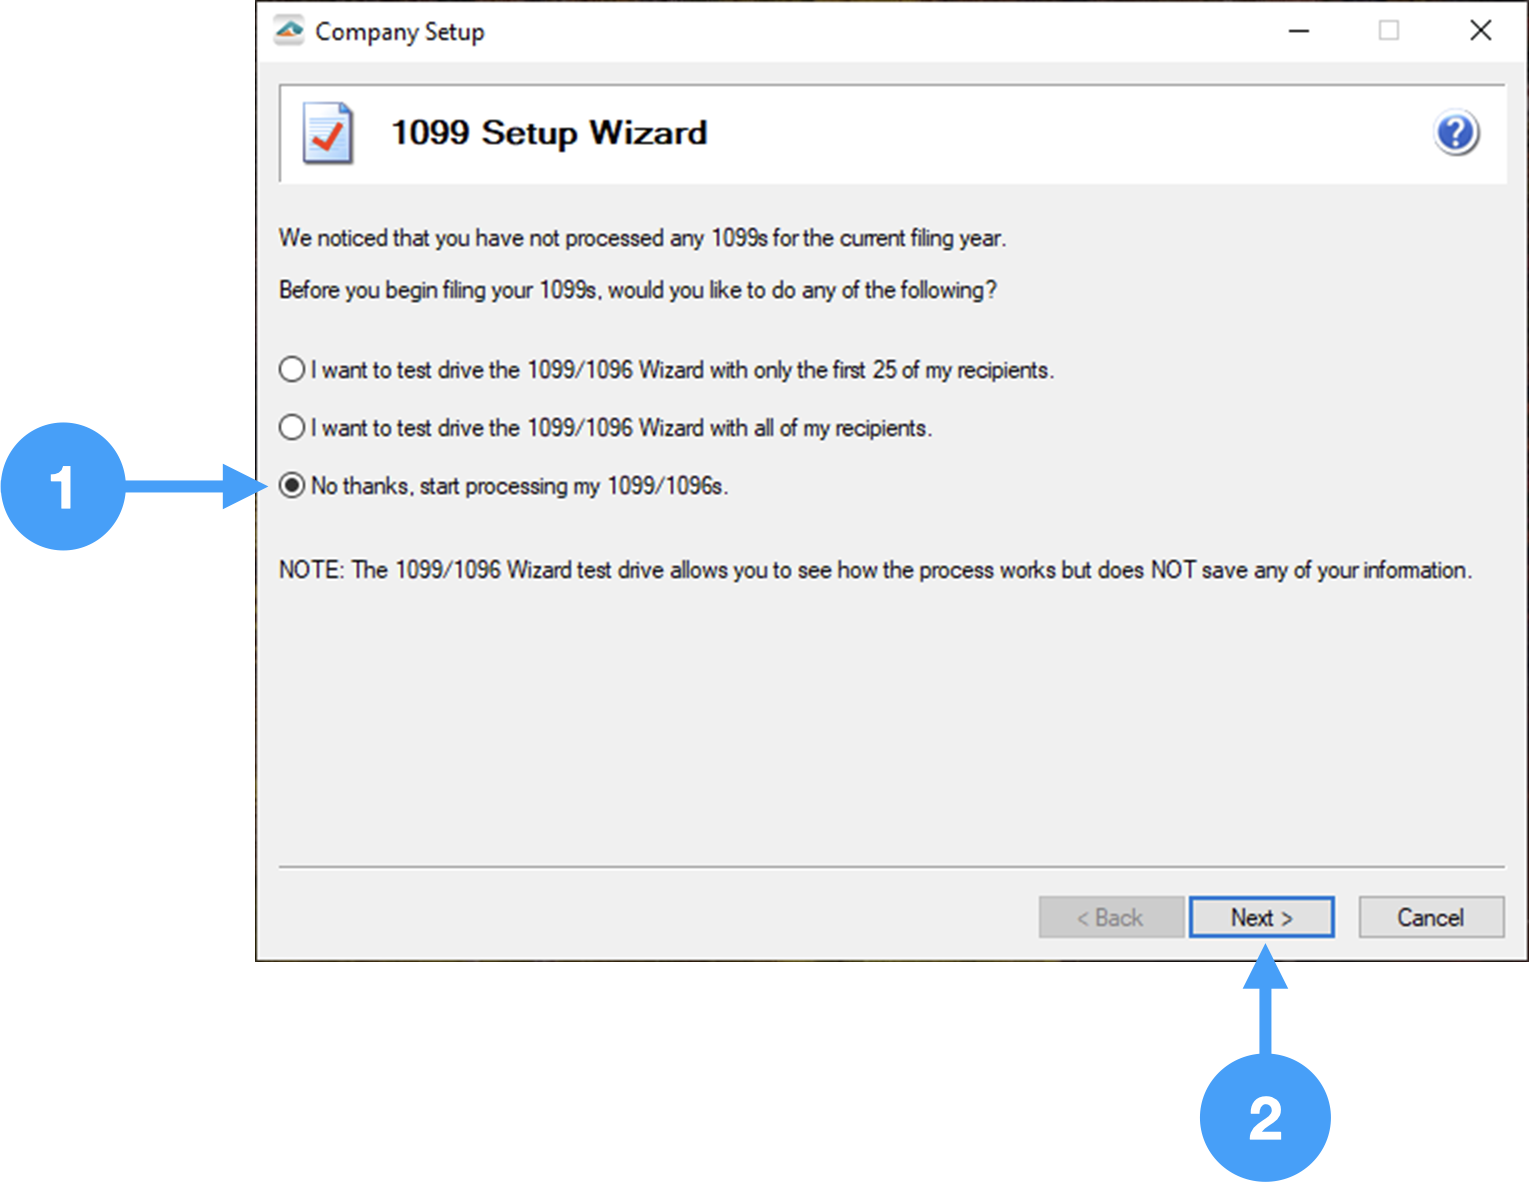
Do you want to run through a test of the 1099/1096 process?
If you wish to test the 1099 process, select either the first or second radio buttons. The testing process is identical to the actual processing, but no information is saved.
In our example, we will select the third radio button to begin the processing of the final copies.
-
1099 Setup Wizard window opens, select 'No thanks, start processing my 1099/1096s.'
-
Click Next.
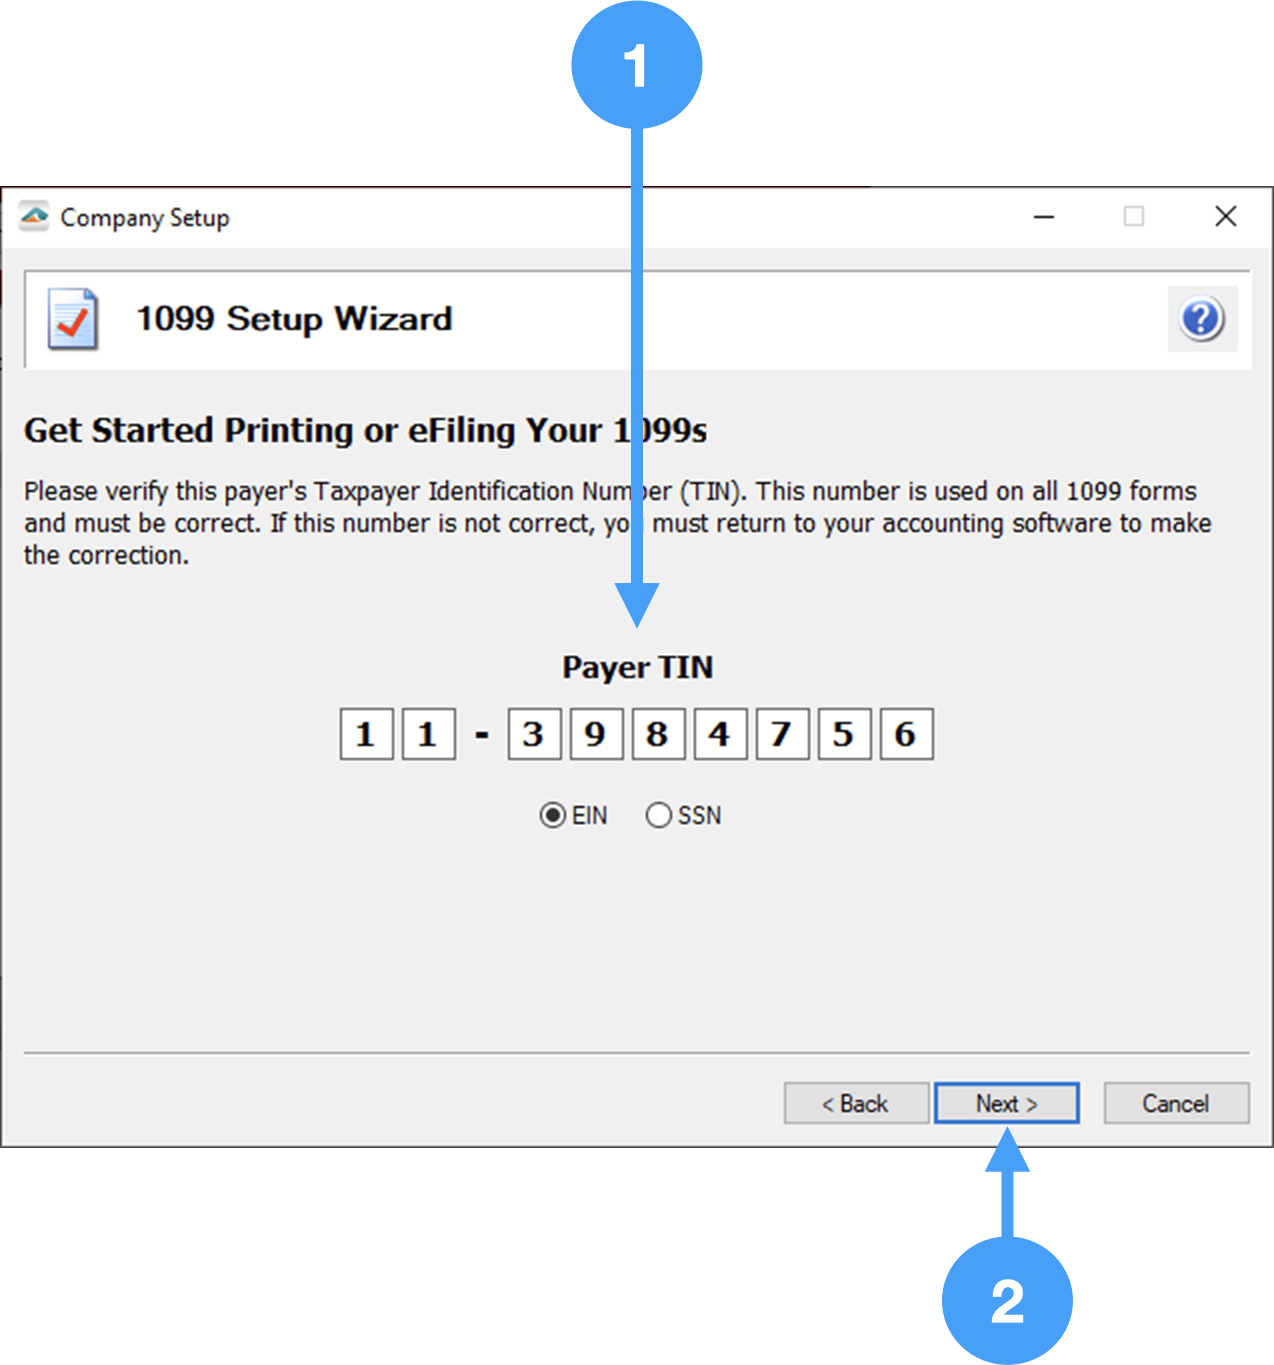
Review Payer Tax Identification Number (TIN)
-
Ensure Payer TIN is correct.
-
Click Next
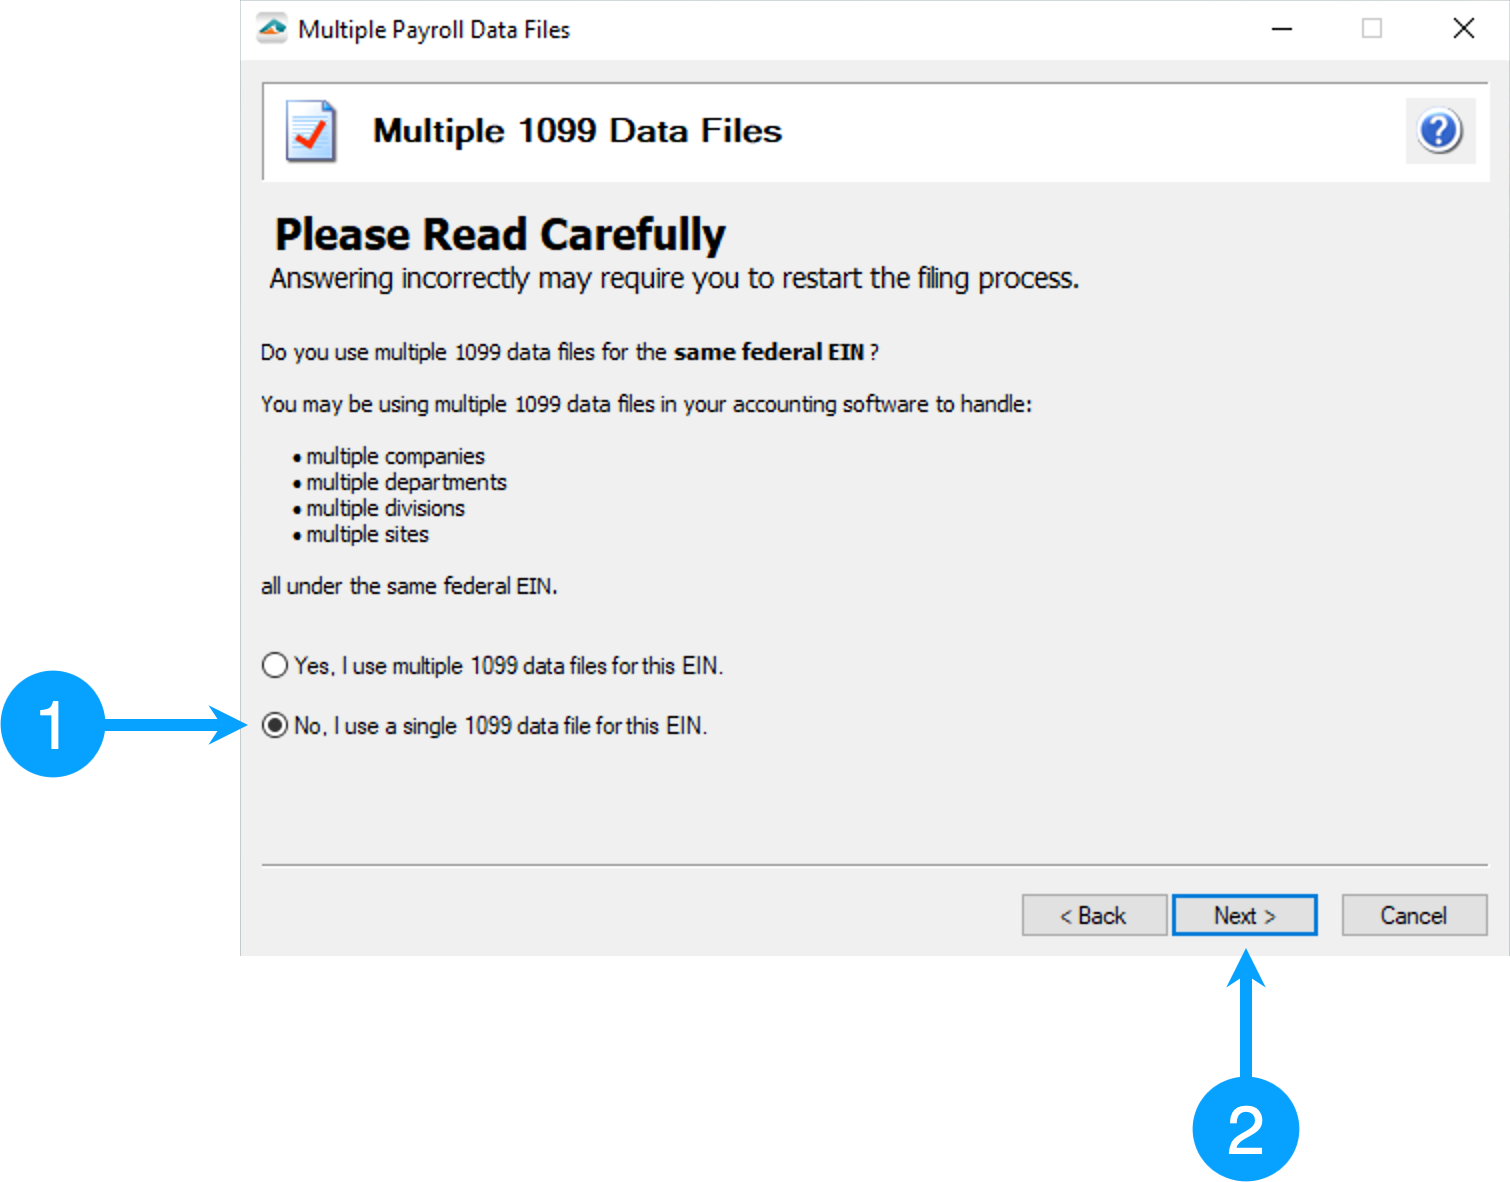
Select the number of Data Files
-
Typically, you will select the choice for a single 1099 data file. You should select 'Yes, I use multiple 1099 data files for this EIN.' if you have more than one CDM+ database. Therefore, we will select 'No, I use a single 1099 data file for this EIN.'
-
Click Next
Payer Information
-
Ensure Payer Information is correct. Changes made in this window will not be reflected in CDM+.
-
Click Next

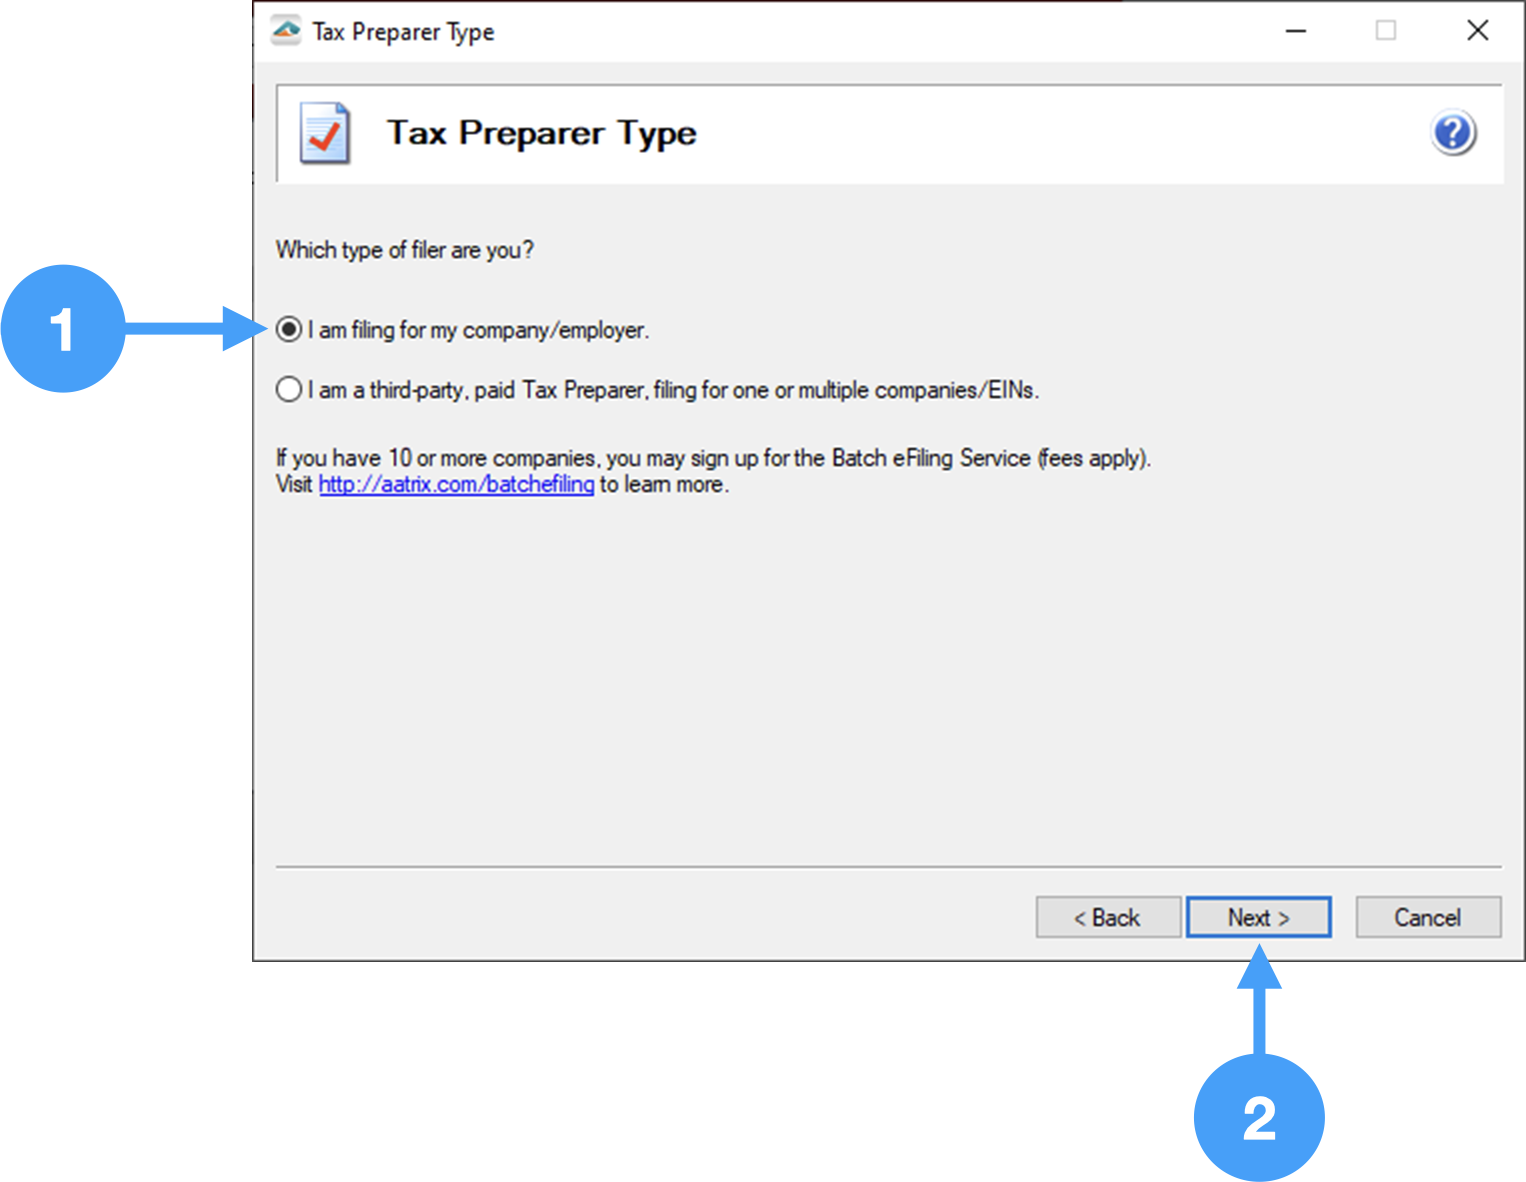
Tax Payer Type
-
Select appropriate Tax Preparer choice. Typically, you will select the first radio button. If you are unsure, ask a tax specialist what you should select.
-
Click Next
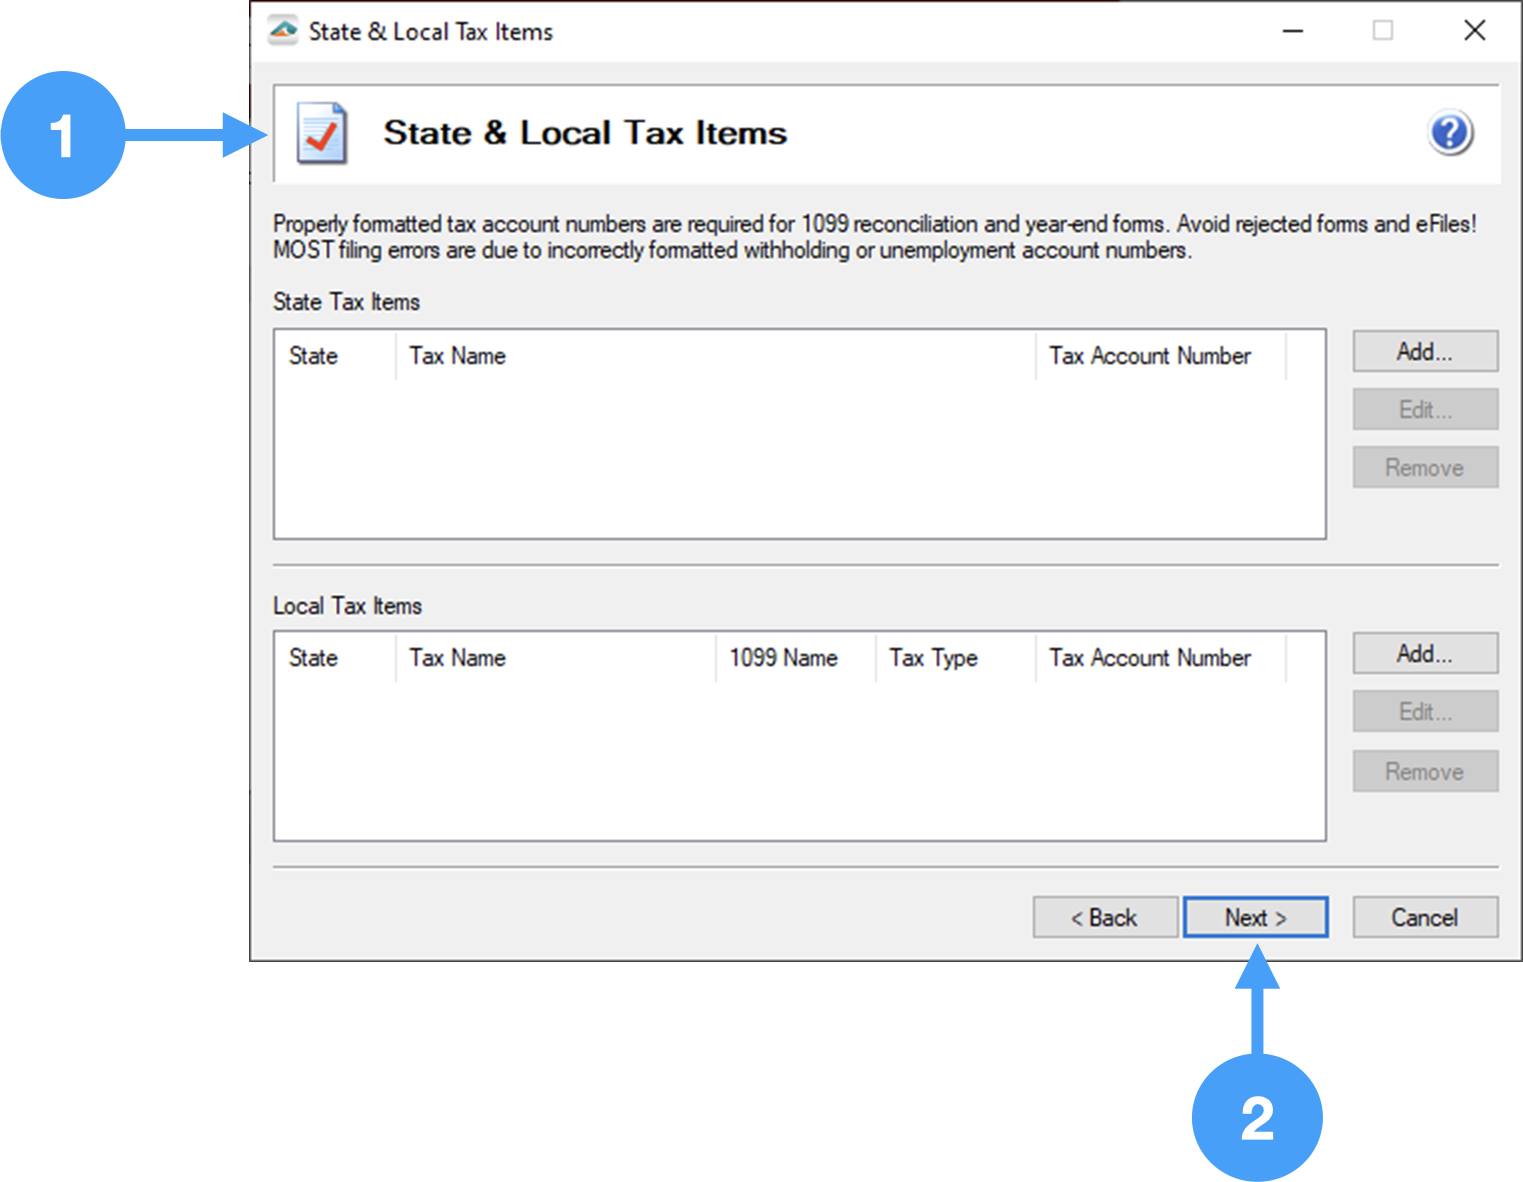
State and Local Tax Items
-
State and Local Items can be ignored.
-
Click Next
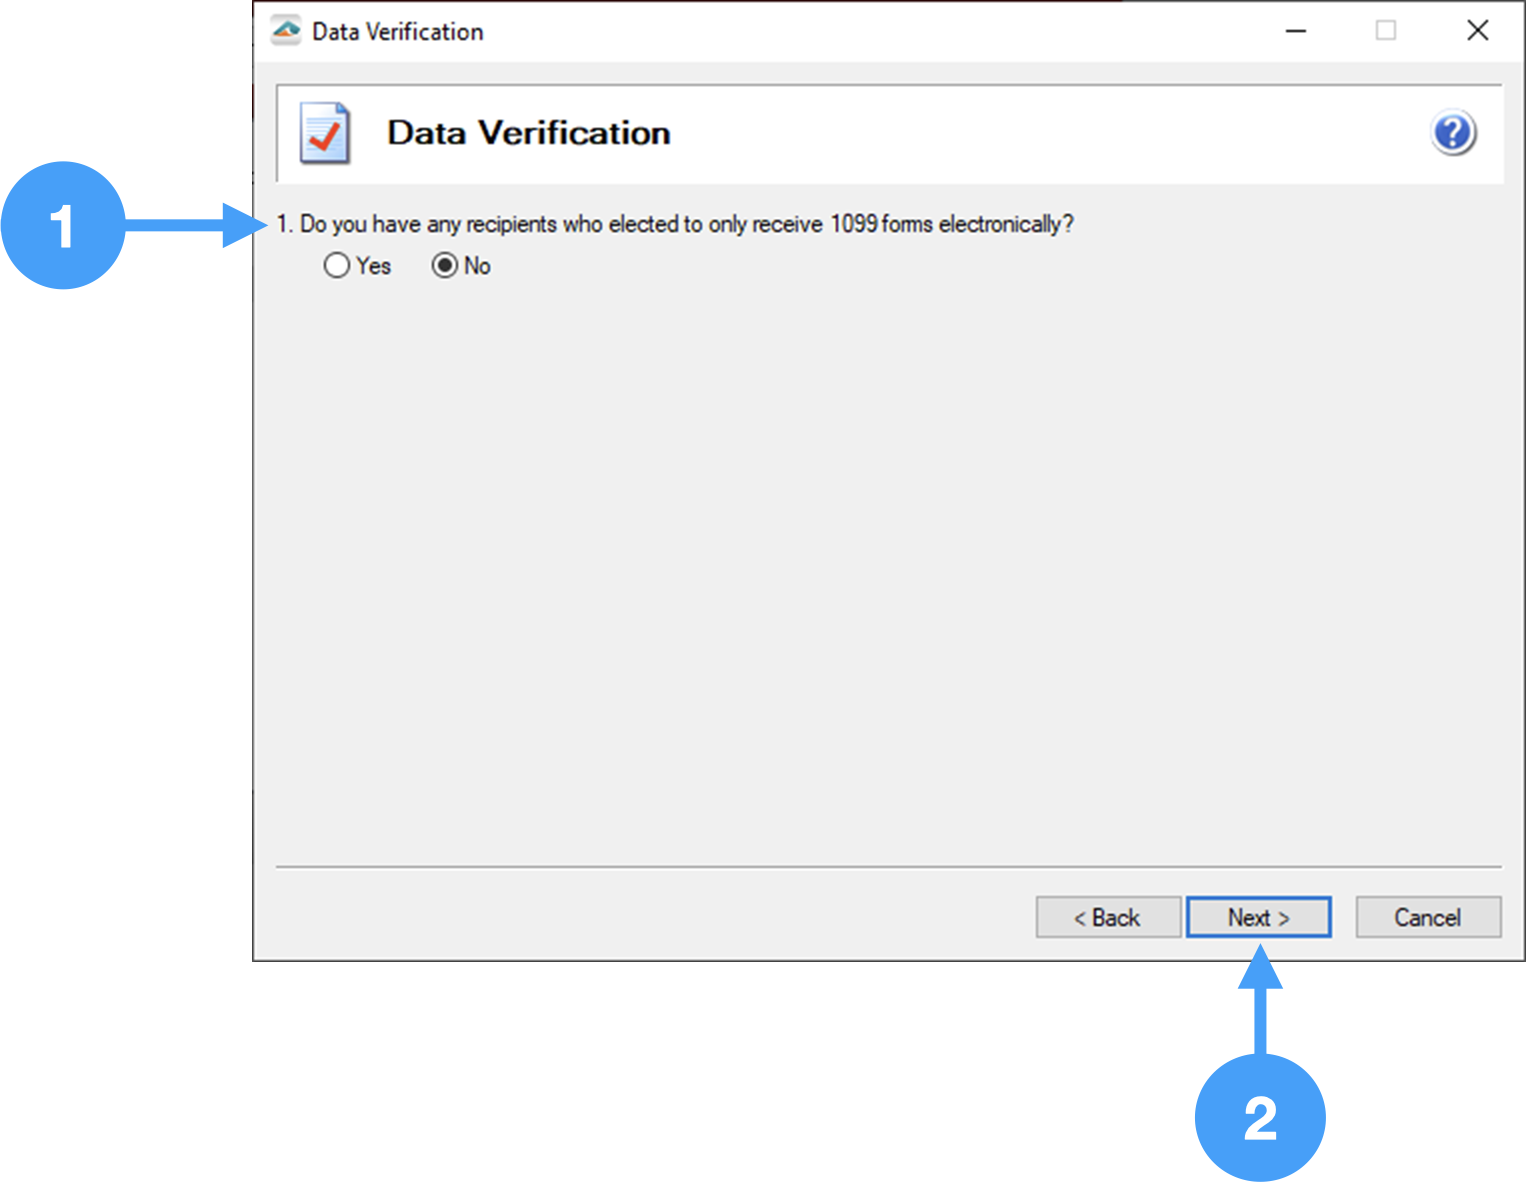
Data Verification
-
If you have any Vendors who have requested to receive electronic copies of their 1099's, you must select Yes. Otherwise, select No.
-
Click Next
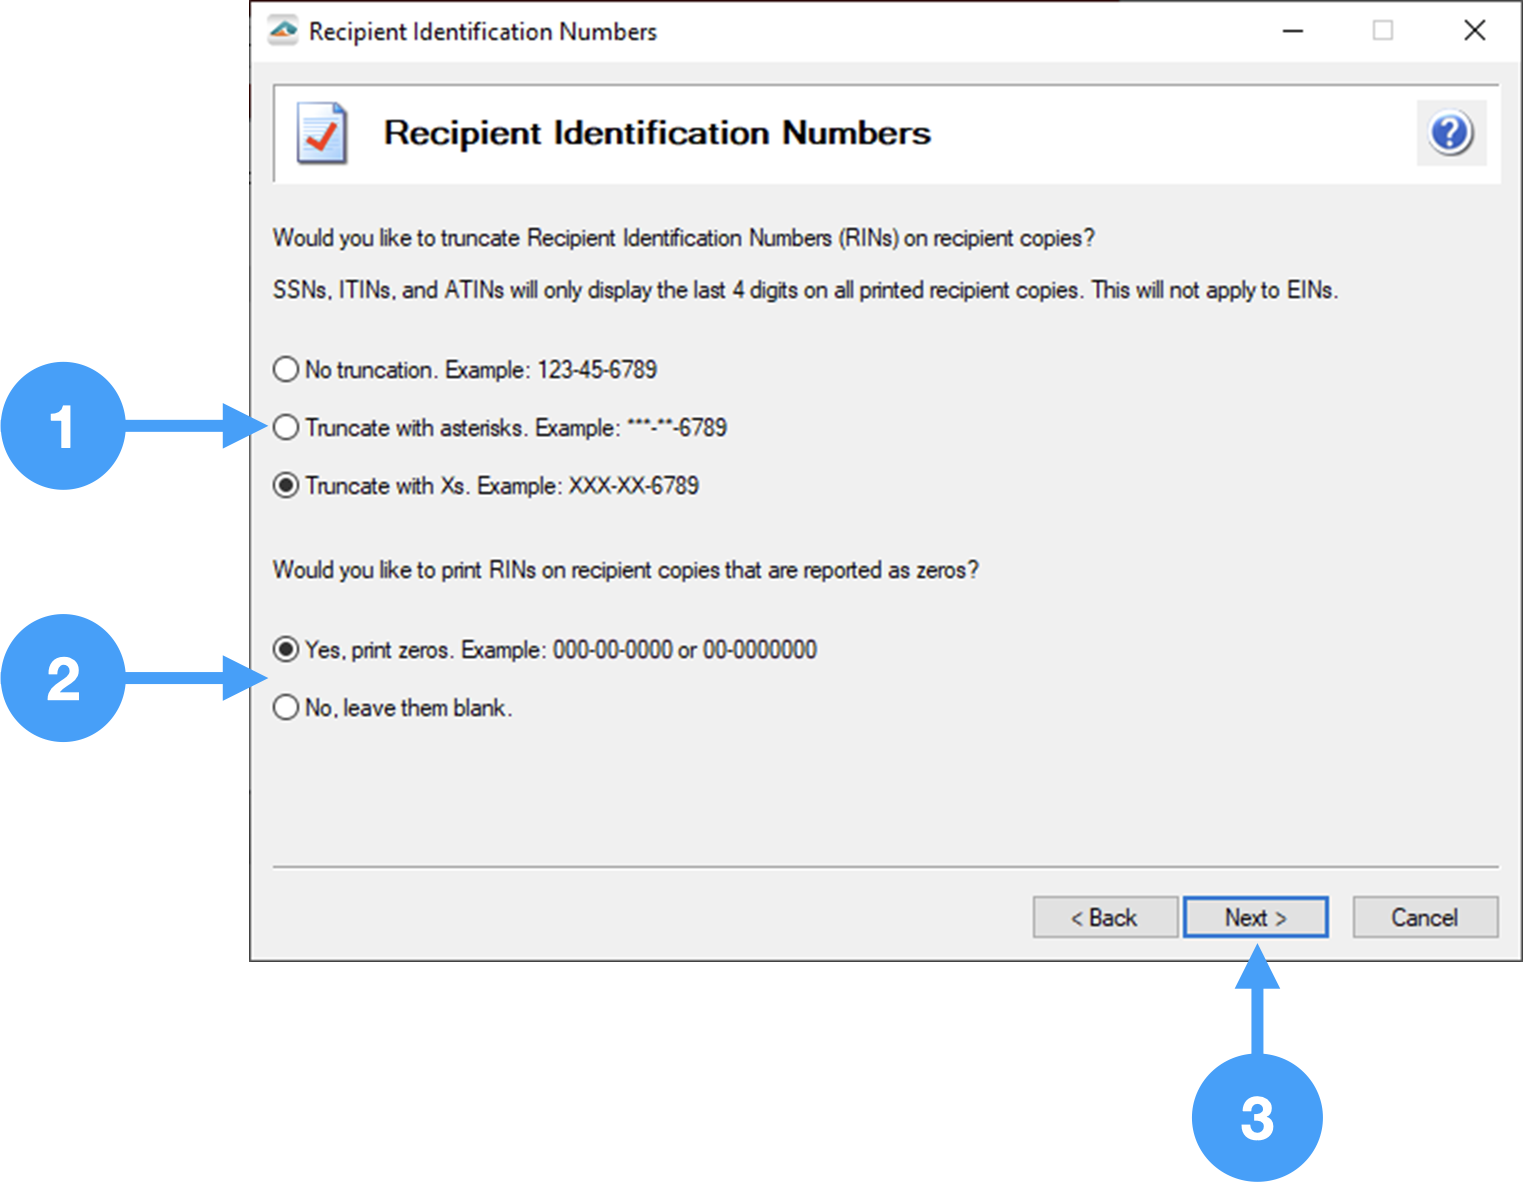
Recipient Identification Number
-
Select how you wish the Social Security, TIN and RIN numbers to be displayed. You can select to truncate Social Security or Individual Taxpayer Identification numbers using asterisks or 'X's'. We will select to truncate with asterisks.
-
You have the option of printing Recipient Identification with zeros or leave them blank. We will print with zeros.
-
Click Next
Video of the 1099 Wizard
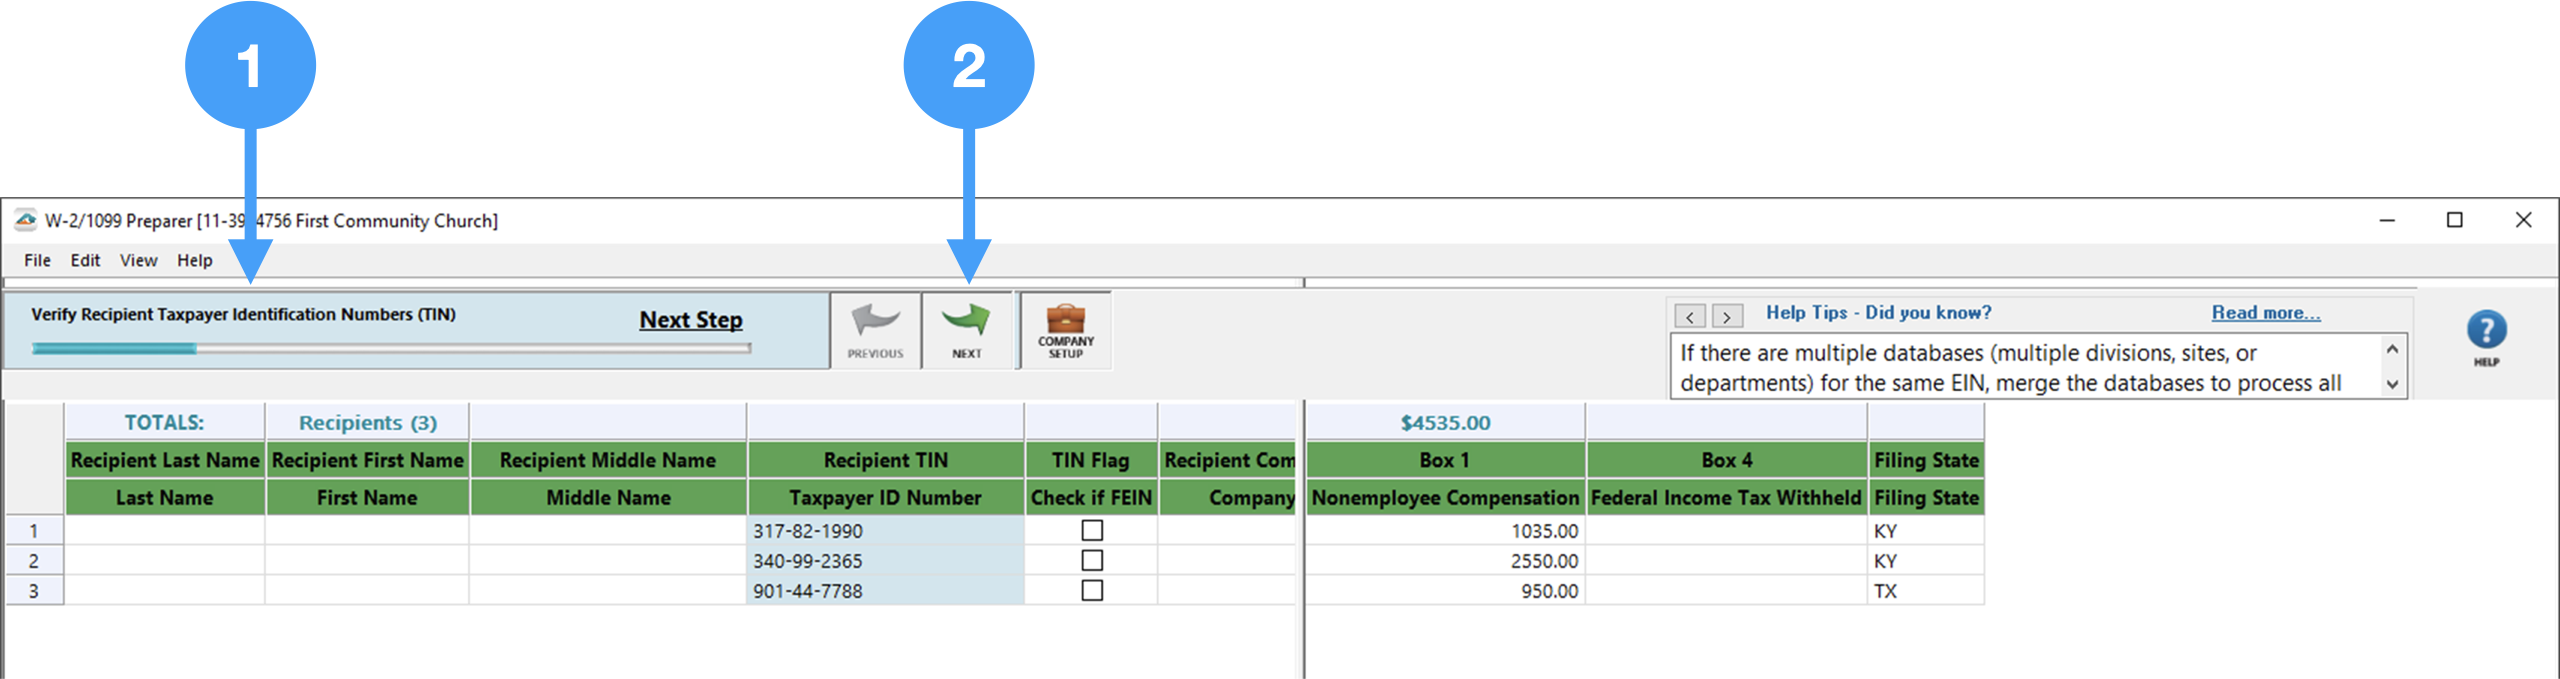
Review Forms
1099-NEC Form Review Process
This process will require you to review specific pieces of information as you progress through each stage.
-
You will review the information that is listed, then
-
Click Next
Continue with this process through to the Complete W2 eFile Service advertisement window. Click Next and the 1099 Printing and Filing Options window will appear.
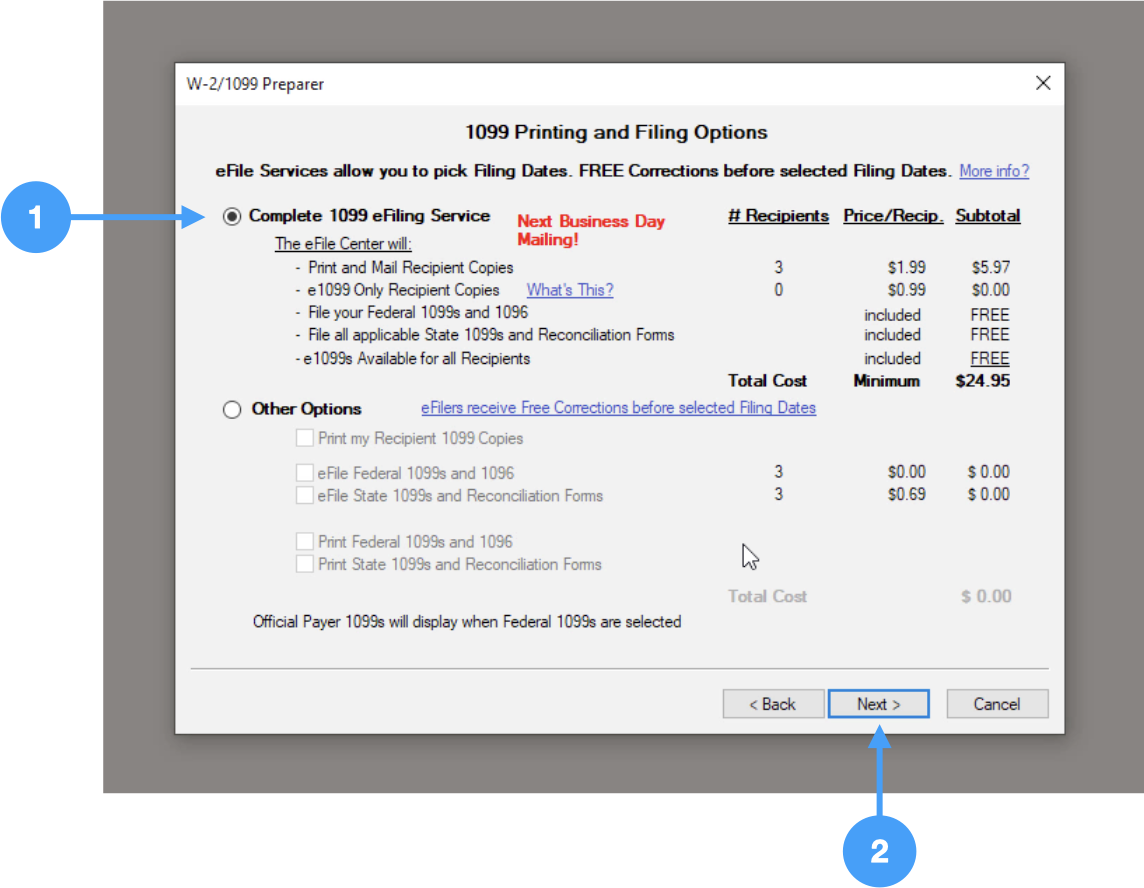
1099 Printing and Filing Options window
-
Select the first option, 'Complete 1099 eFiling Service' in order to use the Aatrix eFiling service.
-
Click Next
With the next few windows, click Next to finish this portion of the process. For a complete walk-through of this process see the video below.
Video of 1099 Review Process
Submit Forms
Printing 1099 Forms (Optional)
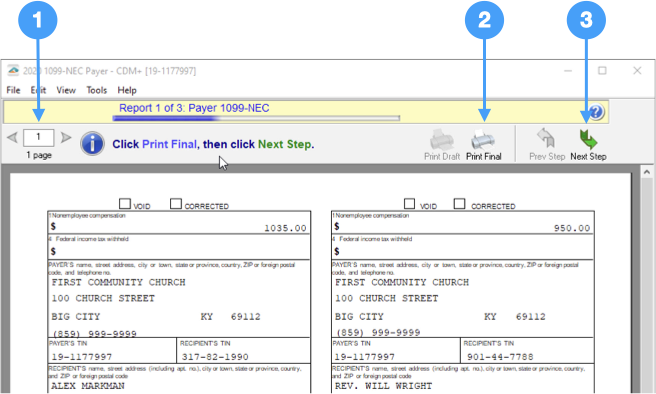
The Aatrix Forms Viewer opens allowing you to print copies of your 1099 forms. Each step of the process gives you the opportunity to print the 1099 Payer Records, State copies and Recipient copies. To print the forms, go through the following steps on each report.
Printing is an optional step and provides hard copies of the forms for your records. You can bypass this step by clicking Next Step in the toolbar. You can also print these forms to a PDF to store digital hard copies for your records.
The top of the page shows the Report you are printing along with arrows to move through the different pages. In addition, you have a Print Final icon which you use to print your forms and the Next Step button to proceed to the next set of reports. Here is an example of the process for the Federal 1096 form.
-
Go through each page to review information.
-
Click Print Final and follow steps to print the Payer 1099 form.
-
Then Next Step
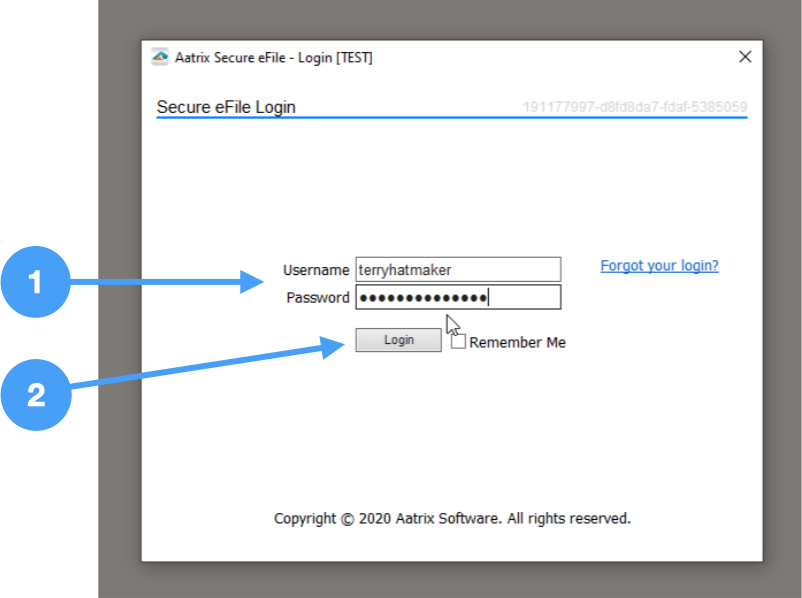
Aatrix Login Window
-
Enter username and password
-
Click Login
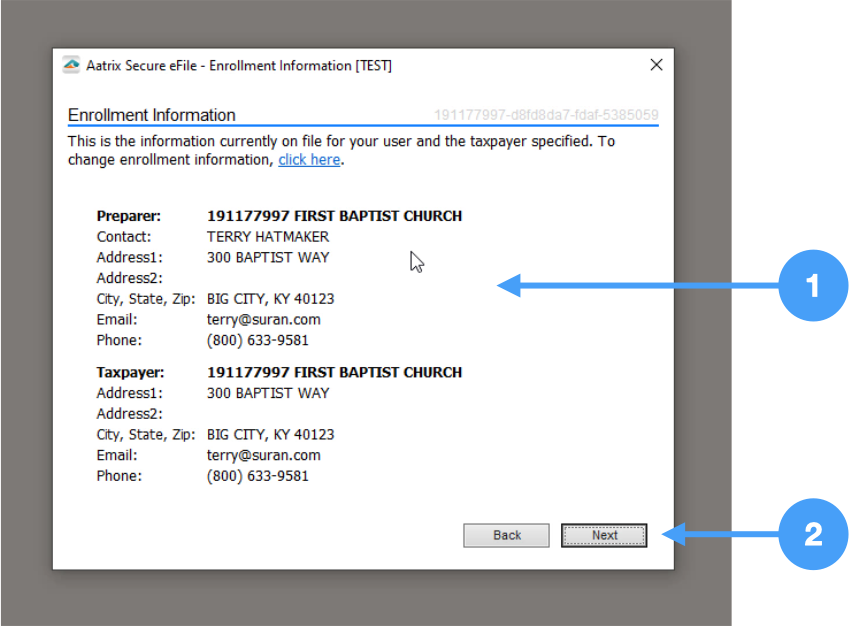
Aatrix Enrollment Information
This window displays information provided during the enrollment process. If any of this information is incorrect, you will need to go into a browser and log into Aatrix eFile service and make the changes. Then you will be able to start the printing process again.
-
Review the information to ensure accuracy.
-
Click Next if information is correct.
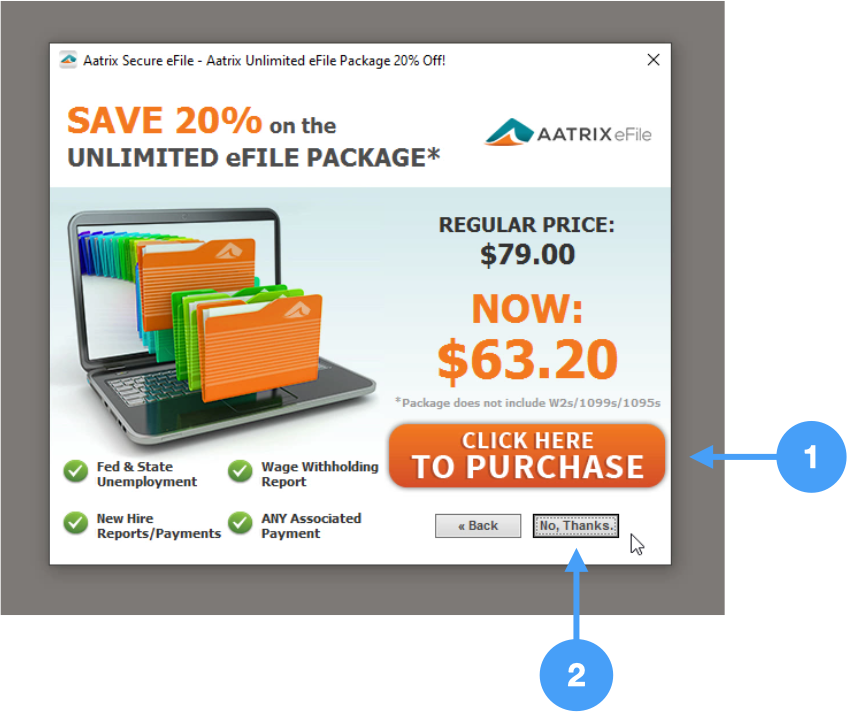
Aatrix Advertisement Window
-
If you want to purchase Aatrix's unlimited eFile package, then click the button 'Click Here to Purchase.'
-
Otherwise, click No Thanks.
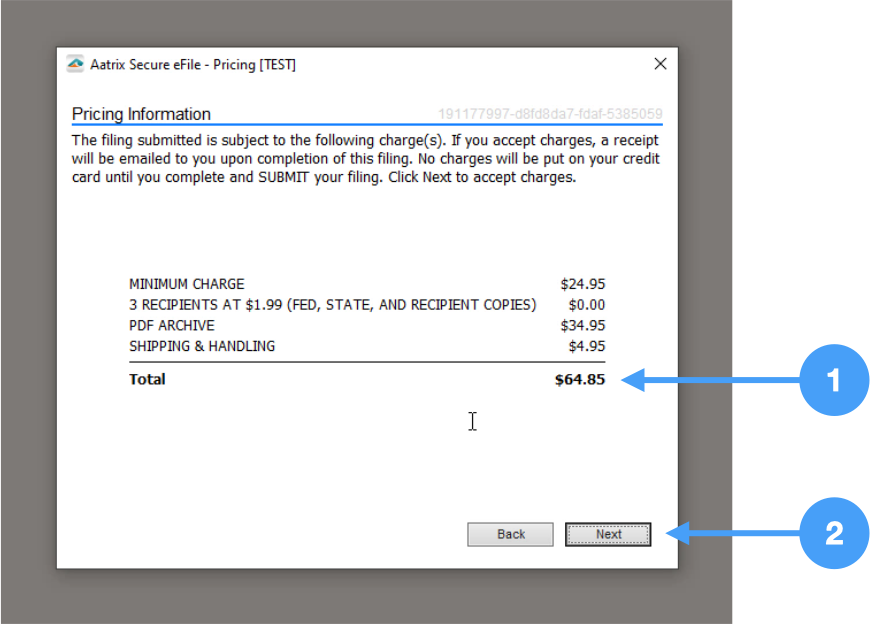
Pricing Window
This window lists the pricing for your 1099-NEC eFiling.
-
Review the pricing.
-
Click Next if it is correct.
Choose 1099 Submission Dates
-
Click the drop down and select the dates you want to submit your 1099-NEC forms.
-
Click Next.
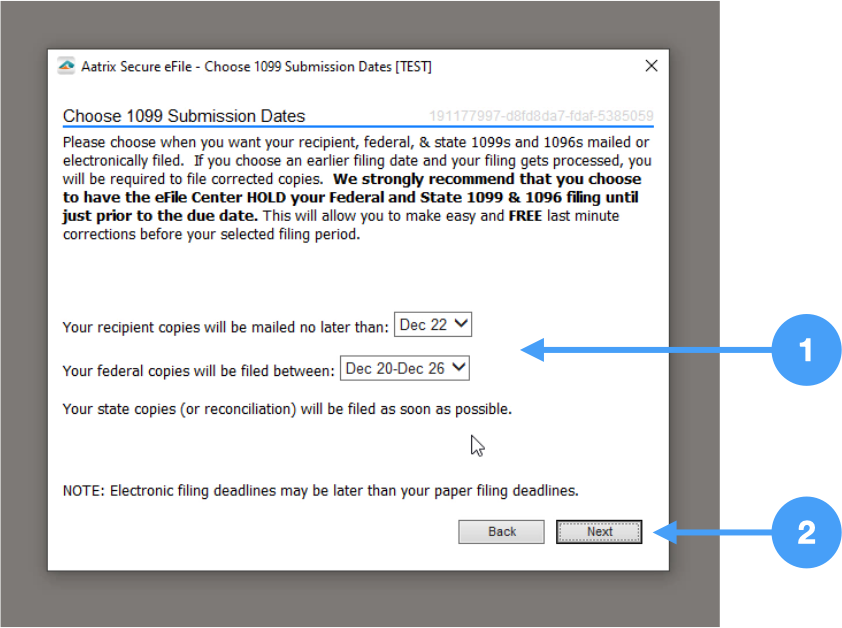
It is recommended to choose the last filing date range. This allows extra time to cancel the forms and re-submit if corrections need to be made after eFiling.
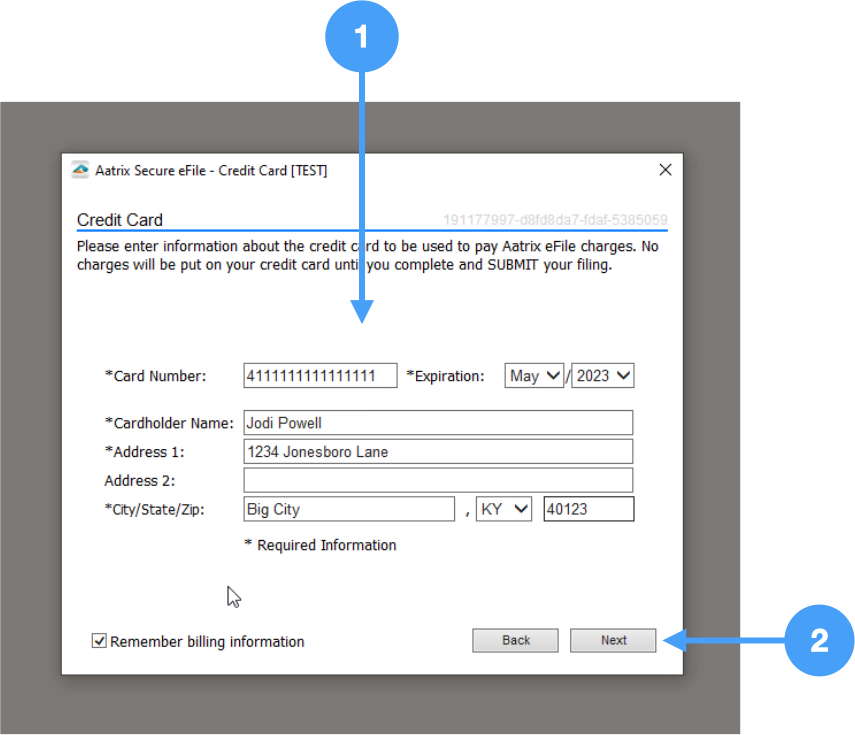
Credit Card Information
-
Enter Credit Card and contact information.
-
Click Next
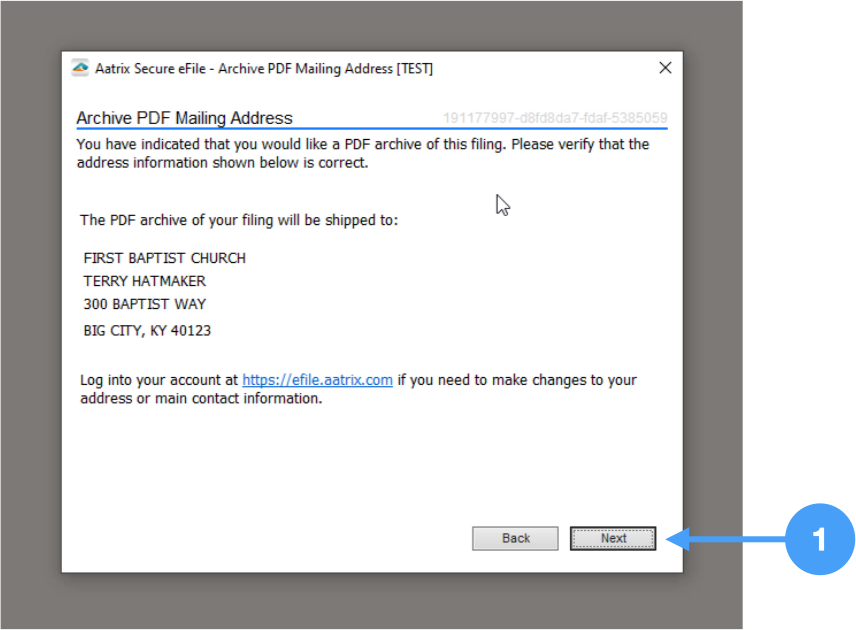
Archive PDF Mailing Address
-
Verify address information is correct and click Next
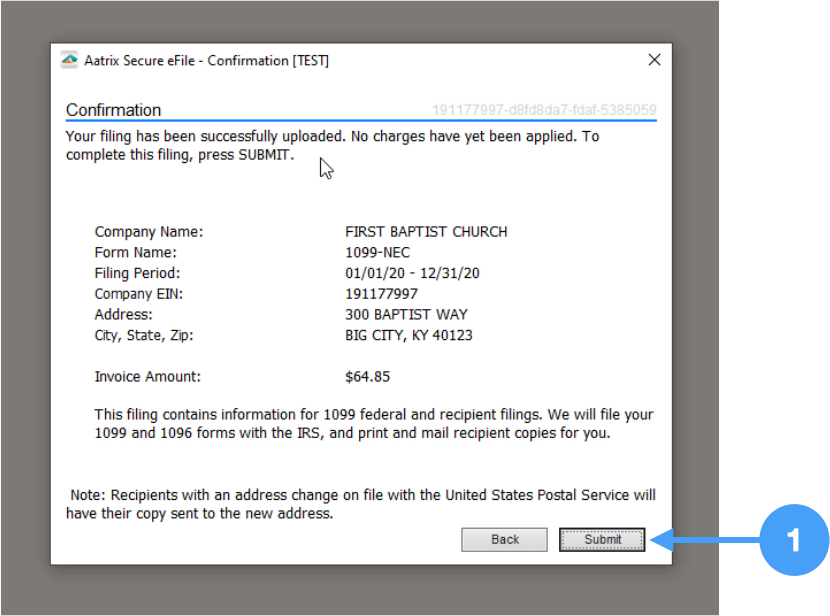
Confirmation Window
-
Review information in the window.
-
Click Submit.
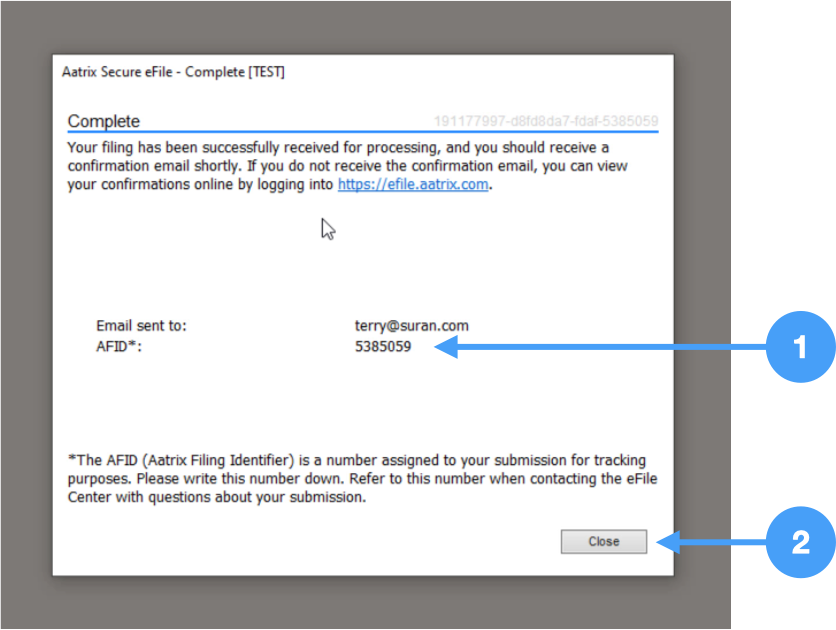
Completion Window
-
Make note of the AFID for your records.
-
Click Close.
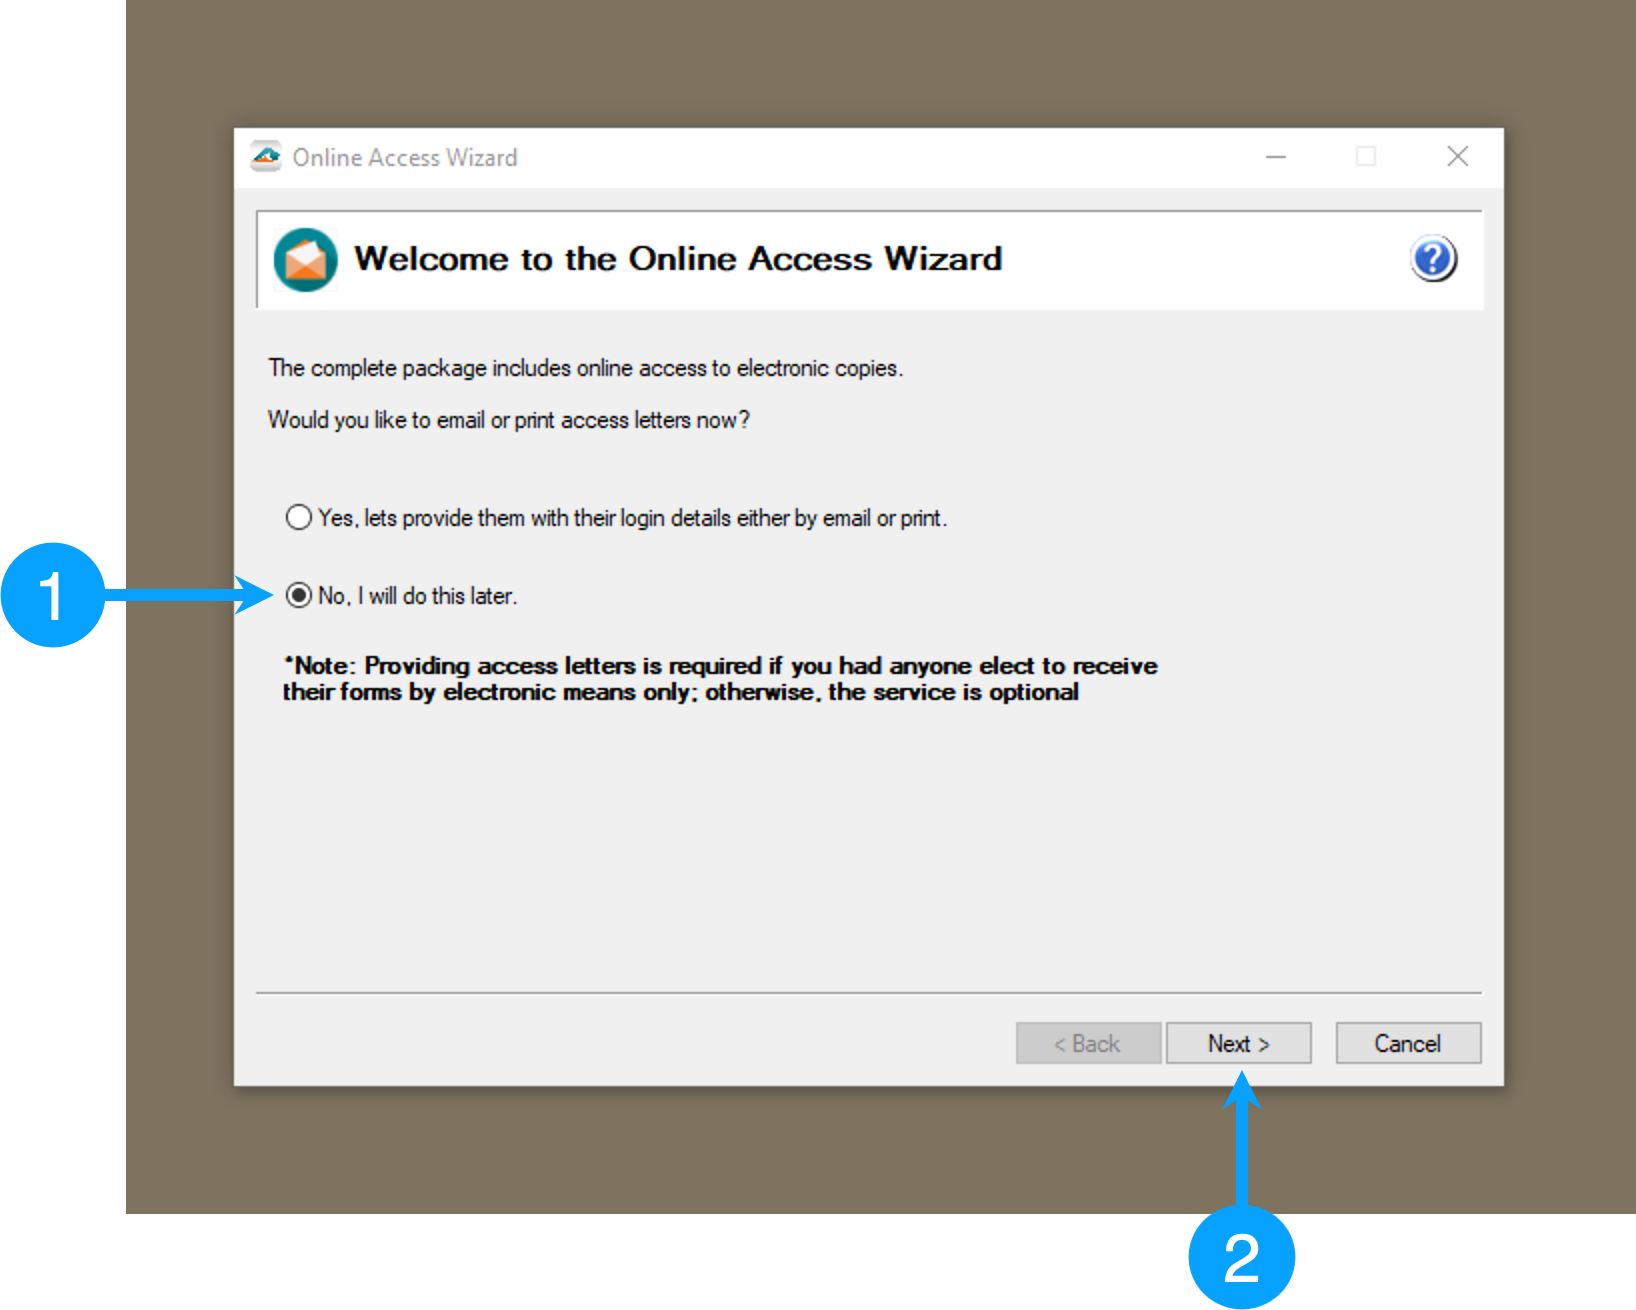
Access Instructions for 1099 Recipients
-
Select the option you wish to use to provide instructions to 1099 recipients.
-
Click Next.
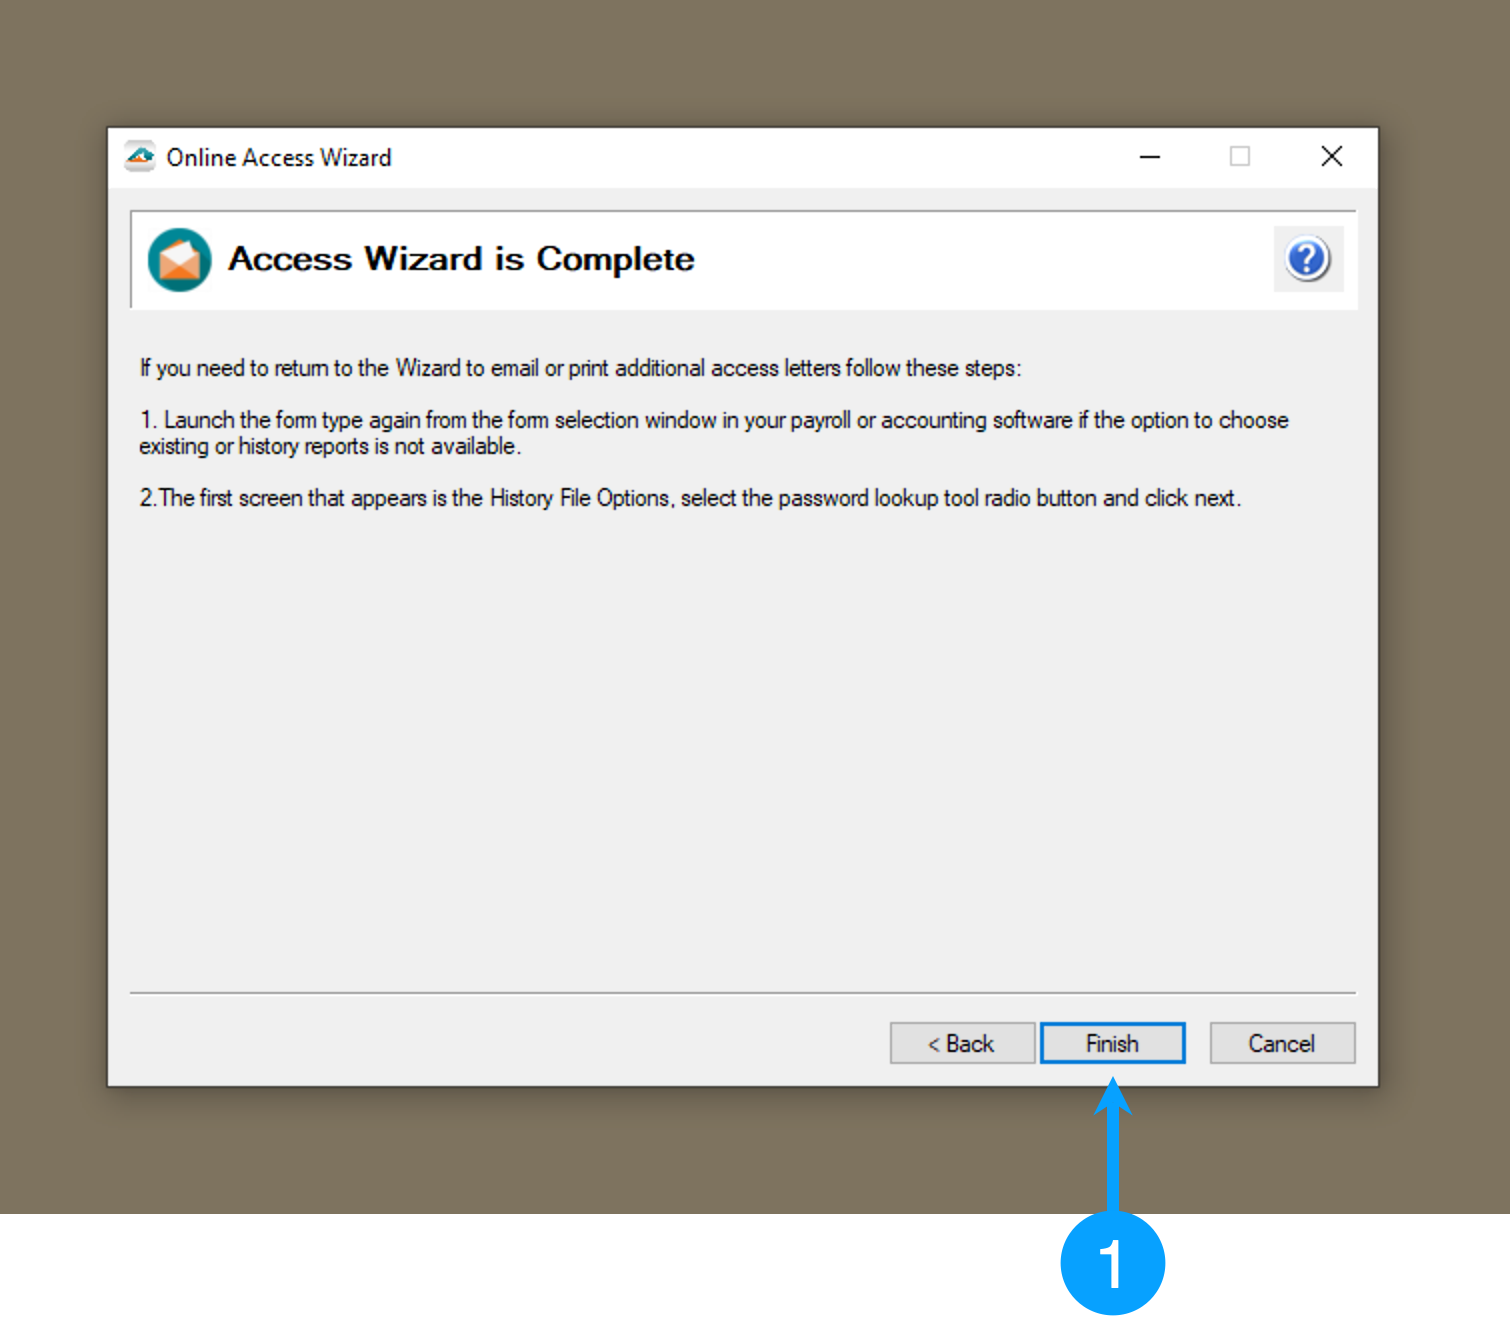
1099 Wizard Complete
-
Click Finish.
This completes the printing and eFiling of 1099-NEC forms on Windows. For a walkthrough of the above process, watch the video below.
Video for Printing and e-filing 1099-NEC Forms