If you want to do a mailing for your event, you have the option to print labels or print addresses directly on an envelope.
-
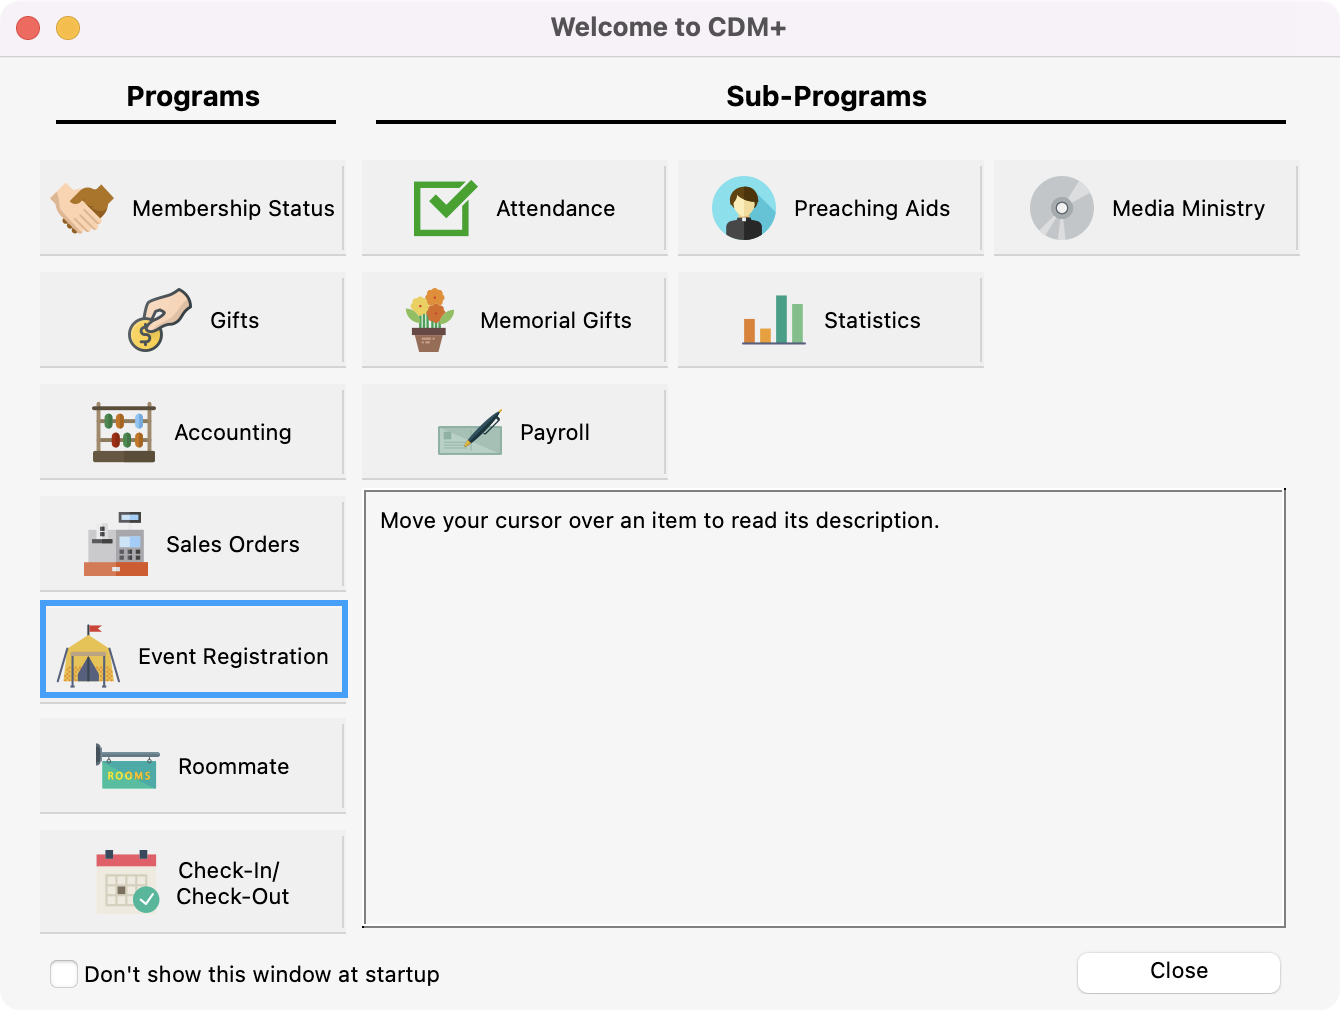
To Navigate to Registration Labels/Envelops, from the Welcome to CDM+ window, click on Event Registration.
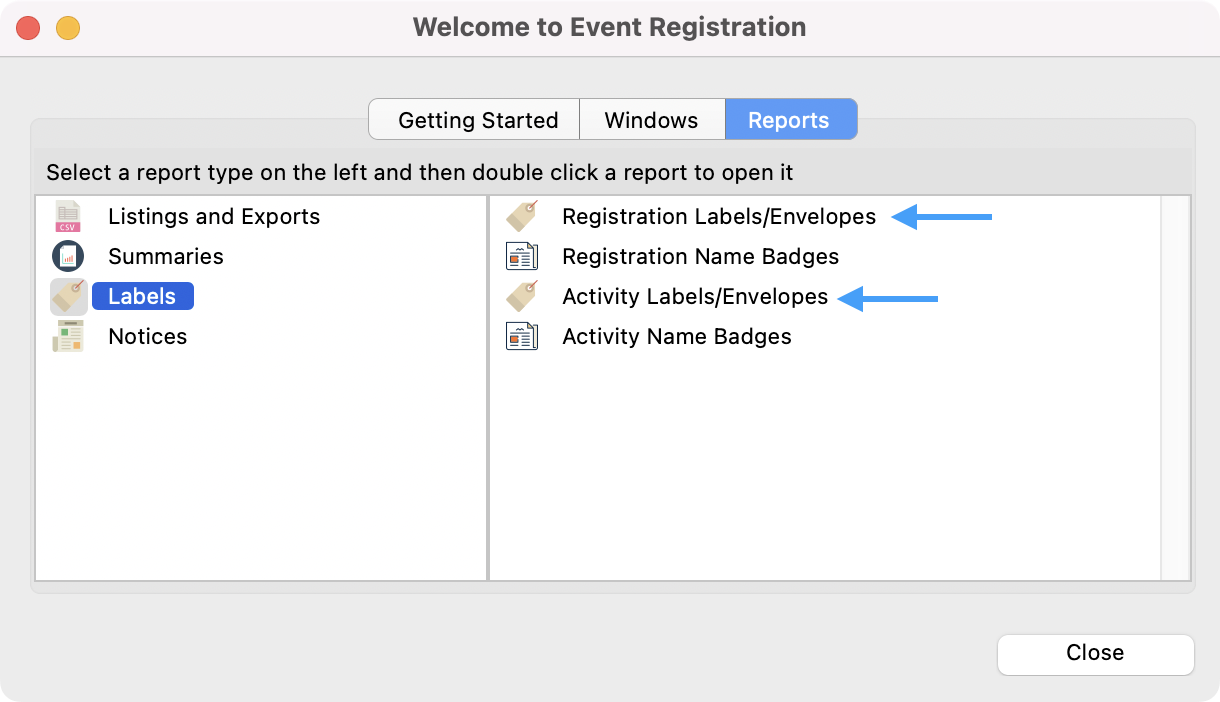
Then, click on the Reports tab → Labels → Registration Labels/Envelopes or Activity Labels/Envelopes
or
Go to Reports → Event Registration Reports → Labels → Registration Labels/Envelopes or Activity Labels/Envelopes.
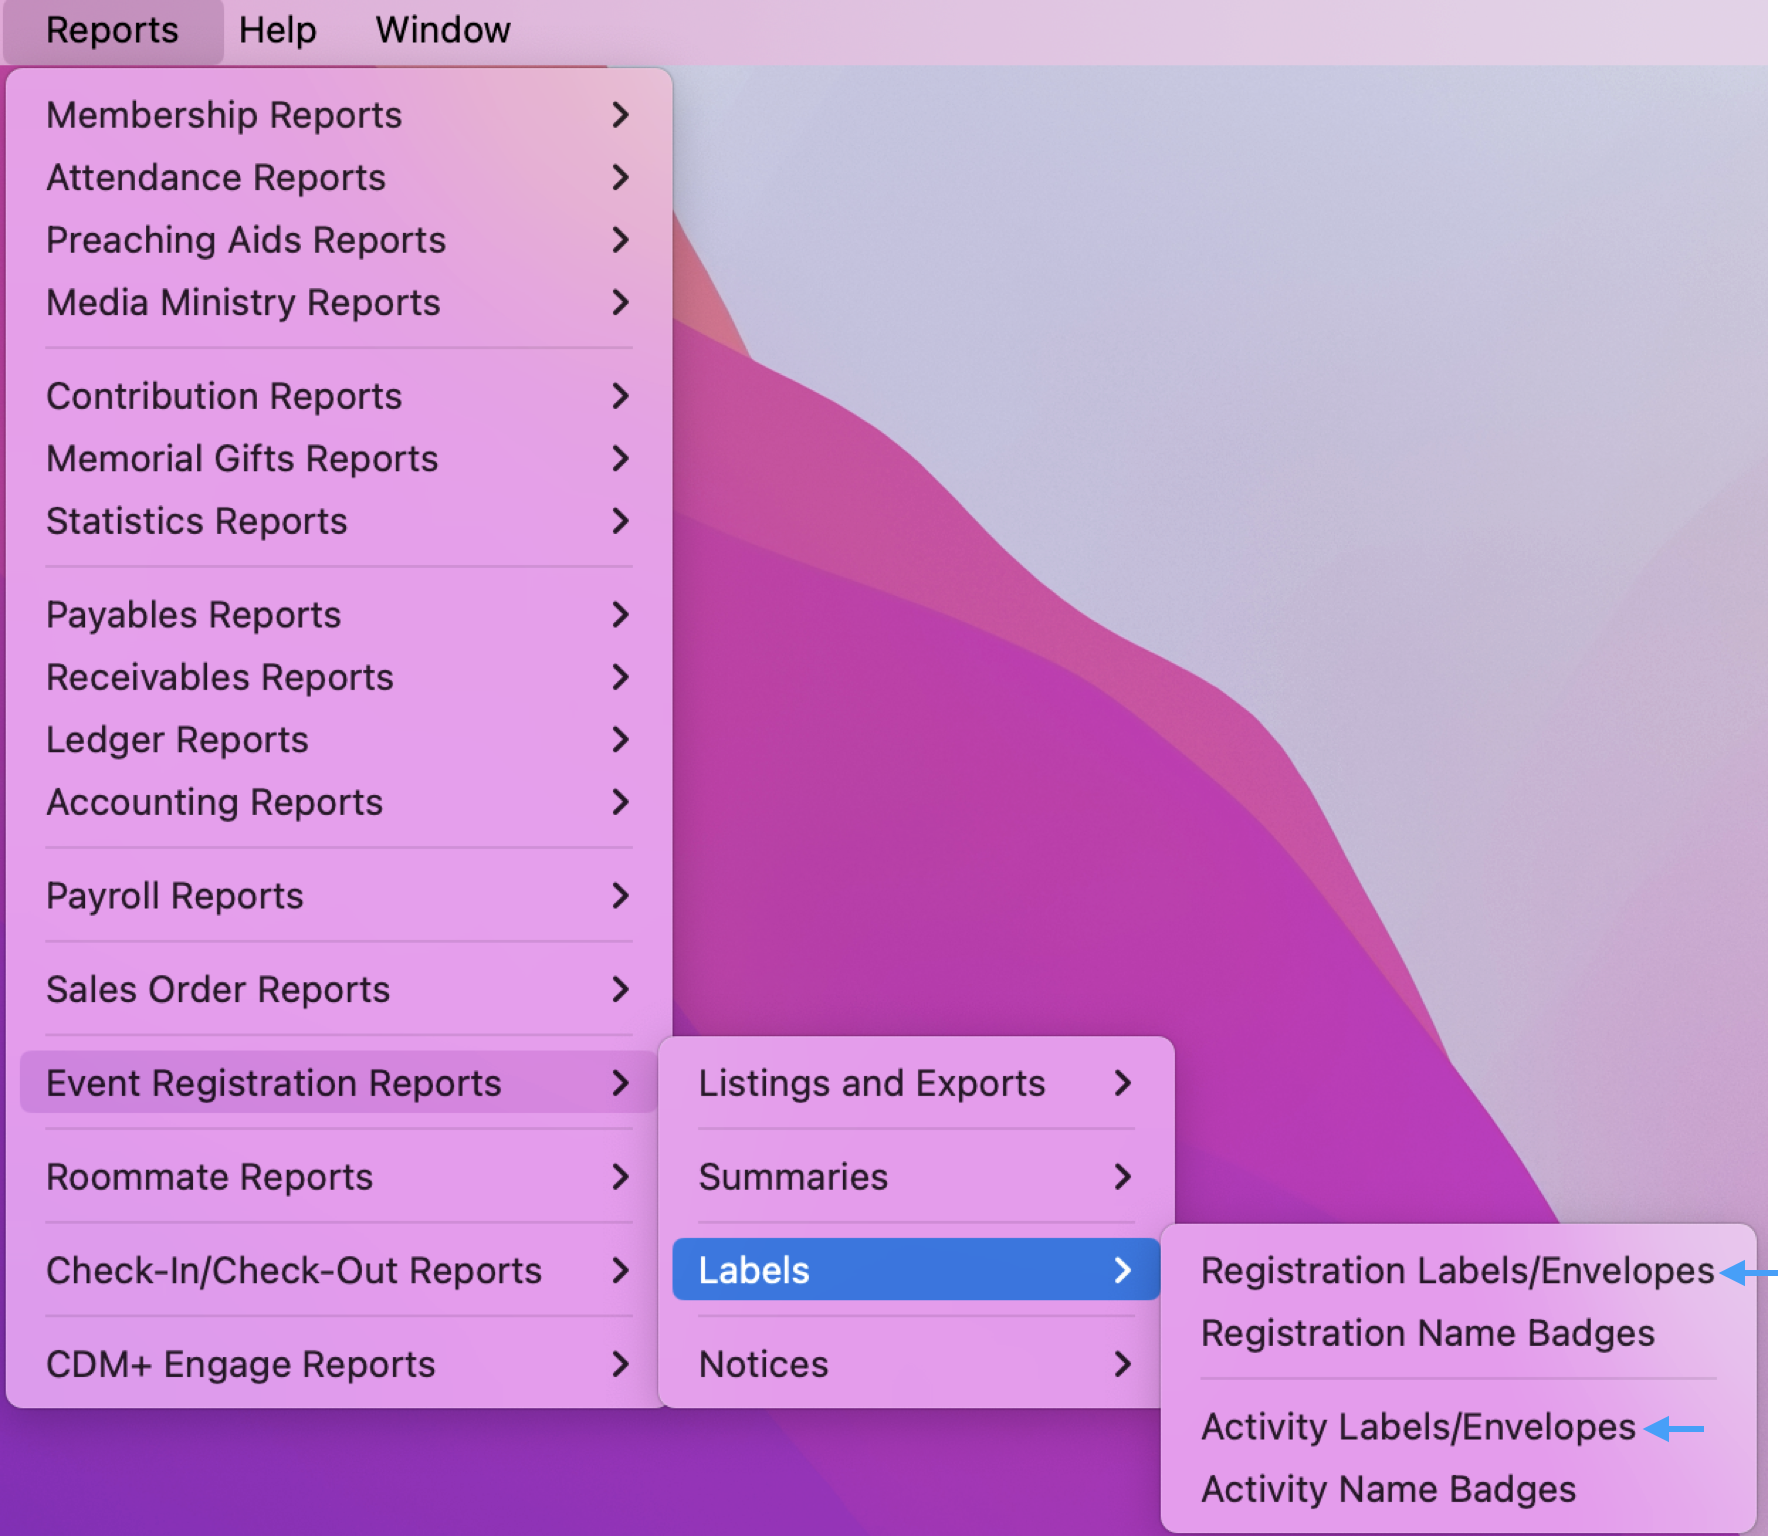
The instructions below show a sample for Registration Labels/Envelopes but the process is the same for Activity Labels/Envelopes.
-
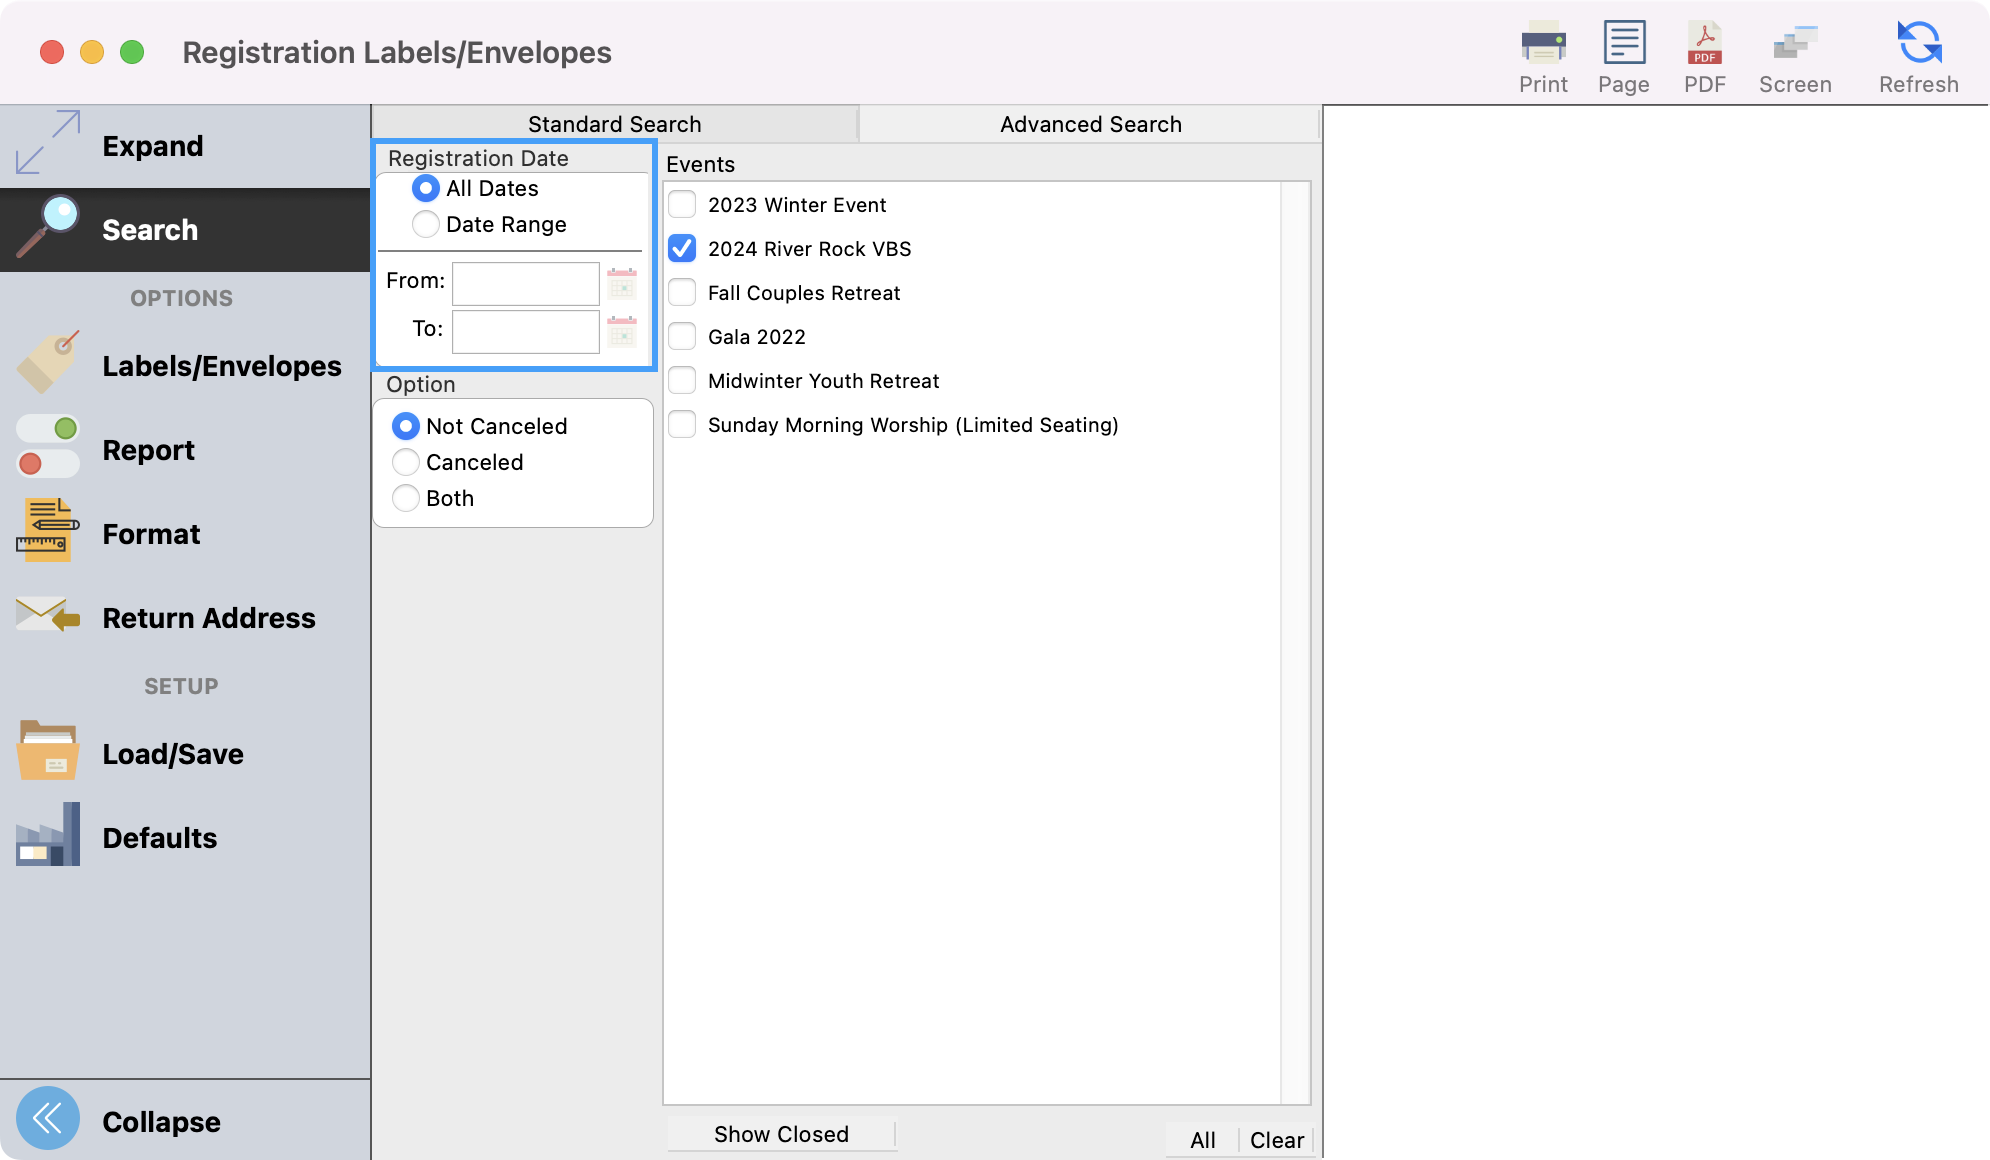
In the Registration Labels/Envelopes window under Search, in the top half of a Registration Name Badges setup window, click the checkbox next to the Event in the list on the right.

-
Choose which registrants you want to print a label/envelope for by their Registration Date. You may choose to print labels/envelopes for all registrations by clicking the All Dates radio button or you can click the Date Range radio button and enter From and To dates to limit it to registrations entered during a certain period.
-
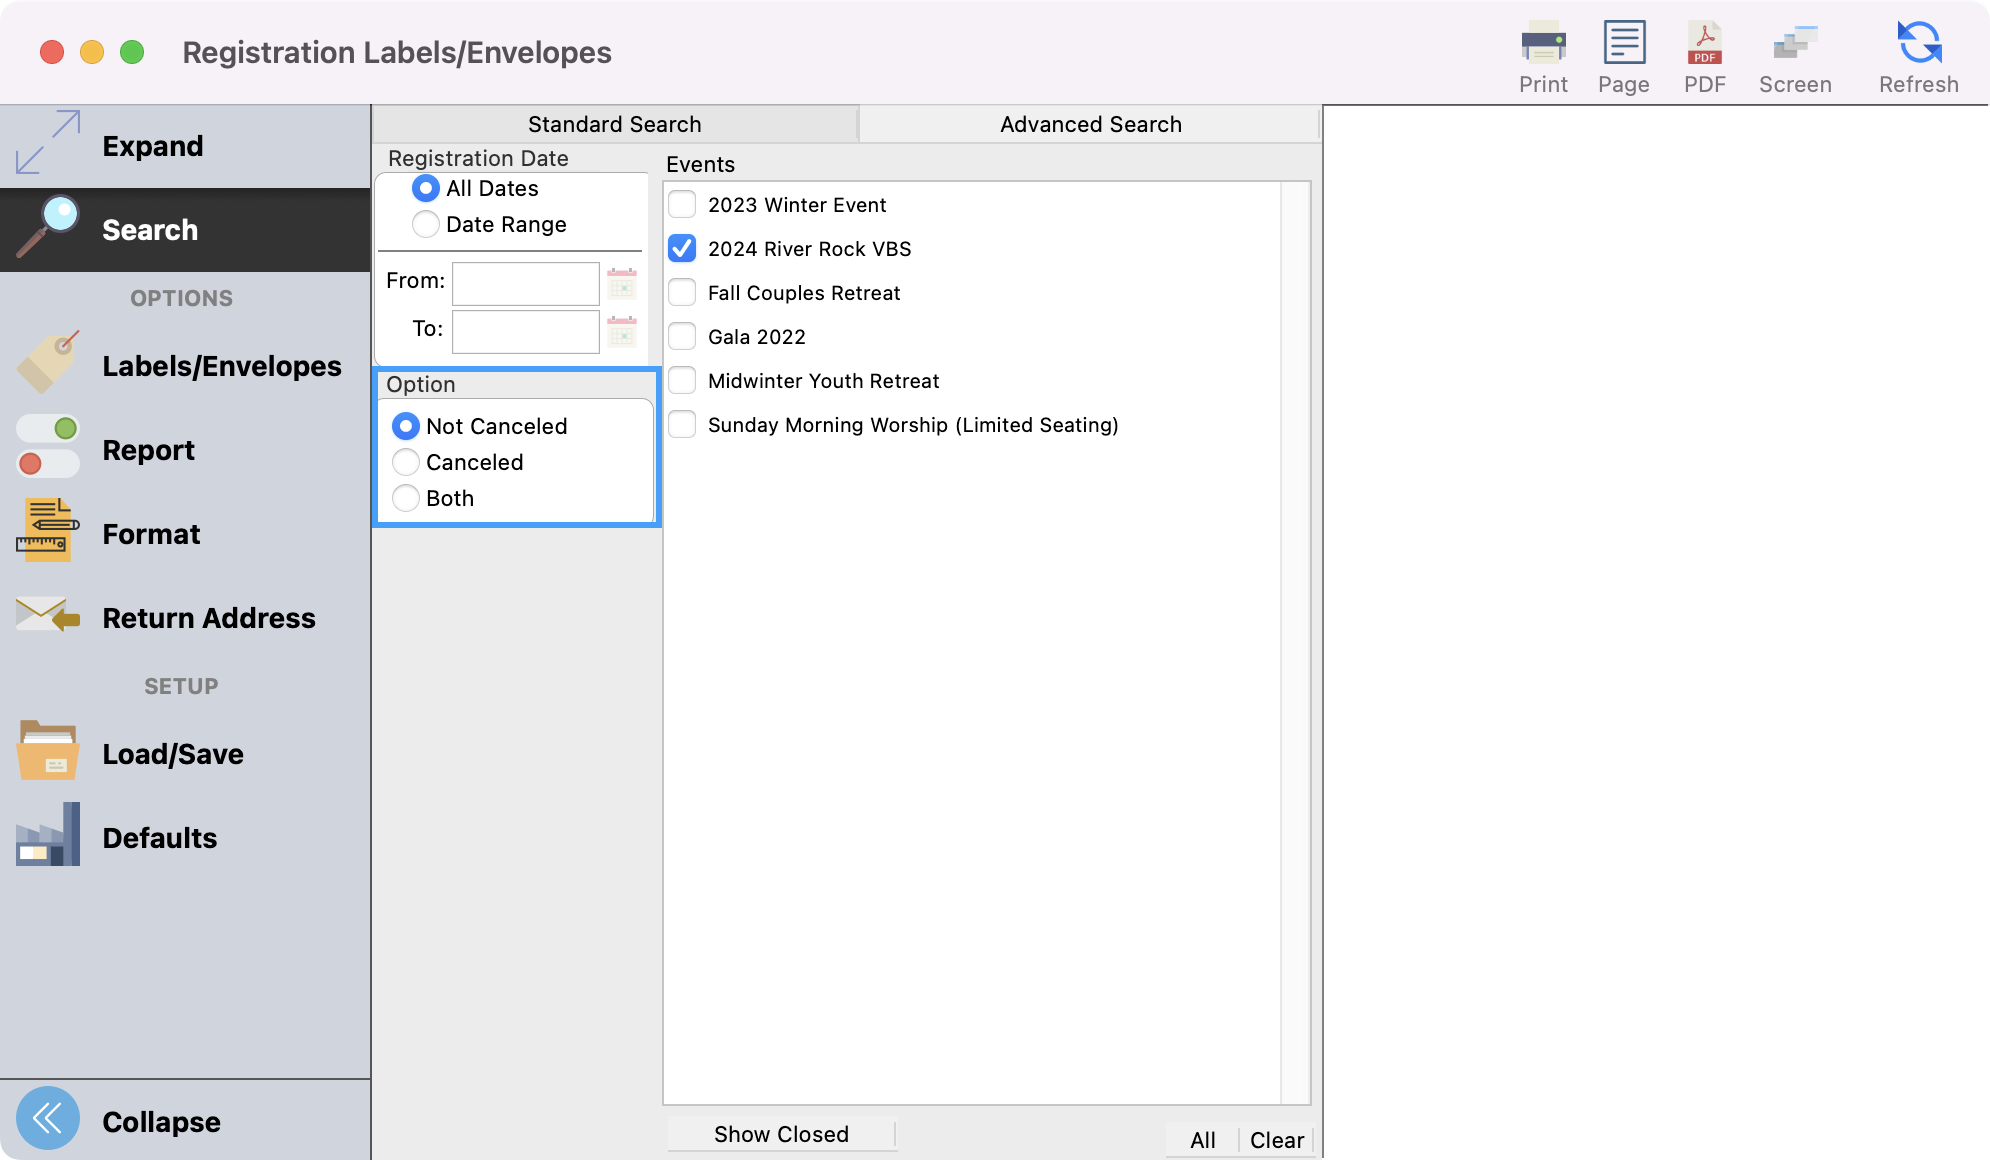
Under the Option heading, you can choose to print labels/envelopes for persons whose registration is Not Cancelled, Cancelled, or Both.
You can also set up an Advance Find if you need to to pull in more targeted registrants. You can see the steps to set up and Advance Find here.
-
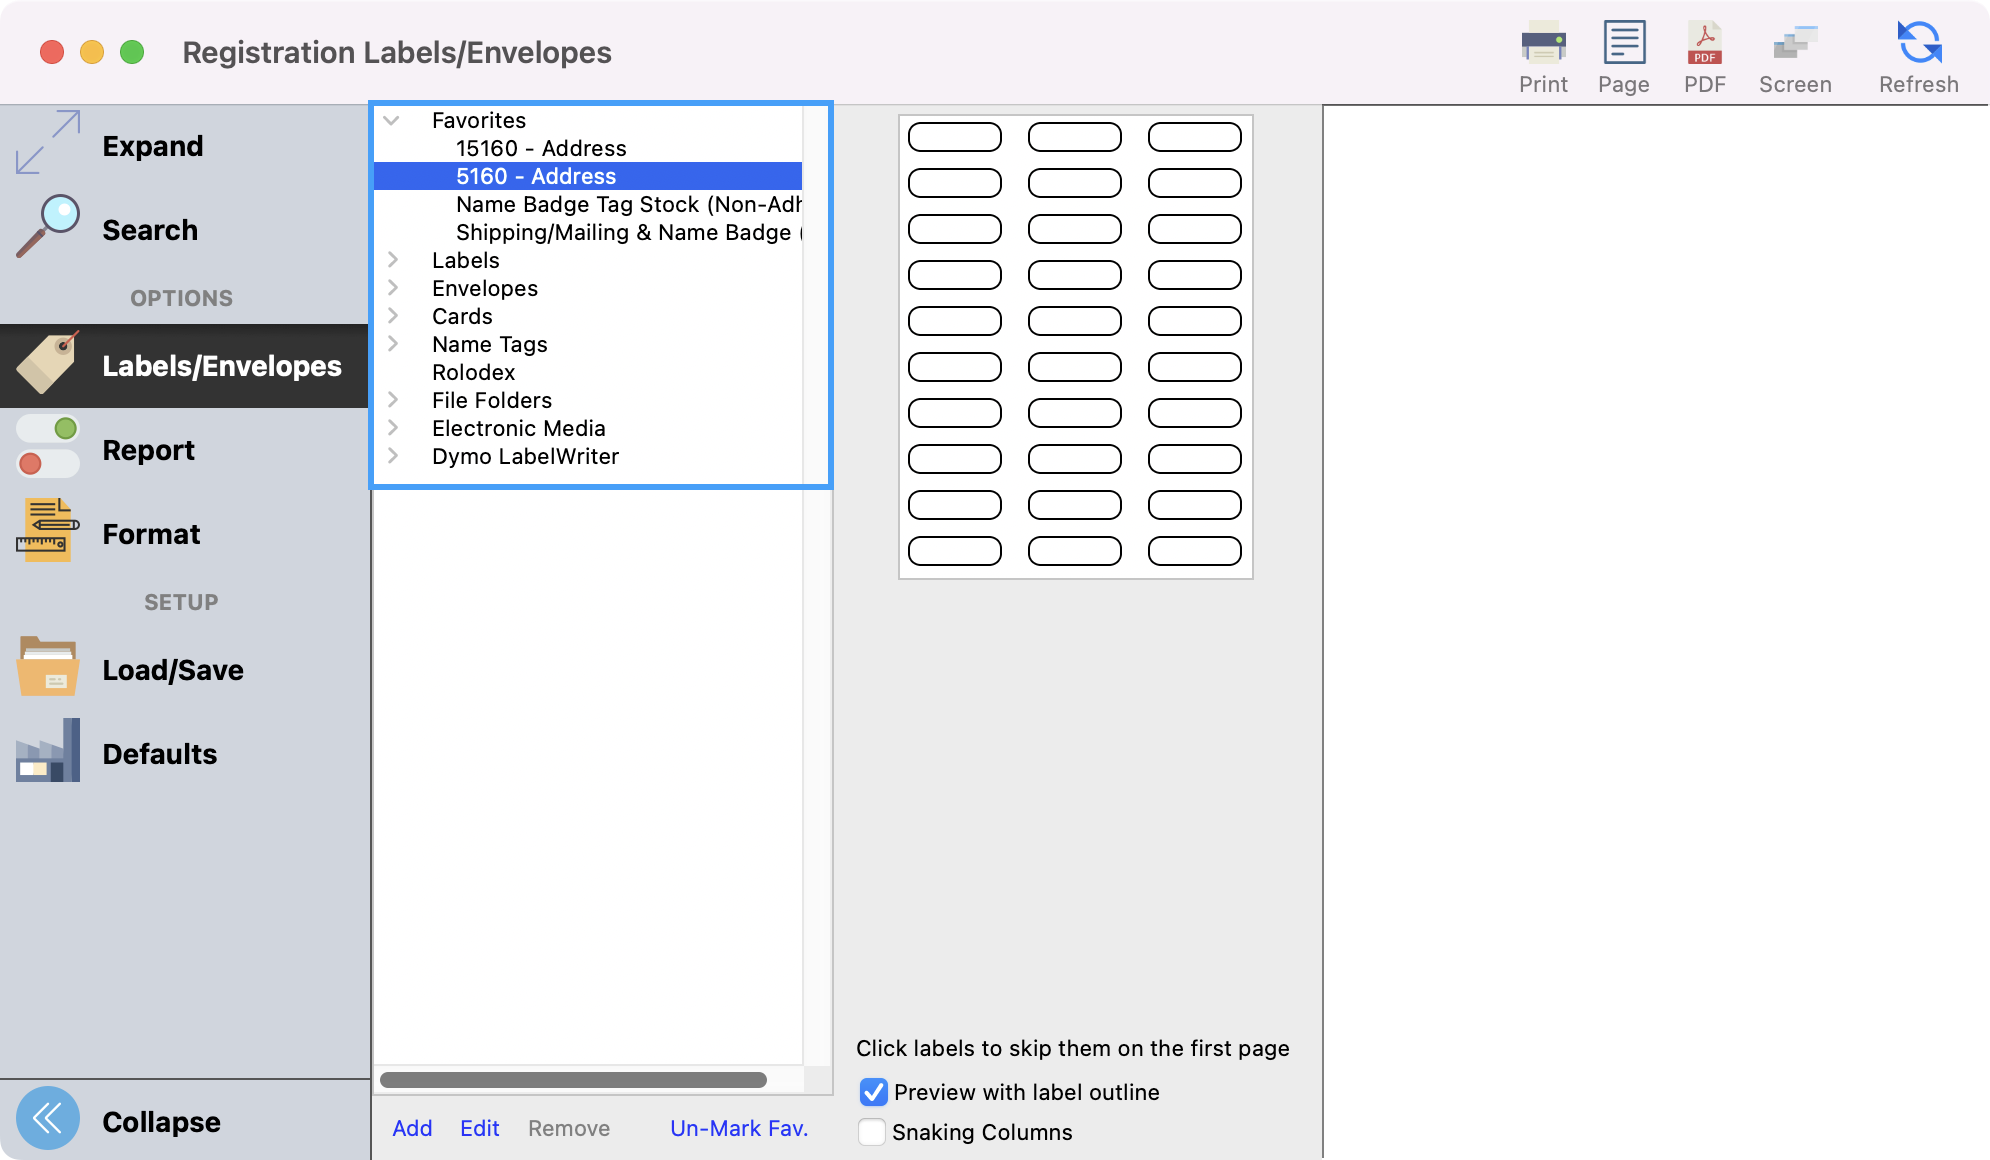
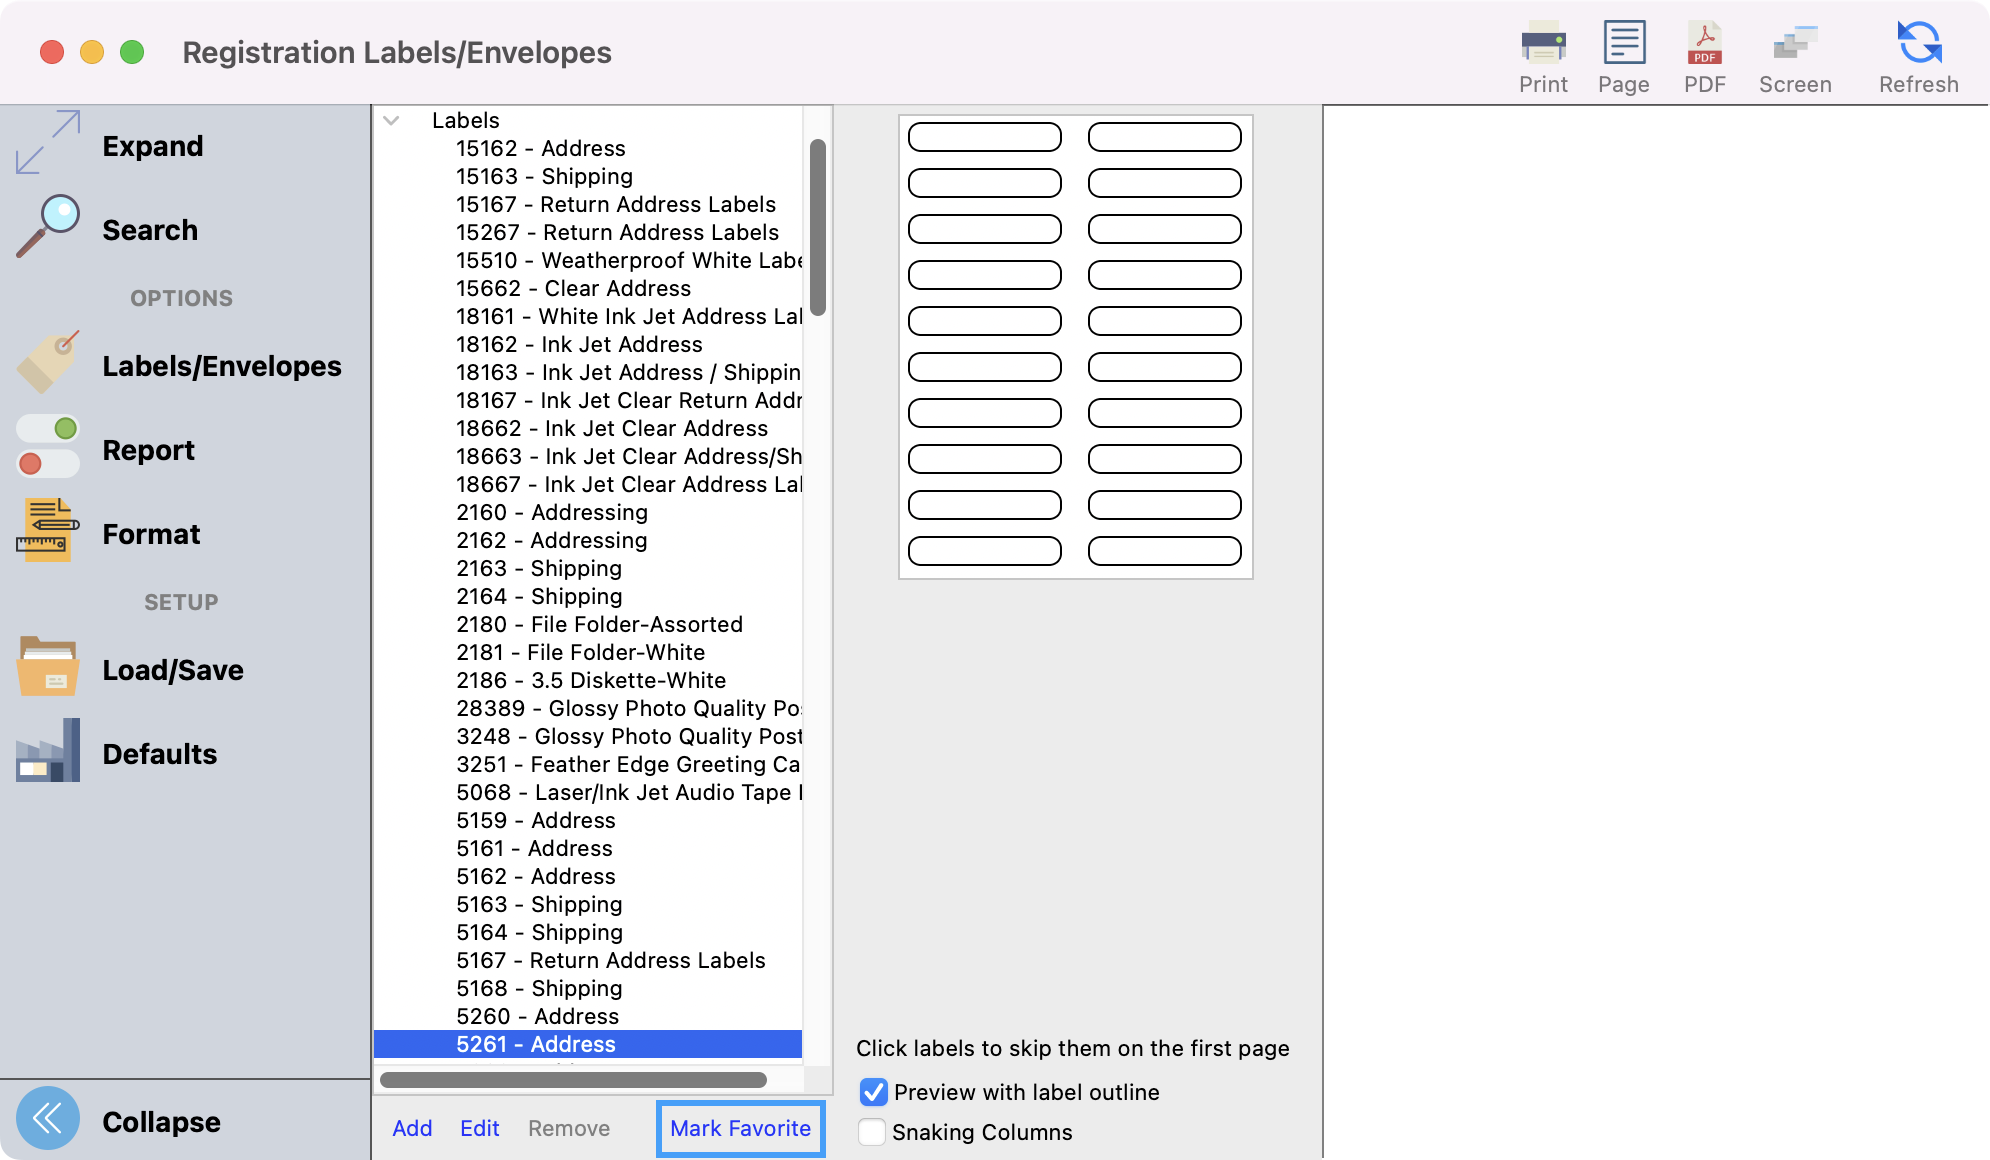
Next click Labels/Envelopes from the left sidebar. Select the label or envelope from the list of Avery® formats.
-
If there is a label or envelope format you use often, you have the option to mark it as a favorite and it will appear under the Favorites drop-down for easy access.
-
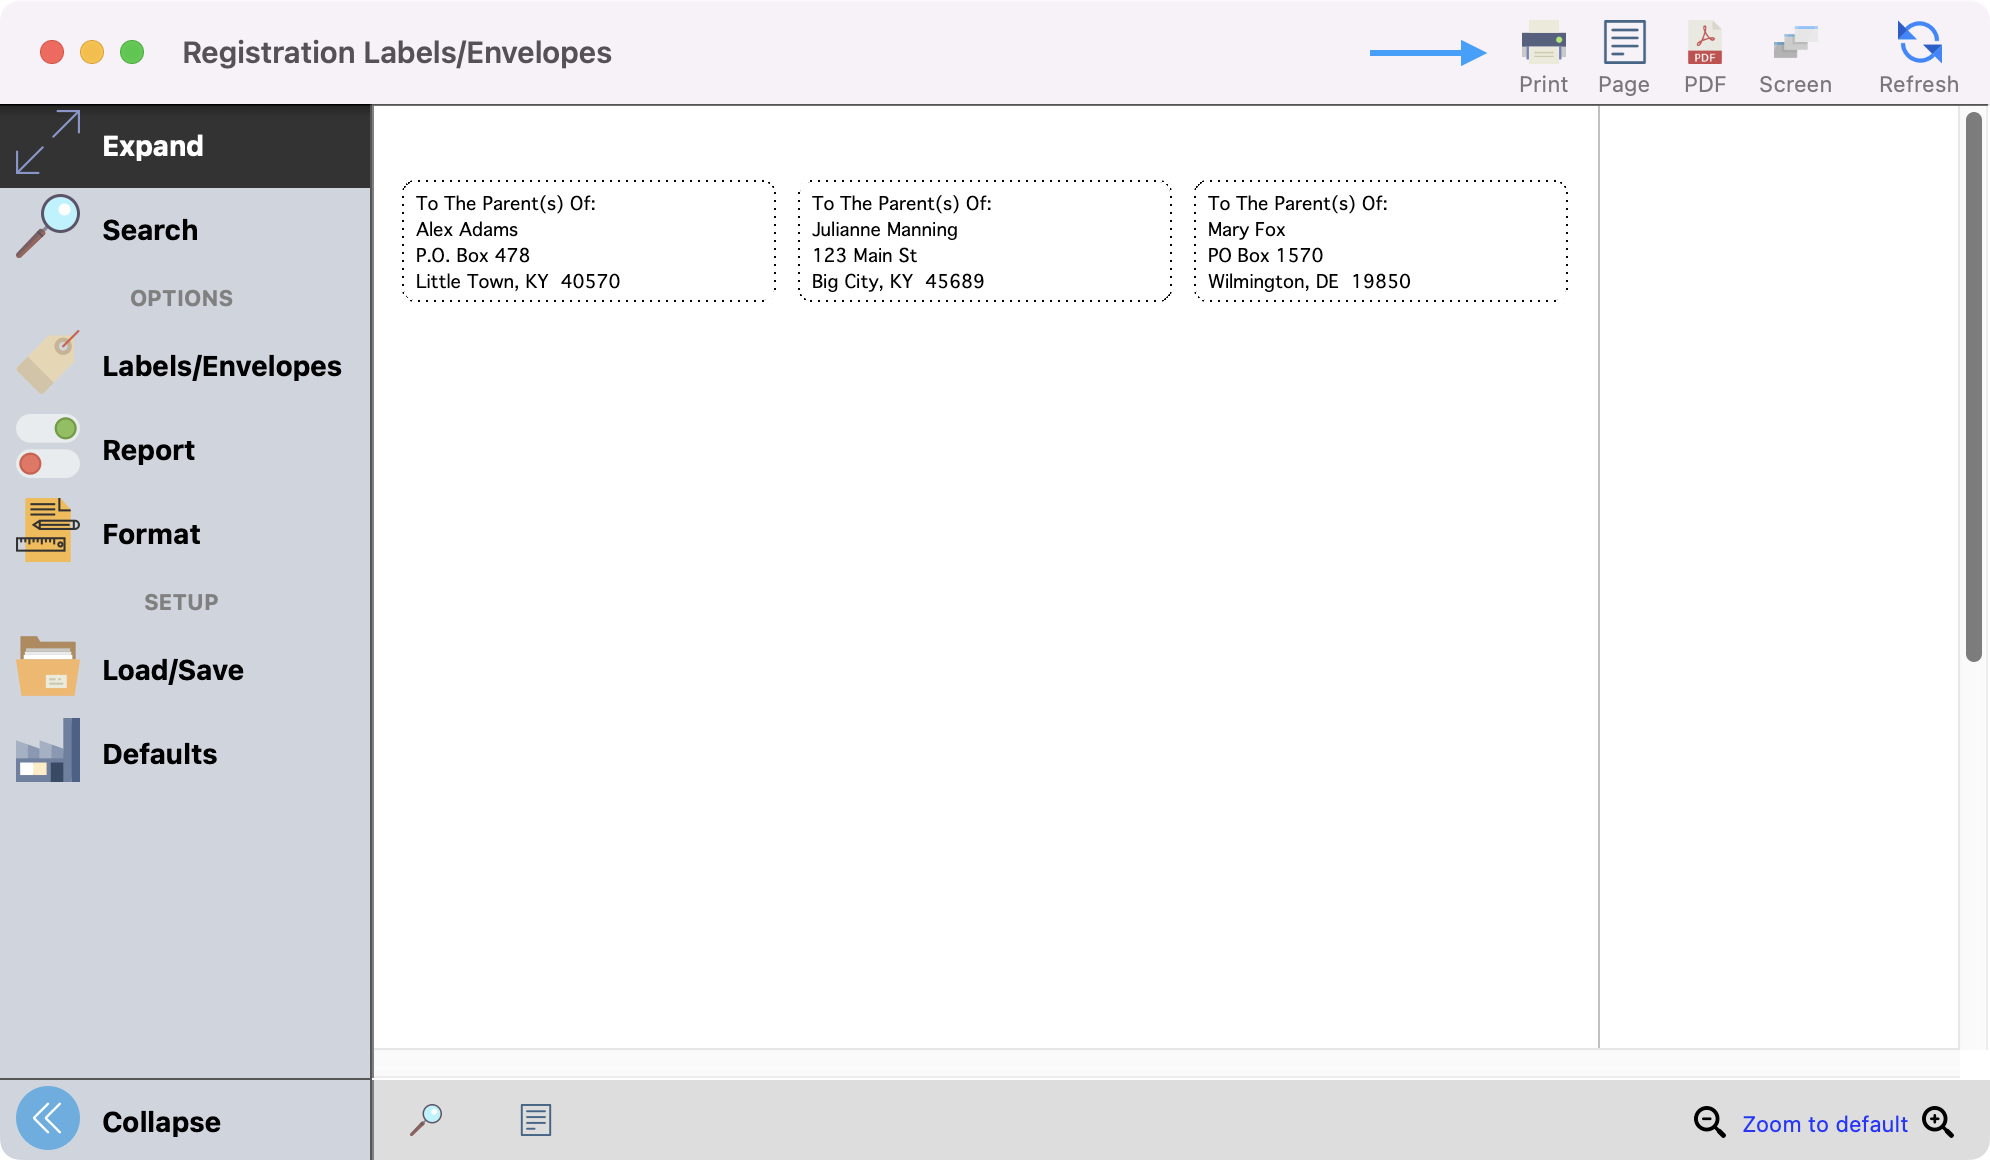
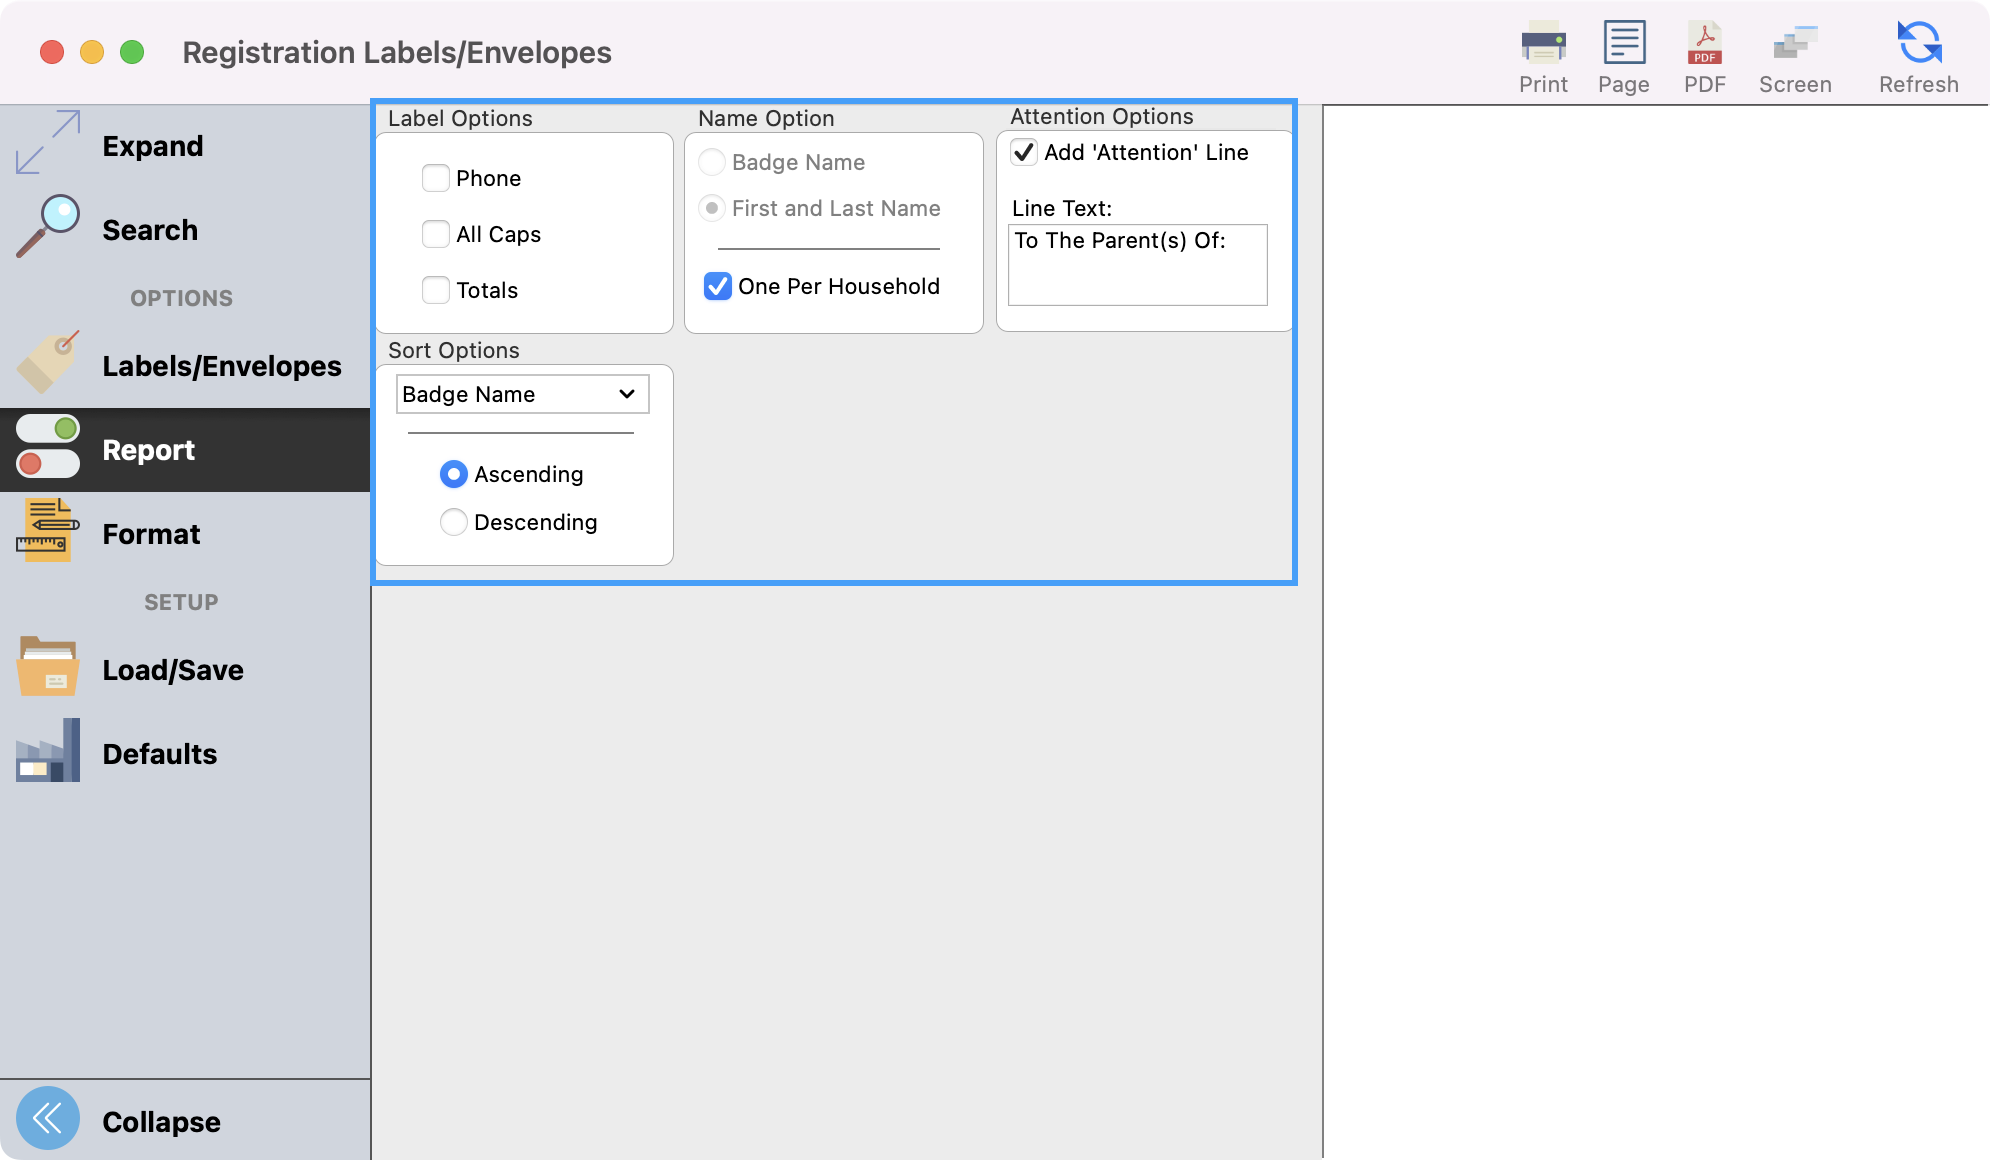
Next, click on Report from the left sidebar. This is where you have several options for what is included on the labels. Two very useful options are the One Per Household option and the Add “Attention” Line to labels. Checking the One Per Household box under the Name Option section will prevent sending duplicate copies of a mailing to a household if registrants are linked from CDM+ Membership. Checking the Add ‘Attention’ Line checkbox to print an additional line of text above the address will add the default text ”To The Parent(s) Of:”, which is very useful when mailing to participants in a youth event. You can override the default by entering new text in this field.
-
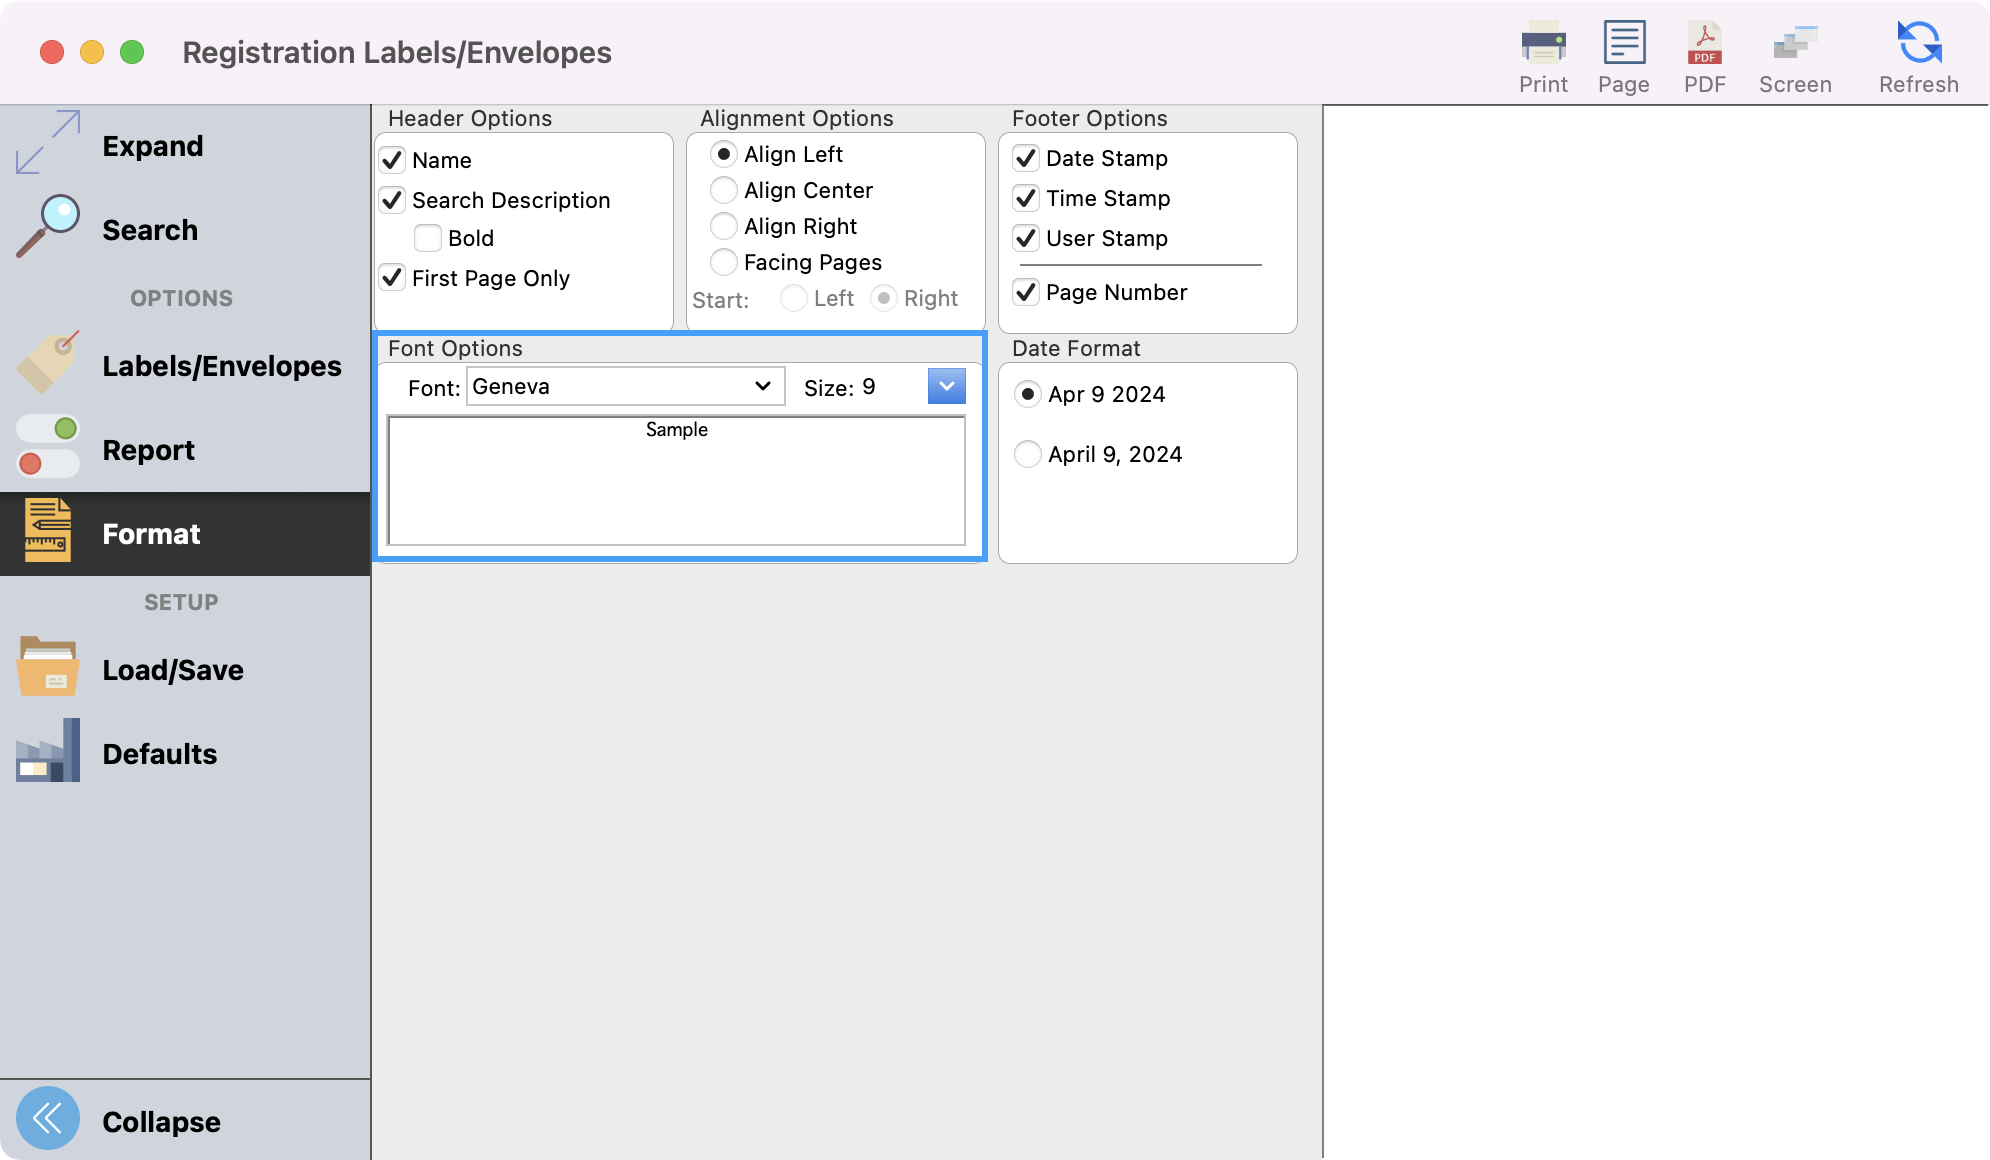
Next, you can click Format from the left sidebar. A helpful option under format is the ability to change your Font and text Size.
-
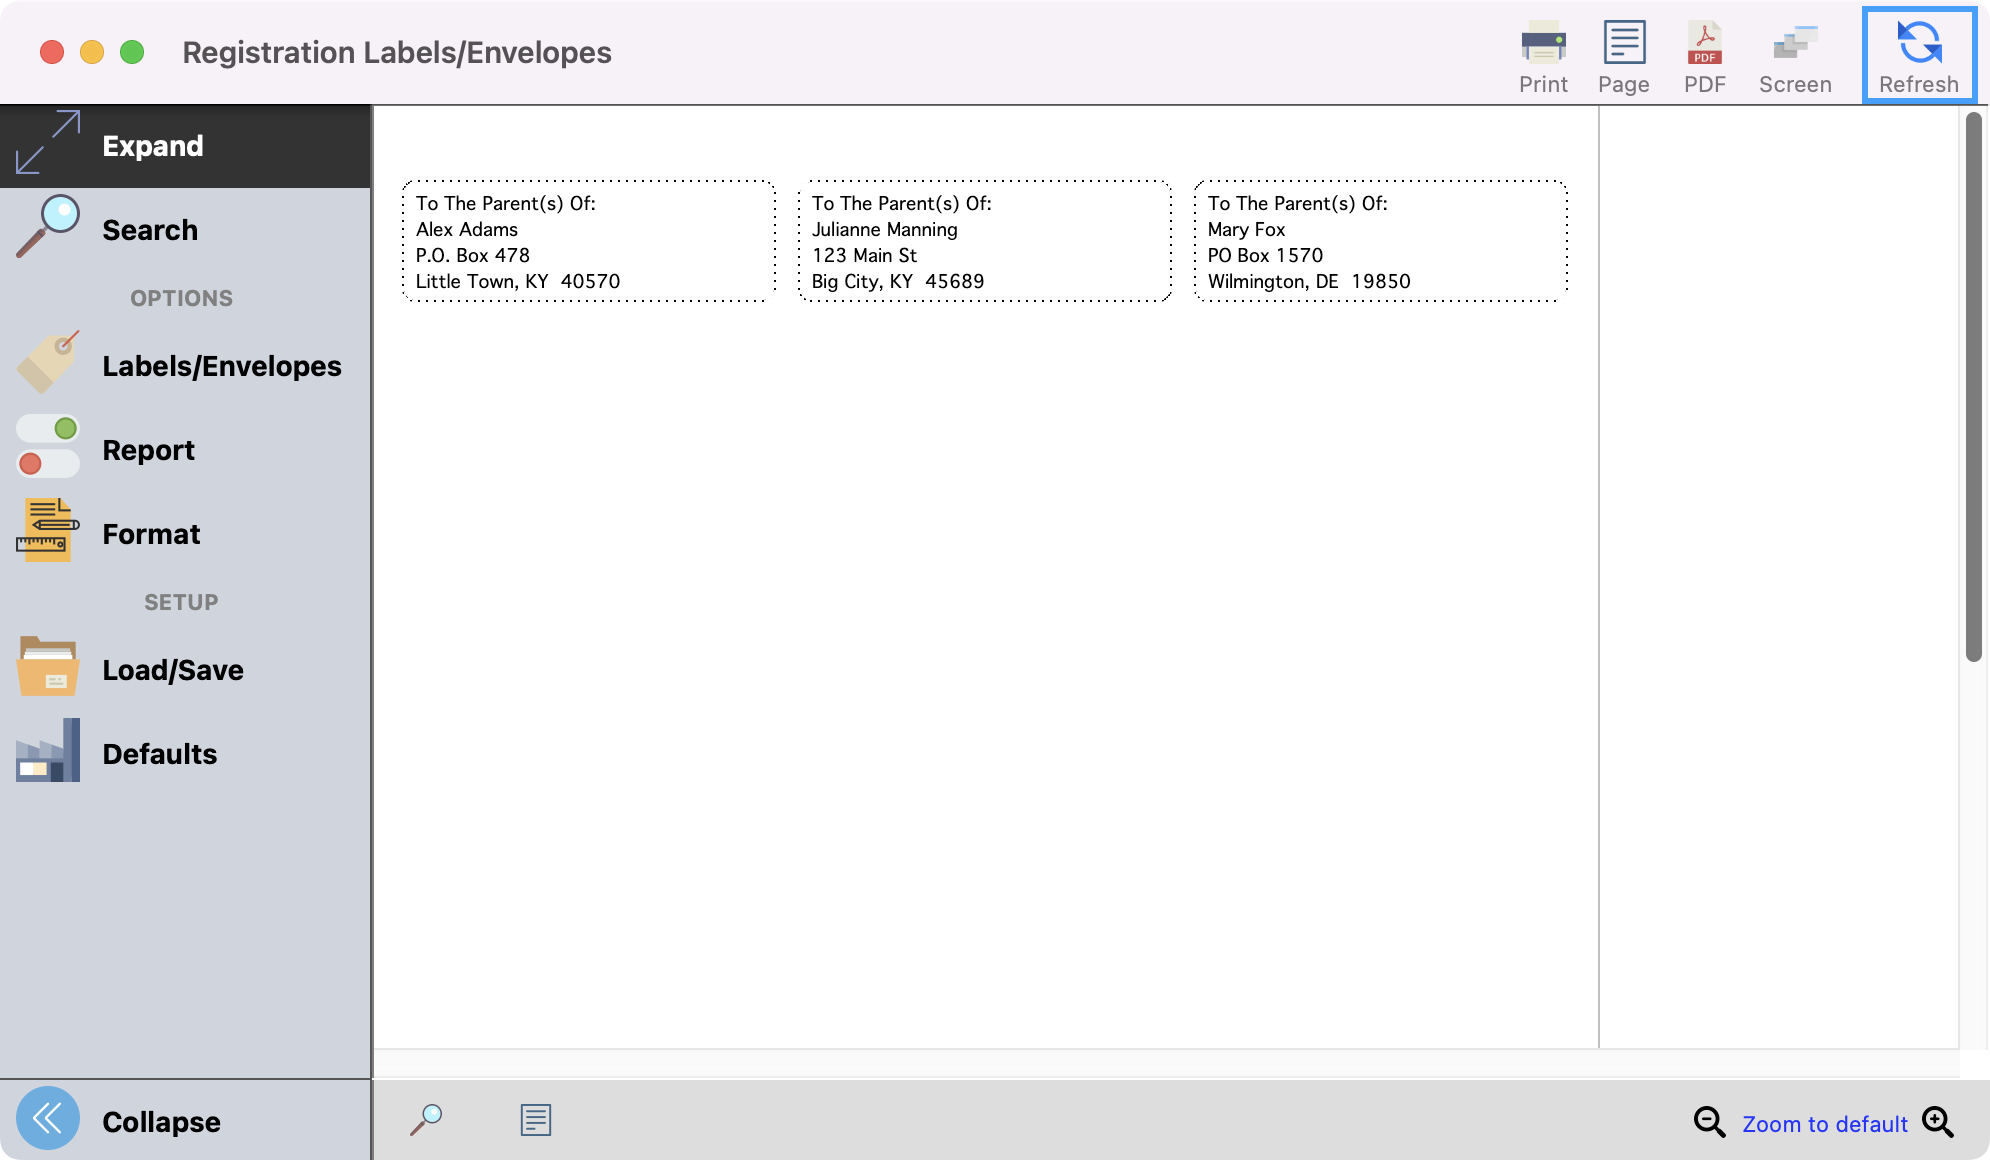
To see a preview of your labels/envelopes, click Refresh in the upper right-hand corner. To see a larger preview, click Expand from the left sidebar.
-
When you’re ready you can Print or export your labels/envelopes as you wish.