
A One Time Charge can be used to make payments that do not link to a gift, registration, customer account, etc.
These payments are purely financial and do not create additional records in CDM+.
If you need to make a gift, registration payment, or Accounts Receivable payment use the related area of Engage, such as Giving, Registration, Billing, etc.
Accessing One-Time Charge
-
Log in to Engage as an Administrator.
-
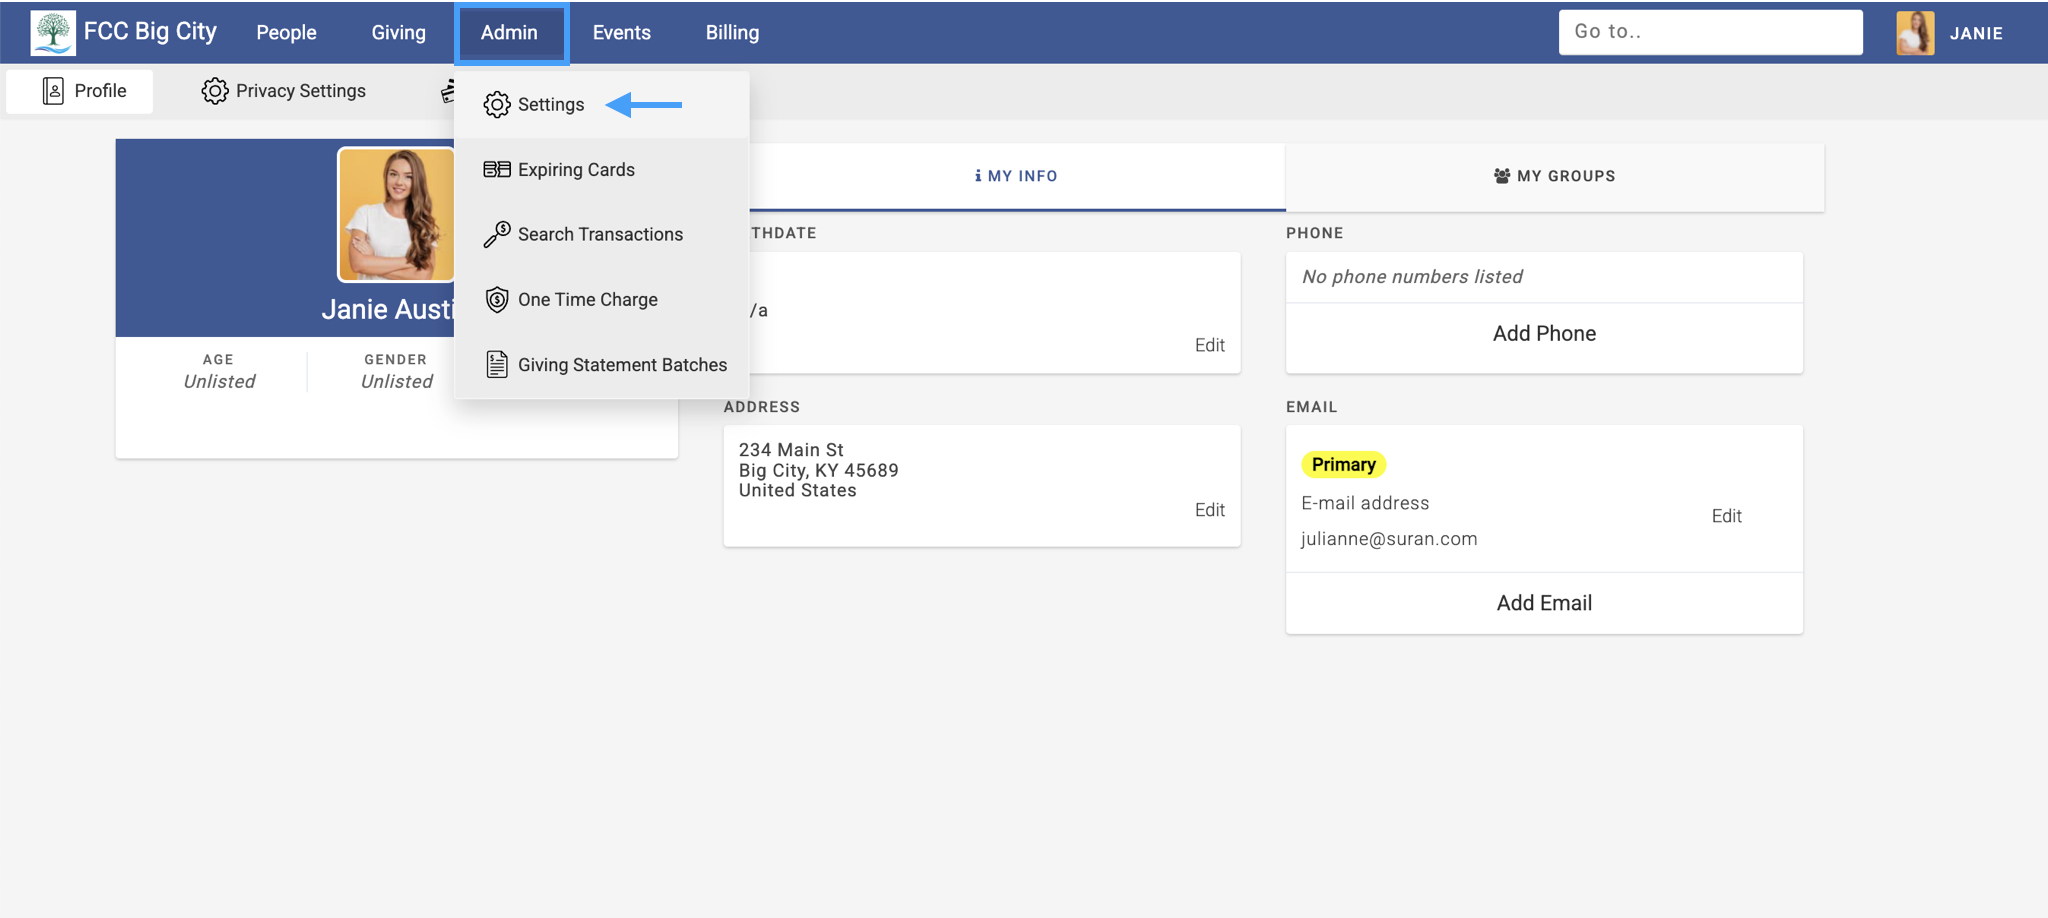
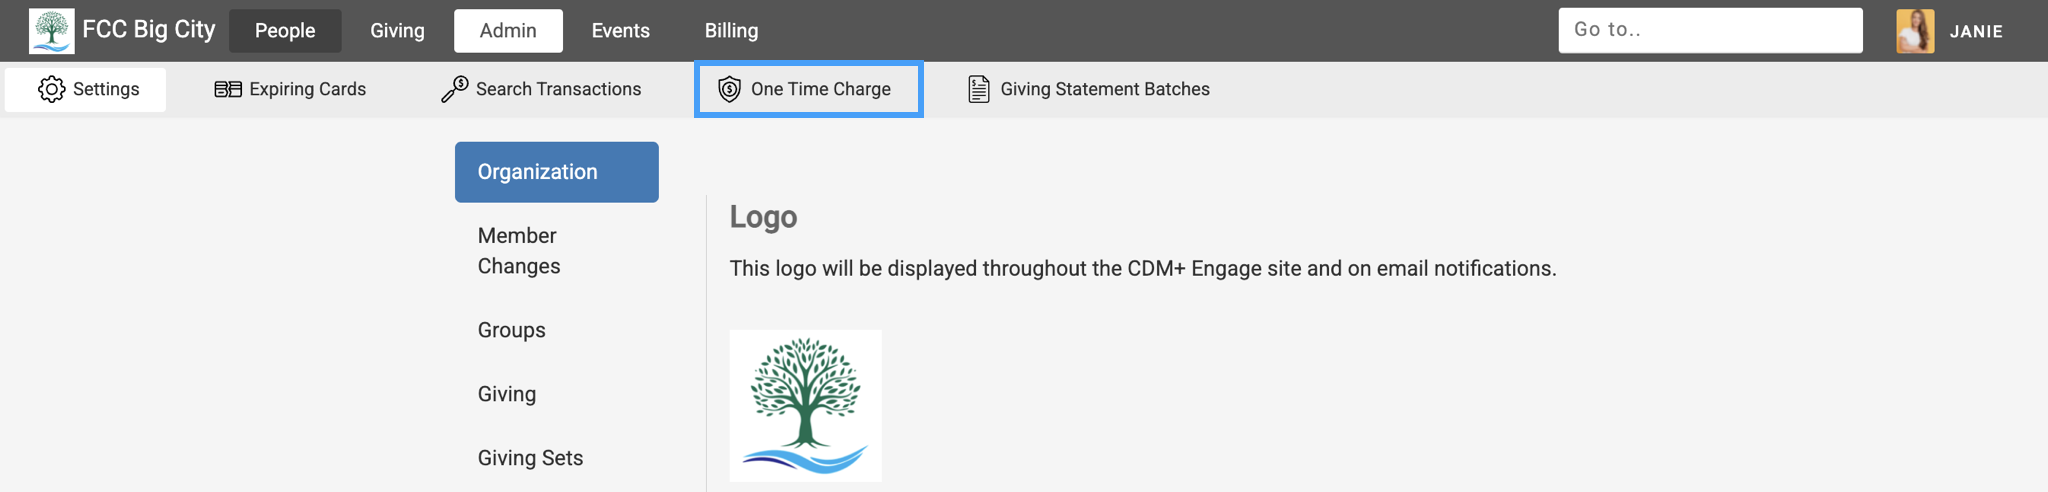
From the top menu, click Admin and then click Settings.
-
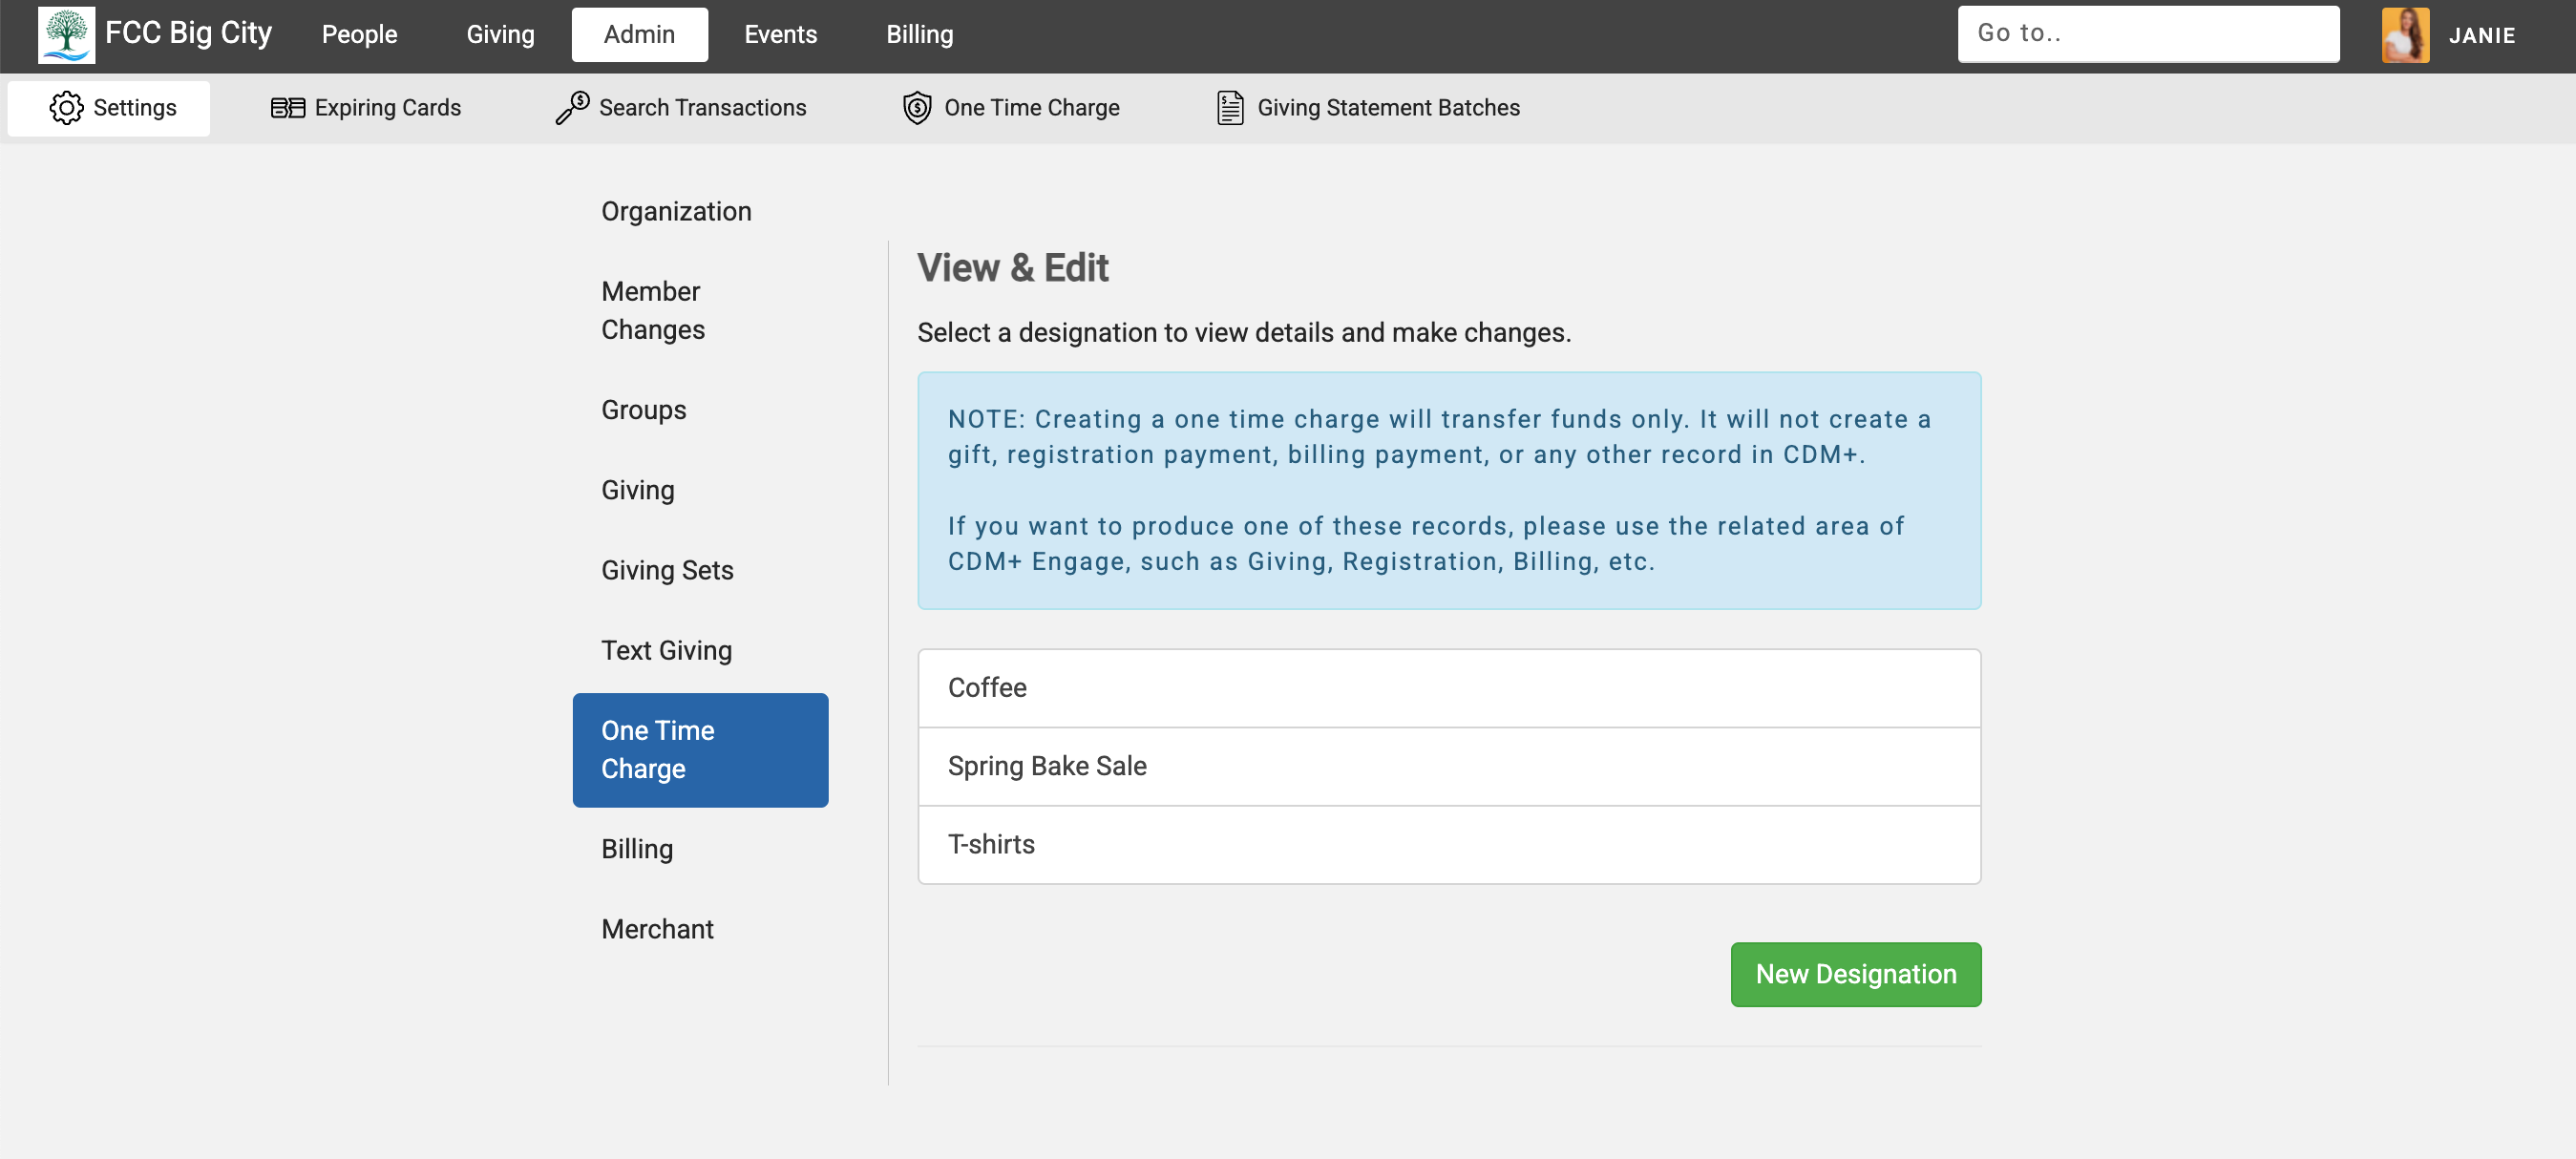
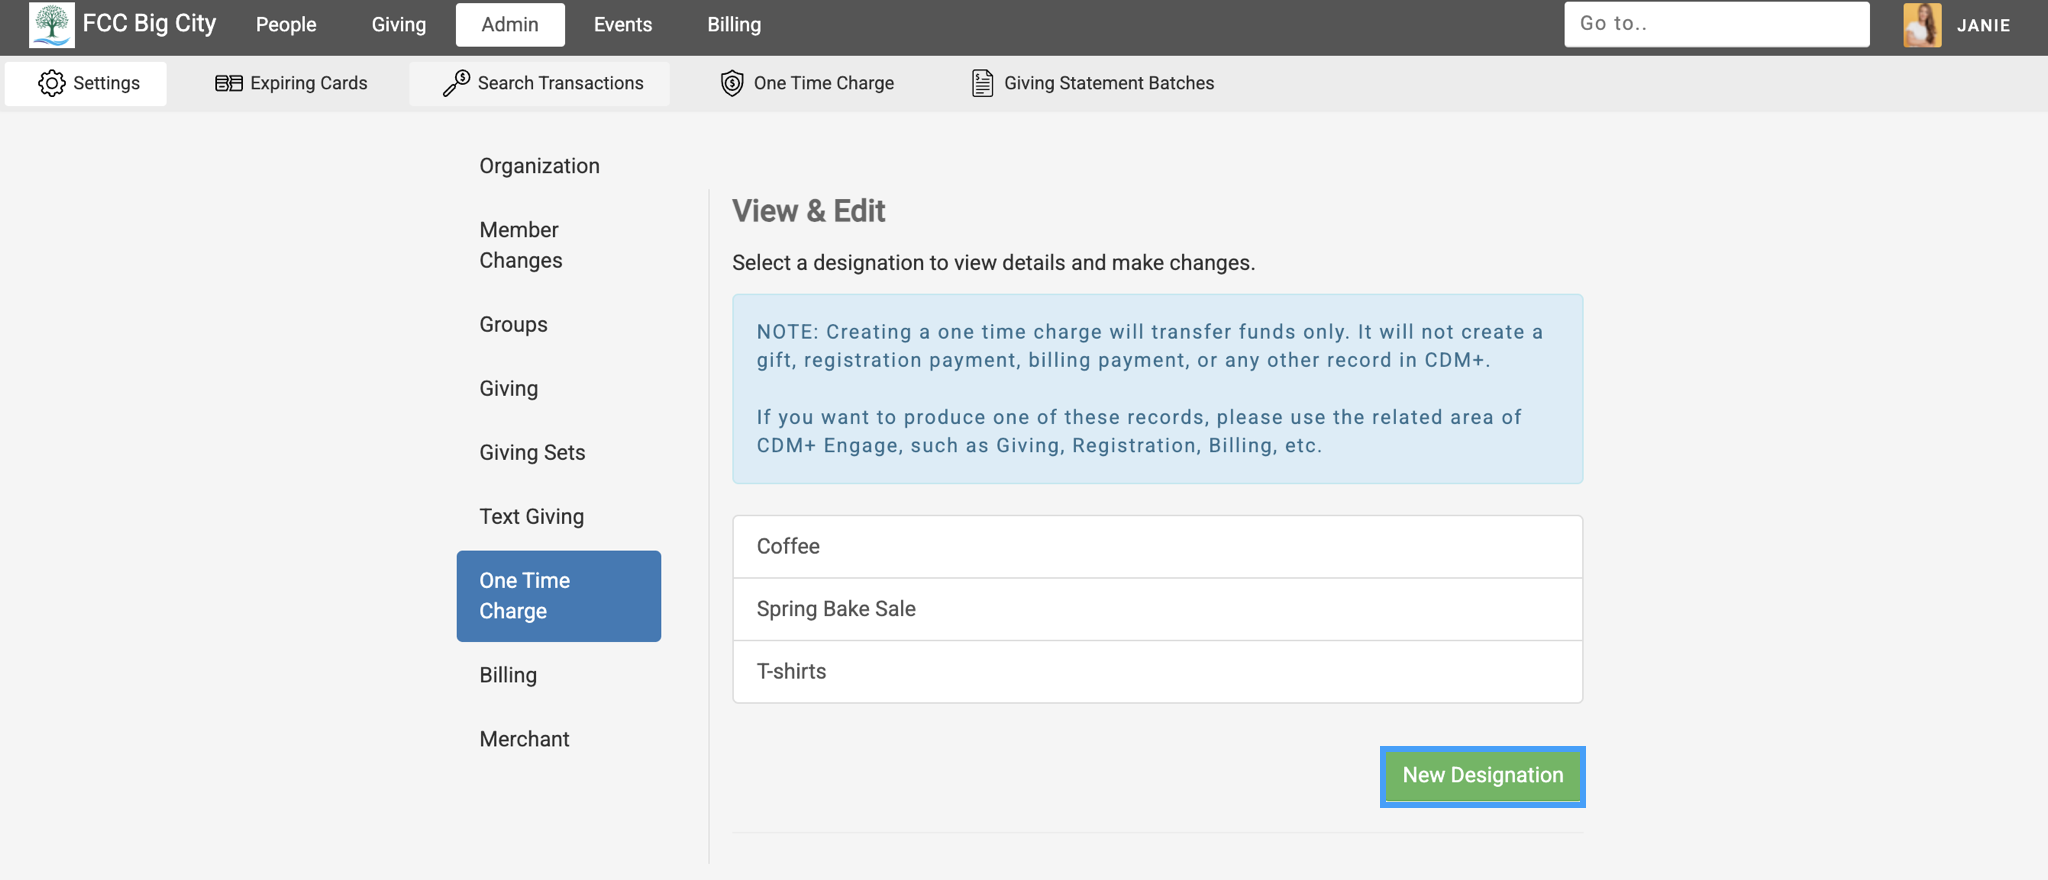
From the left sidebar menu, click One Time Charge.
Create a Designation and One-Time Charge URL
A Designation is the term given to the specific transaction names that you can select from to label where One-Time charges are being taken from. For example, you may want a Designation for T-shirts for VBS, or media resources for members, or an annual bake sale.
-
Click New Designation.
-
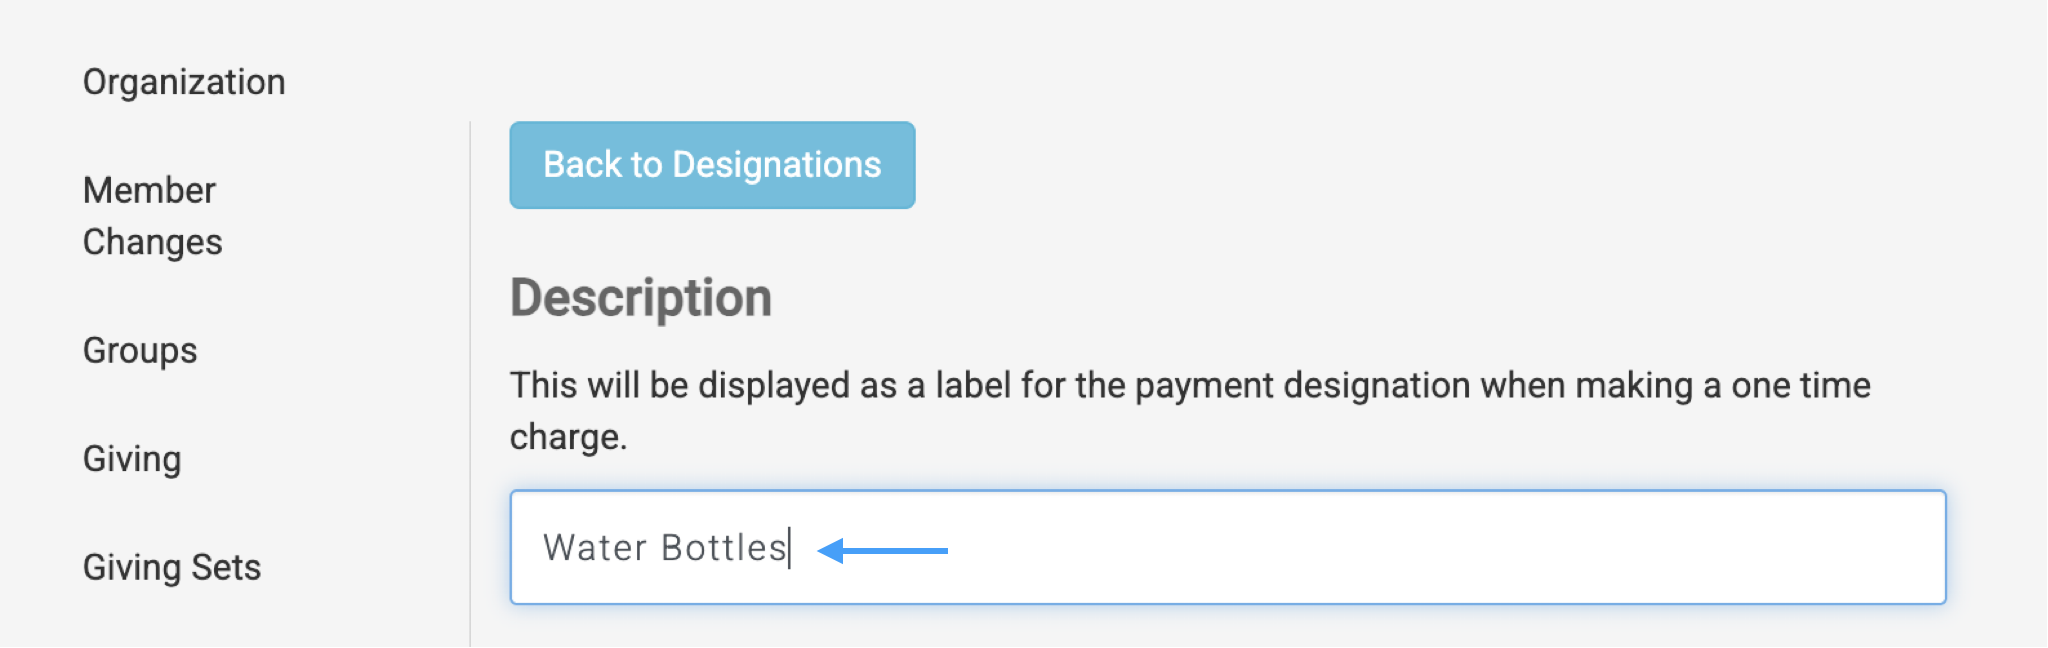
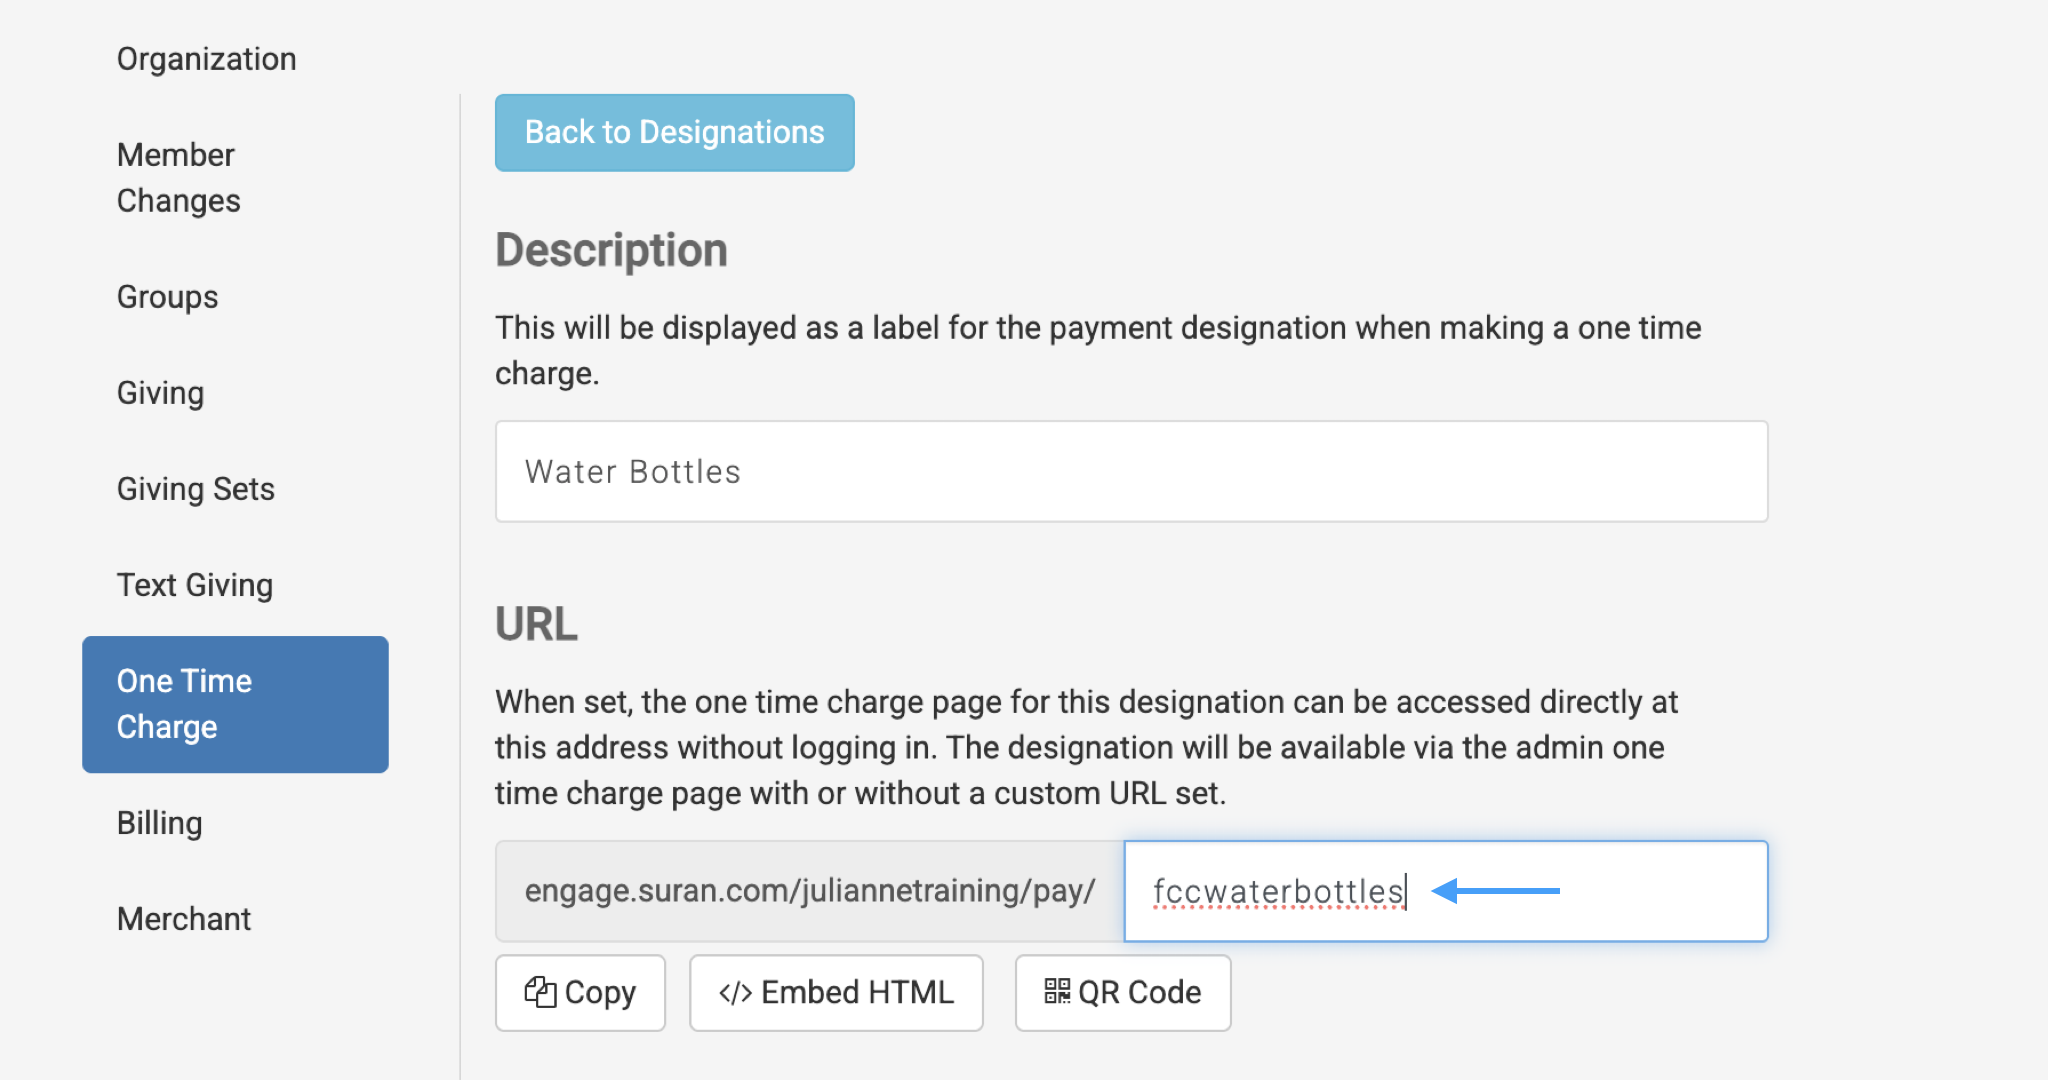
Enter a Name to identify the designation.
-
Enter a descriptive name in the URL field, making sure it does not include any spaces (e.g., 2022-spring-bake-sale).
-
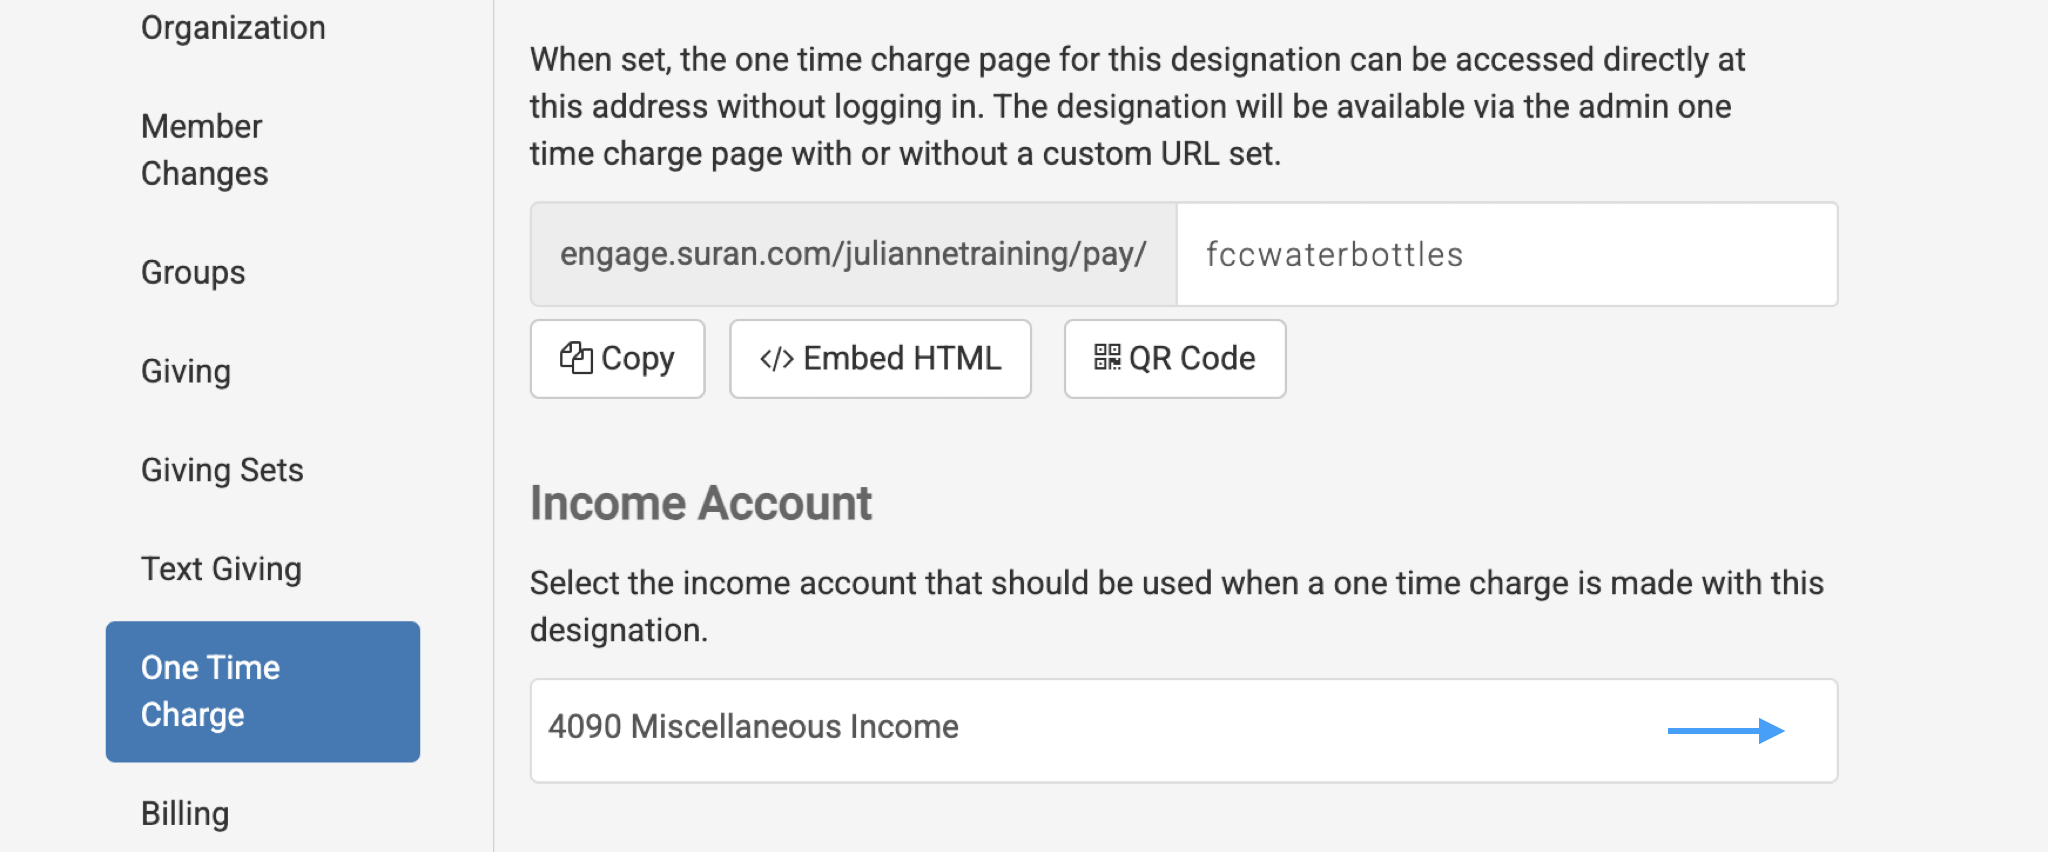
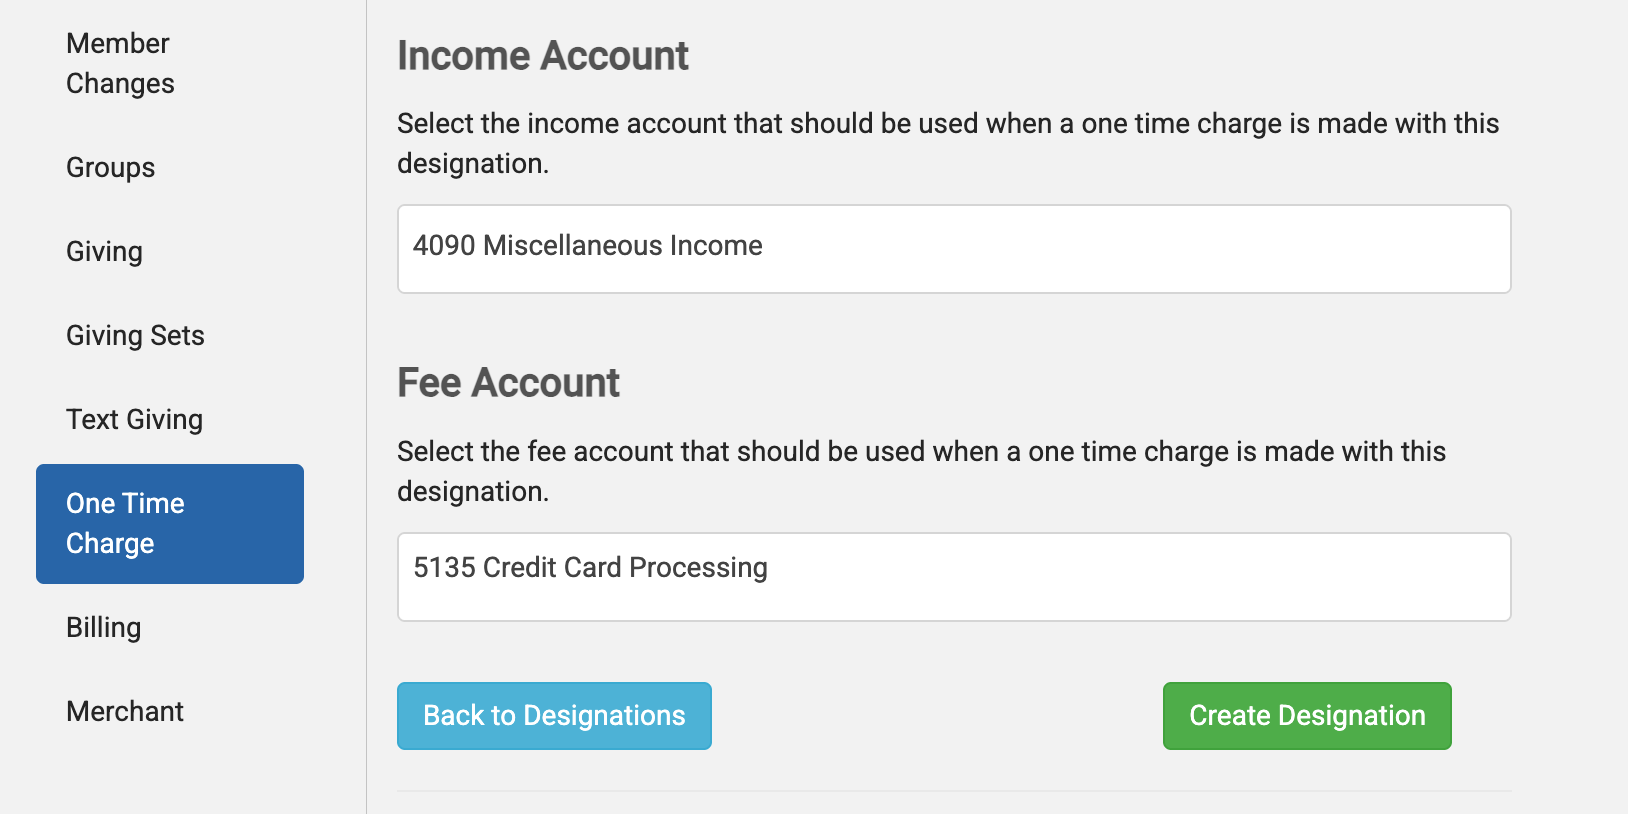
Select the Income Account, which specifies where the deposit will post again.
-
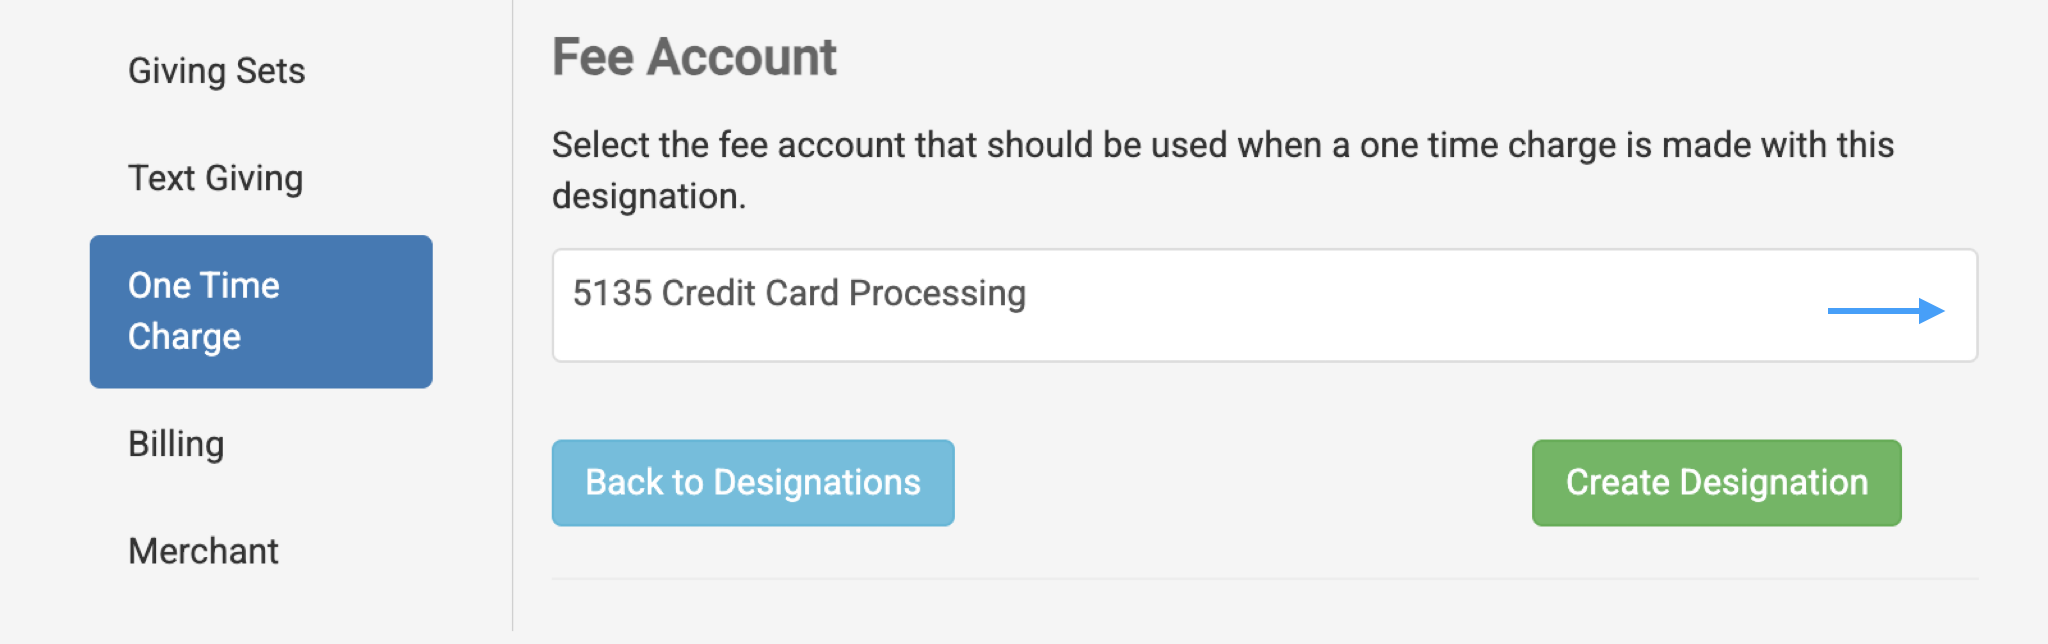
Select the Fee Account which is used for transaction fees for the payment.
-
Click Create Designation.
-
A pop-up will appear on the screen. Click OK.
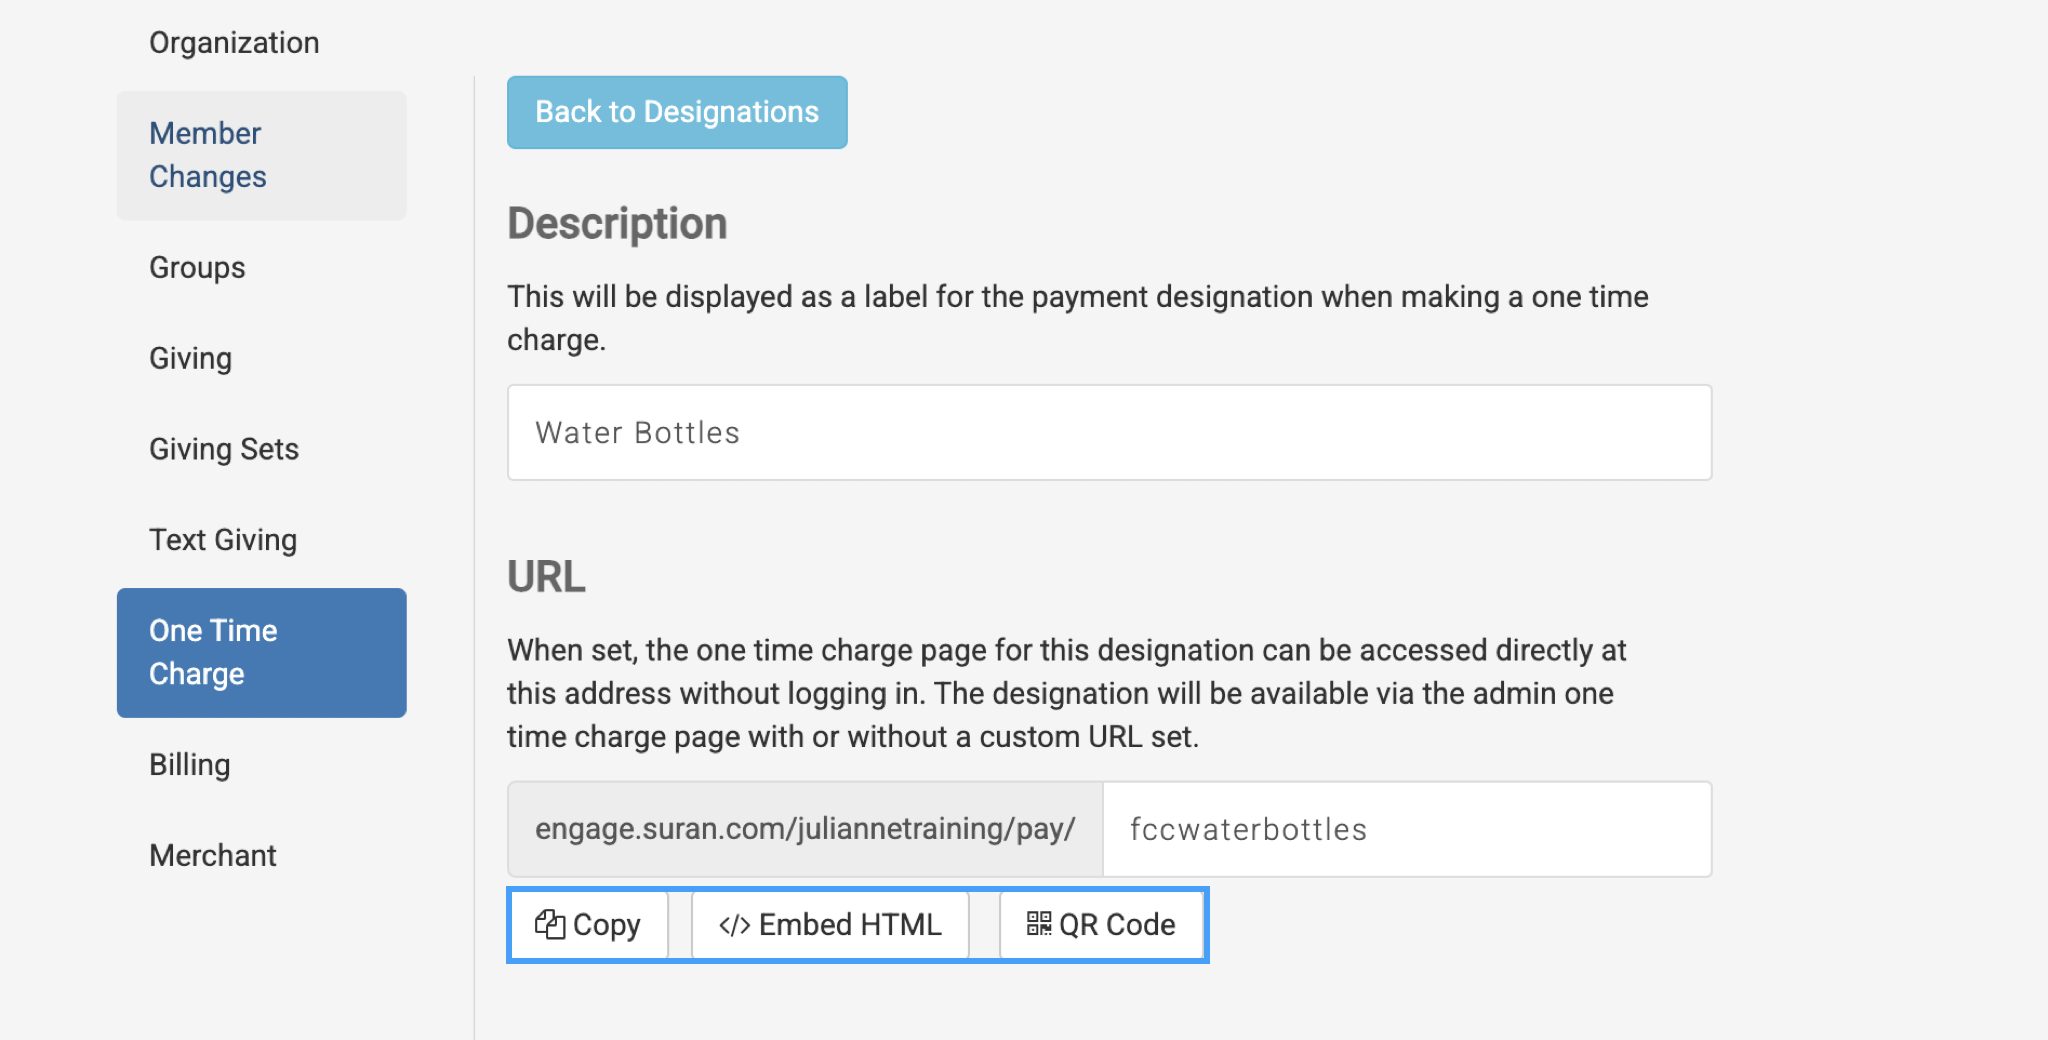
Sharing your One-Time Charge URL
To begin entering charges, or to share it with someone else, copy the URL and paste it into a web browser. You can also download a QR code to include on your website or event materials.
Card Swiping
This is not a secure card swiping designed to be run with a mobile device or stand-alone kiosk. The swiper simply enters card data in lieu of manually typing it in. Card swiping has the same security and functionality and typing in card information using the keyboard, and should be used in a staffed environment.
Any card swiper that offers keyboard emulation should work to accept a swipe. The following devices have been tested and processed swipes correctly:
Entering a One-Time Charge
-
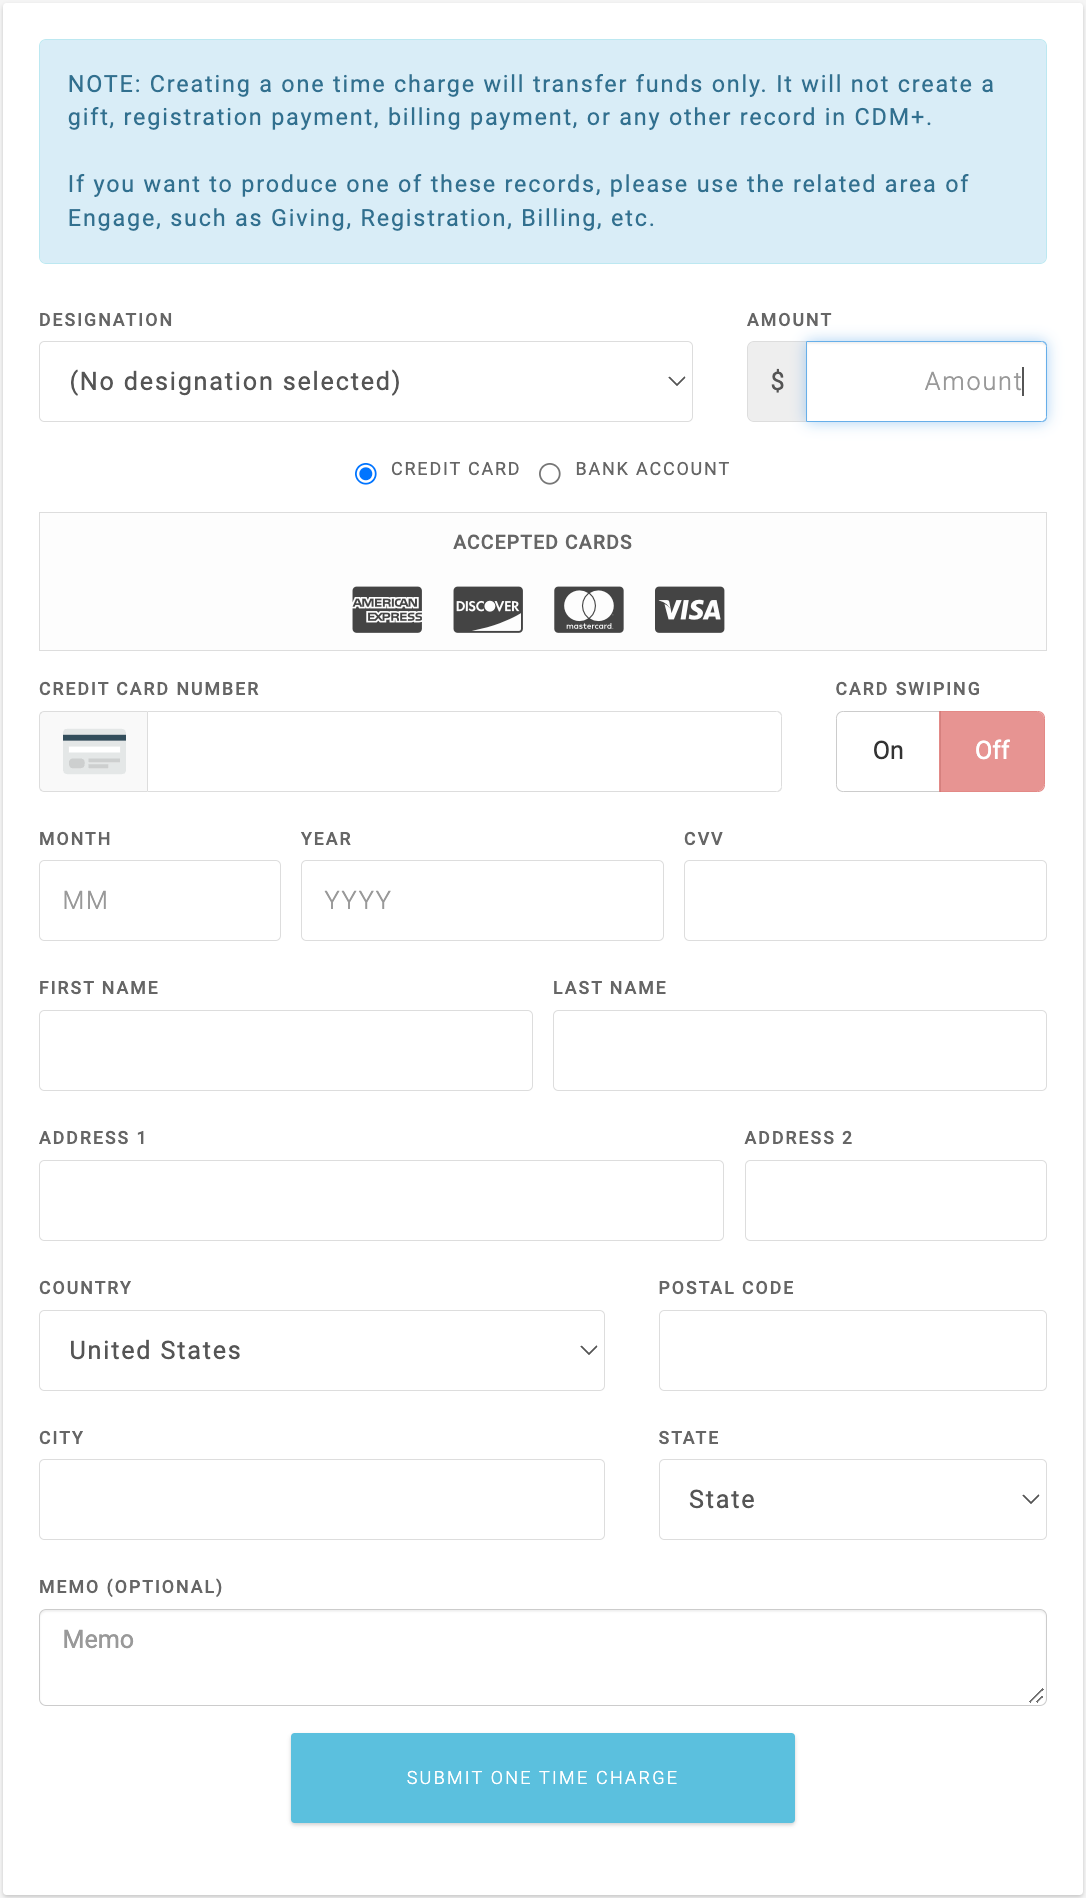
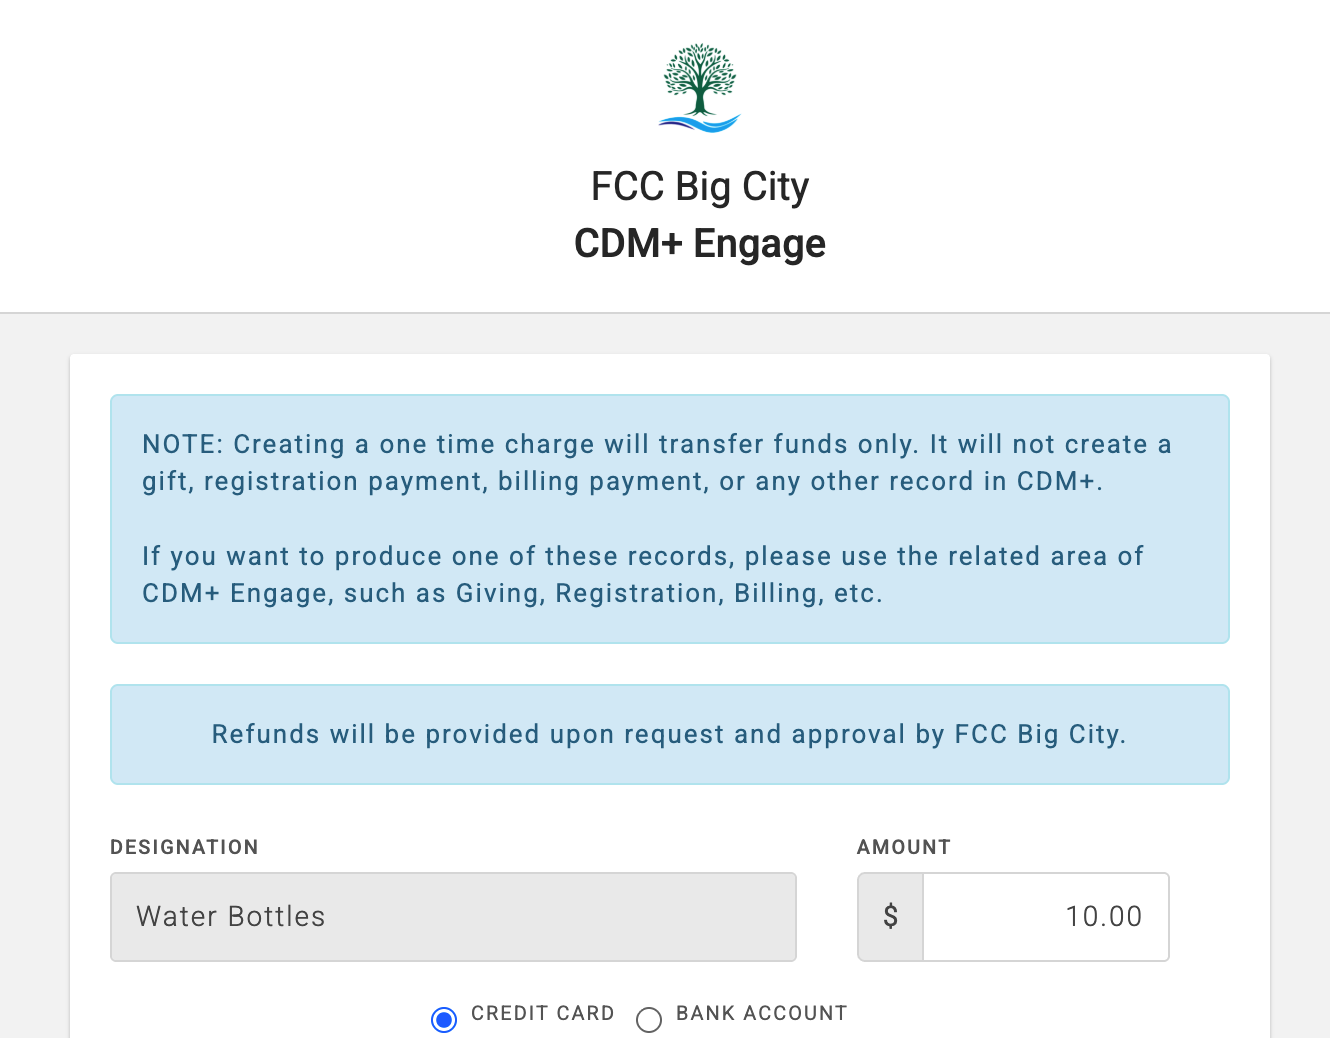
Using the Designation's URL or QR code will take you to the One-Time Charge window. Upon opening the One Time Charge window, Card Swiping will be turned off. It will turn on automatically when you swipe your card or begin typing the credit card number.
Card Swiper Status
-
If the Card Swiper is turned On, you will see a yellow banner.

-
When you put your cursor in the Credit Card Number field, the banner will turn green.

-
If you swipe a card while your cursor is in a field other than the Credit Card Number field, then the banner will turn red.

-
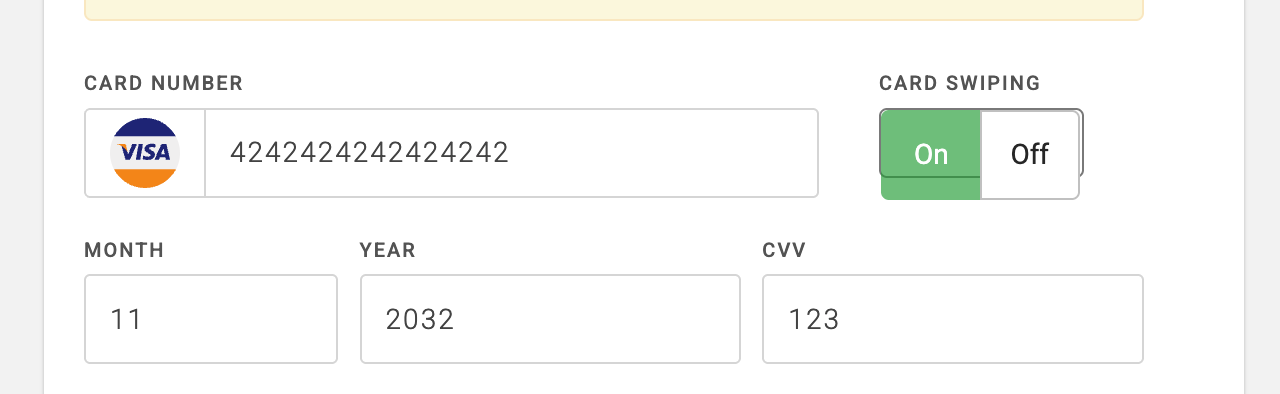
Enter the Amount and tab to go to the Credit Card Number field.
-
Once your in the Credit Card Number field, Card Swiping will be toggled to on. If you swipe the credit card, the credit card number, the card holders name, and the expiration date of the card will automatically be populated. Then, the cursor will move to the CVV field. Enter the CVV from the back of the credit card.
-
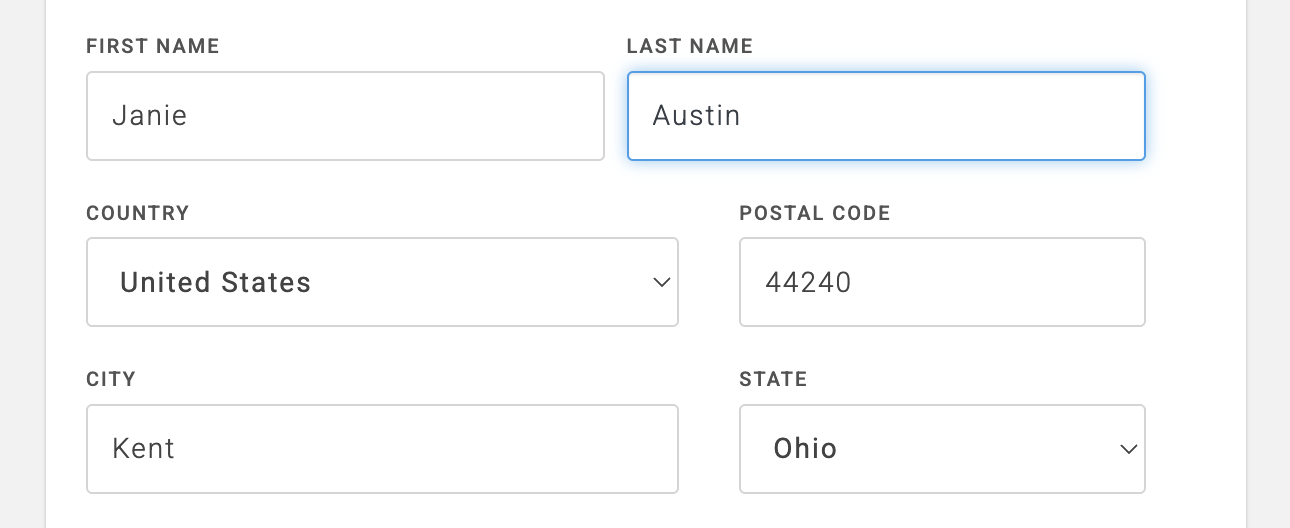
Enter the user’s first and last name. Then, enter their address. If you enter the postal code the city and state will automatically fill in.
-
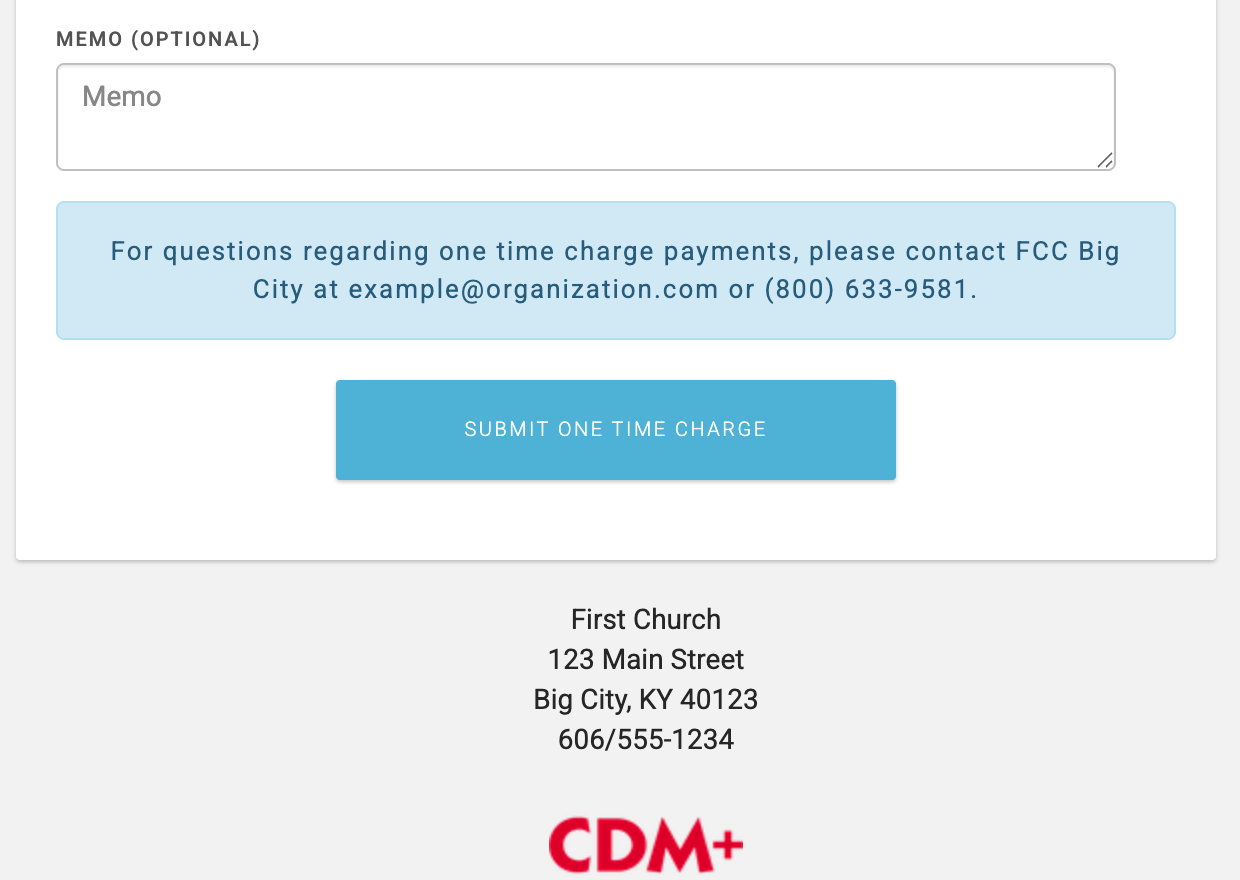
Enter a memo if desired, and then click Submit One Time Charge.
-
A confirmation page will appear. Click Submit Another One Time Charge to return to the first screen so you can make another one-time credit card charge.

Administrator Functions
If you are an administrator, you can access One Time Charge directly and do not need a URL or QR Code. You also do not need a designation to perform a one-time charge.
-
Under the navigation menu, click One Time Charge under Admin.
-
The One Time Charge window will open, but instead of having a pre-selected Designation, you as the administrator, have the ability to select which Designation you want, and can switch between them as needed. Every time you finish entering a One-Time Charge, you will return to this window with no pre-selected Designation. This is especially helpful if you have two events going on at the same time.
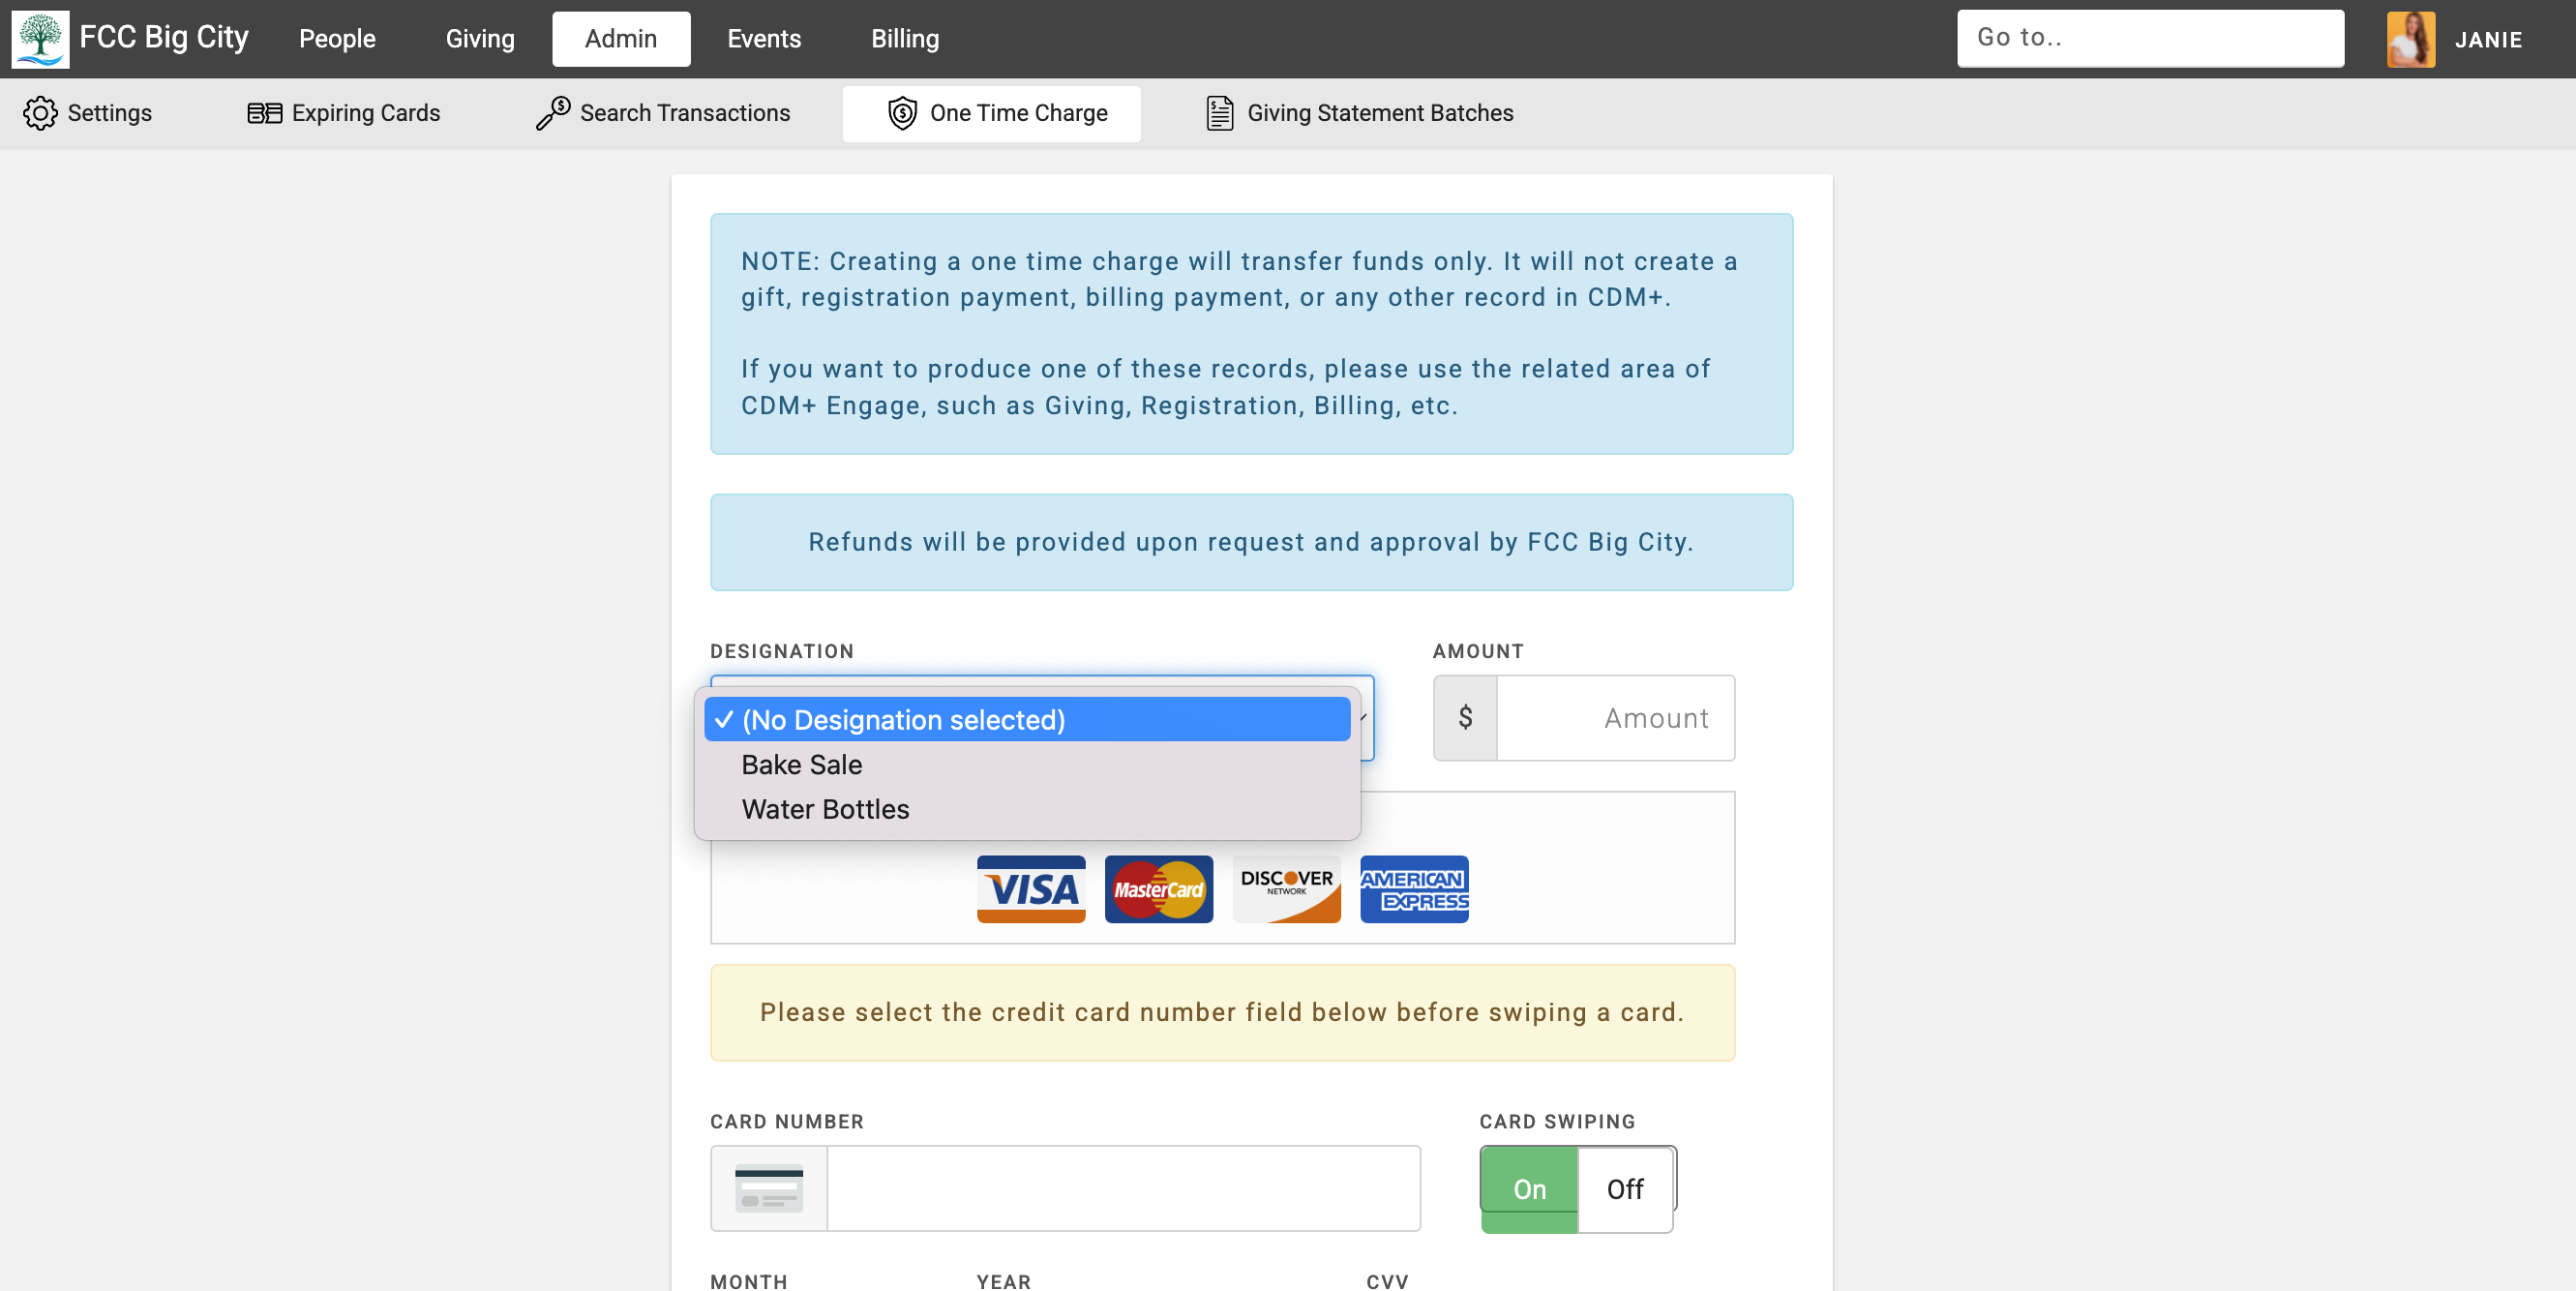
If you enter a One-Time Charge as (No designation selected), income and fee accounts will need to be selected in Deposit Processing.