
-
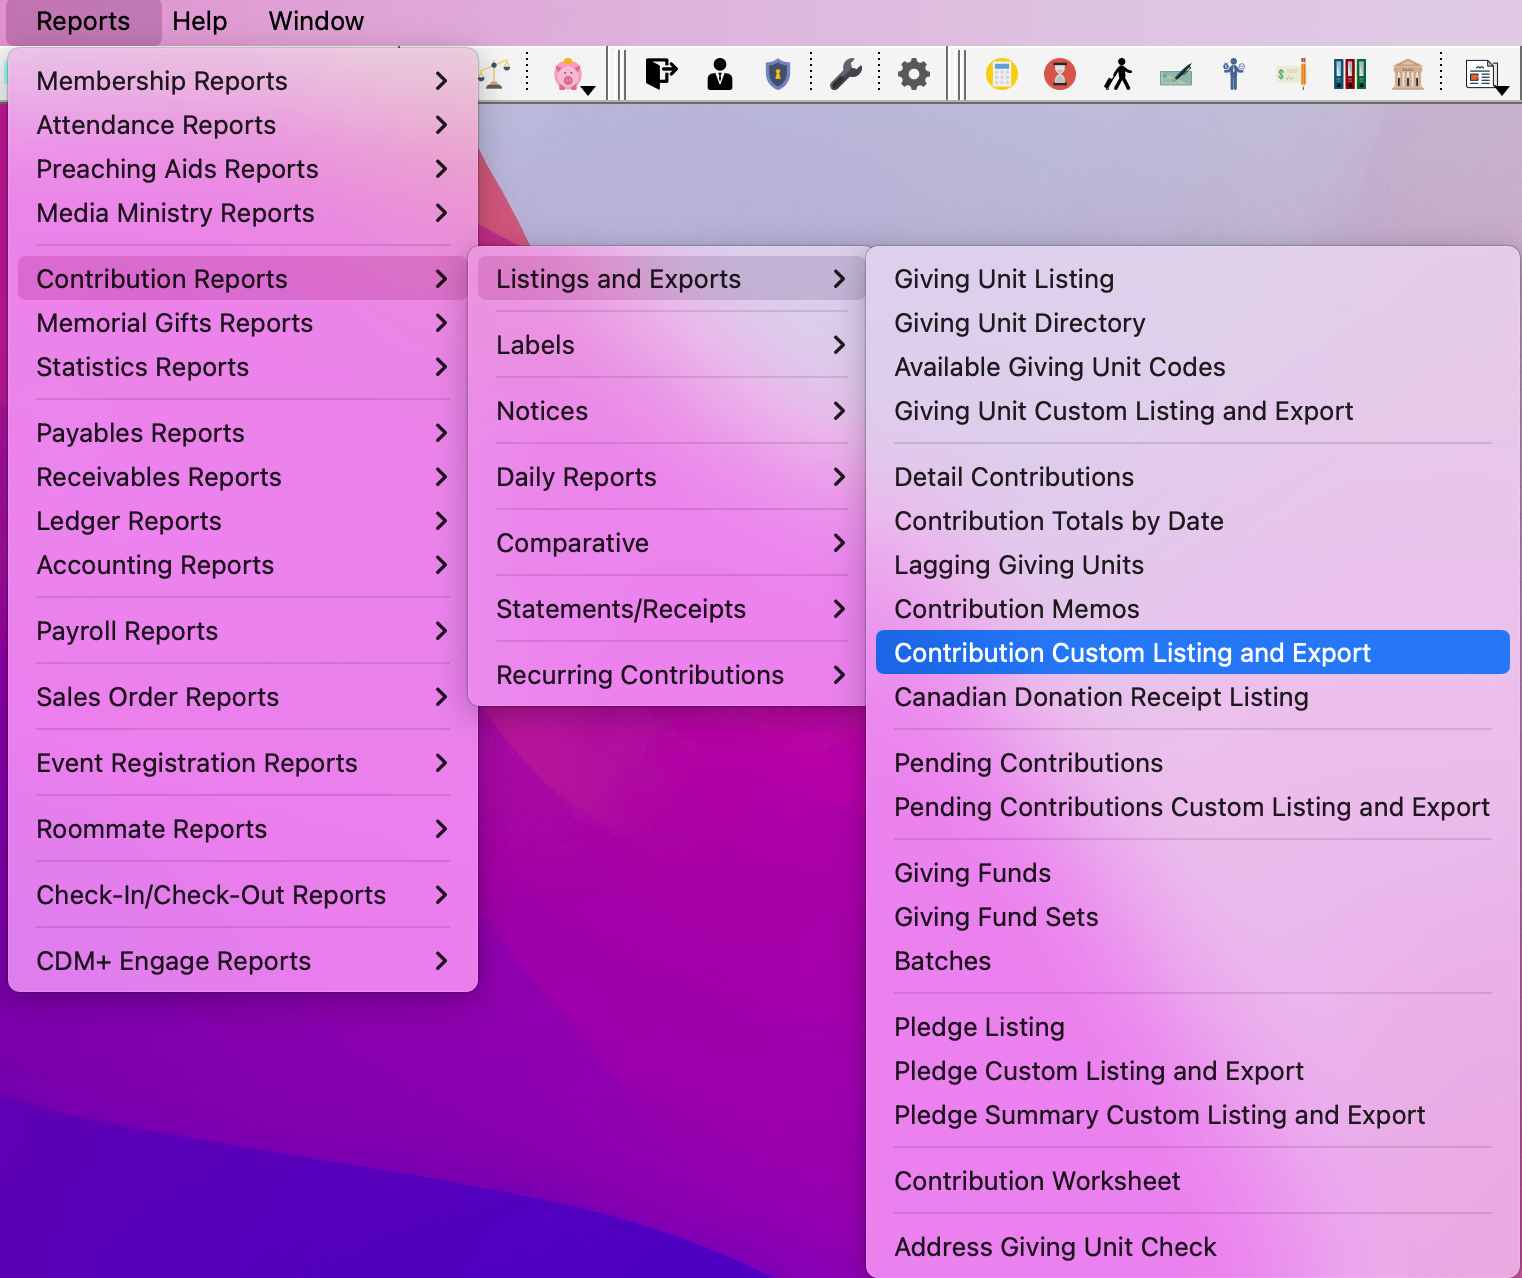
Go to Reports → Contribution Reports → Listing and Exports → Contribution Custom Listing and Export.
-
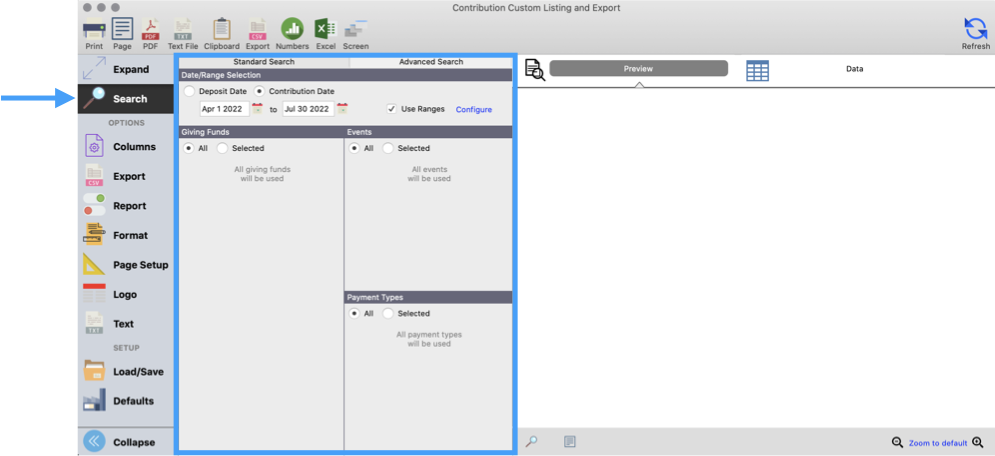
On the Search tab, narrow the criteria to be shown on the report by Date/Range, Giving Funds, Events, and Payment Types.
-
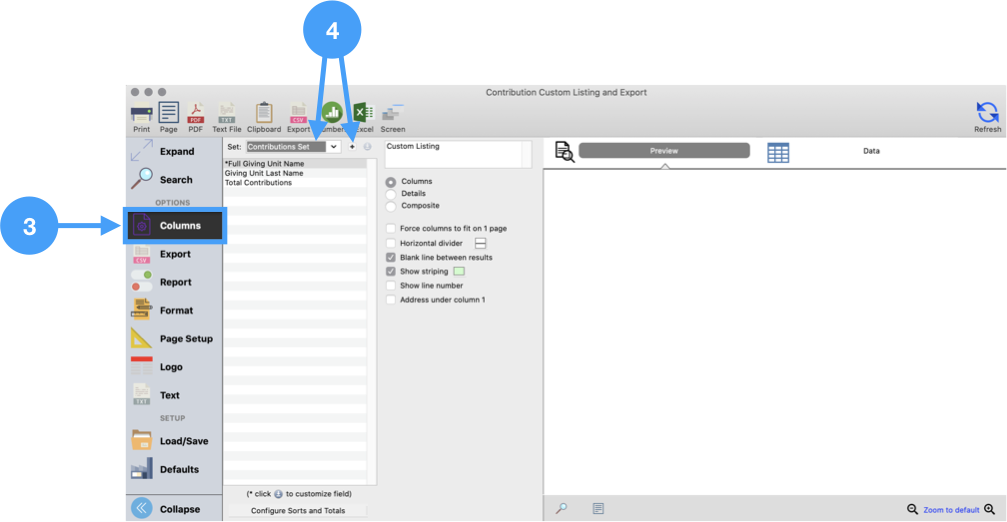
Go to the Columns tab
-
Select the Set from the dropdown menu, or click the plus sign to create a new Set.
-
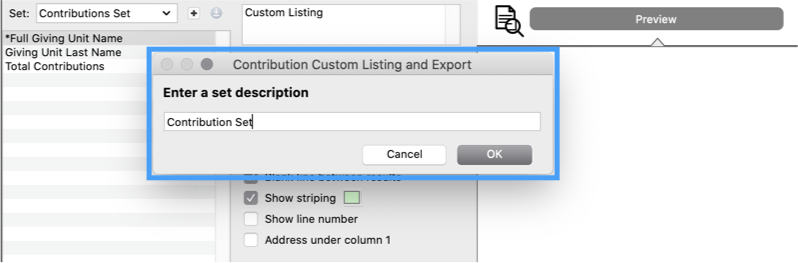
When creating a new Set, a popup window will appear. Enter the name of the new Set.
-
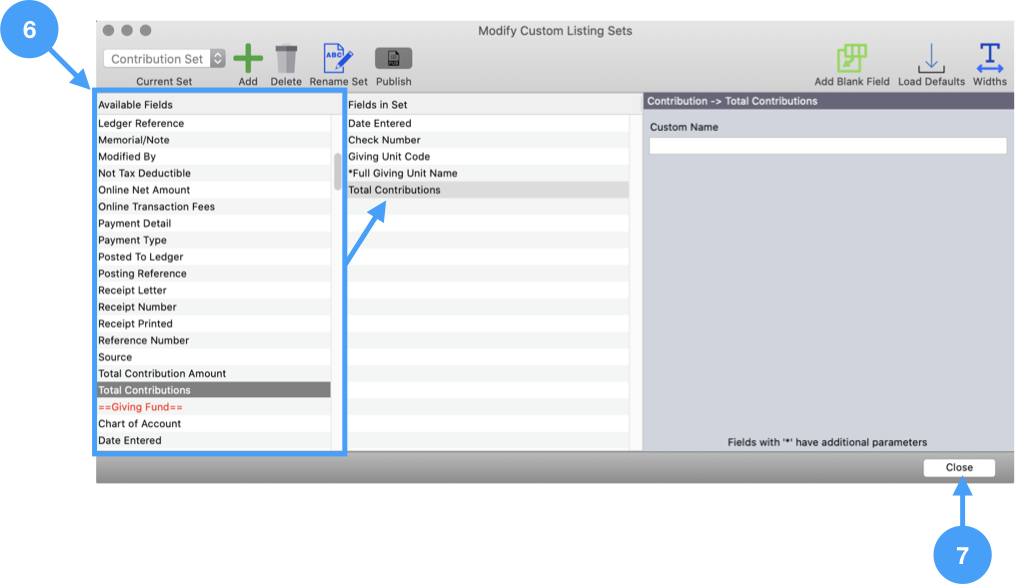
After naming the Set, the Modify Custom Listing Sets window will open. Drag and drop Fields from Available Fields to Fields in Set.
-
Click Close to return to the Report window. The Set Fields save automatically.
-
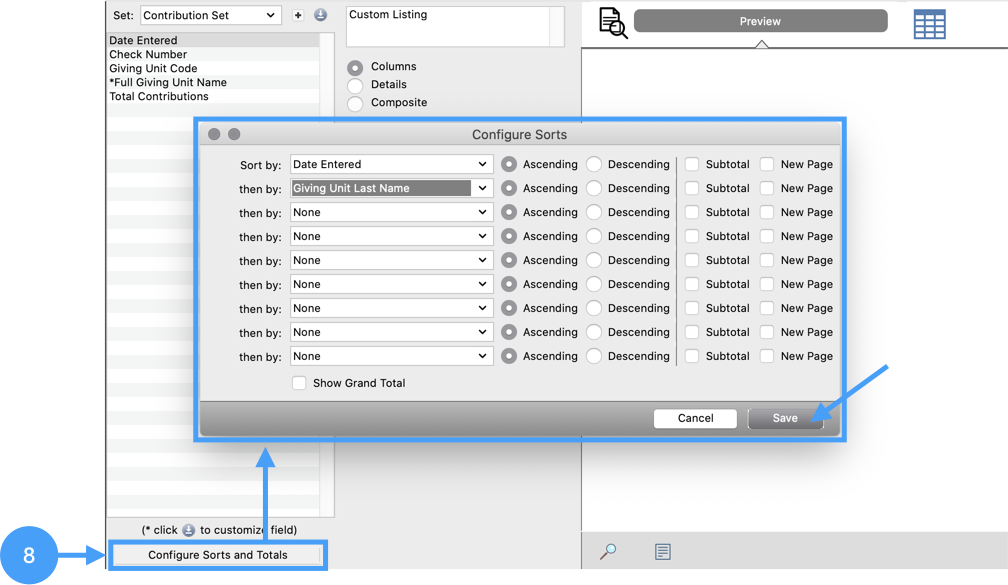
At the bottom of the report window, click Configure Sorts and Totals. This window allows you to select as many different sorts as you like. The report can also be set to subtotal by a specific sort and have the sort start a new page. So, select how you want the results to be sorted on the report using the dropdown menu and other buttons. Click Save when finished.
-
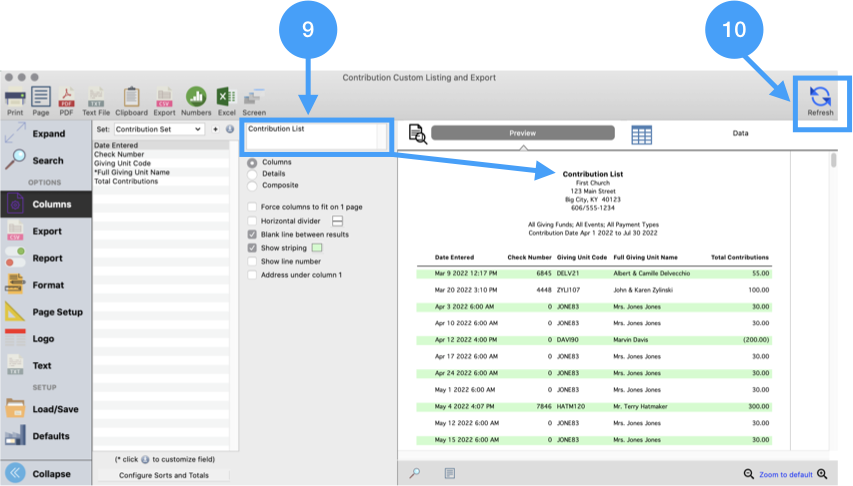
Near the top of the report window, there is a text box where you can change the name for the report. The default name is 'Custom Listing.' You can enter any name for this report for example we changed it to Contribution List.
-
Click Refresh in the top right corner. The results of the report will appear, including the new name at the top of the report.
For more information on basic formatting for Custom Listing and Exports, click here.