-
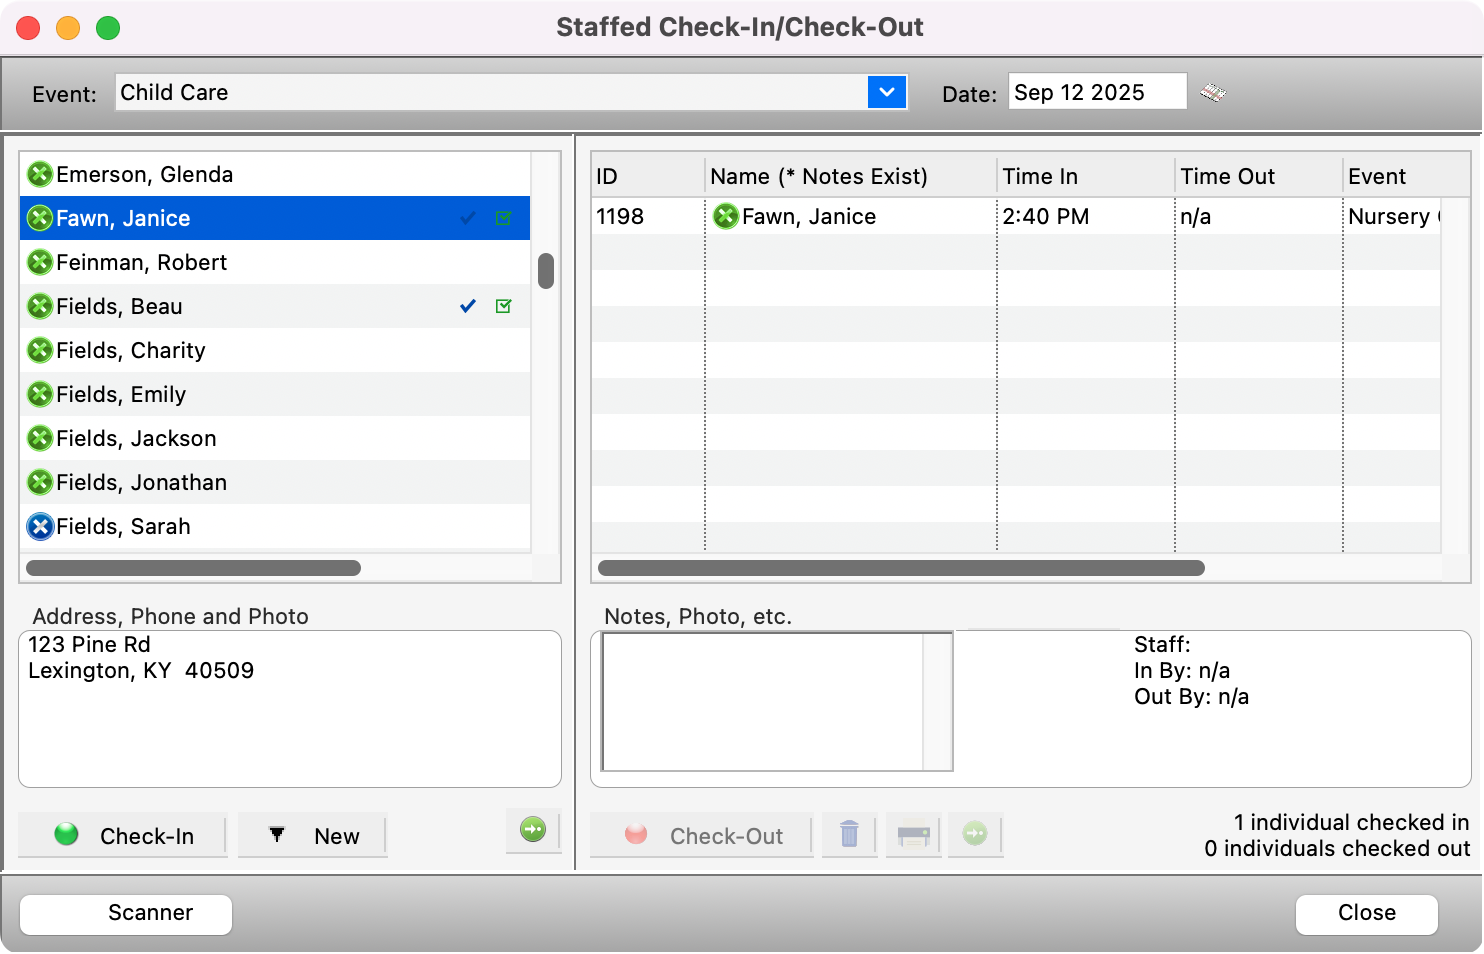
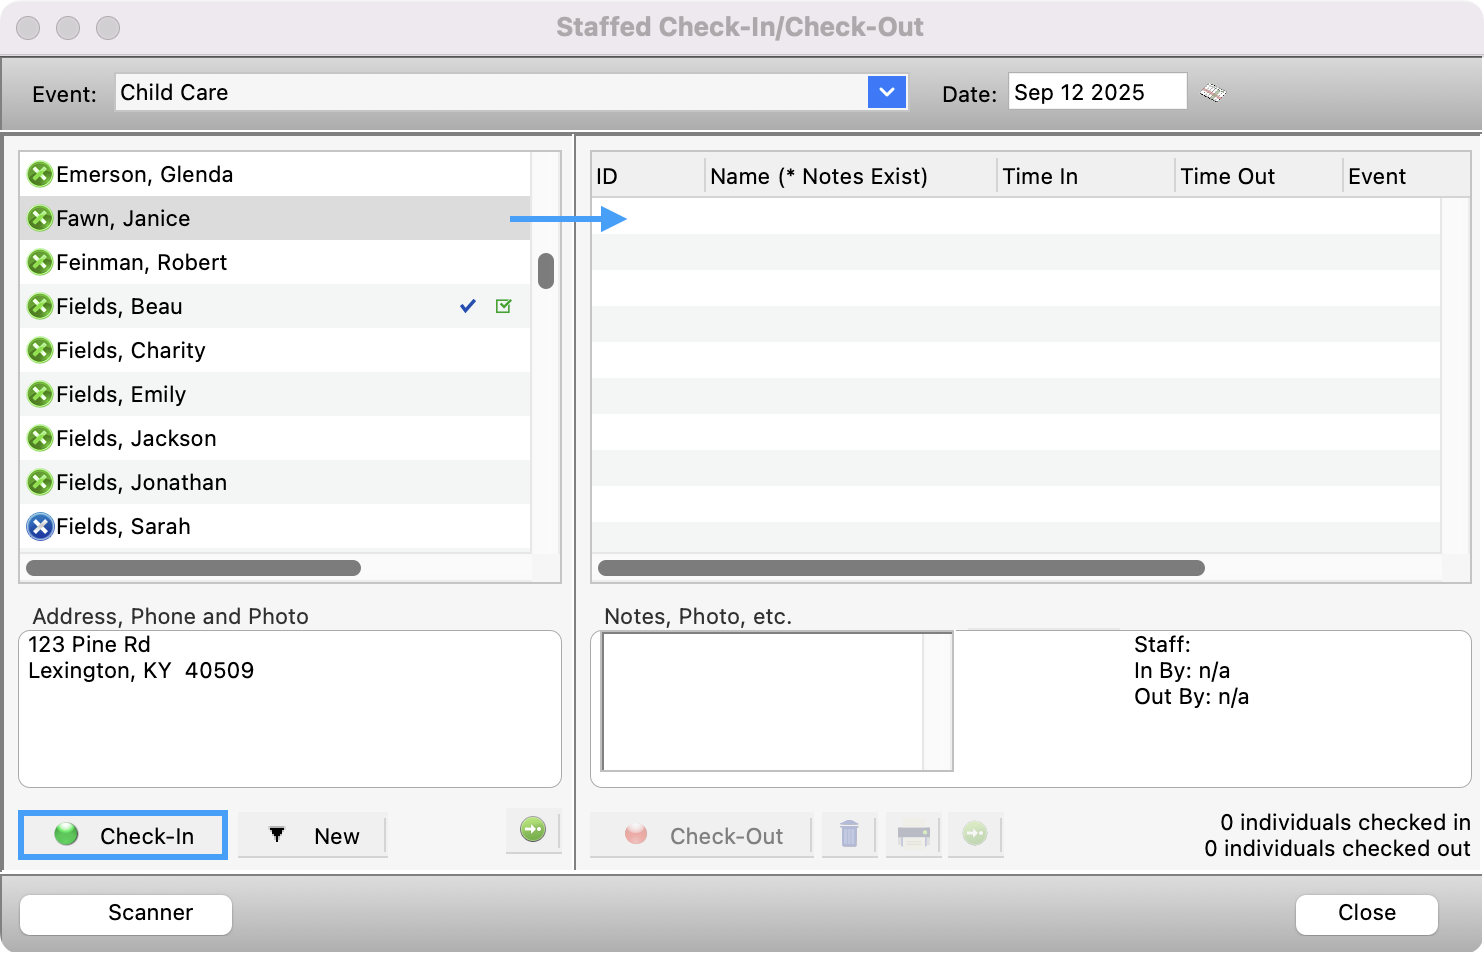
There are several ways to initiate a check-in for an individual.
-
Find and highlight the person’s name on the individuals list and double click it.
-
Find and highlight the person’s name on the individuals list and press the return or enter key.
-
Find and highlight the person’s name on the individuals list and click the Check-In button on the bottom of the window.
-
Find and highlight the person’s name on the individuals list and drag it to the people already checked in list on the right.
-
Scan the individual’s or address’s barcode for the individual. For more information on integrating barcodes and barcode scanners into Check-In/Check-Out, please read Scanning.
-
-
The Check-In Options window will open automatically after performing one of the above functions.
Depending on what criteria you set up in Check-In/Check-Out Records, this may or may not be the first screen you see. If it is, continue reading. If not, please skip to the next section.
-
There are three kinds of notes that will appear:
-
Events Notes: Notes entered on the Notes tab on the Check-In/Check-Out Event Records window (specifically, the notes typed in the “notes to display during check-in” column). These notes appear each time a person is checked into the event.
-
Individual Notes: Notes entered on the Preferences tab under the Check-In tab on each individual record. These notes will appear every time this individual is checked in to any event.
-
Other Notes: Notes about other people that appear on the individual’s record (Authorization tab under the Check-In tab). These notes appear next to the names of each individual on the Authorization tab and is a good place to add information about who is and is not allowed to check this individual in or out.
Once you have reviewed all notes on this page, click Next.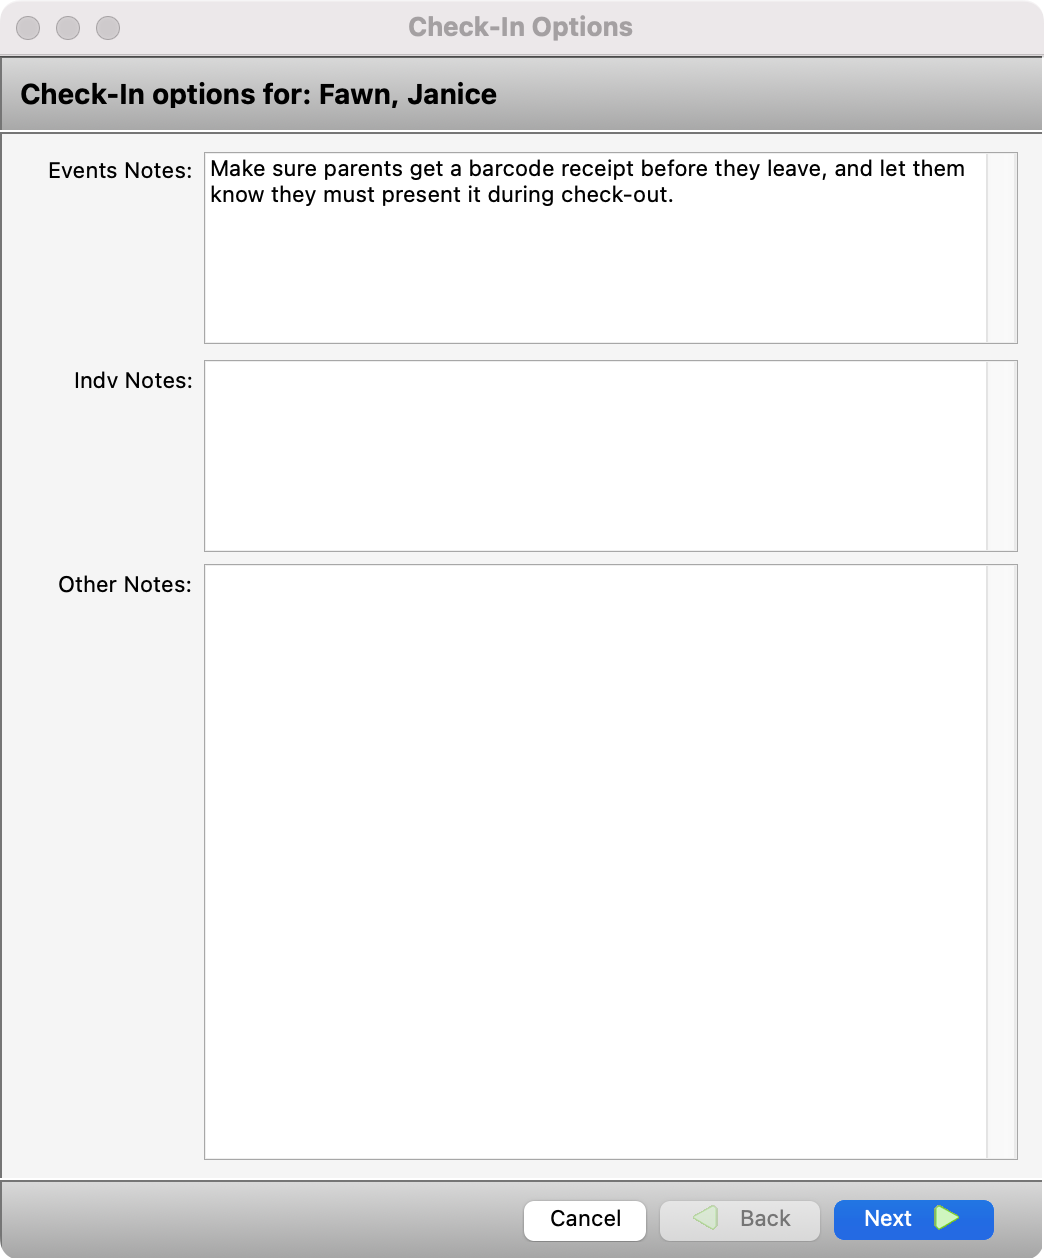
-
Check-In Options
-
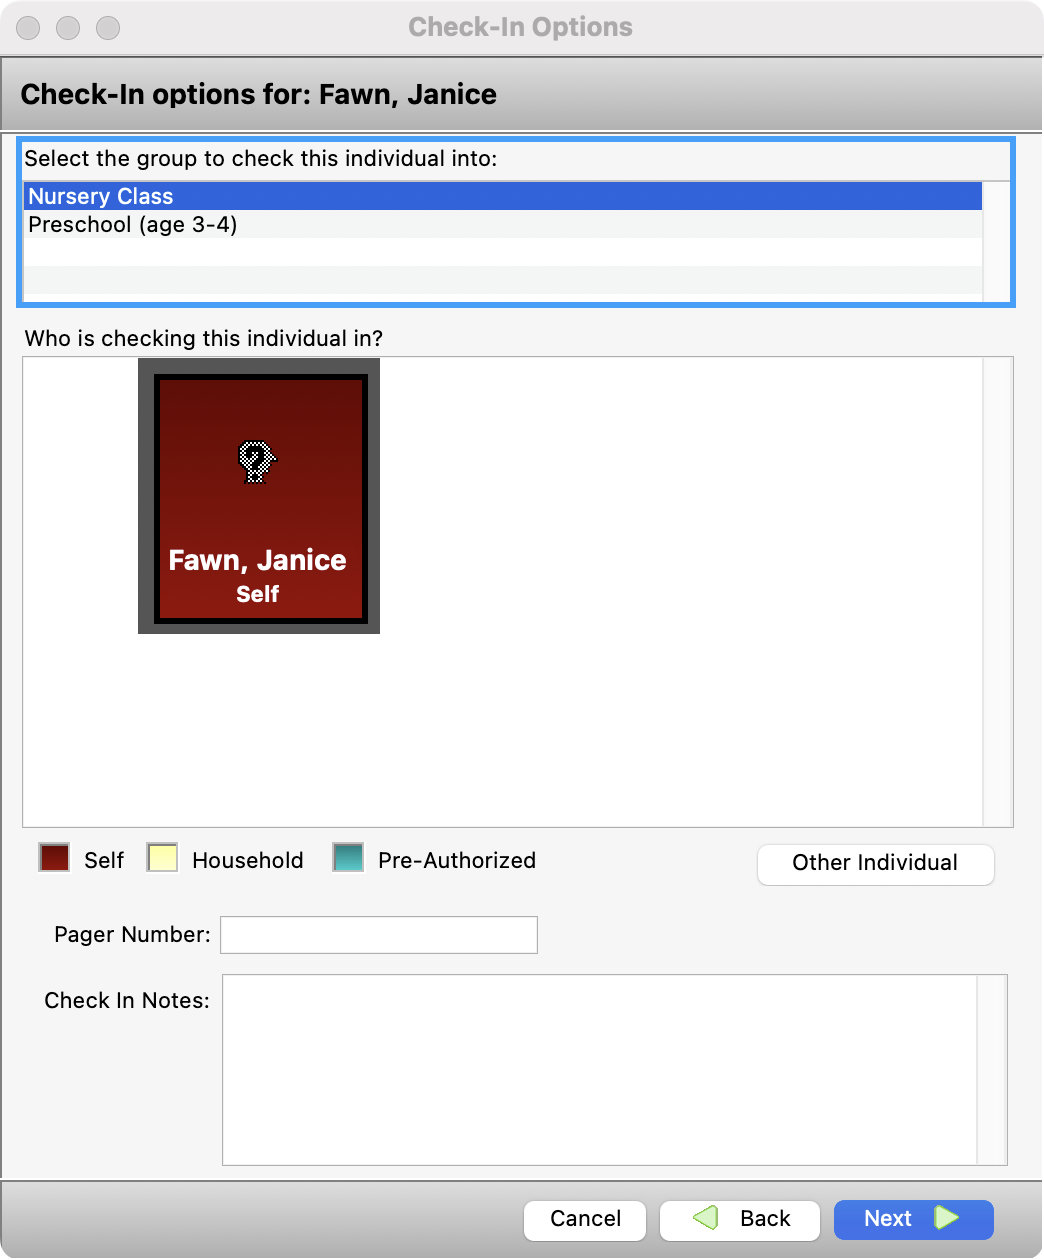
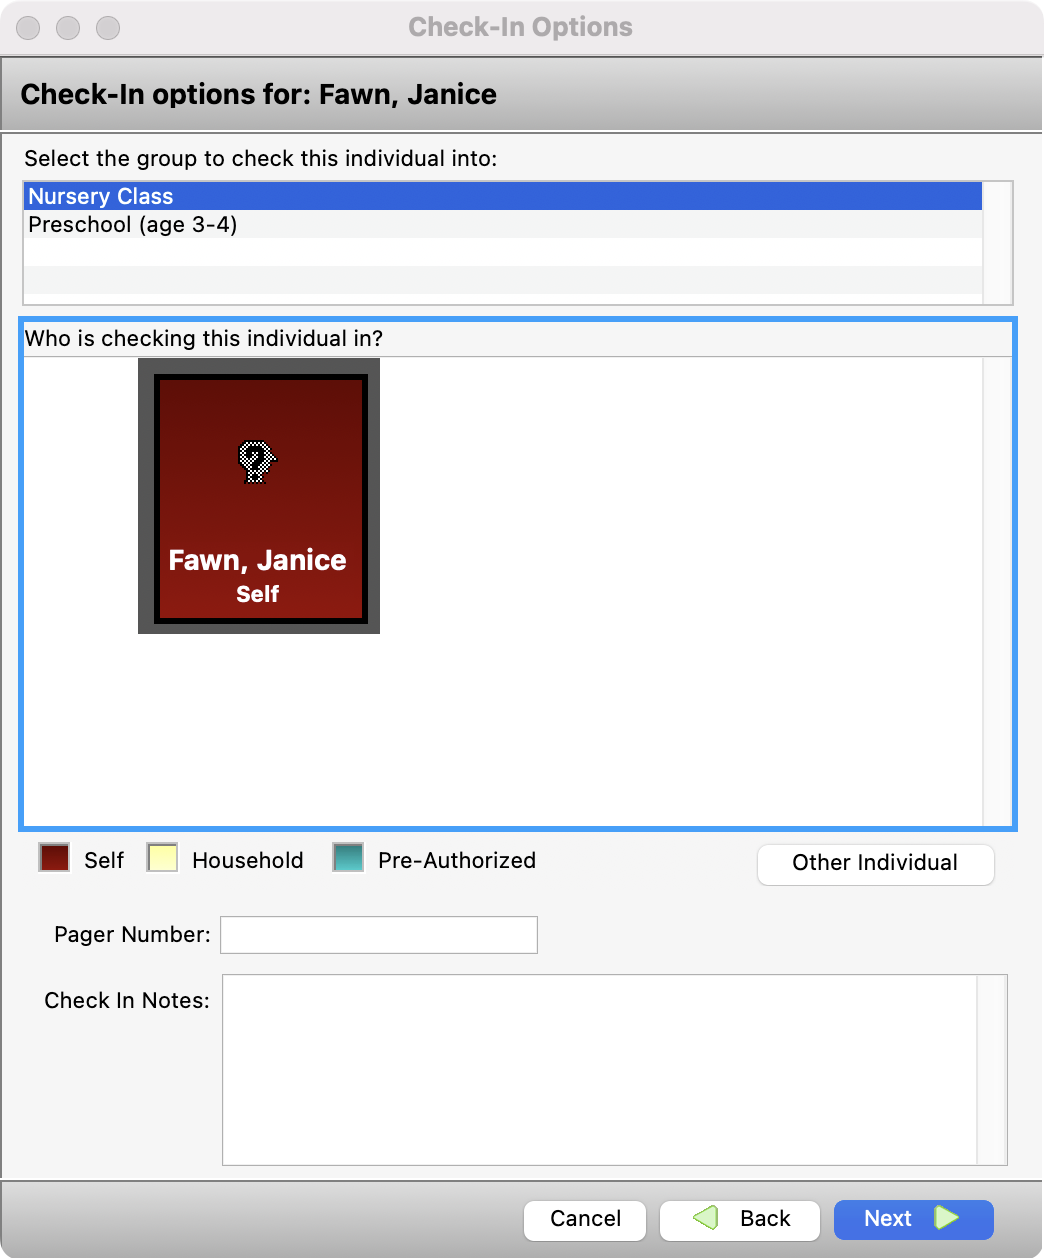
Select the group or class you want to check the individual into. If you have pre-selected the group for this event, that part of the window will not show.
-
Select from the list of colored boxes the person who is checking in the individual. The name and picture in red will match the name of the individual, and will be automatically checked.
-
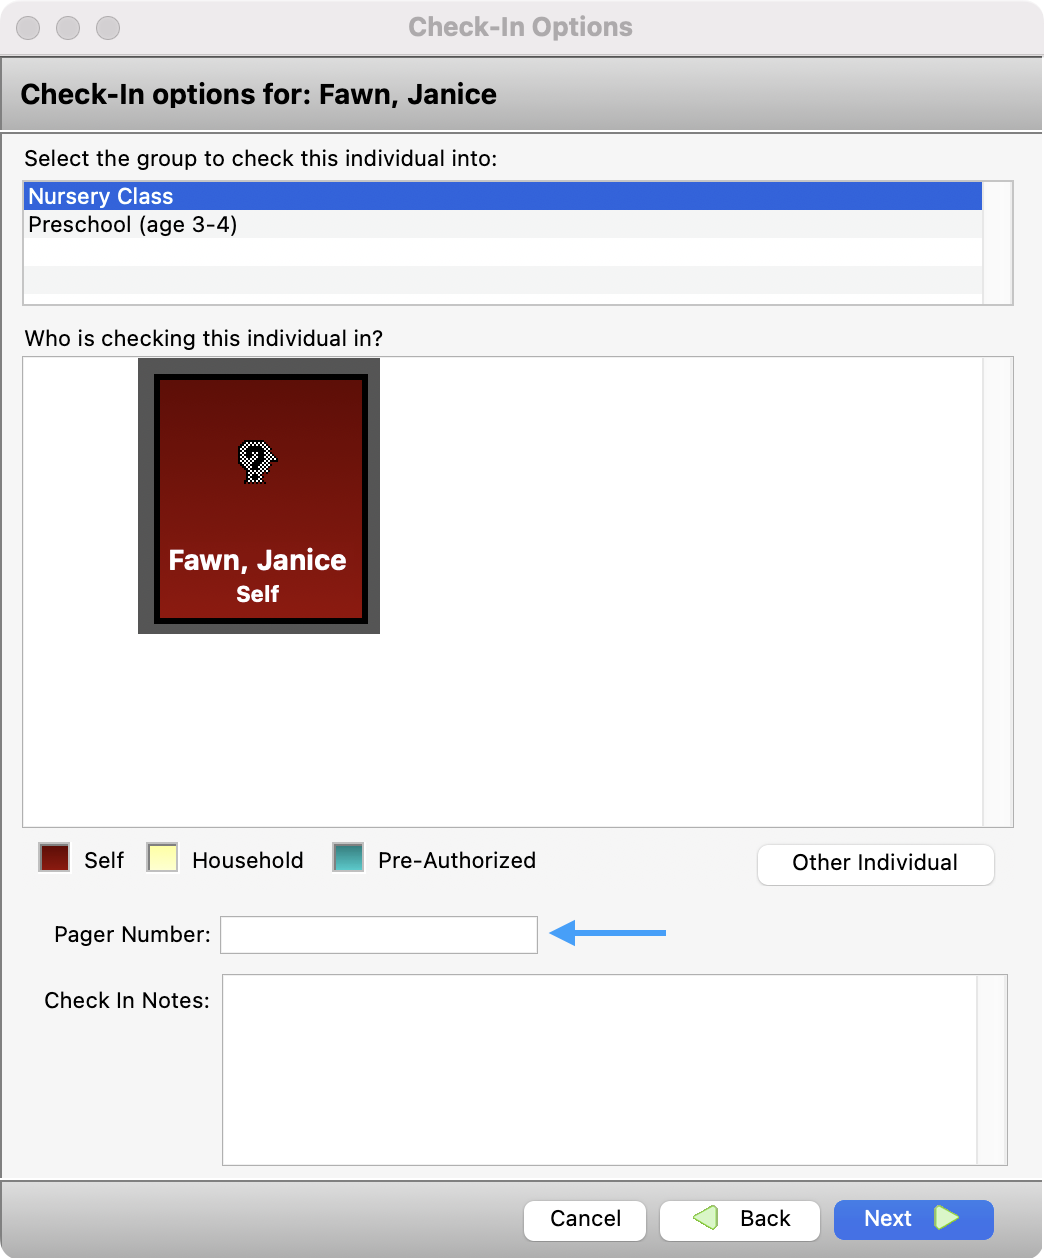
If you are using a pager system for parents/guardians, you can enter the pager number in the space provided. This field can hold up to 200 characters, so you could use it for cell phone numbers or other contact information instead.
-
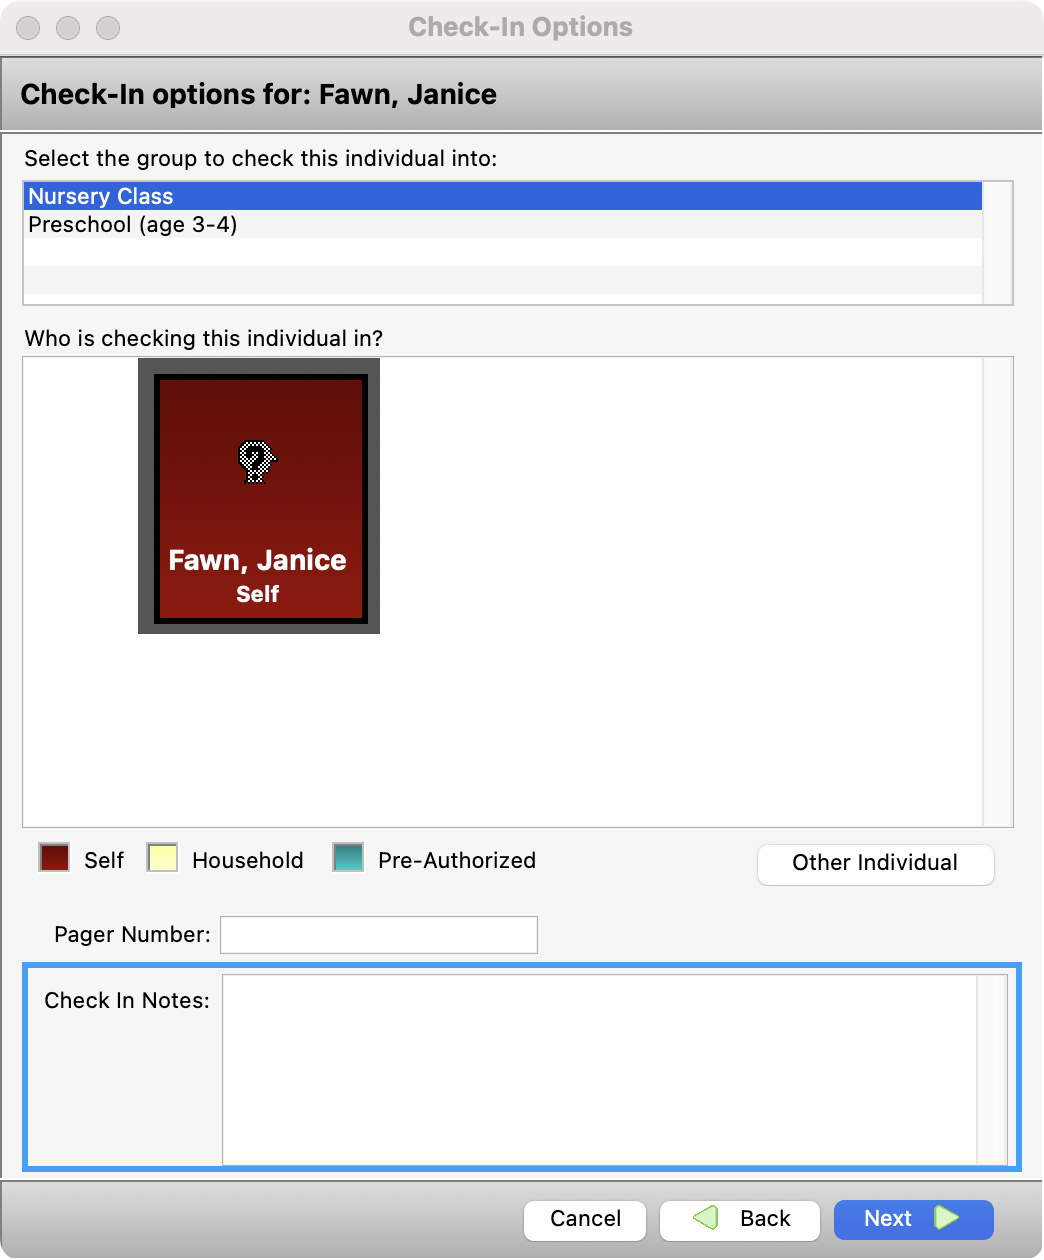
Enter any necessary check-in notes. These notes will be available for staff during this event only. To view them after check-in, highlight the individual’s name on the list on the right of the Staffed Check-In/Check-Out, window and the notes will appear in the box below the list. An asterisk will appear next to the individual’s name after check-in to alert staff that notes were entered here.
-
If you have set up Validation fields , click Next and complete the validation pages. If not, click Finished to complete Check-In.
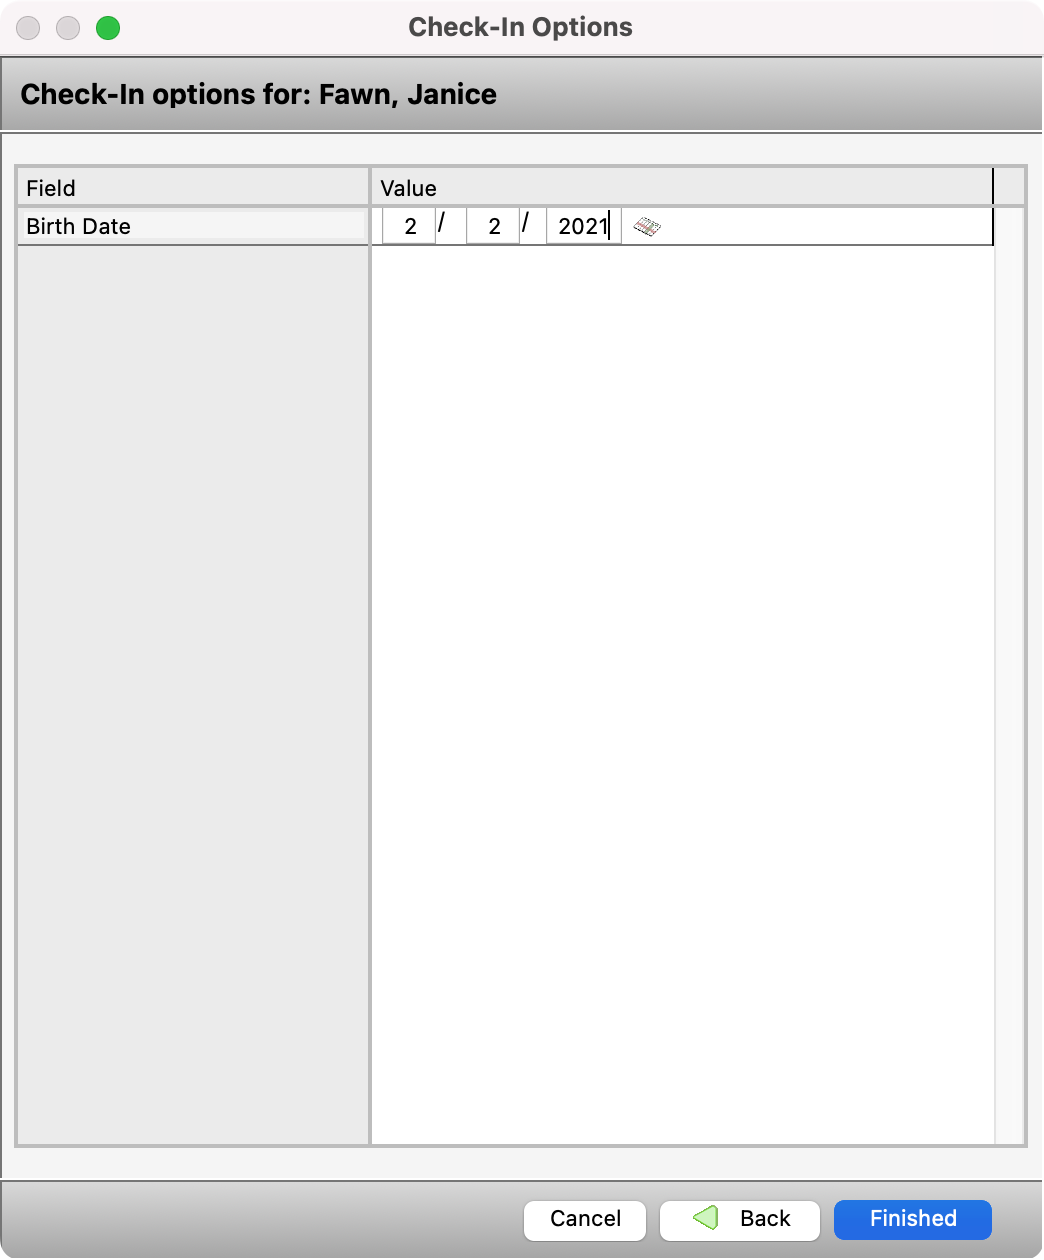
If you have set up Validation Fields, the next screen you see will ask you to validate those fields. For example, individual’s email address. If the individual record already has an email address listed, it will appear under the Value column. If not, this space will be empty. Verify the existing address or enter a new one to update the individual’s record. After you have verified all fields listed here, click Finished.
-
The individual is now checked into the event. If automatic report printing for name badges or receipts has been set up in the Event Records window prior to check-in, those reports will print automatically immediately following each check-in.