
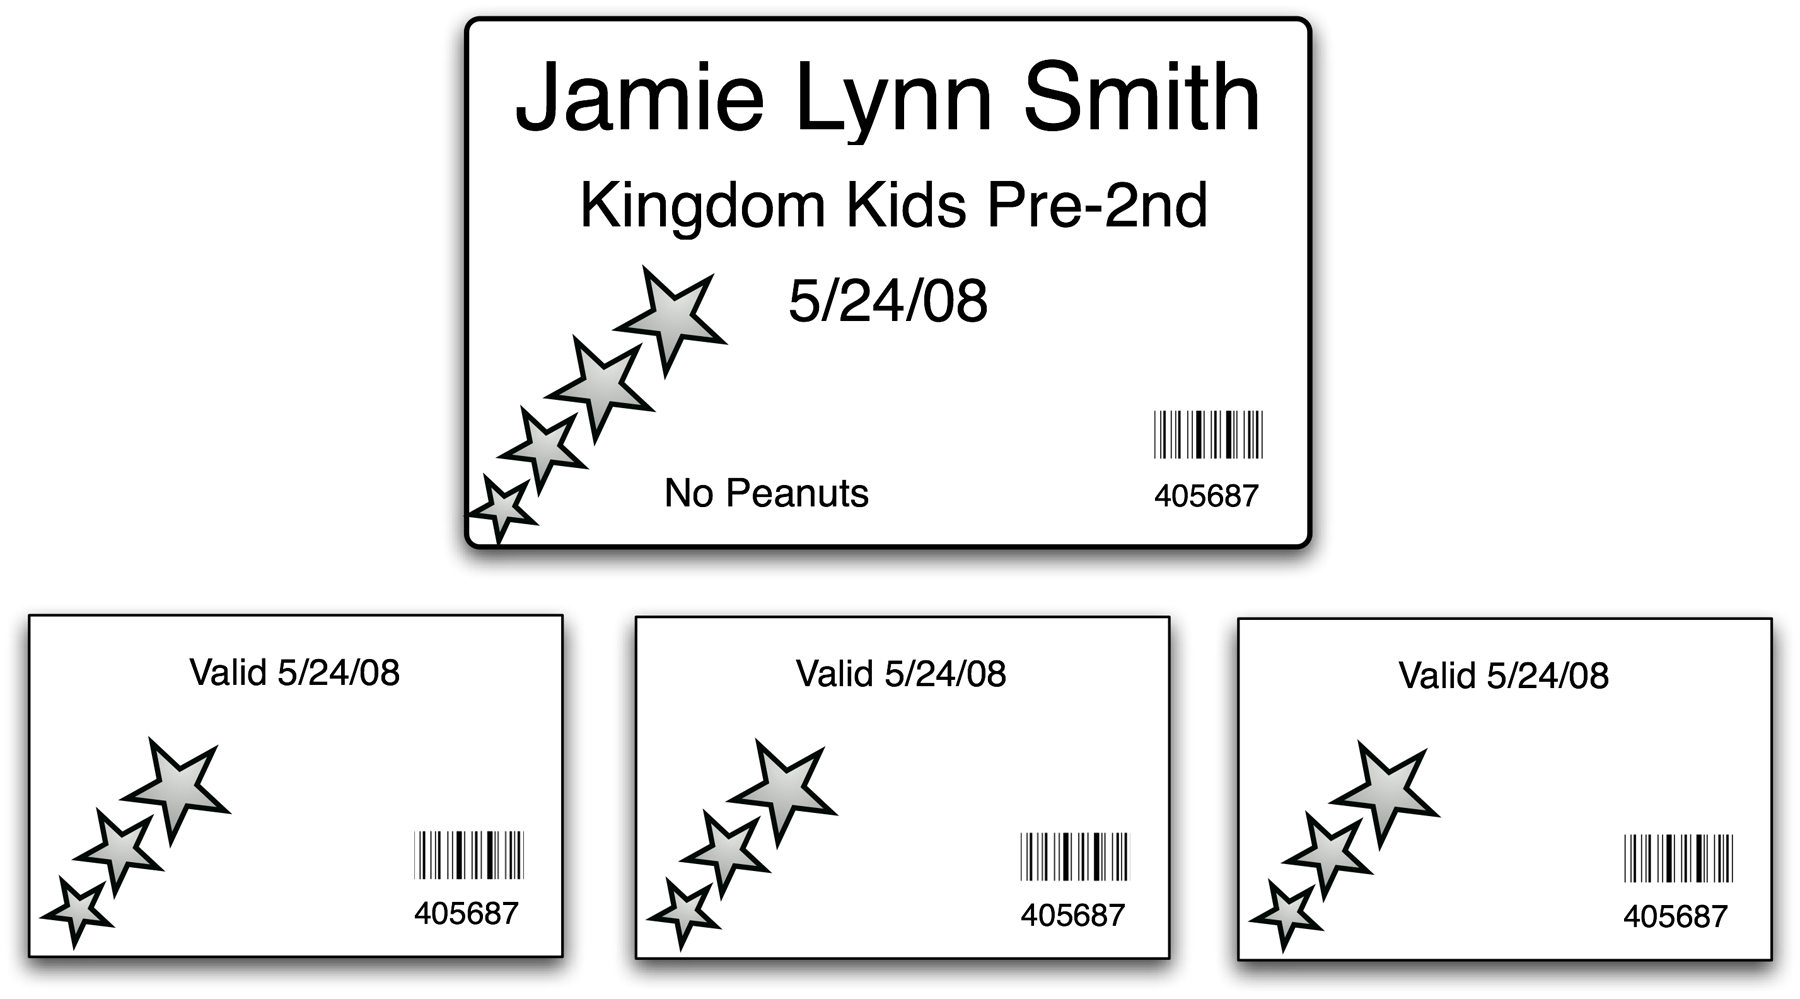
At the end of check-in, CDM+ Check-In/Check-Out can produce any number of reports (name badges, receipts, labels, etc.) to any printer connected to the check-in workstation. The most common Check-In Reports you will use fall into two categories: Name Badges and Check-Out Receipts. The Check-In Reports tab on the Check-In/Check-Out Event Records window has the tools you need to set up a new report or to modify or delete an existing report. This screen also includes a default printer setting option.
Check-In Reports should not be confused with Check-In/Check-Out Reports.
-
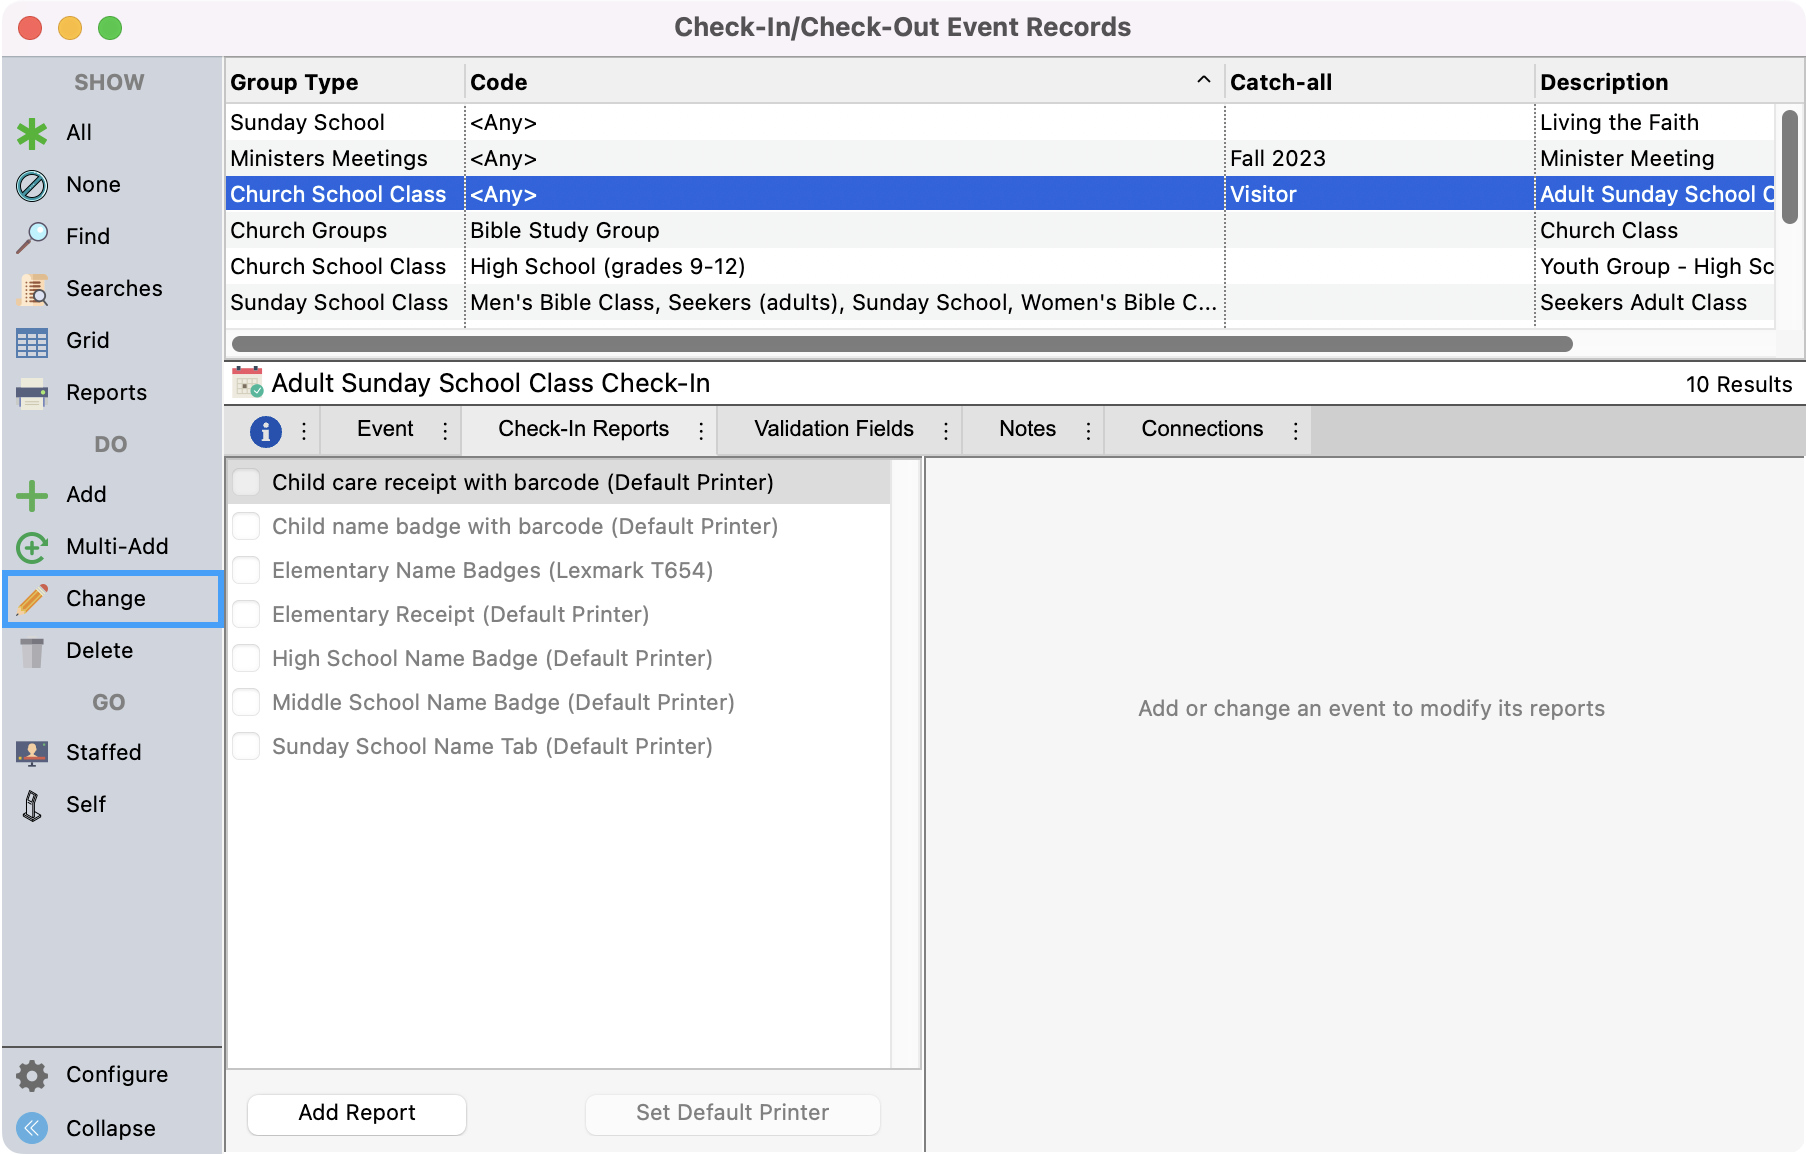
Under the Check-In/Check-Out Event Records window, select an event (if already created), and click Change from the left sidebar.
-
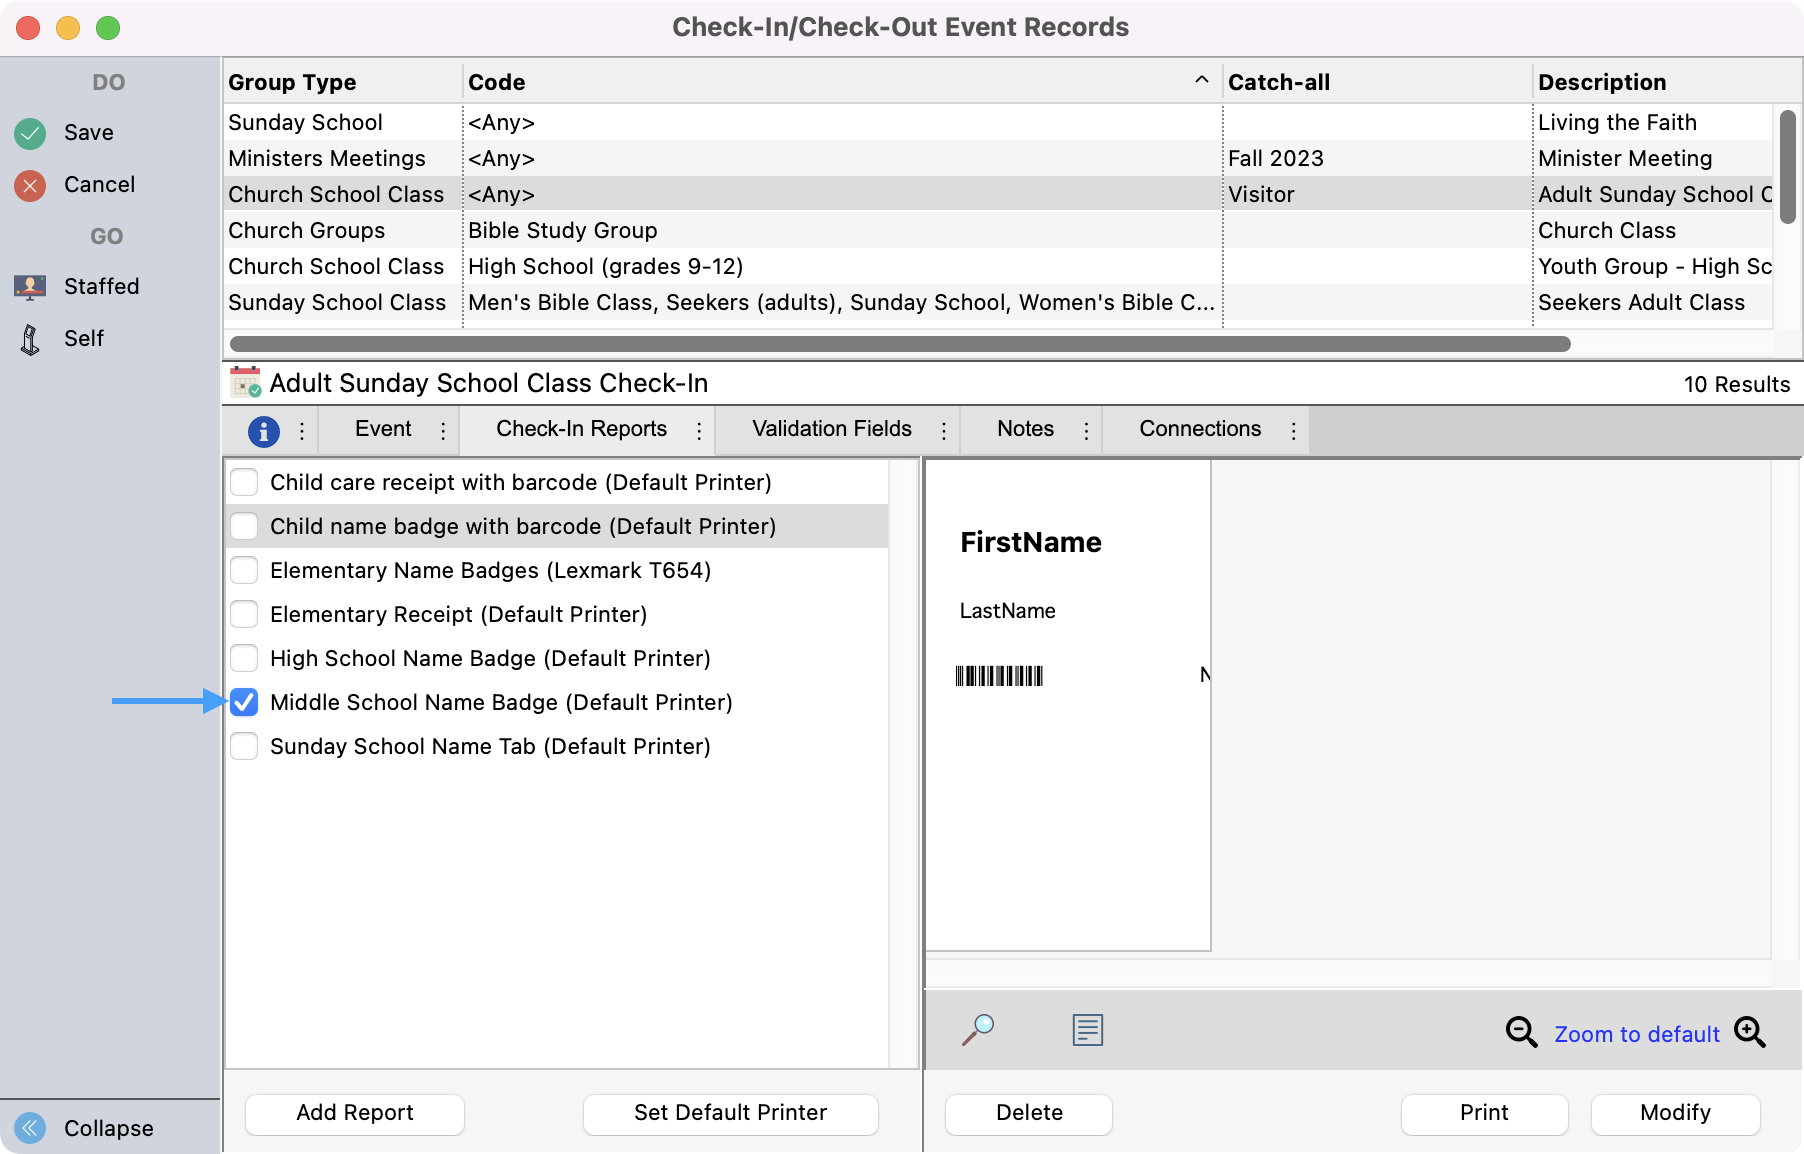
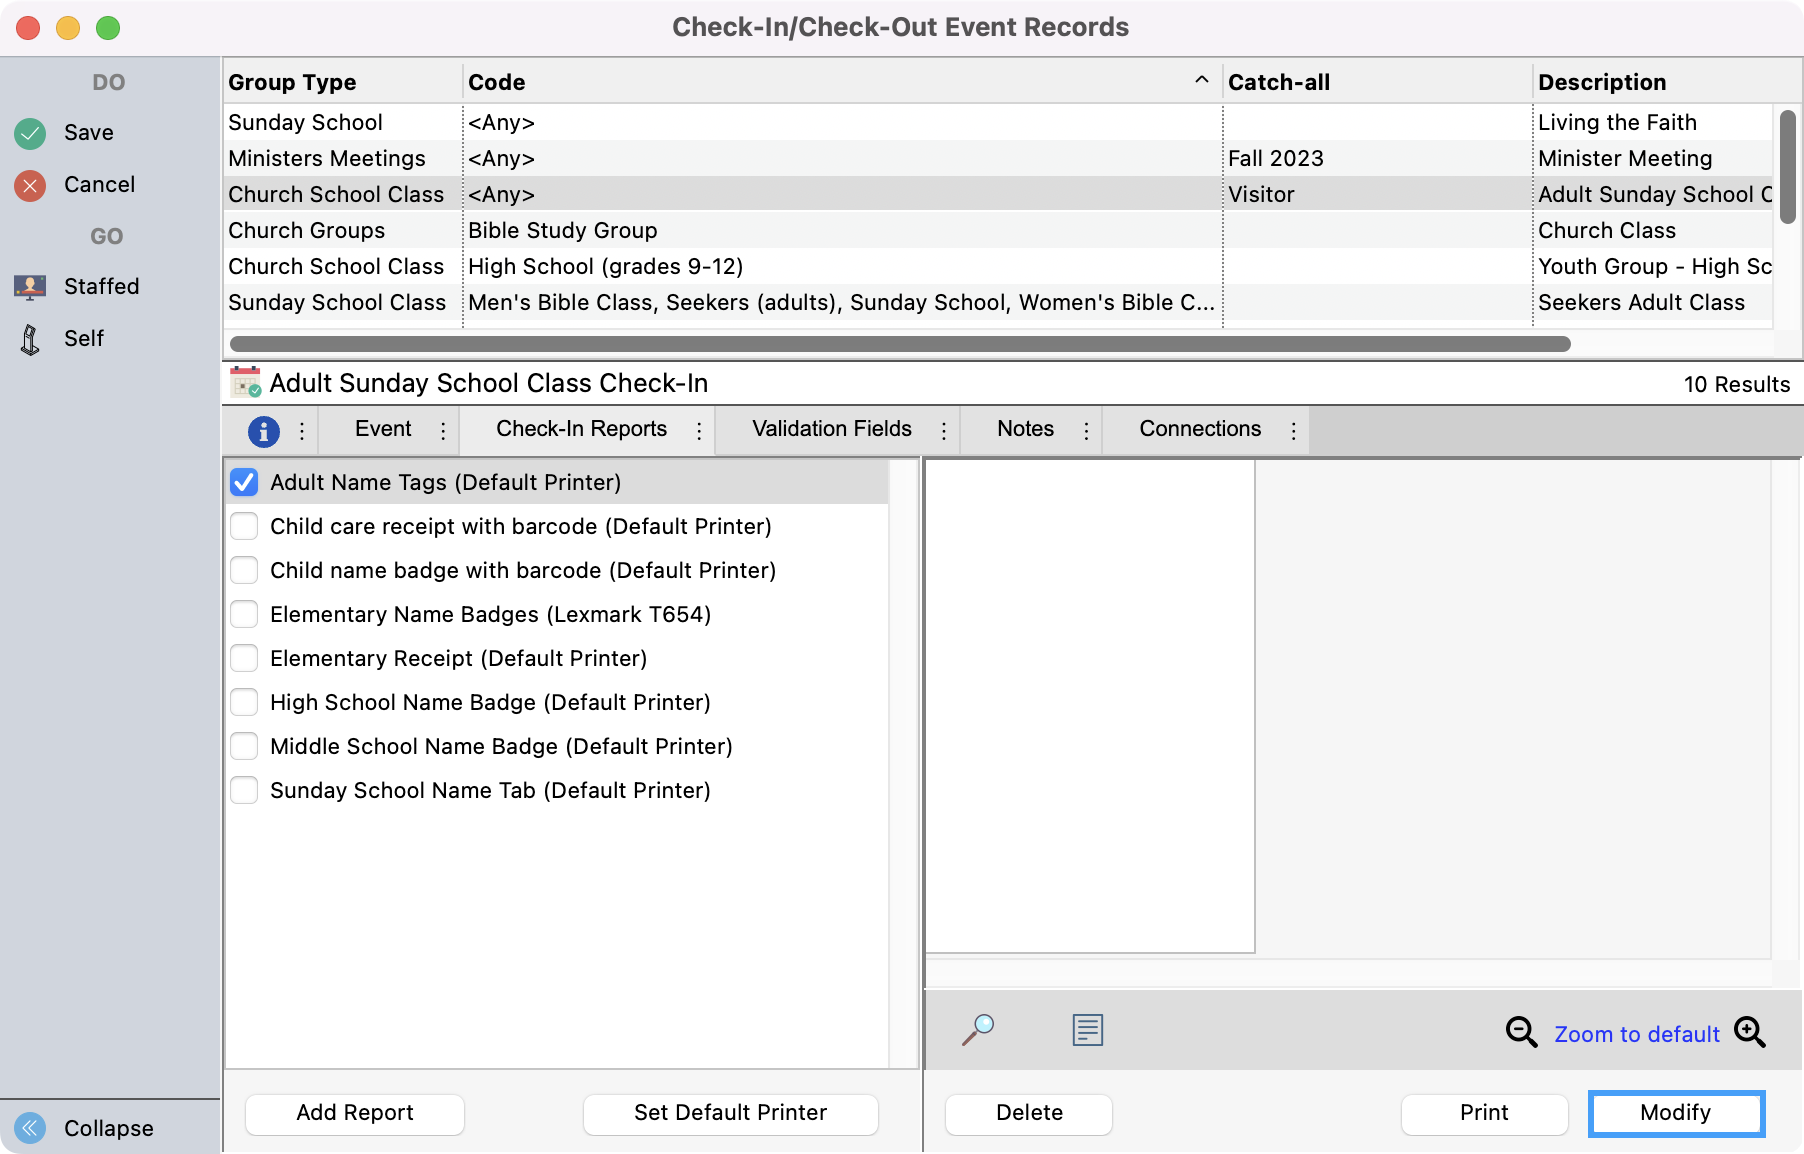
There are two ways to select reports on the list. Placing a check mark beside a check-in report means the report will print at the completion of each check-in.
-
Highlighting the name of a check-in report will open a preview of the report on the right and allow you to modify or delete the report from the list. You highlight a report by simply selecting it, and you will see it turn gray.
NOTE: You must check the checkbox next to a report if you want it to automatically print at the end of check-in. You can reuse check-in reports between events. When you create a report, it will appear on the Check-In Reports tab for all events, but it will only print for a given event if you check its checkbox while adding or changing that event. Changes you make to a check-in report will appear when that report is printed for any event.
Adding a New Report
-
Under the Check-In Reports tab, click Add Report.

-
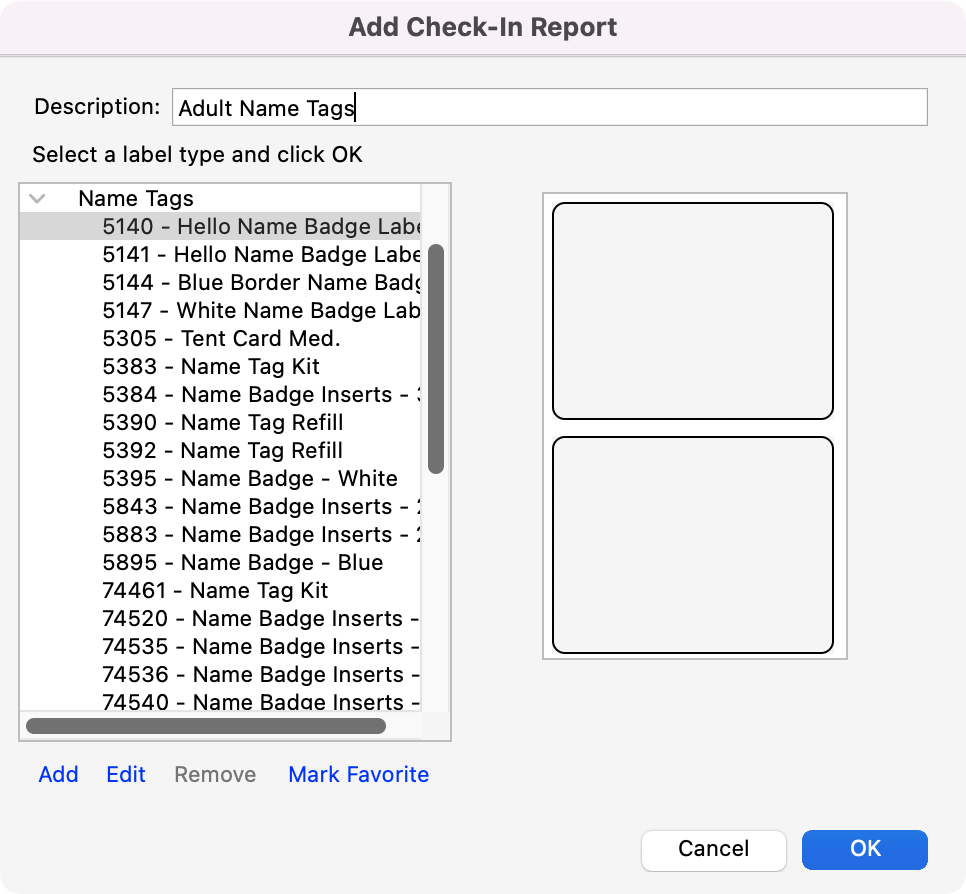
The Add Check-In Report window will open automatically. Enter a description—this will be what appears on the report list. Then select a label type and click OK.
-
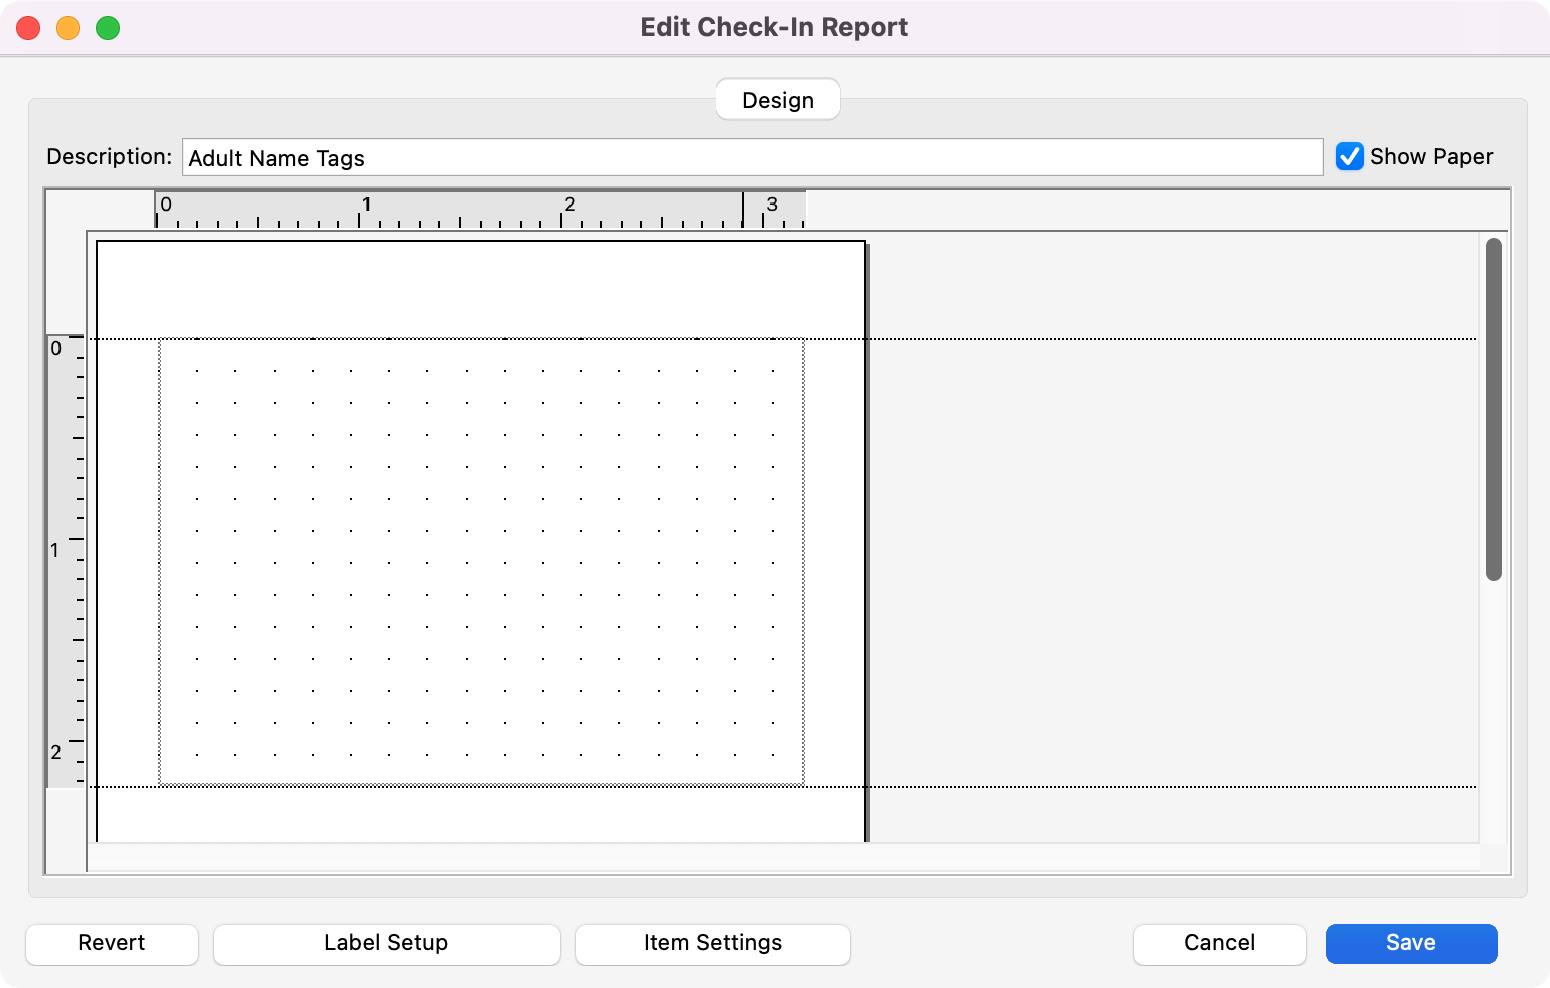
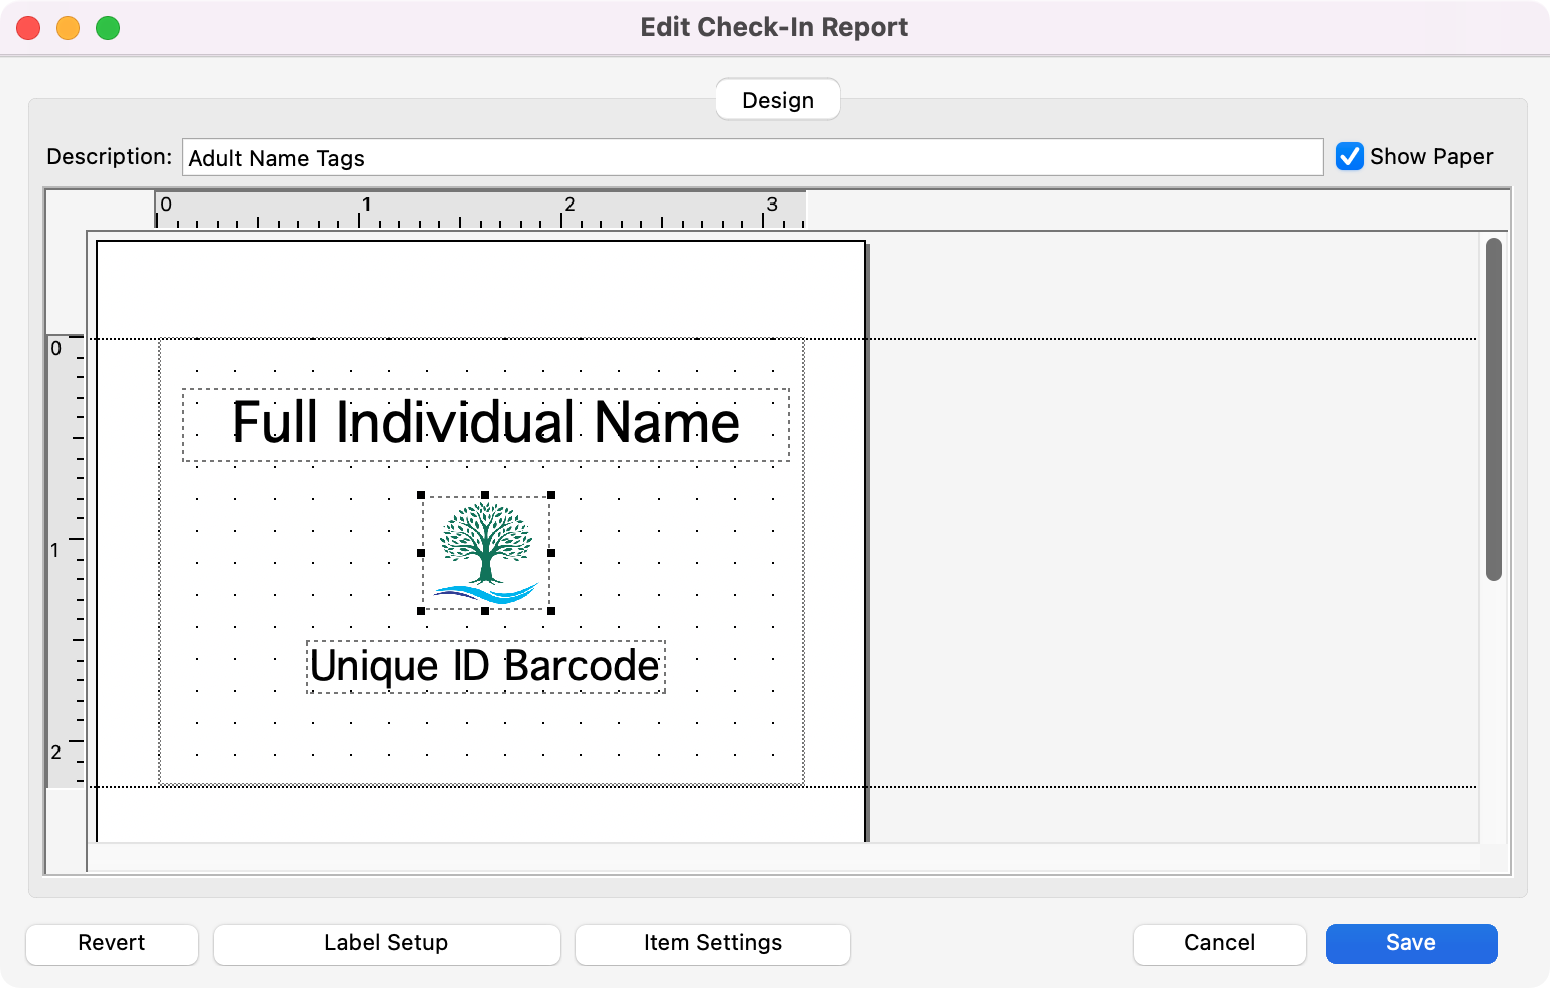
Next, the Edit Check-In Report window will open. Here you can design your new name badge or receipt. On the Check-In/Check-Out Events Records window, you can edit an existing report by highlighting it on the list and clicking Modify.
If you want to use a printer that prints on non-standard-sized paper (such as a Dymo LabelWriter), make that printer your default printer in Windows or Mac OS X before modifying the check-in report. This will allow CDM+ to display the custom paper sizes supported by your printer.
Editing Reports
-
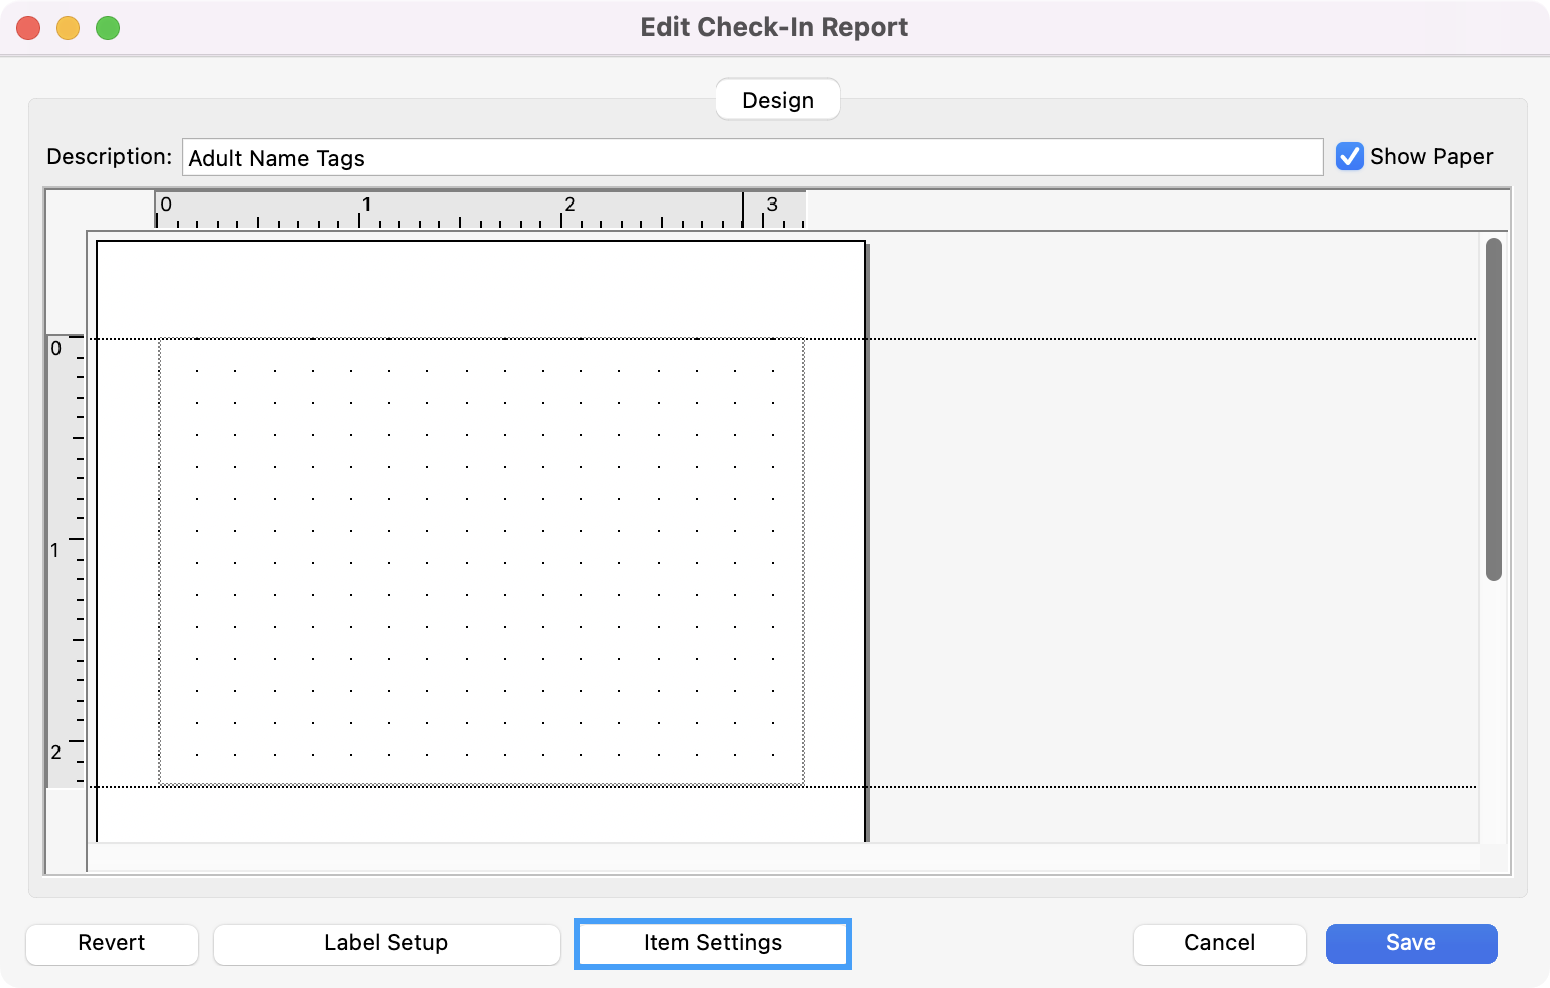
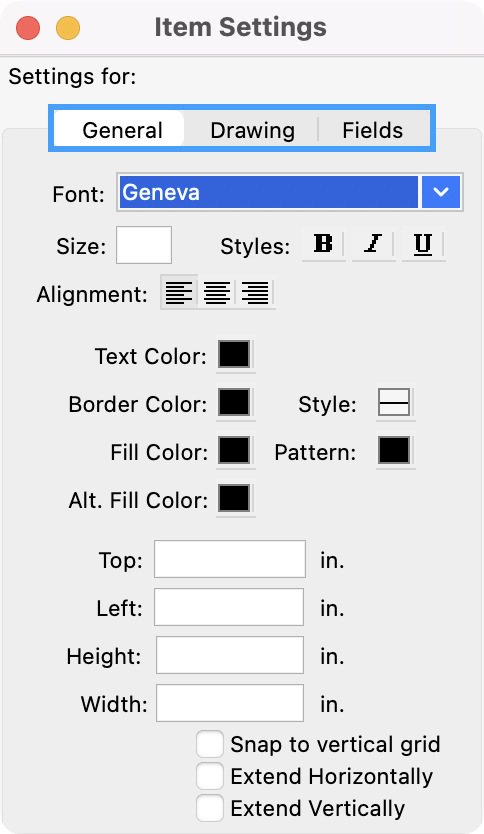
On the Edit Check-In Report window, click the Item Settings button.
-
The General tab allows you to select font (size and color), border, and fill.
-
Select the Drawing tab to add text (such as the name of the group or class), lines, and geometric shapes. You can also import a graphic and place it on the badge or receipt.
-
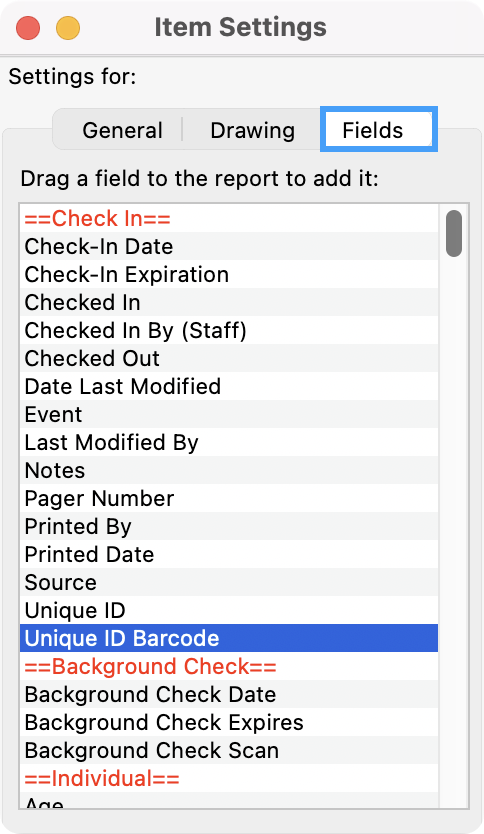
Click the Fields tab next. Here you can choose from virtually all the individual and address records fields, including the Full Individual Name. Click and drag a field to the white area of the Edit Name Badge window. Click on the field, select the General tab, and choose the Font, Size, Style, Alignment, and Text Color.
-
To print a barcode to use at Check-Out on name badges or receipts, choose the field Unique ID Barcode.
-
When you are finished designing your name badge, click Save on the Edit Name Badge window.
Printing Reports
To set up automatic printing for name badges and receipts as each person checks in, check the box beside the report(s) in the left column on the Check-In Reports tab (Check-In/Check-Out Event Records window)
You can also set your default printer on the Check-In Reports tab by clicking the Set Default Printer button. Select the desired printer from the list and click OK.
When check-in reports are printed at the end of check-in, they will print to the printer with no prompts (Destination, Job Setup, Print Dialog, etc.).