
There are three types of reports for sales orders, all of which are available under >Reports >Sales Order Reports >Listings and Exports :
-
Sales Order Custom Listing and Export
-
Sales Order Line Item Custom Listing and Export
-
Sales Order Payment Custom Listing and Export
These can produce a variety of reports, from a printable bill of sale to a summary of sales by payment method. It offers standard Custom Listing/Export-type reports for each of the main record types, and you can use them to analyze sales order, items purchased, or payments made.
The Sales Order Report discussed above is also available under >Reports >Sales Order Reports >Sales Order. This report is designed to print a receipt page for a single sales order.
You can print a summary of all sales orders for a day or range of days using the Sales Order Summary report, available at >Reports >Sales Order Reports >Summaries >Sales Order Summary. This report is ideal for balancing a cash register or calculating sales tax.
Example Reports
Inventory Stock Report
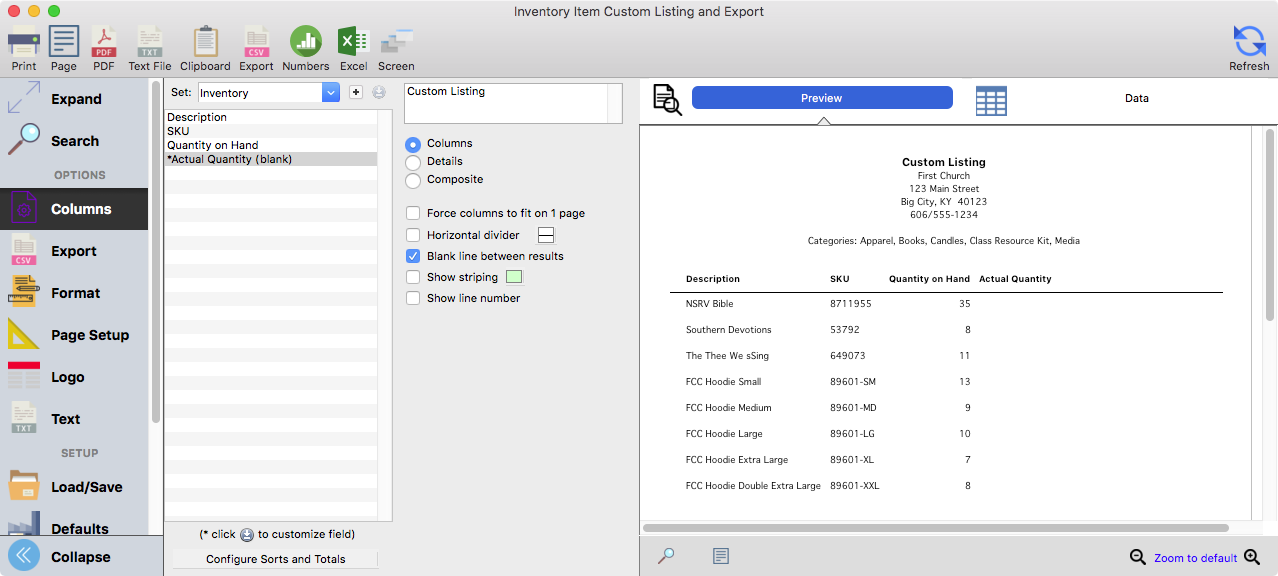
Print an Inventory Item Custom Listing and Export report for all non-active items showing the description, quantity on hand, SKU, and more of your inventory. Use this report for all your inventory needs.
Begin this report by going to >Reports >Sales Order Reports >Listings and Exports >Inventory Item Custom Listing and Export.
-
Search tab - Set a search for the inventory. There are many different options, depending on what you are searching for. If you have never used this particular Custom Listing and Export Search, please see "How to set a search" below.
-
Columns tab - Set the Set to Inventory. If you have never used or set up a Set before, please see "How to create a set" below.
-
Refresh button - Click the Refresh button in the top righthand corner to load the report results.
Once finished, you can select one of the options on the top bar, depending on how you want to save, export, or print the report.
Searches in Custom Listing and Export reports are incredibly detailed and customizable. Below is a simple explanation of what some of the options are in this particular search.
Under Quantity on Hand:
-
Any - If you select this, it will search any quantity on hand.
-
Range - If you select this, it will search your selected range of quantity; e.g. items between 1 and 15 on hand, 30 and 50, etc.
Under Categories:
-
All - If you select this, it will search every single Category you have created.
-
Selected - If you select this, you can pick individual Categories to search on; e.g. Books, Apparel, etc.
-
If a Set has never been created, click Create Set. Otherwise, click the small plus button next to the Set dropdown menu.
-
In the new window, create a new Set. Name it Inventory, (or whatever word you prefer,) and hit OK.
-
A new window will open that allows you to add specifications to the set. Simply drag and drop the desired fields into the box marked Fields In Set. For the example above, we chose Description, SKU, Quantity on Hand, and *Actual Quantity (blank).
-
You can change the name of the fields, (optional.) Simply type the name you wish in the box on the right. If you change "Quantity on Hand" to "Quantity", it will show up in the Fields box as "Quantity (Quantity on Hand)". Only your new name will appear in the report.
-
When you are finished, click Close at the bottom right. Your new set will automatically load.
Quantity Activity
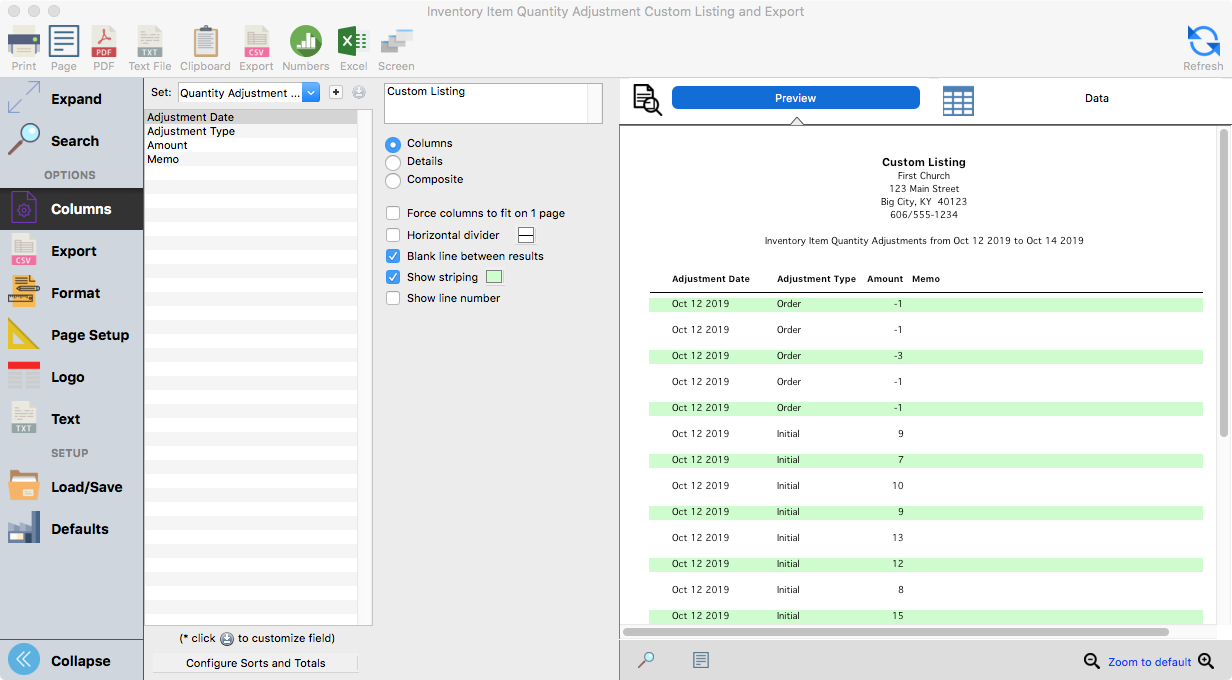
Print an Inventory Item Quantity Adjustment Listing and Export for a specific inventory item to show purchases and restocking over time. Use this report to predict future need and troubleshoot stock discrepancies.
Begin this report by going to >Reports >Sales Order Reports >Listings and Exports >Inventory Item Quantity Adjustment Custom Listing and Export.
-
Search tab - Set a search for the dates the quantity was adjusted, to track sales. If you have never used this particular Custom Listing and Export Search, please see "How to set a search" below.
-
Columns tab - Set the Set to Quantity Adjustment History. If you have never used or set up a Set before, please see "How to create a set" below.
-
Refresh button - Click the Refresh button in the top righthand corner to load the report results.
Once finished, you can select one of the options on the top bar, depending on how you want to save, export, or print the report.
Searches in Custom Listing and Export reports are incredibly detailed and customizable. Below is a simple explanation of what this particular search does.
Under Inventory Item quantity adjustment date between:
-
You can select the period of dates for sales; e.g. 10/01/19 - 11/30/19.
-
If a Set has never been created, click Create Set. Otherwise, click the small plus button next to the Set dropdown menu.
-
In the new window, create a new Set. Name it Quantity Adjustment History, (or whatever name you prefer,) and hit OK.
-
A new window will open that allows you to add specifications to the set. Simply drag and drop the desired fields into the box marked Fields In Set. For the example in the screenshot above, we chose Adjustment Date, Adjustment Type, Amount, and Memo.
-
You can change the name of the fields, (optional.) Simply type the name you wish in the box on the right. If you change "Adjustment Date" to "Quantity Adjustment Date", it will show up in the Fields box as "Quantity Adjustment Date (Adjustment Date)". Only your new name will appear in the report.
-
When you are finished, click Close at the bottom right. Your new set will automatically load.