Engage users can review the history of their registration and make payments against outstanding balances.
-
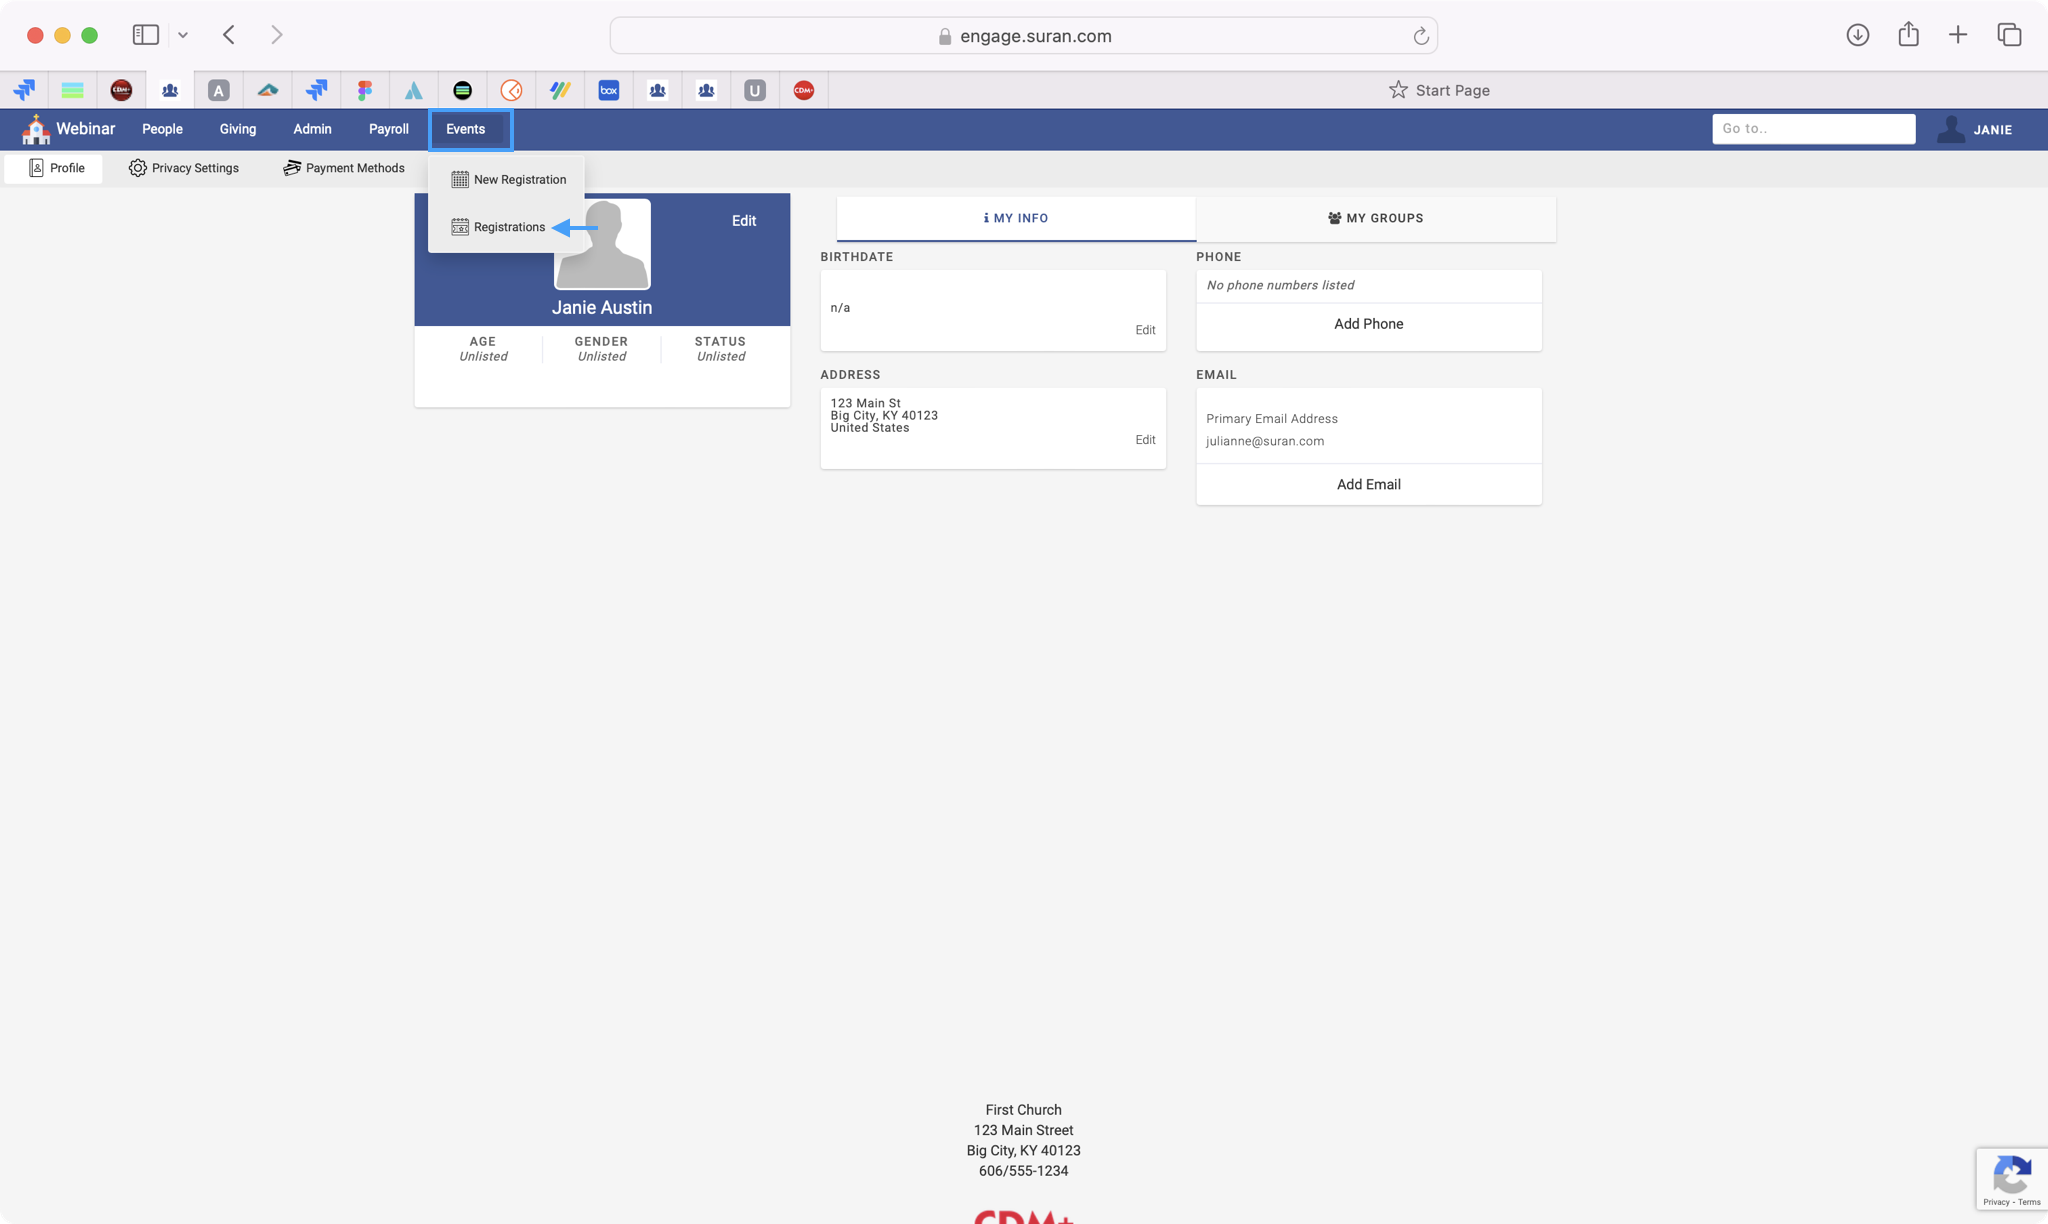
In Engage go to Events → Registrations.
-
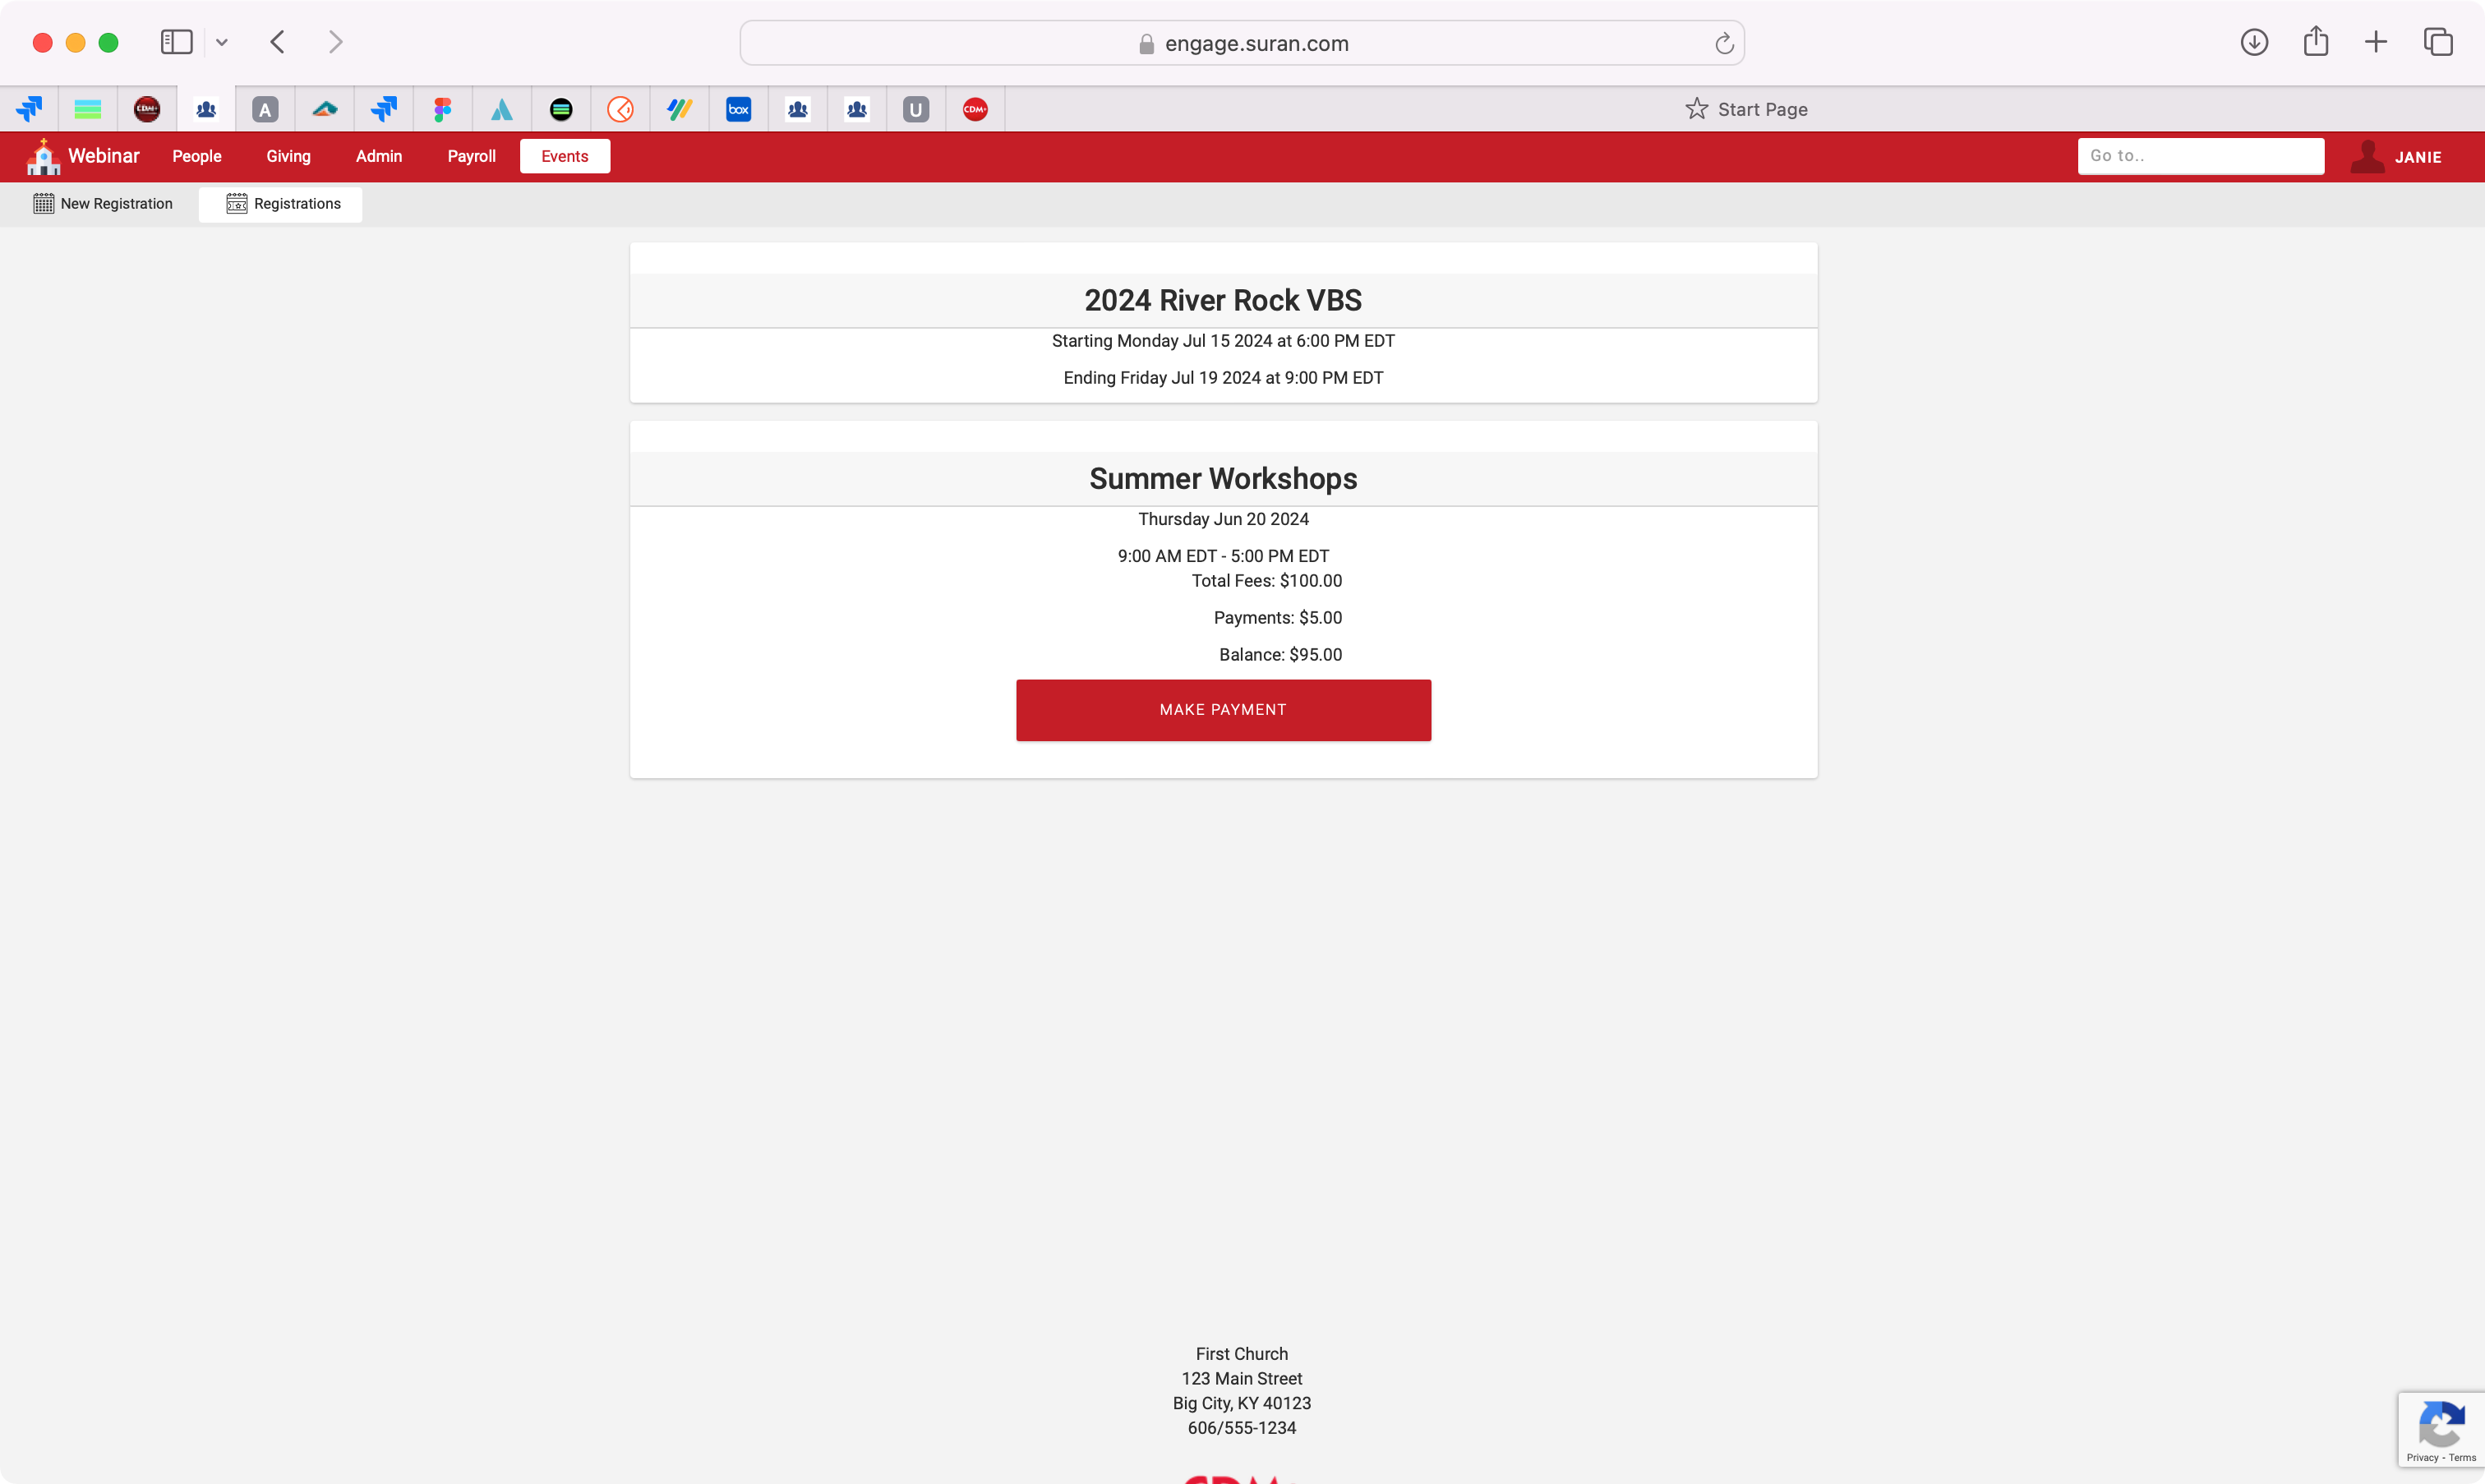
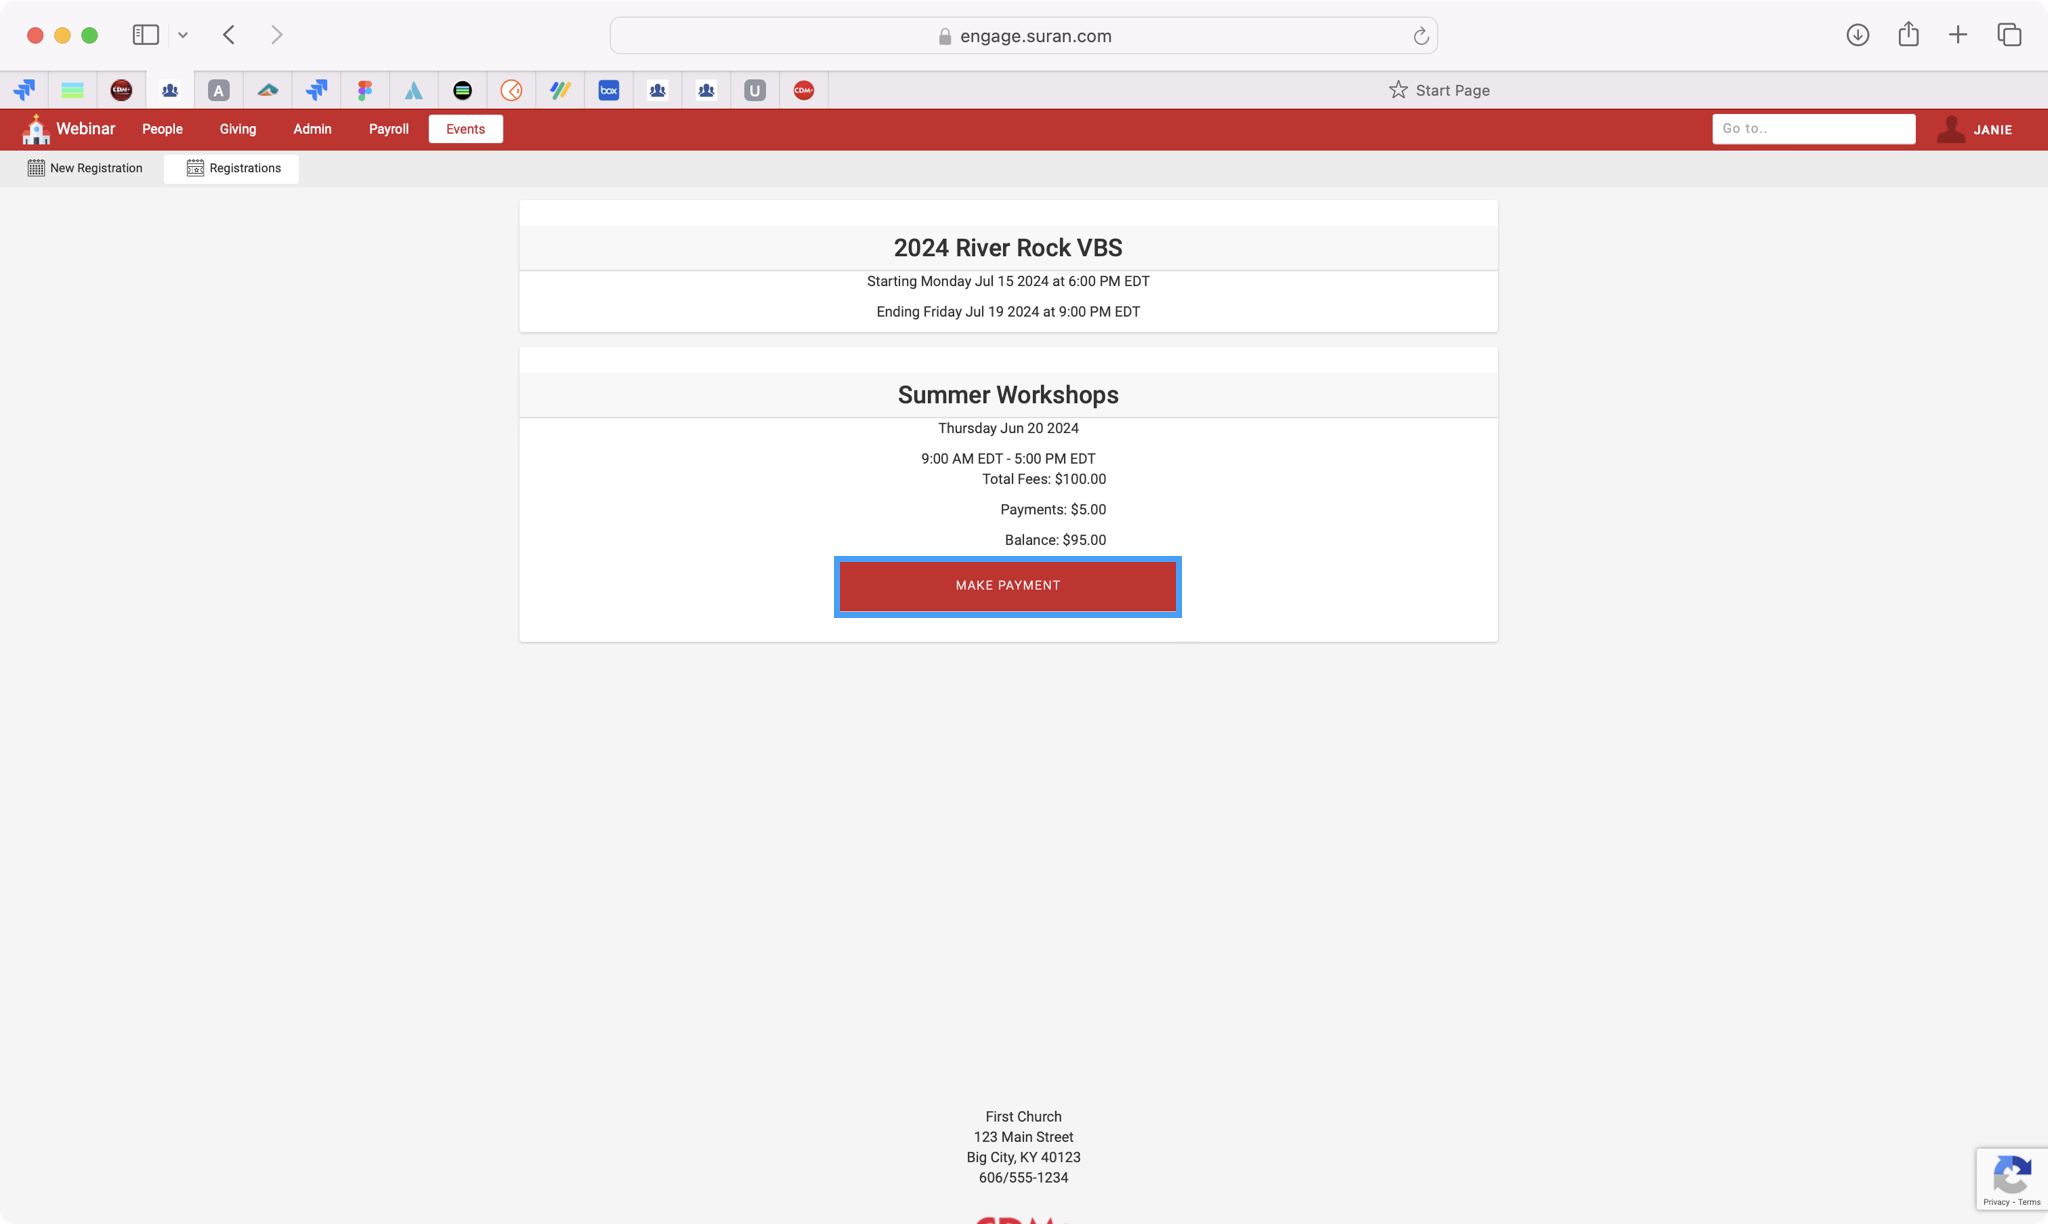
Selecting Registrations will open the event registration window showing all events for the individual. If the individual has a balance due for an event, Engage will display the total fees, any payments made to date, and the balance due along with a Make Payment button.
-
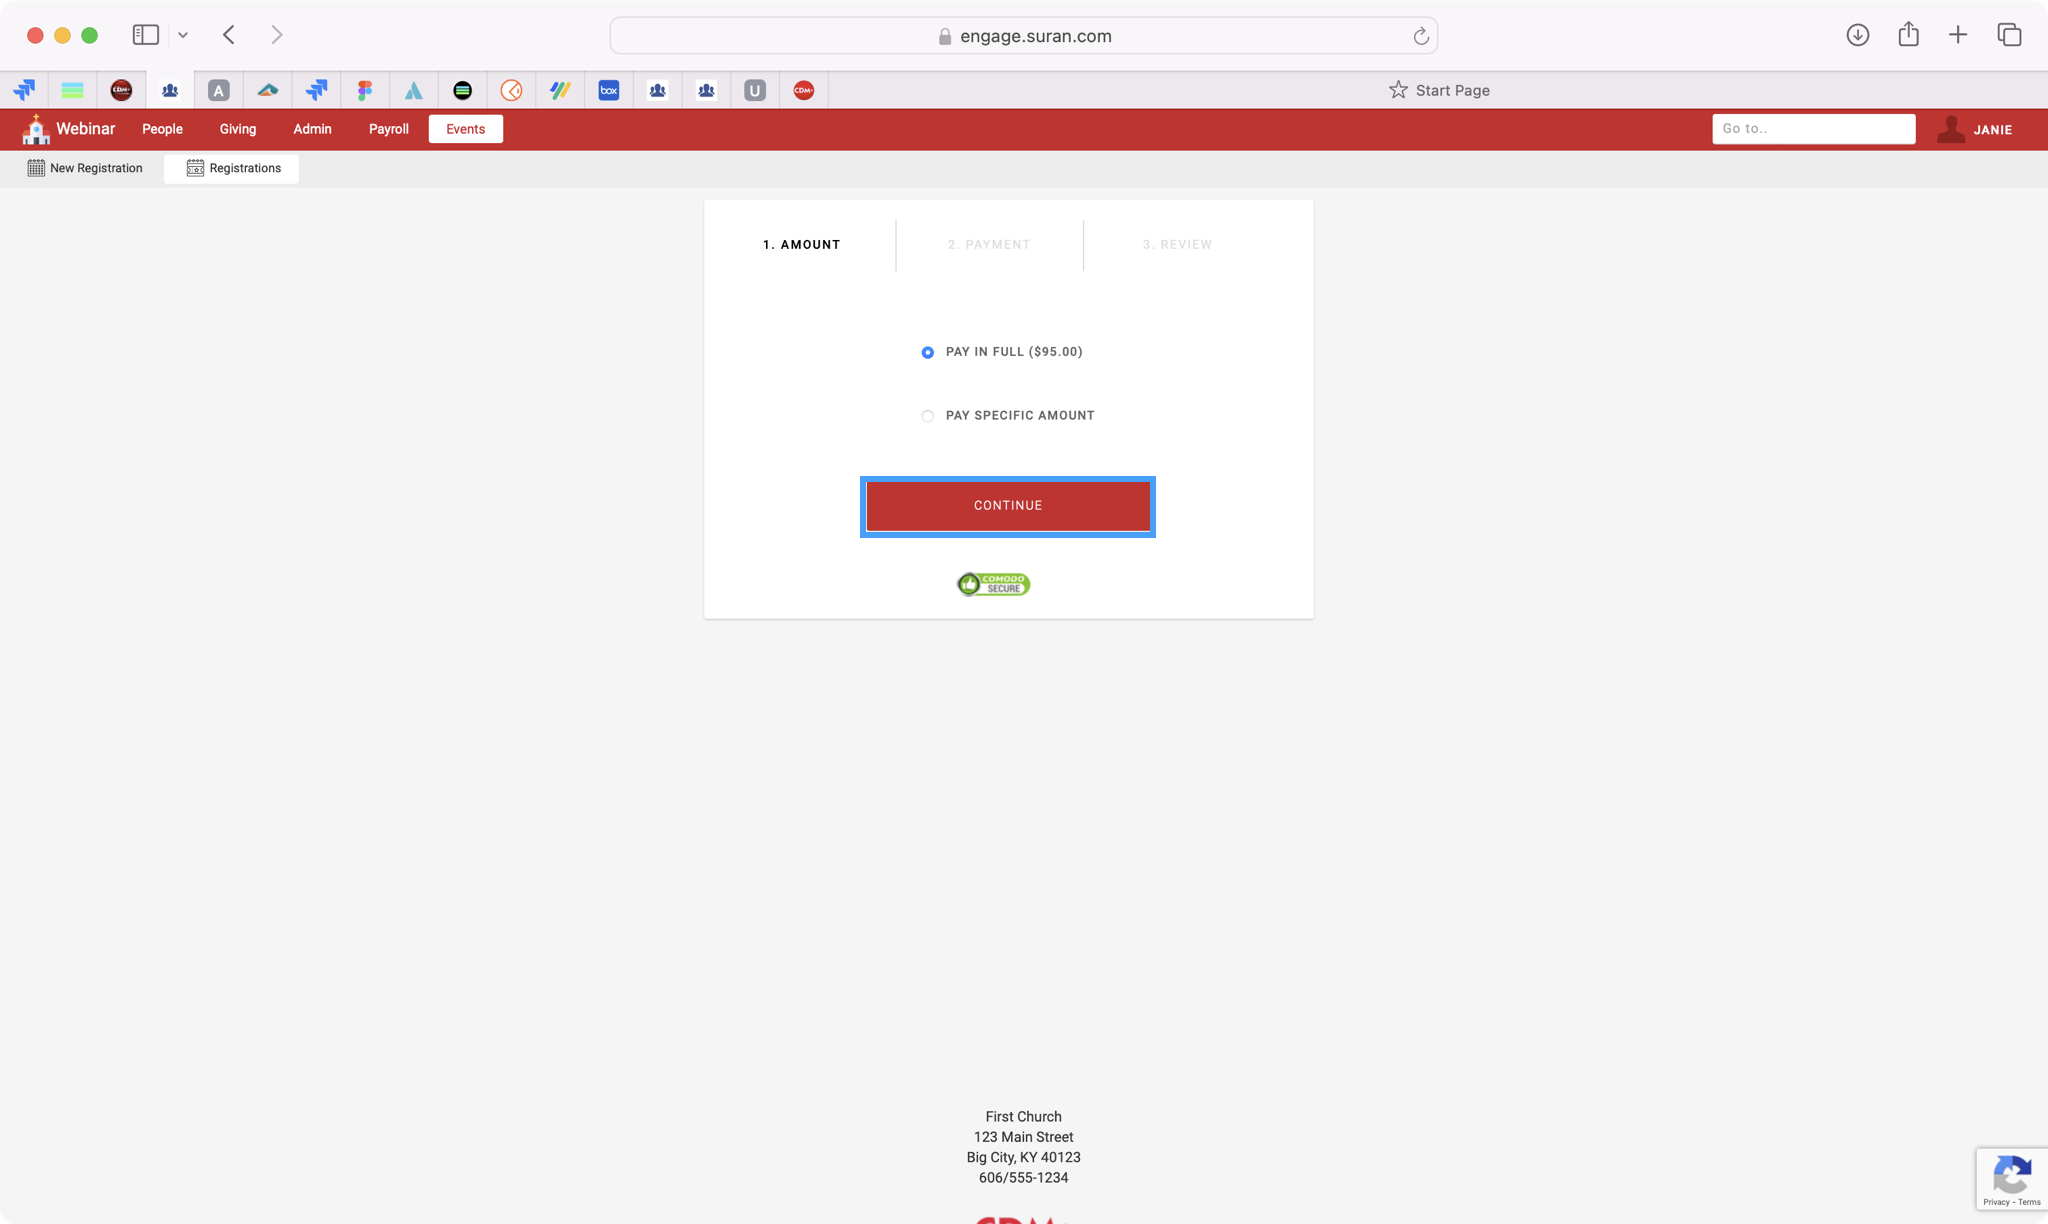
Tapping or clicking Make Payment will allow the user to make a full or partial payment on the event using the credit card or bank accounts created for Engage Giving. After making your selection, click Continue.
-
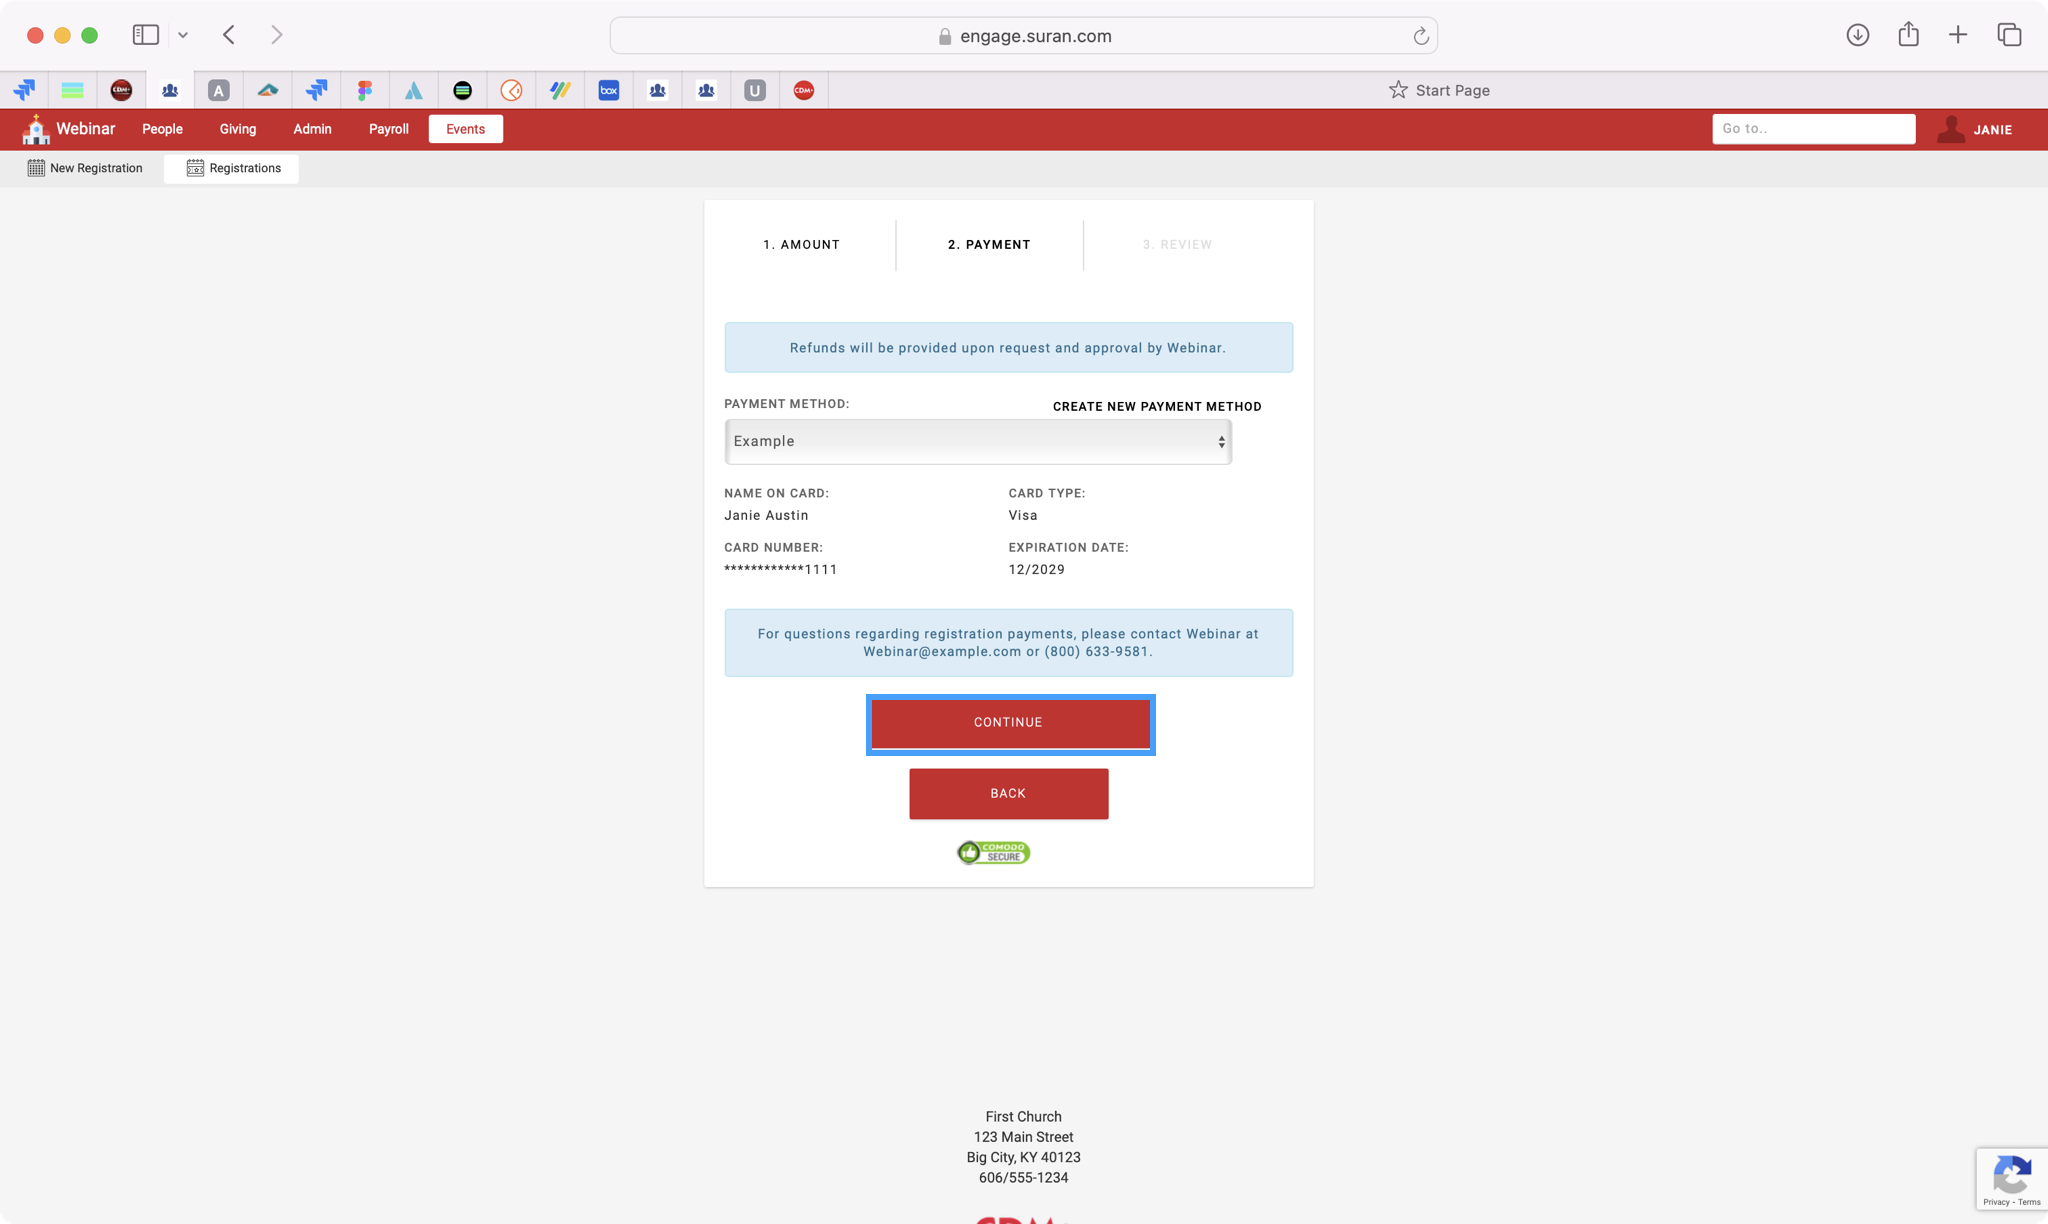
If you are using an existing payment method, use the drop-down box to make your selection and click Continue. Then go to Step #7.
-
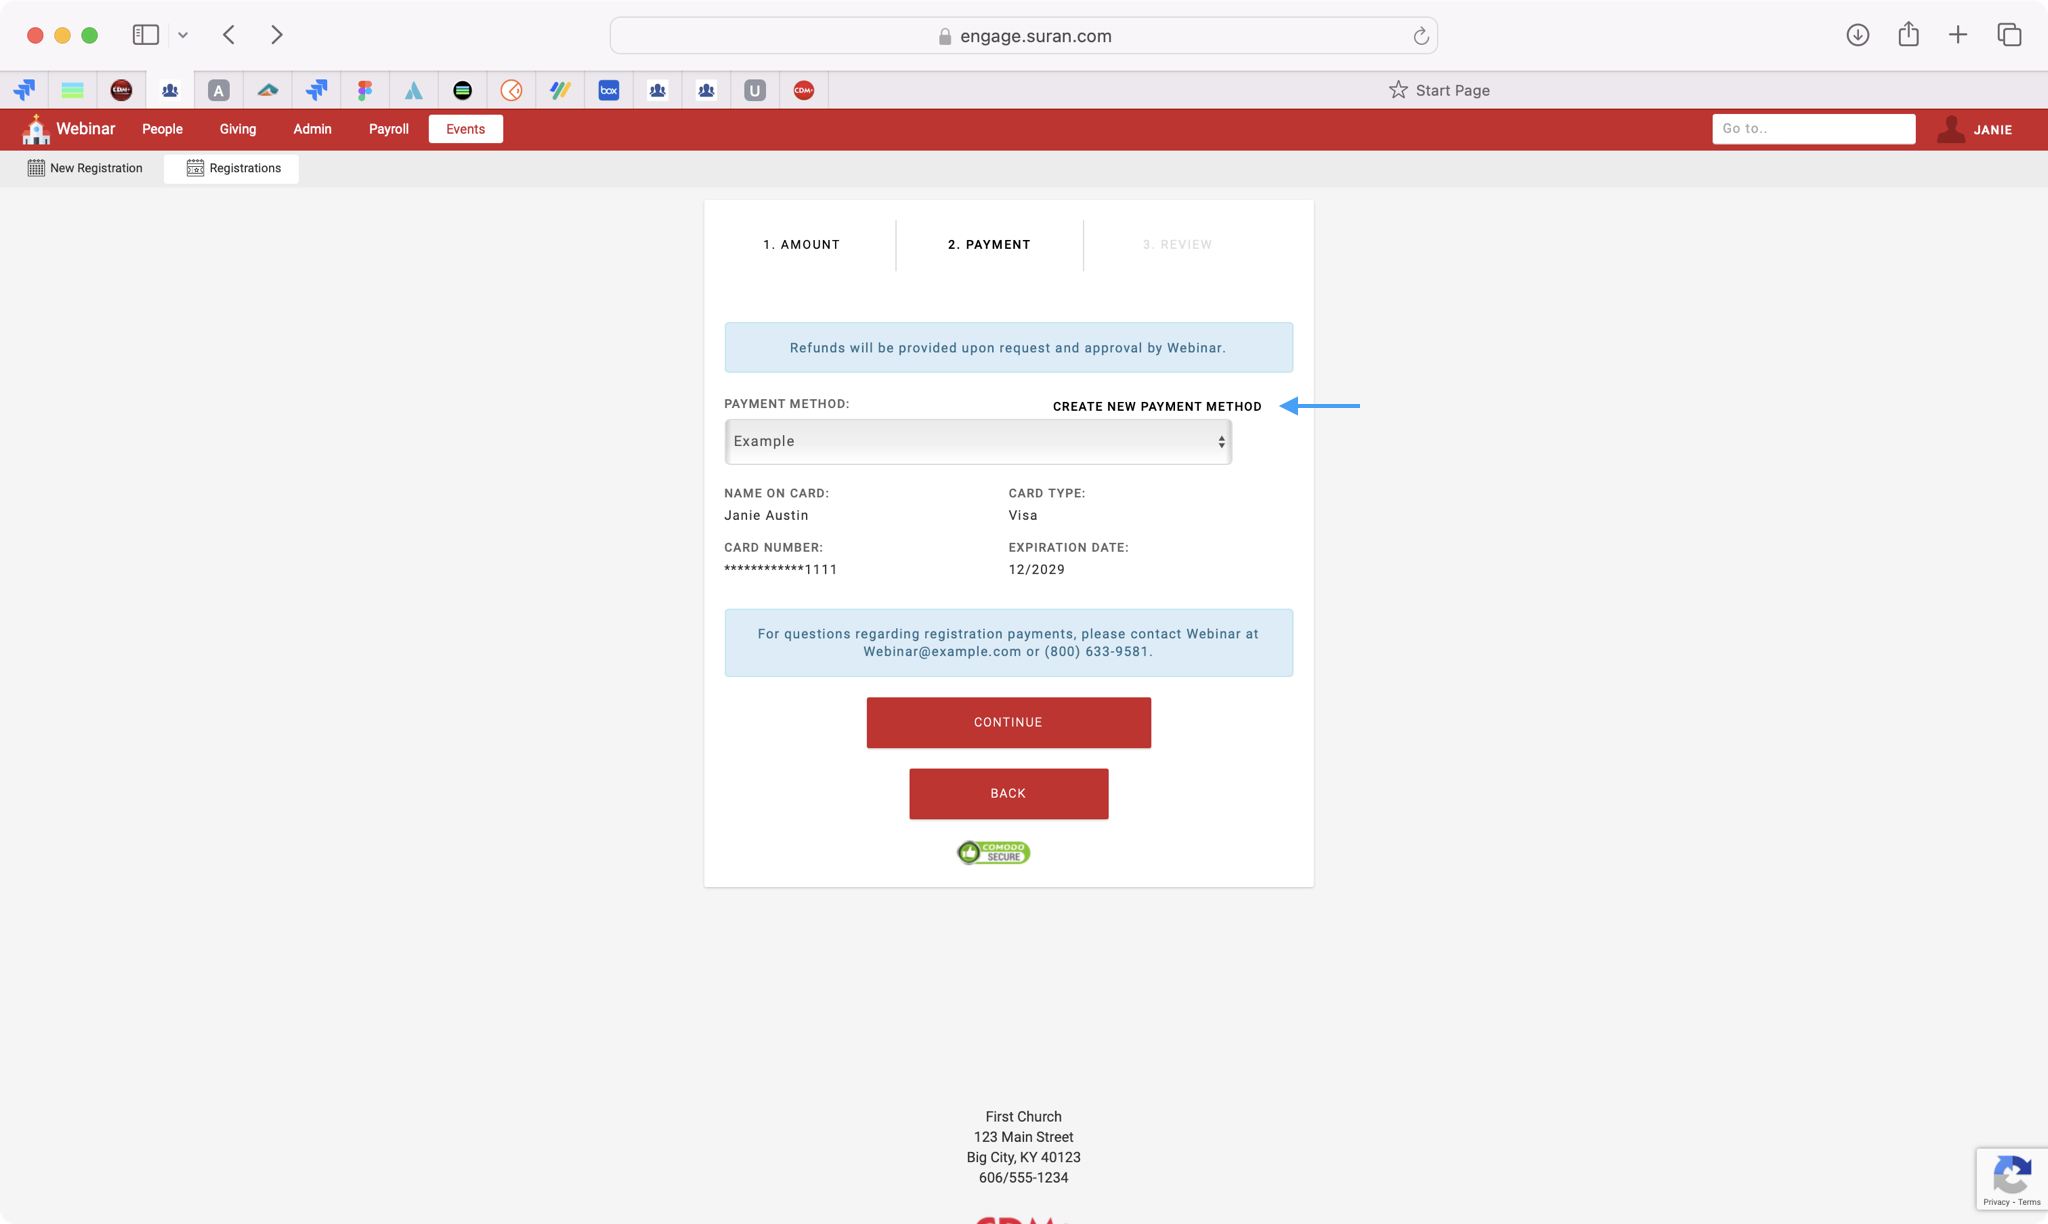
If you need to add a new payment method, click Create New Payment Method.
-
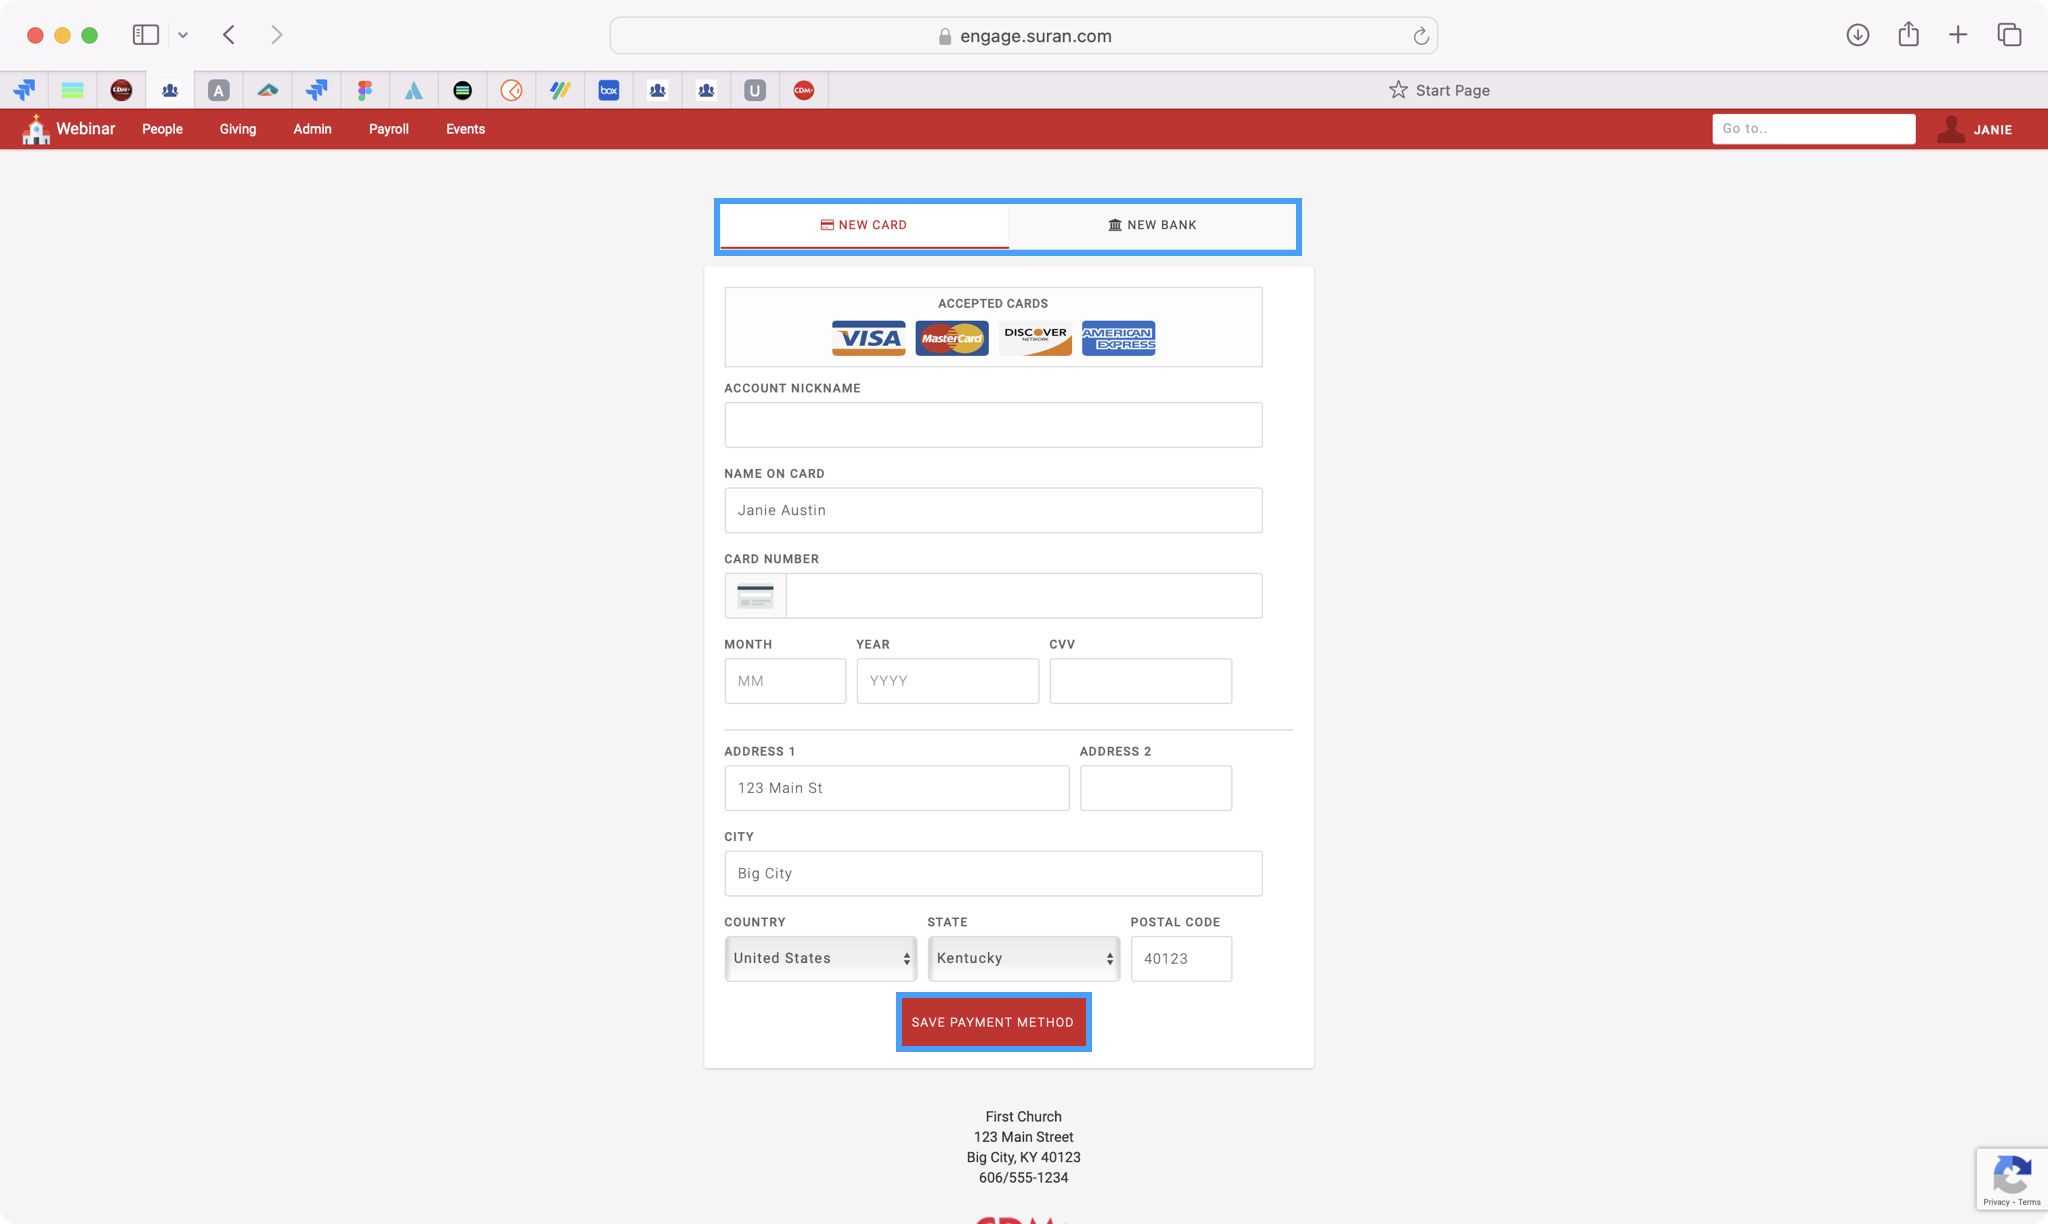
Choose if you’re adding a New Card or New Bank, fill in the payment details, and click Save Payment Method.
-
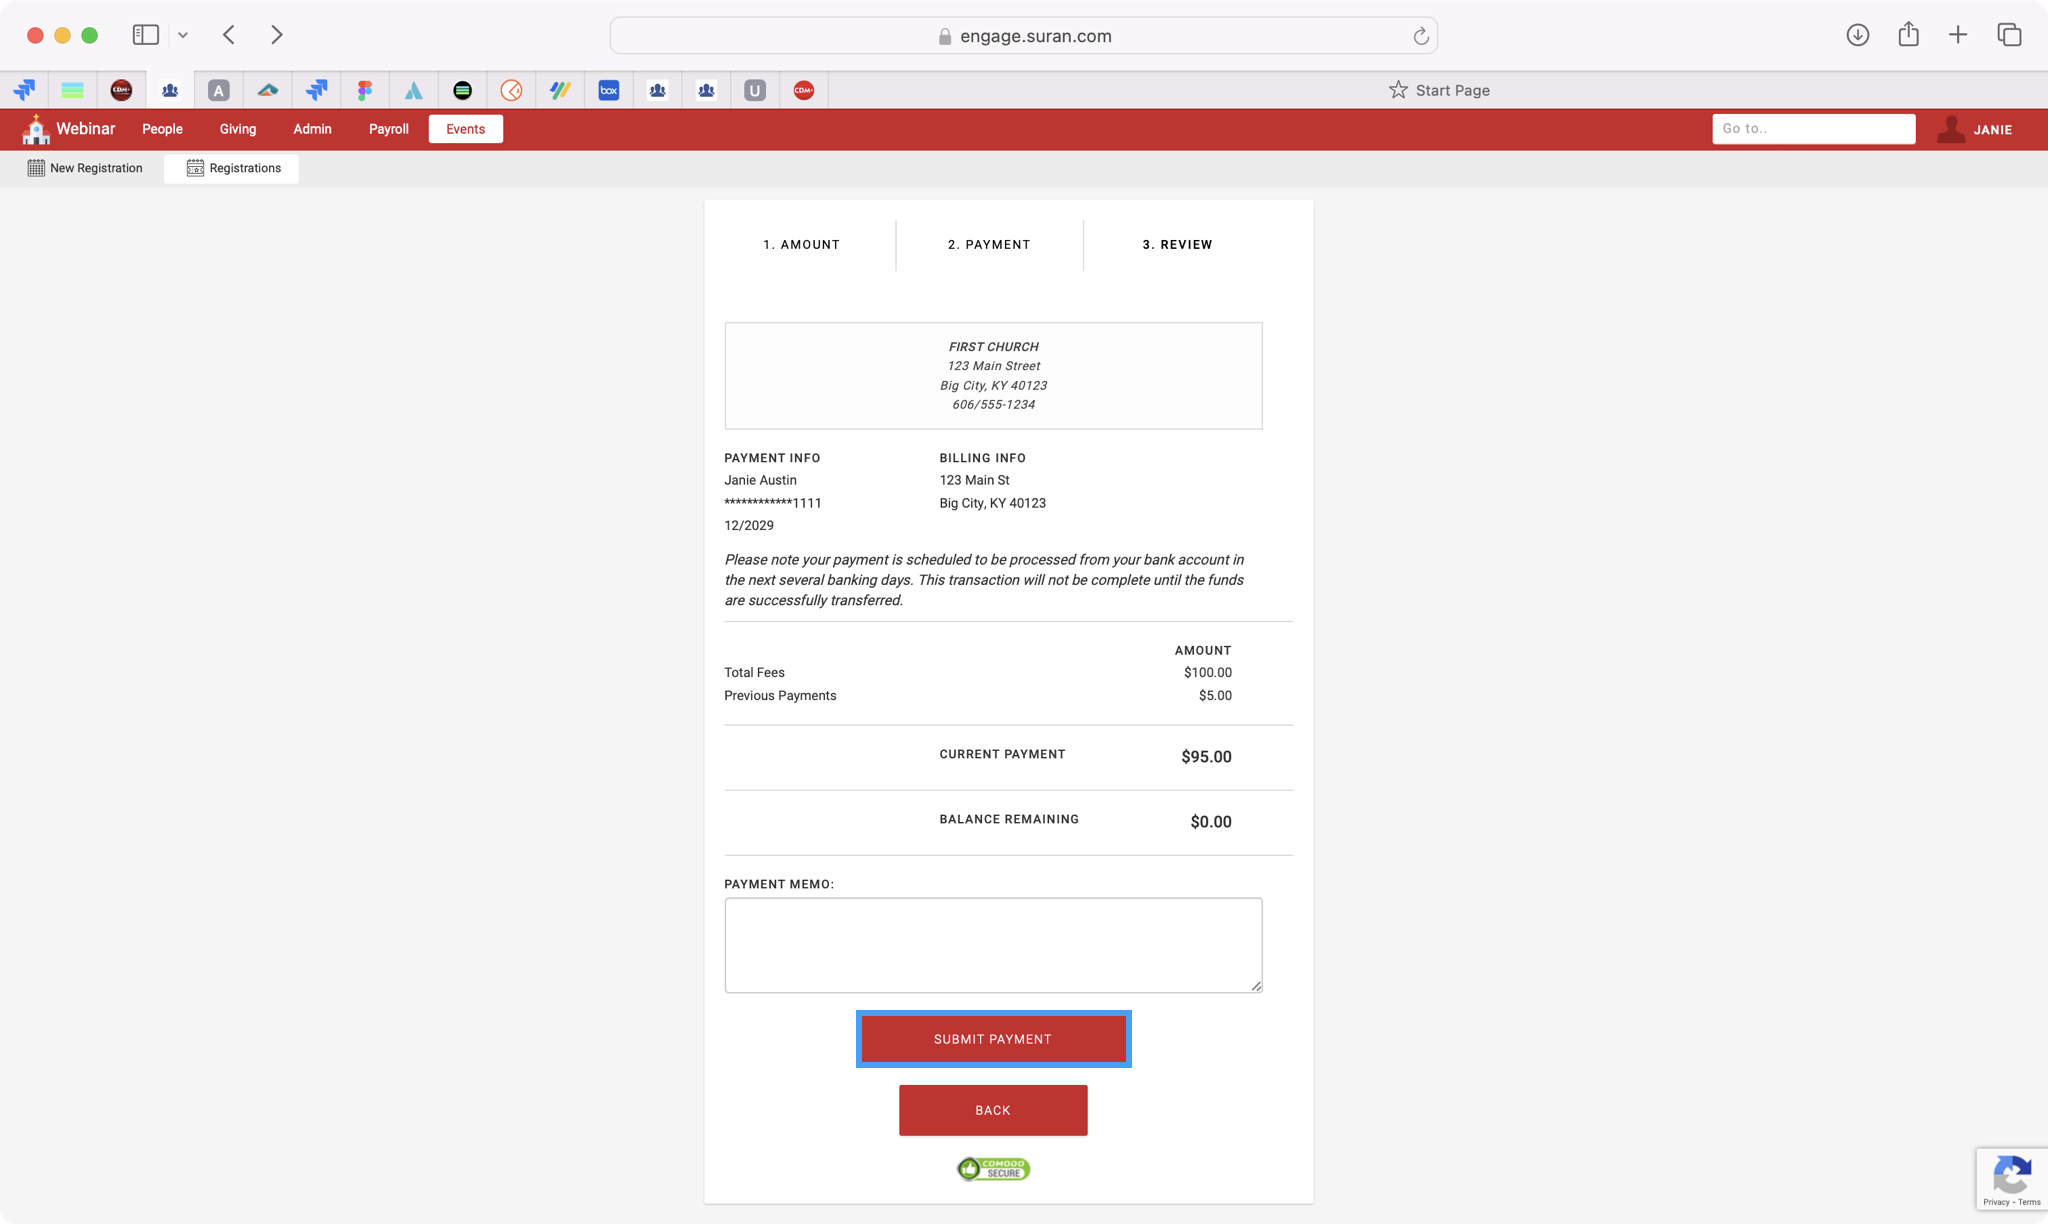
After reviewing your payment information and adding any notes, click Submit Payment.
-
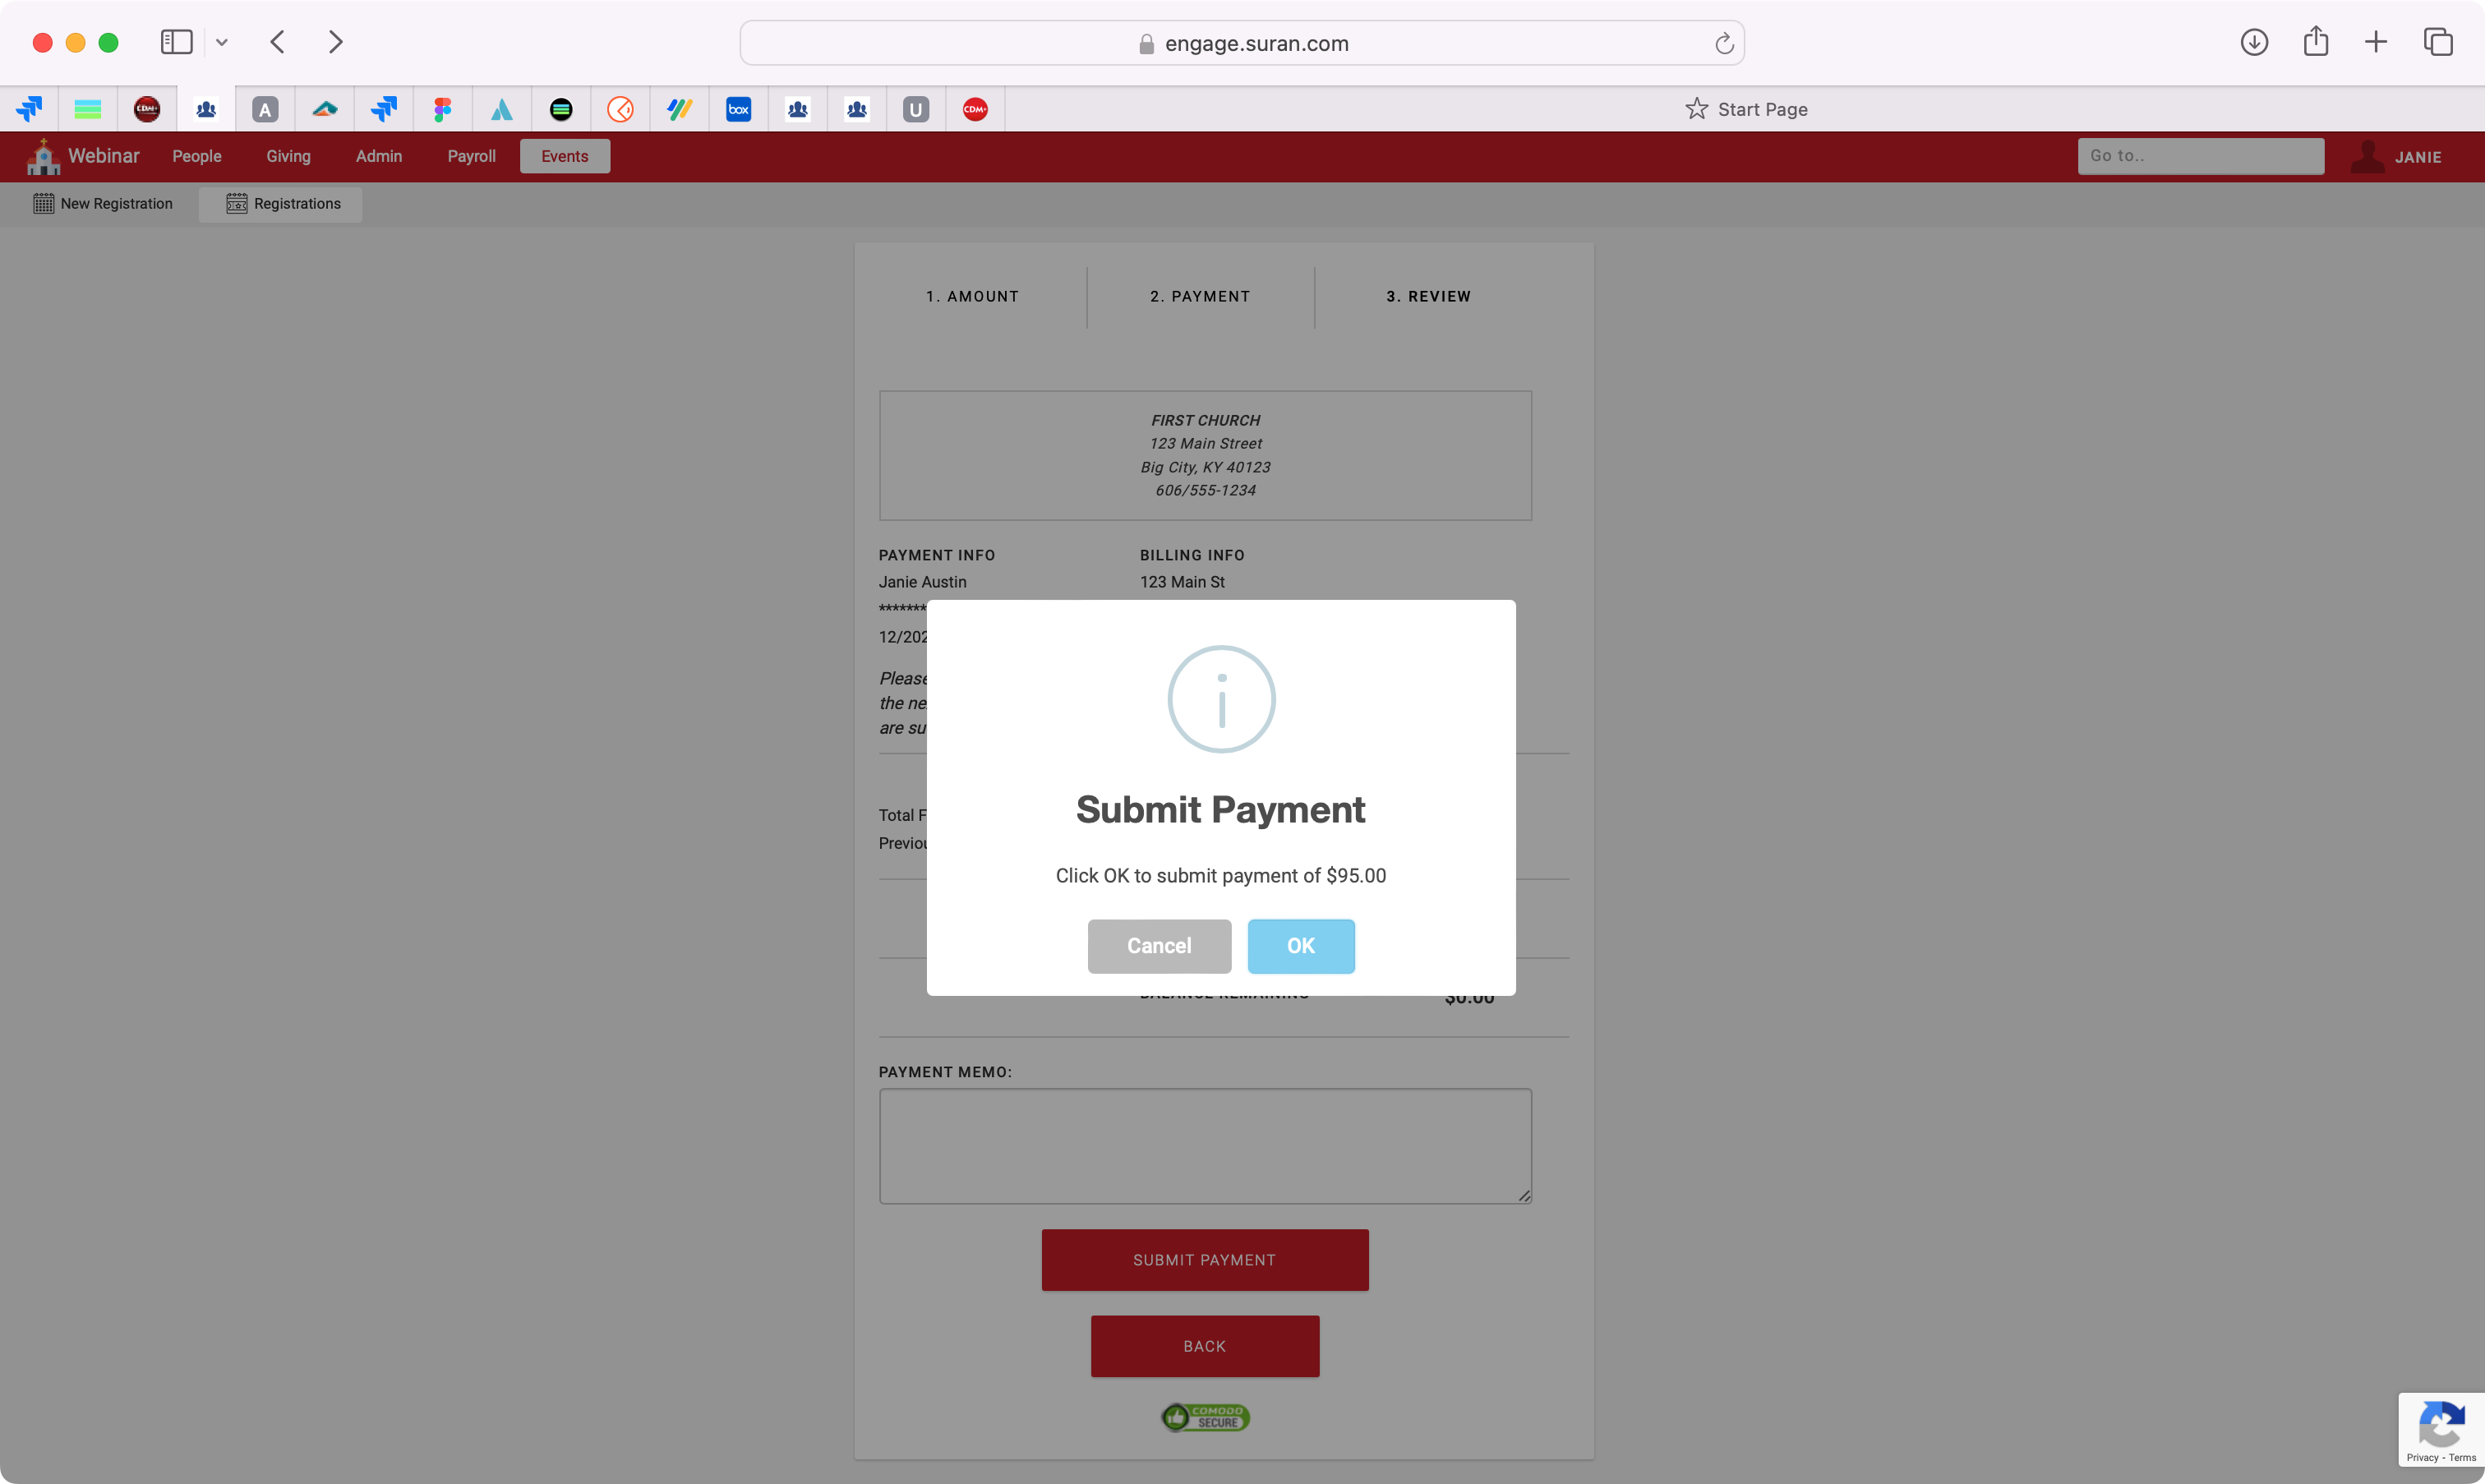
You’ll see a pop-up confirming you’re submitting the payment. Click OK.
-
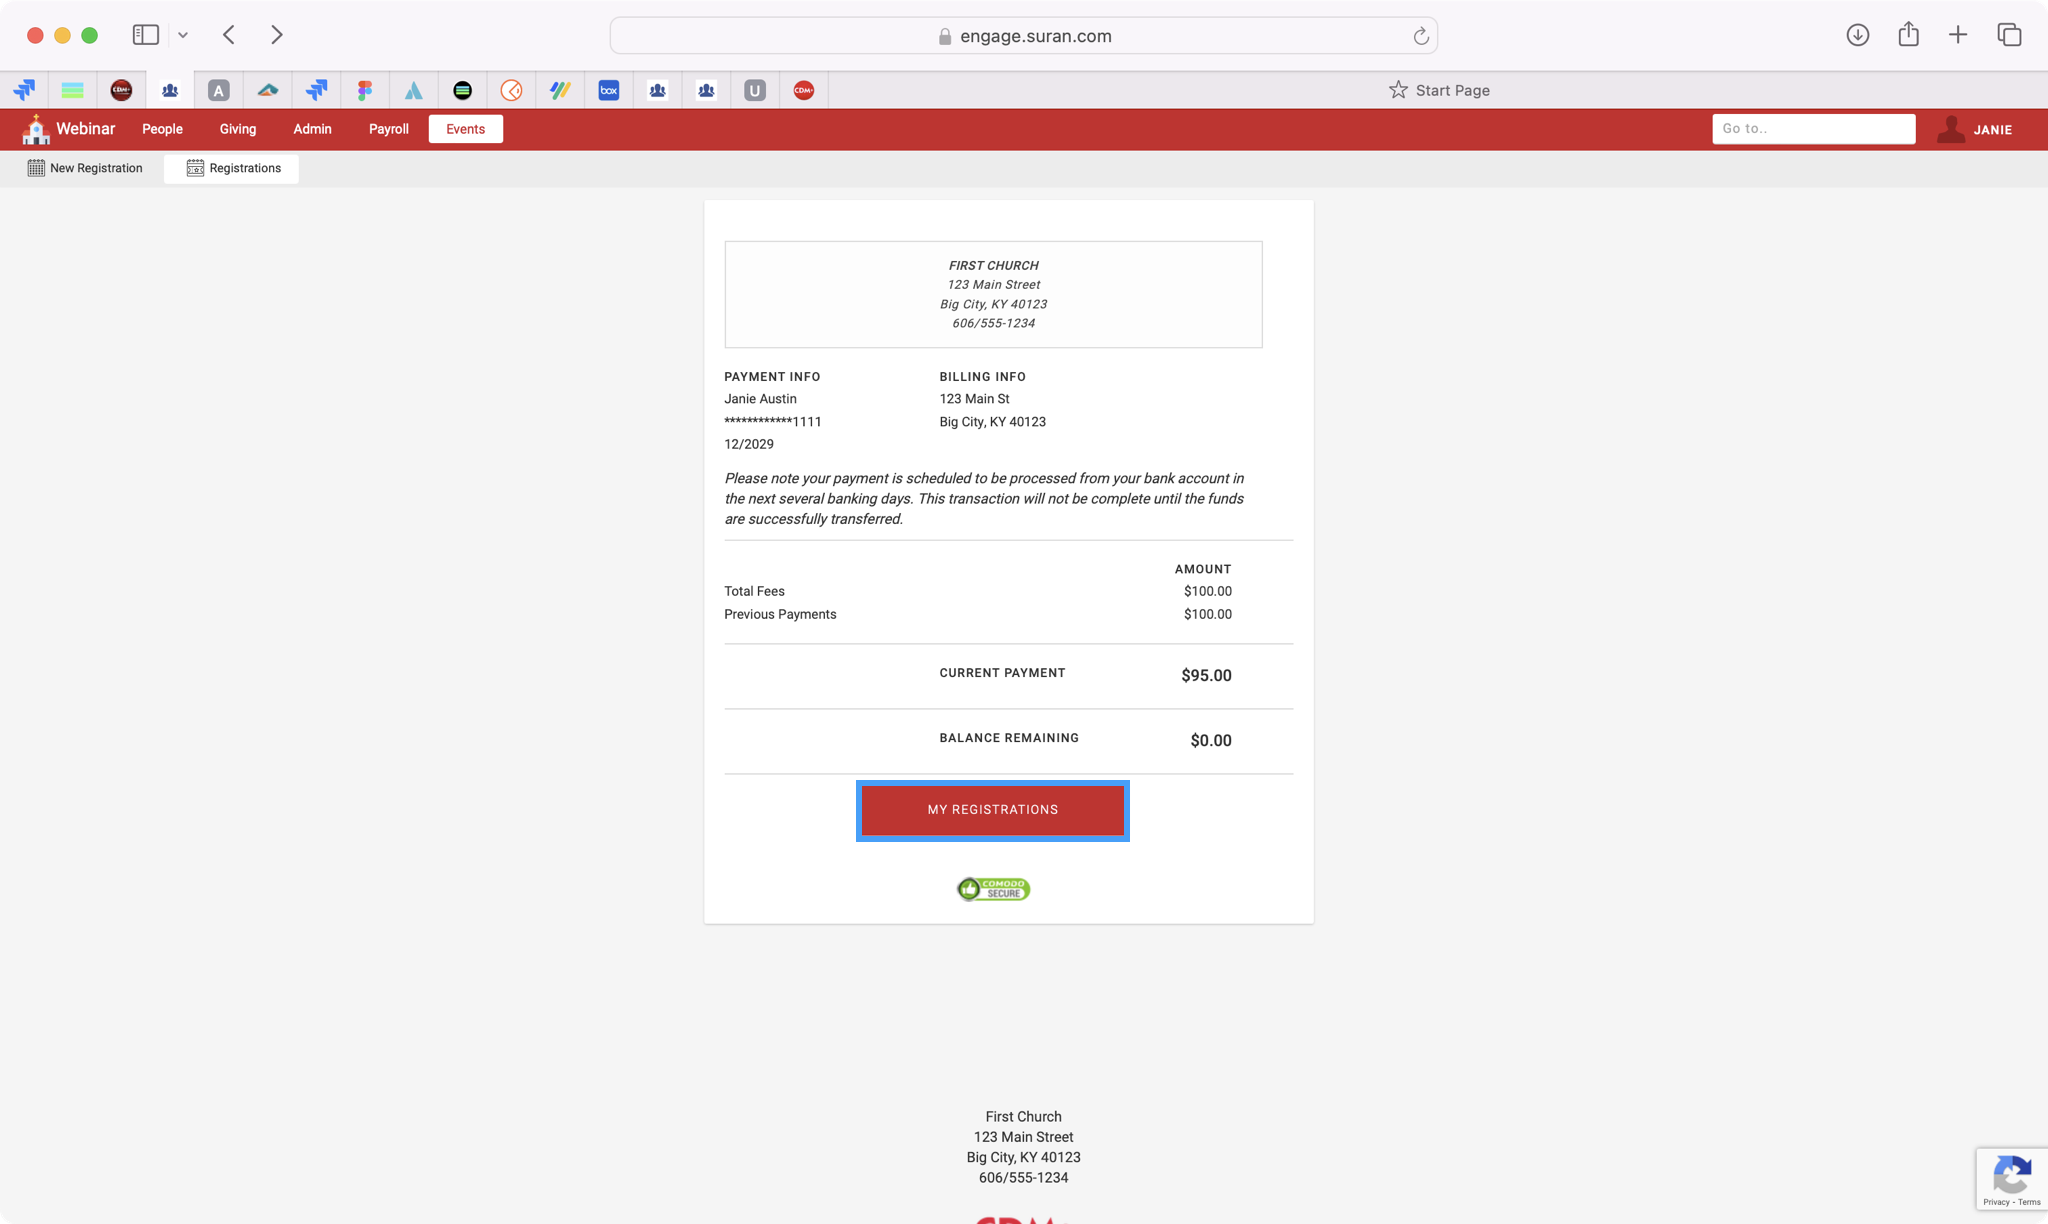
You’ll then see a pop-up letting you know that your payment was successful. You can click on My Registrations to go back to the event registration window.