
Search Tab
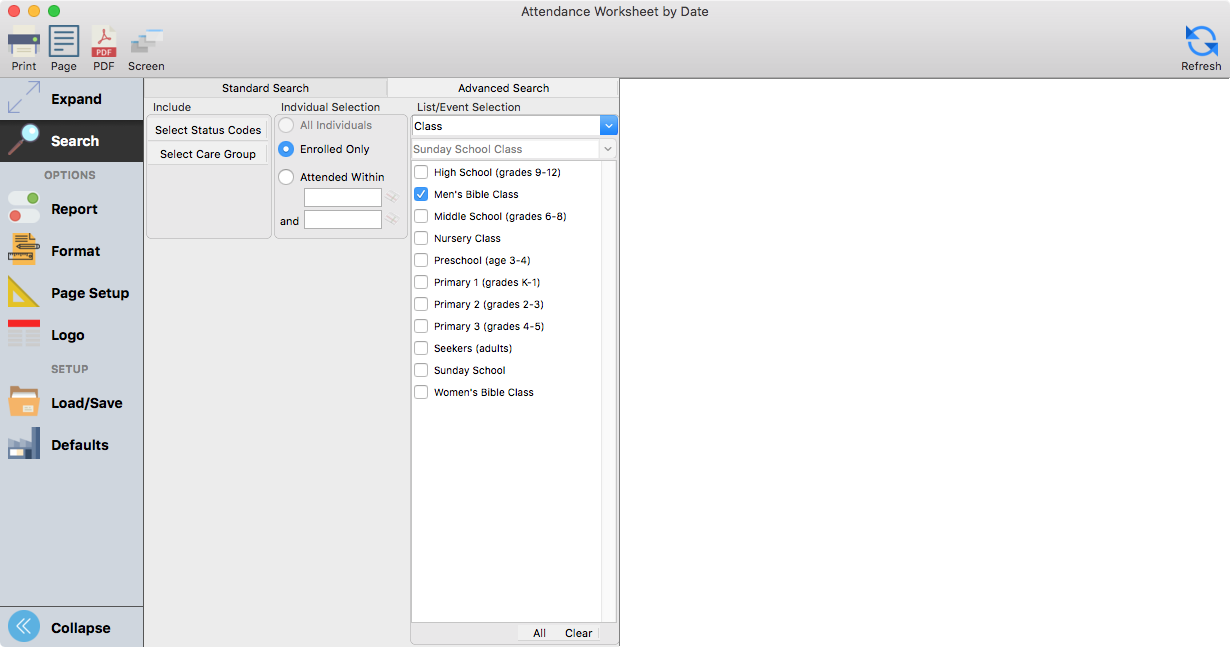
There are three sections to this tab. The first is Include, where you can Select Status Codes (i.e., active, inactive, etc.) and/or Select Care Groups. The second is Individual Selection, where you can choose either All Individuals, only Enrolled Individuals, or those persons who Attended Within a range of dates. Attended Within is useful if you only want to print the names of people who have attended this year. Anyone who has not attended between January 1st (or the date the Sunday School year began) and the current date would not show up on the worksheet. The third section, List/Event Selection, is where you select the classes or events to be printed on the worksheet.
Another option appears on the drop down list under List/Event Selection: List. Choose this if you wish to print an attendance worksheet for a group.
Report Tab
In the Dates section of the Report tab, choose the dates you want to be printed on the worksheet by clicking on the Choose button. This opens the Choose Dates window.
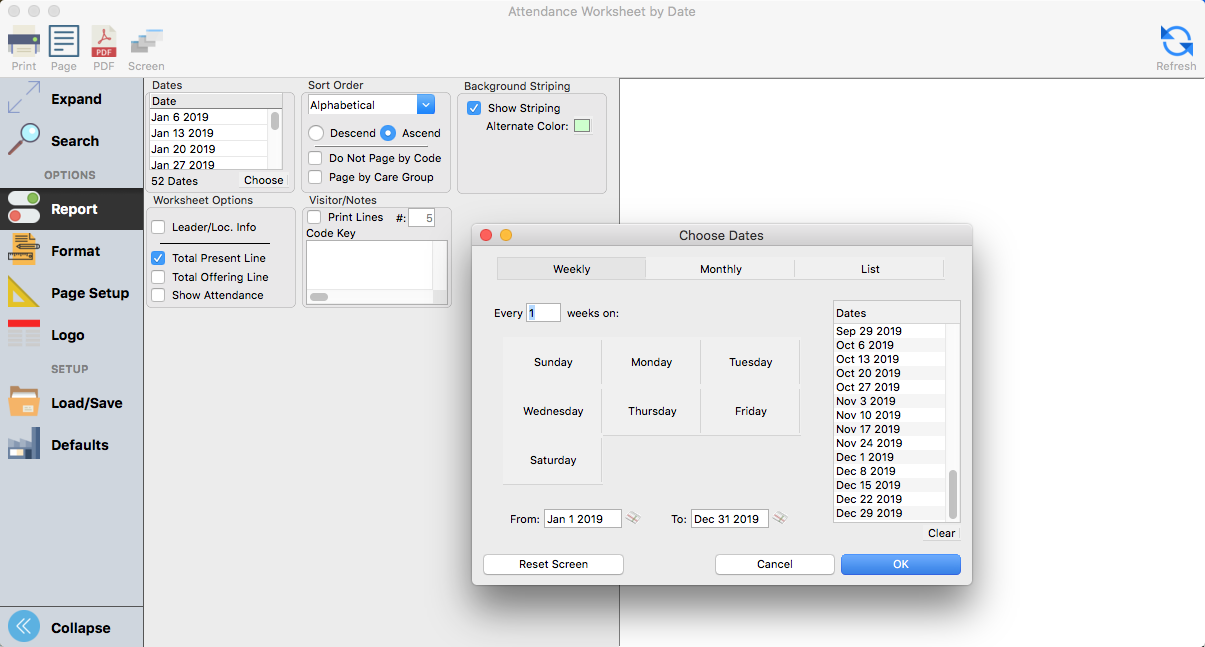
You may choose the dates to print on the worksheet on a weekly basis—on a certain day, every 1, 2, 3, etc. weeks.
For example, to set up a worksheet for each Sunday in the month of April, type 1 in the box within Every ____ weeks on: and click on the Sunday button. Next enter the first and last Sundays of the month in the date boxes at the bottom of the window. You may either type the dates or click on the small calendar icon and double-click the date on the calendar. The resulting weekly dates are displayed in the box to the right. When finished, click OK. When you have these parameters set, you are ready to print the worksheet.
You also have the option to choose the dates to print on the worksheet on a monthly basis. Click on the Monthly button at the top of the Choose Dates window. Click the buttons to select dates by the day of the month or the day of the week.
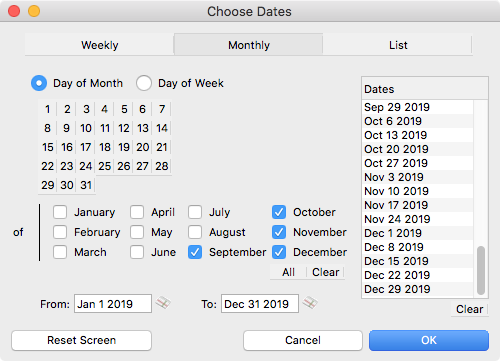
Check the months that you want to print and enter the date range either by typing From and To dates or by clicking on the small calendar icon and double-clicking the date on the calendar. When finished, click OK. When you have these parameters set, you are ready to print the worksheet.
If you want to select most of the months, click the small All button and then click off the months you do not want selected.
The final option to choose dates is under the List tab. This allows you to choose individual dates simply by clicking on them on a calendar.

Choose the month and year from the drop lists above the calendar or use the previous and next arrow buttons below the calendar to display the correct month. Double-click on a date that you wish to have printed on the Attendance by Date worksheet. You may add as many dates as you wish. When finished, click OK.
This option for choosing attendance dates is useful for an event that does not follow any pattern in meeting times.
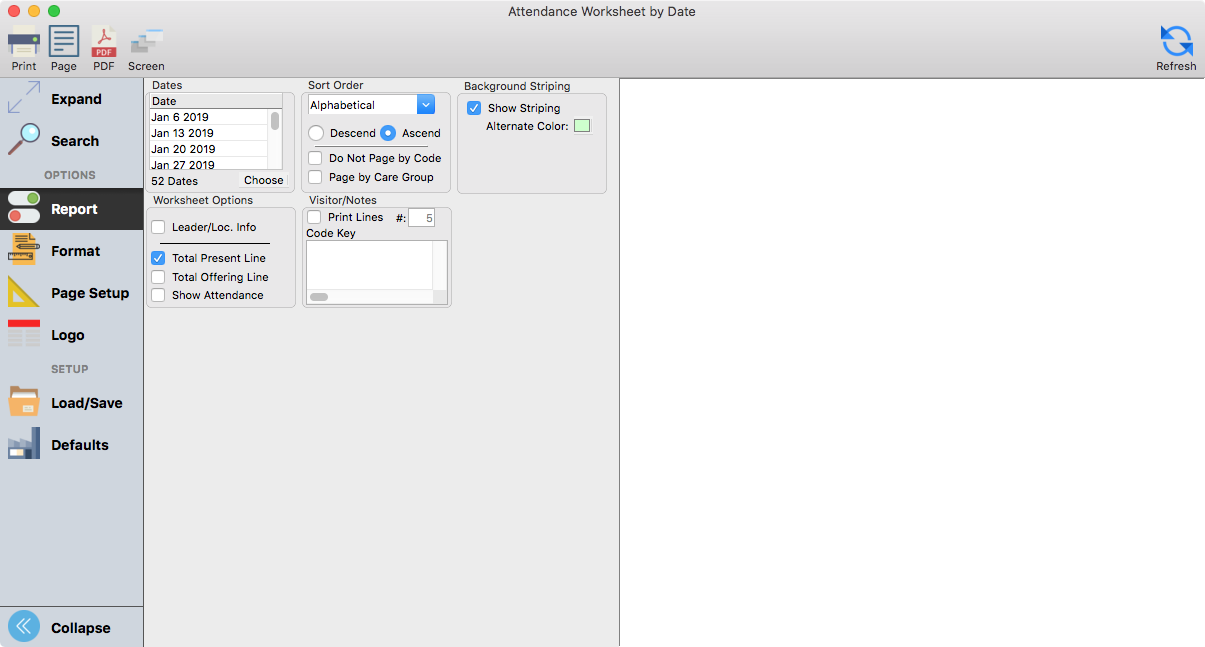
Make your other choices on the Report tab of the report set up window to define the appearance of the worksheet—Sort Order, Background Striping, Worksheet Options, and Visitor/Notes.
Format Tab
You can follow the screenshot below to format your report, or you can see Report Setup Window for more information on how to personalize your report.

If you check the Show Attendance box in the Worksheet Options section and choose dates prior to the date for which you are marking attendance, you can see the members' record of attendance in the class.